If you’re looking for a unique alternative to standard wood or metal outdoor dining tables, a tiled table may be the perfect solution. This method is a simple and beginner-friendly technique requiring no messy thinset or grout. The end result is a durable, low maintenance and custom outdoor table using your favorite tile. Here’s how we did it!
Jump to:
Tiled table inspiration
When searching for a dining table for the Spanish Sanctuary backyard, I was faced with the same nearly impossible task as always—finding a large enough table to seat 10-12 guests, that holds up to the Florida elements, looks great and doesn’t cost a fortune. I’ve never found a table that checks all the boxes, so I began to think of creative solutions.
One day, I came across this photo and had my a-ha moment—a custom tiled table:
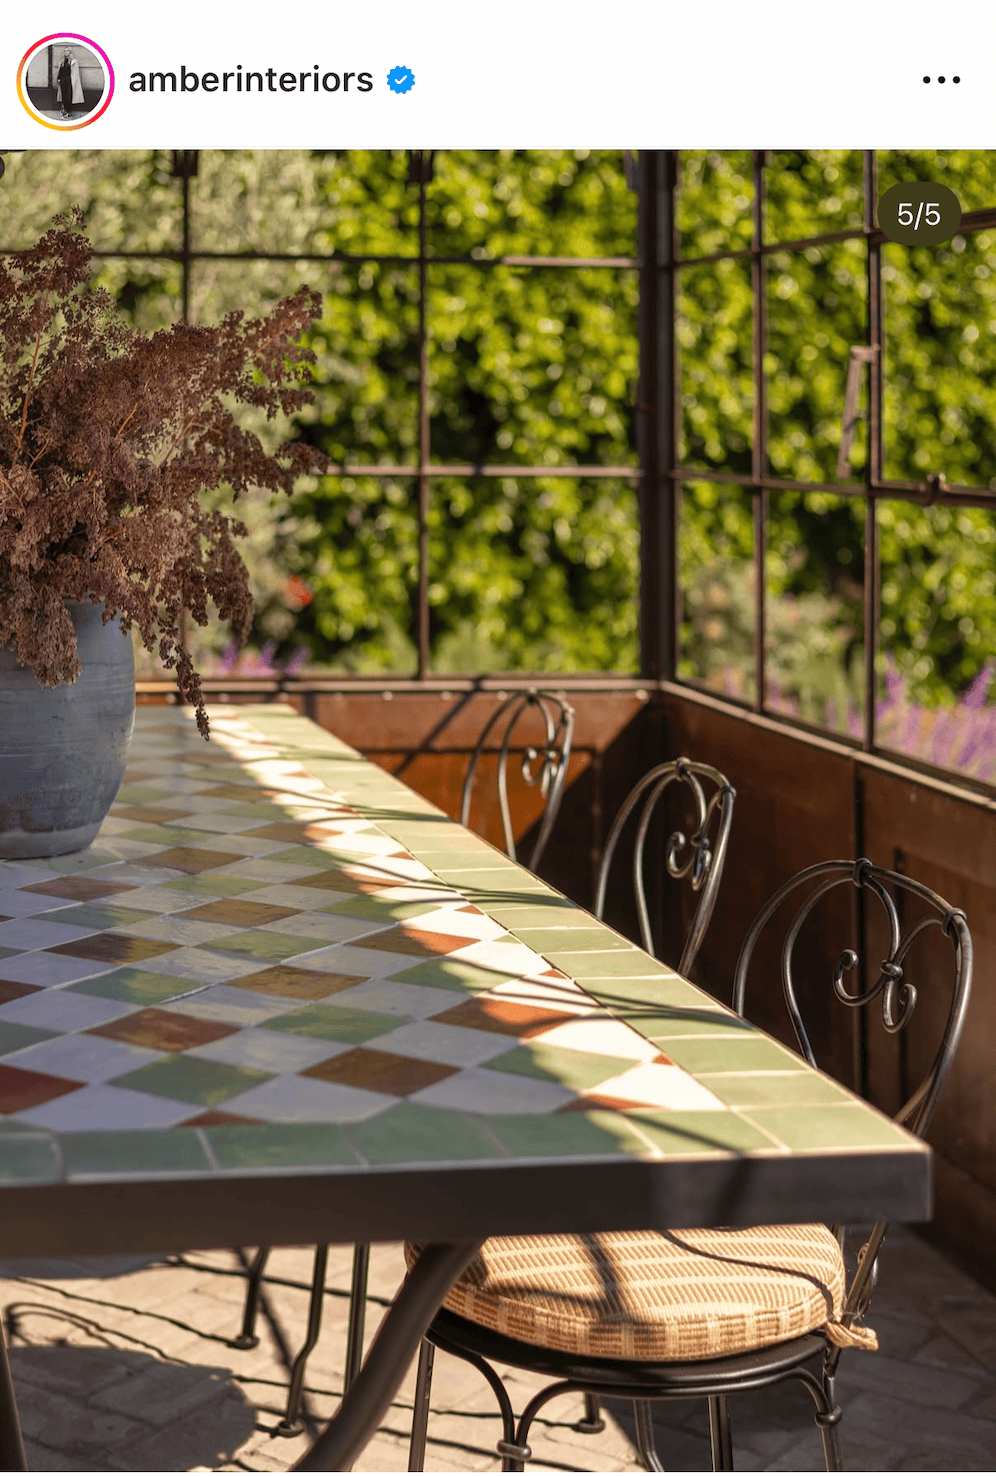
Last spring we DIY’d a tiled coffee table, so the idea wasn’t brand new, but I wanted this one to feel different. I envisioned a classic Mediterranean al-fresco dining experience under a pergola, with traditional metal lattice chairs and a patterned tile table:
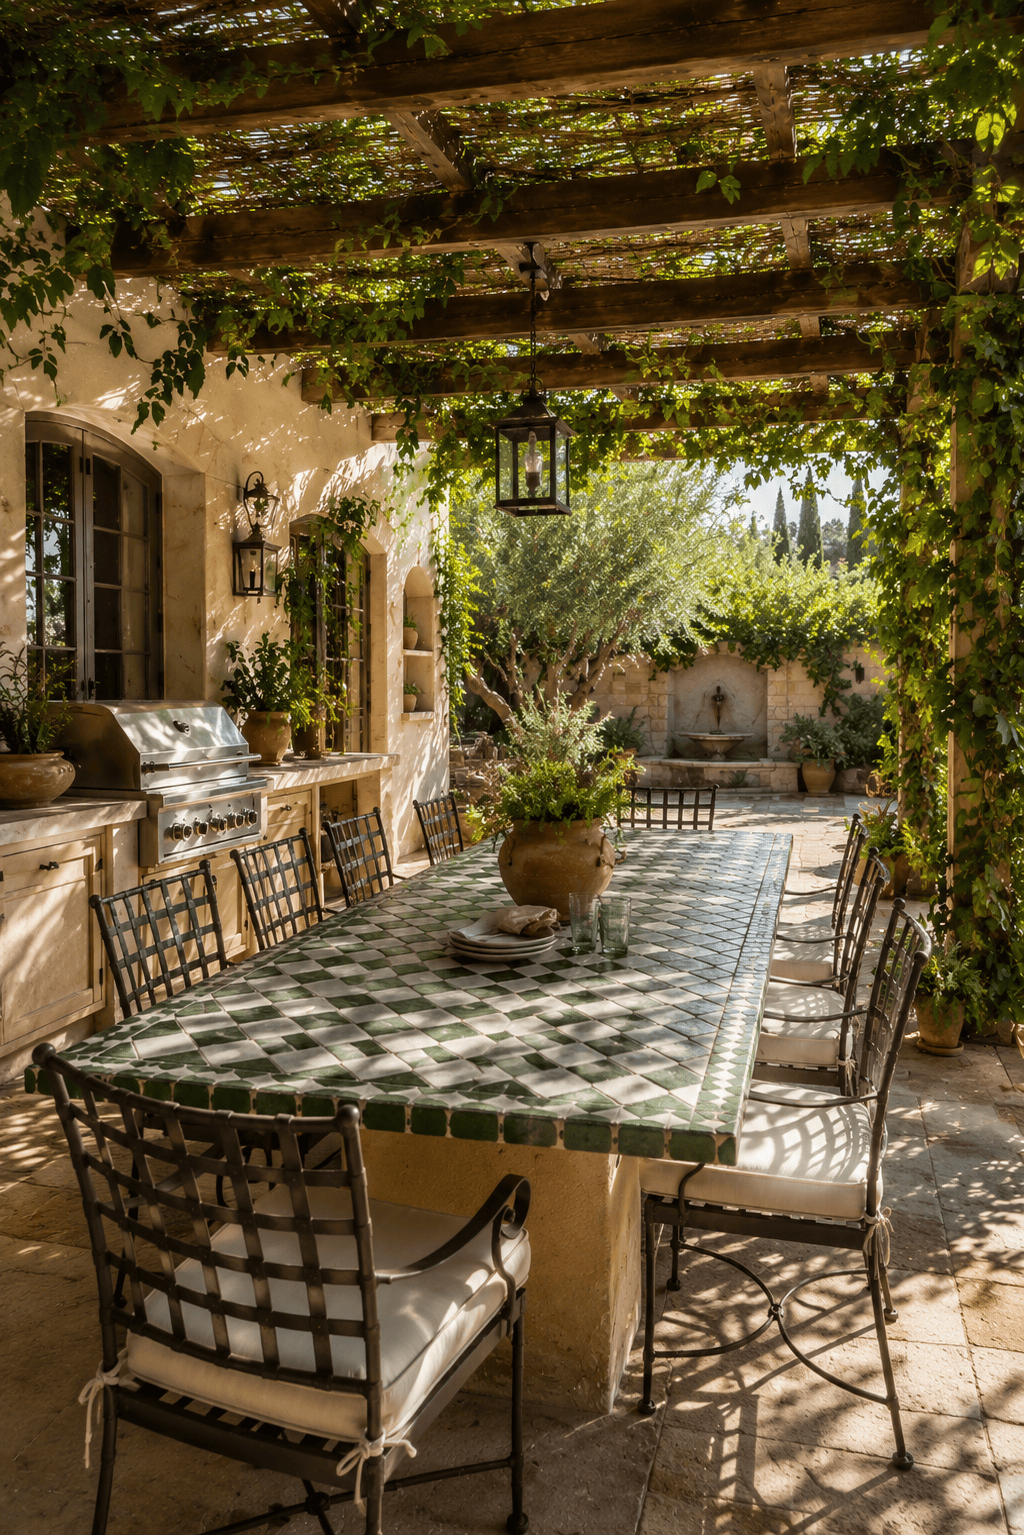
It felt perfect for our “European boutique resort” style backyard, and likely the most durable material to hold up to the harsh Florida elements. The search was on to find the perfect table.
Where to find a table
I briefly considered building our own table and tiling on top of it, but honestly that would require more time and energy than it’s worth at this stage of the renovation.
If you aren’t up for a DIY, Etsy has some really nice customized Moroccan zellige tables. The other option is to re-tile an existing tiled table, or you even can start with a glass top table. There are a handful of new options online, but your best bet is to check local resale—Facebook Marketplace has the largest selection. My only problem? Nothing was big enough for our space. I was about to settle on pushing two tables together until…
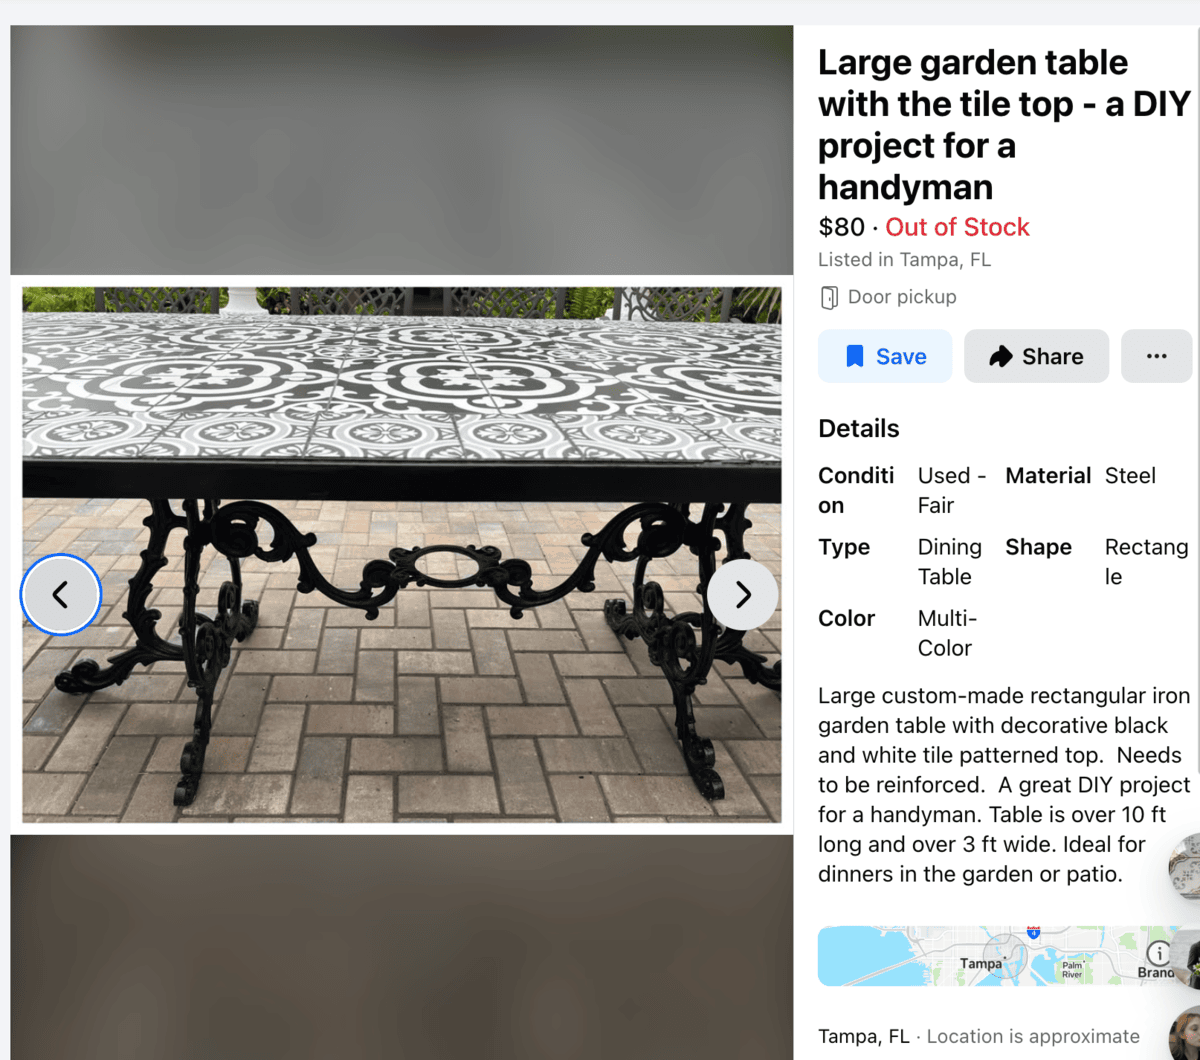
I found it. Months of searching Facebook Marketplace had finally paid off. A 10′ beauty with custom ironwork and so much potential. I’ve never messaged a seller so fast and practically begged her to let me pick it up that night. I hired movers to help load her safely, and $80 later, she was sitting in her final resting place.
Prepping the table for tile
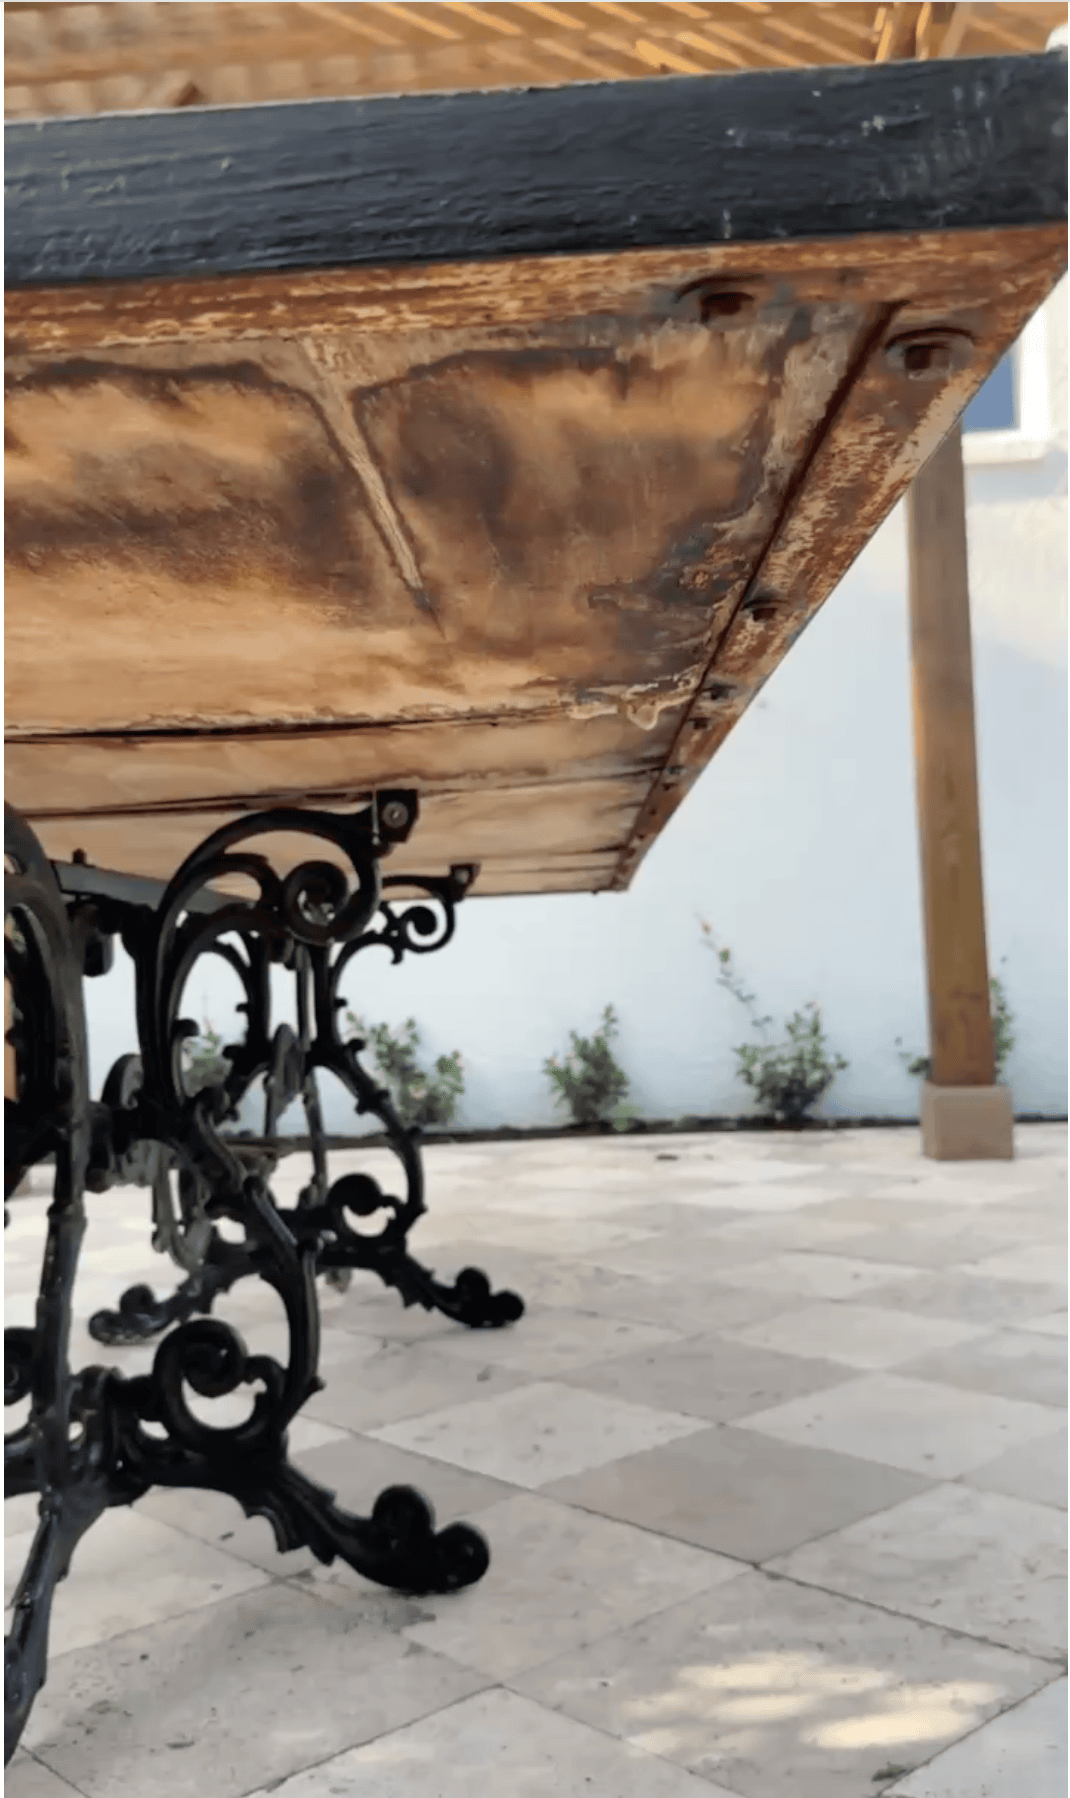
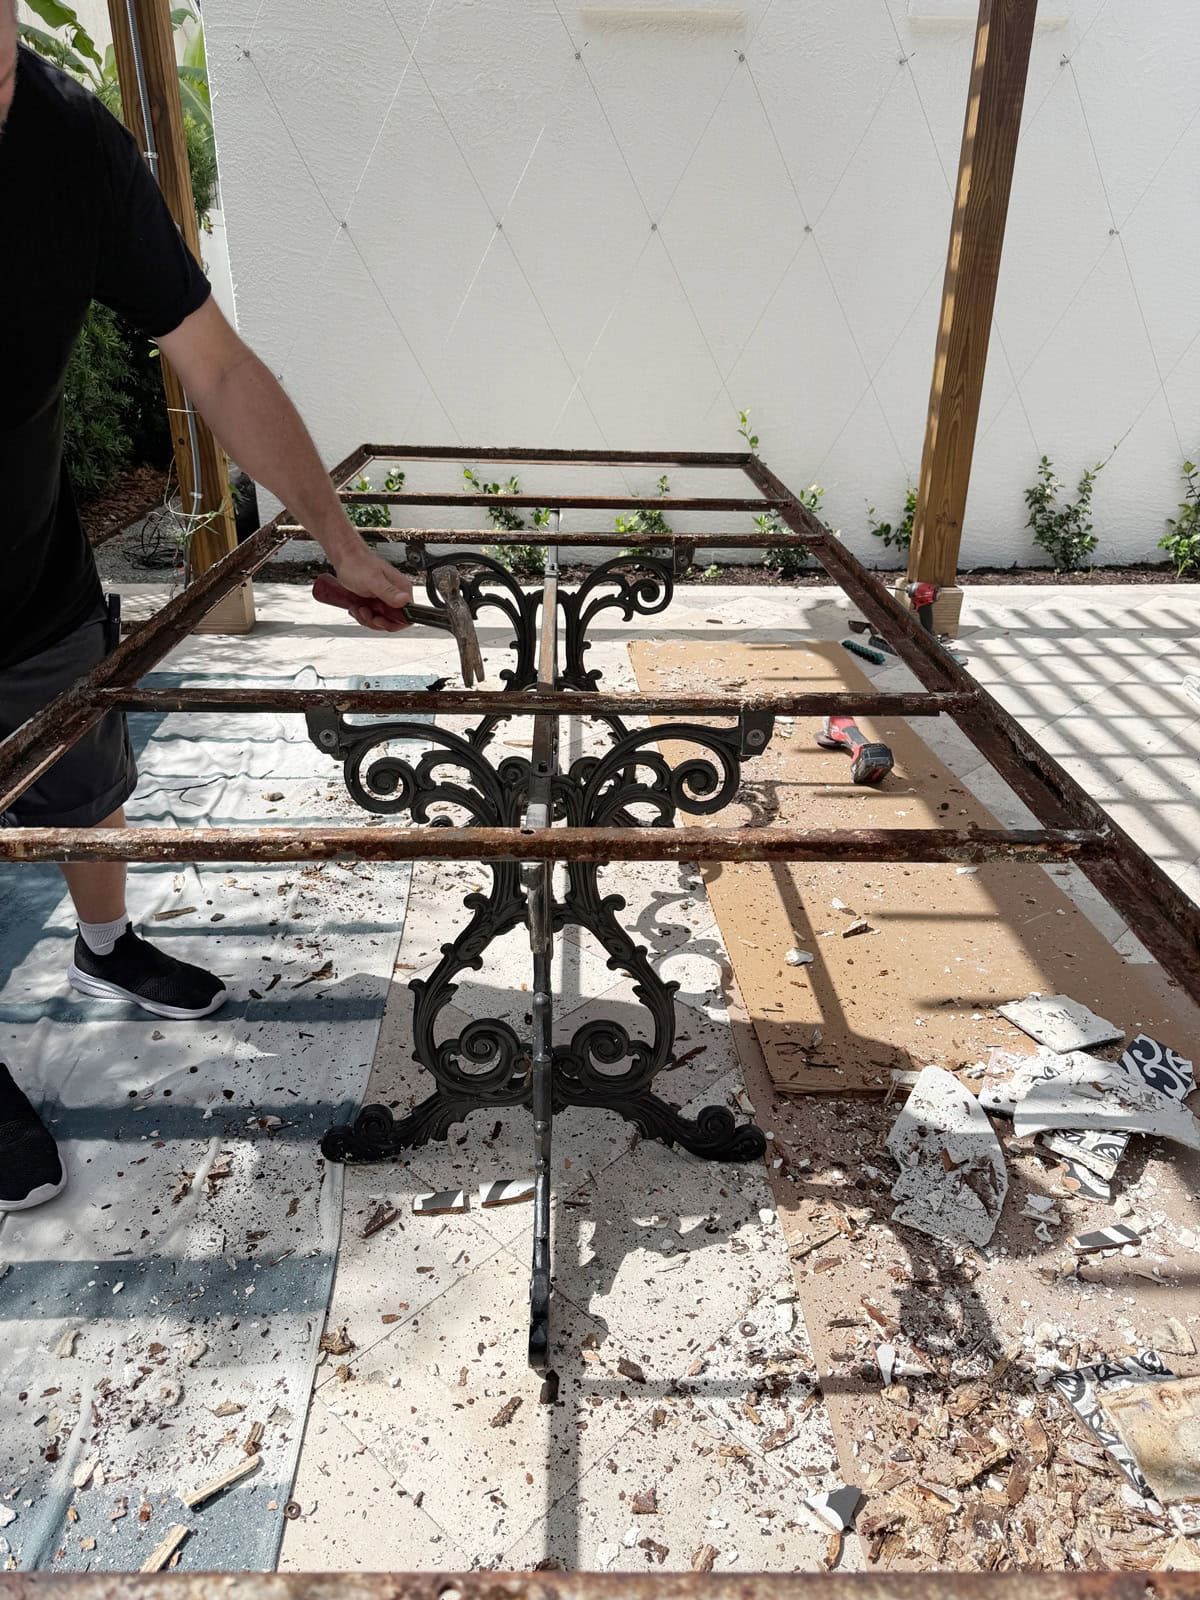
The first step is to ensure the new tile has a sound, solid surface to rest on. In our case, the tile and grout were cracked and dried out, the plywood base was rotted, and metal frame rusted after years outside.
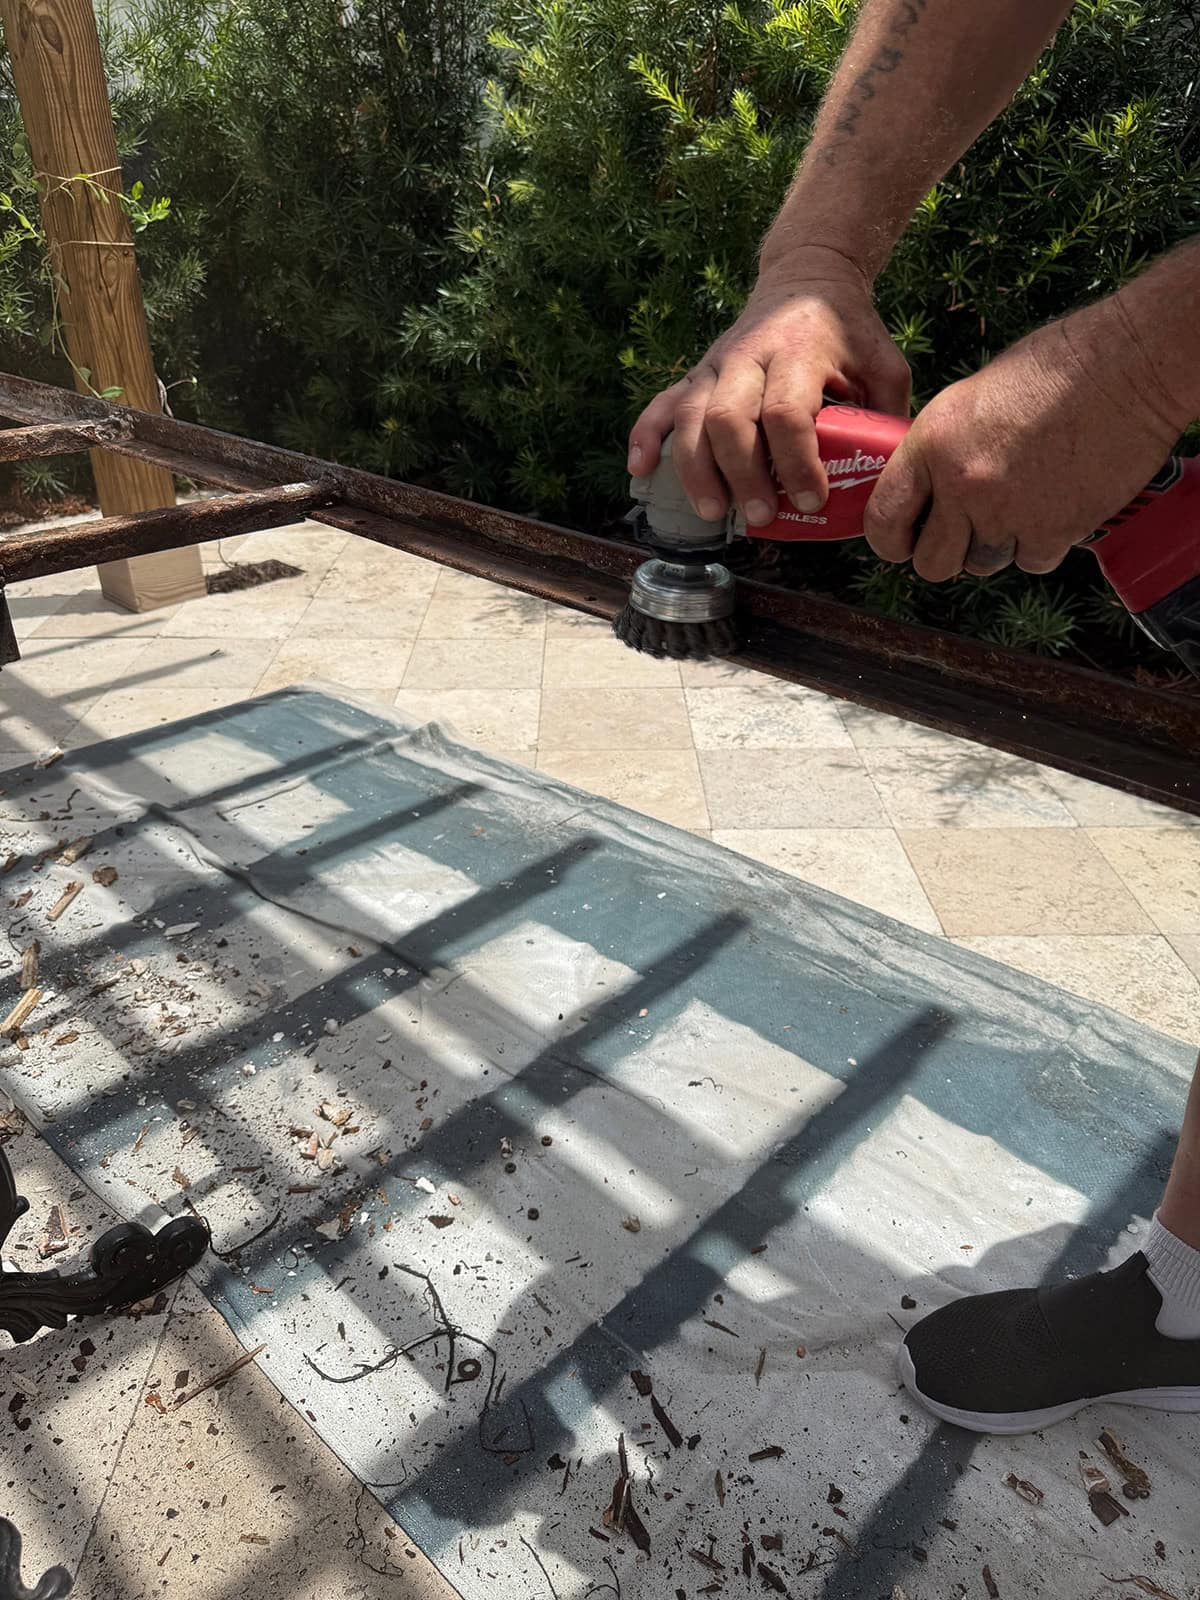
We enlisted our tile guy’s help to knock this project out over a couple days. The first step was demo: removing everything down to the bare metal frame.
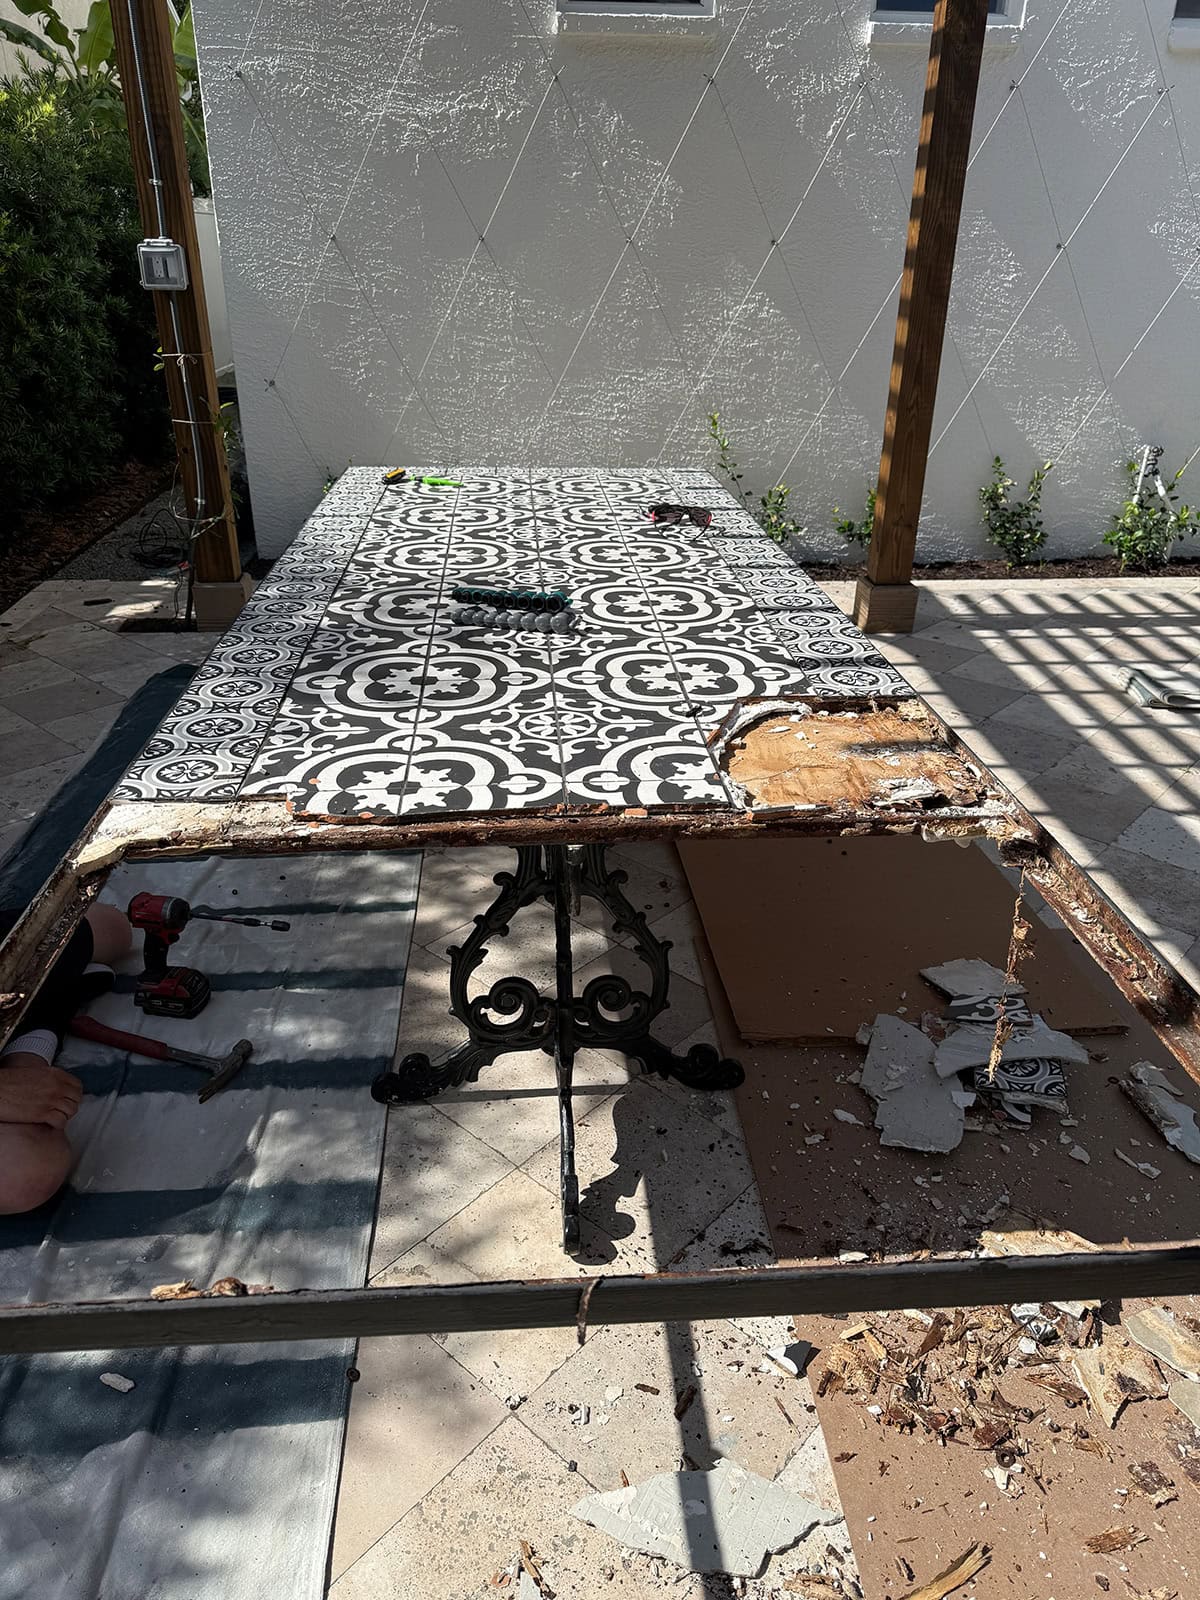
The rust was removed from the metal with a drill, grinder and wire brush attachments.
New 3/4′ plywood sheets were cut down to fit, and coated on both sides with a waterproofing stain + sealer.
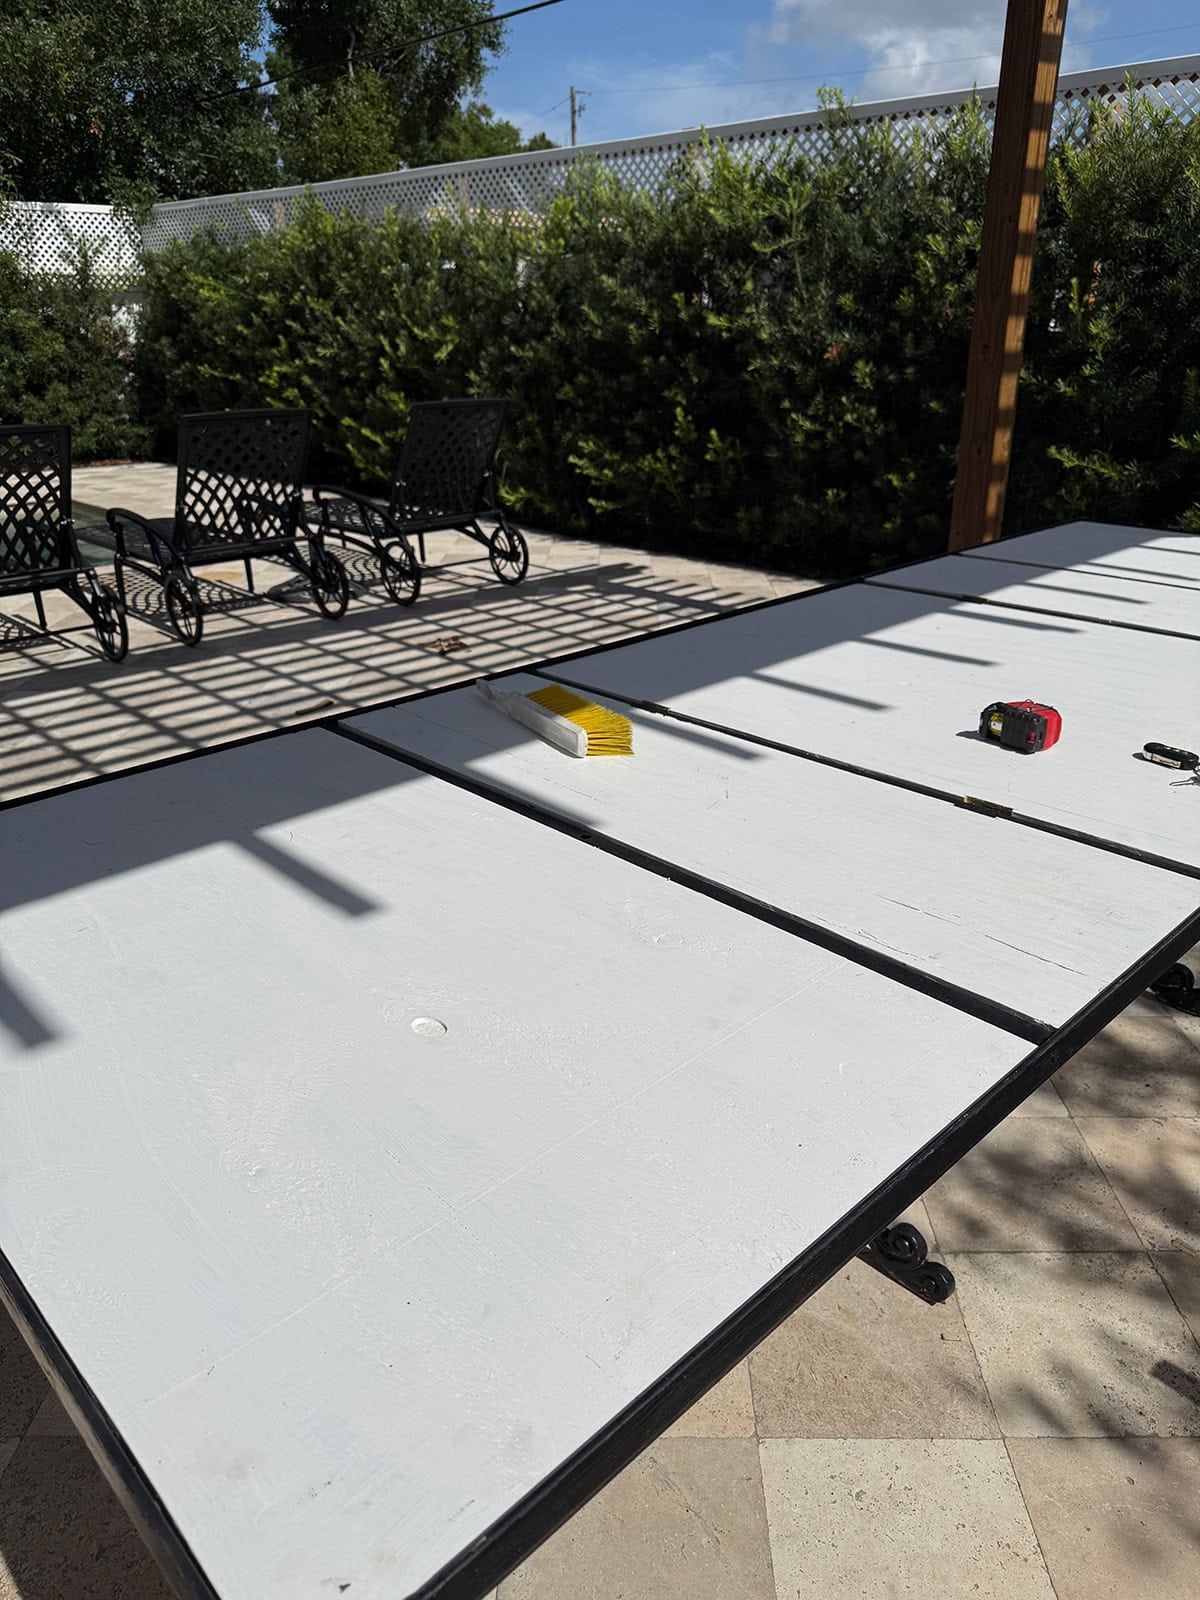
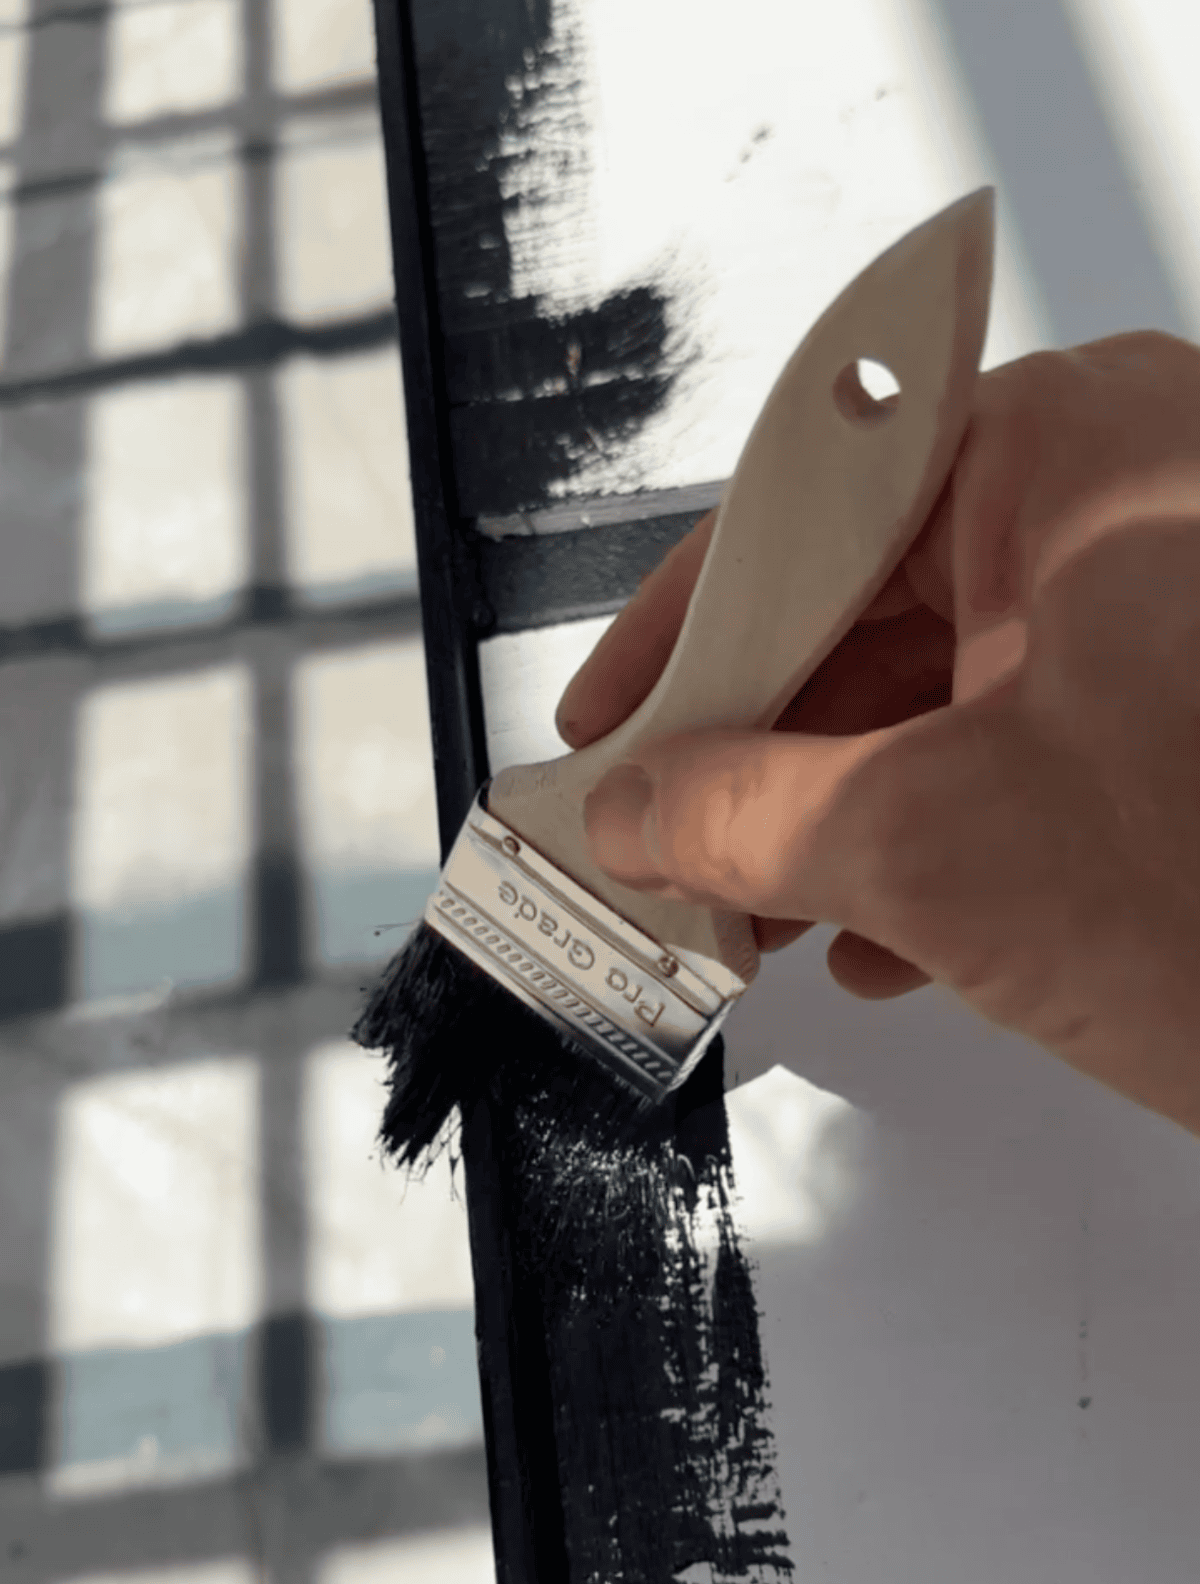
The metal was also coated with a rust-blocking protective enamel.
How to re-tile the table
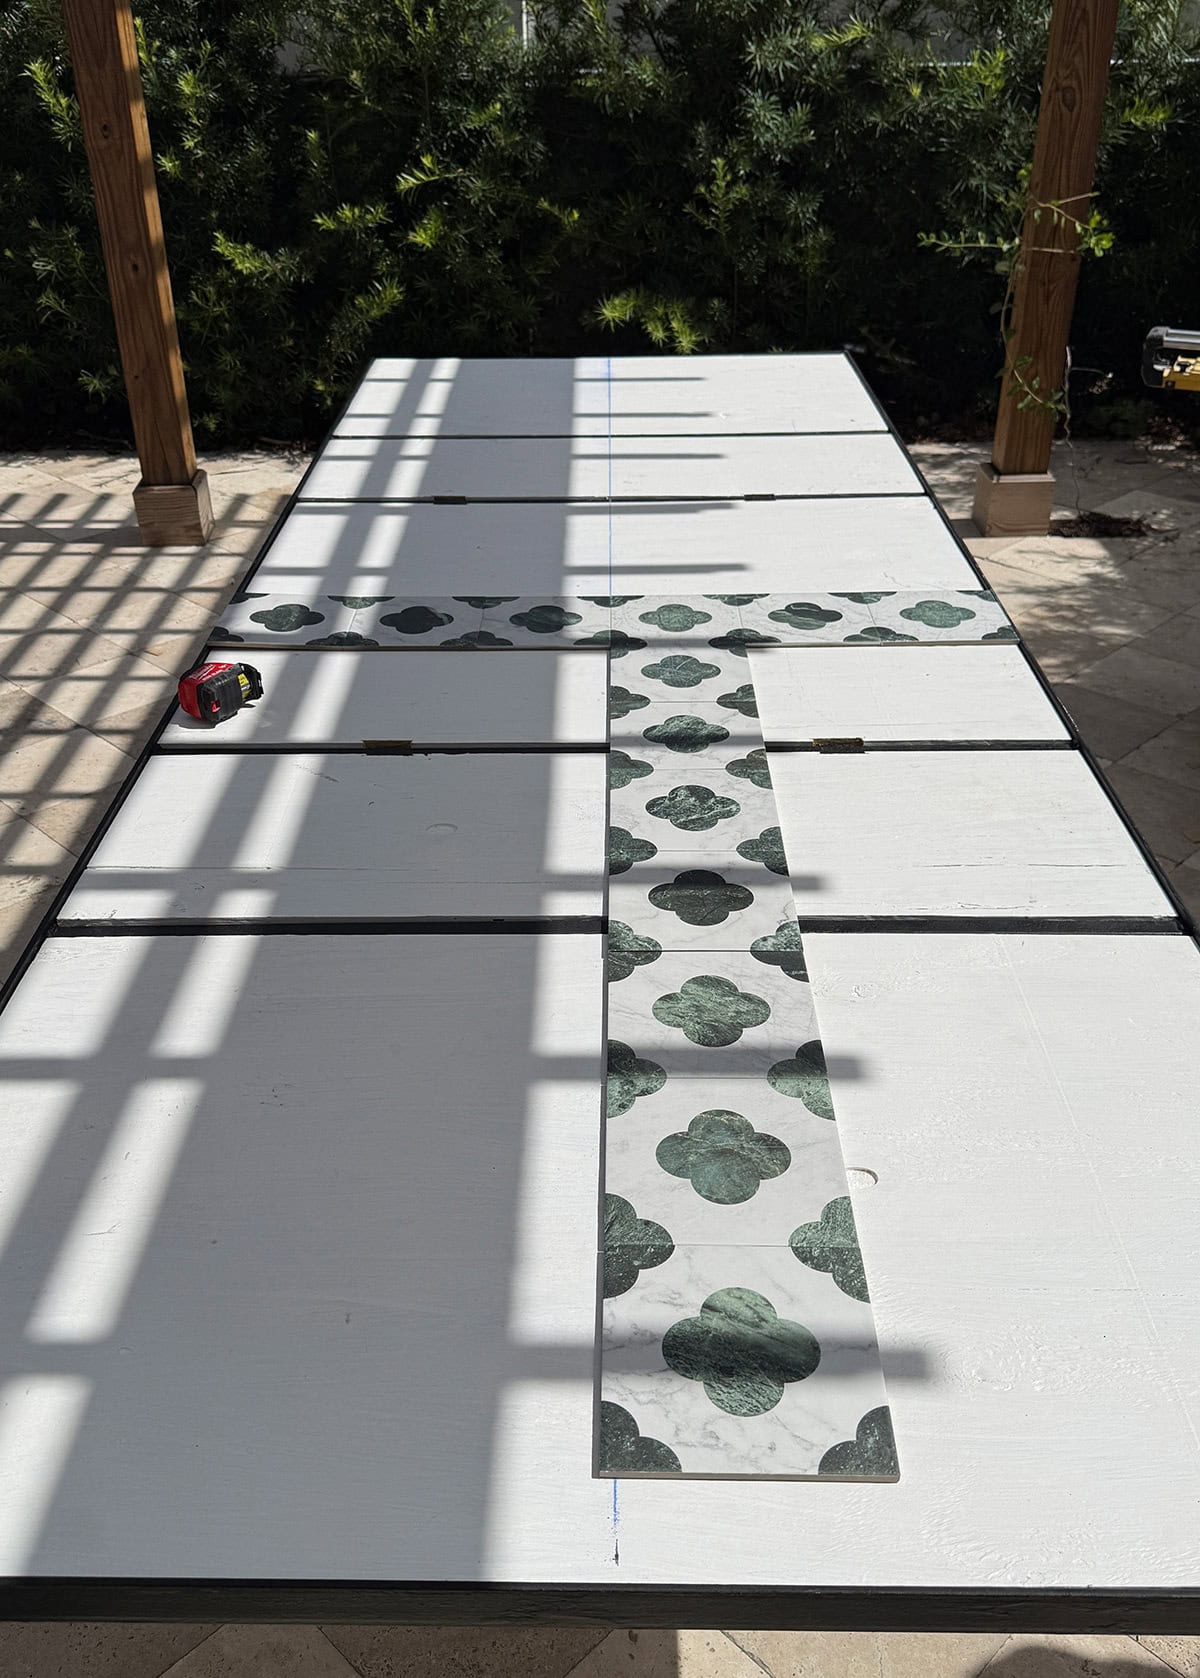
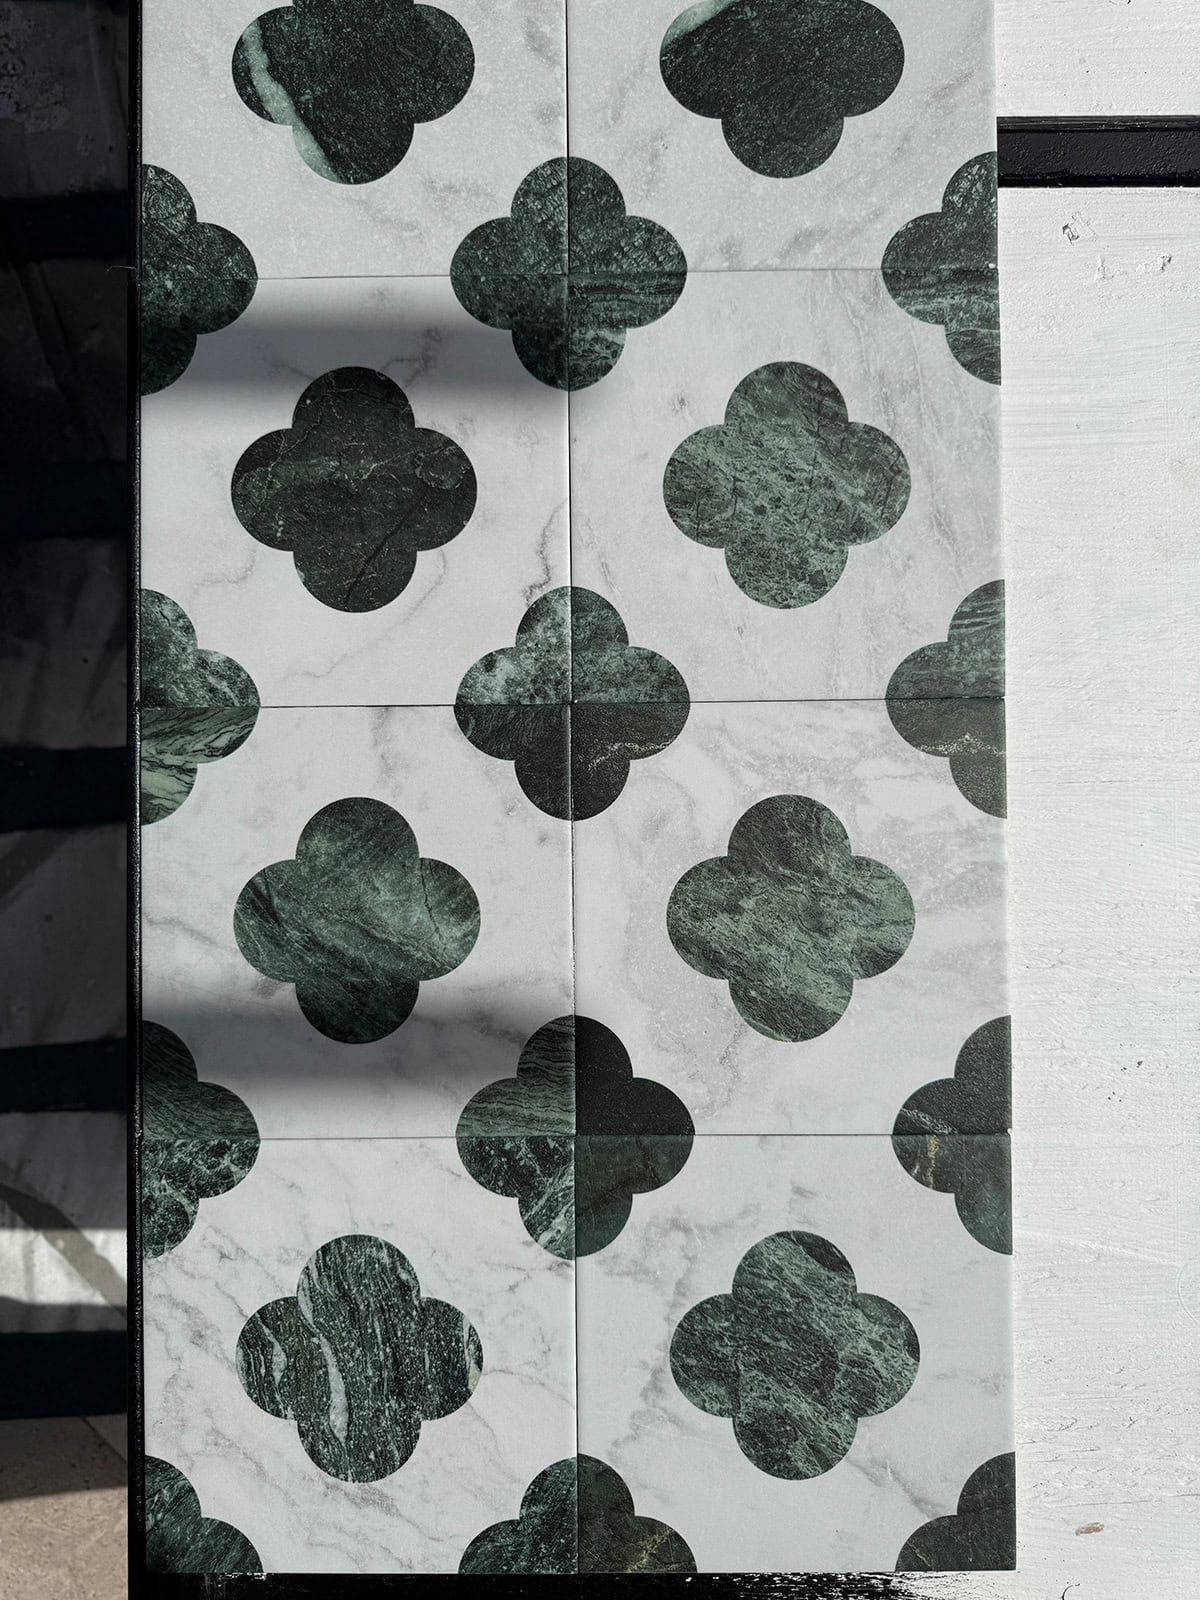
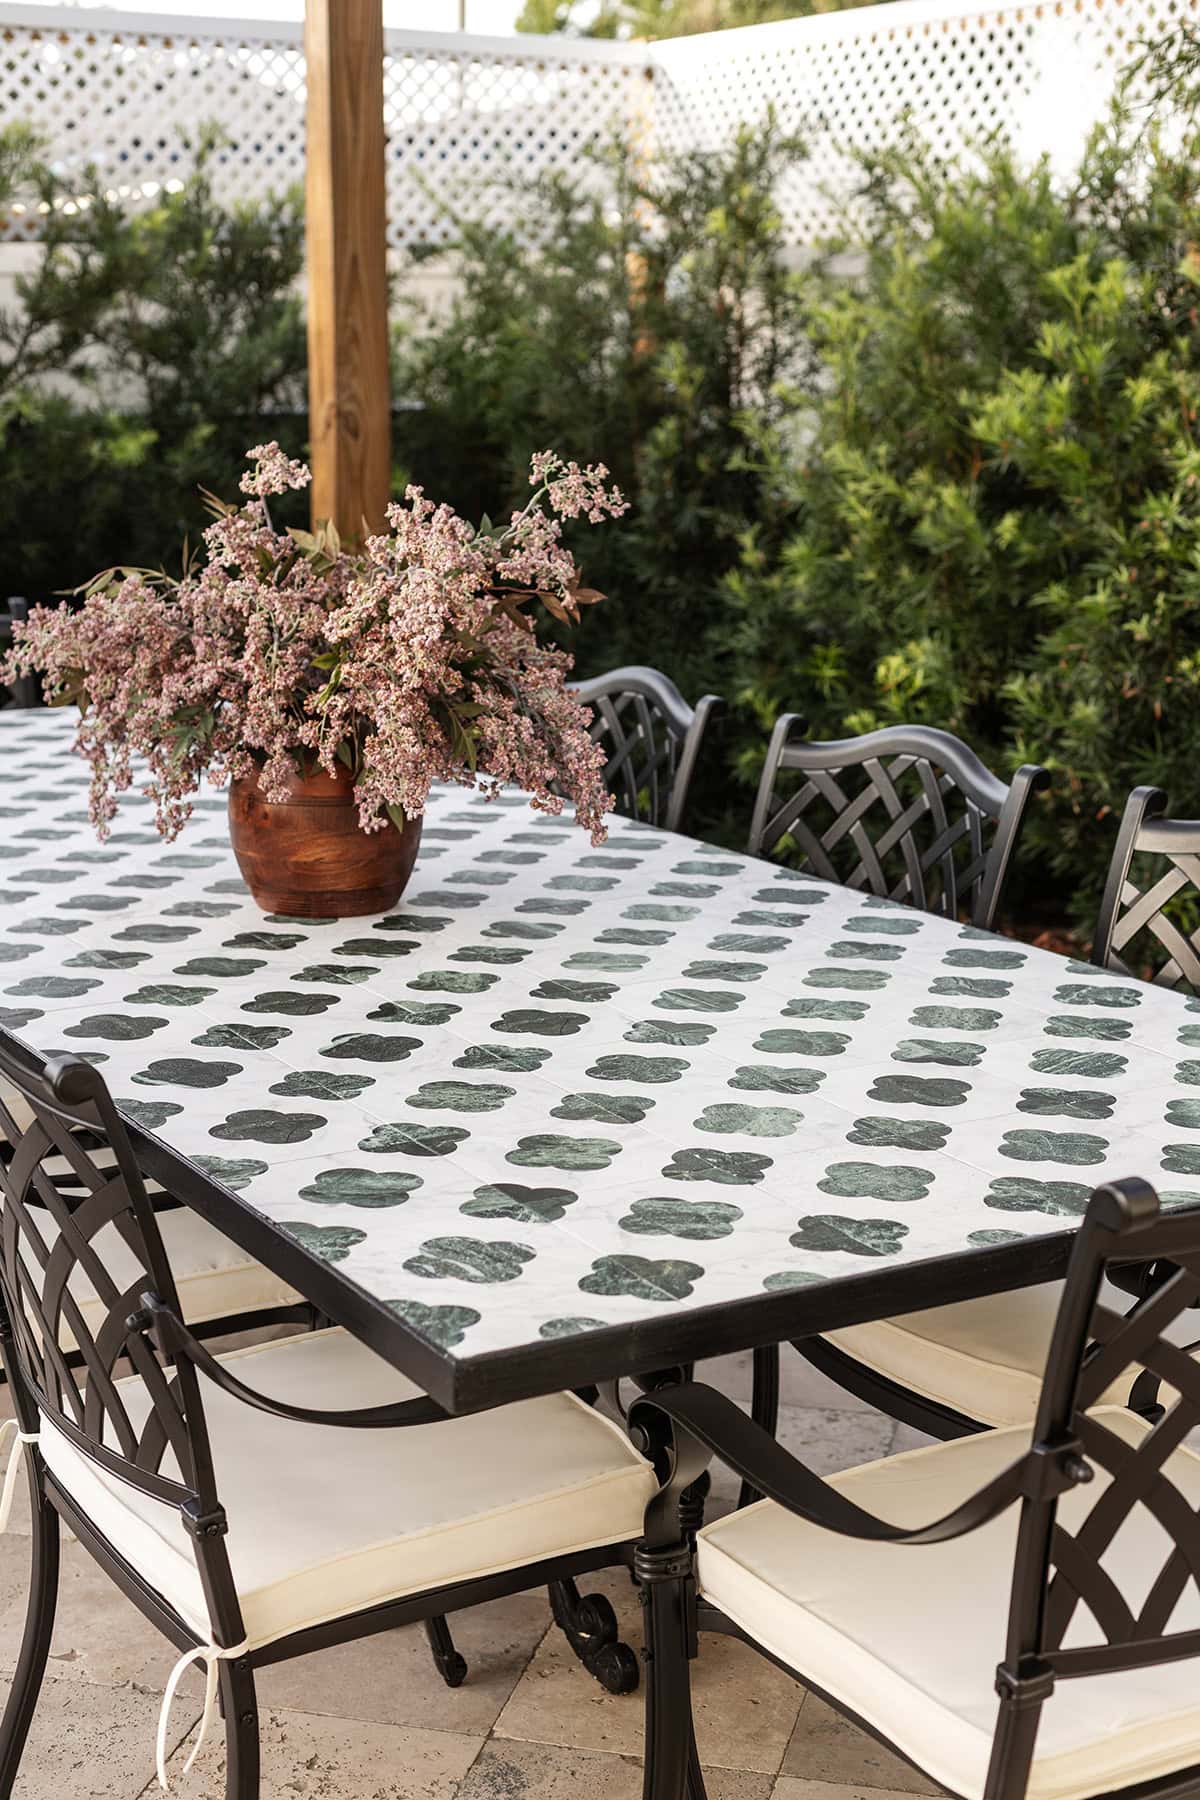
With the table repaired, it was time to lay the tile. I spent hours searching for an outdoor-safe option that fit the Mediterranean feel, worked with the scale of the table, and didn’t cost a small fortune. I eventually landed on this 8×8′ porcelain tile. The quatrefoil pattern has that timeless Spanish feel I love and the emerald tone pulls from the surrounding landscaping and furniture.
I first mocked it up in Illustrator to make sure I was happy with the overall look and layout:

Then we started the dry fit and came up with a plan.
Instead of traditional thinset and grout, we opted to use a waterproof sealant to help reduce the weight. The tabletop had warped from the excessive weight over time, and this lighter and more flexible method will also help prevent future cracking.
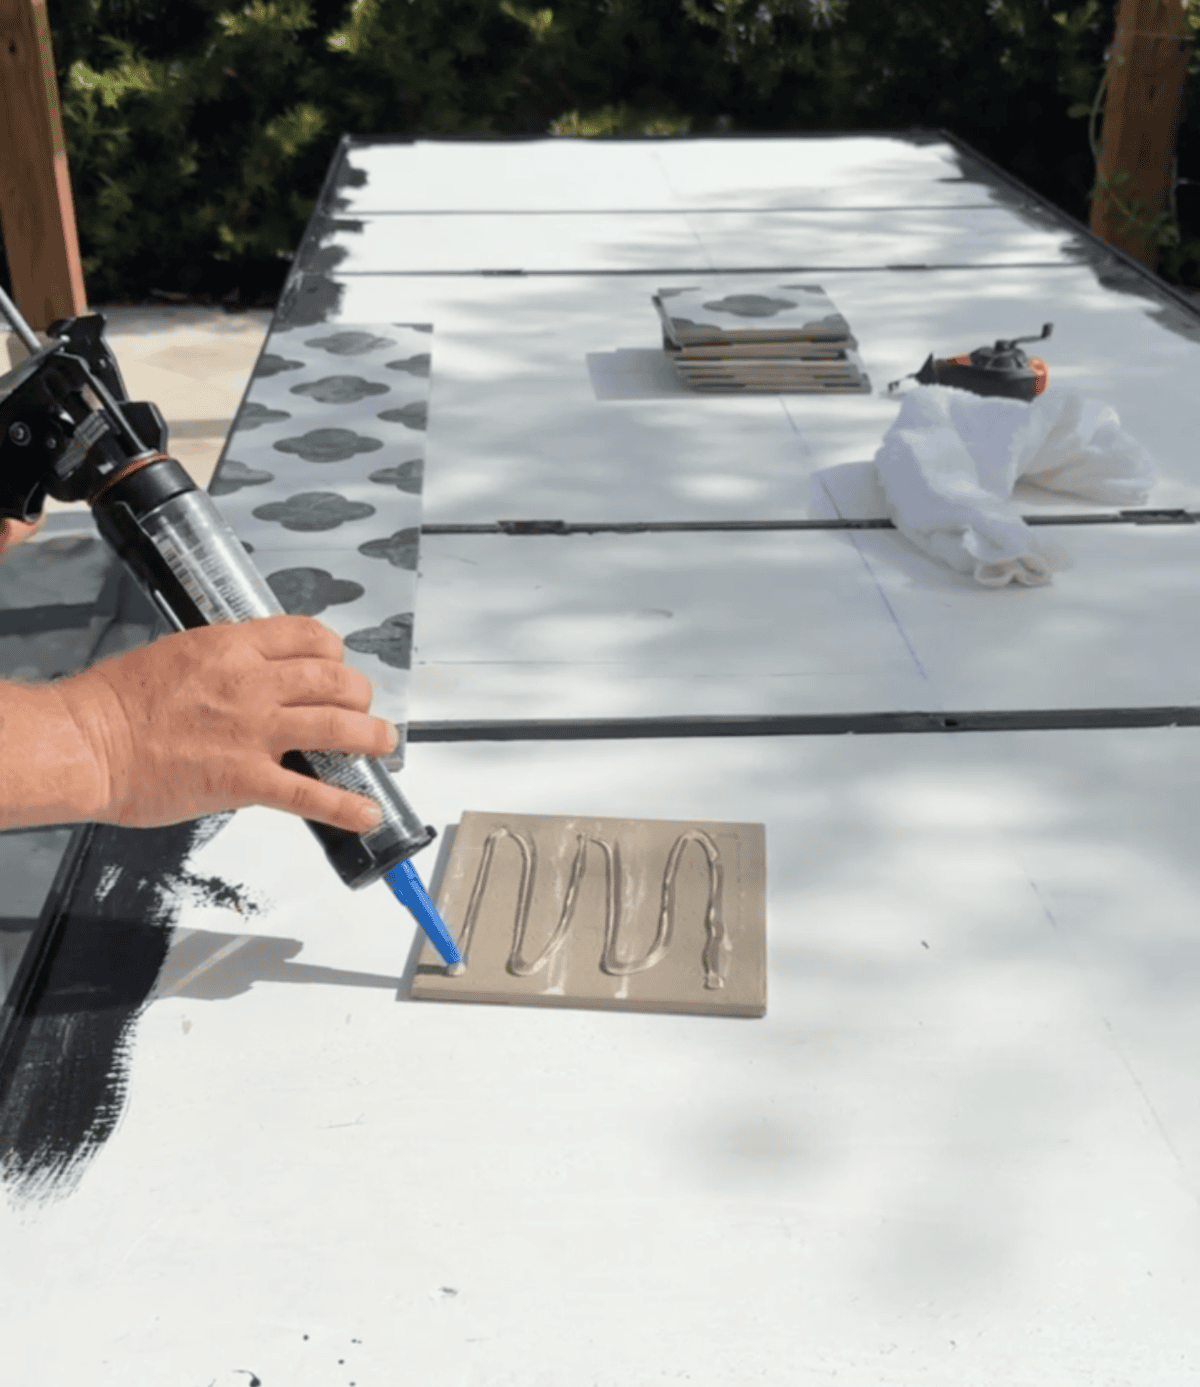
After each tile was set in place, adhesive was applied along each edge to create a waterproof seal between the tiles. I’m a fan of the cleaner, seamless look of no grout lines.
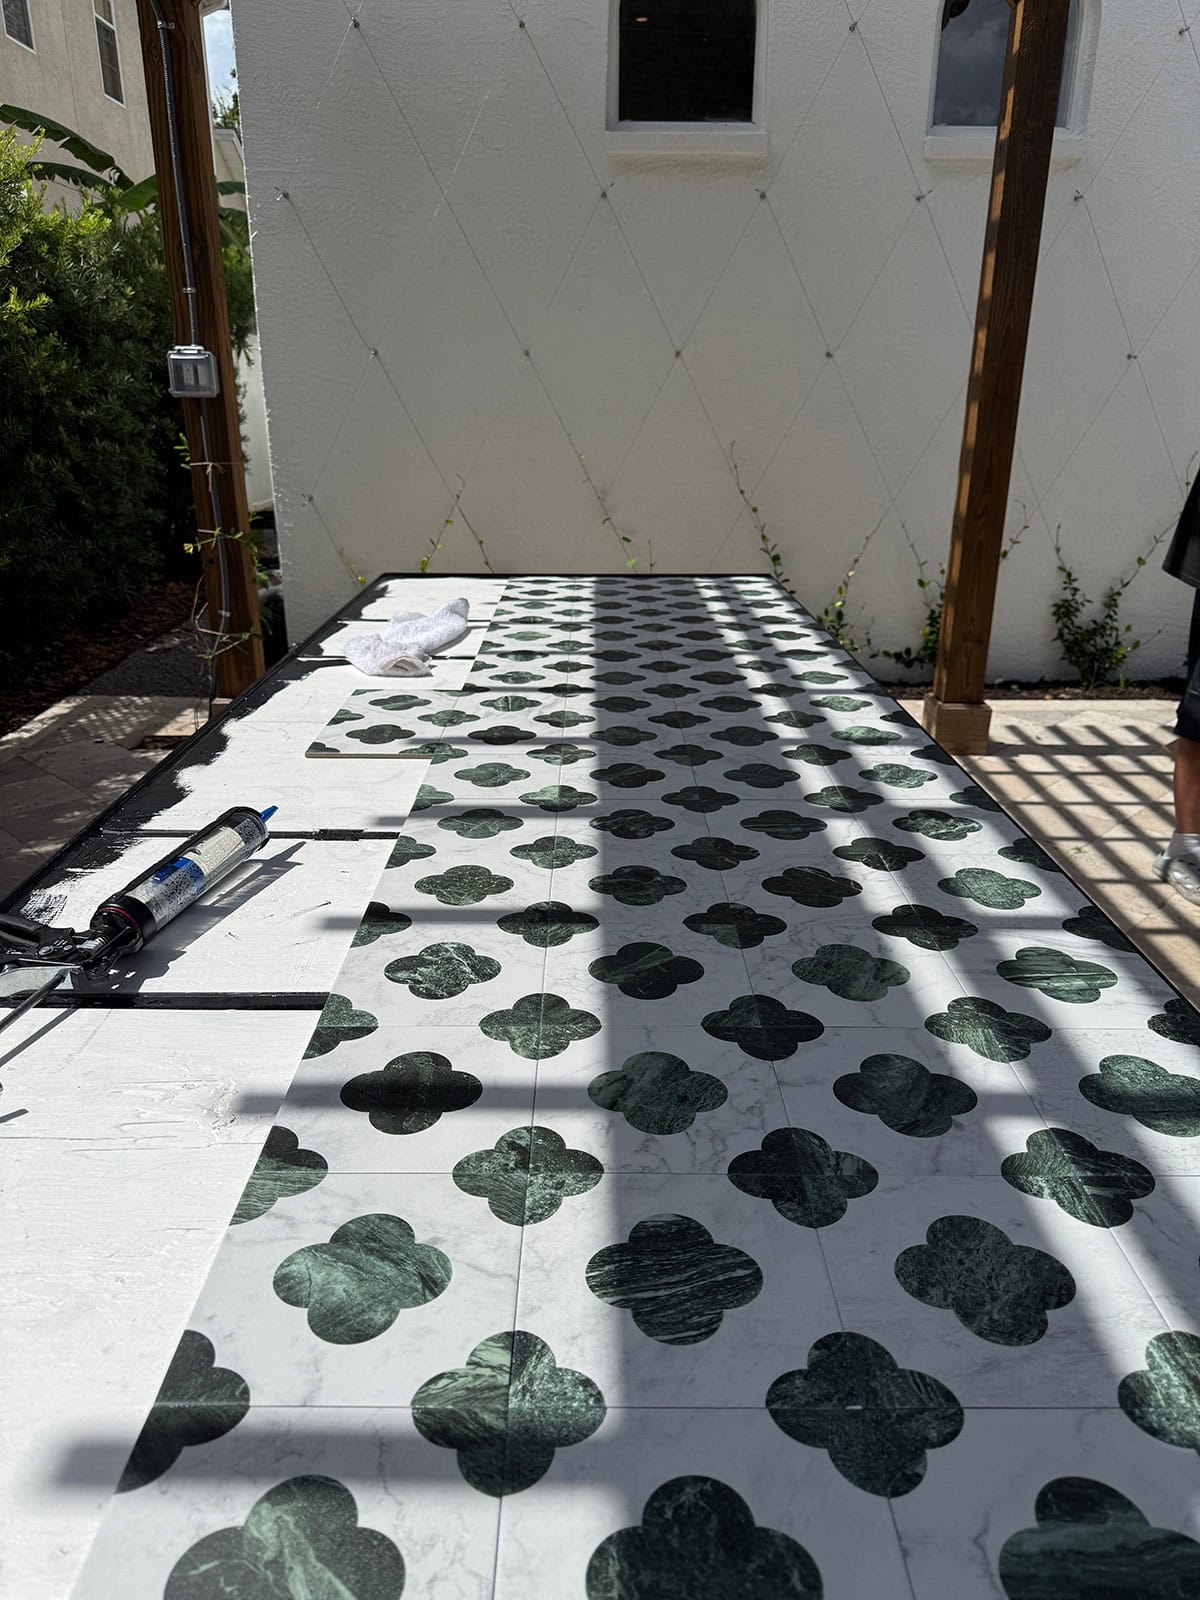
The pattern was centered on the table, and our installer trimmed the edges of the border tile for a perfect snug fit.
Another reason I love this tile is how easy it was to work with. The size and repeating pattern made the process simple enough to complete in just one afternoon.
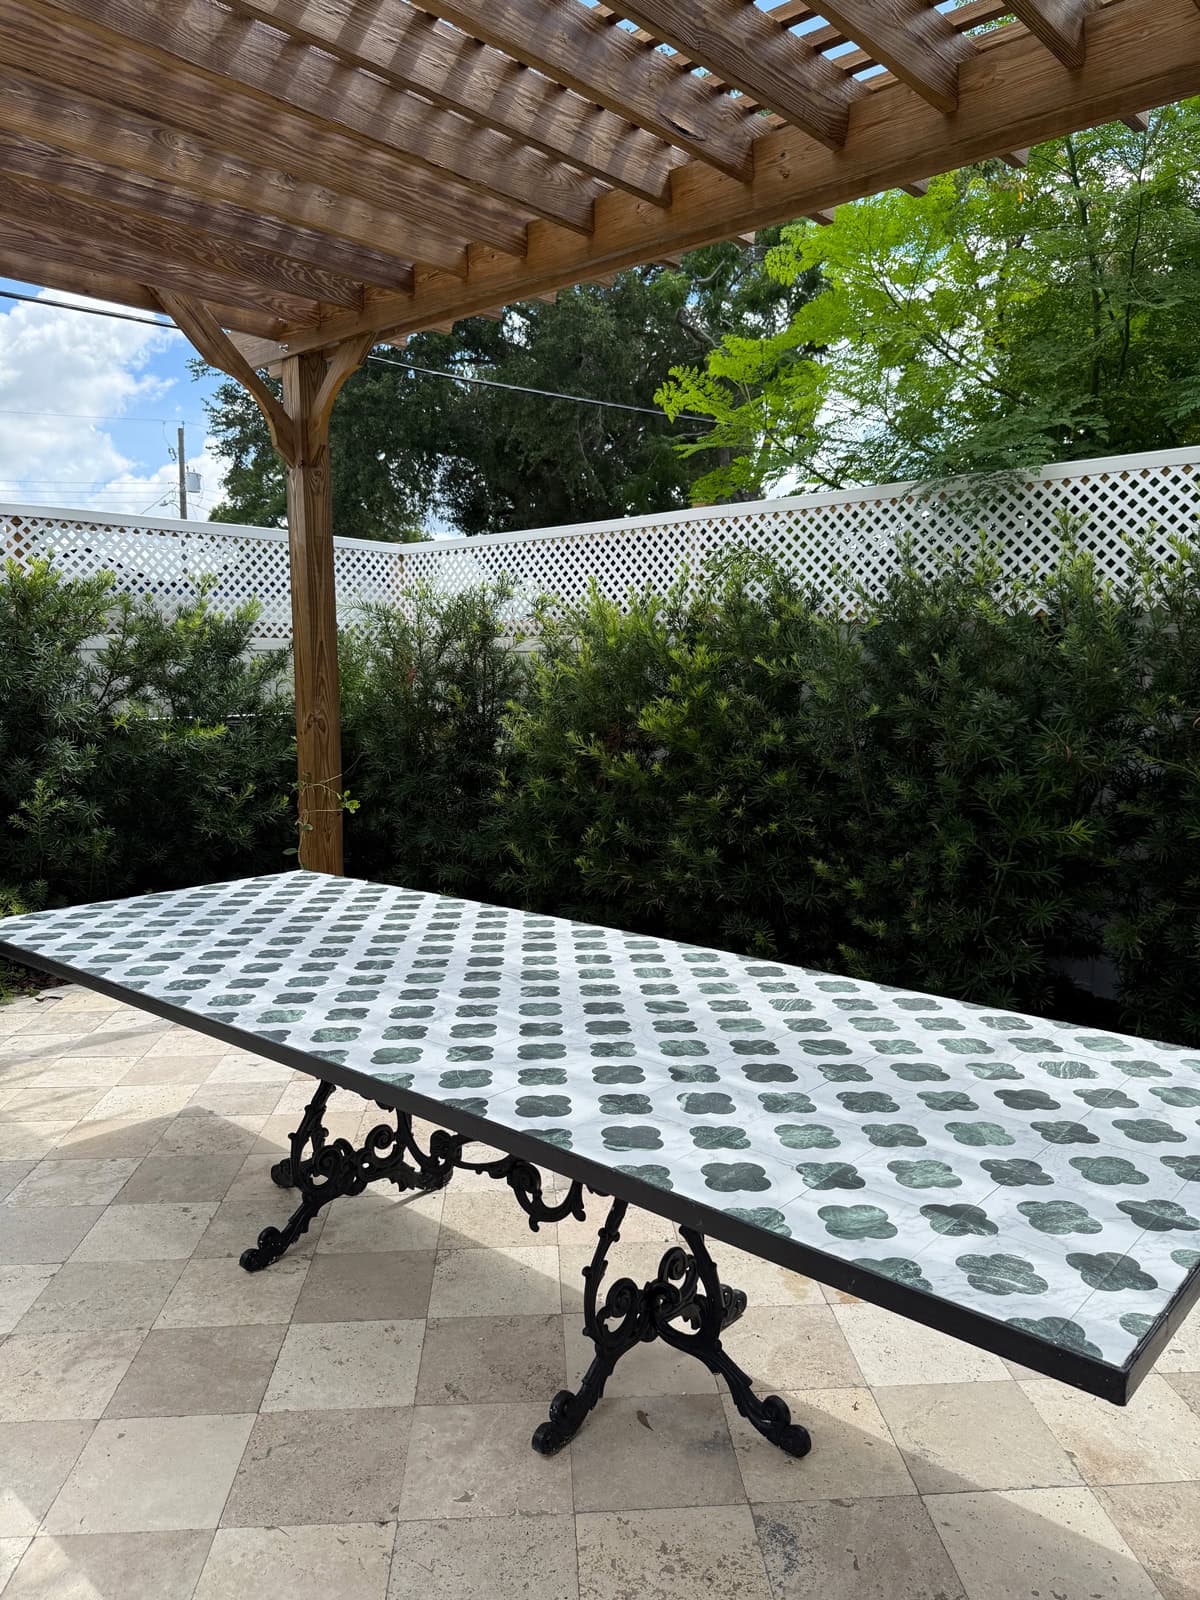
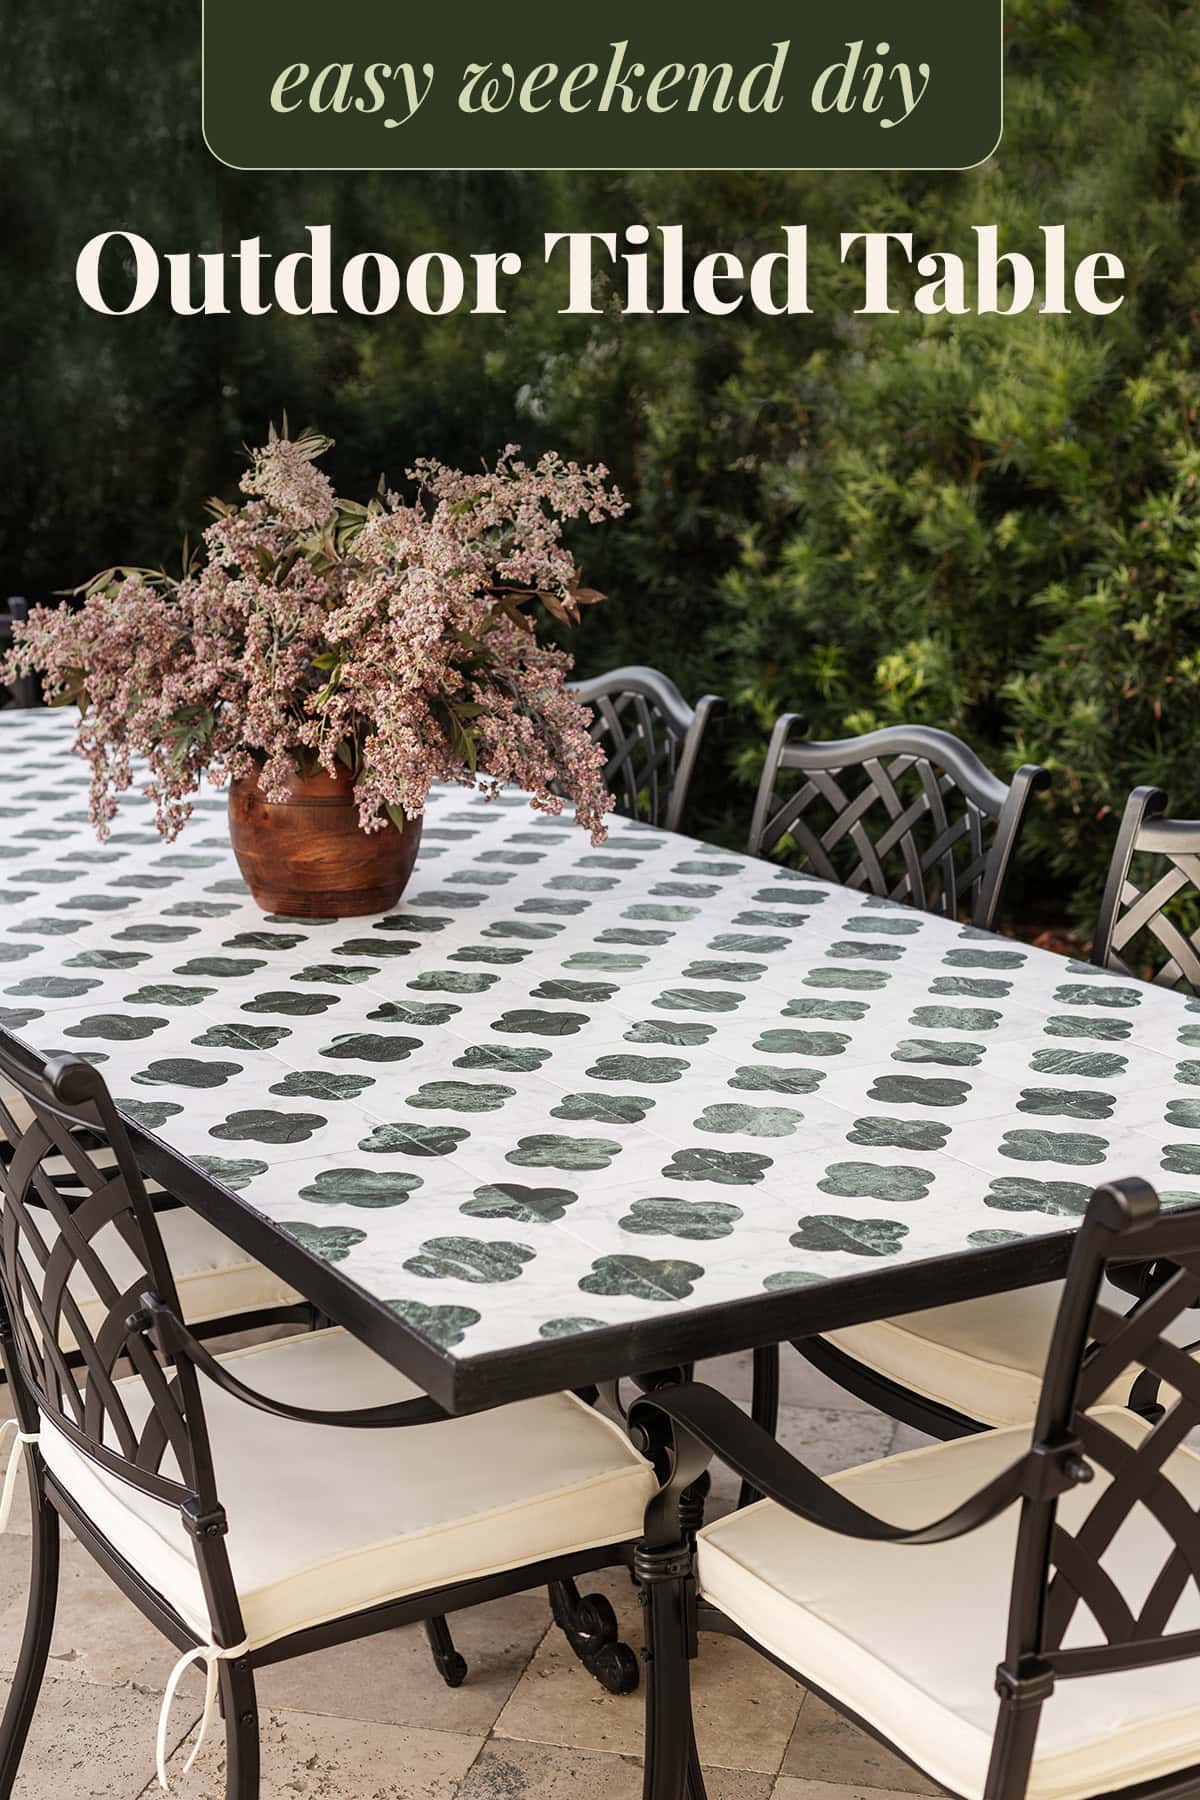
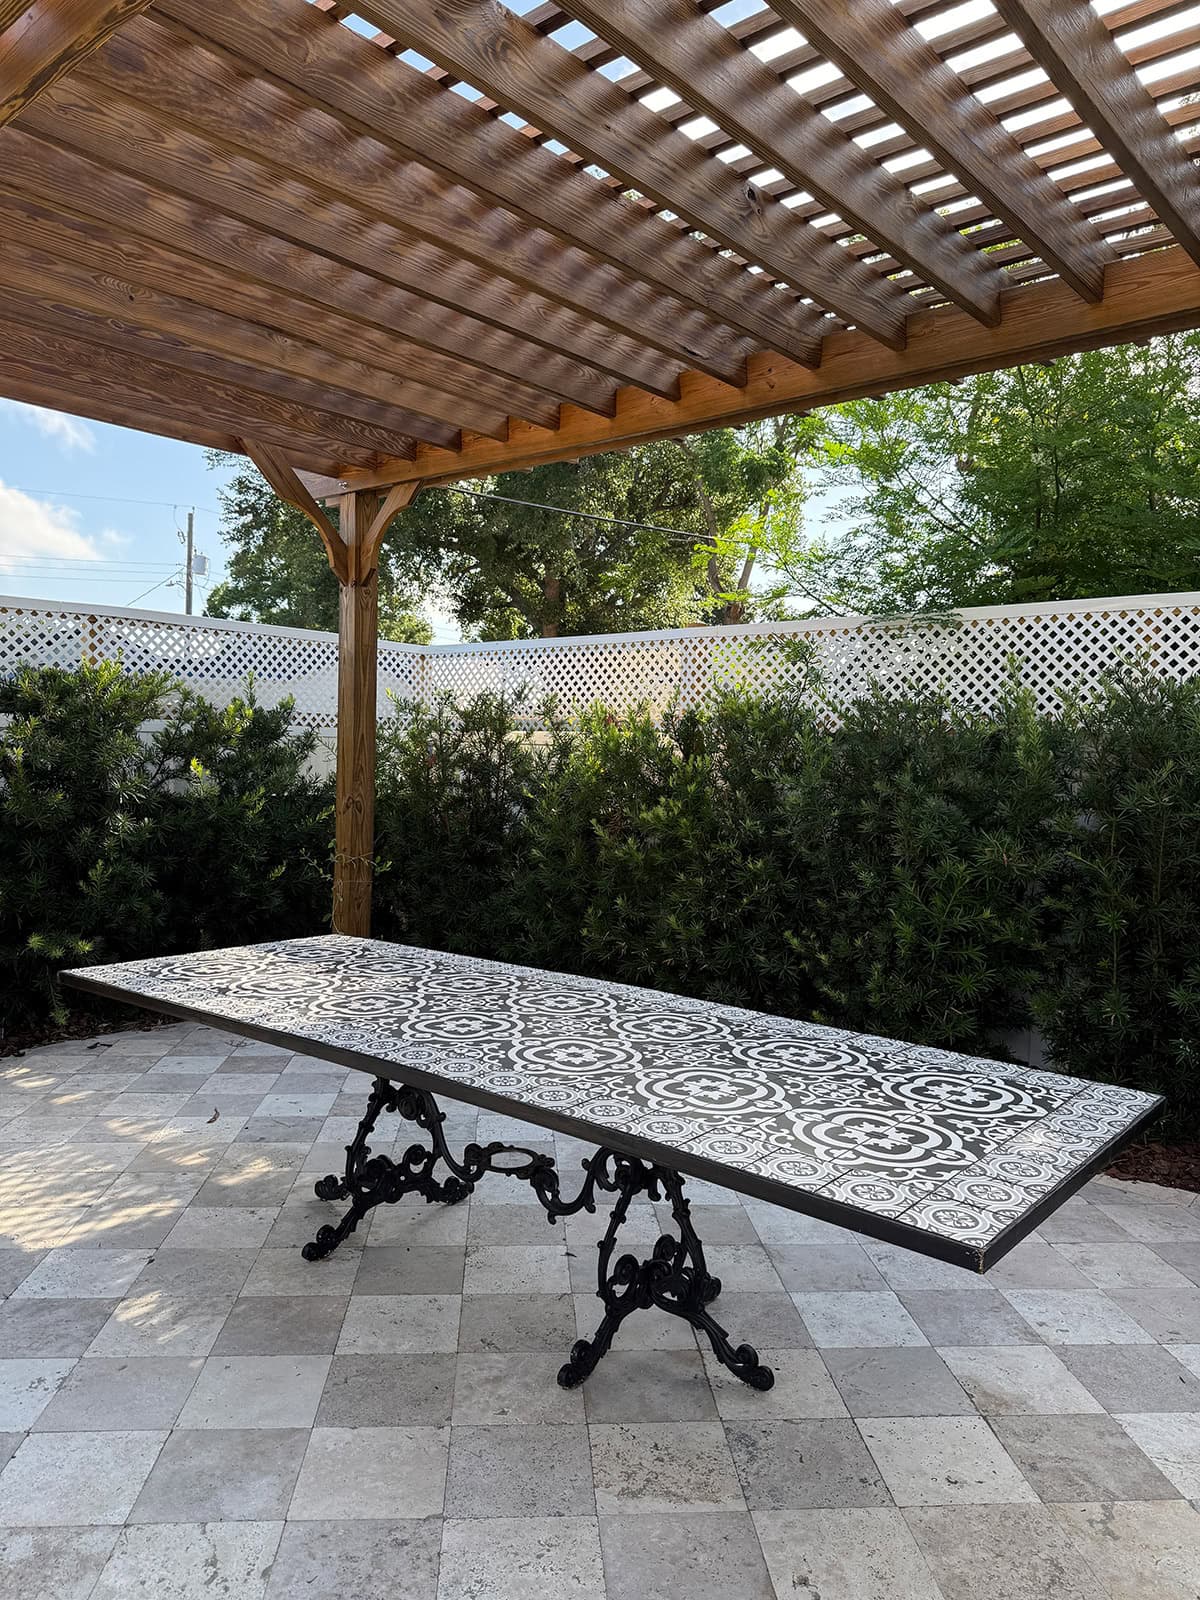
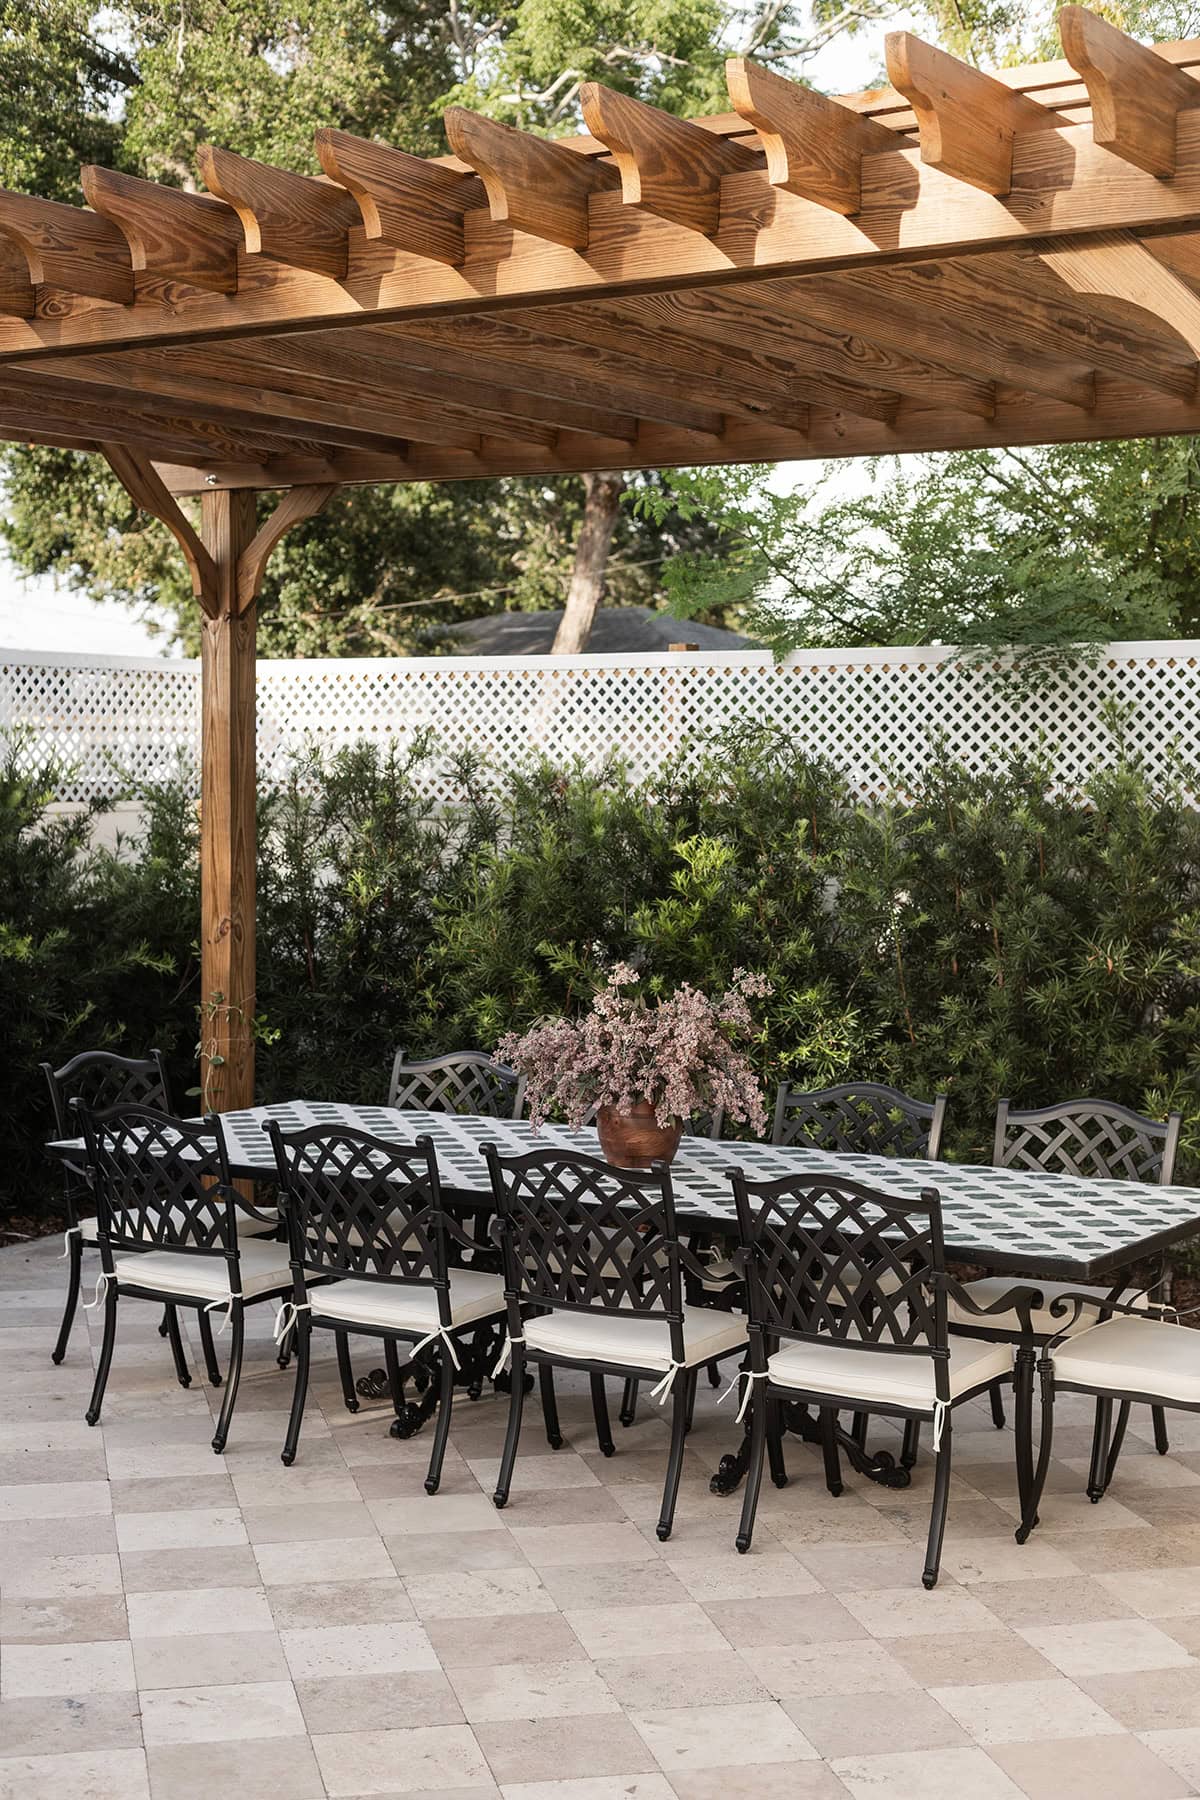
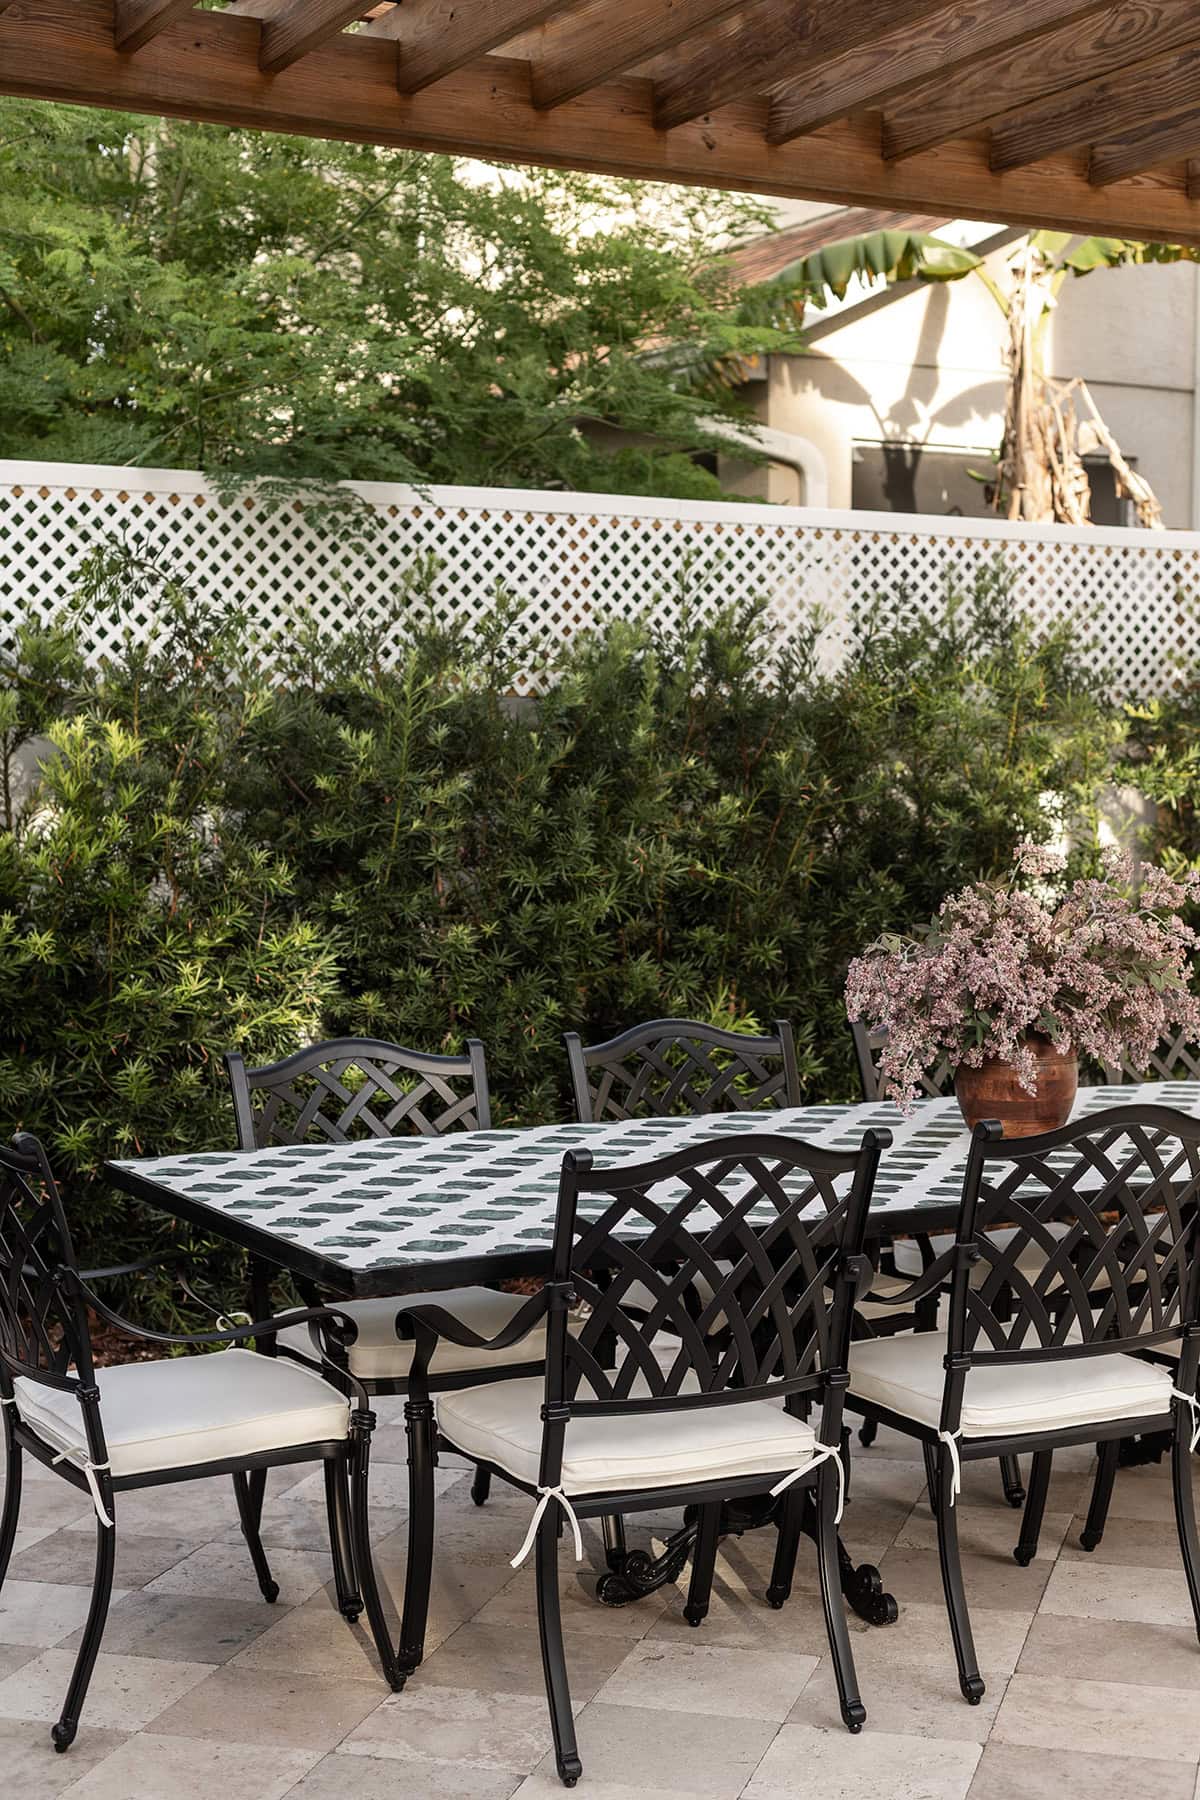
The Result
Here’s how it looks with our new chairs!
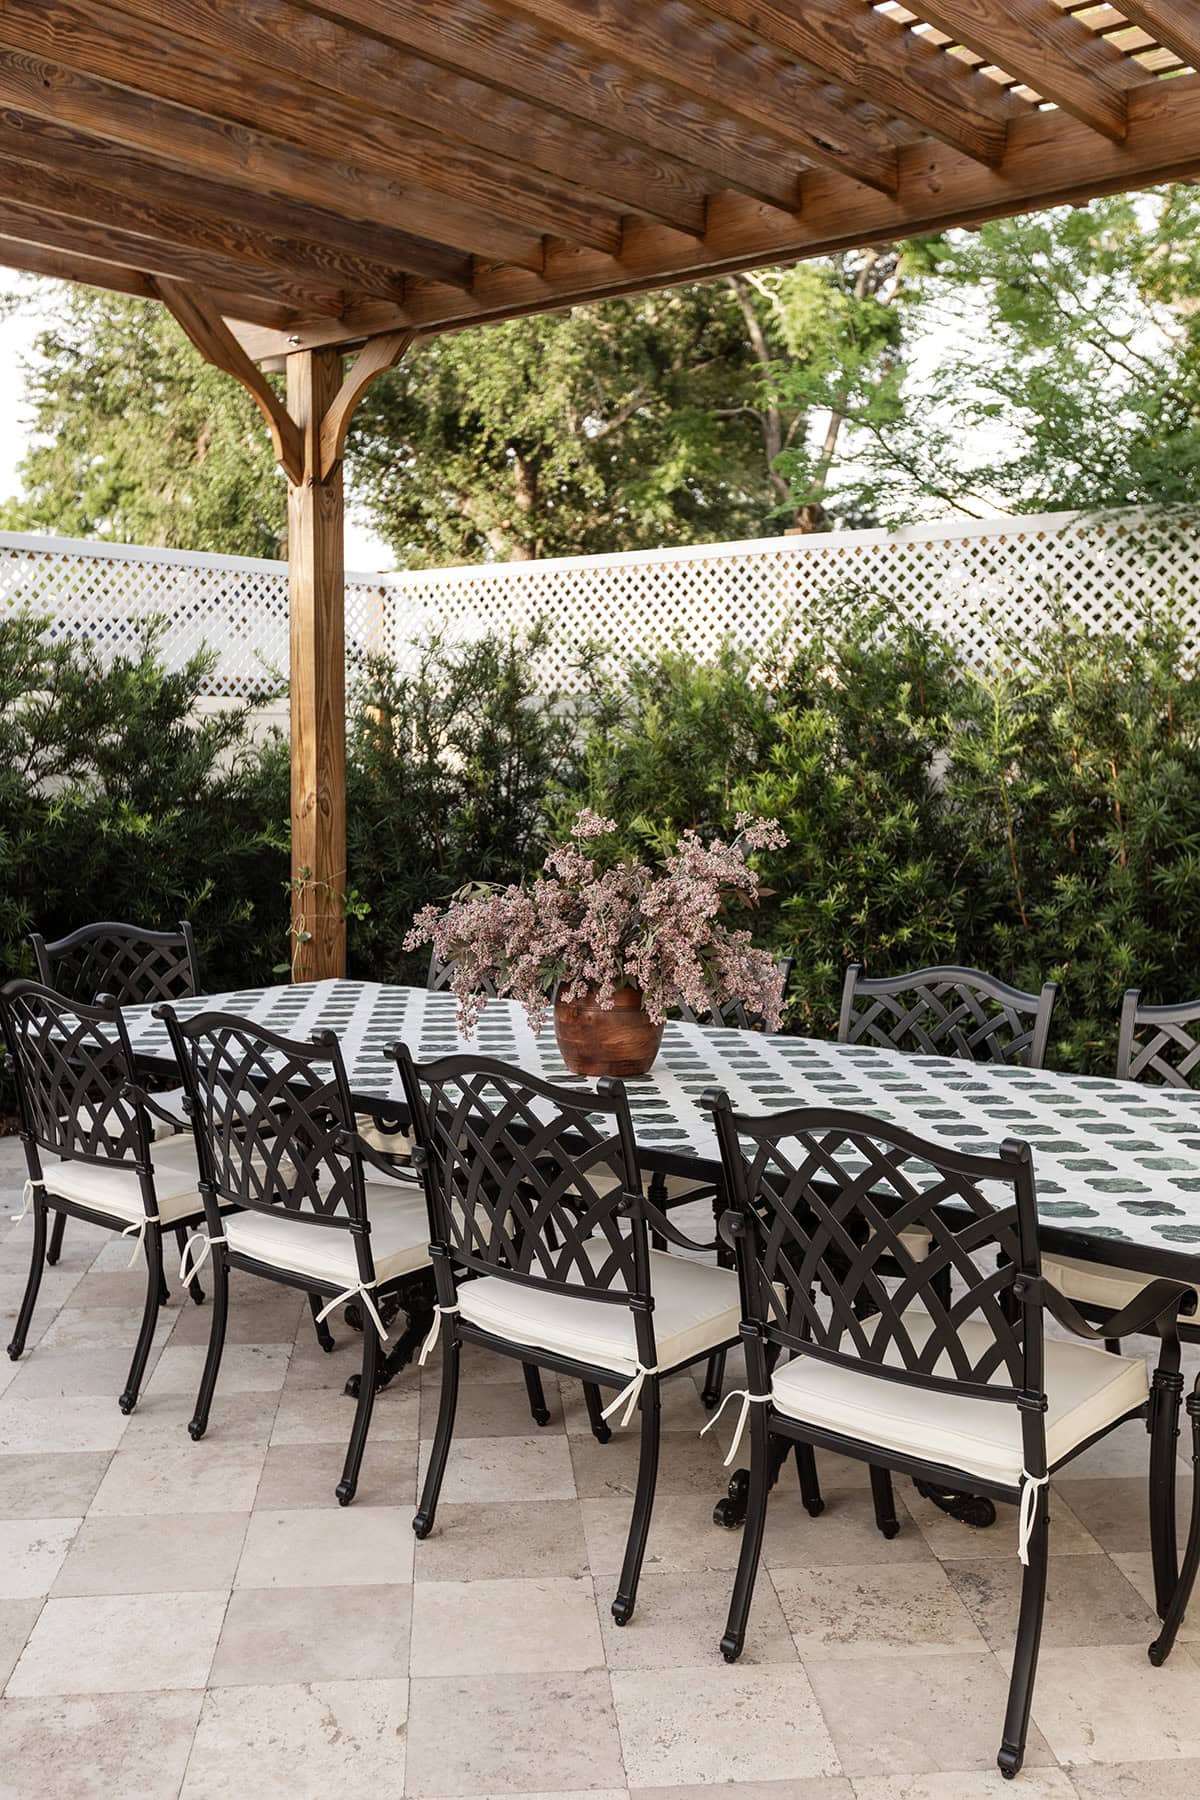
I chose these inexpensive metal lattice chairs that mirror the style of our chaise lounges and bistro set. They have that classic European design, and they’re cast aluminum so they won’t rust like traditional cast iron.
Can you imagine this pergola in a few years covered in a lush canopy of yellow honeysuckle? It’s going to be magical.
Time will tell how well this table holds up after a few Florida summers, but I’m hopeful it will fare better than the previous wood and aluminum tables we’ve had to replace in the past.

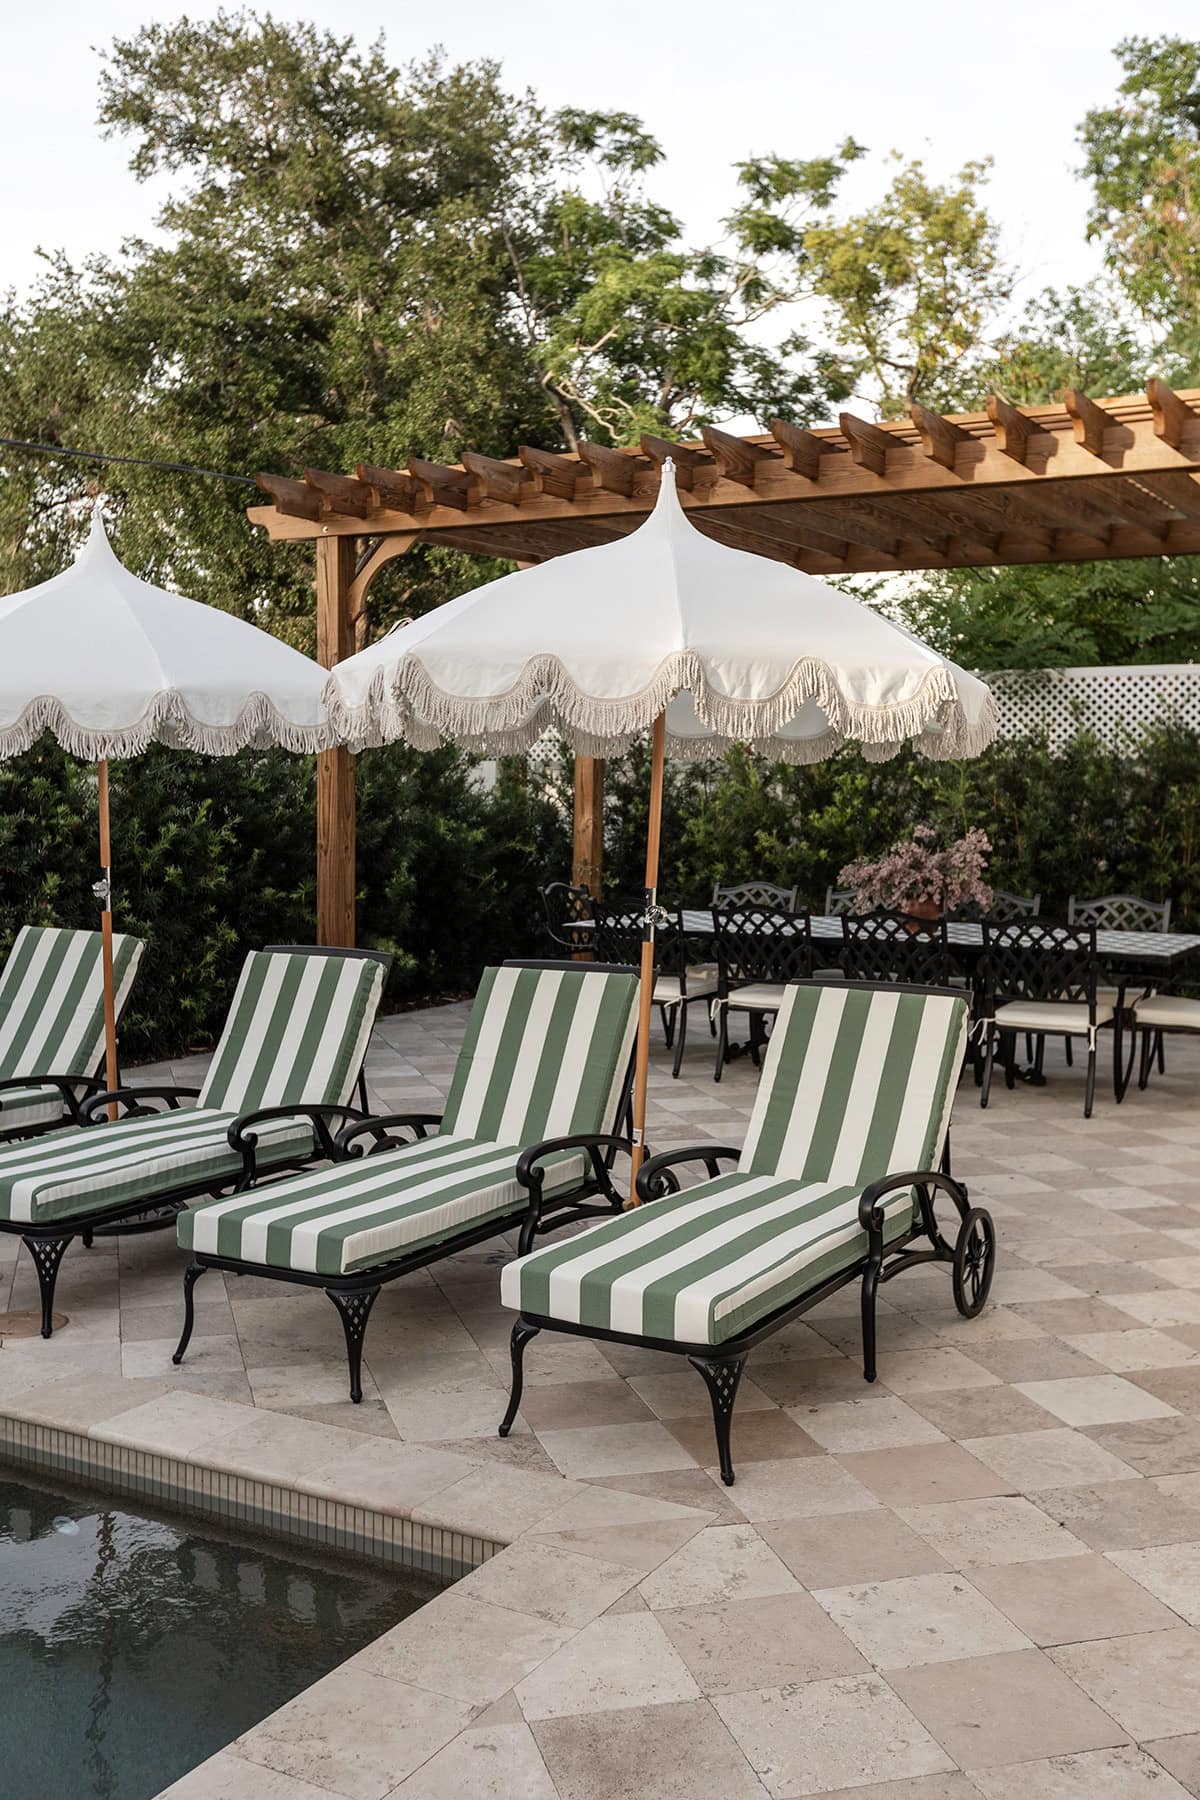
Here’s the view from the pool area. I set up the chaise lounges, cushions and umbrellas a few weeks ago, and added a bistro set in the opposite corner last week. You can see videos of the whole setup on my Instagram.
The final phase of the backyard is building an outdoor kitchen under the covered patio. Still working on plans for that, but first we’re focusing on the main kitchen. I’ve been posting updates over in my Instagram stories if you want to see the latest! Much more to come,


Becky says
You are a wizard! I adore everything you create! Amazing!! 🤩
Jenna Sue says
Appreciate it Becky!
Julie says
What a find, and then a lot of work to clean up the old table. But I loved that you recycled something old and gave it new life. It turned out beautiful under that dreamy pergola!
Hallie Smith Vredenburgh says
Just beautiful! I’m envisioning the honeysuckle. Dreamy.
Penny says
What a creative solution. It’s absolutely gorgeous, like everything else you do. Proof that patience and persistence really do pay off.
Val says
Wow! The table looks fantastic! A new table like that would have been so expensive. Love the whole backyard.
Jenna Sue says
Thank you! It really does look like a $$ custom piece. What would I do without Facebook Marketplace?!
Michele M. says
Oh, MAN……you’ve done it yet again. My goodness it is fabulous – that entire outdoor area is DREAMY!
Jenna Sue says
Thanks Michele! The table was such a lucky find.
Arli says
Love the tiled table.
Jenna Sue says
So glad you like it Arli 🙂