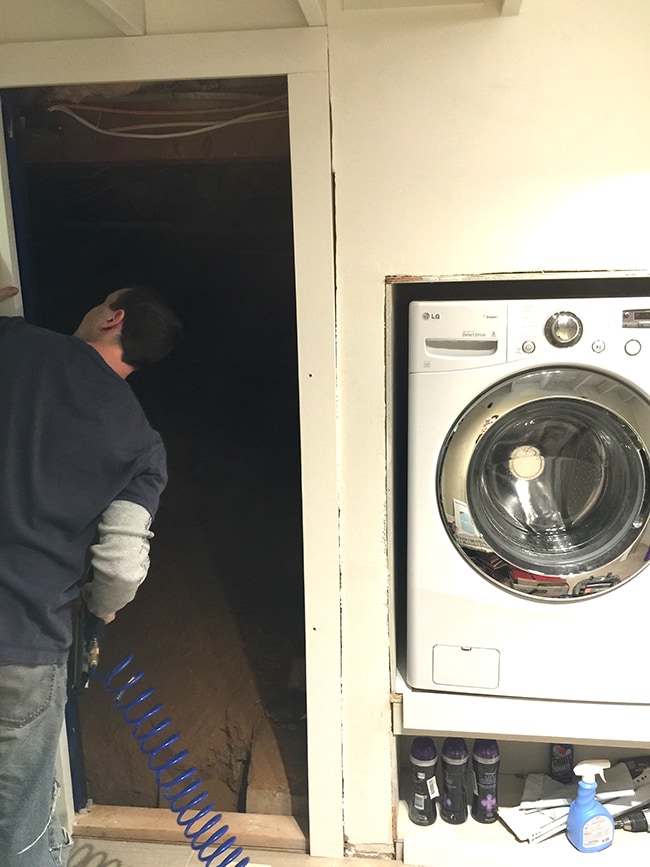
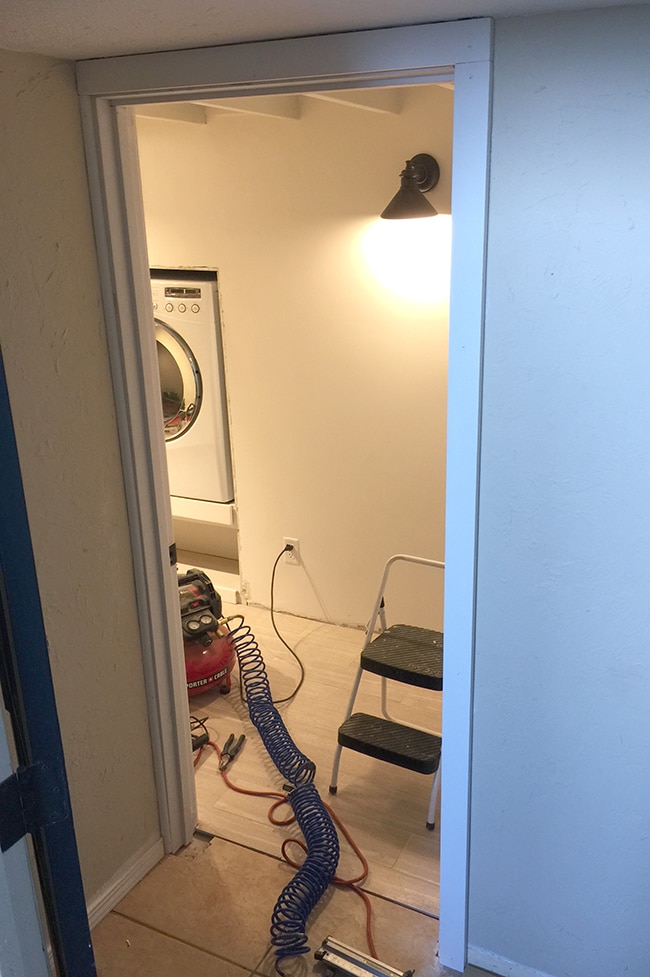
This past weekend we had planned to build drawers for underneath the washer/dryer enclosure but some things came up and there was a change of plans, so we focused on the door and enclosure trim instead. But first, we had to relocate the washer and dryer. Here’s how it looked before:

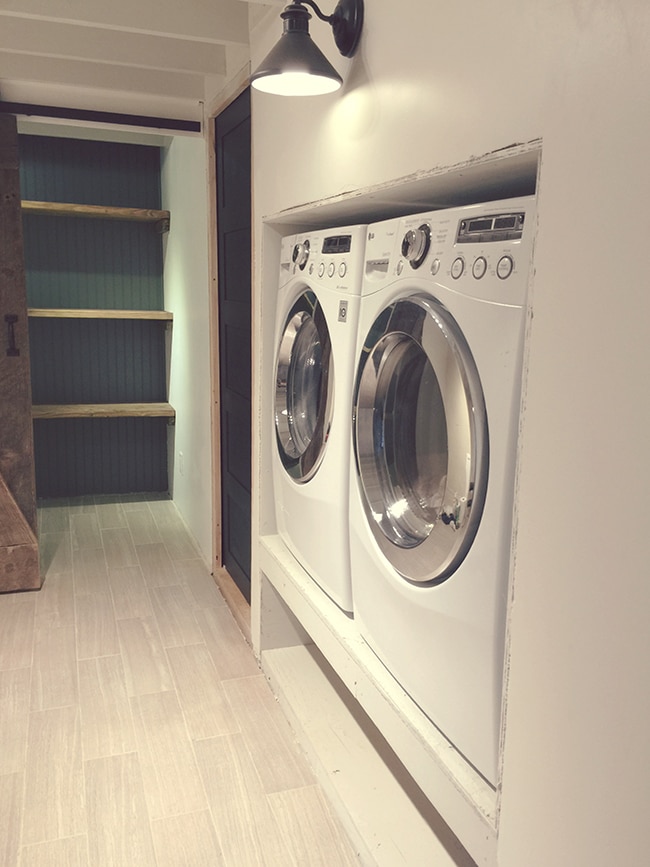
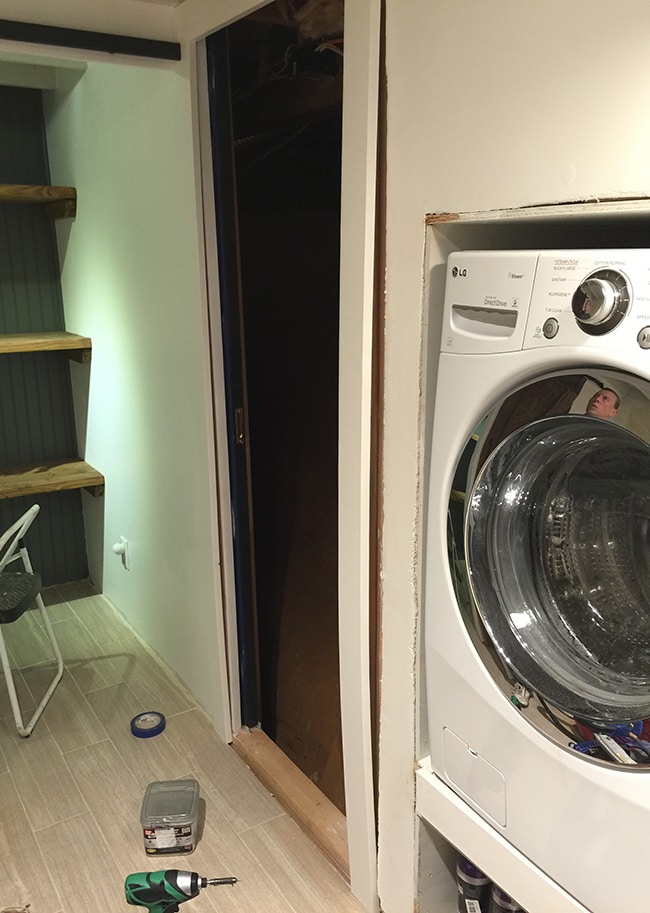
A while ago we had our plumber install the drains for the washer, then Brad and I added a couple electric boxes and cut a dryer vent and access panel so he could attach them once they were in. After switching a few wires around at the breaker, we got a couple movers in to carry them to their new spot…
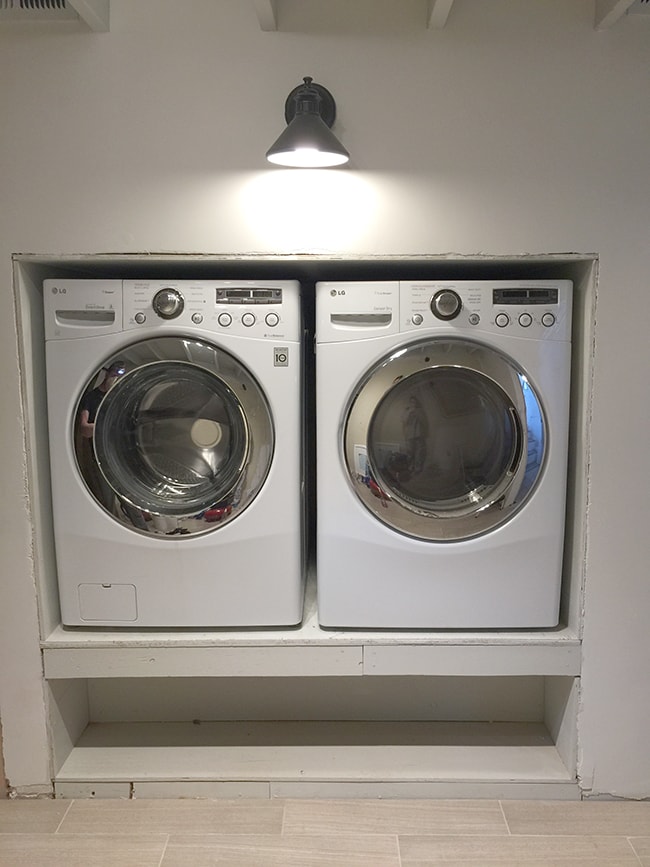
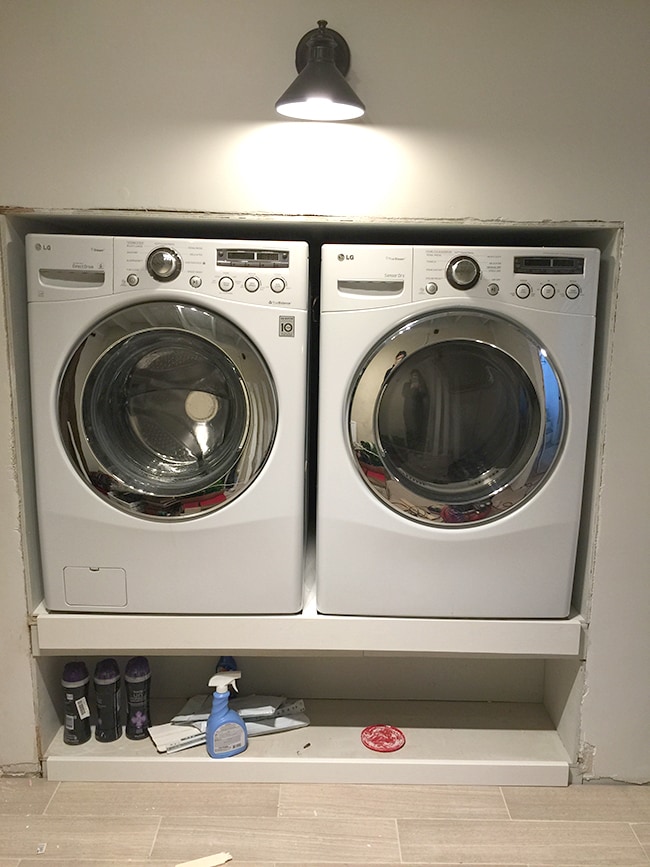
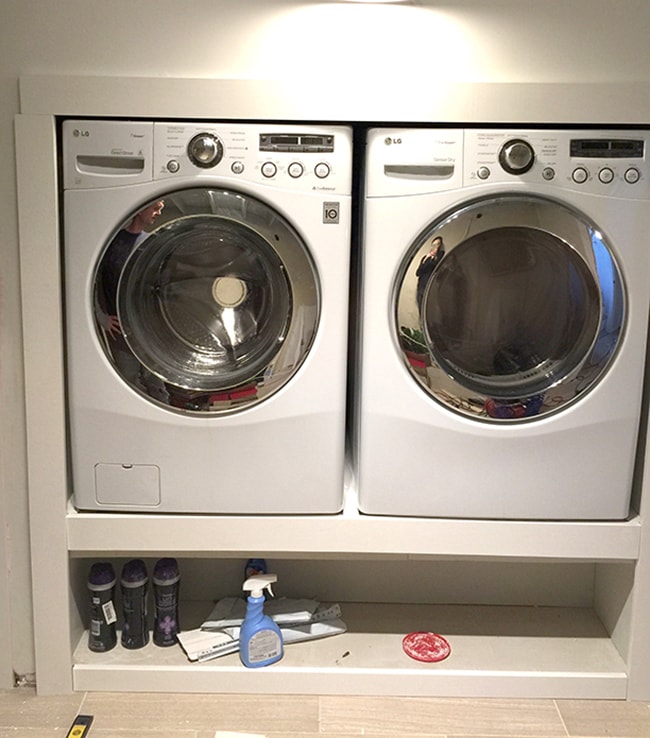
Total game changer. It finally feels like an actual laundry room when you walk in…
I couldn’t help but share my excitement on instagram:
Someone had commented that their washer ended up vibrating right off their pedestal—I mentioned it to Brad and he came up with a way to prevent that. We don’t have access to the back feet to hold anything down so his idea was to cut a square of plywood, route a hole inside for the feet to sit in, and attach it to the bottom.
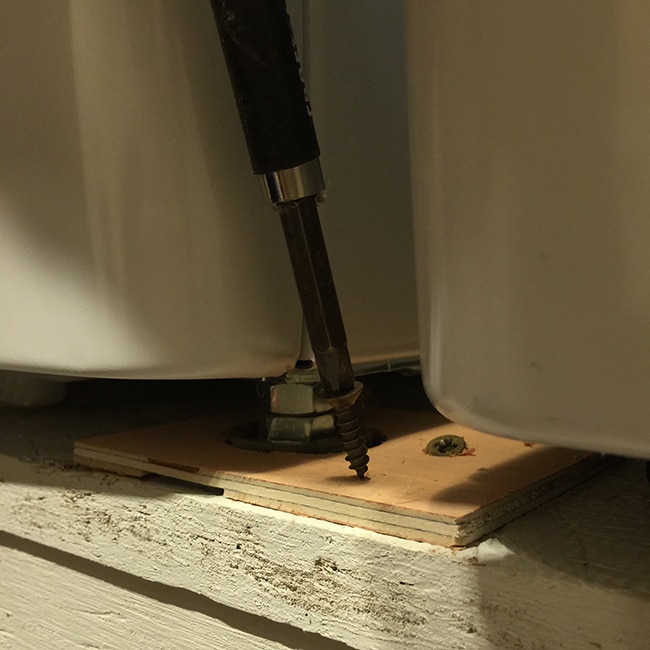
It’s nothing fancy and the screws had to go in at an angle since we couldn’t get our drill between the washer and dryer…
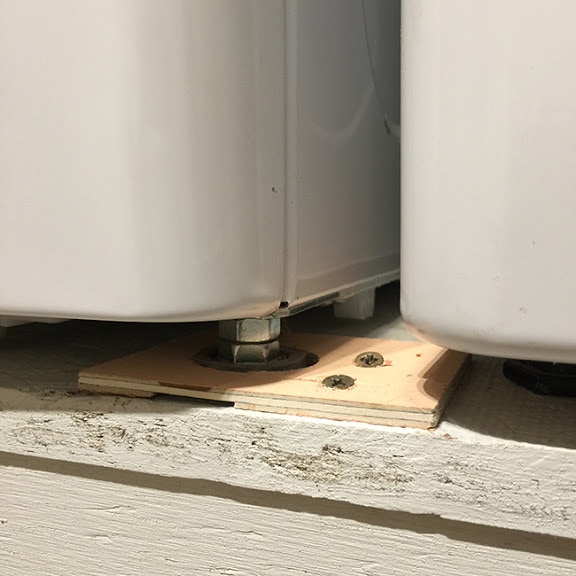
But it works. We did one on both feet.
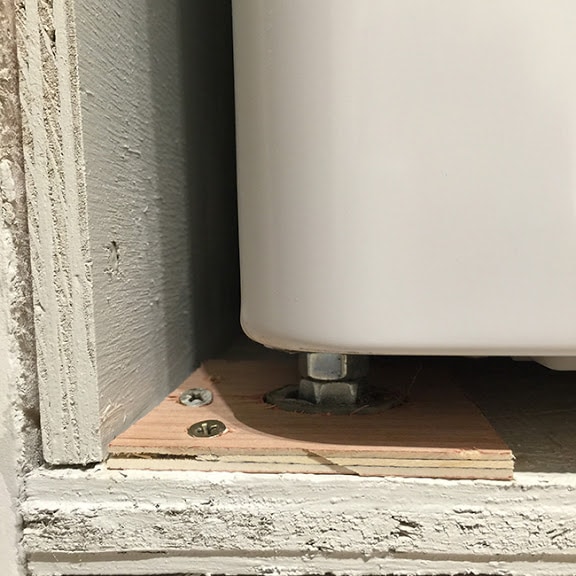
We’ve done several loads of laundry since then, watching the spin cycle carefully, and we’re pretty certain it’ll do the job.
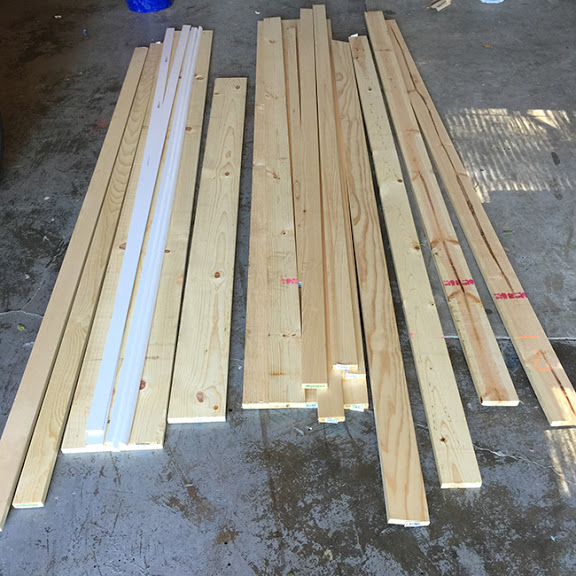
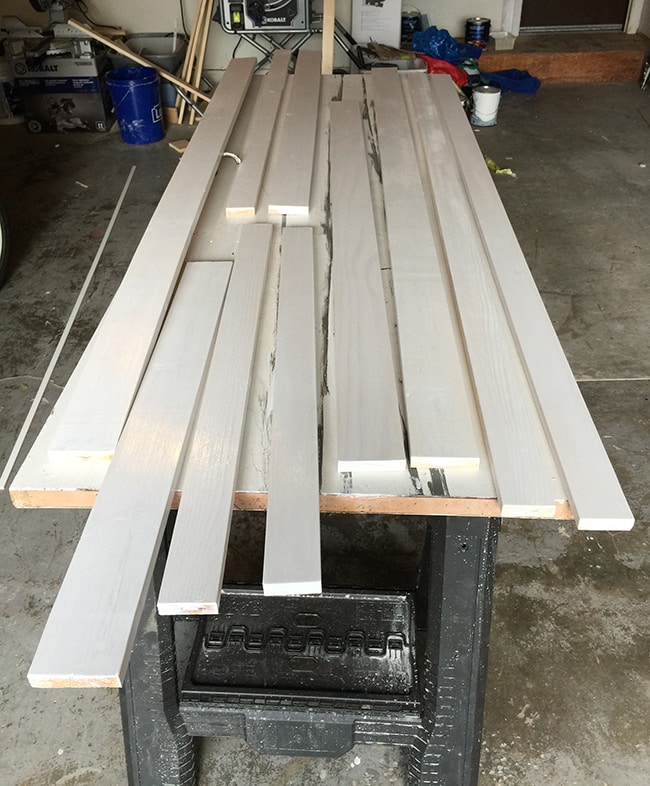
Next came the fun part of figuring out all our trim. In the rest of the house I’ve been using 1×3’x and 1×4’s to trim out the windows and doors and wanted to stick with that here as well. It’s simple, inexpensive and clean looking. So I made a Lowe’s run and grabbed enough boards for the entrance door, pocket door, washer/dryer enclosure and drawers which we’ll build this week:
I thought I could save some time by measuring, cutting and painting everything before installation… which didn’t exactly work as planned (as you’ll find out in a second)
The doors are always quite simple. Straight edges, nothing fancy.
The washer/dryer enclosre… not so much. There was going to be some overhang so I had to do a lot of eyeballing, and splitting differences, and calculating—I should have written it down because by the time I got up to the garage, one of the numbers got switched in my brain and I made the wrong cut (on two boards). And had to run back to Lowe’s to buy replacements (this is why even if it’s easy to do by yourself, it’s always helpful to have someone helping you to double check!)
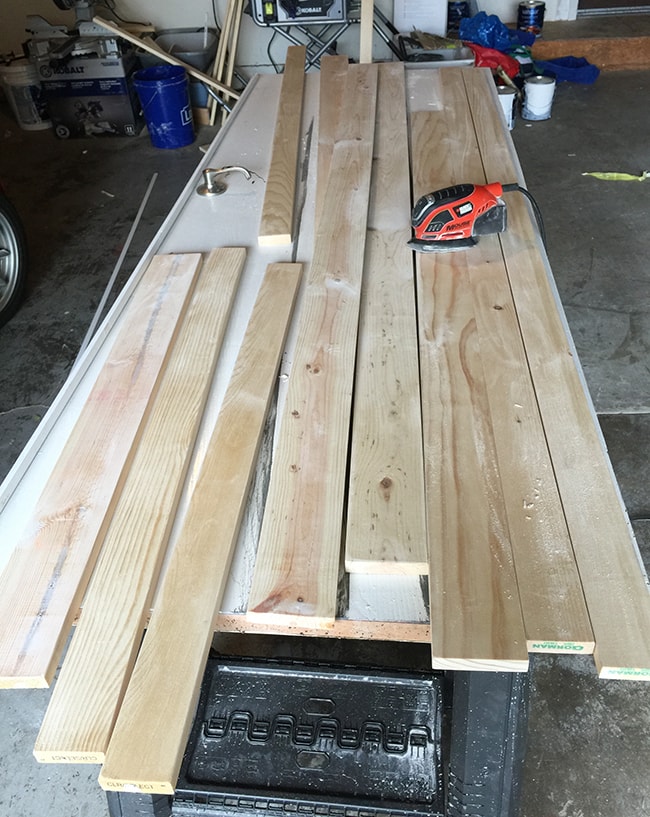
So anyway, back in the garage I had made all of my cuts and sanded everything down nice and smooth:
I decided to prime the boards first to cover all of the knots/tannins in the pine (using Zinssers’ water based primer since that’s what we had on hand, we’ll see how well it holds up):
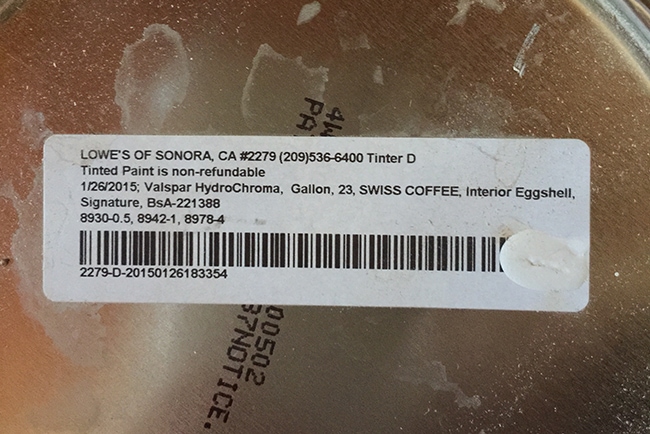
For the paint color, I used the same white we’ve used in the whole house—Kelly Moore’s Swiss Coffee, but had it color matched by Valspar. Some of you had been asking about the color code, and here it is (we used eggshell on the walls and semi-gloss for the trim):
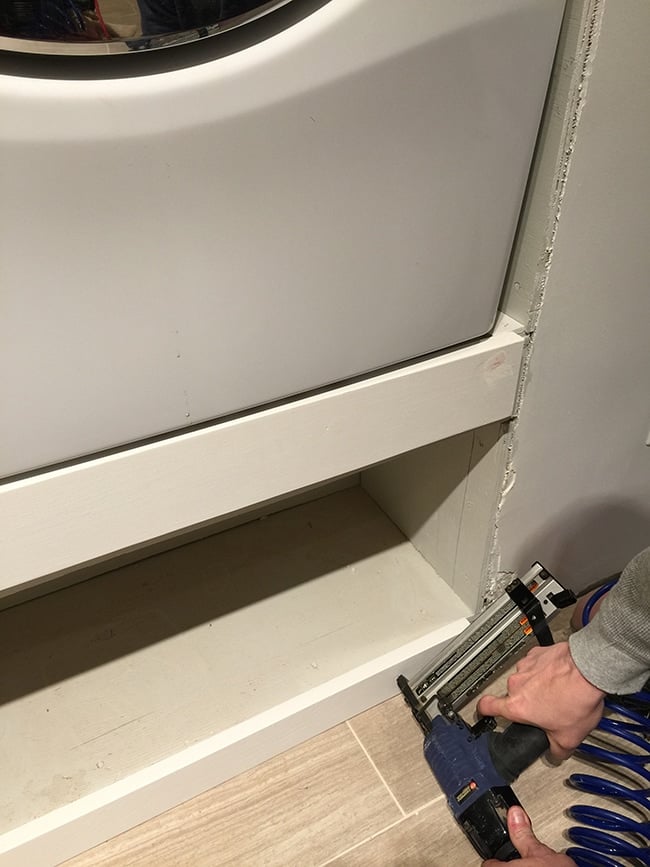
To hide the plywood blocks around the front feet of the washer, I picked up some 2″ flat trim and stapled another plywood piece on the back so it would be level:
Then I just slid it back in. Once the trim is in it’s not something you’ll notice:
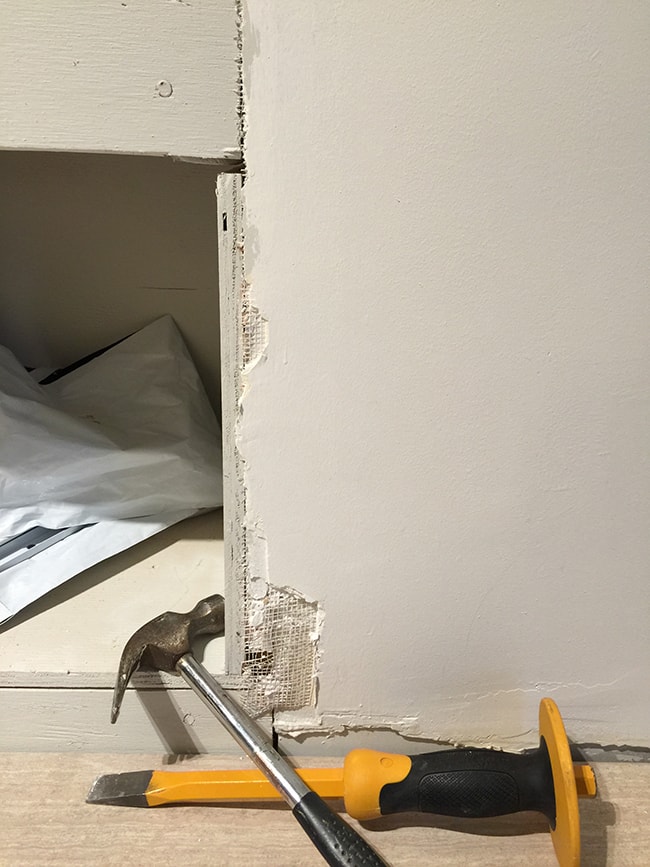
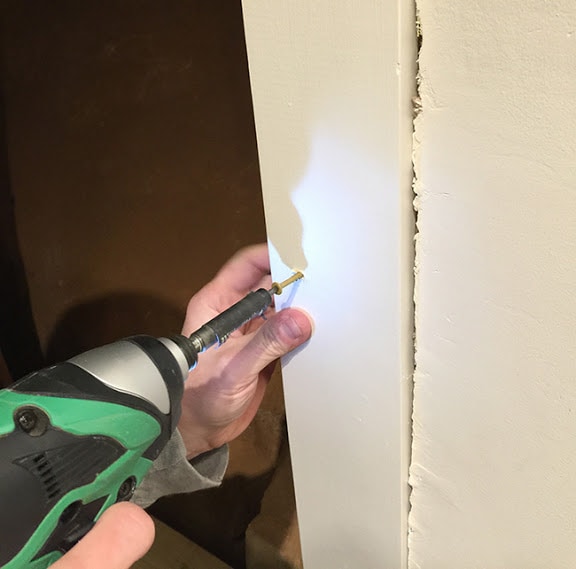
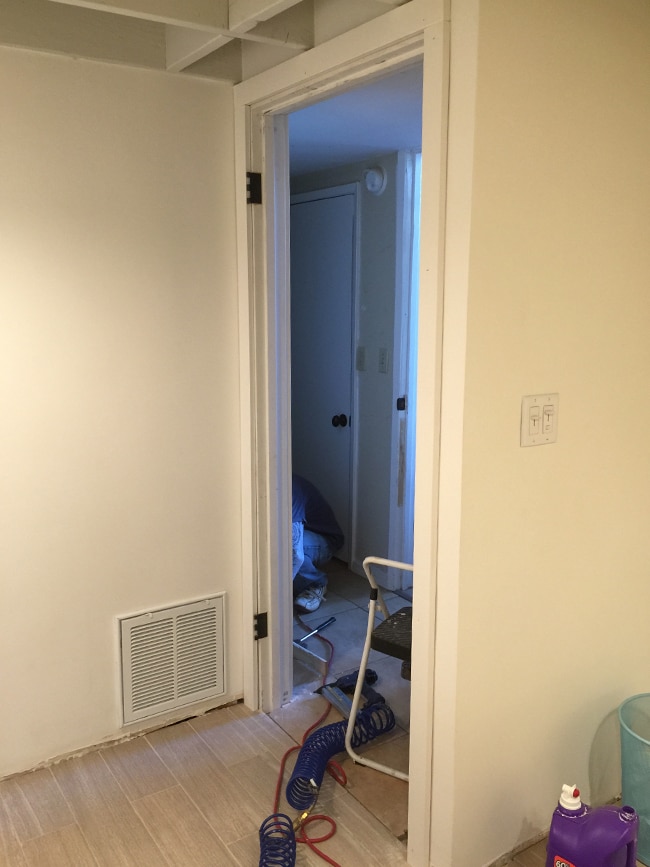
Before we could install the trim, we had to fix all of the uneven-ness of this box and the surrounding drywall. Adding trim should be relatively straightforward but it’s actually quite tricky and time consuming when you’re dealing with surfaces that aren’t level and straight. There were so many factors we had to work around.
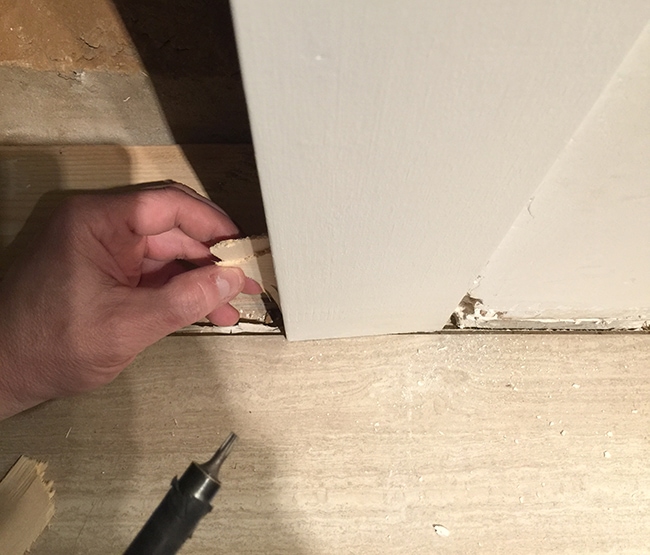
We used a dremel to shave off the protruding edges:
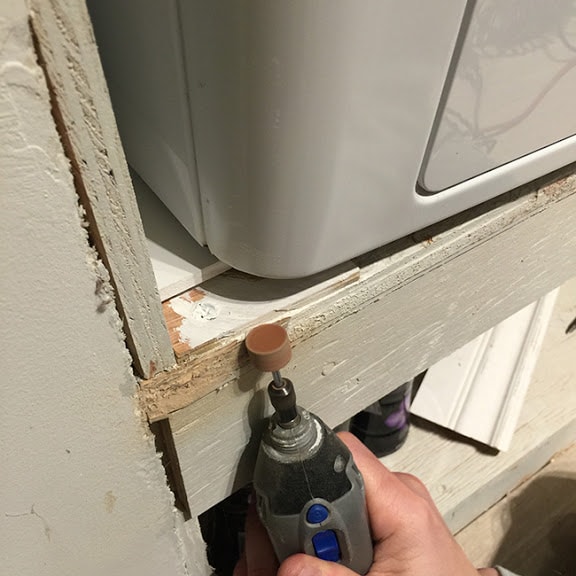
And a hammer and chisel to remove some of the drywall that was sticking out:
The drywall was built up more on the right side of the enclosure than the left, so we had to accept that this wasn’t all going to be perfectly lined up and even. Sometimes you just have to deal with things like this, do the best you can, and realize that “it doesn’t have to be perfect to be beautiful” (thank you @thenester for that reminder). With that in mind, we nailed up our first pieces…
So far, so good…
When we held up our vertical trim, we realized there was a major issue. Somehow my measurements were off and the top piece was way too short!
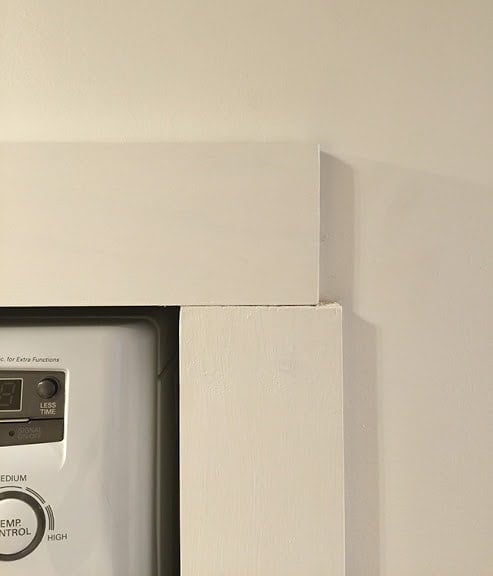
My measurement was taken off the right side only, assuming the left would be the same—clearly it wasn’t—and I should have done a dry test fit with all of the pieces in place before cutting but Brad wasn’t there to help and I couldn’t hold them all up at once by myself. Lesson learned.
Instead of driving back to Lowe’s again (this was yesterday afternoon and we had guests coming for dinner), we decided to run the pieces through the table saw to rip them down 1/4″ so they’d all line up. We test fitted and that did the trick, so they’re currently in the garage, re-sanded/painted and ready to install tonight.
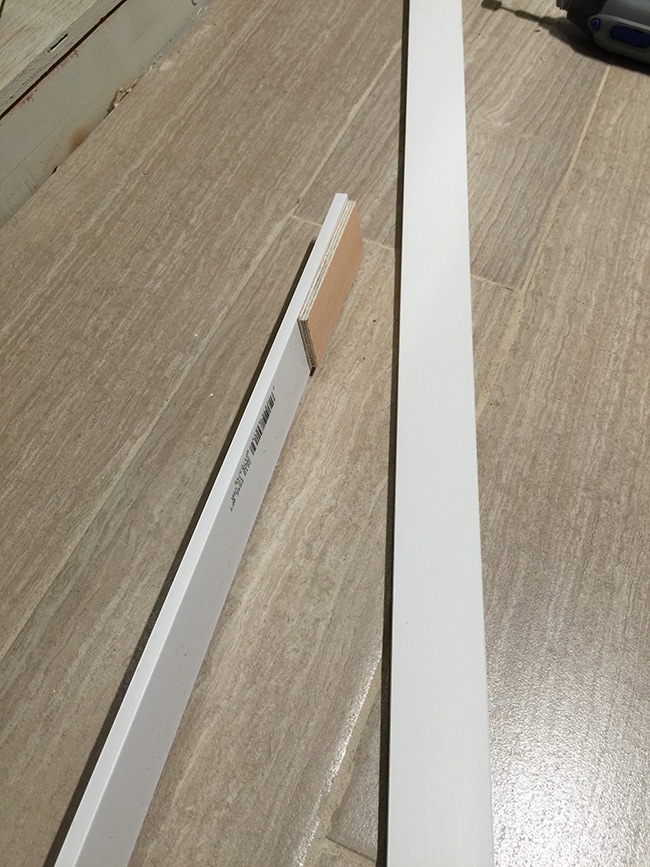
Moving on to the door trim… these pieces fit without any issues but there were slim pickings on 1×4’s at Lowe’s so I ended up with some bowed ones:
Instead of using finish nails on these, we countersunk a couple screws into the wood so they wouldn’t go anywhere.
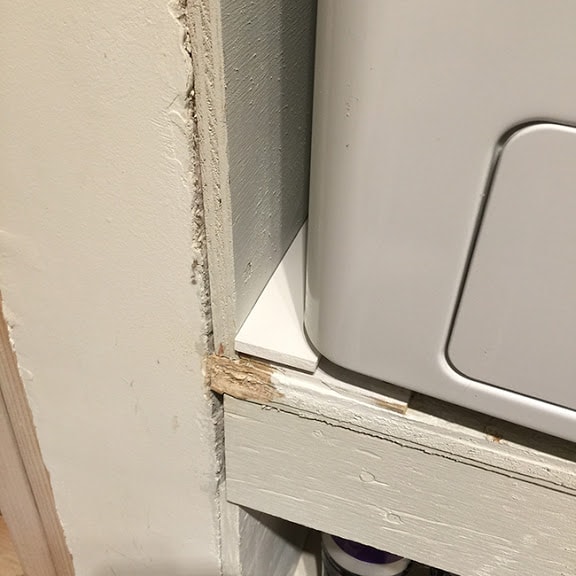
This wall was also completely not level or straight so we had to add some shims to even things up as best a we could…
It all came together fine but there was this large gap on the right where the drywall edge wasn’t straight at all.
I had bought some flat trim to hide it but after holding it up, I didn’t like the way it looked at all so I decided to just mud it in.
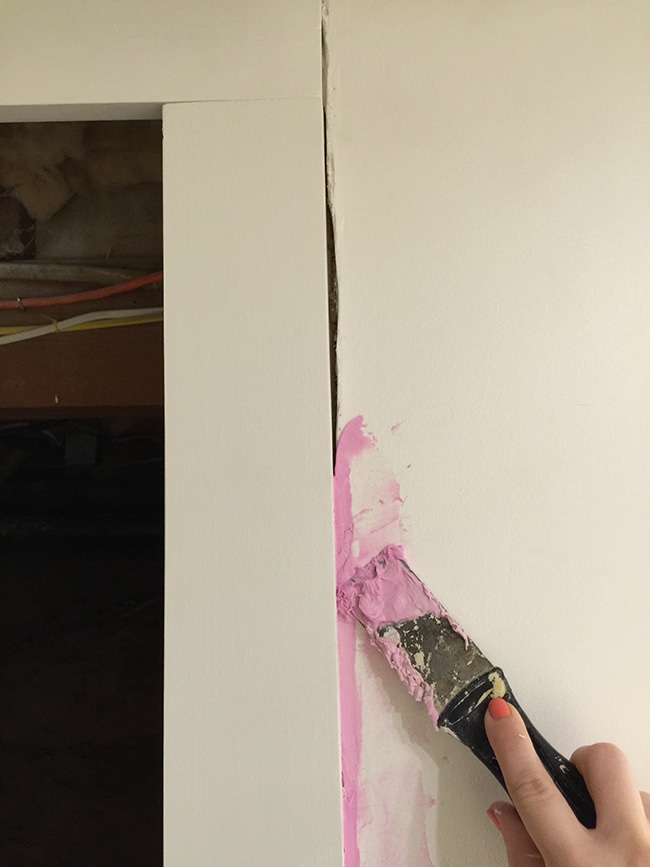
I’ll sand it down today and possibly add another coat to smooth it out, but I think it will look completely fine after it’s done and painted.
Here’s how it looks now (ignore the accidental white paint on the door):
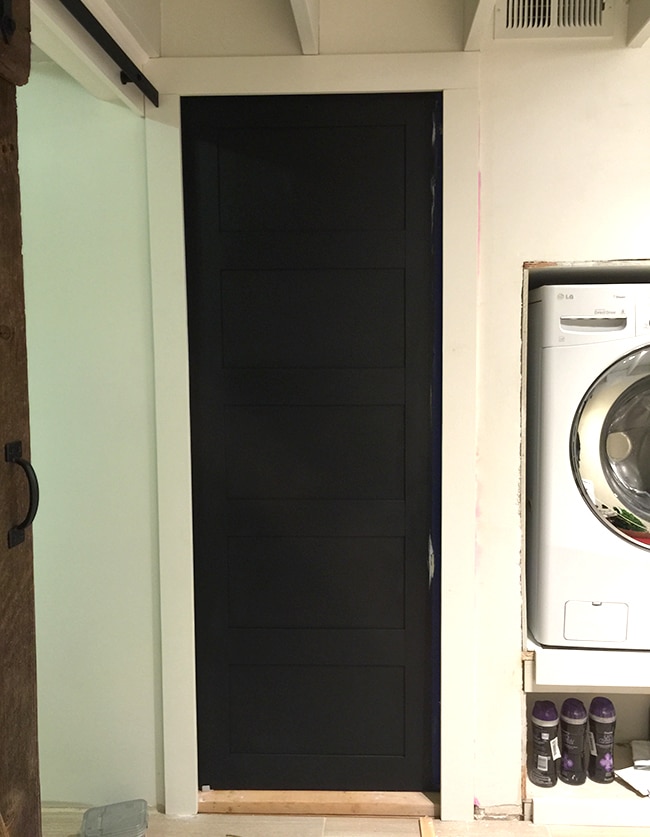
I have to install one more trim piece at the bottom and paint that white as well—or should I paint it black? hmmm… what do you think?
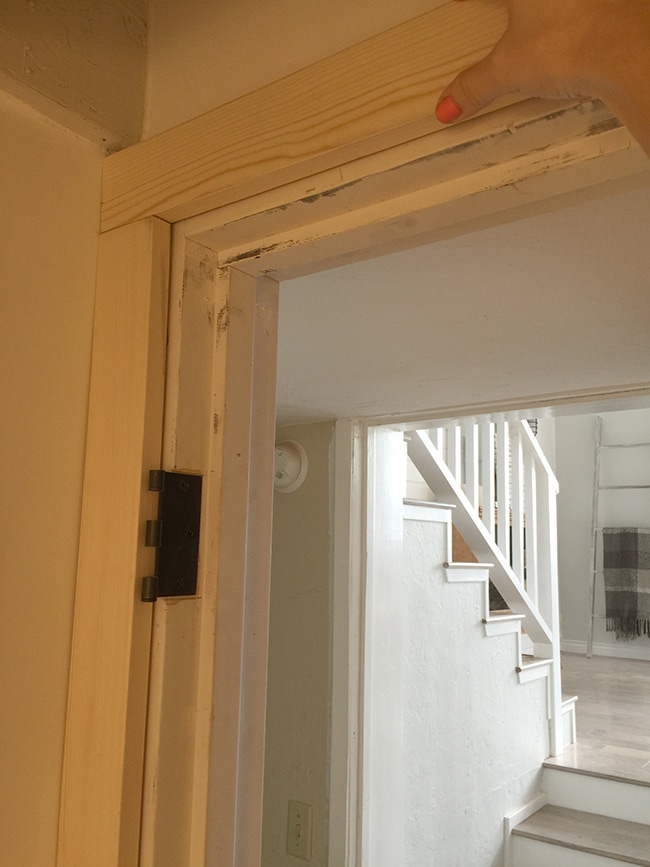
We also finished trimming out the main door—after removing the old baseboard in the hallway and cutting it to make room for the wider trim:

On the left edge there was only room for quarter round to hide the gap:

Here’s the finished outside (still need to patch, sand, caulk and paint of course):
And here’s the inside of that door:
And that’s as far as we got. Tonight I hope to finish at least most of it, and then tomorrow we’ll tackle building that drawer. Which leads me to this question—originally I was going to paint them white to match the trim but now I’m wondering if there’s too much white going on and I should stain the wood instead? Here it is again so you don’t have to scroll up…
And another angle:
Looking at it straight on, it is a lot of white, but when you look at the overall room (especially once it’s finished) I think it still works. But I haven’t decided 100%. I’d love to hear your thoughts!
I’ll be back as soon as the trim and drawers are ready to show off…