I have to say, this is definitely in the top 3 favorite projects I’ve done to a house. Relatively small cost and effort for a huge impact.
I had been wanting to do wainscoting forever, and our dining room was the perfect area to try it on. I was worried about how the boards would meet up with our baseboards, since it was only 1/4 ” thick, and I didn’t want to replace those and have them not match the rest of the house.
Then I came across this tutorial and knew it was the perfect and easiest way to achieve the look. Since the boards were only 1/4″ thick they would line up perfectly with my existing baseboard. Problem solved!
So I made my measurements and took a trip down to HD. I had around 254″ of wall length to cover, so here’s how the materials broke down for me:
(10) 1/4″ x 4″ x 3′ poplar boards
(8) 1/4 x 3″ x 3′ poplar boards
254″ of chair rail trim
It worked out best for me to space the vertical boards 16.5″ across (it was originally 16 but then I found out the boards labeled 4″ are actually 3.5″ wide! Why do they do this?)
Then I would use the narrower poplar boards and run them horizontally across the wall on top of the vertical boards, then top that off with the trim.
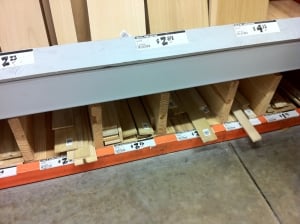
I ended up finding my poplar boards in cubby’s below the larger wood pieces. For those of you who always get lost in the HD aisles looking for the right wood, I snapped a pic:
They came in quarter inch and half inch thick pieces, all 3 feet long, in various widths. In the tutorial I followed, she used the same 4″ thick (err 3.5″) pieces to run across the top, but I was worried it would look too thick with the chair rail so I opted for the 3″ (which is also actually 2.5″).
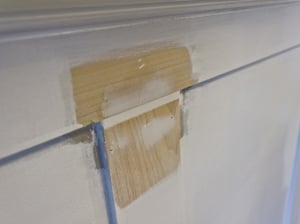
FYI, they only had 7 of the narrower poplar boards left so we had to buy one oak in the same size. Ugh. Stay away from oak, it has horrible rough grain that you can see when you paint over it and it’s really hard to cover without turning yellow. Stick with poplar!
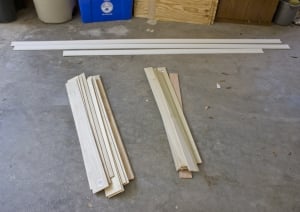
Anyway, here are all my pieces at home, ready to cut:
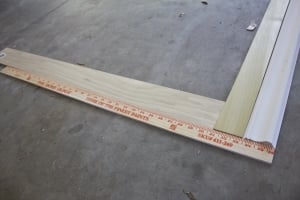
I wanted the height to be 3′ (plus the existing baseboard), so I carefully measured the cutting point for each vertical board by mocking it up against a yardstick:
After making all the straight cuts and miters (with only one small miter disaster that we later fixed with caulk) the boards were ready to go up!
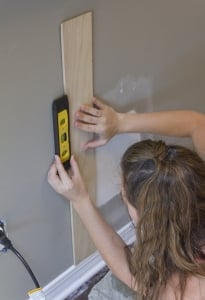
Here I’m leveling the board for the nail gun:
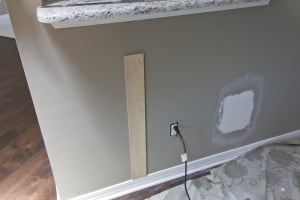
And board #1 is up!
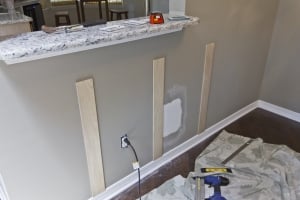
Here’s two more…
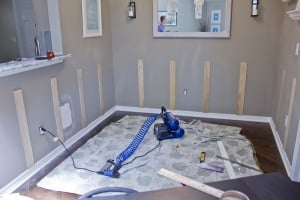
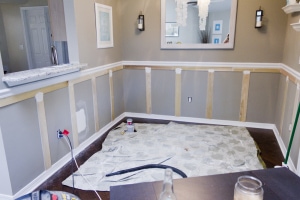
I’ll fast forward through all the rest—here is the end of phase one:
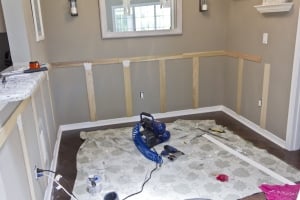
In phase two, we attached the narrower poplar boards across the top:
Then in phase three, we added the trim:
All that was left to do was caulk and spackle and paint! Which ended up taking 80% of our time.
Our plan and our measurements were just about perfect… but we forgot that this house was not built perfect. The walls are not completely straight and level, so we ended up with some gaps here and there where the boards didn’t quite meet:
Luckily we were able to fill it and sand over it and you can’t really tell unless you’re looking for it.
On to the results!
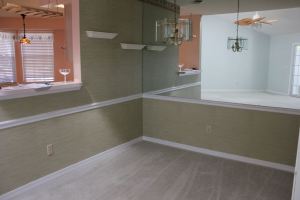
Here is the before before, as in when we bought the house….
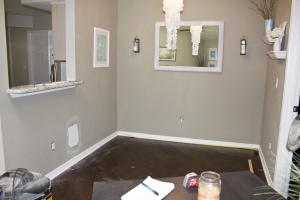
Here is the before we started, as in yesterday morning:
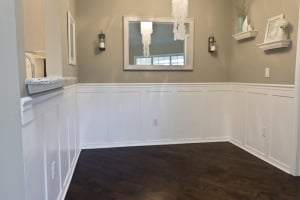
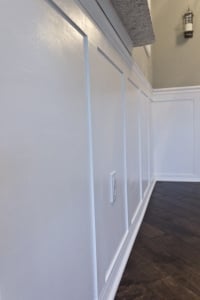
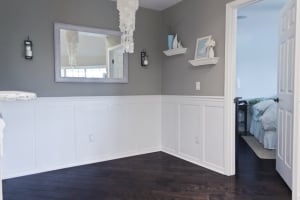
And…… after!
Ahhh… worth every second of sanding and painting!
Here is the project cost breakdown:
10 vertical boards: $24.70
8 horizontal boards: $18.45
Chair railing: $29.91
1 gal Behr paint + primer (we were out): $33.98 (minus $5 mail in rebate)
Total = $115 ($110 after rebate)
Timewise, it took a couple hours to get the wood all cut and mounted, another few hours to caulk and sand at least, which carried over to the next day where it took a good half day to paint and put the final touches on. In hours I’d say we spent a good ten hours on the project (again, most of it spackling and sanding out the problem areas).
All in all, I’m so happy it’s finally done, and I want to do our bedroom next! It will take some time to convince Brad to do this all over again though 🙂
Be back in a few days with another kitchen update!



Brock says
May be a dumb question, but did you sand the poplar boards, or did you just have to sand where you speckled and filled in holes? Also just curious what grit paper you used either way. Thanks so much for this tutorial. We will be starting very soon!
jennasuedesign says
Just where the holes were patched since the boards are smooth. I’d use 120 grit before painting. Hope this helps!
Gail B says
Did you nail the boards to studs or just into the drywall? Would Liquid Nails work instead of nailing when applying to drywall?
jennasuedesign says
Hi Gail, I think in this room it was just the drywall but it was so long ago I cant remember! You definitely want to attach to the studs if possible. The drywall should pull the board to it but it won’t be super secure, which doesn’t always matter but if there’s a stubborn area where the board needs to bend a bit then nailing into a stud is the way to go. Liquid nails won’t do anything until it dries but it’s not needed at that point. Good luck!
NOMI says
Hello Jenna Sue, I am a home improvement expert, I appreciate your idea because your all instructions are perfect. I love this.. Thanks for sharing your Think/ideas
Matthew says
Beadboard also varies in size and thickness. The common widths recommended in the past for good workmanship were 3 and 4 (showing 2 1/4 and 3 1/4 on the face). Nominal thickness ranged from 3/4 to 5/8 to 1/2 and as thin as 3/8 depending upon the manufacturer.
Jenna Sue says
I think it was just off the shelf untinted white!
Anonymous says
LOVE THIS!!! Super excited to try in our home. Any idea what color the trim/wainscoting was? It looks bright white, but Im often fooled. 🙂
Isabelle says
Hi,
Love your DIY wainscoting design and featured it on our list of amazing wainscoting design ideas on our website here:
https://visualresistance.org/20-fabulous-wainscoting-ideas.html
Do check it out and let us know what you think. 🙂
Alex Moulding says
Looks nice, like this good use of faux wainscoting!
Alex Moulding says
A really cool diy wainscoting idea
Anonymous says
Hi Jenna Sue – thanks so much! we followed your instructions and we can't believe the difference it has made to our house. We are now doing more rooms. i am from Australia and wainscoting is not common here, all my friends can't believe how good it looks! tks again! cheers Kim
Jenna Sue says
I haven't, but I've used a similar type of wallpaper on a storage cabinet and loved the way it turned out! https://jennasuedesign.blogspot.com/2012/08/office-cabinet-refinish-with-wallpaper.html
Anonymous says
Great! Thank you so much! One last question….have you ever done beadboard wallpaper to kitchen cabinets? This is yet another task within this house that i want to tackle, but again…its finding time, and courage to do such a big job! Any advice on this?
-Jen
Jenna Sue says
Hi Jen! I can't remember the exact costs for each, but I would have to say the board and batten cost less because there's less material. The horizontal pieces could be the same depending on what you decide to use, but you only need a handful of strips/wood pieces for the verticals which can be quite cheap depending on what you use.
You would want to use both liquid nails and a nail gun for the beadboard, and you can get away with just a nail gun for the board & batten (if you are just using the vertical 'battens' like I did and not boards to cover your walls).
It's a pretty similar process, so In the end I would just go with whatever you think looks and fits your space best! Hope this helps!
Anonymous says
Hey Jenna Sue! Just wanted to thank you for all of your inspiring and very helpful tips! We too live in Jax, (good ole' military) and i have been to your website many times, trying to talk myself into trying some of your projects! For the past few weeks, I have been looking very intently at your board and batten/faux wainscoting tutorials, and one day i think i can do it, and then the next day i scare myself out of it. So, this time i think i am gonna take that leap and just do it……so my question for you is, which way was more budget friendly? the poplar boards, paint, and trim (or chair rail??), or the beadboard way in your new office? and which way would you suggest for each getting them to stick up there on the wall? Liquid nail for beadboard?? nail gun for the poplar, correct? I know i want something in both our front foyer and dining room, i just need to get moving on it and make a decision already! So, thank you again for all of your helpful step by steps, and any tips or advice is greatly appreciated!!!
-Jen
Jenna Sue says
Nope! They are only 1/4″ thick and we went with them because they sat flush against the baseboards.