• Skip to primary navigation
  • Skip to main content
  • Skip to primary sidebar
  • Skip to footer

    Nav Social Menu

    • Email
    • Facebook
    • Instagram
    • Pinterest
    • YouTube
  • Houses + Sources
  • DIY Projects
  • My Shop
  • About Jenna Sue
  • About the Blog
  • Contact
Jenna Sue Design

Jenna Sue Design

DIY tutorials, home design and budget decor inspiration

  • Houses + Sources
    • Heights House
    • Riverside Retreat
    • Cottage House Flip
    • Modern Farmhouse
    • SEE ALL
  • DIYs
  • My Shop
  • About
    • About Jenna Sue
    • About the Blog
  • Contact
Home » DIY Projects » Rustic DIY Blanket Ladder

Rustic DIY Blanket Ladder

April 12, 2012 | By Jenna Sue DIY Projects

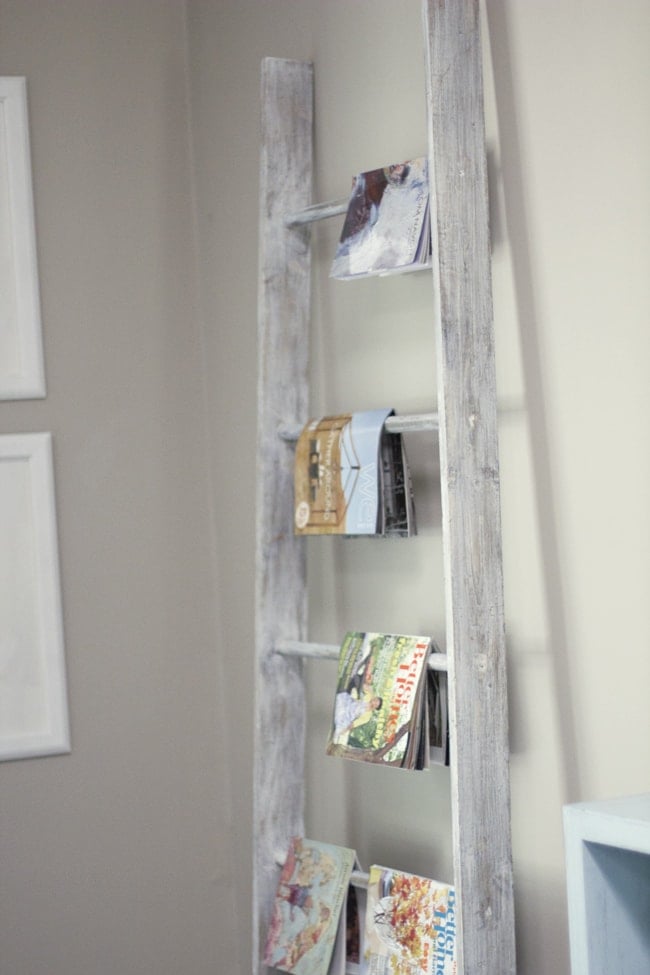
Here’s how to make a simple rustic DIY blanket ladder:

Pin

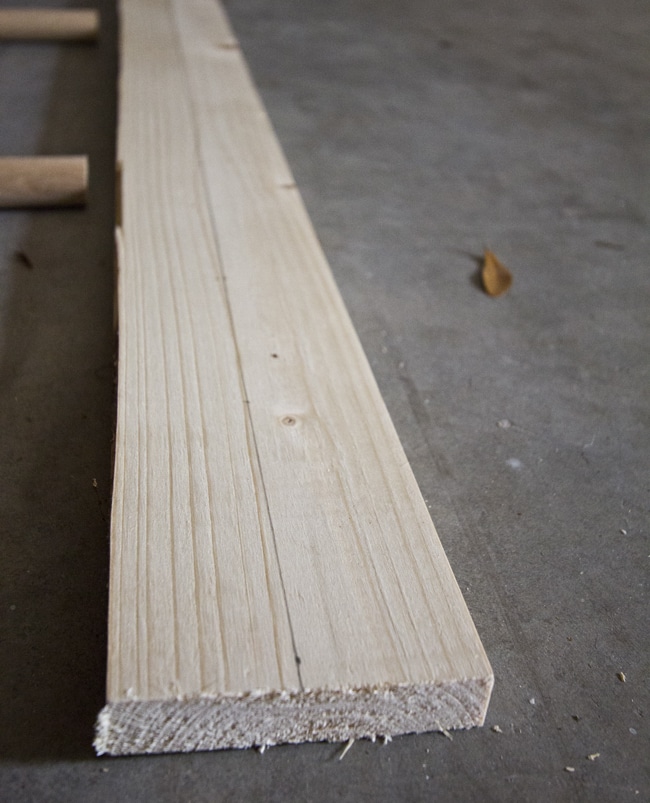
Step 1: Buy a couple 1/4″ boards. I had our drywall guy pick them up while he was getting supplies for our sunroom roof, since we are lacking a truck. The boards came 8′ long and I ended up cutting them down to around 7′.

I also picked up some 1″ dowels at Lowe’s. Luckily, these come in smaller 3′ and 4′ lengths so they are easily transportable. I failed to take a raw materials picture (sorry).

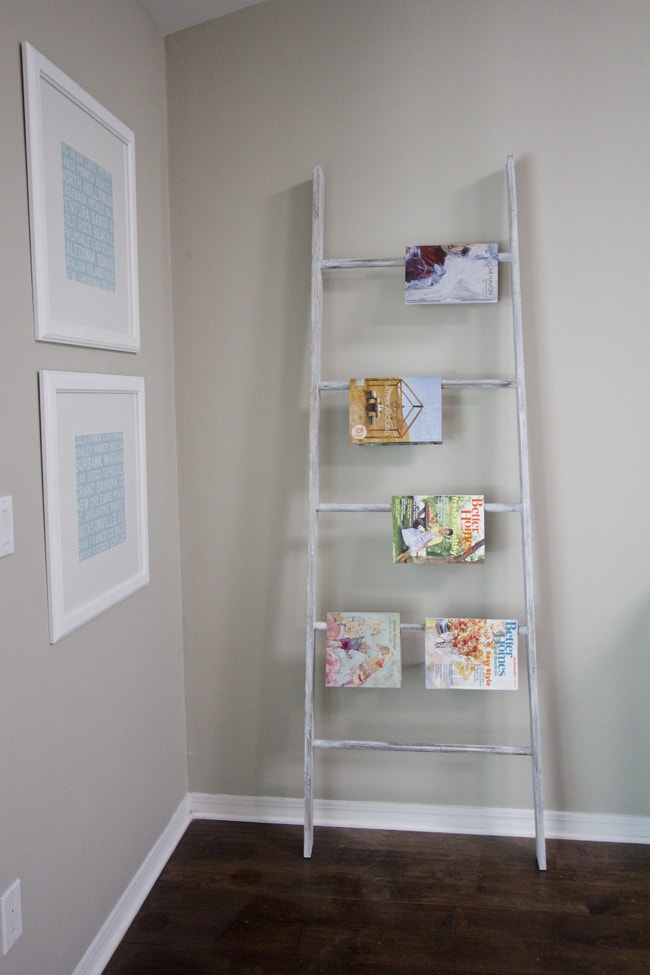
My plan was for the ladder to be a little wider on the bottom, so I cut each dowel an inch bigger than the previous one. The top rung is 22″ wide, and the bottom is 26″ (5 rungs total).

After my cuts were made, I laid everything on the ground to get a general sense of how it would look:
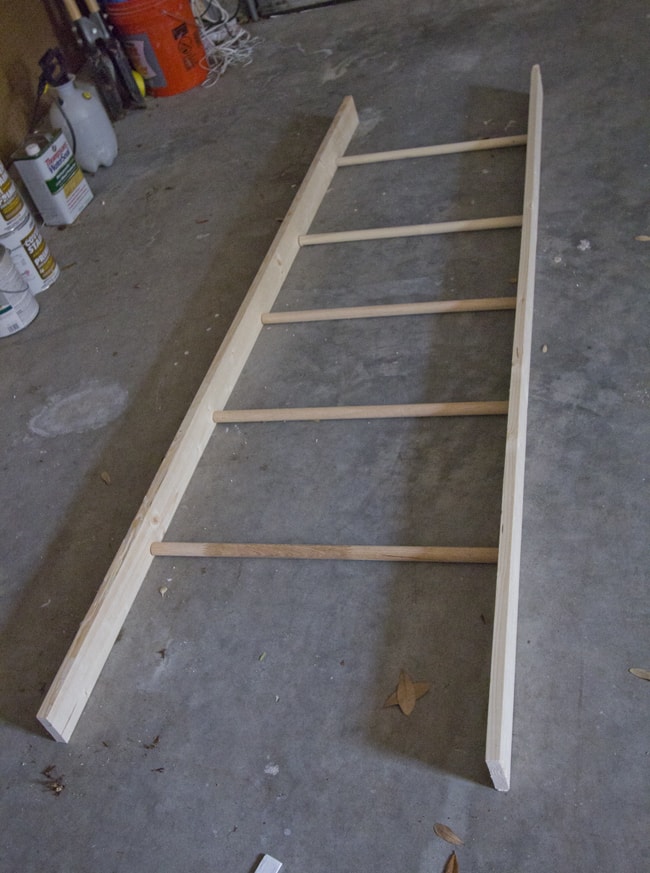
 

Pin

Works for me!

Next was time to measure where the dowels would go.

I marked the center and drew a vertical line down the 1×4, then made a mark every 14″ where the dowels would go (and repeated on the second board, of course).

Pin

I then took a small drill bit and went straight through the board on each mark I had made, in order to mark the drilling locations for the final screws that would hold the dowels in.

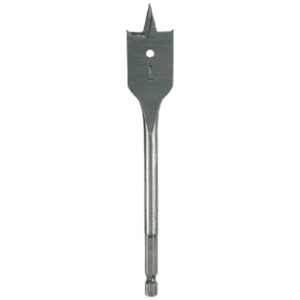
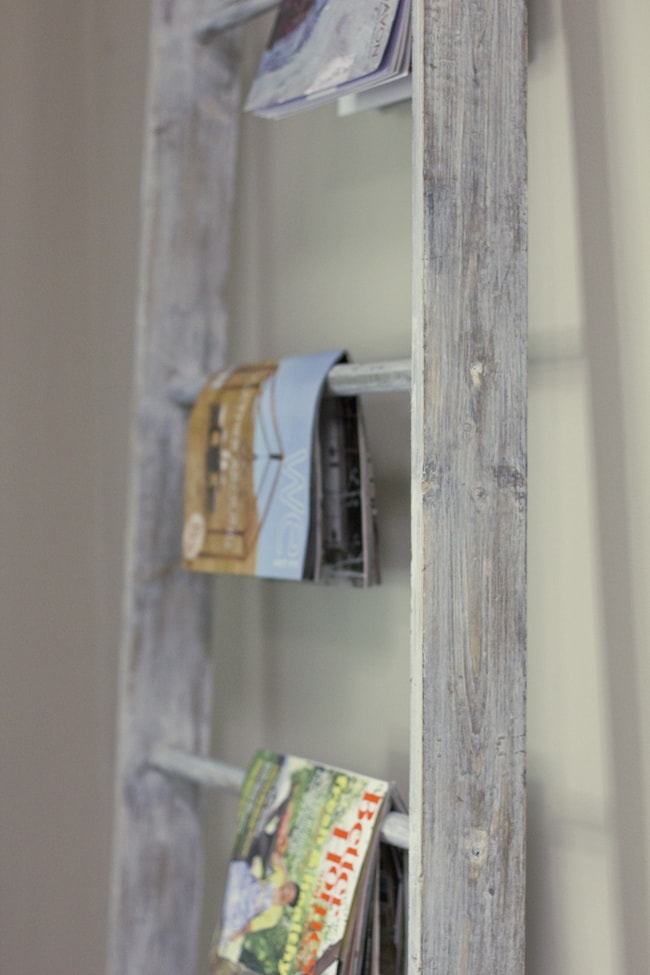
Once I had my holes drilled, I used a 1″ wide spade bit to chisel out a hole for the dowel to fit into.

Pin

Within a few minutes, my holes were drilled and ready to go:

Pin
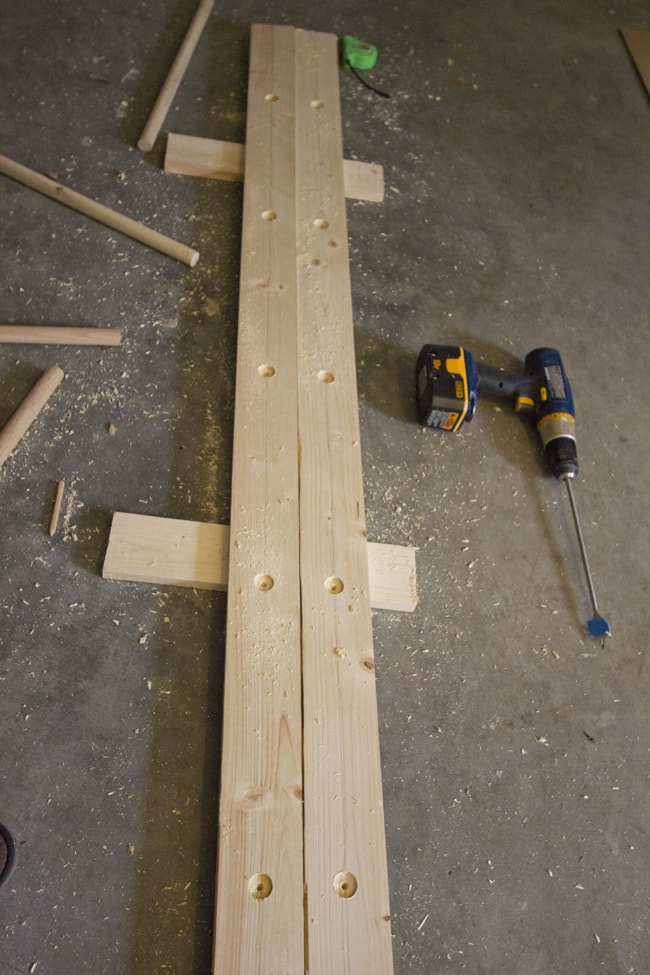
Be careful not to hollow it out all the way through… about 1/2″ deep should be good.

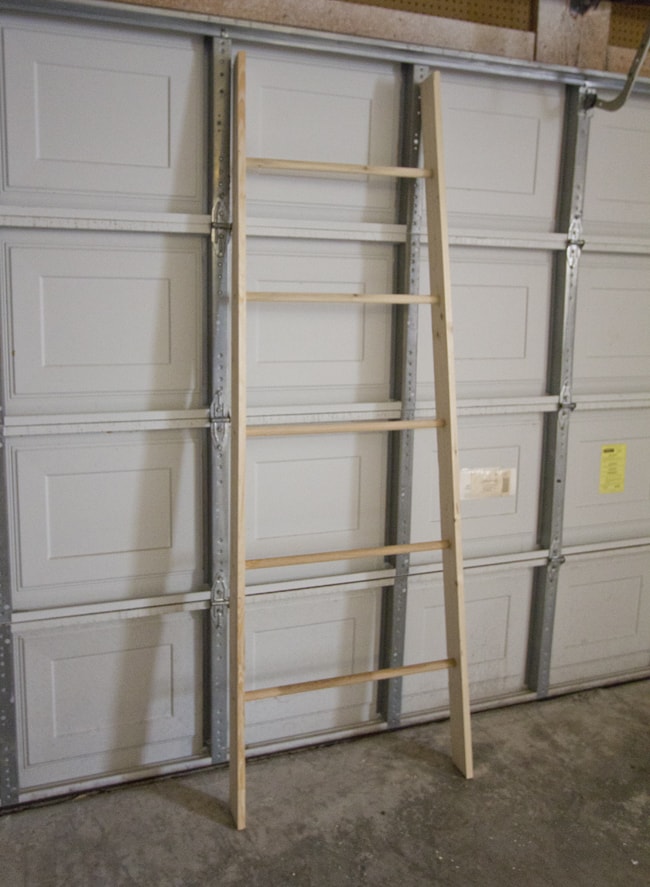
This next part required Brad’s help.

While one board was laying flat, I applied some wood glue to the dowel ends and nestled them into the holes I had just drilled. When the dowels were in, we carefully lined up the top board and did the same. To secure it into place, we used a rubber mallet to make sure the dowels had seated all the way.

Success!

Pin
Finally, we used some long wood screws and drilled into each side of the dowel (using the hole locations we had made earlier).
For best results, I’d recommend setting a torque level on your drill to make sure all of the screws are tightened the same amount. This will help keep the ladder straight and avoid it from bowing out in any areas.
And we had ourselves a ladder, simple as that:
Pin
Then came the fun part… making it look pretty!
I opted for a white washed/weathered look after seeing this amazing ladder another blogger had done:
Pin
Source
So I first stained it a nice grey-ish walnut (using my go-to stain for everything, Minwax in Ebony)
Pin
After the stain had set, I applied a quick layer of basic white paint and let it dry for a couple hours. Then I grabbed some 150 grit sandpaper and sanded random areas by hand until I was satisfied. (I seemed to have skipped taking pictures of this step, oops).
Finally, to give it a bit of extra character, I banged it up a bit with some tools lying around the garage:
I absolutely love the way the finish turned out… and it has become my new favorite thing in our house at the moment.
Pin
Pin
Pin
Pin
Pin
What do you think?
Pin

Related posts:

DIY Reeded Glass Door
How to DIY Floating Kitchen Shelves
DIY Venetian Plaster Fireplace
TwitterFacebookEmail8Pinterest
8
SHARES
Previous Post: « Sunroom + Living Room Wall Progress
Next Post: Sunroom: Week 3 »

Reader Interactions

Comments

  1. Whitney says

    July 17, 2013 at 5:47 pm

    Ahh! I am off to home depot to get supplies to make the ladder! I LOVE it!

  2. hilda dada says

    April 26, 2012 at 2:07 am

    Good ideas! I like the way you express your idea and the topic you choose. KEep on your sharing! I appreciate it. outlooksoft consulting

  3. thelotteryhouse says

    April 19, 2012 at 2:39 am

    Both of these projects turned out so beautifully! I've been itching to DIY a ladder – luckily now we have an awesome tutorial to follow along with. 🙂

  4. Diana @ Boy + Girl says

    April 14, 2012 at 3:25 pm

    I love them both! I was to do a globe so badly! I will have to find one on sale somewhere or maybe at a thrift store.

  5. Beach girl says

    April 14, 2012 at 4:10 am

    I love the ladder! The way it looks weathered! I would love to do that to a dresser!

  6. Jenna Sue says

    April 12, 2012 at 9:03 pm

    Thanks for catching that! Fixed 🙂

  7. Callie and David says

    April 12, 2012 at 8:22 pm

    Looks so good! I was wondering how you did the globe 🙂 Tiny editing police – I think you mean *continents* most places where you've written countries 🙂

  8. Brittany says

    April 12, 2012 at 6:32 pm

    That globe is SO cool! I think it looks great and am inspired to try this out myself.

Welcome!

Hi, I’m Jenna and I’ve been designing and DIY’ing my way through homes since 2008. Join me as I learn, share my experience, and hopefully encourage/inspire you along the way!

As Seen In

Primary Sidebar

Welcome!

Hi, I’m Jenna and I’ve been designing and DIY’ing my way through homes since 2008. Join me as I learn, share my experience, and hopefully encourage/inspire you along the way!

JOIN THE FUN

  • Email
  • Facebook
  • Instagram
  • Pinterest
  • YouTube

Shop MY HOMES

  • Heights House
  • Riverside Retreat
  • Cottage House Flip
  • Modern Farmhouse

Shop MY AMAZON

As an Amazon Associate I earn
from qualifying purchases

Recent Posts

  • Fall Stem and Floral Roundup
  • DIY Reeded Glass Door
  • 40+ Sage Green Kitchen Cabinets (with Paint Colors!)
  • Modern Mediterranean Kitchen Reveal
  • How to DIY Floating Kitchen Shelves
  • DIY Venetian Plaster Fireplace
  • How to Make a Sink Drip Rail

Subscribe via email

Footer

Shop My Homes

  • Heights House
  • Riverside Retreat
  • Cottage House Flip
  • Modern Farmhouse

Connect

  • Instagram
  • Facebook
  • Pinterest
  • Youtube

Information

  • Contact
  • About Jenna Sue
  • About the Blog
  • Privacy Policy

Copyright © 2022 · Jenna Sue Design Co. · All Rights Reserved ·

SUBSCRIBE VIA EMAIL: