It’s about time, right? This reno has been 90% complete since, oh, Thanksgiving or so… but I finally finished that last 10% yesterday and now it’s ready for the world to see!
As always, I’ll start with the befores.
This bathroom was a real piece of work, let me tell you.
It’s split into two small rooms: the shower/toilet area, and the vanity/sink area.
 |
| Excuse the mess, we had just moved in here |
It had the same white washed oak cabinets and beige formica countertops as the kitchen, and the old guest bath… they must have gotten a group discount.

And oh, the almond tile again… why???

Gotta have the matching almond toilet. Oh, same crusty white tile as the old kitchen.

But they opted for carpet in the vanity/sink room.

Make a note of that medicine cabinet for the ‘after’ pictures.

The view from the closet.
Back in November we decided to get this project started, and I put together a mood board (are they still calling it that?):
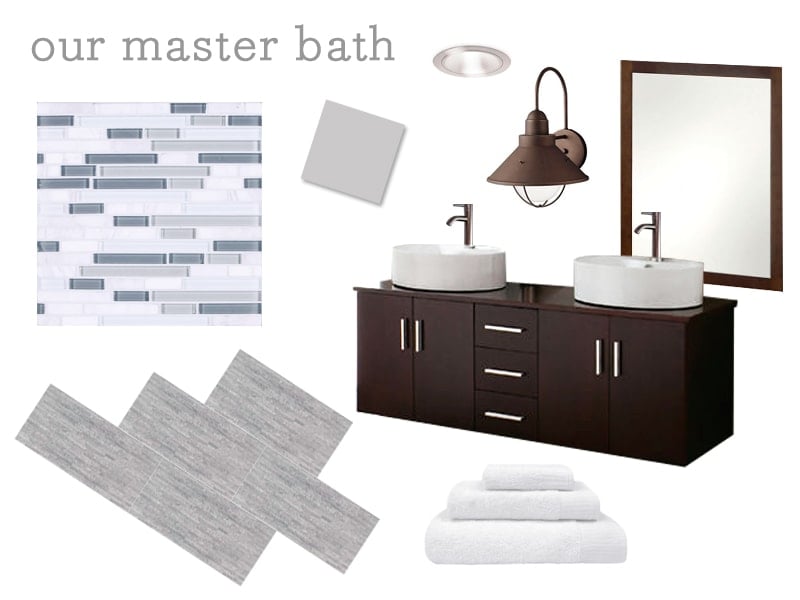
The look I was going for was coastal-modern-rustic-spa.
Once that was settled, we began ripping it out and putting it back together the right way:


I’ll just skip through all the in between phases and get to the good stuff… I present to you, our completed master bathroom!


These lights are my favorite thing ever.


We converted the medicine cabinet to a recessed box. I built a shelf out of scrap wood and found these perfectly fitting vases (at Michael’s) to store our bathroom essentials.

I slipped a couple flat seagrass baskets (also found at Michael’s) underneath the floating vanity, and Brad installed LED lighting underneath.


I built this textured wood piece from lumber scraps. It’s stained to match the mirror frames and recessed box shelf.
Moving onto the shower room….
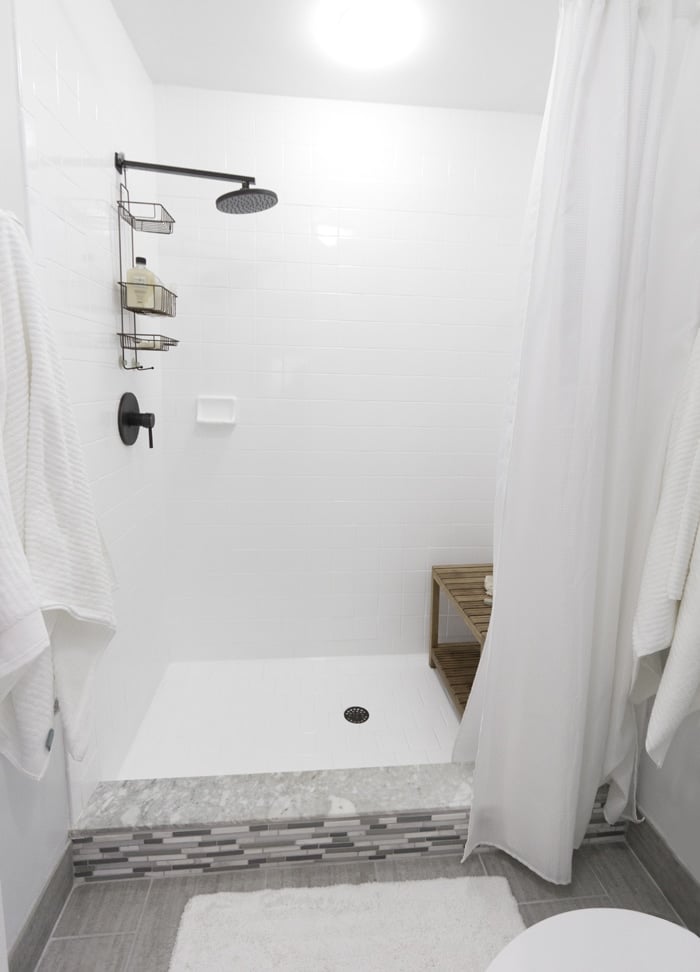
To save money, we simply reglazed the tile from almond to a bright white for around $600 (it was $1200 to do both this room and the guest bath).

We found this clean and modern ORB shower set on Ebay for around $130.


Ahh… love me some long rain showers.
I found this shower bench at Macy’s for $90. It was a perfect fit.


We swapped out the old beige toilet for a white dual flush version:

Then I installed a couple floating shelves (Lowe’s) and topped them with more seagrass baskets (Walmart)


No renovation would be complete without Brad’s in ceiling speakers and recessed LED dimmable lighting. There’s one speaker in each room. And the crown molding was the final touch.

And there you have it.
I actually tried to keep a list this time to calculate our costs. Some of these are accurate to the cent, some are approximate… and I’m sure I’ve left some things off. Here goes…
Tile: $927.32 From a local retailer called the Floor Club. Floor tile: Bambu “Grigio”, Glass/Marble accent tile: Eclipse “Eternity”
Tile installation: $477
Shower tile reglazing: $600
Vanity/Sinks/Mirrors (without frame): $910 Ebay
Vanity Lights/Bulbs: $152 agtstores.com
Toilet/plumbing: $239
Ceiling & accent lighting: $169
Speakers: $50
Drywall: $145
Paint: $34 Behr’s Reflecting Pool
Sink Faucet/Drains: $153.61
Shelves: $53.42 Lowe;s
ORB accessories: $51.29 Ebay
Drawer pulls: $30 Ebay
White square vases: $15 Michaels
Baskets: $30 Michaels
Towels: $10
Wood shelf divider: $10
Shower bench: $90 Macy’s
Shower fixtures: $130 Ebay (no longer listed)
Wood art: $30
Crown Molding: $40
Total: $4436-ish… so even with the rough estimates and probability that I’m missing some things, I think it’s still safe to say that this is another under 5k reno. Woohoo! I’m actually surprised the number came in so low… probably because this project has just been dragging on for-ever.
Be back tomorrow to announce the hand stamped necklace winner!


Wendy (SpikesnSparkles) says
wow it looks amazing! I especially love the wall of tile behind the vanity!
Eliesa says
Gorgeous! Love it!
Korrie@RedHenHome says
Gorgeous! Love the tile! The floating vanity is so cool–I've never seen one before. You did a great job!
laxsupermom says
Wow! What a stunning makeover! Love the tile and vanities! Just gorgeous! Thanks for sharing.
Starr @ The Kiefer Cottage says
How beautiful! Love how much space you have in there.
Anne says
Absolutely stunning & I love those lights too!!!
threeacres says
Gorgeous! I love the vanity, glass tile, sconces, and sinks. Such a big transformation for such a small price. Good job!
Leila says
That helped a lot, I will read this to my husband, Im pretty sure he will love it. Do you like your speakers? I checked out ebay and I was wondering if they have a good quality.
dennis dietz says
Very nice. You did a great job on the frames. Any issues making them?
tricia @ mash-up chic says
This literally made me say OOOOOOOOOOOOOOOOOOH outloud at my desk. Amazing job! Classic yet modern and just spa-like! Love all the choices.
Trish
http://www.mash-upchic.blogspot.com
RAENOVATE says
amazing as always. another raenovation, i'll send you the link when she's up.
Jenna Sue says
Leila–The main home theater system has an Onkyo receiver with a Zone 2 output, that output is fed up through the wall via RCA Cables to a closet. Inside that closet there is an amplifier and a speaker selector box. The selector box has 1 input and 8 outputs, one for each room in the house. It handles the loads so that the amp doesn’t get overloaded. The Zone 2 output can be a separate source than what is being listened to in the home theater room. The source and volume can be controlled by phone with the Onkyo App, however the speaker on/off for each room is manually selected. You can buy an electronic selector, but they are much more expensive.
Sonia says
Beautiful renovation. I love seeing realistic renovations done on a good budget.
Leila says
Hi, you did a great job, I have the same bathroom layout, so odd. And my shower area is even smaller,oh well..
I have a question about ceiling speakers. How did you wire them? What kind of stereo system do you have? I read somewhere here that you can turn off each room individually, how do you do that?
The DIY Show Off says
WOW-wee! What a gorgeous transformation! You did an amazing job, Jenna Sue!