Updates: Watch a time lapse tutorial of the process here and see the full room reveal here!
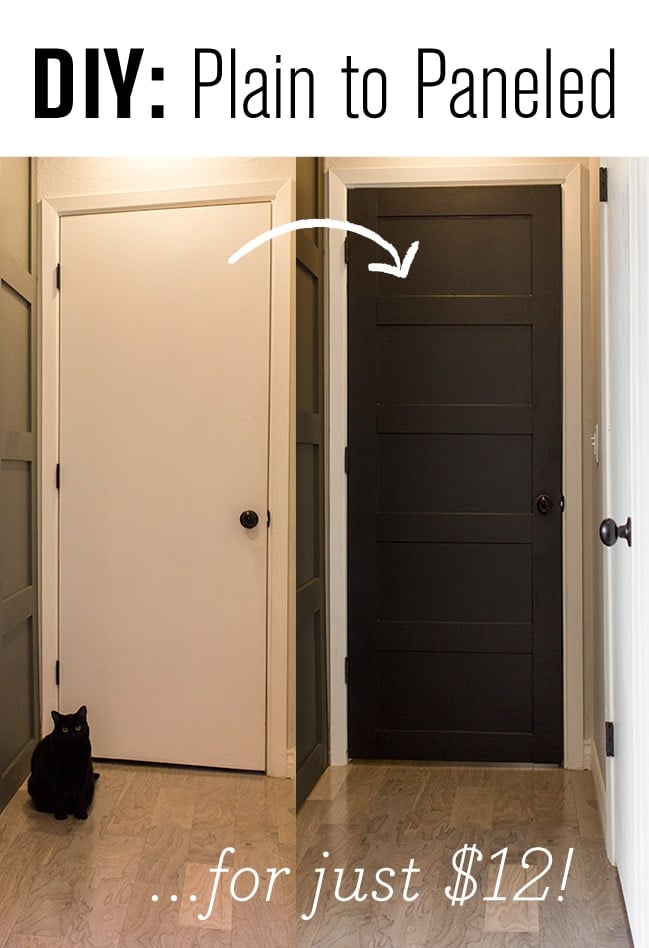
Have any plain, flat doors in your house? This tutorial is for you!
Here’s what you’ll need for this project (per one standard door):
Materials
Tools
- Miter saw
- Table saw
- Drill
- 2 1/8″ hole saw
- Finish nailer
- Electric sander
- Paint brush and roller (or sprayer)
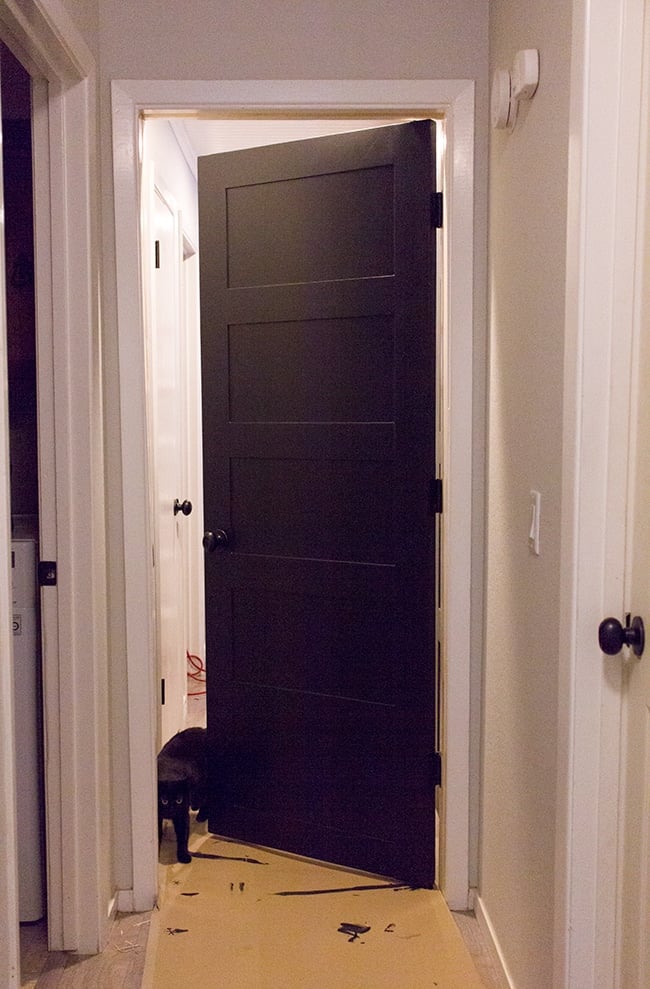
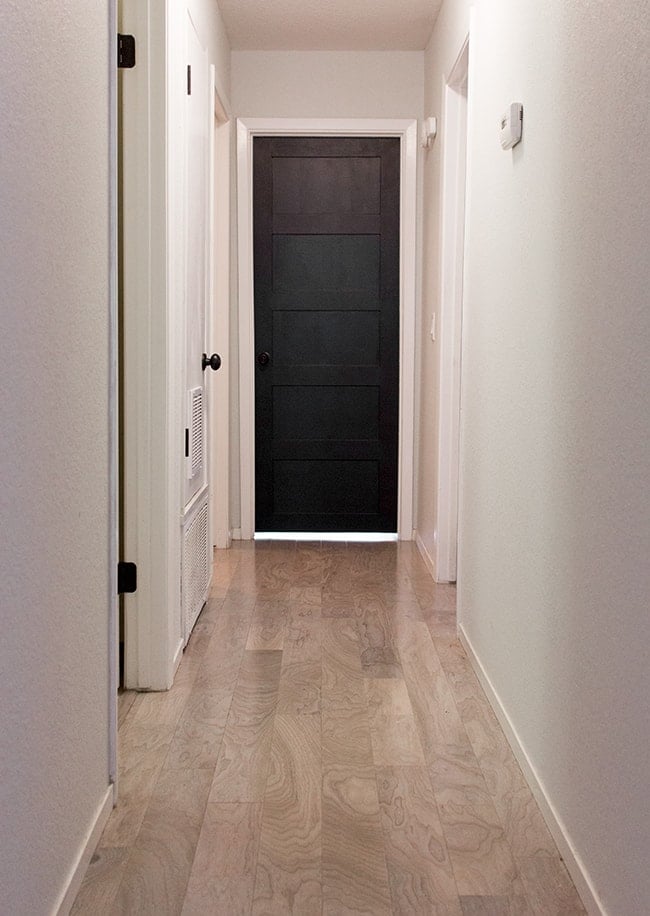
I spent a lot of time trying to figure out what to do about our doors. Here’s an old shot from the hallway:
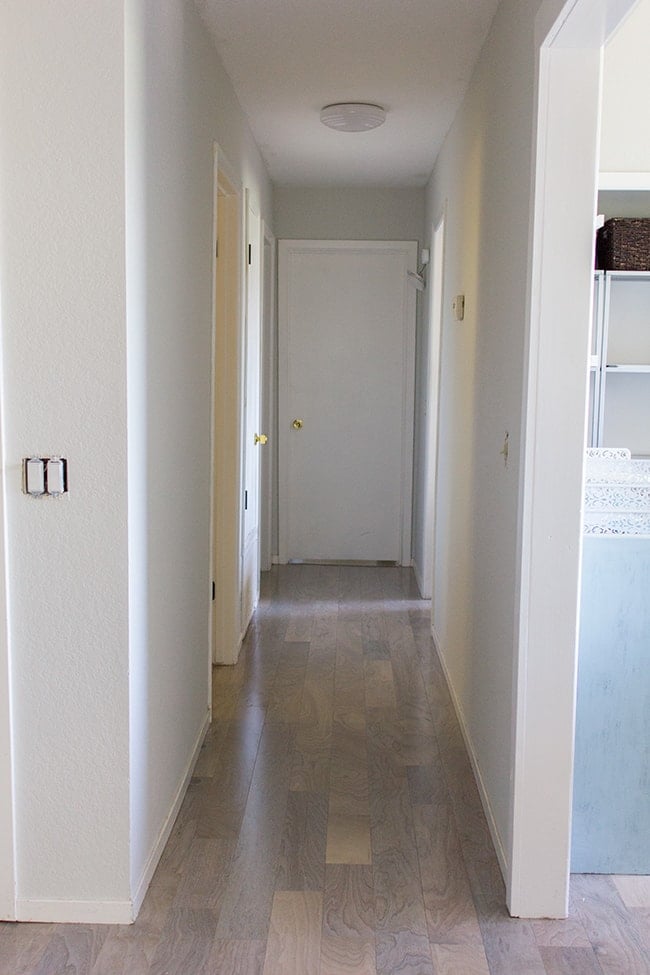
After I painted the walls an almost white/super light gray shade, it just turned into the hallway of no color. I knew I needed to do something with the cheap hollow core doors but didn’t want to break the bank. In a perfect world, they would all be beautifully constructed and detailed solid wood, but there’s no way I’m spending that much on all of the doors in the house.
Then I gave our foyer closet door a makeover...
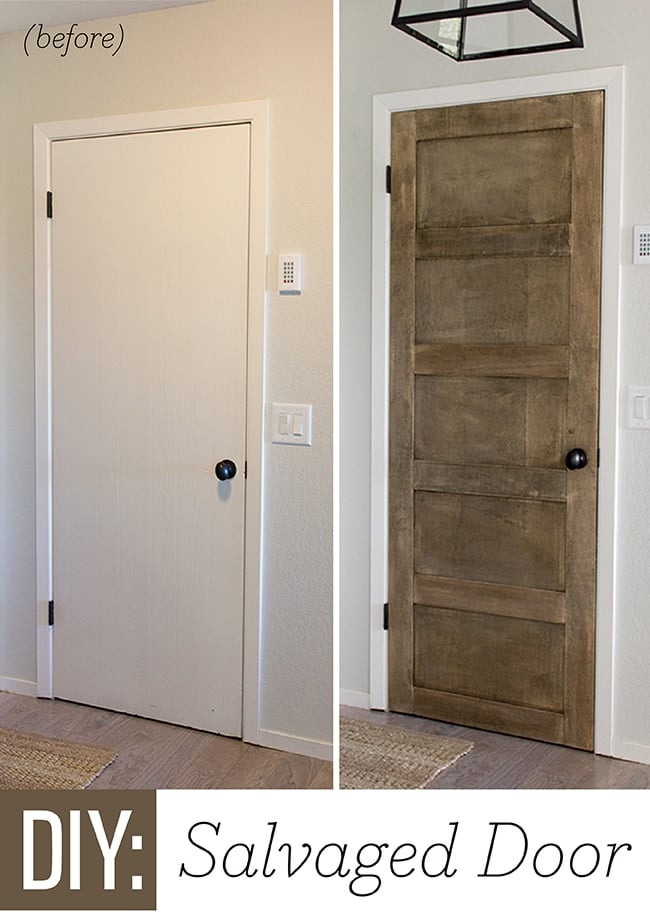
And I loved the results. It was simple enough to do to the rest of the doors in the house.
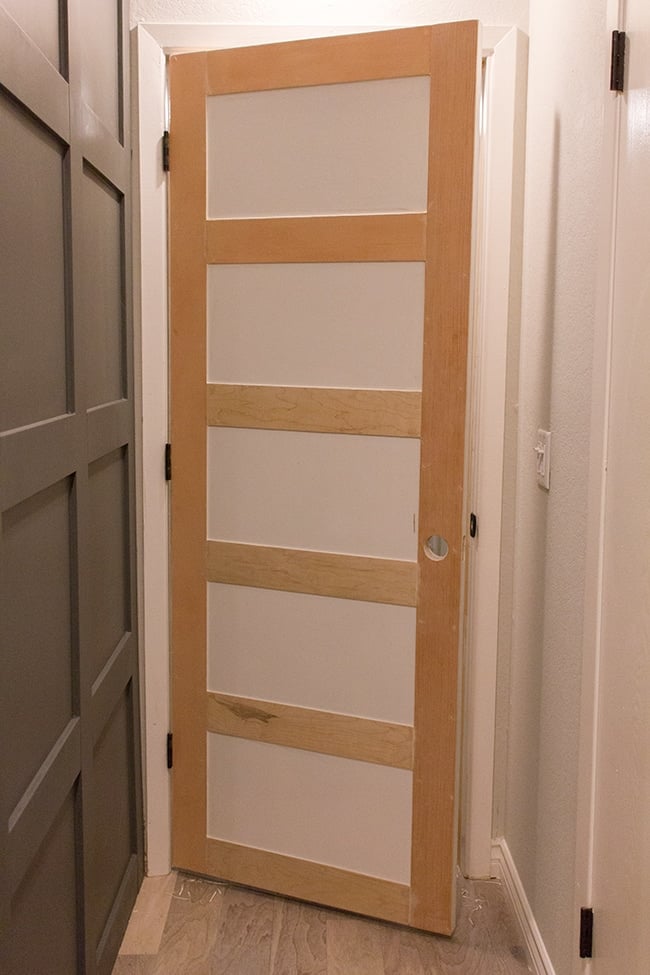
Fortunately, our bedroom door was completely smooth so I didn’t need to apply veneer over it (our foyer door had that faux wood grain texture which I covered with veneer). That meant that all I’d need for this project is a $12 piece of 1/4″ (actual thickness = 0.2″) plywood from Lowe’s. I ripped mine down into 4″ strips with a table saw (but I’ve also had luck asking Lowe’s to do this for me in the past!)
I’ve already covered the basic method for installing the strips which you can read about in my foyer door post:

It’s so easy though… just measure and cut, spacing your horizontal pieces out evenly, and secure with a nail gun (wood glue is optional).
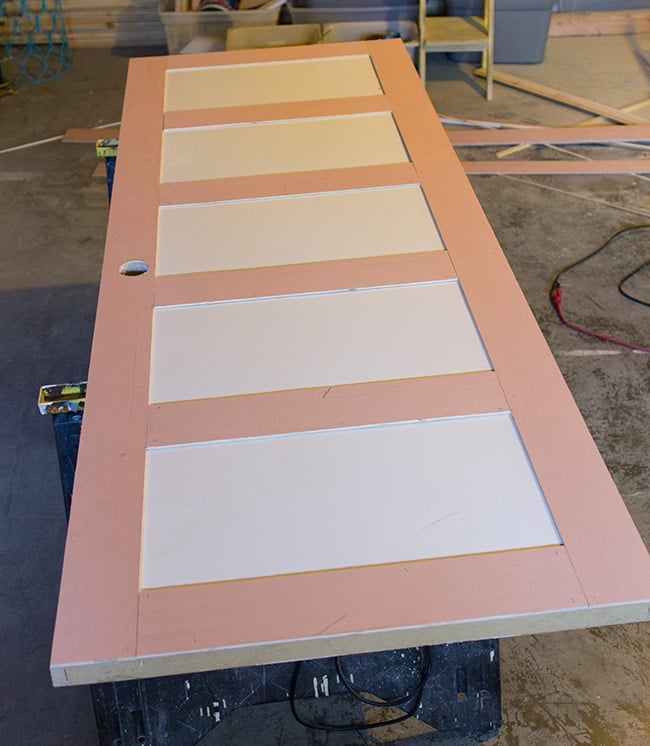
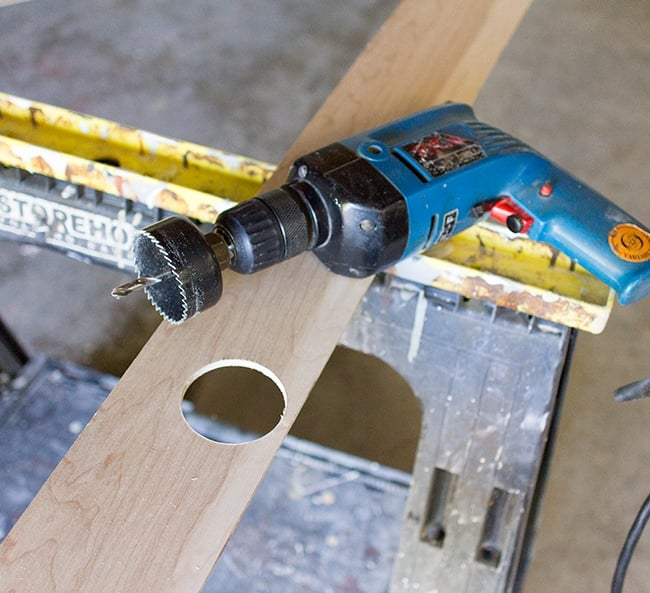
Flip it over and repeat for the other side. You’ll need to use an arbor to drill out a hole for the door handle (make sure to drill it in the exact same location!)
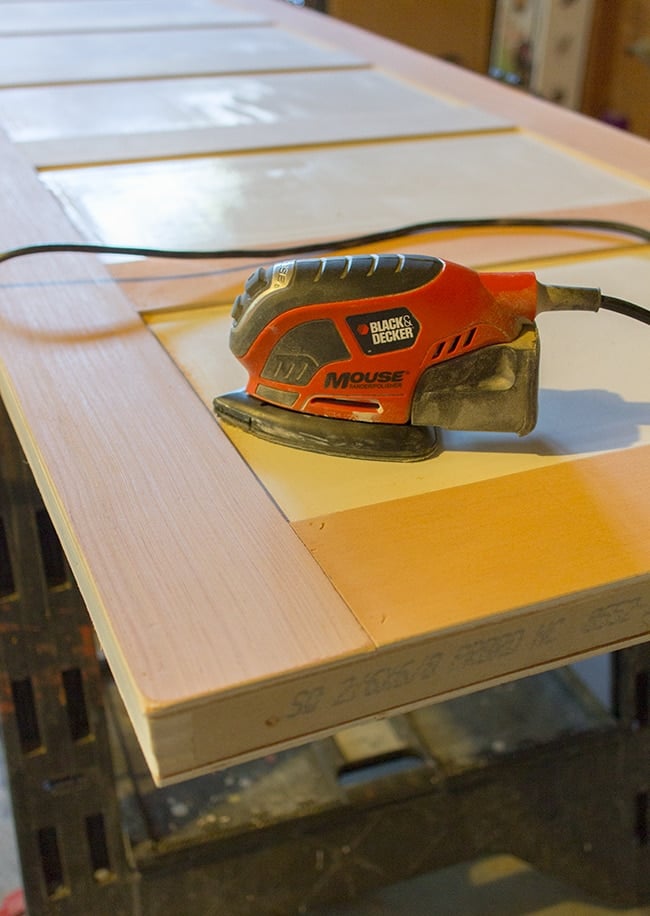
Once all my pieces were attached, I sanded down the rough edges with my Mouse (if you don’t own one of these yet, you’re missing out!)
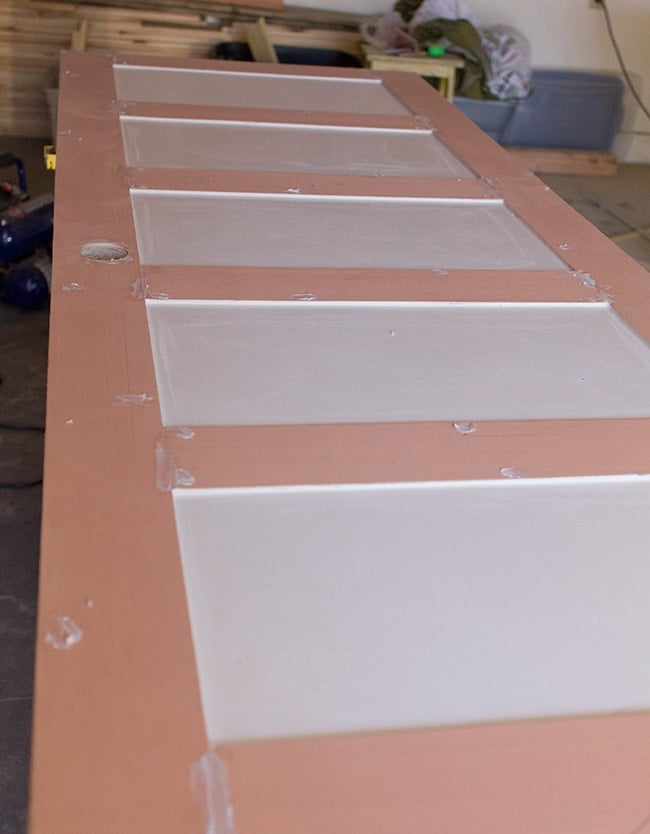
Then I spackled the nail holes and caulked along the inside edges for a seamless look.
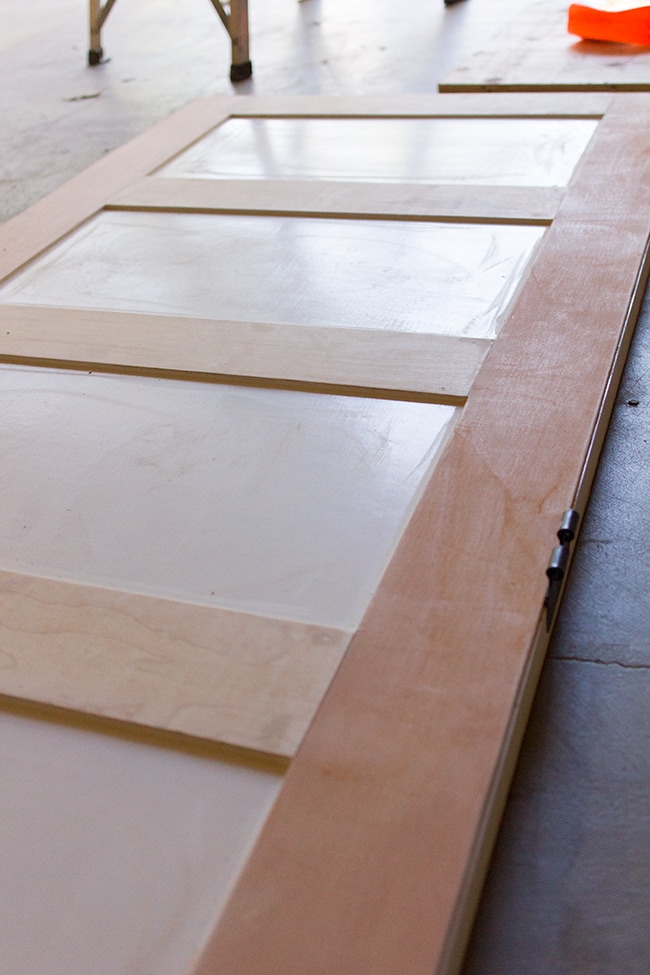
After drying overnight, I gave everything a nice thorough sanding with finer grit sandpaper (including the actual door panel).
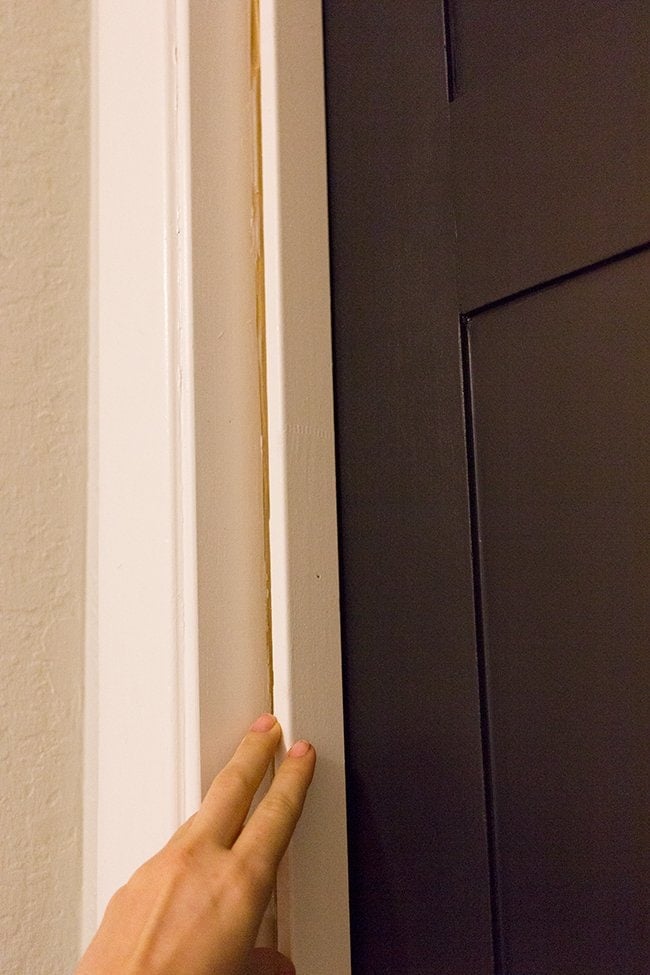
Since I added almost 1/2″ of depth onto the door, I had to remove the door stop casing or else it wouldn’t close properly.
To do that, you must first cut a line with a utility knife on all sides…
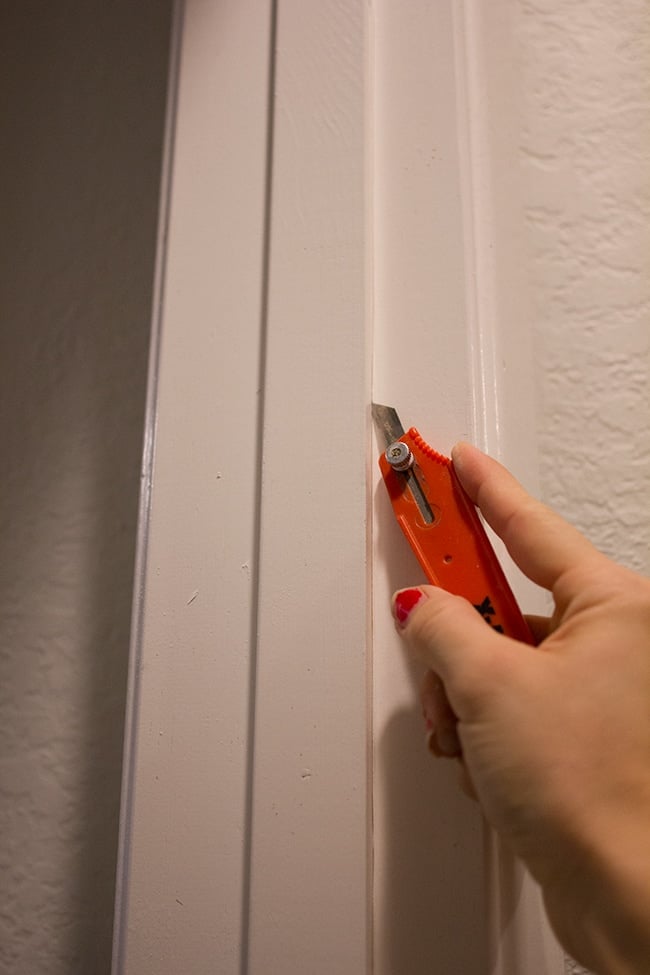
Then pry the pieces off. Luckily these ones came off really easily (you can see the three pieces in the hallway).
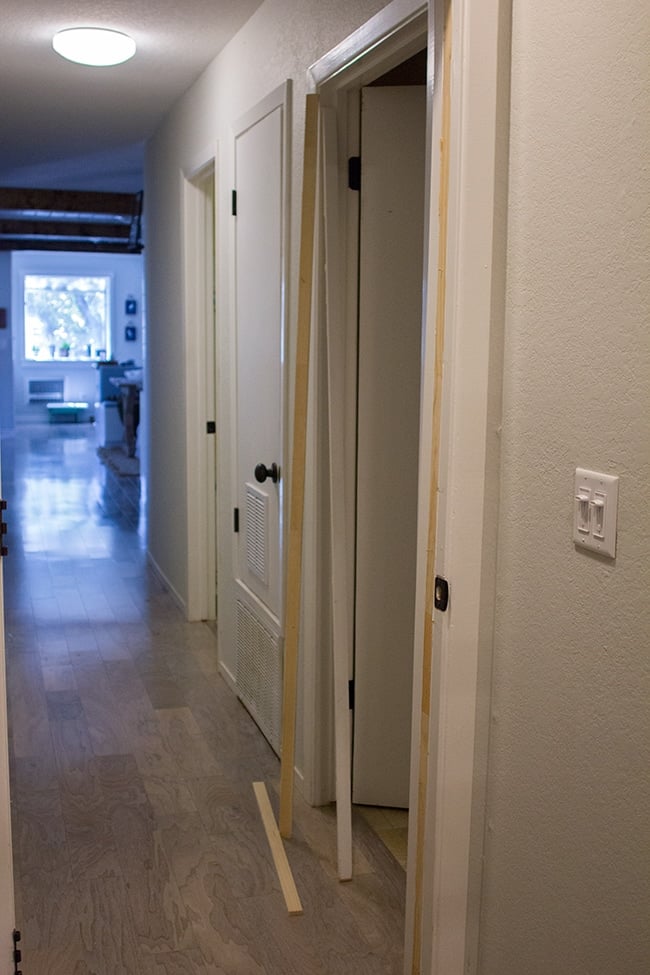
Some of the nails will stay in the door casing which you can just hammer back in, and break off the ones stuck in the molding.
Then clear the built up caulk from the door casing and the trim pieces so it’s nice and clean for reinstallation:

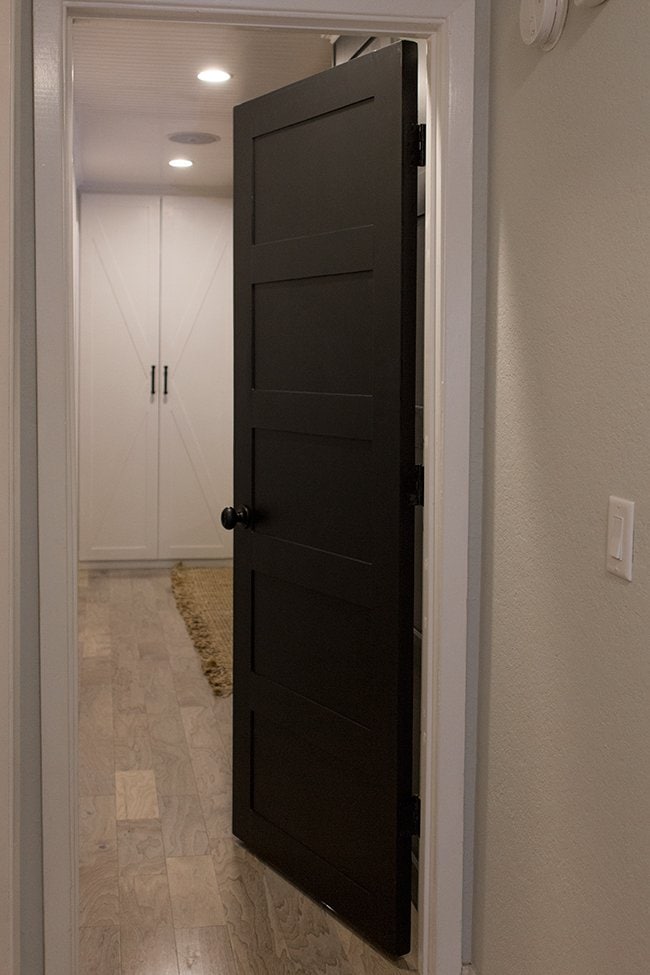
I decided to hang the door back up first before painting it because 1) it was 100° in the garage, and 2) I could turn on the TV in our room to make it more enjoyable. It really doesn’t matter either way, you just have to be slightly more careful to not paint the casing.
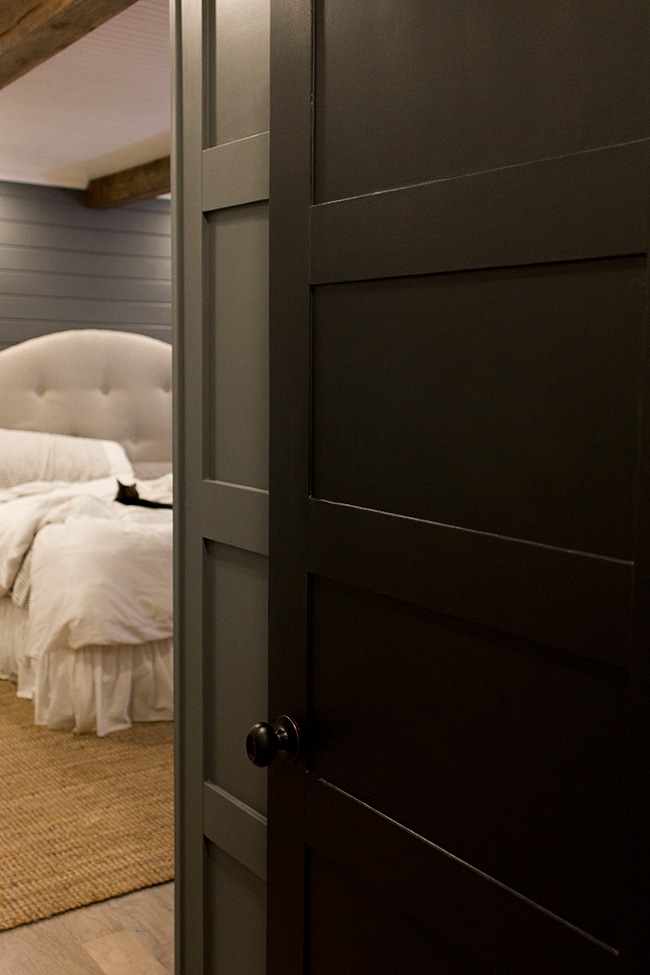
I used the same black that’s on the kitchen and front doors, except in a satin finish—Valspar’s Dark Kettle Black.
I haven’t tried their new Reserve line yet, but I can’t imagine needing anything better than their Signature. The coverage is amazing… here’s after just one coat:
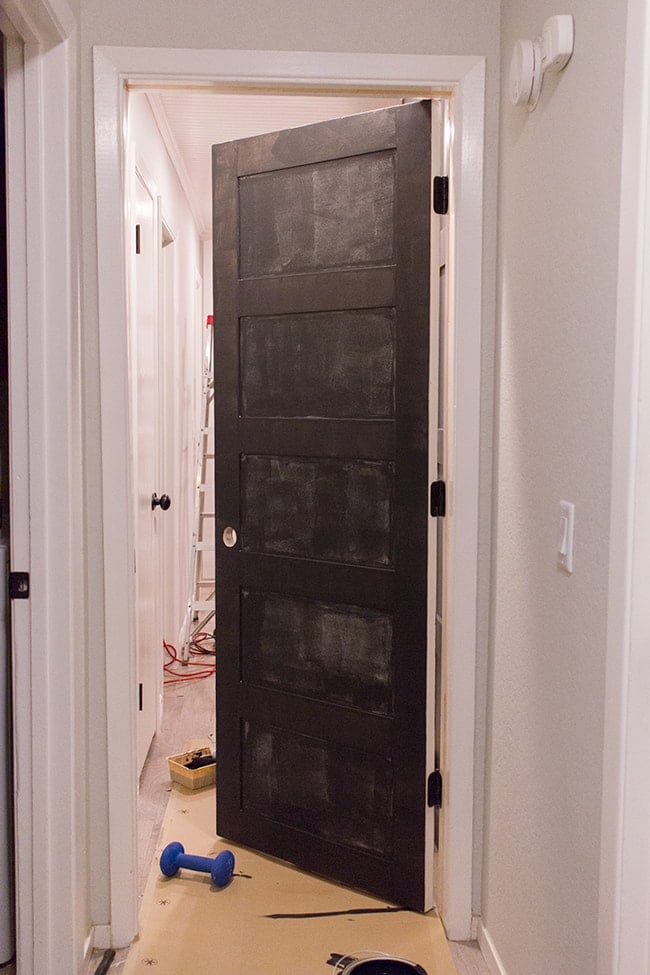
Of course the plywood took to it better than the painted white door—it almost covered in just one coat!
All it needed was two coats and a few touchups. Easy, fast paint job (excuse the poor lighting).
Once the handle was back on, I shut the door and nailed the casing pieces back in place so the new door would shut properly.
Then I filled the nail holes and caulked it back in. (I still have to sand and touch up paint… that will be done tonight).
Ahhh… so rich.
It’s a little difficult to see the detail through photos (I have to bump up the exposure a bit, hence the grainy-ish pics) but it’s really lovely in person. Black doors will never go out of style.
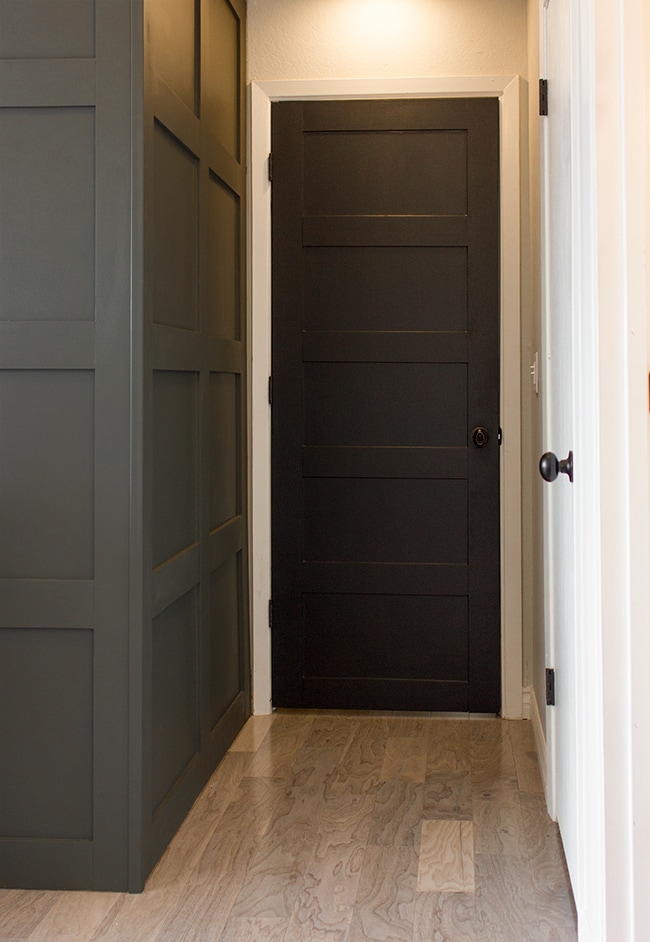
I love the way it ties into the wall paneling.
I’ll be converting all of the doors eventually. This hallway needs some loving, I know. One step at a time.
If you like this project, check out these popular beginner budget DIYs from my Project Library:
- $10 canvas floating frame
- How to realistically age wood (the easy way!)
- Easy string light planters
- Board + Batten tutorial


Amber S says
YES! Thank you so much for this post! I've seen the “reverse paneled” look created with molding, but I wanted something more contemporary looking like this. Couldn't bare to think of the expense in replacing all these hollow doors. Just amazing! You've made my day!
jenniferdavid6 says
BRILLIANT! I have so many of these door in our dated home that we bought for space, not fashion! I will be doing this to many of our doors! Thank you and your step by step is fantastic! Thank you!
Shayann Behjati says
Good job … Very well done
Heather @ Fabrictherapy says
Looks fantastic. I'm thinking of doing something like this on my mirrored closet doors. I can't afford to replace them and I like how they reflect the light but ti would be great to give them some style.
Sarah says
We did something similar to our cabinet doors and we used wood putty which worked well. It took a couple of coats but once the final coat was sanded you couldn't see the seam. They have been up for 1.5 years and no issues.
Diane says
I am fascinated by this idea…..but from a different perspective..
I have kitchen cabinet doors with panels with arched tops. In updating my kitchen I would like to make them more modern. I.e. plain and flat. Is there a way I can eliminate the panels? Maybe fill in the recessed part with wood putty and sand to make it flat. Then paint it. Could this work? Or am I just dreaming and hoping not to replace all my cabinet doors?
Jenna Sue says
Yep, that's the one! It's $1 cheaper at my store (strange) but still such a great value. Good luck with your doors!
Anonymous says
Not a problem, this is such a great idea, I wanted to make sure I could get the proper materials to do this to our nasty hollow core doors. After doing a little more digging on Lowes website I found the following:
https://www.lowes.com/pd_518477-53547-518477_0__?productId=50121135&Ntt=plywood&pl=1¤tURL=%3FNtt%3Dplywood&facetInfo=
This seems to be somewhere right between 1/8 and 1/4. Thanks again for the idea (my wife initially came across this post) and I am sure anyone that comes over to see our house and these doors will be impressed!
Jenna Sue says
You know what, I think you're right. I just measured and it's actually right in between 1/8″ and 1/4″, it just seemed thinner to me. I can't locate it on their website but I did find the cabinet grade version, which says it's 0.2″ and it's the same thickness: https://www.lowes.com/pd_68239-99899-68239_0__?productId=3658444&Ntt=1%2F4%22+plywood&pl=1¤tURL=%3FNtt%3D1%252F4%2522%2Bplywood&facetInfo=
I'm going to go ahead and update the post now so others don't get confused. Thanks for bringing it to my attention!
Anonymous says
I am having a hard time finding the 1/8 plywood you have mentioned in your post. Is this something Lowes no longer carries? Do you have the product number by chance? If they don't carry this, in you opinion, would a 1/4 in piece work well? Thanks for your help, love the post!
Jenna Sue says
I'm not sure how well that would work. Plywood is rough by nature so you'd have to do a lot of sanding, and caulk works best in gaps at an angle, not where there are two flat pieces side by side. And it also shrinks after it dries so it wouldn't stay smooth if you could even achieve that. It might help but would be difficult to make it look completely seamless, and I think way more trouble than it's worth since to me it's unnoticeable (especially painted black).
Carlos says
If you really care about the seams on the edge of the door you can purchase an edge veneer meant to cover up the edges of a plywood project to make it look more like a real piece of wood. I imagine it would work easily for this use case as well, but as Jenna said, I think you won’t really notice it once everything is said and done. You can find edge veneer at any big box store.
GlamistaHome says
I just love all your DIY projects. They seem simple enough, but make all the difference in your home, it looks beautiful and inviting. I love the color palette. Thank you for sharing!
Love,
Dagmara @ https://glamistahome.blogspot.com/
Elizabeth says
Could you possibly caulk the spots where they meet like you did on the interior pieces? Sand it smooth, so the door and the plywood pieces are completely smooth all the way down, then just a tiny smidge of caulk and then smooth with your finger, just to get rid of the “two pieces together” look?
Kara says
Sorry I just noticed you already answered the door knob question.
Kara says
Did you have any problems with the door knobs since the door is now 1/4 in thicker? They look great!
Ed says
your current house is SICK (sick being amazing)! will follow the blog…found you on pinterest.