

Yep, we’ve jumped right back in to our pantry remodel!
Let’s go back to where we left off last time:
I came up with a plan, purchased a few boxes and glass jars, and was ready for the next step.
During this month-long hiatus, I was still stuck on what to do with the very top shelf. Should I add more boxes/baskets? Keep everything out in the open? Nothing was really working for me.
And then…. last week… out of nowhere, it hit me.
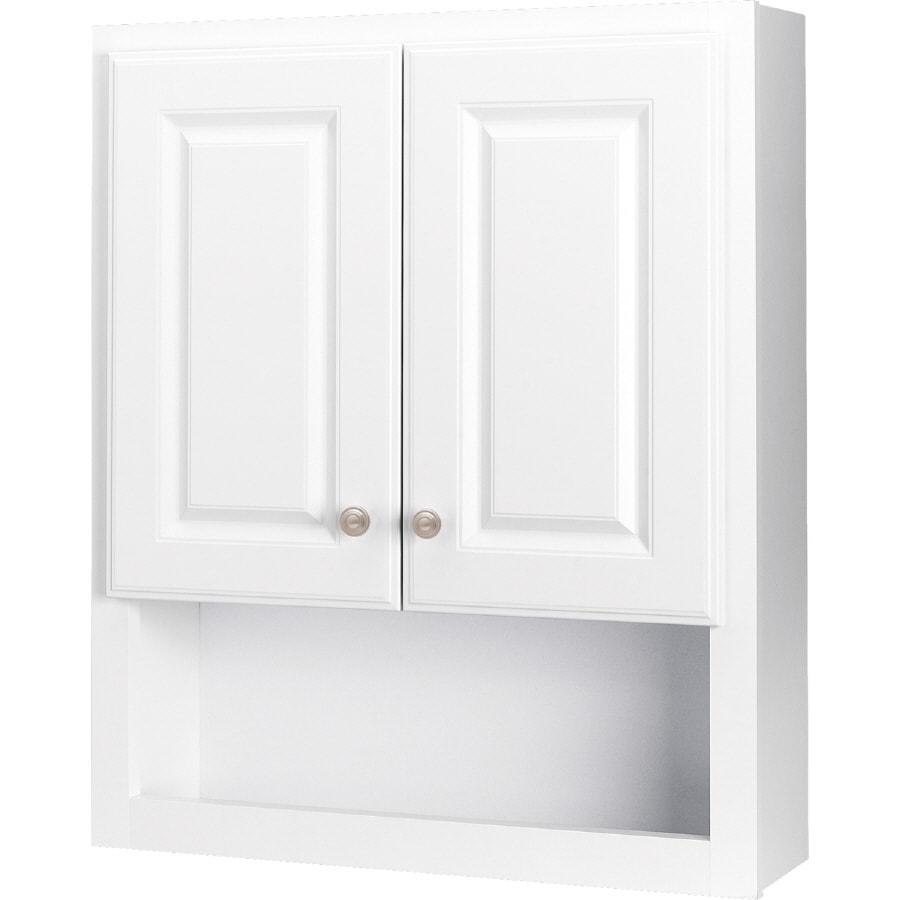
Ditch the top shelf altogether and get a medicine cabinet. This made perfect sense for so many reasons:
1) I could utilize the otherwise wasted vertical space up to the ceiling
2) Concealed storage without having to pull down an entire basket to grab one thing
3) Items inside would be lined up in a single row, easy to find and sort
4) The shelf below this will have tall jars which I can now easily lift out without a shelf above in the way (the cabinet is only 7″ deep)
5) The bottom nook makes a perfect spice rack, which I hadn’t yet figured out a solution for.
This cabinet from Lowe’s (Estate by RSI) just happened to be the exact width of my pantry and the most inexpensive model I could find. Plus it was white so I wouldn’t have to repaint. It was meant to be.
With my dilemma solved, I had new motivation and excitement to get the ball rolling.
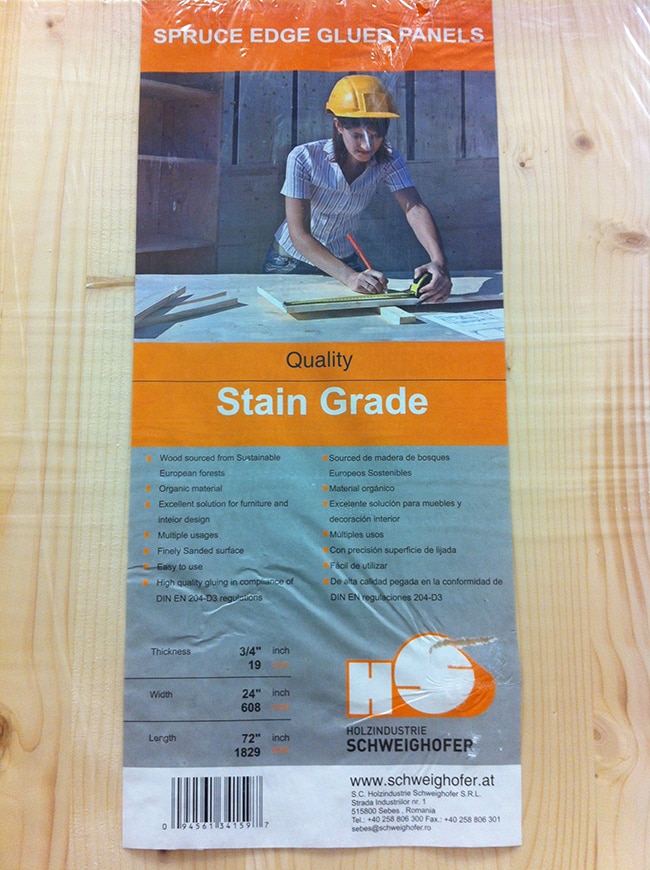
I went to Lowe’s to find my shelves, and found this 24″x72″ ready to paint board for $31. It was perfect because it was the exact width of my pantry, and when cut into 4 pieces, it was also the exact depth I needed (18″):
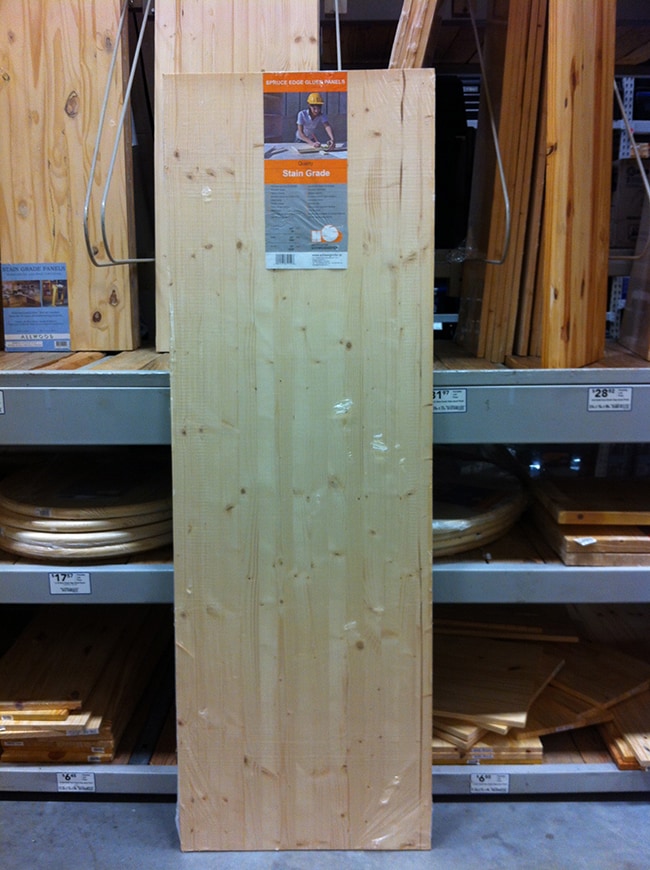
Here’s a closer look:
4 shelves for $32, not bad.
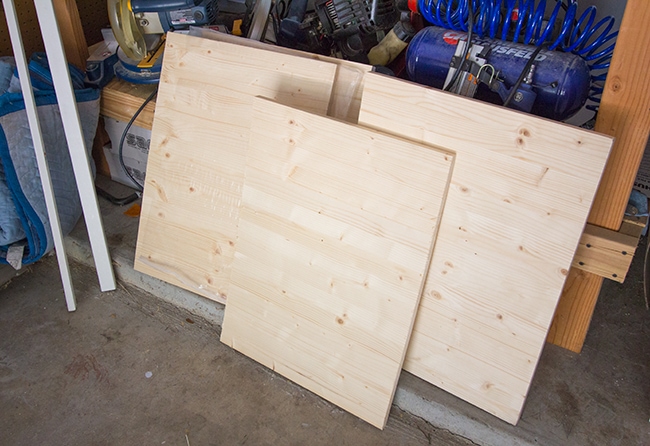
I’m only using 3 shelves, so it’s good to have an extra just in case I need it later on. Or for other projects.
I also picked up some 1×2″ primed MDF pieces (you can see them on the left in the photo above). These will be my shelf supports—more on that in the next post.
Lowe’s had my cabinet in stock so I picked that up also:
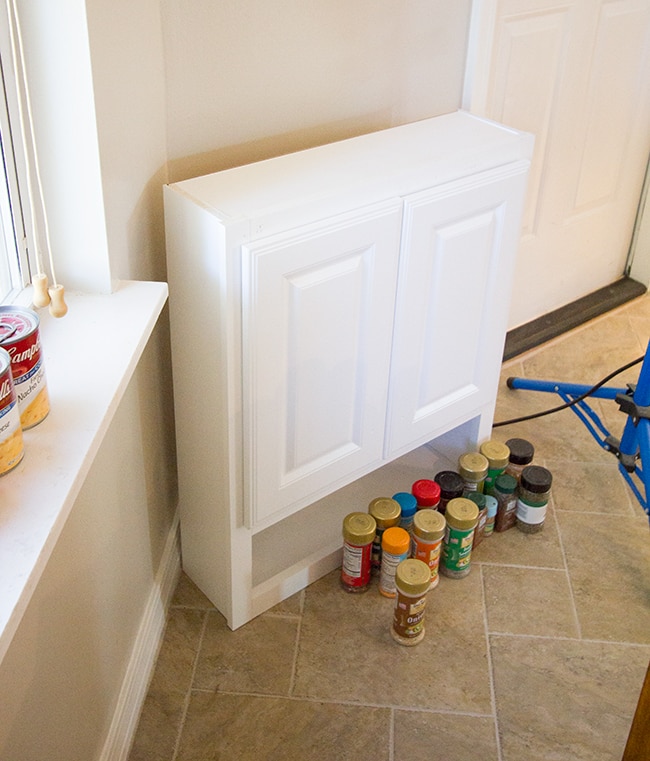
I’ll be swapping out the stock knobs for cute ones from Hobby Lobby.
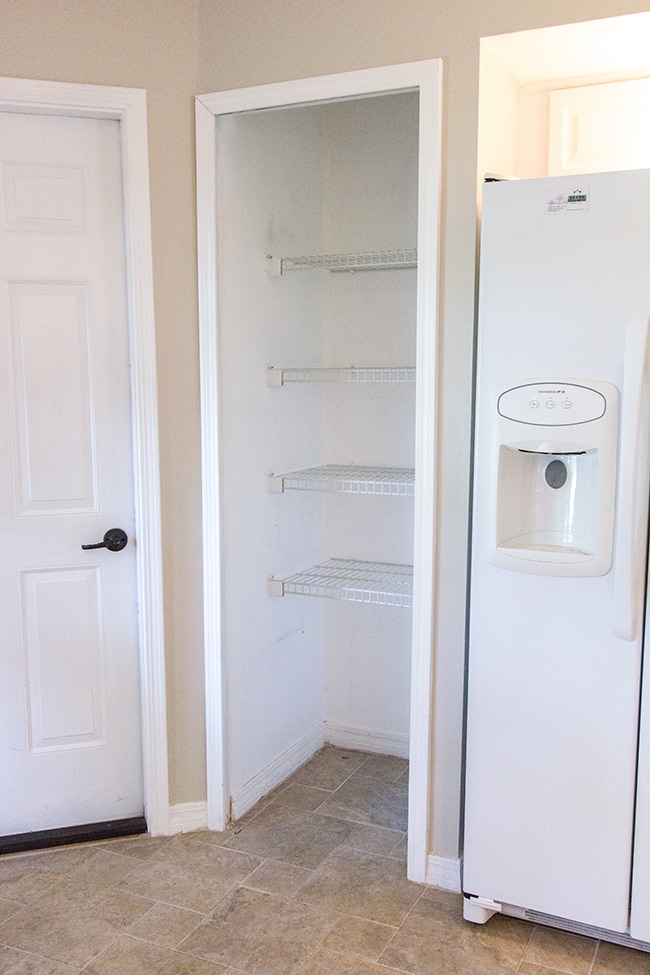
After removing the useless bifold door, it was time to clean out the pantry:
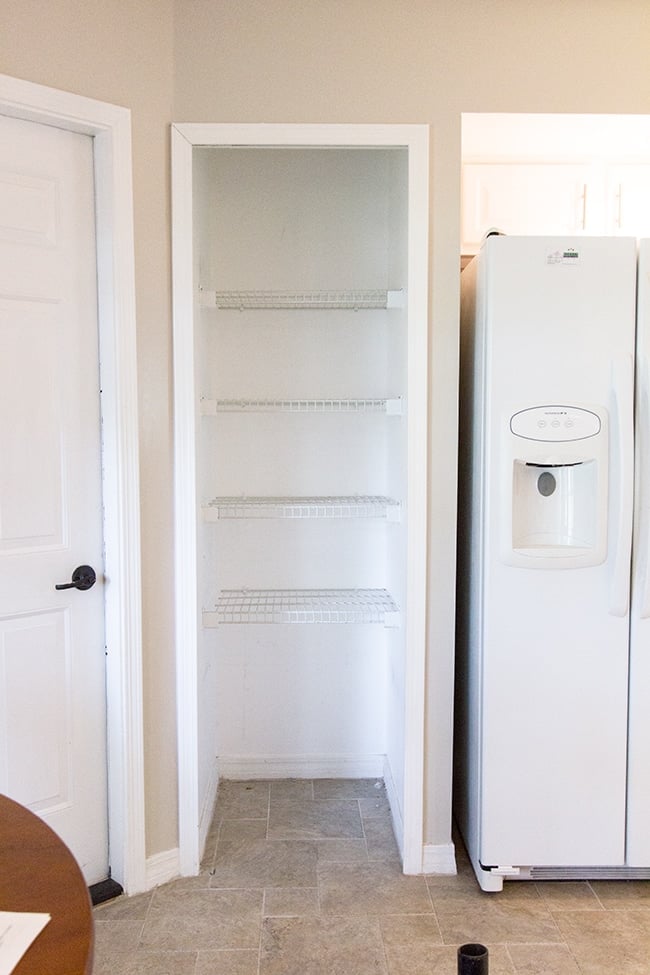
Then it was shelf demo time.
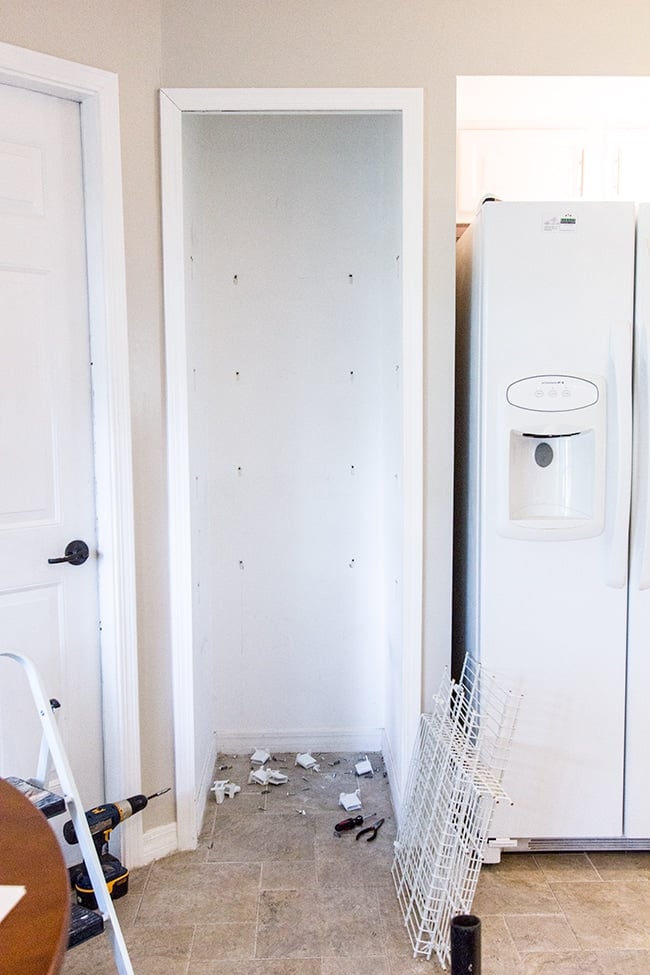
I was left with some nasty anchor holes…
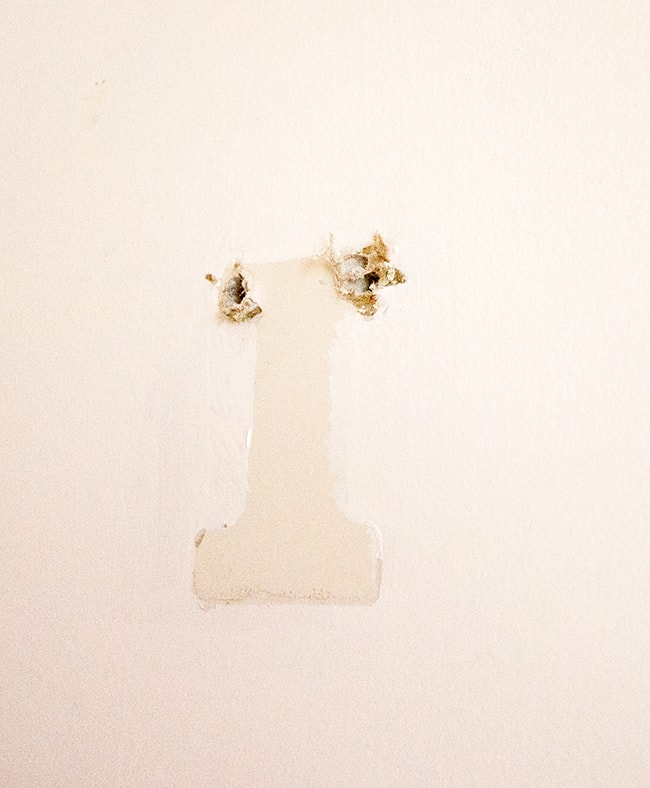
The whole thing was basically just a mess from lazy construction practices… so I took some time (but not too much) to patch and sand everything down.
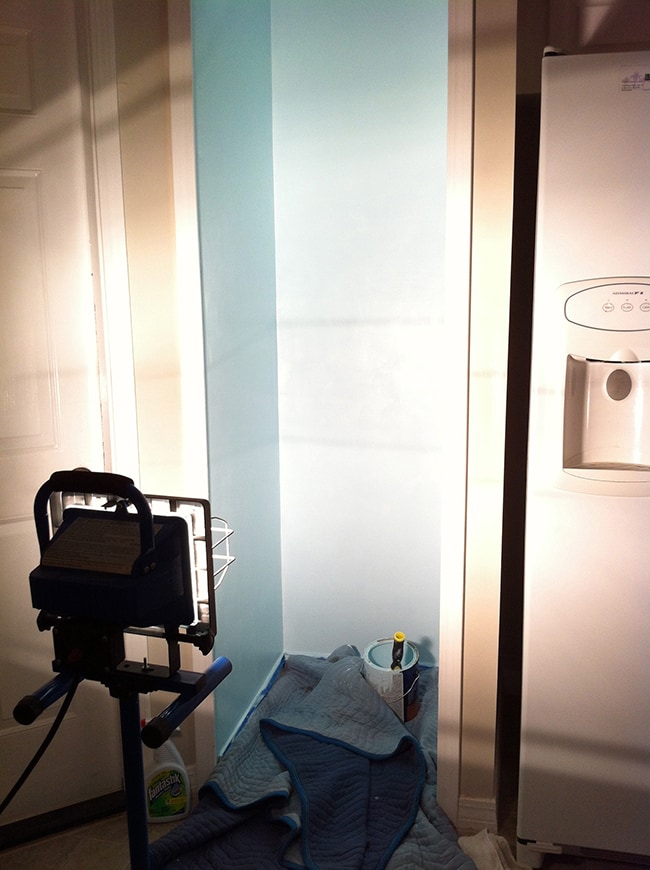
Then, it was time for paint!
I decided to use the leftover paint from our sunroom ceiling—Valspar’s Tropical Mist.
Here’s a mid painting shot, via instagram:
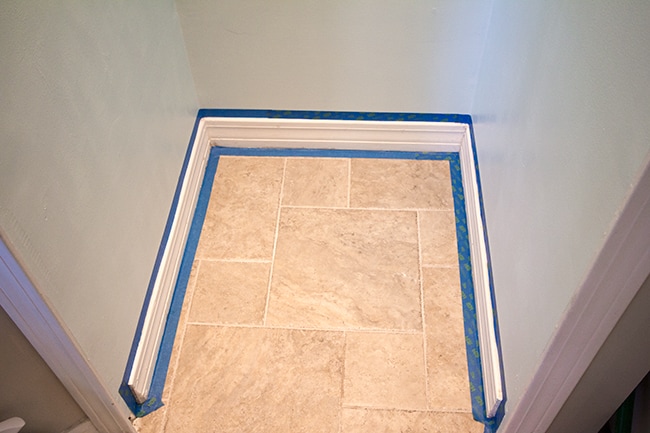
Once the walls were dry, I added a fresh coat of white to the baseboards:
And finally, Brad installed a couple recessed lights this morning:
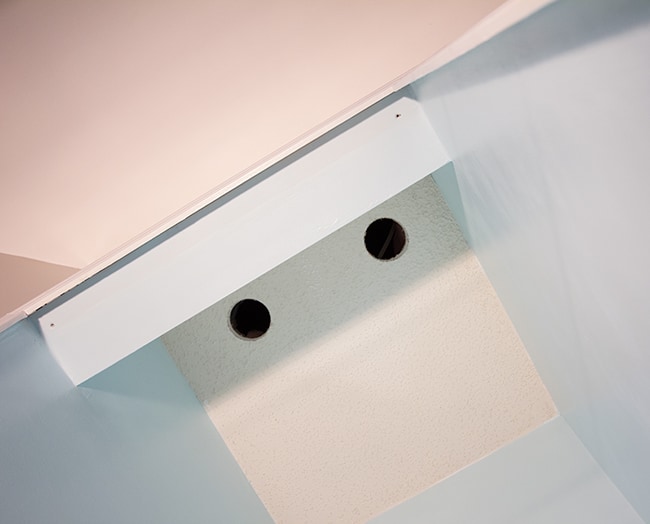
They’re a little off center because there’s some piping in the attic in the way. But the bulb direction is adjustable and you can’t see them unless you’re on the ground, so no big deal.
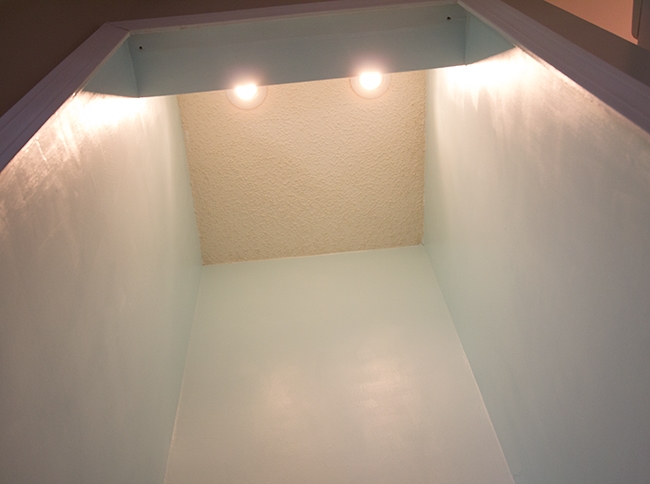
We put them on the same circuit as the rest of the kitchen lighting, and they are dimmable as well.
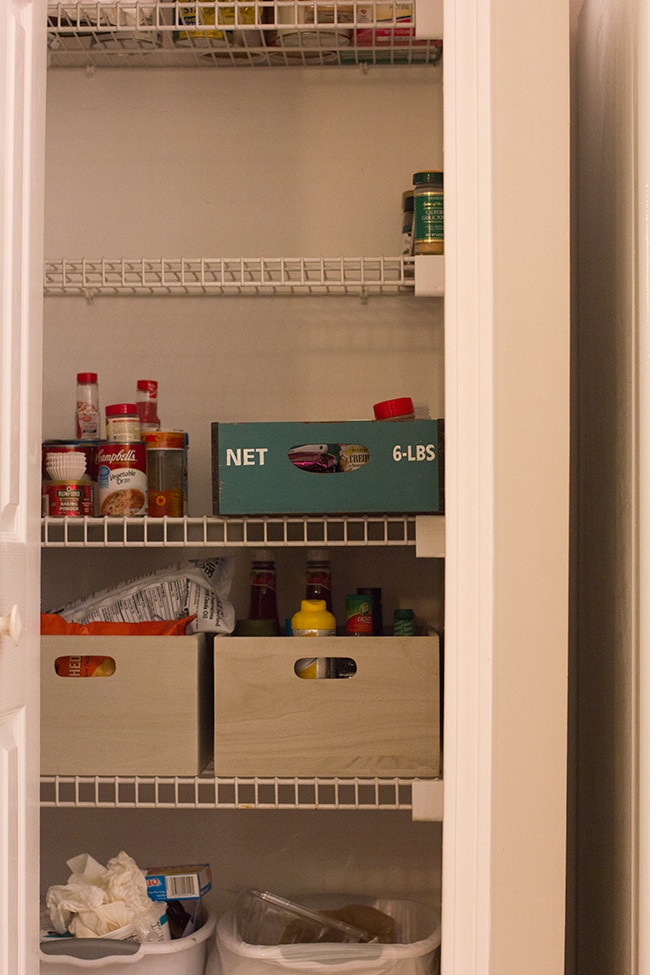
Here’s the pantry as it stands now:
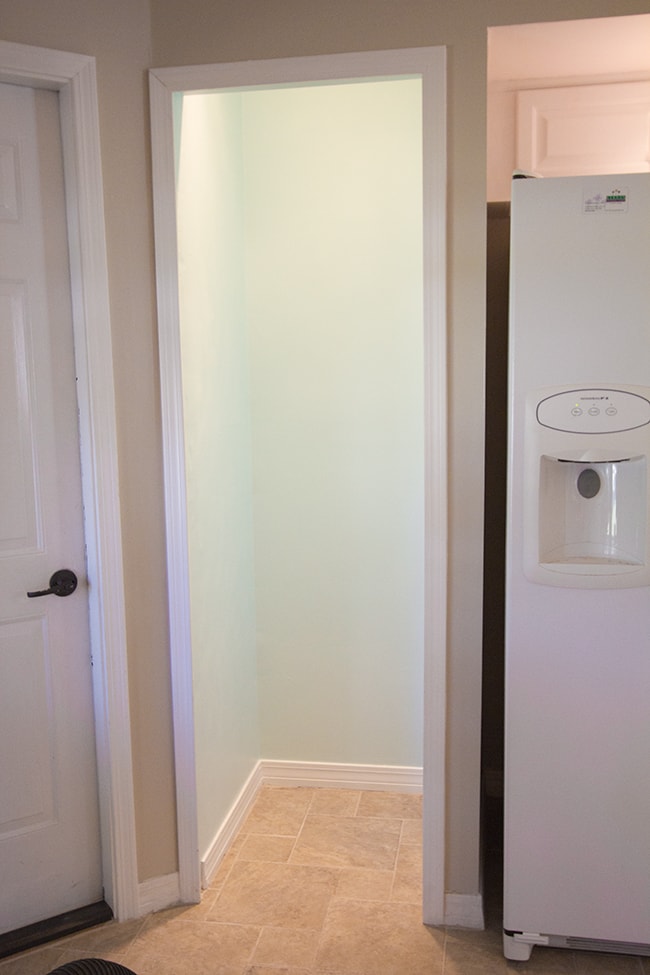
It looks *way* lighter in these photos than it does in real life… I hate this lens. Anyone want a Canon 10-22? Bleh.
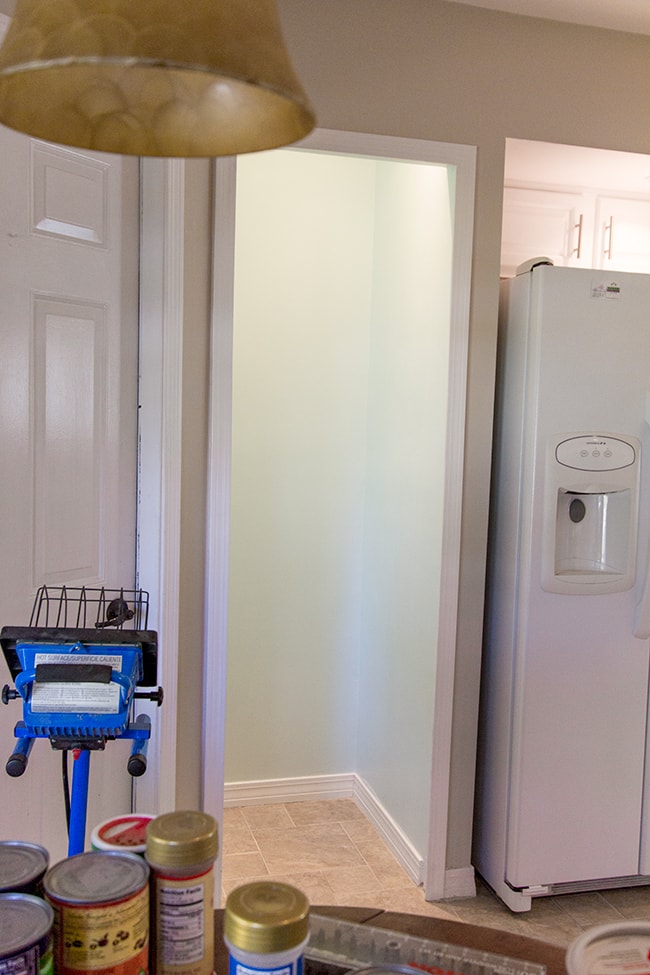
Here we go… I just ran into the kitchen and took this from my iphone. It’s grainy, but realistic:
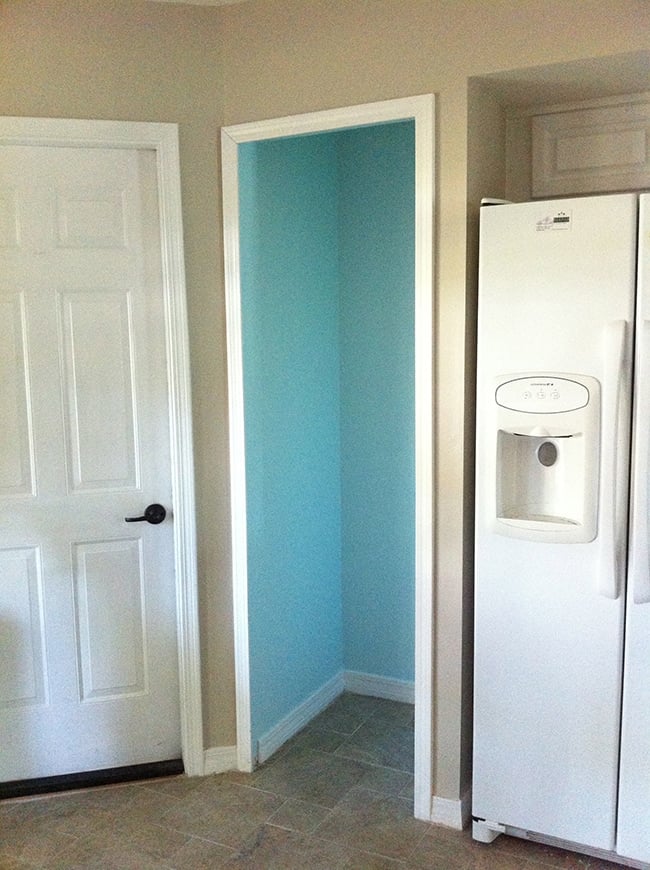
See… it’s very blue in there. A little jarring but it will come together once everything is installed and in place.
Before I jump into phase 3 (the not so fun part of shelf installation), I’ll share what I’ve been scheming for the fun part: fabric.
Luckily, Brad agreed to let me leave the bifold off and hang a curtain. Since then, I’ve been keeping an eye out at every fabric/home improvement store I’ve stepped into, hoping to fall in love with something.
Here’s my vision: mostly aqua and (gasp, a new color!) yellow. Something floral or organic or graphic (but not too bold). Seems like there would be tons out there, right? Nope. Or maybe I’m just too picky.
I spent entirely way too much time searching the world for “the one”, and never really found it. There were countless close calls, so eventually I had to settle for the best option.
Here were the final contenders (all via Etsy):
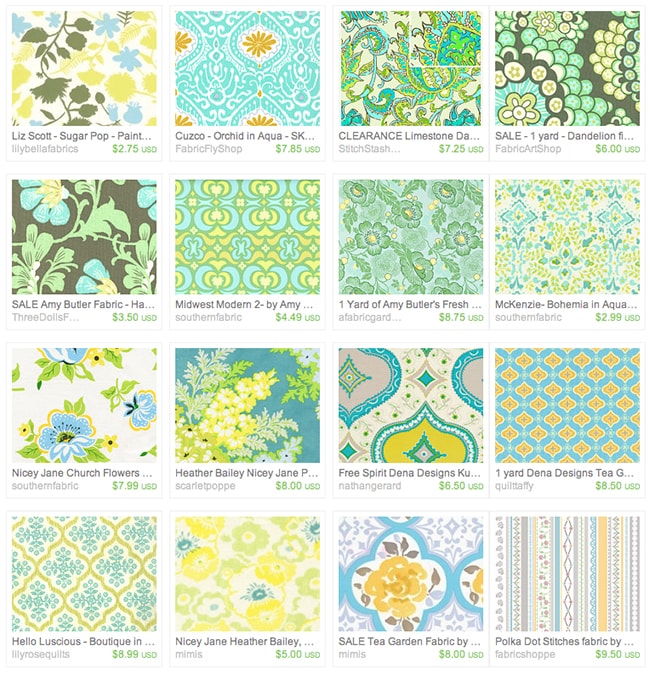
Which one is your favorite?
Can you guess which I finally settled on?
….
……..
…………….
………………………
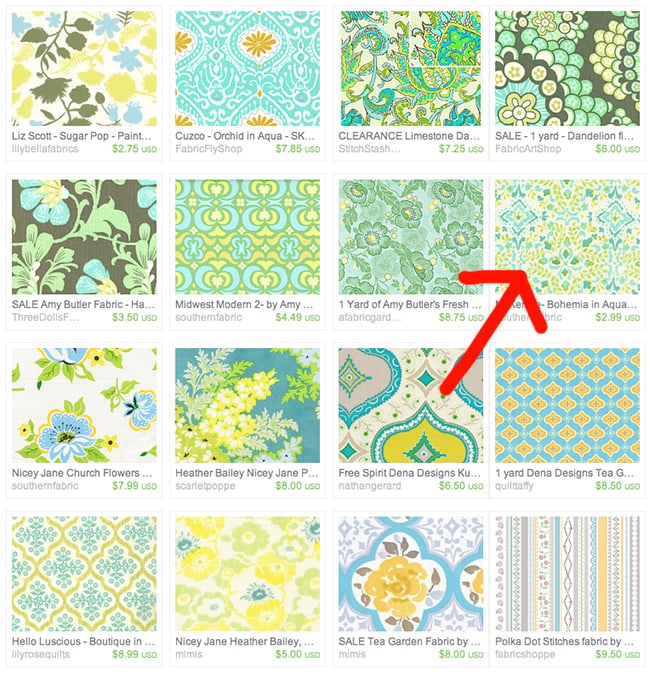
I *almost* pulled the trigger on the bottom left, but decided the colors weren’t exactly right.
So McKenzie Bohemia in Aqua by Dena Designs it is.
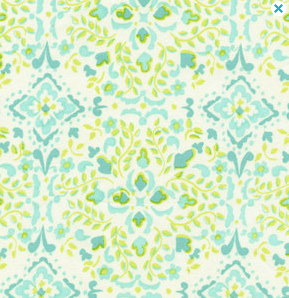
I purchased it here and it came to $22.22 shipped for 2.5 yards. I’ll use stitch witchery to make it into a curtain, and of course document that whole process later.
Hopefully it will be yellow enough in person—but if it isn’t, I have other plans to add a splash of yellow. And I’m pretty excited about that project.
Cross your fingers for me that all goes well and we have shelves and a cabinet installed next week!


freestanding pantry cabinet says
Awesome post! I love your pantry, it looks very nice and beautiful!
Wendy says
Hmm. I see what you're saying :)I adjust my WB in camera- not in PP because I'm stuck with tons of mixed lighting now and it's easier for me to get it custom in camera, then adjust if needed afterword.(I'm a SAHM now, used to be a photgrapher but moved a few months ago out of state.. bla bla 😉 ) I don't shoot Canon but lots of people love the 28-75 2.8 made by Tamron for Canon. My walk-around lens is the thrifty-fifty 50 1.8 but I'd really like to get a 35mm 1.8! Anyhow, don't want to hijack with camera talk. Keep up the great work!
Jenna Sue says
Thanks Meghan! I'm leaning towards the 24 2.8mm. I'm going to rent it for a day first before pulling the trigger (should have done that last time!)
Meghan says
Pantry looks great! Love those Tomato soup cans!! 🙂 What lens will you get instead of the 10-22?
Jenna Sue says
Thanks for the tip Wendy! Even when I adjusted the WB in Raw, it was still blown out inside the pantry and too light to have any color, unfortunately. I'm actually looking at trading this lens for a faster one so I'll have better results shooting indoors where there's limited natural light (like the kitchen) 🙂
Wendy says
Hey! New reader, love the way the pantry came out. I wanted to give you a little camera help- if you'd like 🙂 You mentioned that the paint color looked different in camera as opposed to real life. It's not your lens- it's probably your white balance function 🙂 When you're taking pictures in mixed light (the ambient kitchen light, the pot lights in the pantry and possibly even some flash) the camera has a harder time “reading” the colors and adjusting for the mixed lighting especially if you're using auto-white balance. If you still have your camera manual, look up “custom white balance” or google it 😉 It'll teach you how to adjust your white balance so that the colors you're shoot look more true to life. I hope this helps a little, as you've helped me with some great ideas!
Alice @ Whisketeers says
Oh my, Susie, you're so cute!! 🙂 I wish I could dress up my cats like that, at least once a year, but they'd never let me. The pantry looks great! Looking at the fabric I was deciding between Cuzco and the McKenzie one 🙂 I can't wait to see how it all comes together.
Cocalores says
Just stumbled across your blog again after having seen your sun room some time ago (and weirdly enough, having forgotten to follow you the first time around – duh!). So this time I'm making it right, following now and am curious to find out about your latest projects. Love the turquoise and whites you're using =)
Hello Door Seven says
Ohhh, I simply love all the fabrics you selected. They are EXACTLY in the color scheme of my living room/kitchen. I could use any of them for my curtains 😛
I love the one you picked and cannot wait to see it up! Thrilled!!
Pine Tree Home says
So jealous you have lights in your pantry! You'll love your makeover once done though. It took my 15 years and then I finally got off my butt and redid mine. Organization is a thing of beauty.