Sorry for being MIA last week… I had a project ready to share with you guys on Thursday morning when disaster struck…
 |
| via Instagram |
I’ve since regrouped and developed a Plan B which I’m actually more excited about, so I’ll be spilling all the details soon.
In the meantime, I decided to work on something else in the studio by addressing this desk storage situation…
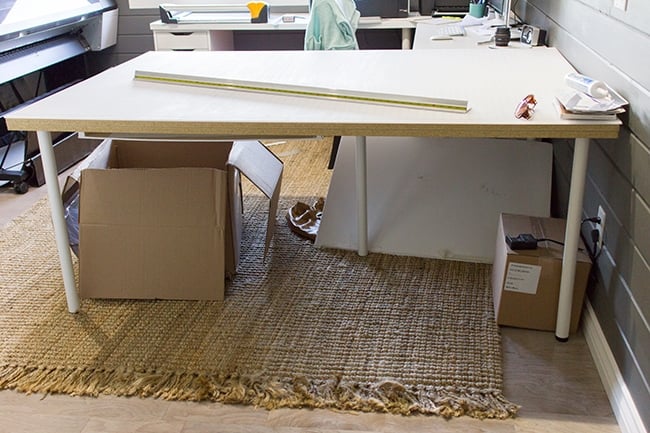
This is the first thing you see when you walk into the house, and it was a mess. My last studio was big enough that I didn’t need to utilize the floor for storage, but this room is about half the size and I have a lot of large bulky supplies that need to be stored underneath.
I knew right away that I wanted the space to be hidden. I thought about adding a panel either with more wood planks, MDF or beadboard, but there’s already so much wood work and hard surfaces in that room so I wanted to soften it up.
I love the look of this fabric from my girl Roeshel at DIY Showoff…

That was definitely the way to go.
The goal is to keep the space simple, neutral and calming as to not compete with the artwork, so I went with a natural linen fabric found at JoAnn’s.

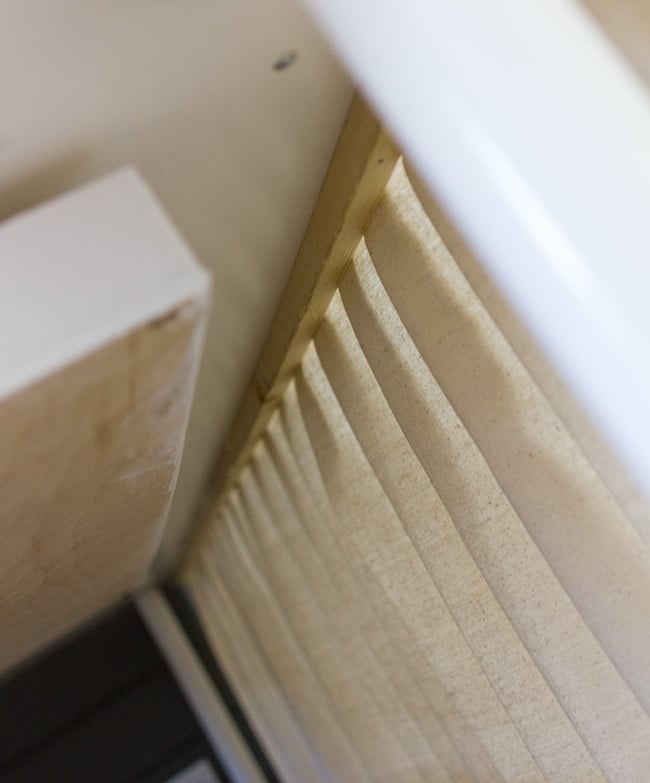
After laying it out, measuring and cutting to size, I grabbed a scrap piece of wood from the garage that was cut to 1×1″ and used it as my base. Then I simply folded the fabric over every 4-5″ or so and used a staple gun to secure it in place.
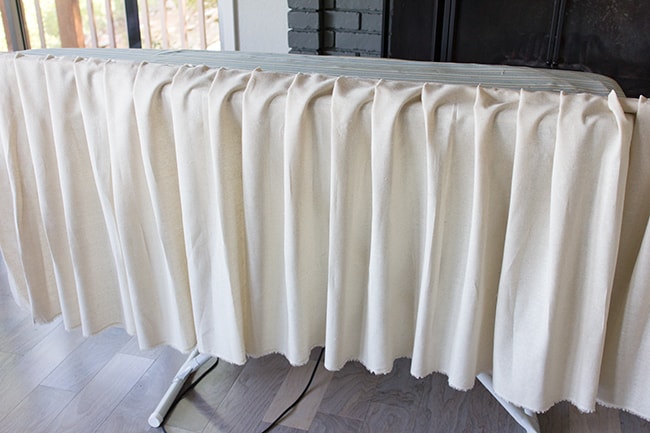
Then I nailed it to the desk from underneath:
Instant hidden storage! I later added trim around the top but forgot to snap pics so you’ll just have to wait for the final reveal…
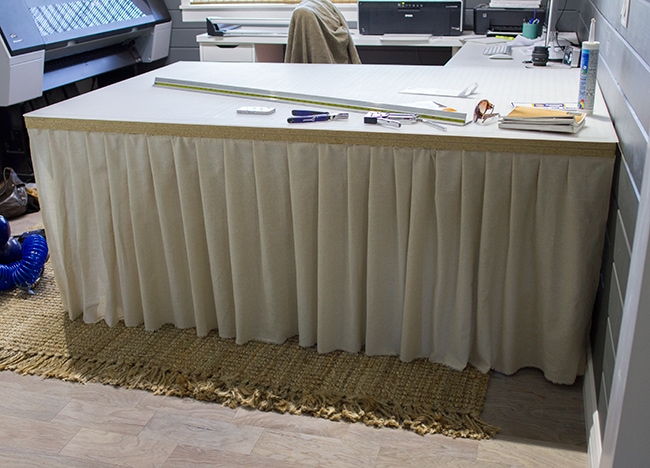
I didn’t wrap it around the sides because I need to access my shipping tubes all the time…
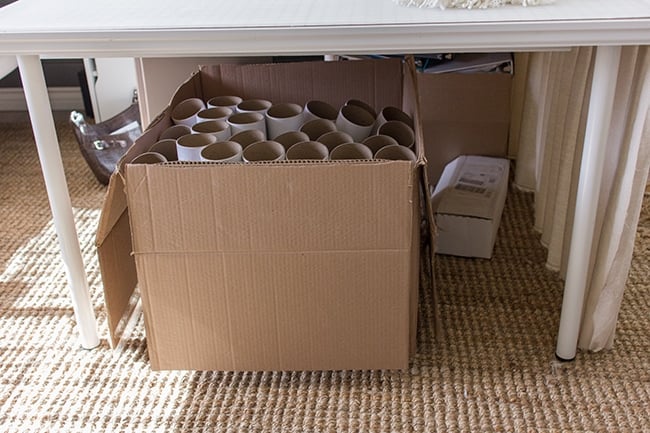
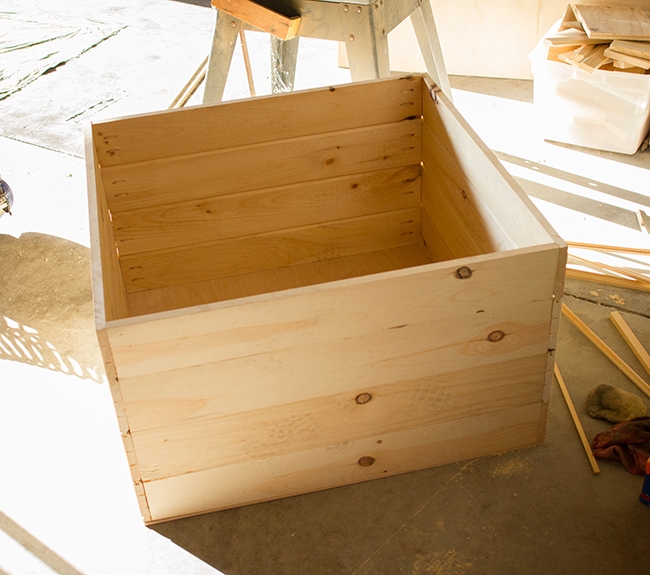
Which brings me to my next project—building a storage box.
I needed something much larger. Two of those cardboard boxes wouldn’t fit under the desk, and I’m constantly running out so I desperately needed a bigger storage container so I can have a larger supply on hand.
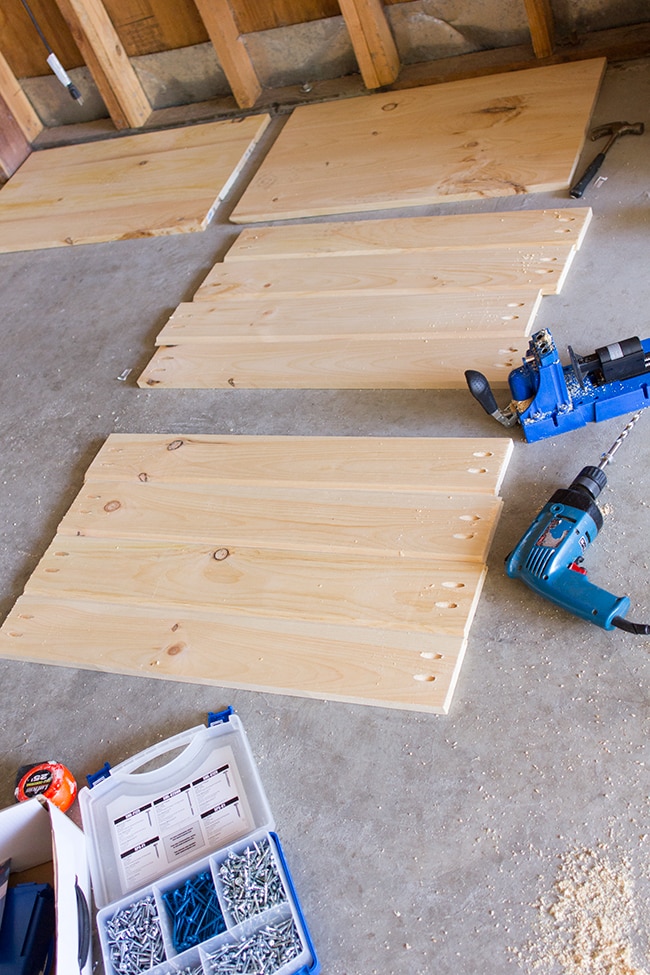
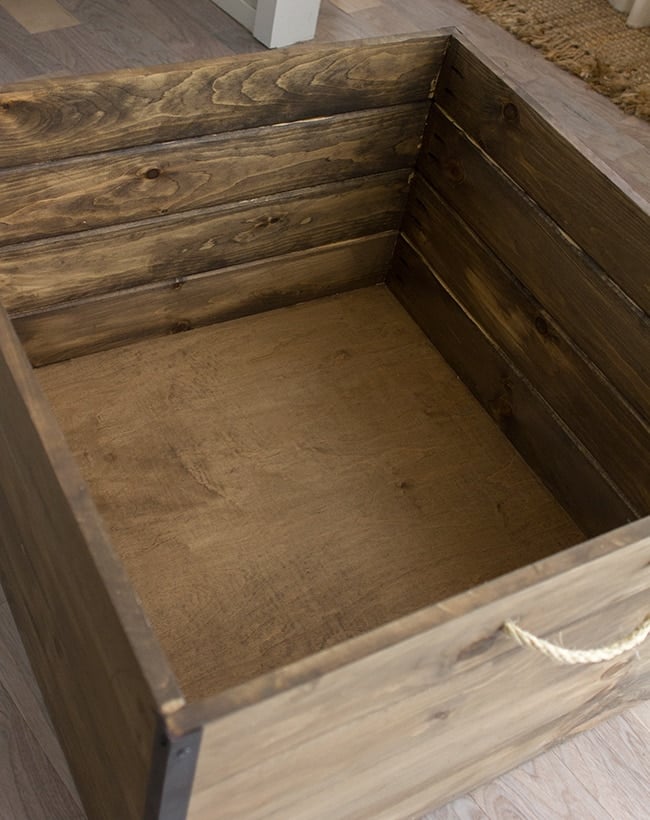
I still have lots of tongue and groove pine leftover from all of our planking projects, so it was a no brainer to use those.
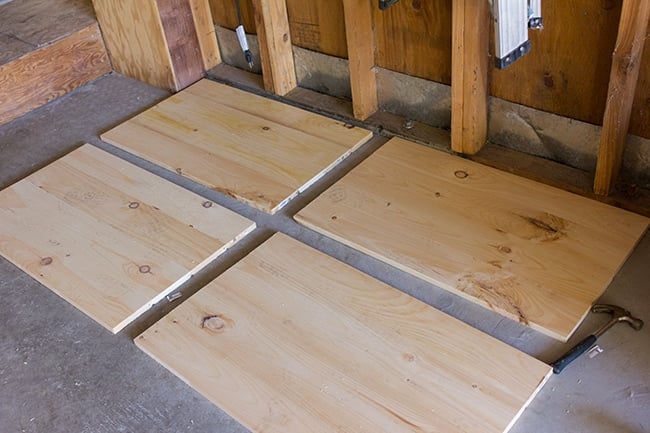
Building a box is a pretty straightforward deal—four sides secured together and a bottom.
My pine planks were 8′ long, so to minimize the amount of waste I cut them into thirds so they were all 32″ long (which worked out nicely for the width of the desk).
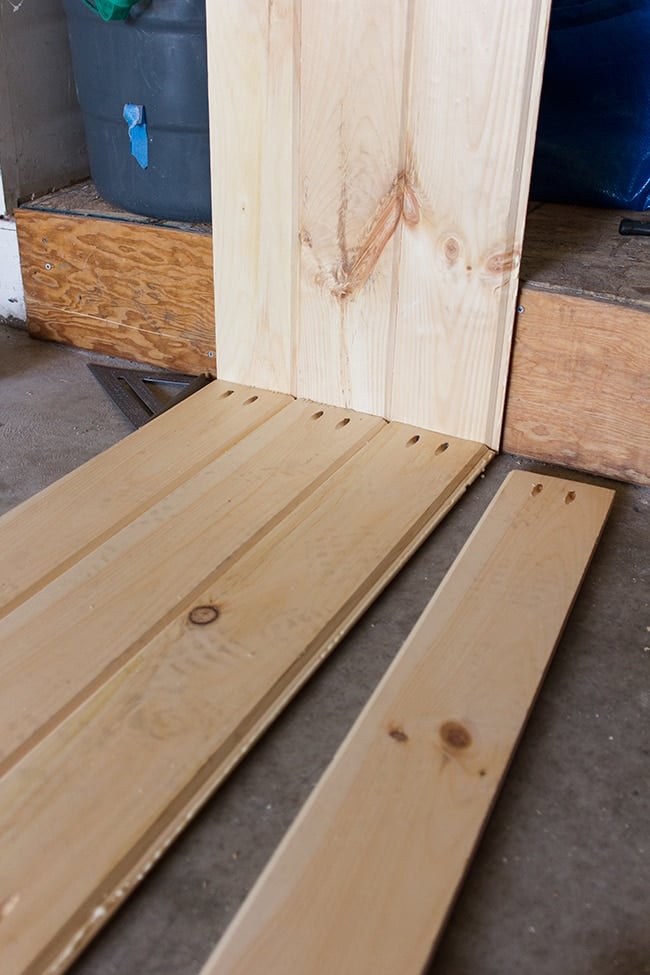
Because the edges have a tongue and a groove, I had to rip the top and bottom boards down so they were flat. You can see the original board on top and a ripped one on the bottom:
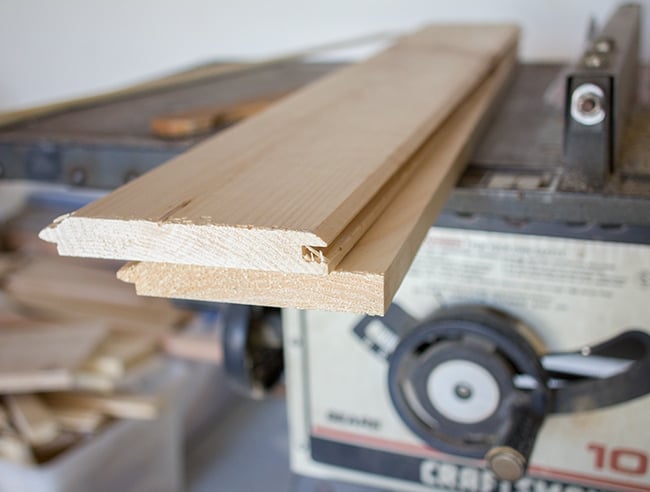
I also decided to use the flat side instead of the grooved side for the exterior of the box. Just a personal preference.
Because the boards lock together, I didn’t need to join them with nails or screws (just wood glue), so I just had to decide how to connect each side to each other.
I thought I’d give the Kreg Jig a try, so I made pocket holes along the ends of two of the sides:
I began by assembling them one board at a time, using a square to make sure they were level and wood glue along the tongue as I went.
And here’s two of the sides joined:
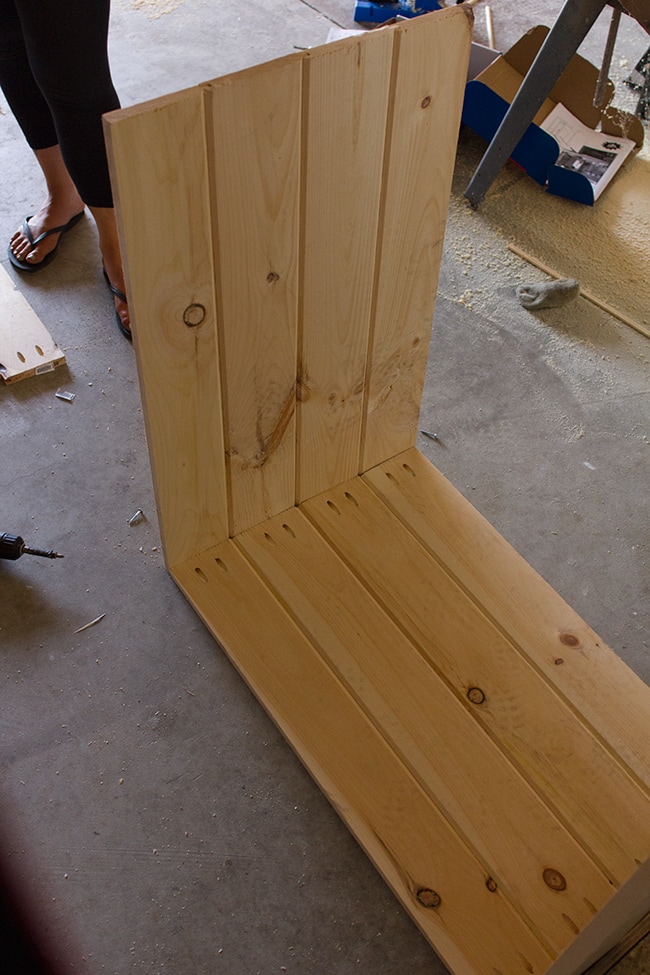
I also decided that assembling the sides first and then securing them to each other was easier and faster.
Here’s my lovely assistant helping me attach the last side:
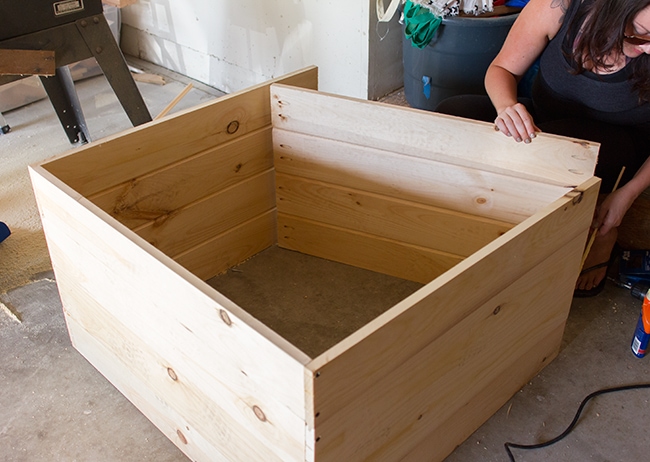
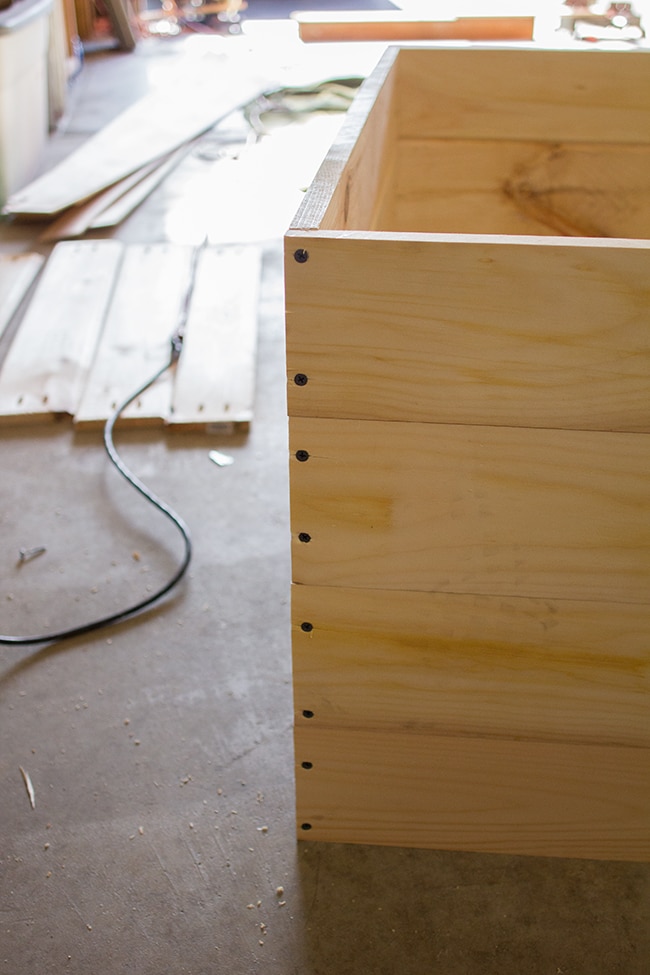
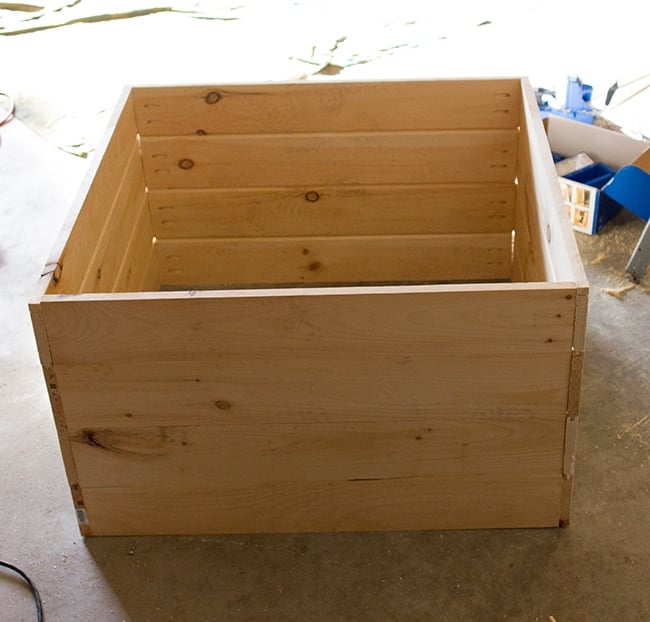
Everything was nice and square and solid in the end—success!
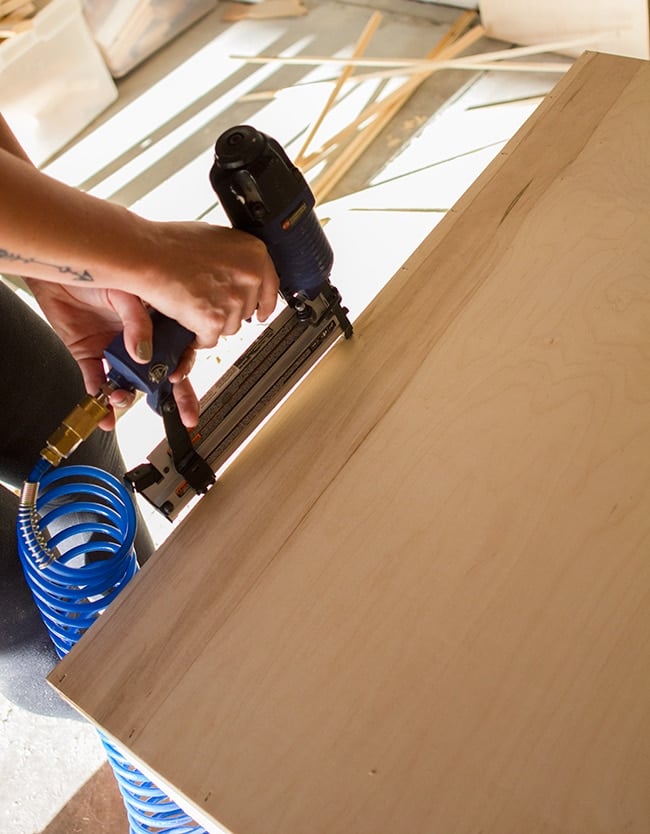
I had a piece of 1/4″ cabinet grade plywood leftover from another project that was somehow miraculously the exact same length as the box, so I just ripped the width down and we had our base.
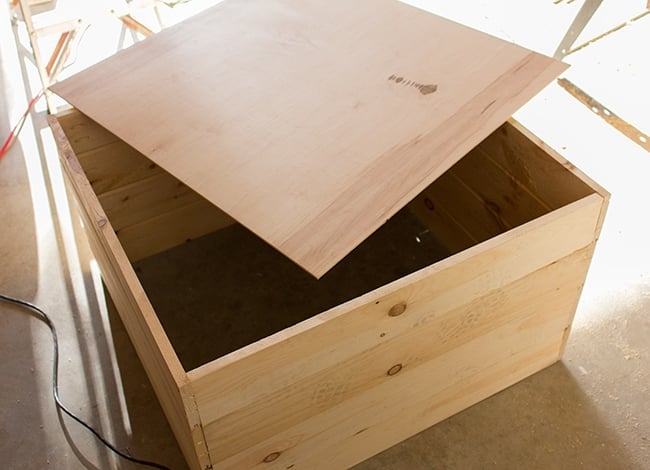
We shot a some nails through the bottom to secure it…
And our box was ready for stain.
I wanted it to be somewhat rustic looking and let the grain show through, so I used a dark walnut stain with just a touch of weathered gray to neutralize the brown.
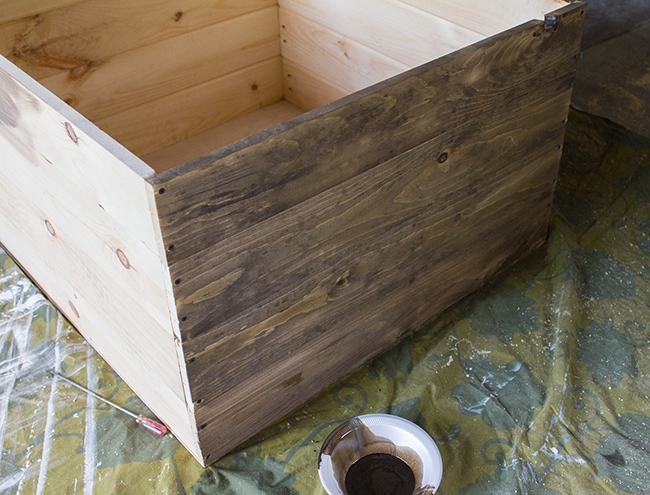
We used a paint brush to get into all the crevices. Love the way the color turned out.
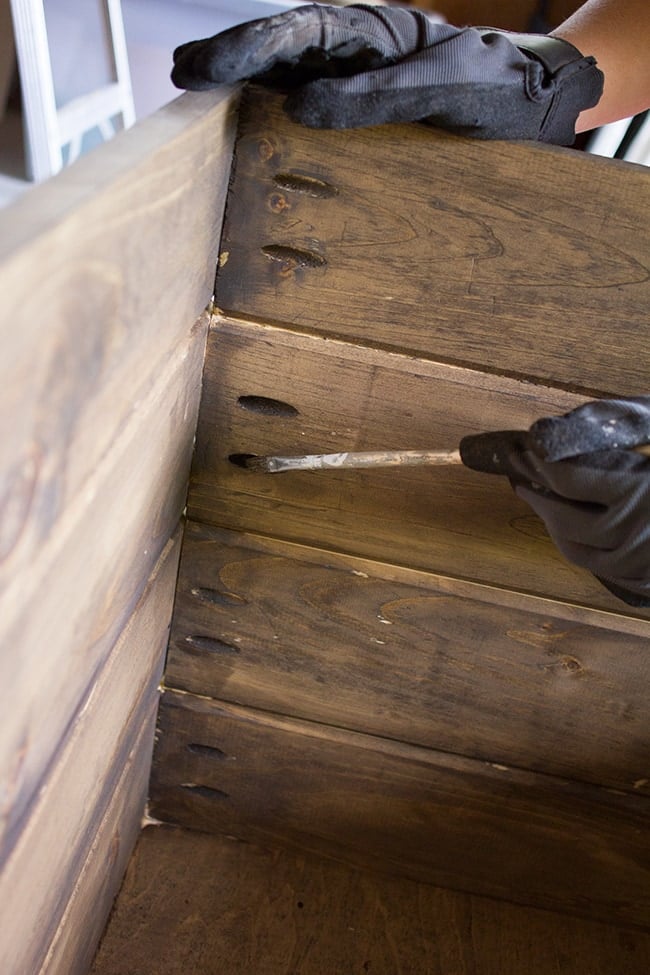
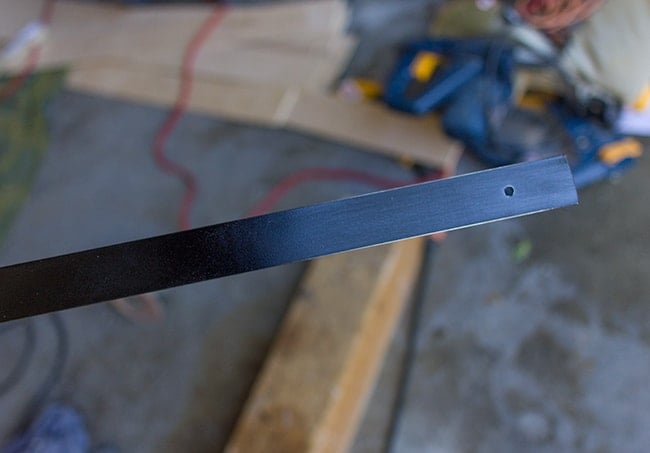
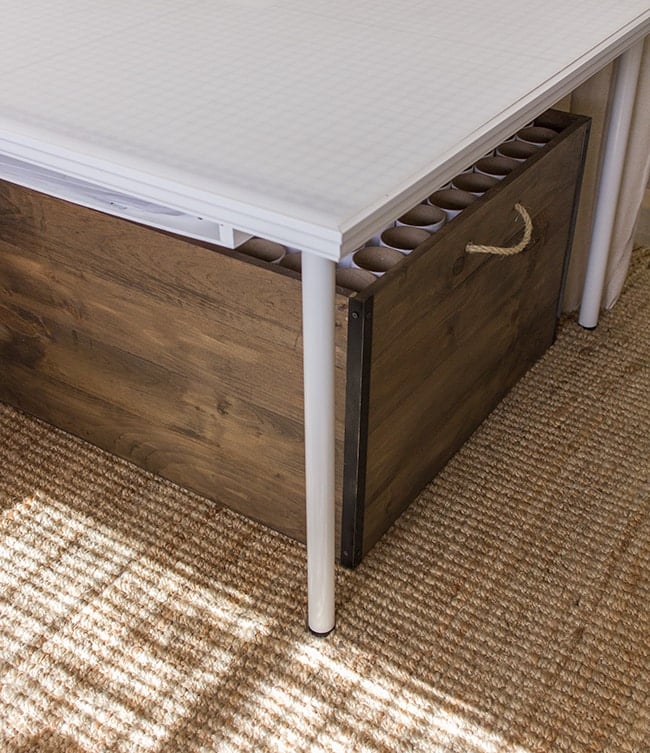
To add that extra special touch (and to hide all the screws) I found this metal L-trim piece at Lowe’s:
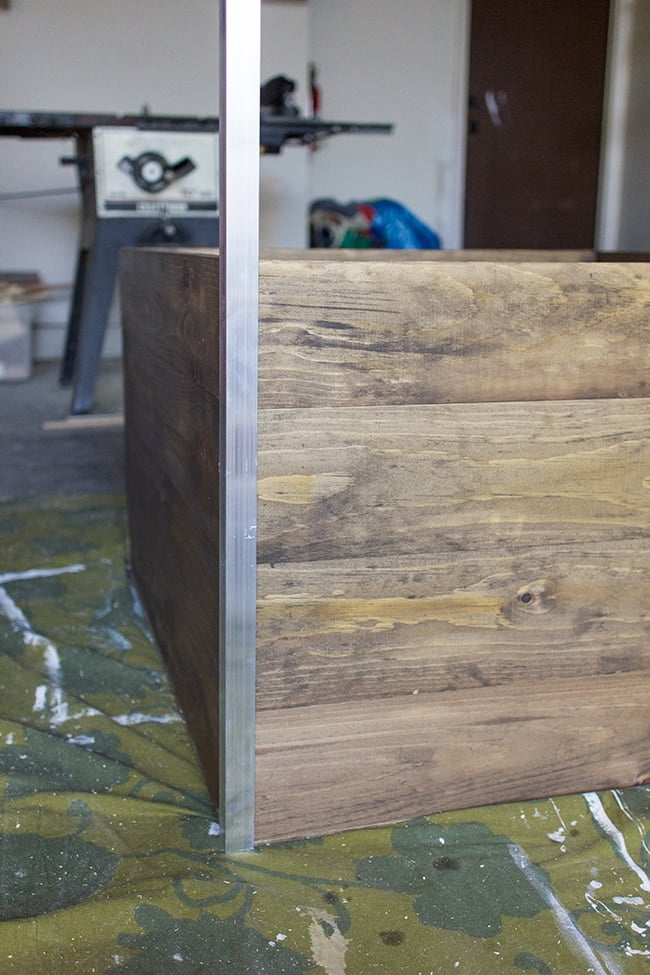
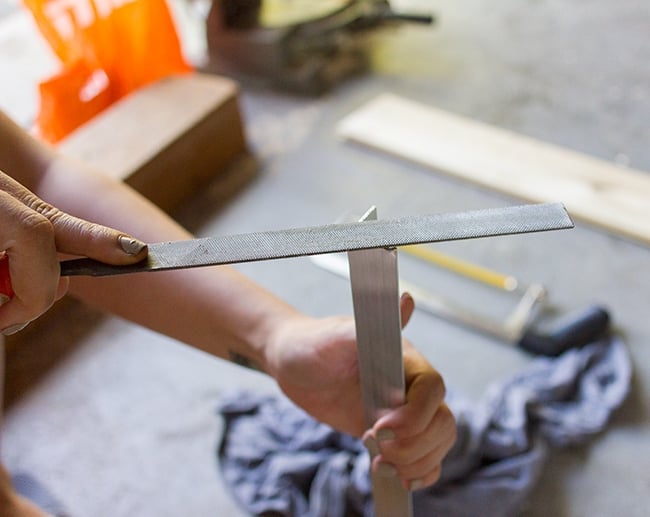
I bought 4 of them (@ $4.90/ea) and used a hacksaw to cut them to size (the metal is thin so it cuts easily). We used a metal file to smooth down the sharp edges.
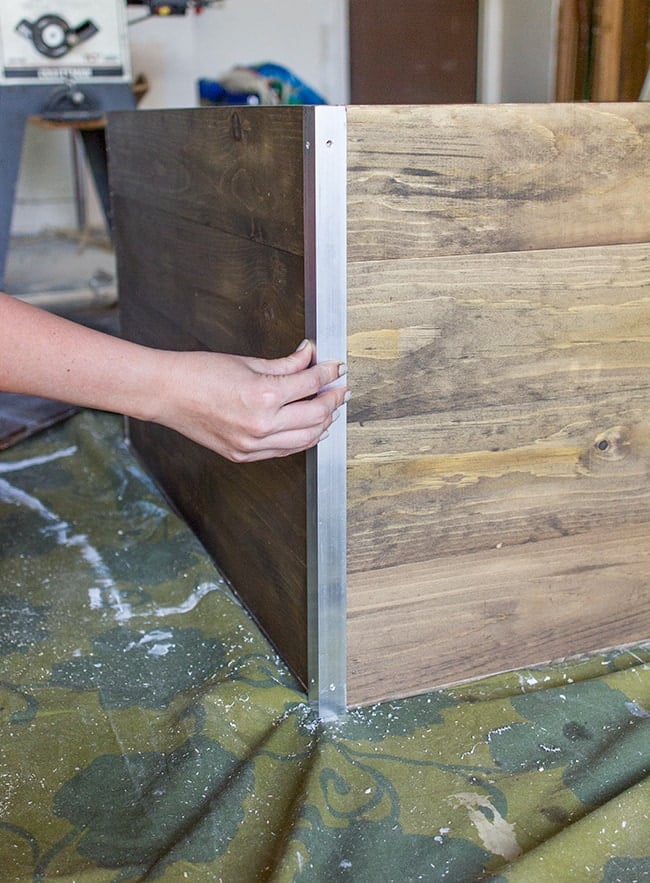
To attach it to the box I drilled pilot holes on the top and bottom to insert screws.
Before attaching it, I gave them a coat of satin black (I thought the dark trim would give it more of an aged look).
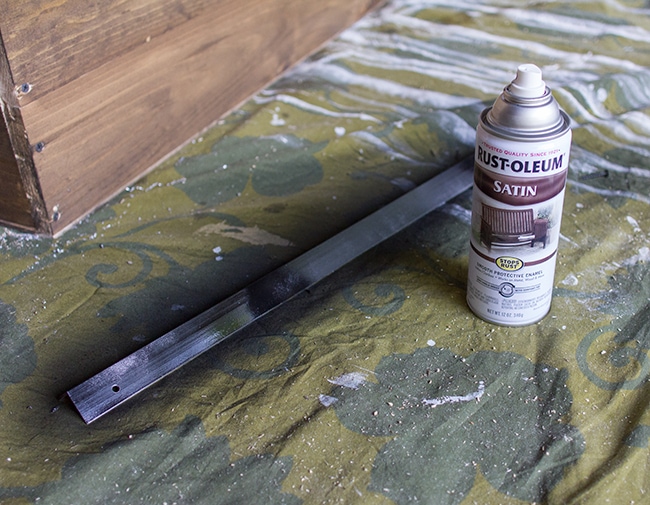
It came out a little too shiny for me, so I used some steel wool to lightly buff and weather it:
Much better…
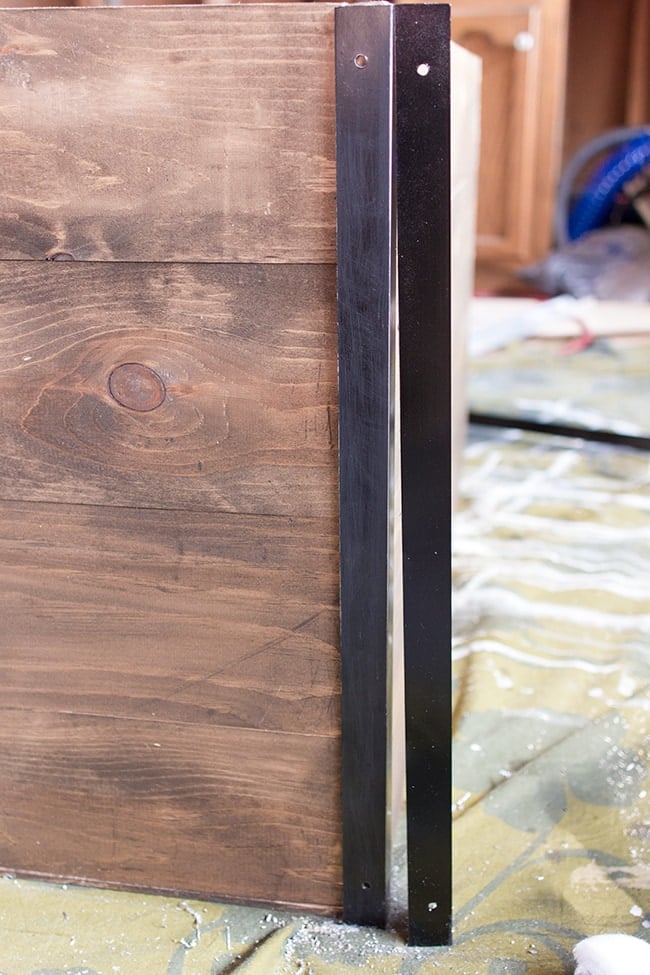
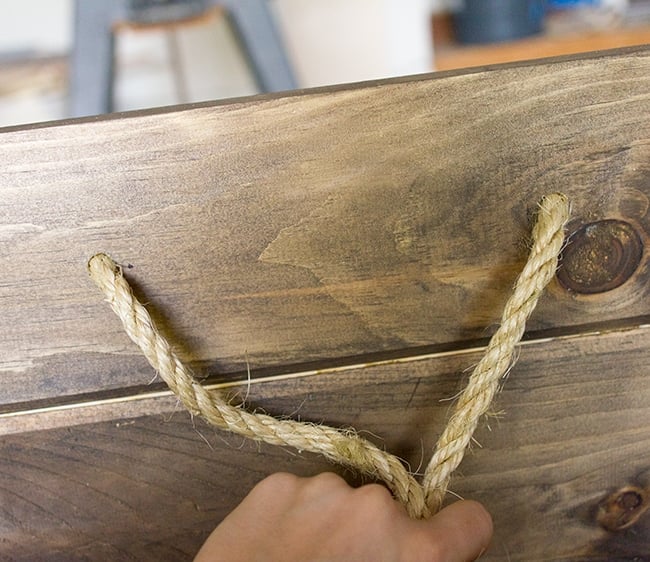
Finally, I used black screws to secure them on:

And the box was ready for action! And a cat photobomb…
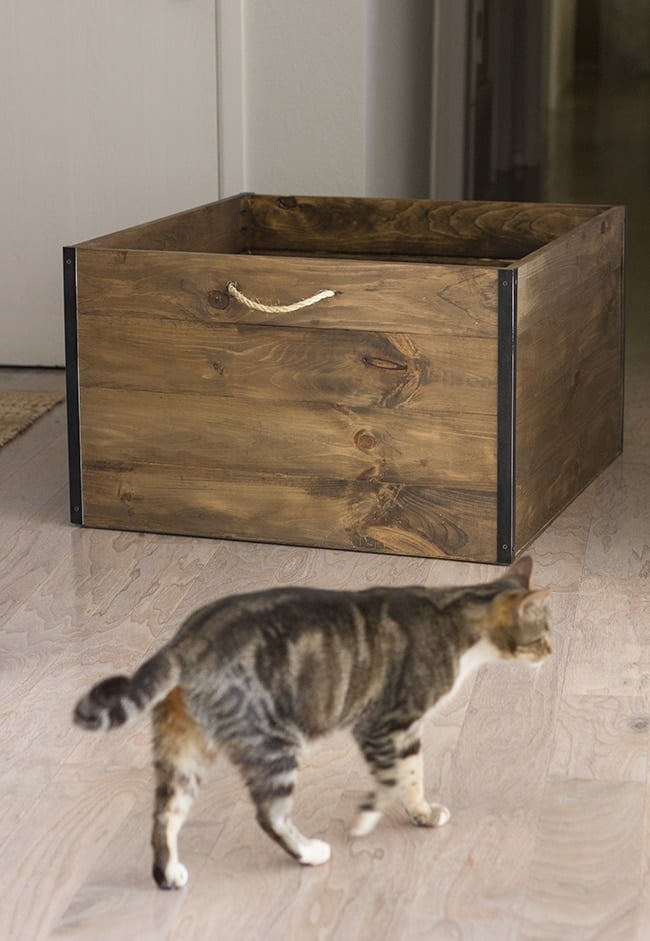
I have so much storage space now… never running out of tubes again!
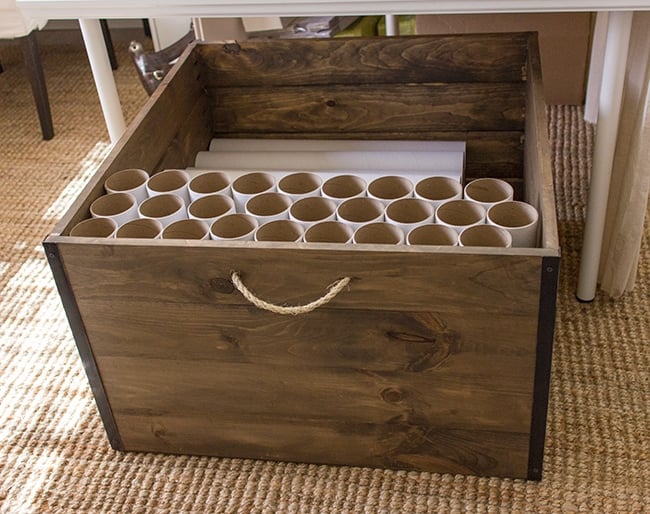
The box is fairly light so it slides in and out easily and fits neatly out of the way when I’m not using it.
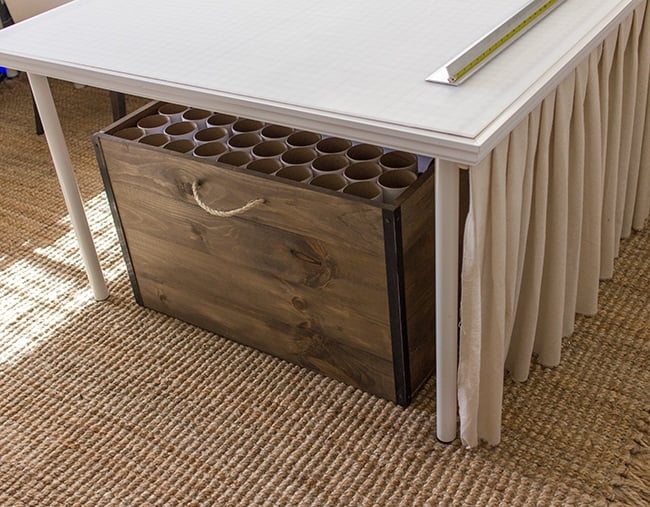
Here’s a shot from the other side of the desk. It’s still completely hidden from view when you wa
lk in the front door—you have to actually walk inside the room and turn the corner to see it.
And that’s the latest from the studio! I’m almost ready to give the final tour… just need to revamp my file organization/storage wall which I’m starting on tonight. I have that lined up for Thursday (along with the details my failed veneering attempt… sigh).


Katie {Little House of Four} says
I love the extra metal detail you added to the sides of the box. Great job!
Kristen says
The storage box looks great! I like the skirting that you created around the desk too! Adds a nice touch of softness to the space.
Cindy @Made2Style says
Great box! It's amazing the things we can create with a little time and elbow grease!
Jenna Sue says
Thanks Deana! I definitely would have used those but the plywood on the bottom is super smooth so it just glides across the rug without needing them 🙂
Deana Fruth says
Love the storage box! Actually the whole house!! For sliding the box what about those plastic disks that are used to move furniture etc. Attached to the bottom. Won't make it too high like casters would, and less expensive.