We’re now a couple months into our new routine of maintaining the yard at the Heights House. Figuring out how to properly care for so many different plants has been a bit of a learning curve (not to mention the never ending weeding and mowing!) and I still owe you guys a complete landscaping post. That will come soon, but today I wanted to share a recent project we tackled on our own that I’m pretty proud of.

Part of our landscape/hardscape plan was creating half-moon bumpouts along the wall on our back patio for bougainvilleas. Here’s a shot from May after the paver installers finished, before they were planted (in blooming season!)
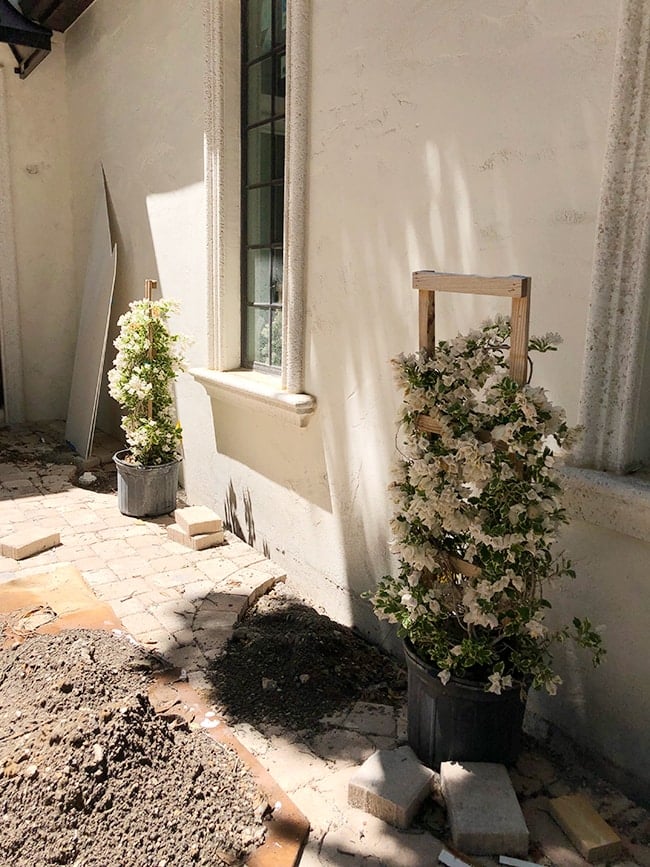
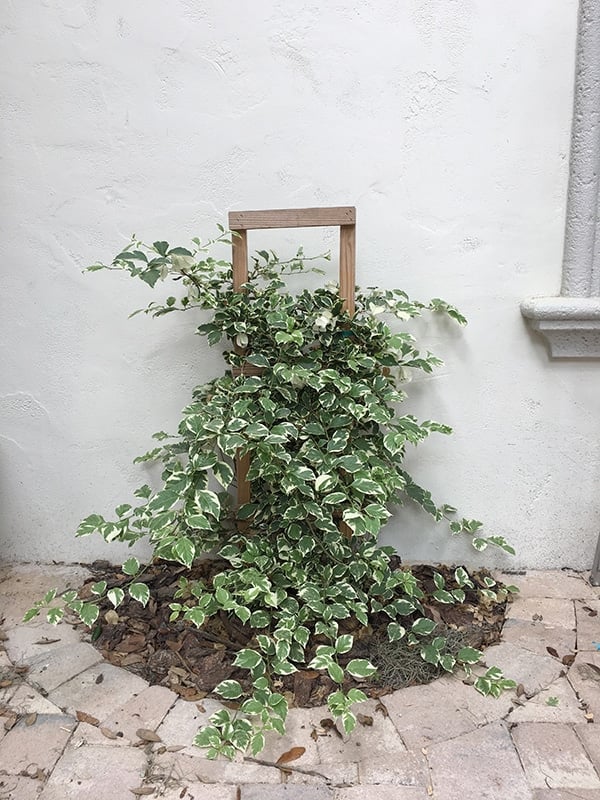
They were planted and stayed wrapped around the little wood trellis for a while as we focused on moving in and other projects…
The plan was always to construct some sort of large trellis so that they would climb the wall. Originally we had envisioned vines organically crawling across the stucco, but those are invasive and would end up damaging the house eventually. Our landscaper suggested these variegated white flowering bougainvillea as an option, and we loved the idea (especially in blooming season) so that was the route we took.
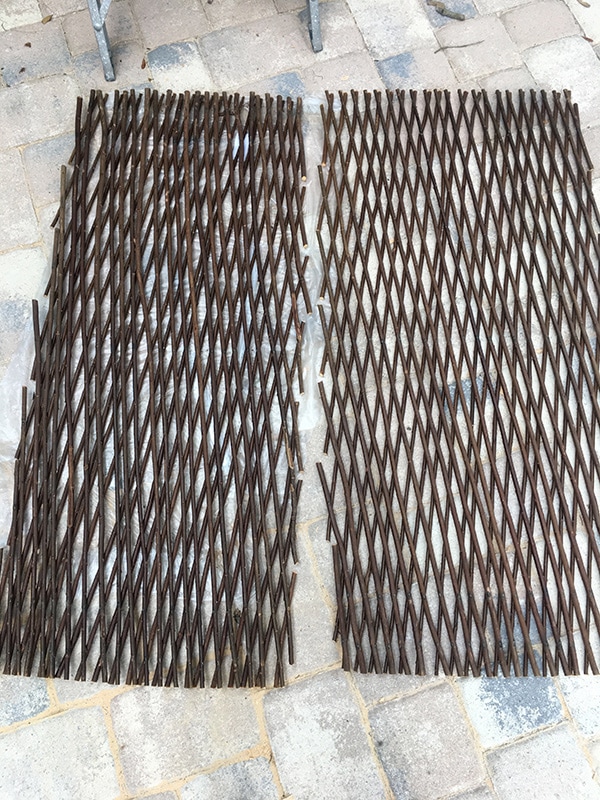
The next piece of the puzzle was how to build the trellis. There are so many options to choose from—pre-made wood sheets, DIY from scratch, fabricated metal, hooks and wire—the list goes on. Pretty quickly I eliminated the costliest and most time consuming options, as we have a laundry list of more pressing house projects to complete this summer. After spending ample time on Pinterest (which gave me plenty of great ideas but didn’t lead to a clear winner) I spotted these on Amazon…

The price tag was the first thing that caught my eye (only $40 for 2 panels) and when I read the details and reviews I was even more interested. We had a pretty specific size to fill between two windows, and most of the other options I found were a too wide and/or too short. This trellis expands all the way up to 120″ and we could adjust the width to fit the wall. And since it was already assembled there was little work involved—simply attach it to the wall. I was also a fan of the natural willow branch material and thought it’d be a nice contrast against our light walls. SOLD!
They arrived a few days later…
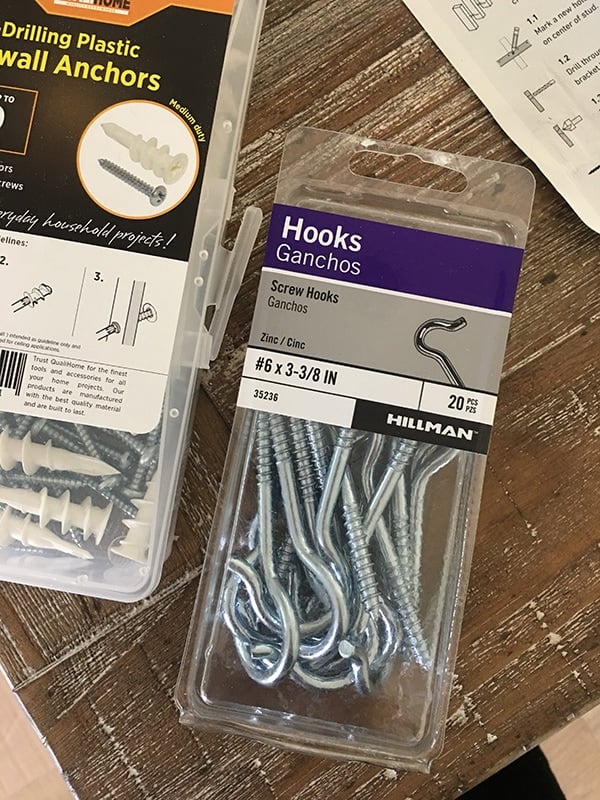
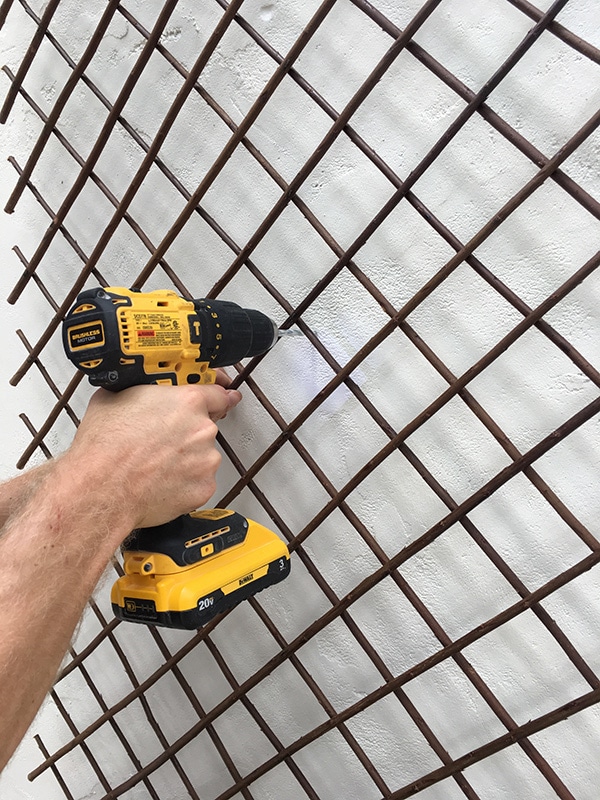
Then we had to figure out how to attach it to the wall. With wood siding it’s pretty simple, but when drilling into concrete you need to use anchors. We found these plastic anchors that can be used with drywall or masonry:

And I also grabbed a pack of these hooks to screw into the anchors:
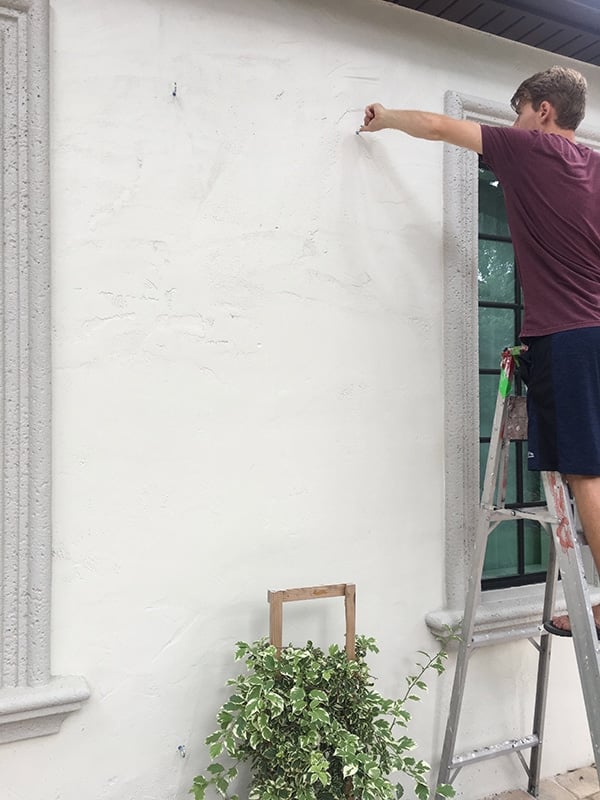
Before getting started, Lucas held up the first trellis while I stood back to direct.
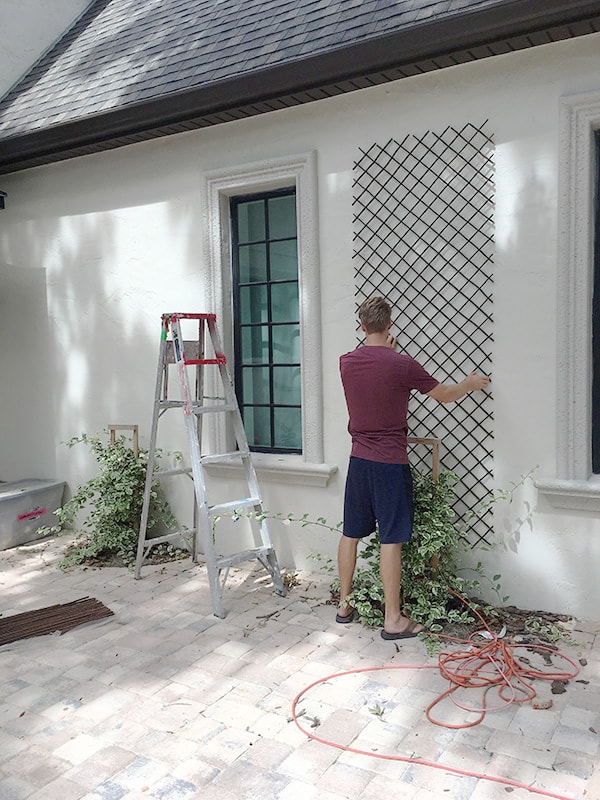
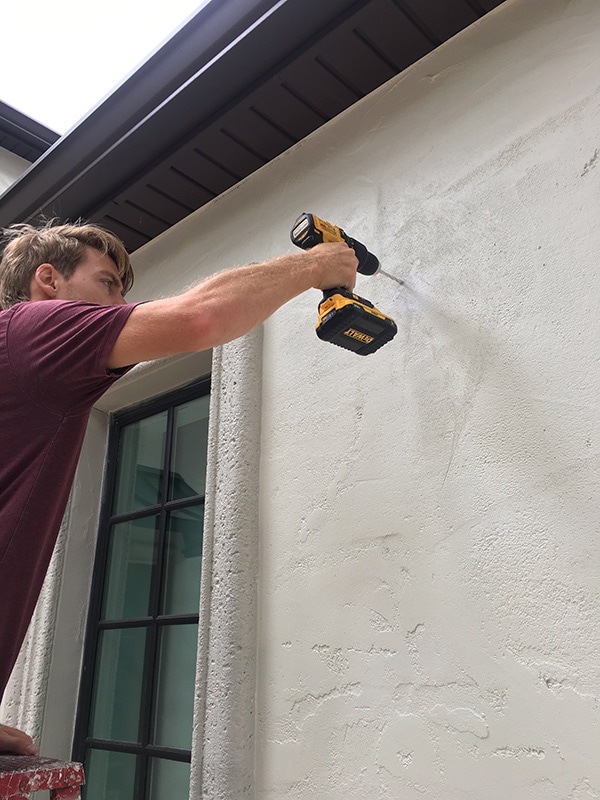
Once I was happy with the position, he held it in place as I marked the wall at four corners of the trellis where we wanted to place the hooks. The trellis was then removed, and Lucas drilled into the holes using the masonry bit that came with our anchor kit.
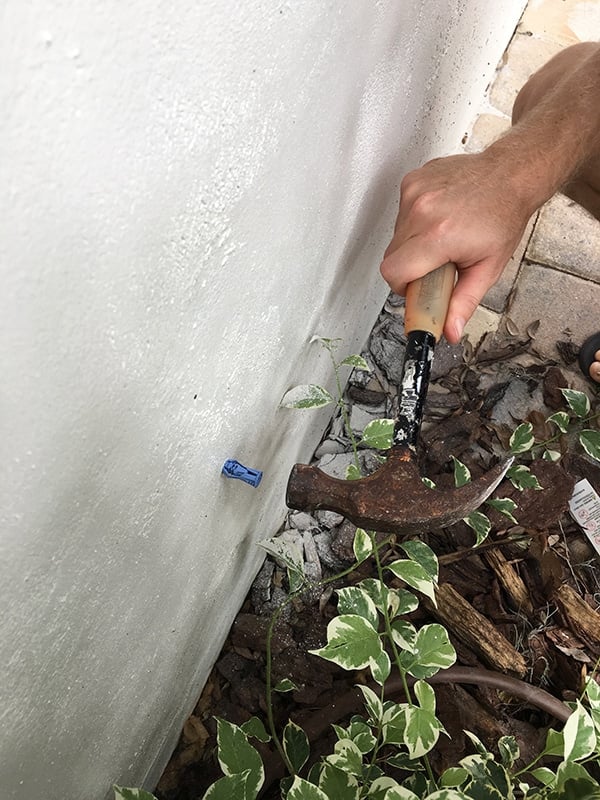
Next, the anchors were inserted and gently hammered into place.
Followed by the screw hooks…
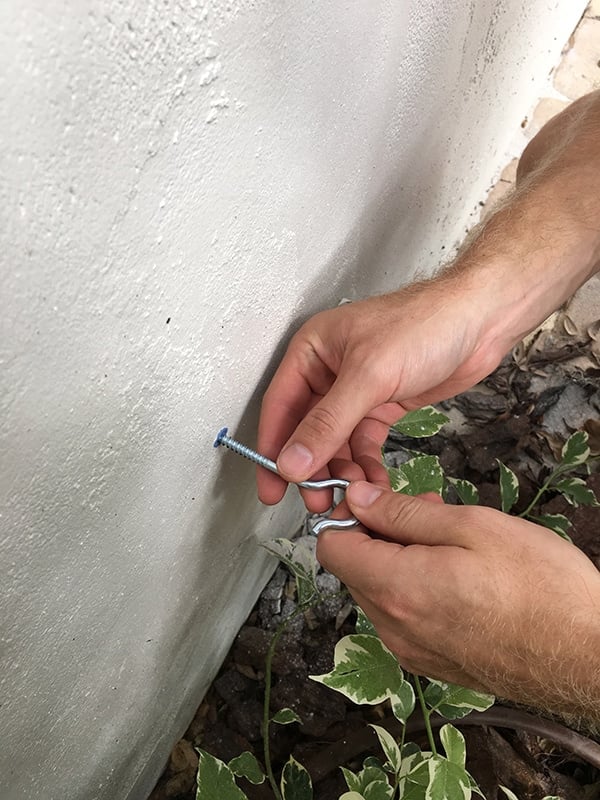
A wrench was used for the last bit to make sure they were nice and snug. These aren’t going anywhere!
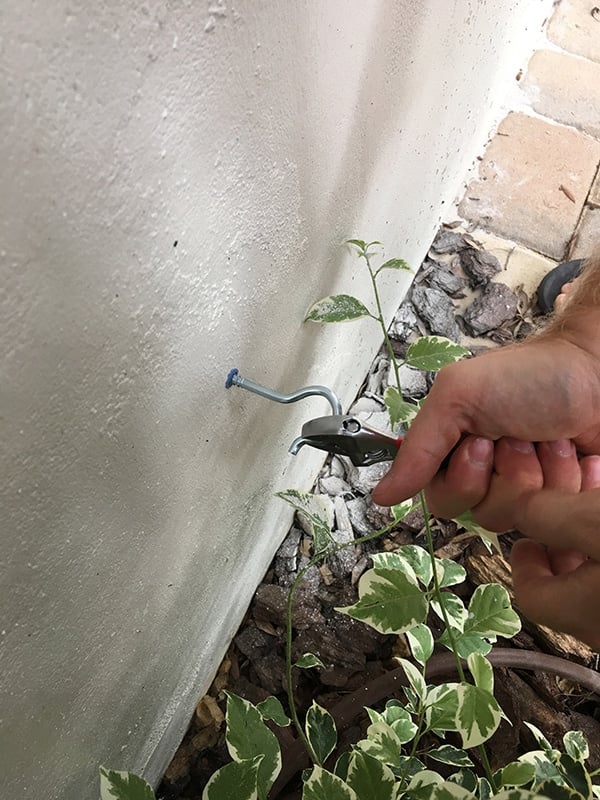
The process was repeated on each corner…
Moment of truth…
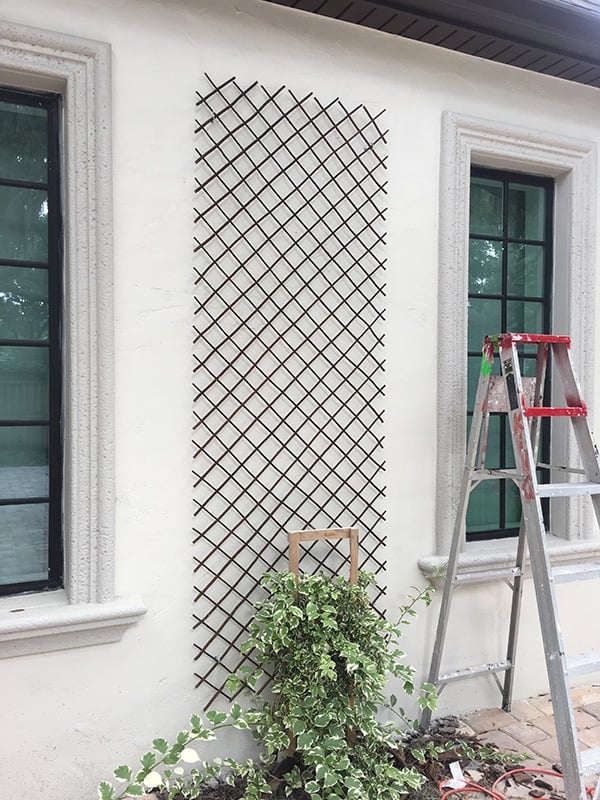
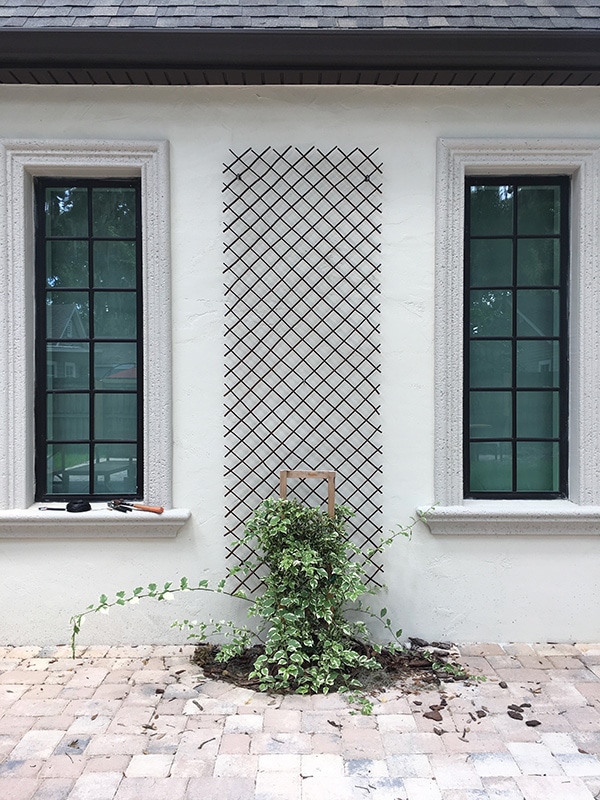
And it fit!
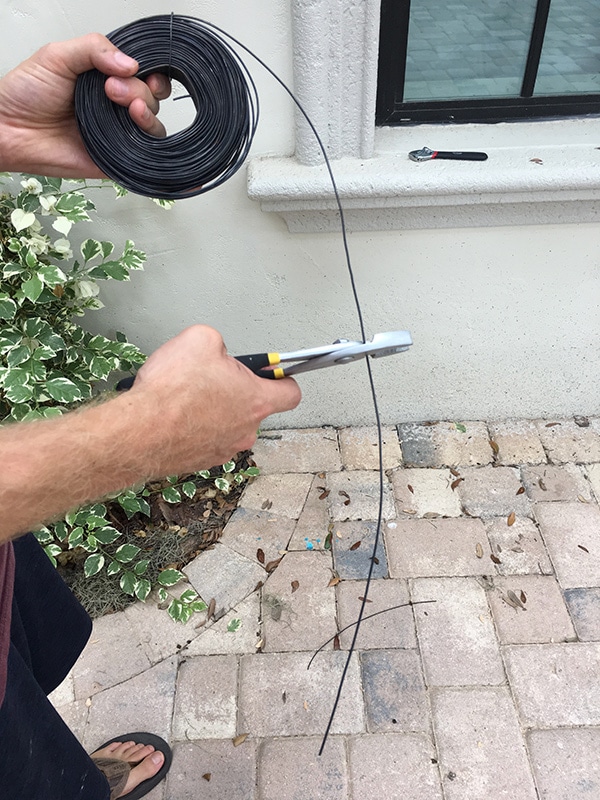
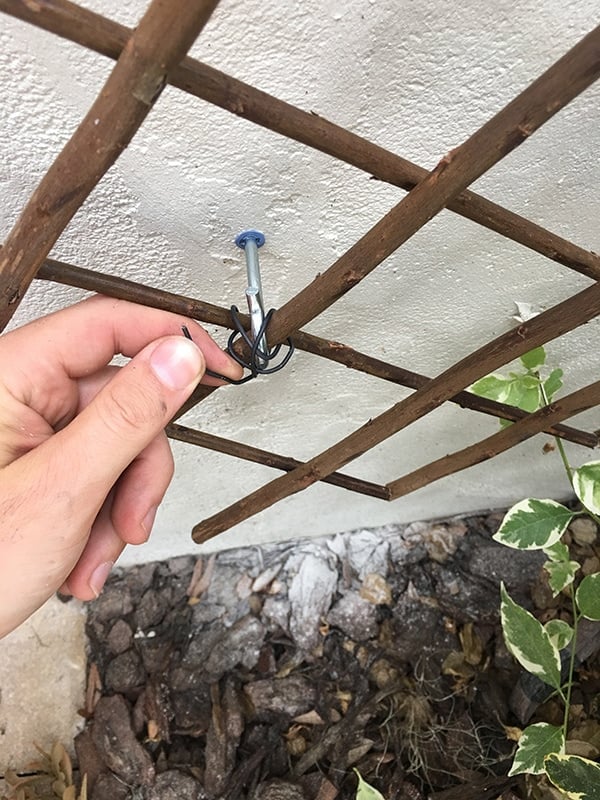
In hindsight we realized it would probably make more sense to face the bottom hooks down and the top hooks up so there’s natural resistance, but the trellis wasn’t going to budge unless you were physically trying to take it down. Just to be safe, we cut some wire to wrap around the hooks.
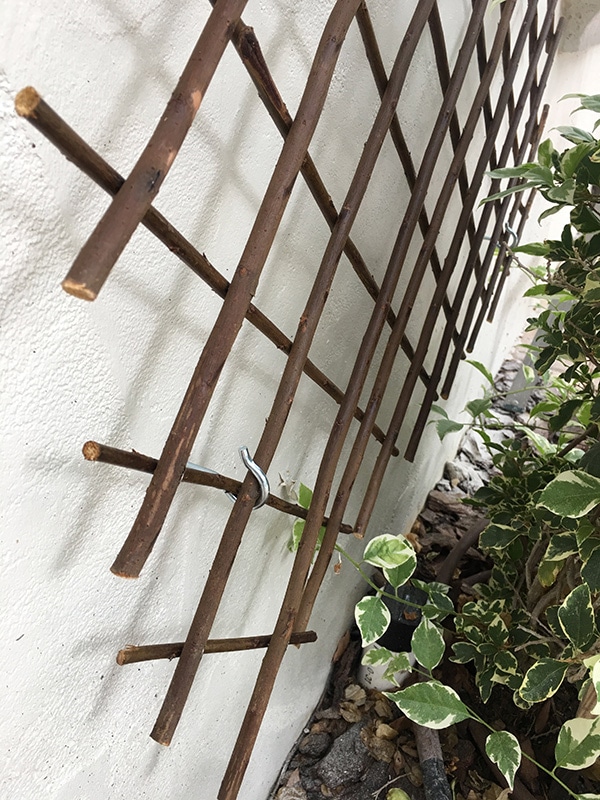
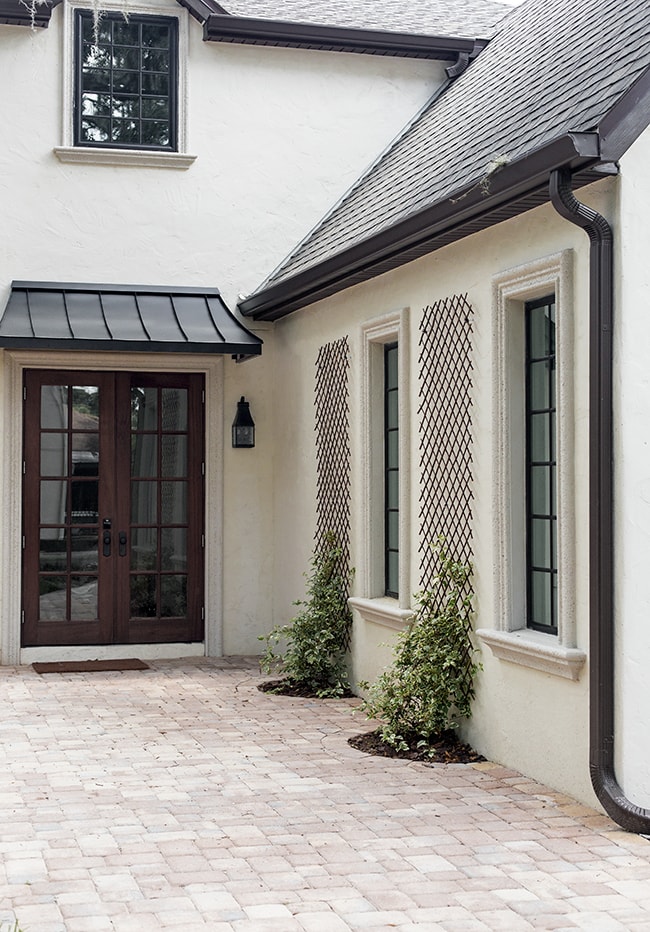
The trellis sticks out a few inches from the wall, which should be a good distance to allow the bougainvillea to weave through.
Since the expandable joints make the trellis easily movable, we decided to add a fifth hook in the center to keep it from shifting.
That did the trick!

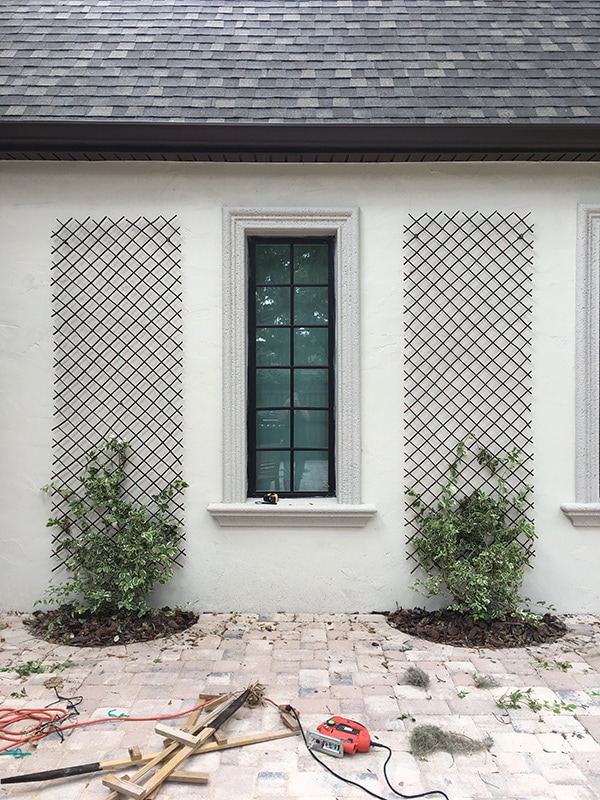
And our first trellis was ready to roll…
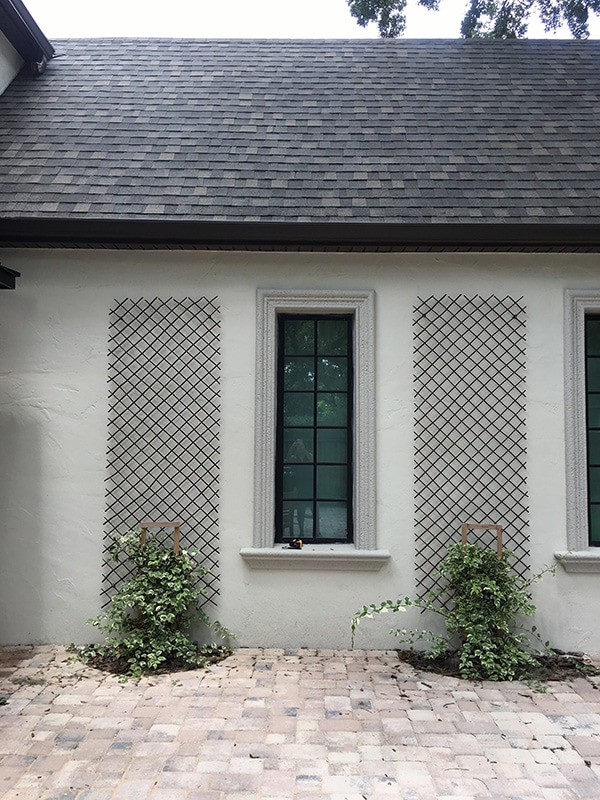
Followed shortly by the second:
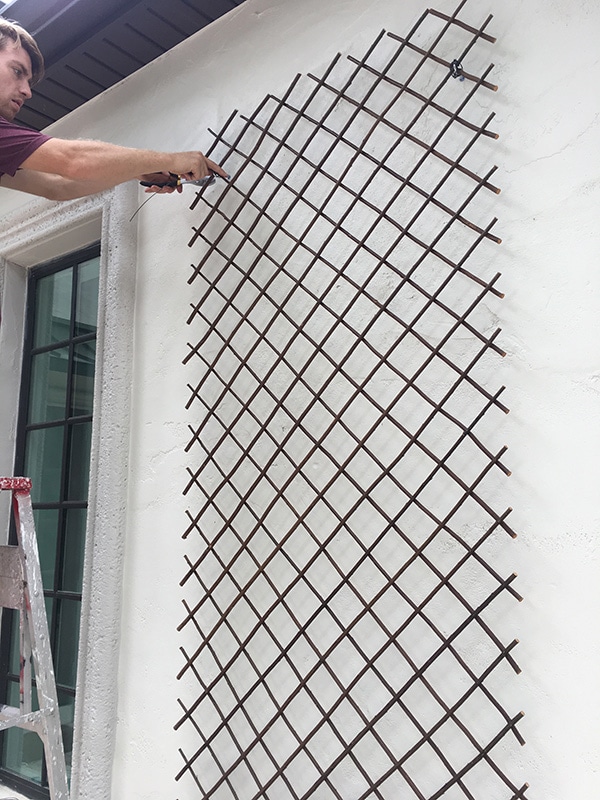
Finally, we had to remove the old wood trellis and get these bougies climbing. We used a jigsaw to cut out the old…
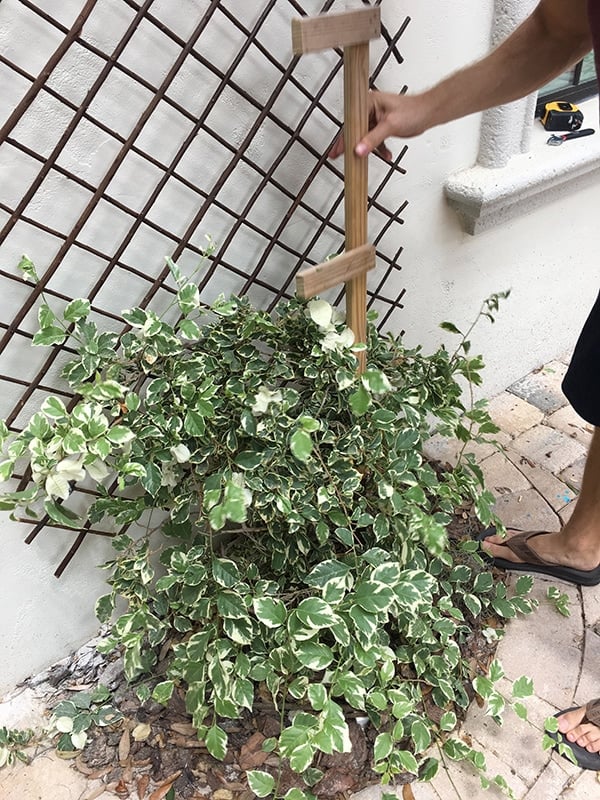
Then carefully pulled apart the branches and wrapped them around the new trellis. No real rhyme or reason to this, we just tried to be as careful as we could (although there were a few casualties in the process).
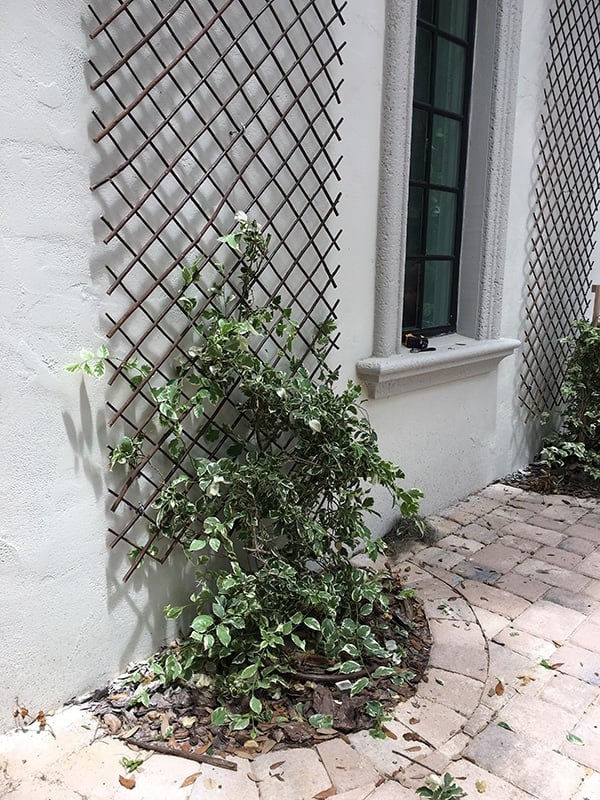
But these plants seem pretty hearty and have been thriving in the past several weeks, so we’re hopeful they’ll take to their new home.
Think tall thoughts, little bougies!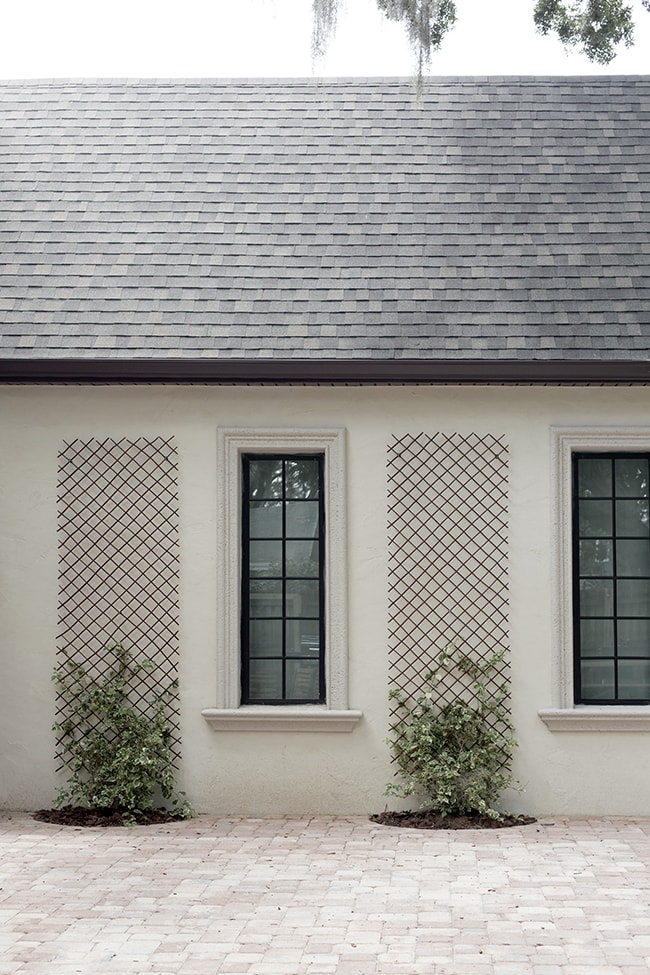
They’ve been hanging out here for 17 days and not much has changed yet, but they aren’t regressing so that’s a good sign…
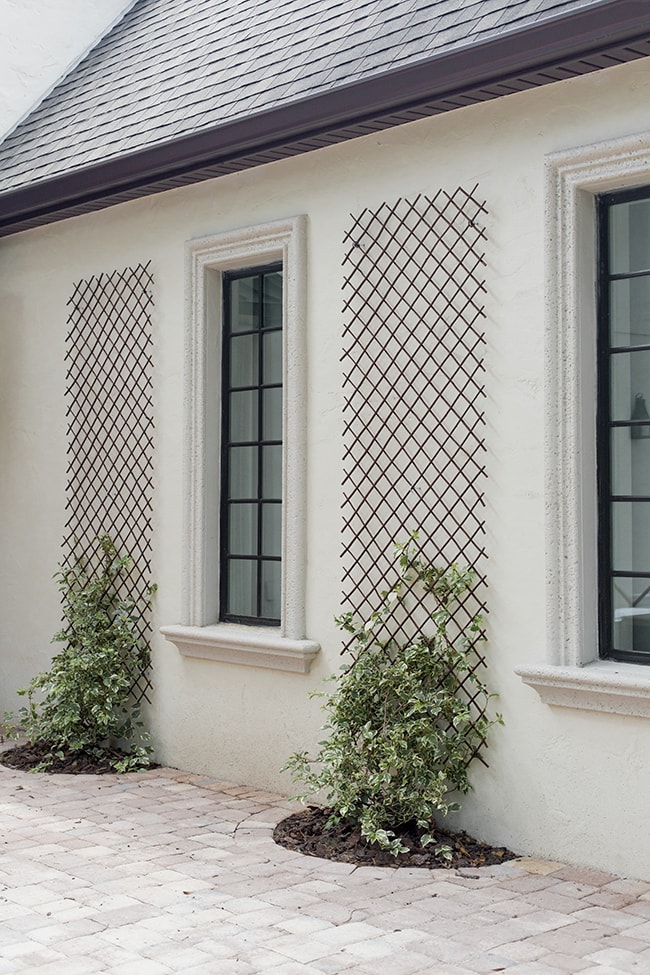
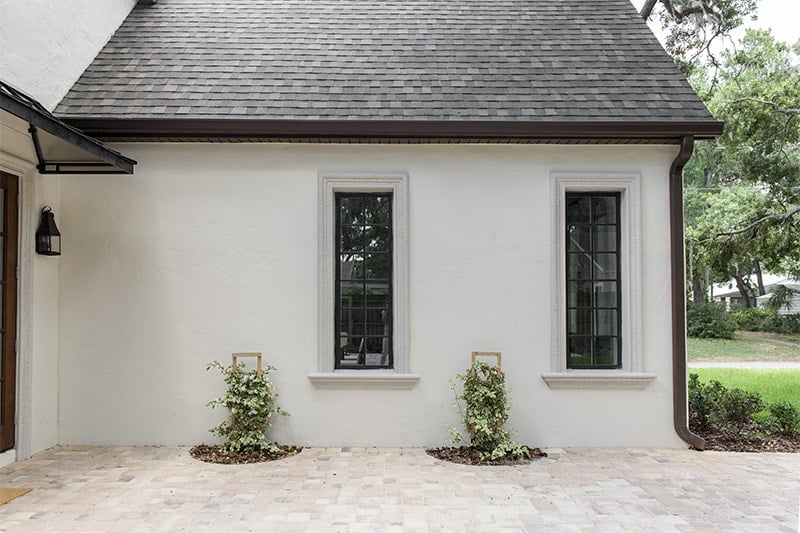
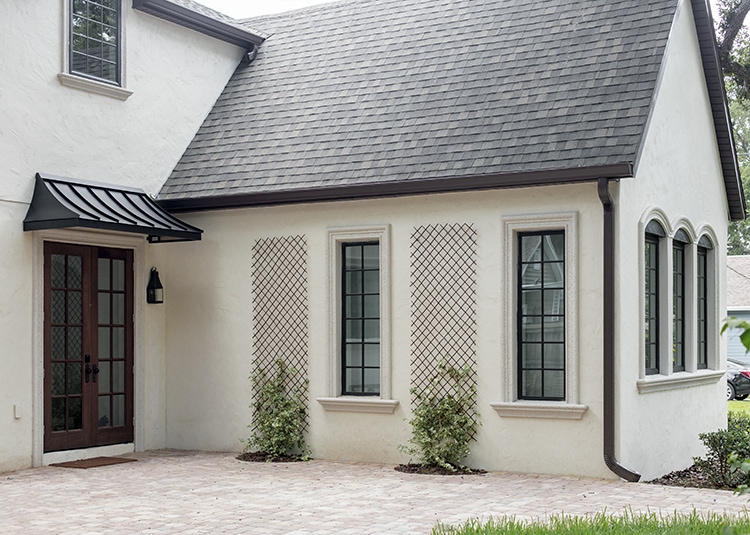
The addition of the trellises have definitely made a noticeable difference on the patio.
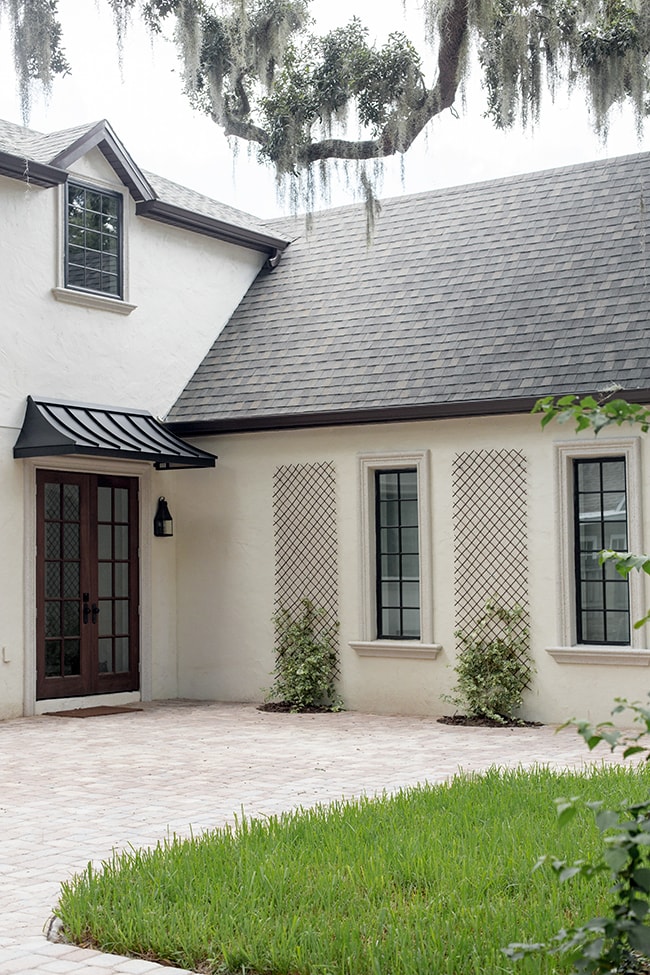
They have such a lovely presence and fill the space quite nicely. And the entire project cost less than $70 (that’s $35 per trellis!) and under two hours from start to finish.
We’re also loving the view from inside…
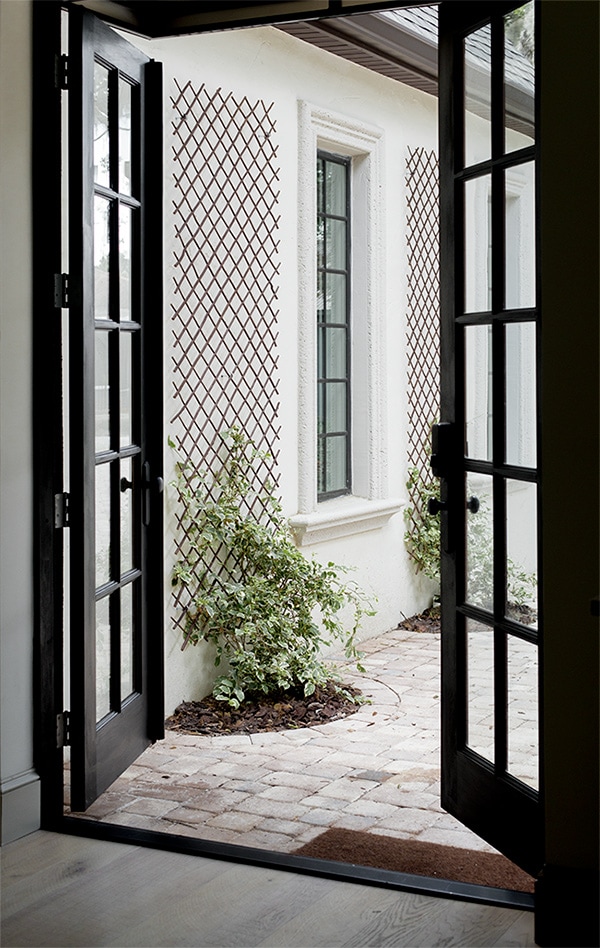
Ahh… it’s the little things in life. So happy with the way our home is shaping up.
If you have an empty section of wall on the outside of your house, I highly encourage you to give this a try! There are lots of ways to make it your own and you can use planted pots if you don’t have any ground space. Landscaping and greenery really does make such a difference, and will especially pay off over time as they fill in. Looking forward to watching them grow!
More Heights House updates, coming soon! In the meantime, you can follow the progress in real time on my Instagram stories and see what’s been inspiring me lately on Pinterest. Happy mid-summer!


Annie says
Hi, will this do any damage to the stucco in the long term?
Jenna Sue says
The bougainvilleas only attach to the trellis, not the stucco like ivy or other invasive plants, so I don’t see how it would!
Angela Schiraldi says
Hi,
I bought the exact same anchors and hooks. The hooks don’t seem like they will fit into the anchors. Are they supposed to be like that?
Thank you, Angela
Jenna Sue says
Our hooks were a bit larger than the screws that came with the anchors but they worked just fine! Try one out before drilling into your house to make sure 🙂
Brenda says
Jenna I would recommend you tie the limbs to the trellis with loose twine otherwise when you are trimming the plant back (at least once a year) you will have to pull the thorny limbs from the trellis.
Brenda says
I would recommend that you don’t weave them into the lattice rather I would use twine and loosely tie to trellis as bougainvilleas naturally grow out in all directions. Reason behind this is you will need to cut the plant back from time to time (annually) plus when you have unruly stems protruding in an undesirable place and if you have to pull those thorny plants from the lattice your hands will he cut up from the thorns.
Jenna Sue says
Thanks for the info Brenda, that’s good to know! We’ll have to try it 🙂
Lisa says
That’s a great idea.
Victoria says
I love that. That is going to look beautiful. I love having jasmine outside my back door and the smell in the evening.
Jenna Sue says
We almost went with star jasmine instead — I’m sure it smells amazing! <3
Lisa says
So pretty! If those are the type of bougainvilleas I am familiar with, they will not weave themselves onto the trellis of their own accord. You will have to guide them. Be careful of the giant thorns!
Jenna Sue says
Good to know! We’ve been keeping an eye on them and guiding the branches. Hopefully they’ll want to grow up! 🙂
Colleen says
Love this Jenna!!! So beautiful!
Jan says
That’s one of those quick and inexpensive designs that add real impact. What a difference! Beautiful!
Teresa says
Pretty, very pretty!