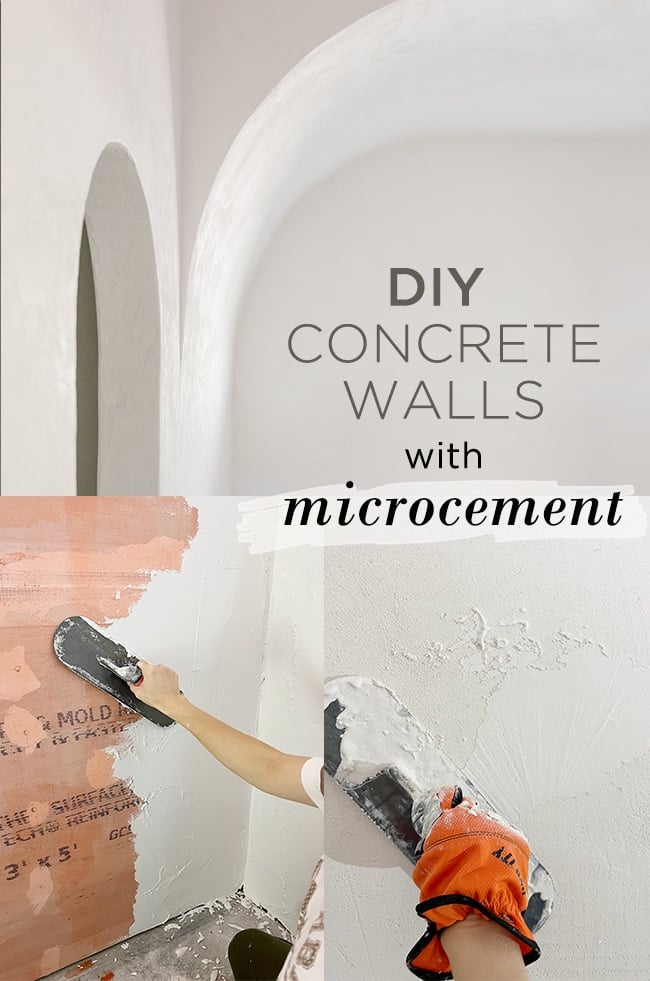
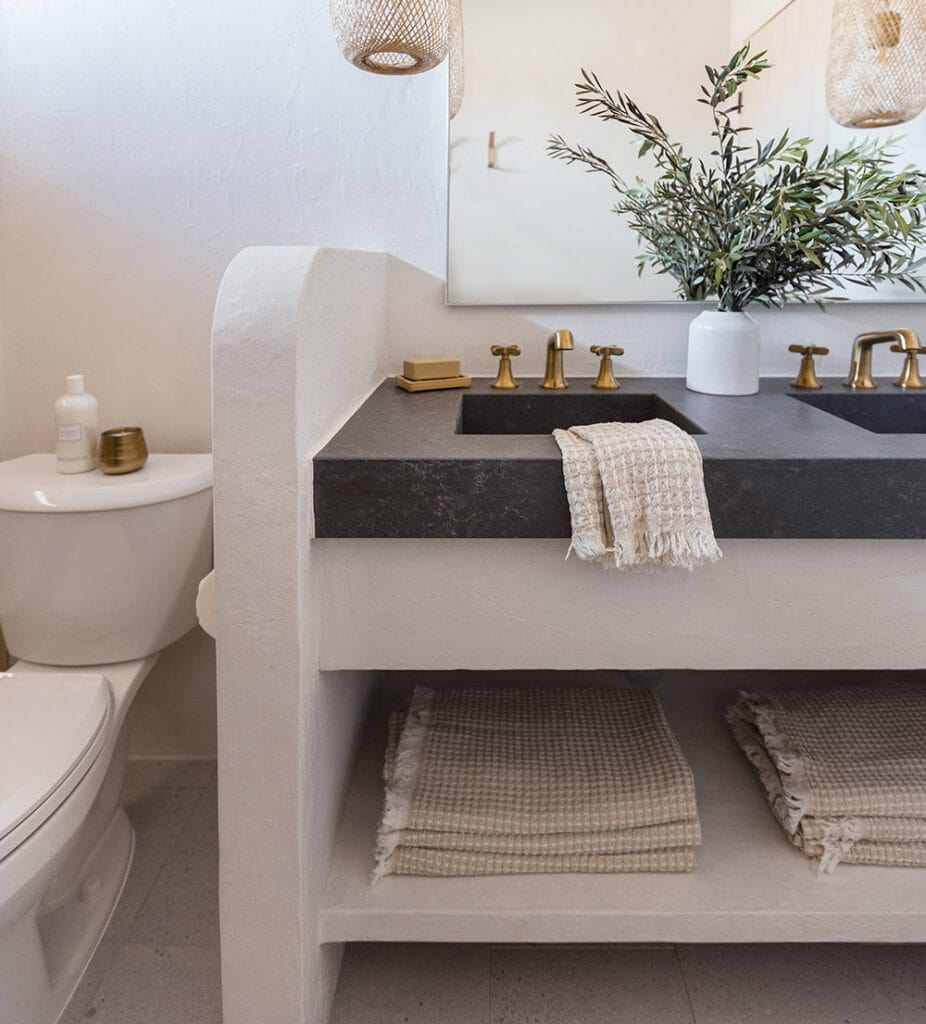
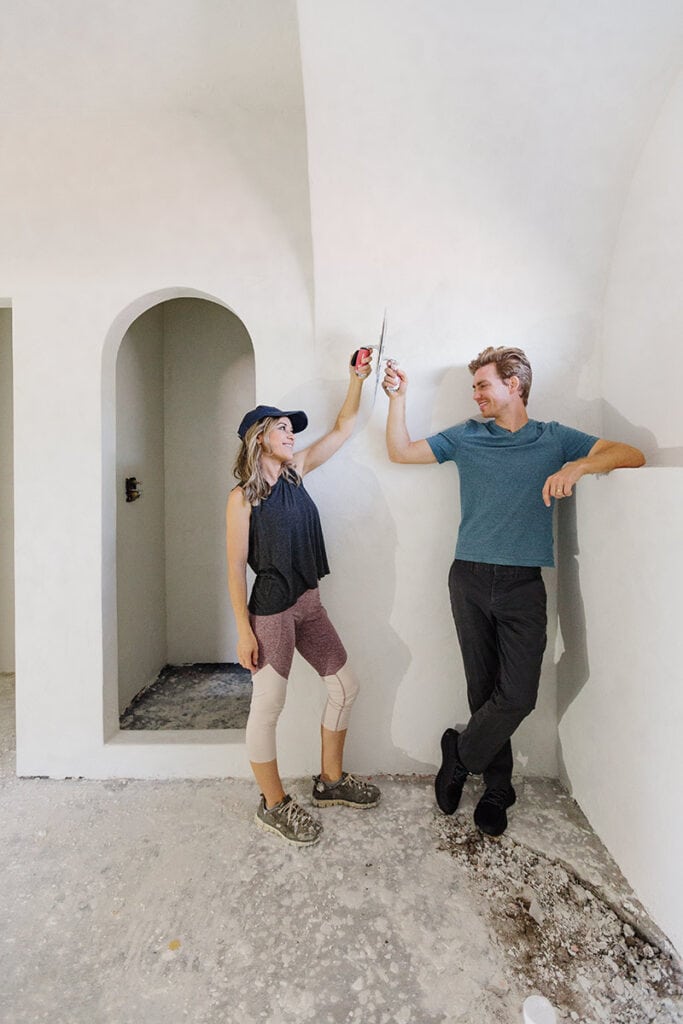
Our Hacienda Hideaway bathroom has been transformed with DIY concrete walls, and I’ve just discovered my new favorite wall texture technique! Today I’m sharing all about our experience with microcement:
Jump to:
What is microcement?
Microcement (also called microconcrete) is a polymer modified cement-based coating which can be applied thinly to almost any surface, both indoors and outdoors. It bonds strongly to nearly everything including drywall, wood, concrete and tile. It can be applied to walls, floors and countertops with minimal prep, and you can use different application techniques to achieve a wide variety of looks.
Microcement is ideal for wet areas such as showers and kitchens (applied over a waterproofing membrane), and it’s stain and crack resistant. It’s low maintenance, hypoallergenic and zero VOC. It’s also extremely cost effective per square foot, requires minimal tools and no experience or expertise.
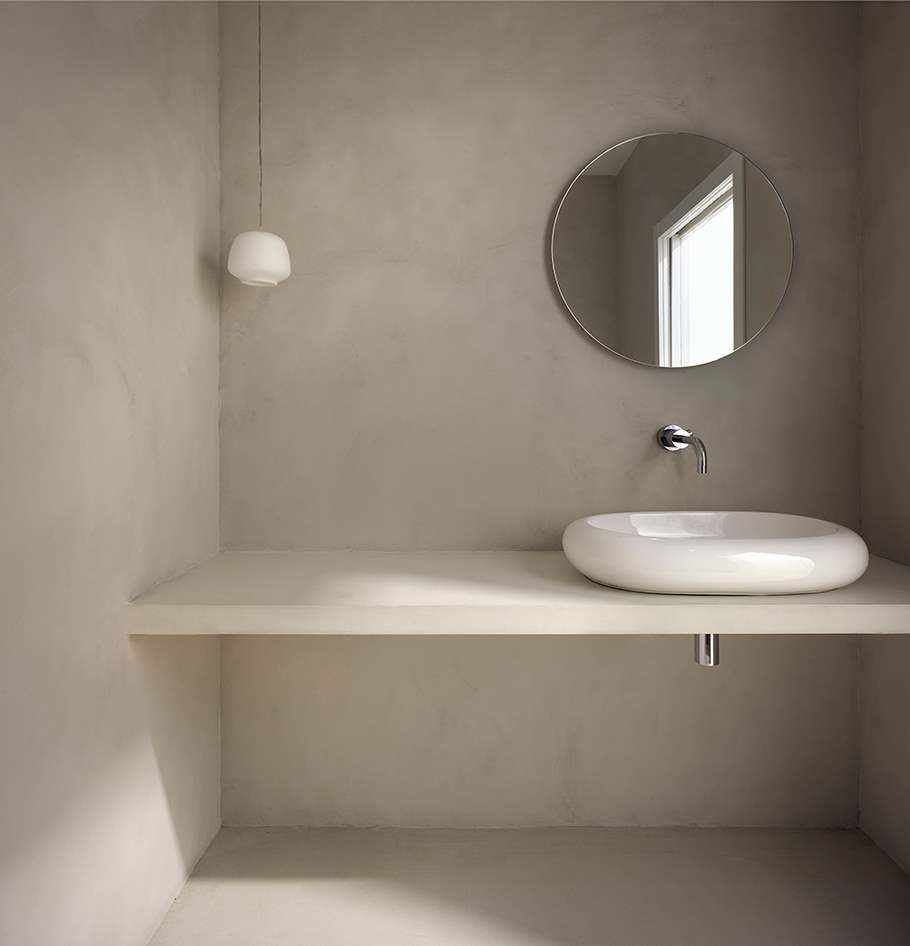
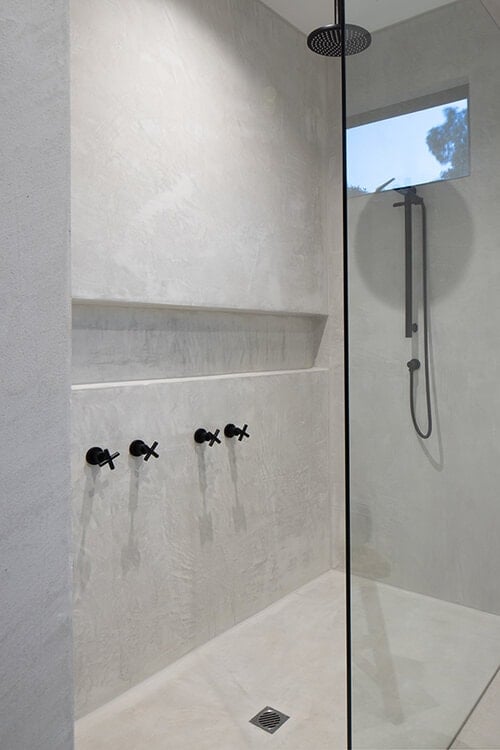
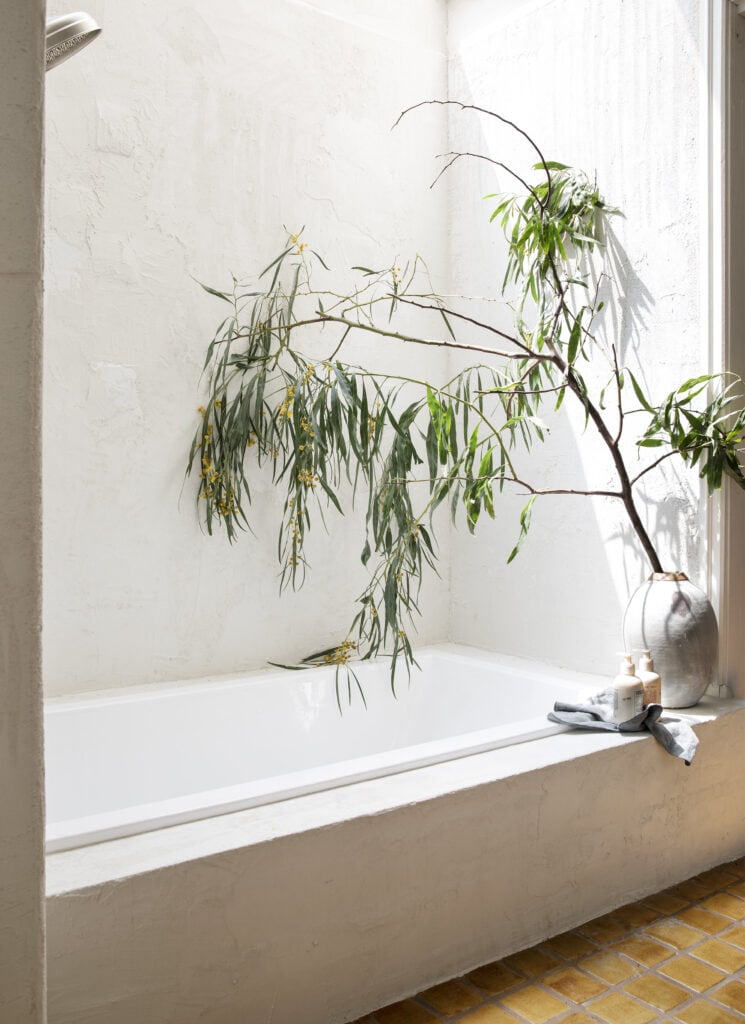
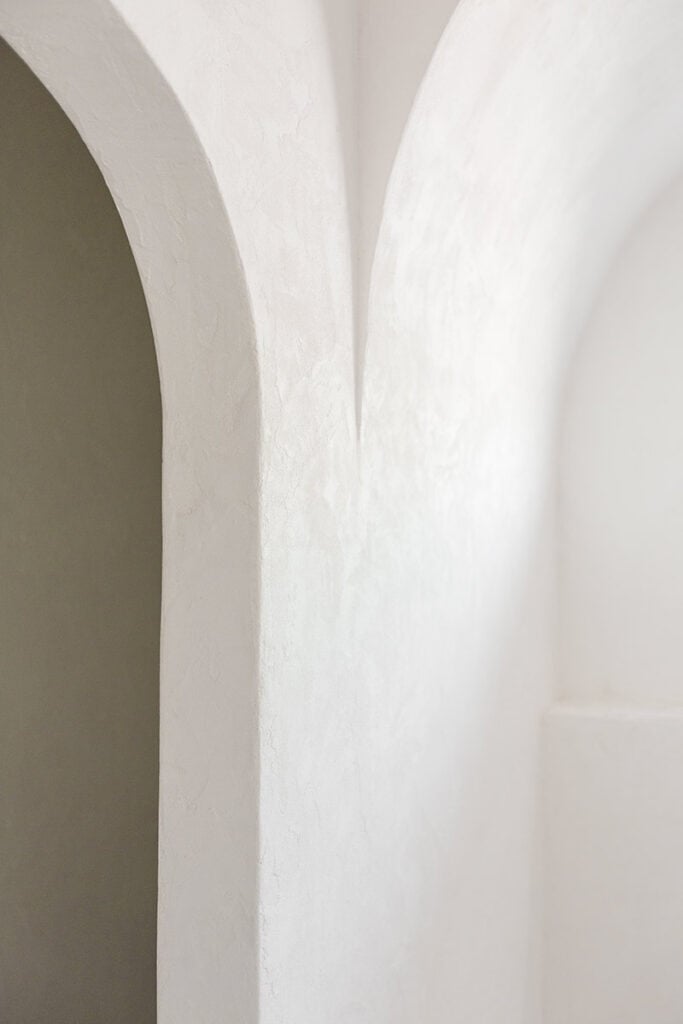
Concrete walls are the norm in many parts of the world, known for their durability, minimalist and clean aesthetic. It was the perfect choice to create a spa-like feel (on a budget) in our rustic mediterranean bathroom!
Supplies
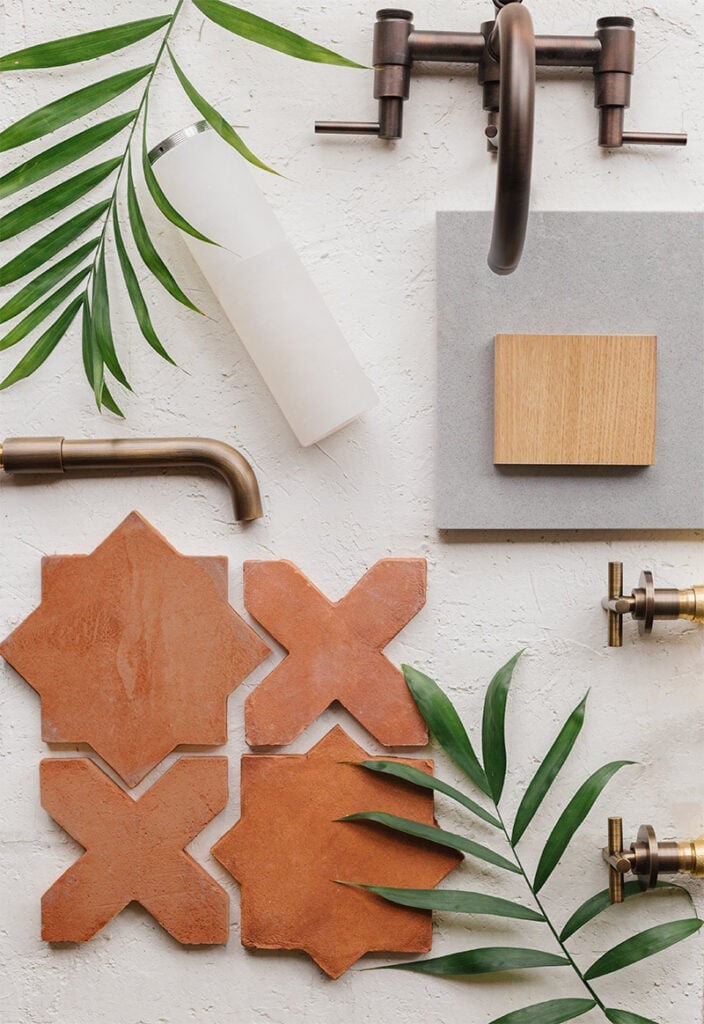
- Microcement (we used SureSpray + WhiteWater color packs)
- For wet areas: ElastoShield or other waterproofing membrane
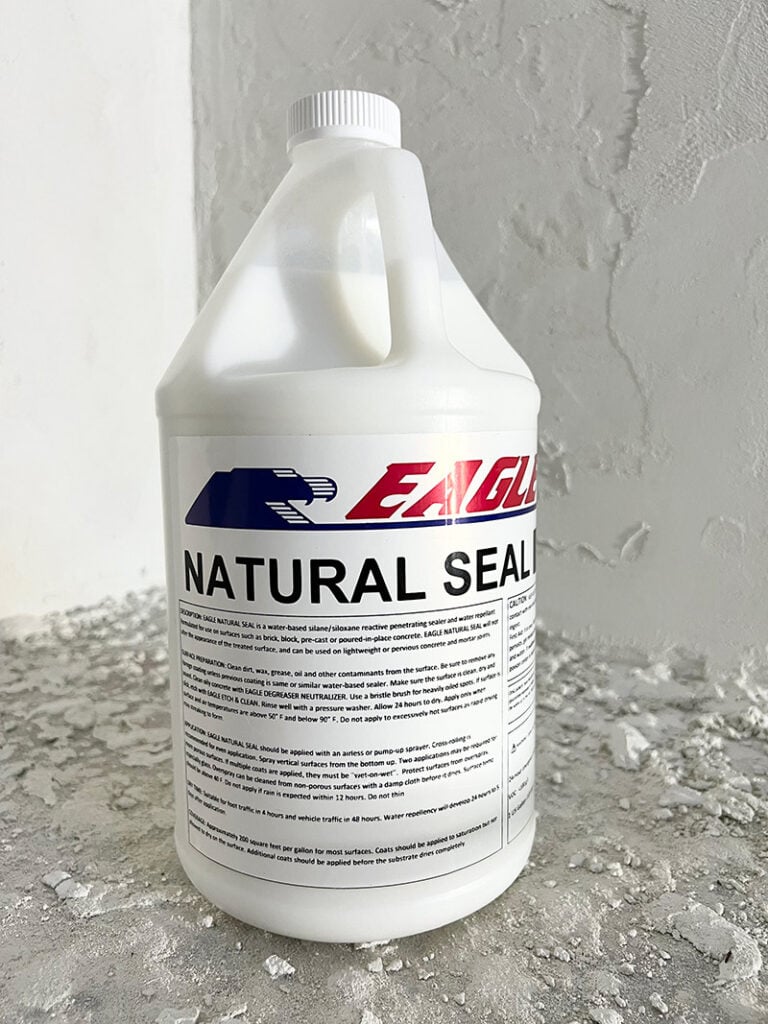
- Sealer: we used SureCrete XS327 in matte for the shower walls, and Eagle Natural Sealer for everything else
- Pool Trowel
- Foam roller for sealer
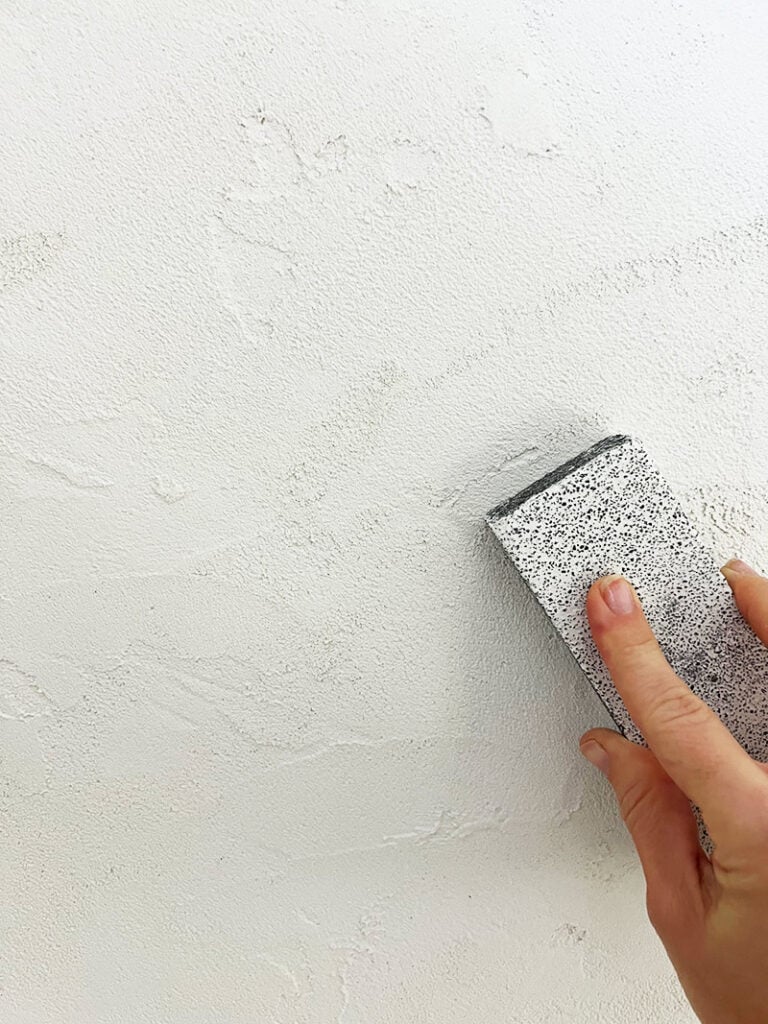
- Rub brick
- Paddle mixer + drill
- 5 gallon bucket
How to apply microcement
Step 1: Surface preparation
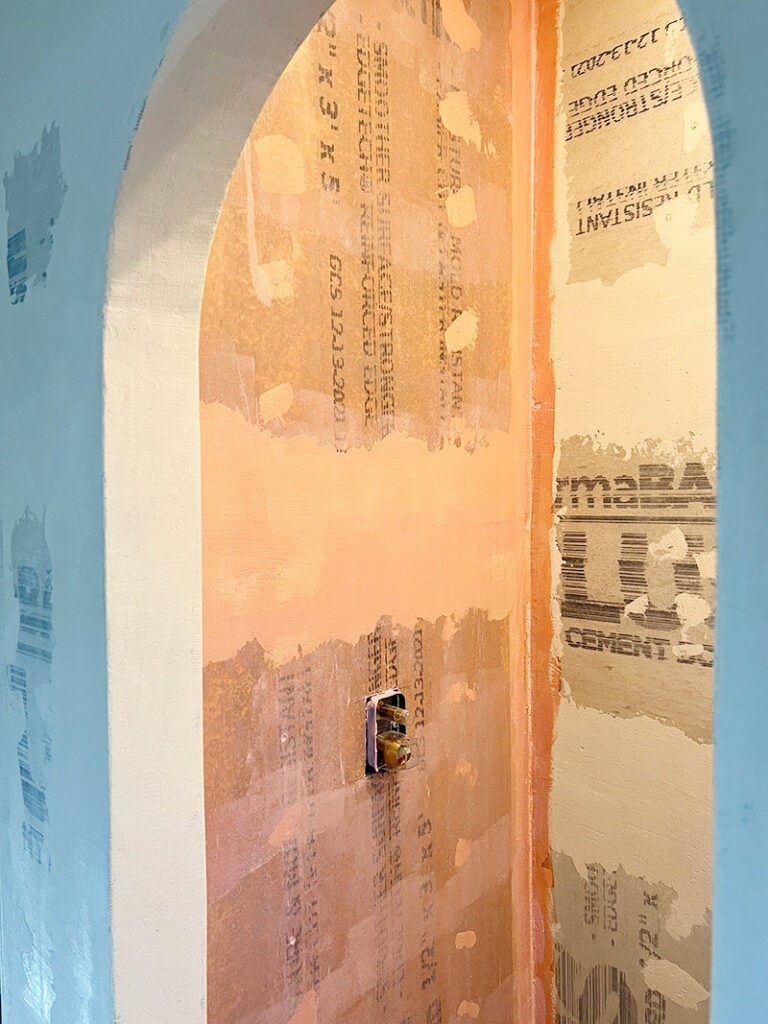
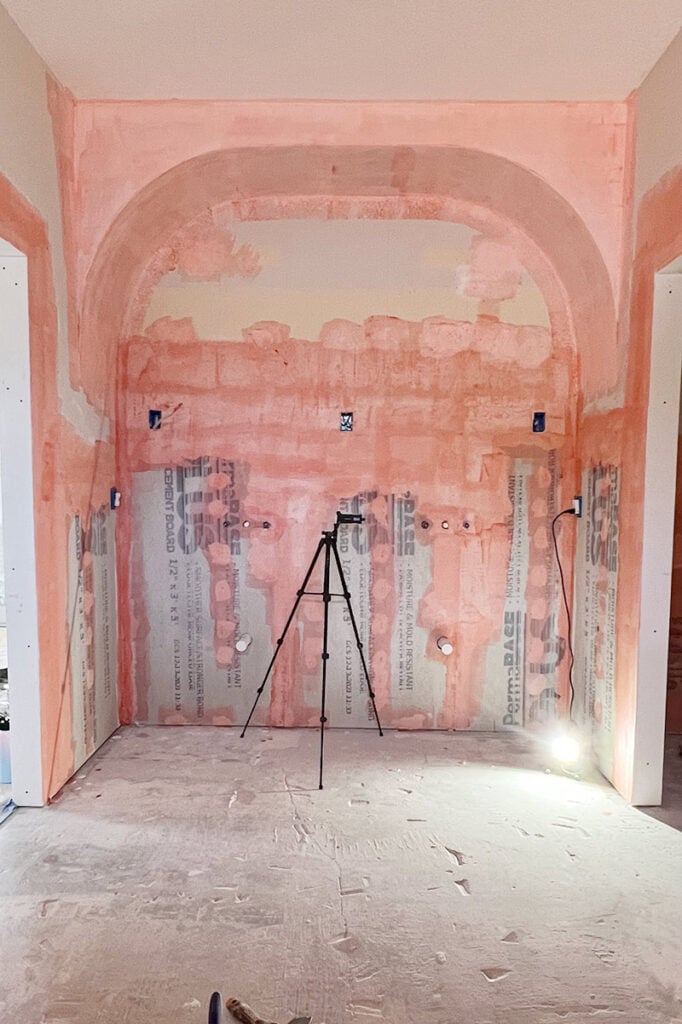
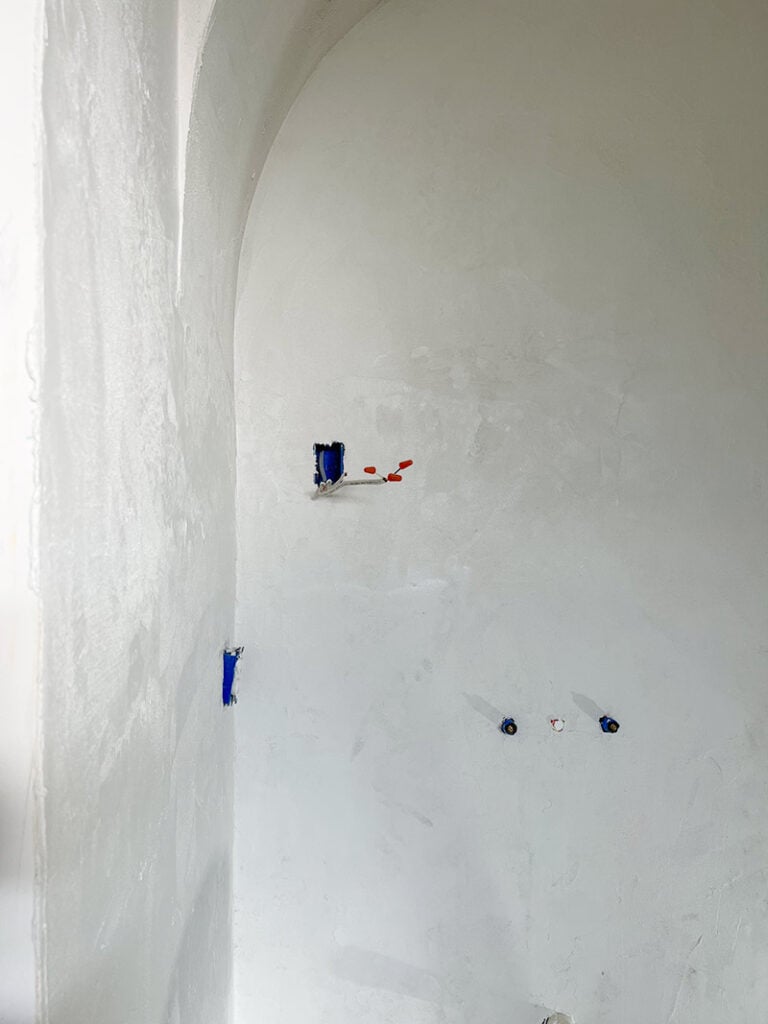
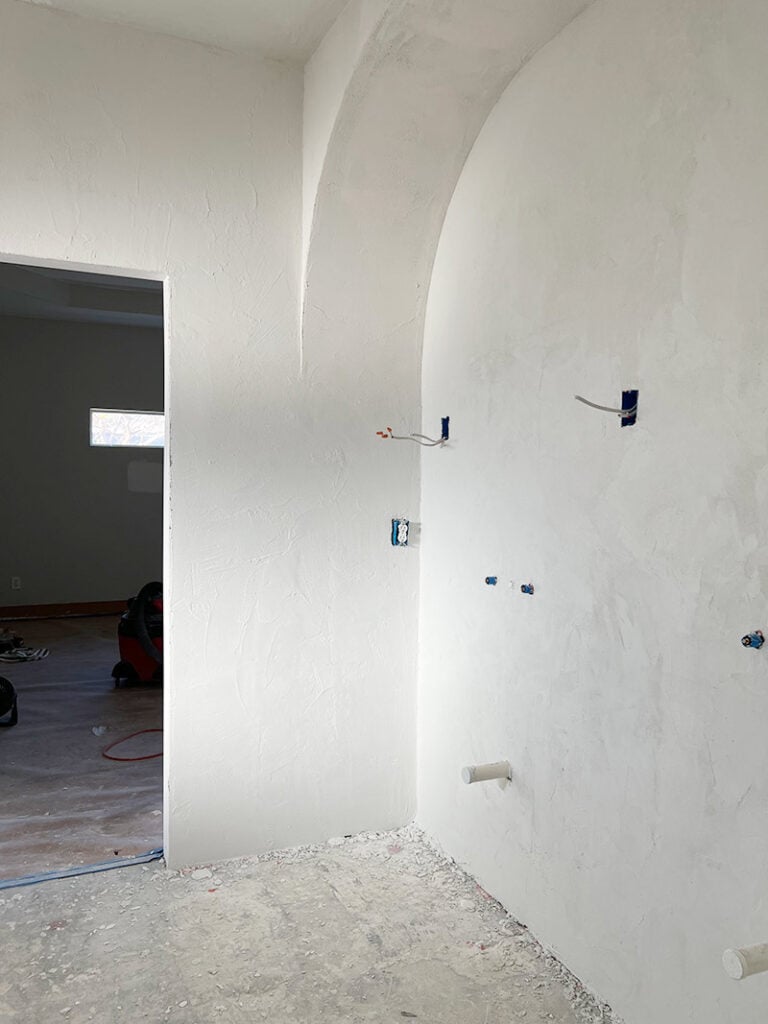
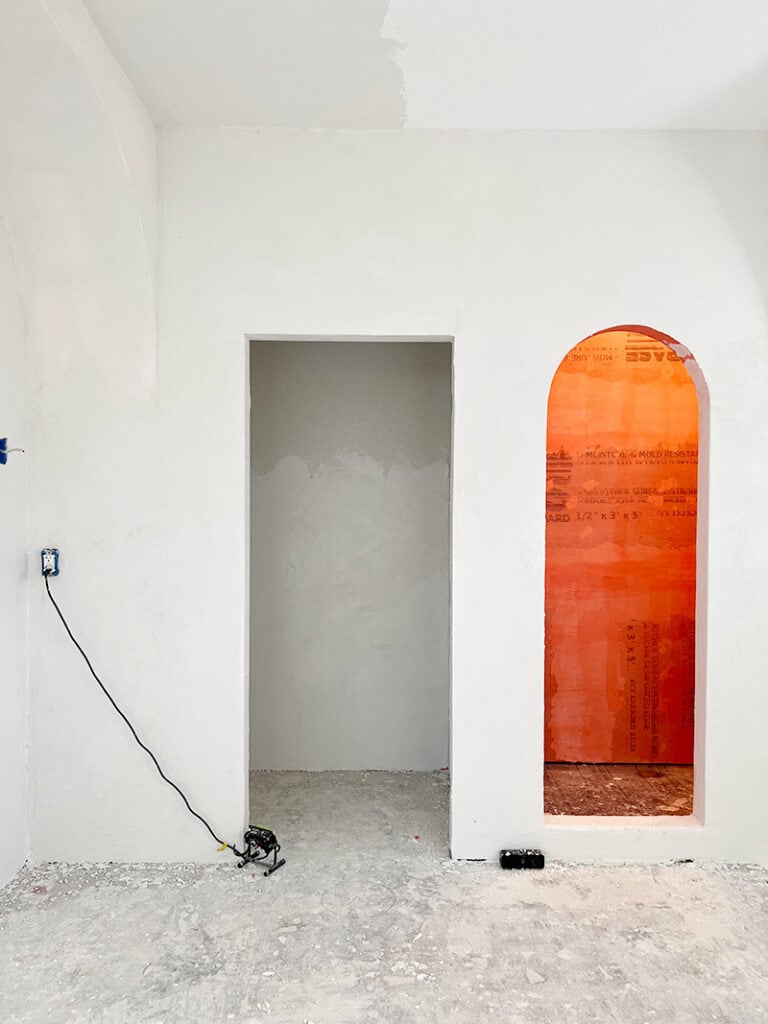
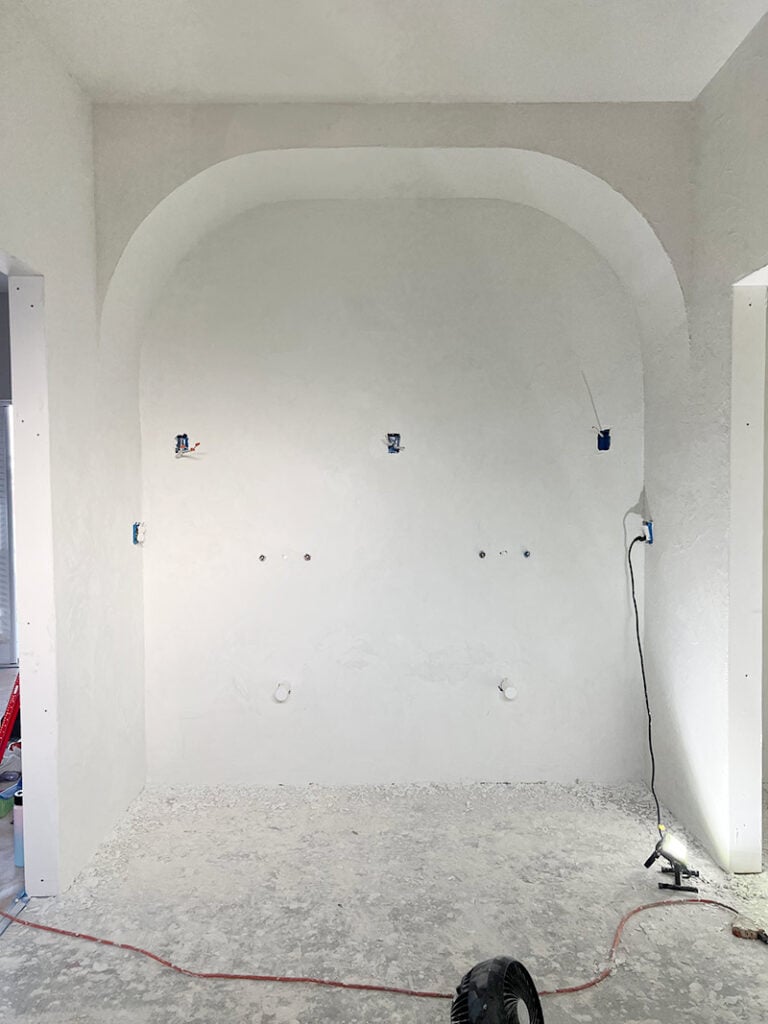
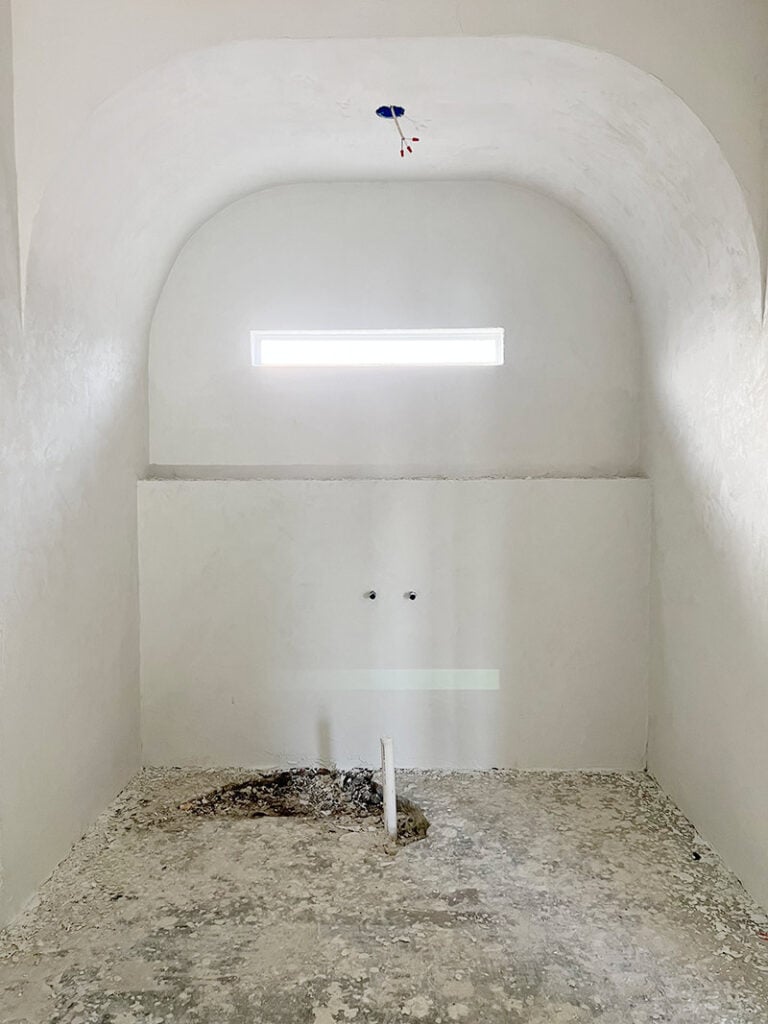
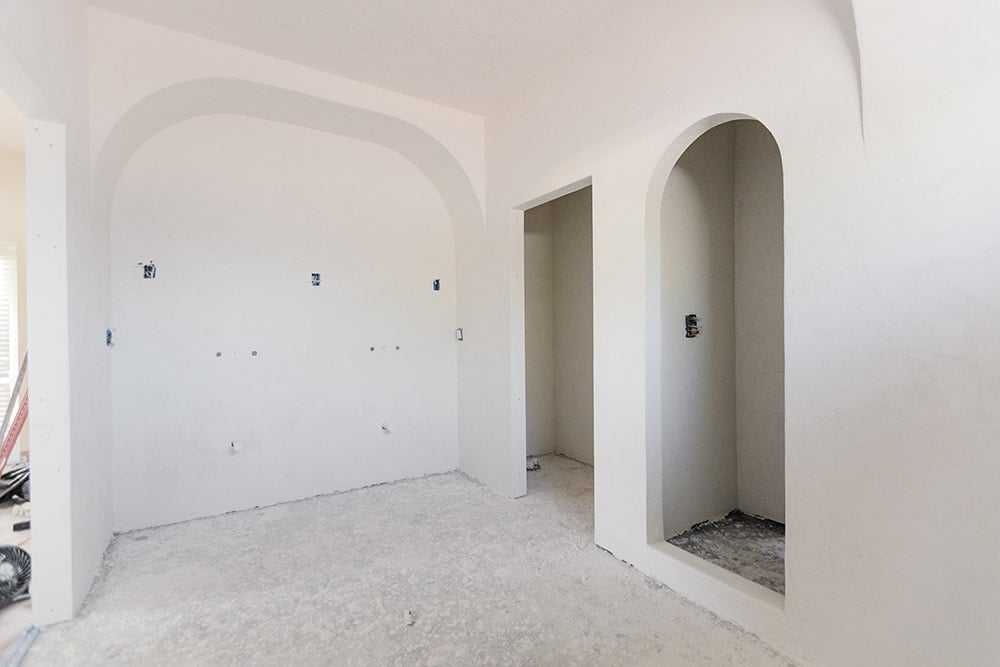
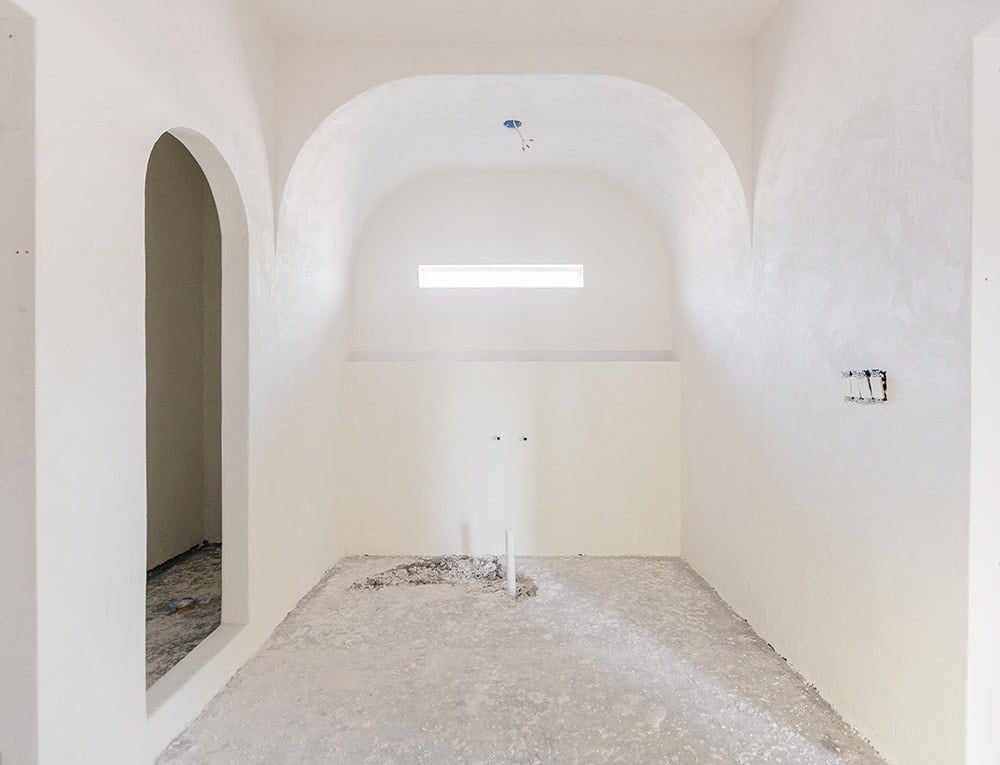
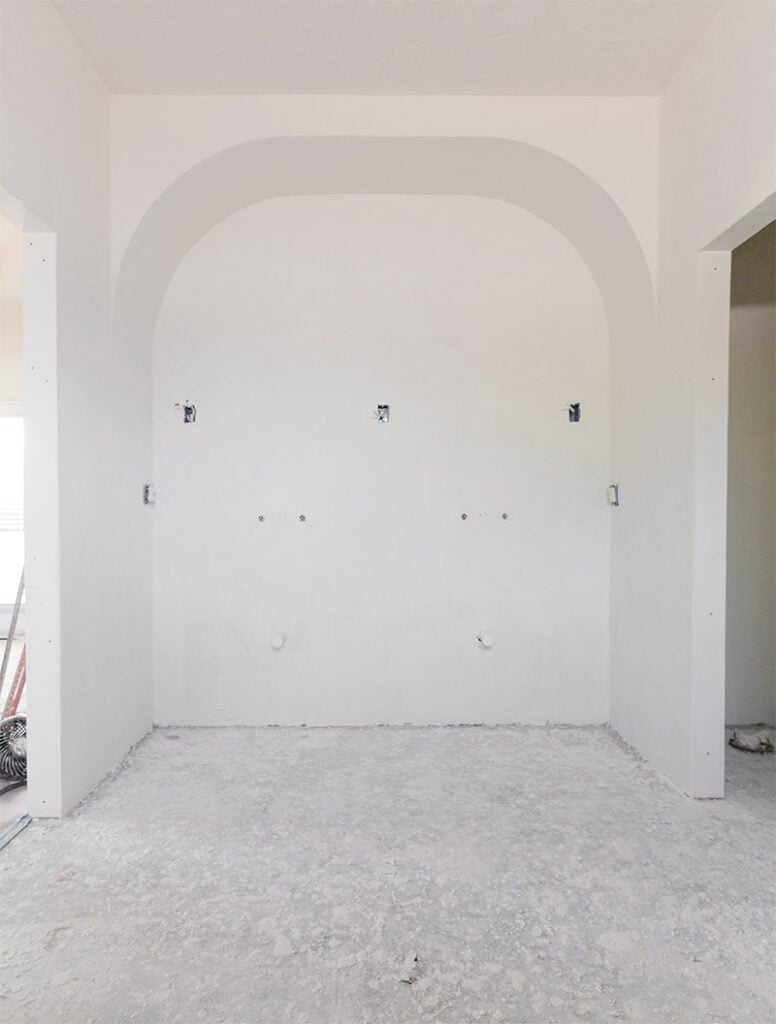
Microcement can be applied to any clean, sound surface including painted or primed drywall (smooth or textured), cement board or existing concrete walls. Our bathroom walls had both painted/textured drywall, and new cement board where the old tiled walls had been removed.
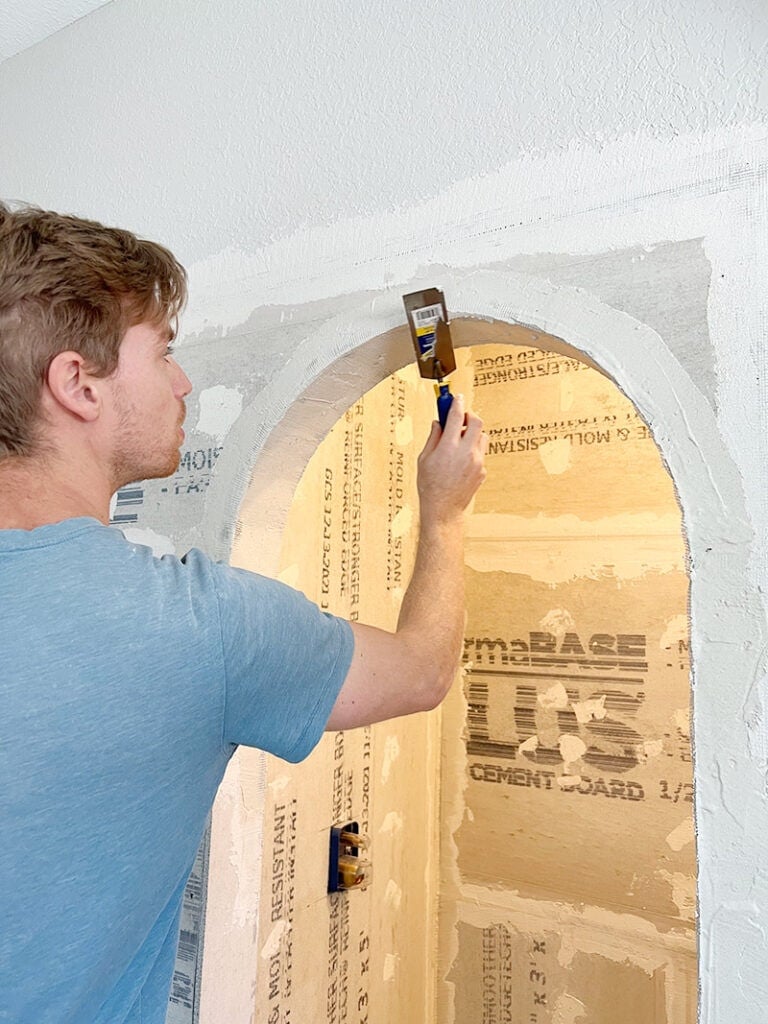
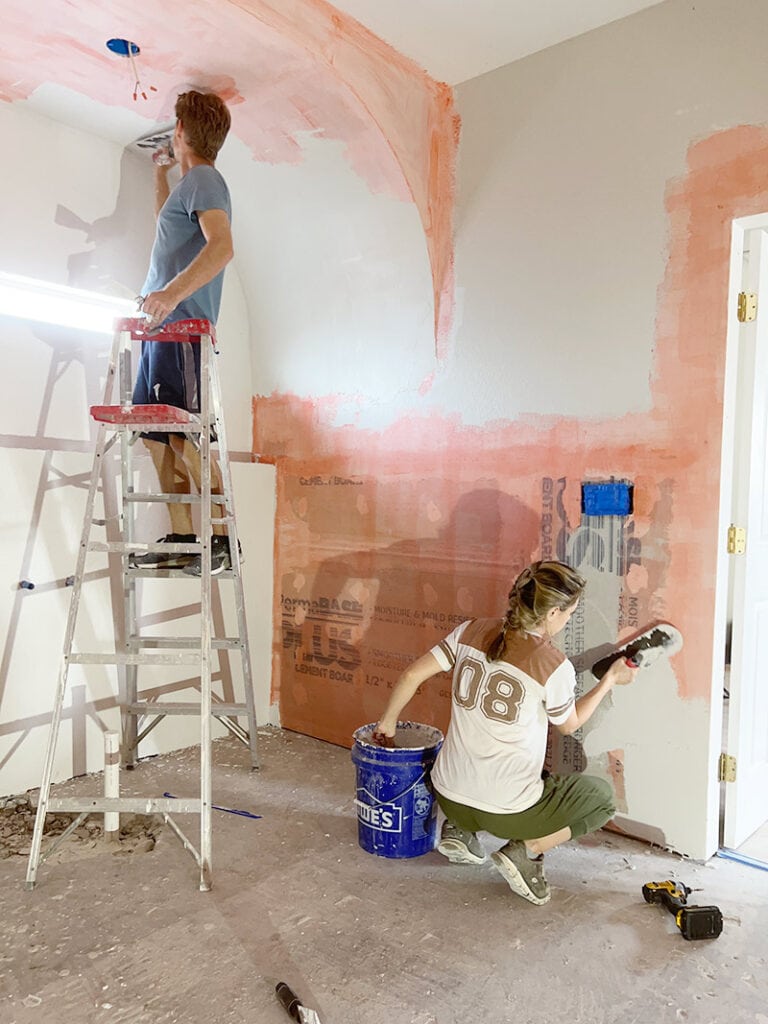
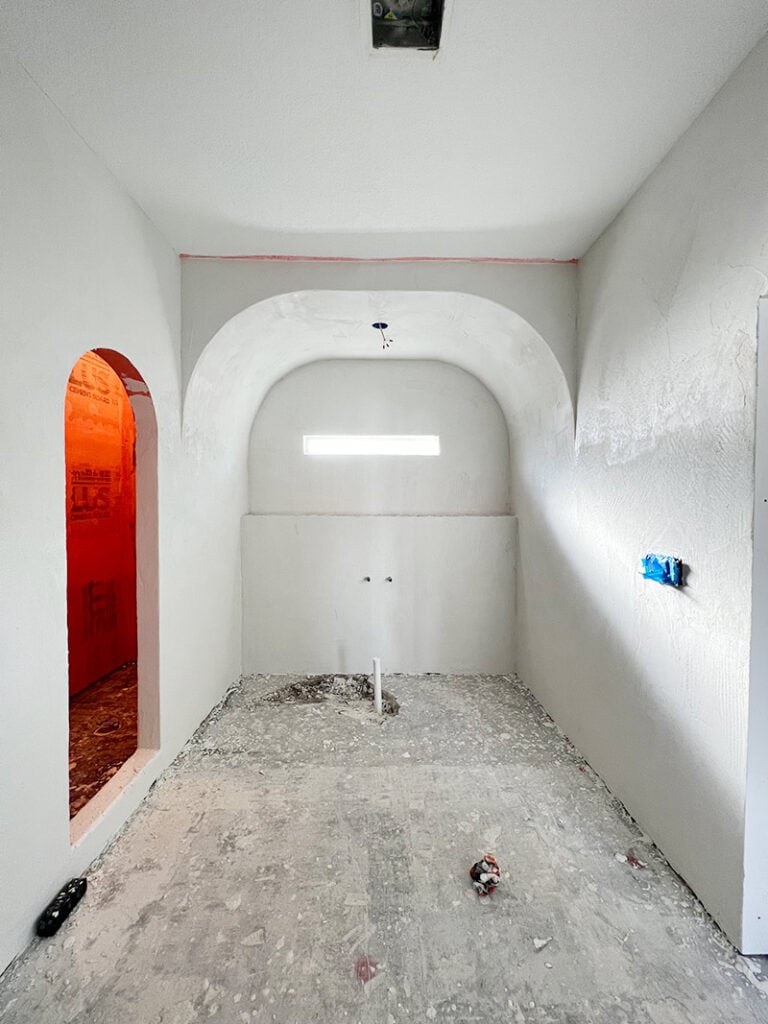
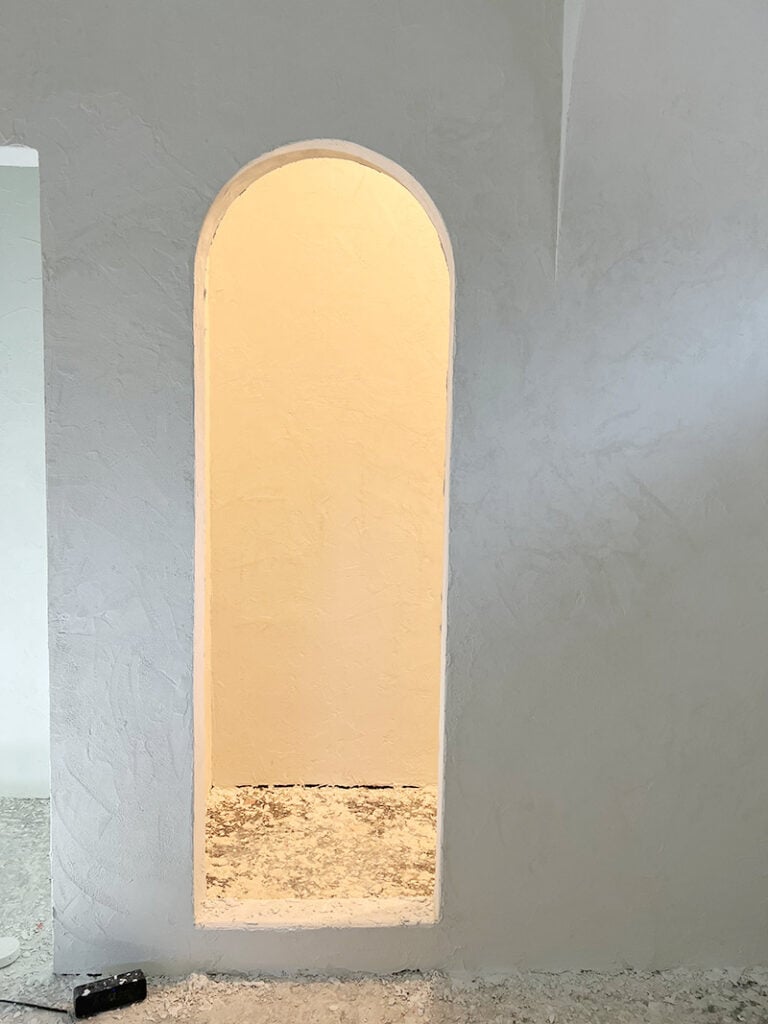
Lucas also built arches (tutorial coming next week!) and spent a couple weeks mudding, sanding, and filling in the seams. The microcement texture can hide a lot, but we wanted to make sure our wall surface was as flat and even as possible to start with.
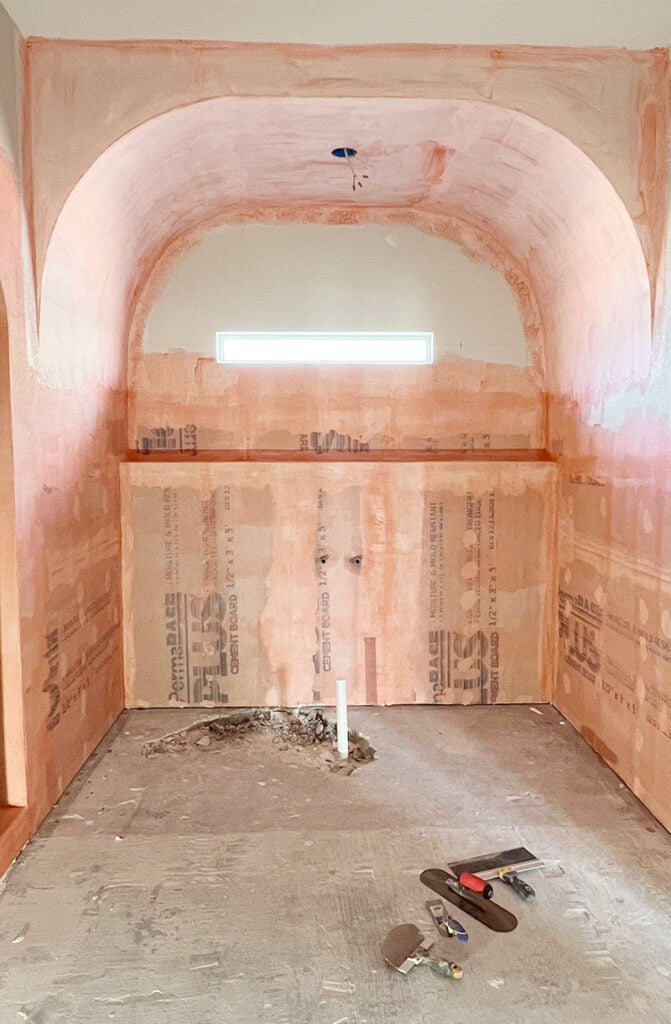
For wet areas like showers, a waterproof membrane is required first. SureCrete recommends two coats of their ElastoShield for this (you can also use this more affordable version). Since we were using microcement in the shower, we first applied the ElastoShield over the cement board.
Waterproofing is not required for other bathroom walls, but it does provide an ideal surface for the microcement to stick to, and helps prevent cracking. Just to be safe, we rolled it on certain areas in the room (focusing around the tub, and seams that may be more prone to cracking) though in hindsight, it was overkill.
Cover your floors with ram board to protect them, and mask off any surface that needs to be protected (this is a MESSY job).
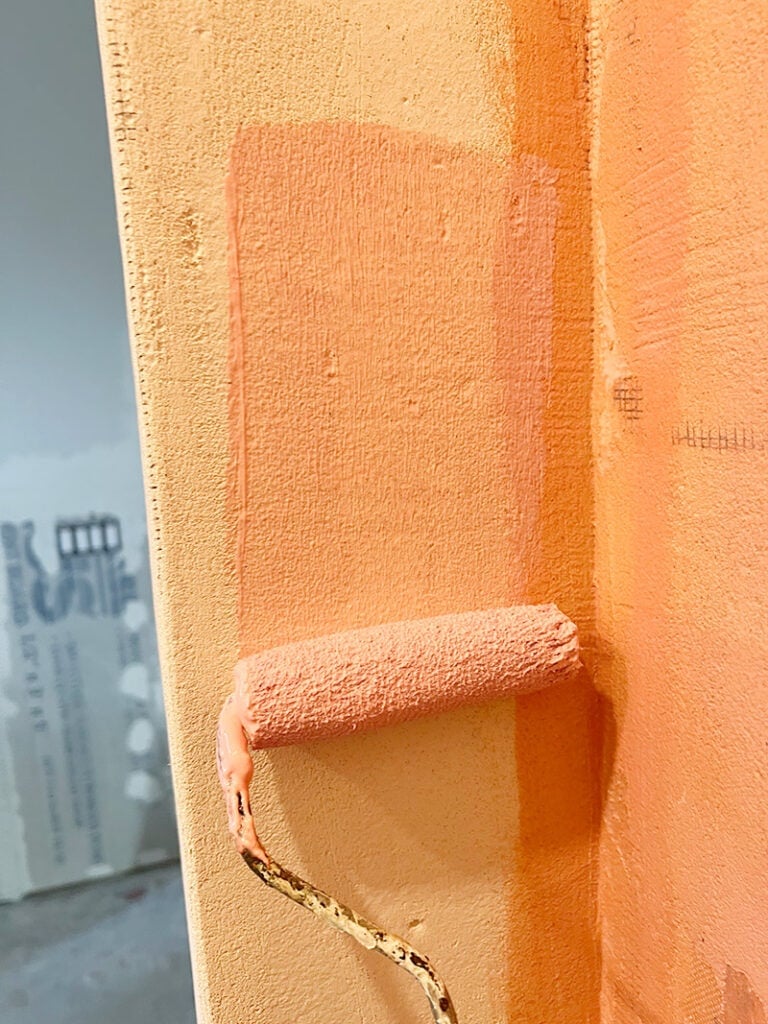
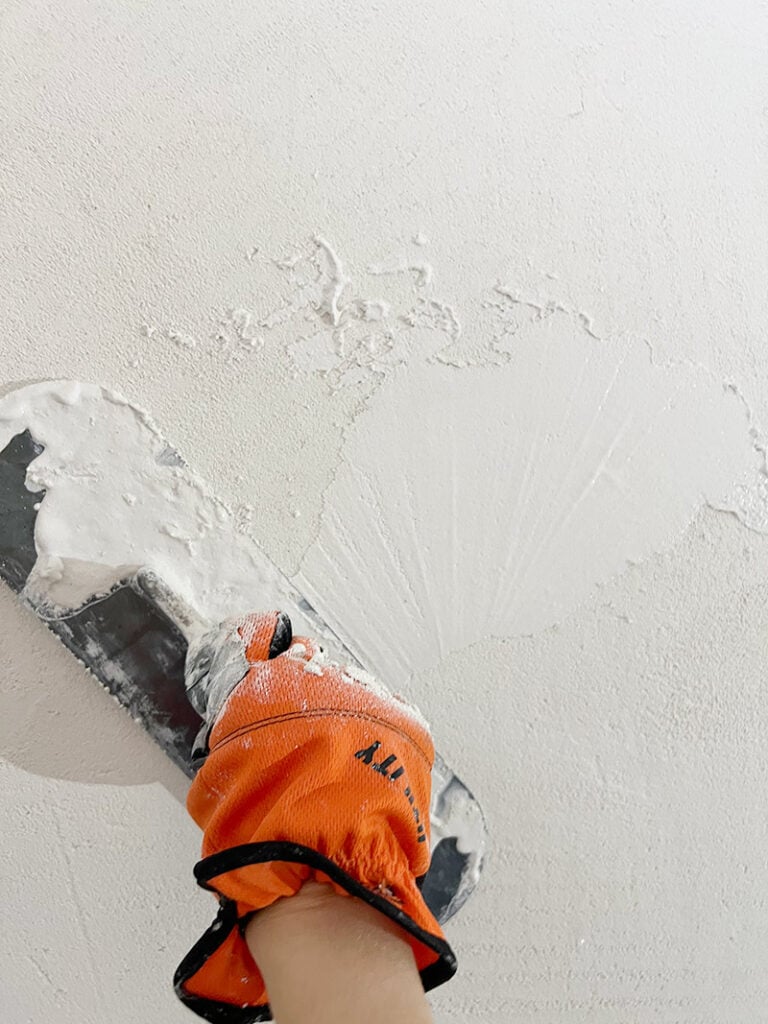
Step 2: Mix microcement and apply first layer
The product we used is called SureCrete SureSpray. SureCrete offers several different concrete overlay products, with slightly different specifications on their website which makes it confusing. We spoke to their main support person several times during our research, and he confirmed their products are all essentially the same thing and can be applied to both walls and floors (this includes MicroTek and WallSpray).
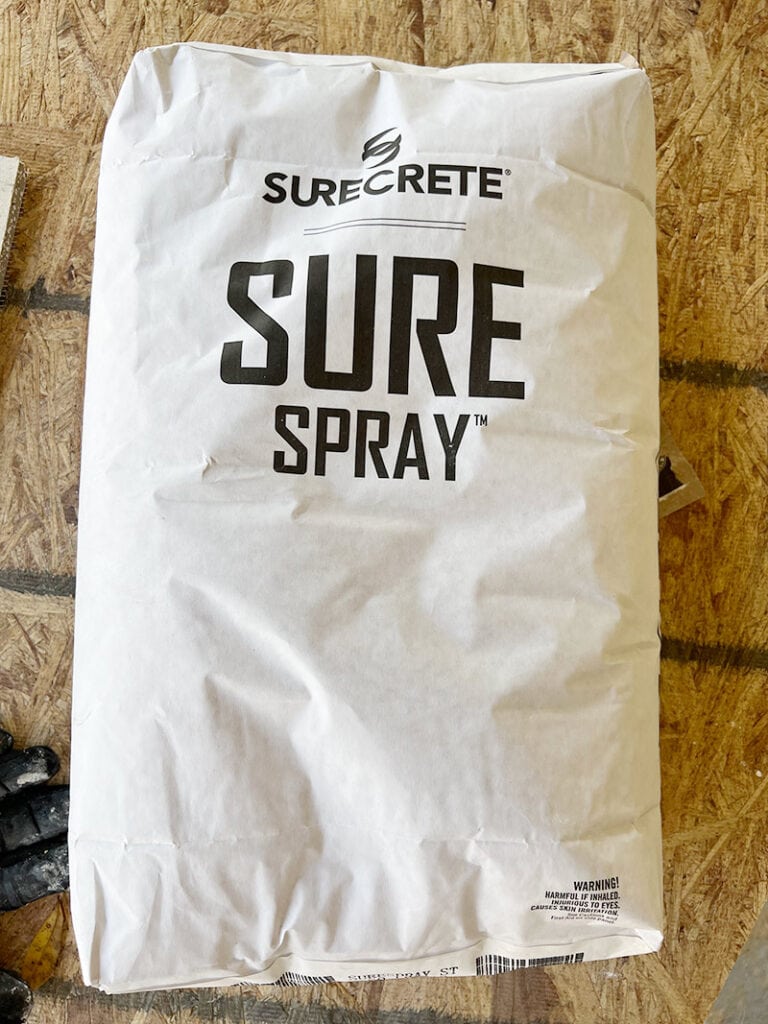
SureSpray can be sprayed onto the wall using a hopper gun, but it can also be troweled on (we didn’t want to rent a gun, so we opted to trowel).
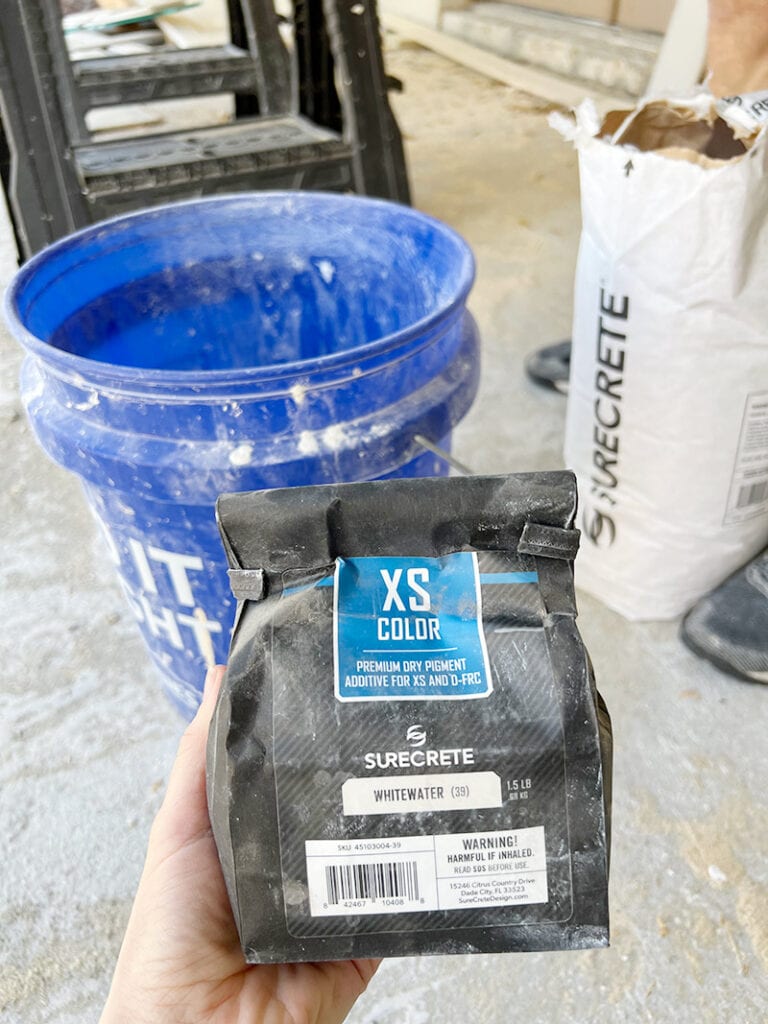
Along with the water and cement, you’ll want to mix in a color pack with your desired finished color. SureCrete offers a wide range to choose from, and they recommended the color Whitewater for a pure white finish.

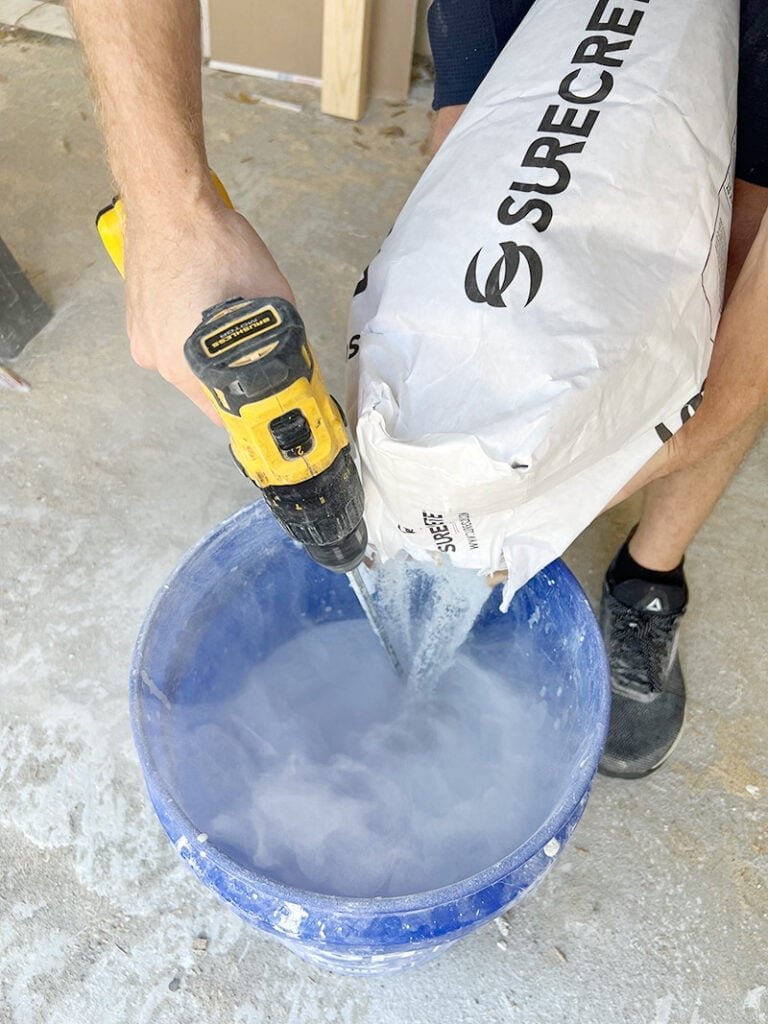
The ratio is one color pack to one bag of cement, and 4 quarts of water to start with. You want the mixture to have a pancake batter consistency.
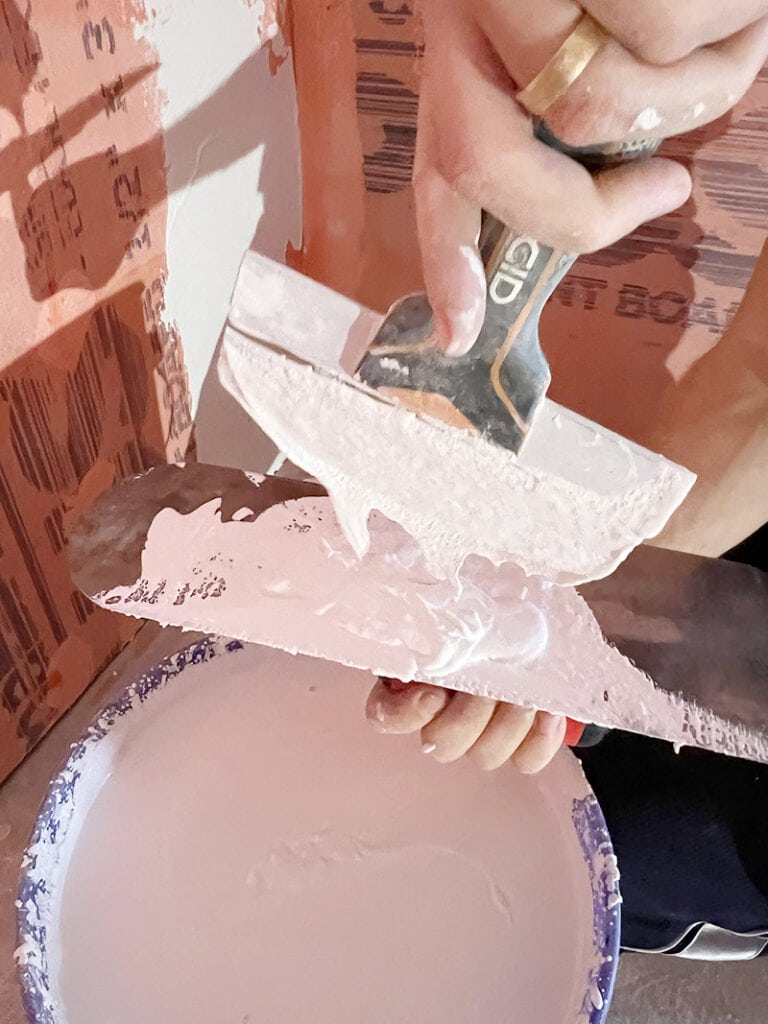
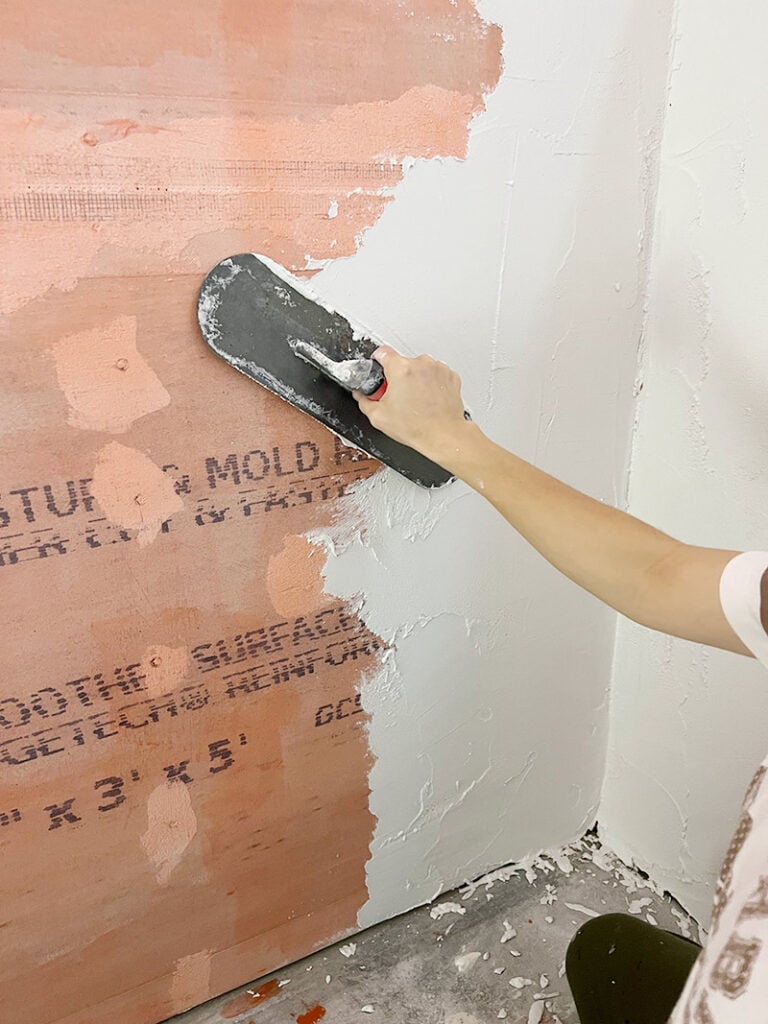
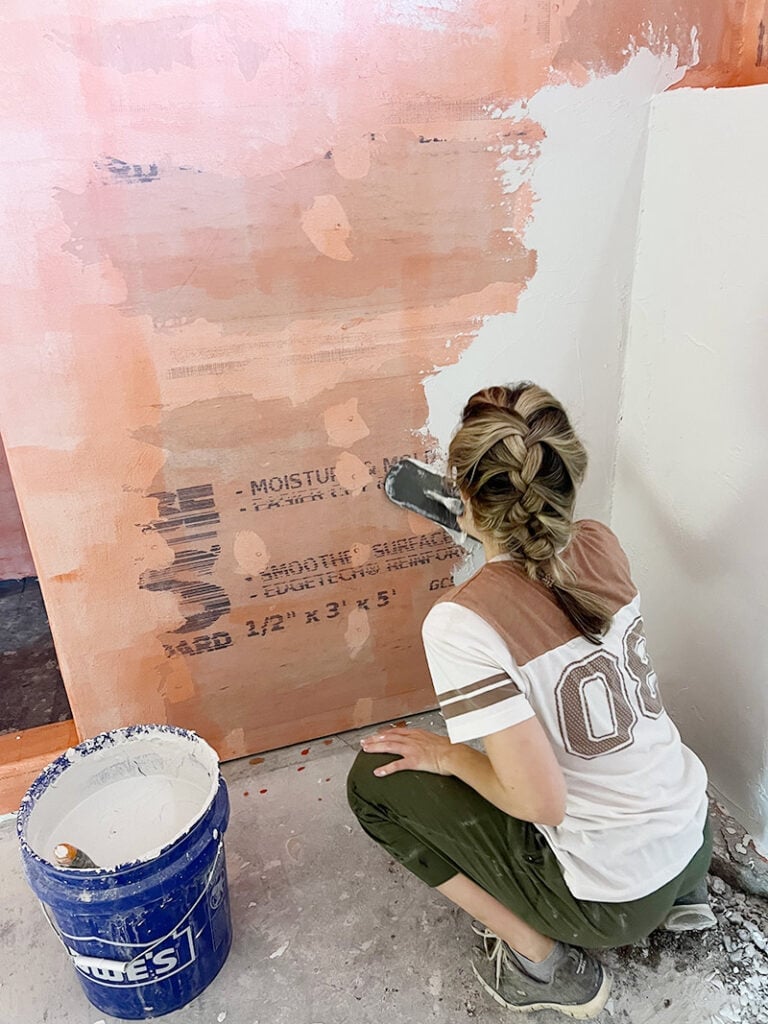
We started by scooping some of the mixture onto a pool trowel, then spread it on the wall in an upwards motion.
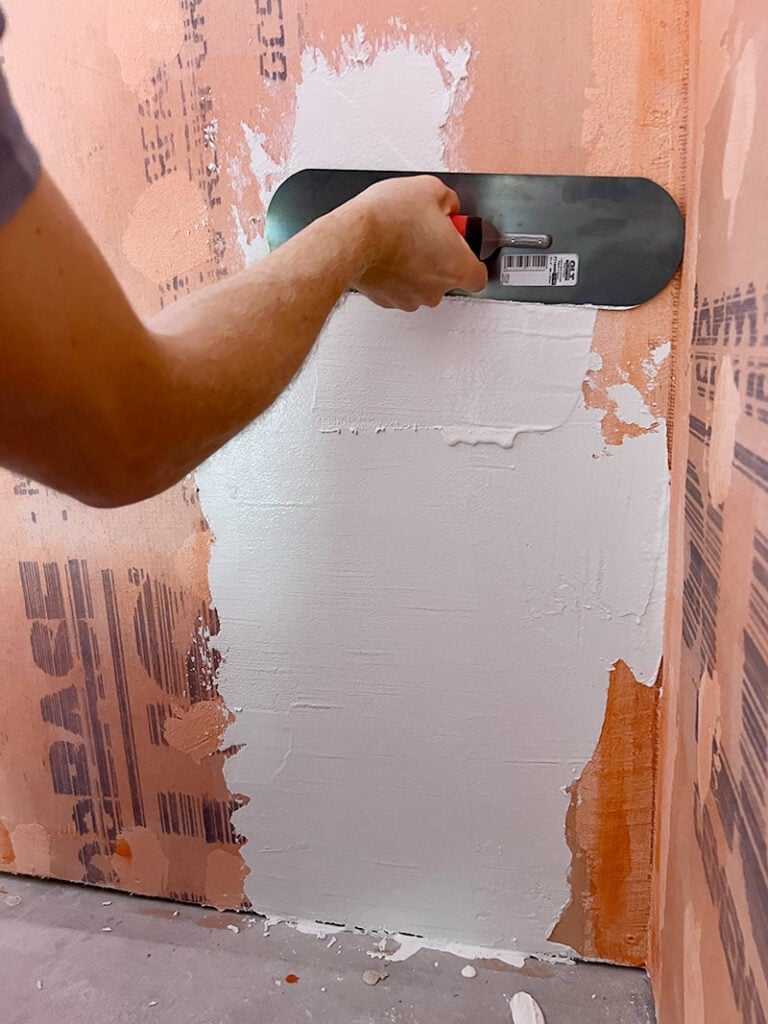
For this first coat, the appearance really doesn’t matter—you just want to make sure to cover the surface completely. If you want a smoother final coat, try to keep this first layer relatively smooth and even.
Application isn’t difficult, but it’s very messy and takes a while to get the technique down. It can also start to hurt your hand after a while (I taped my hands and used gloves to help with blisters).
The concrete mix will thicken as it sets, so we had to add water and re-mix every 30-60 minutes or so. It becomes difficult to apply once it gets too thick.
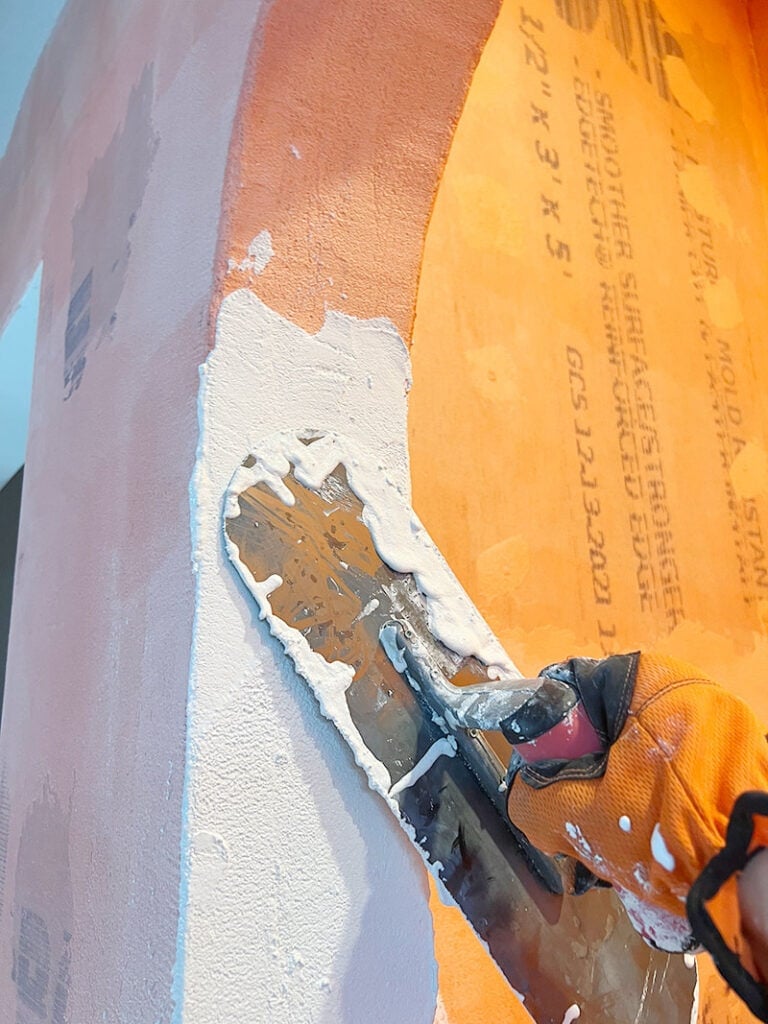
For tricky areas like the edges around the arch and light switches, we used smaller trowels and putty knifes.
Important: adding more water will dilute the mixture and change the color of the end result (we didn’t realize this until three days later). Try to keep a consistent ratio of water/color/cement, and complete one wall at a time, rather than jumping around to different areas.
We ran out of cement before finishing the first coat. It took us a full day to go through six 50lb bags, and we ended up buying six more to finish (that’s 600lbs of concrete mix!)
Step 3: Apply second layer of microcement
After waiting 6-8 hours for the first coat of microcement to dry (depending on room temperature/humidity), you can apply the second coat.
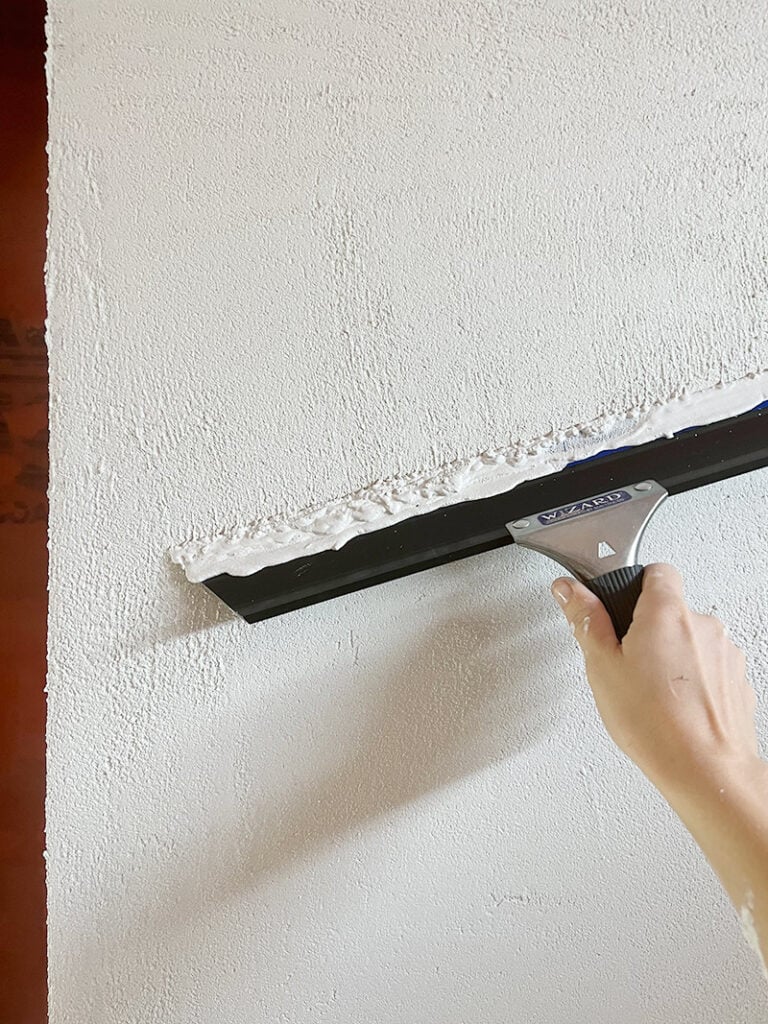
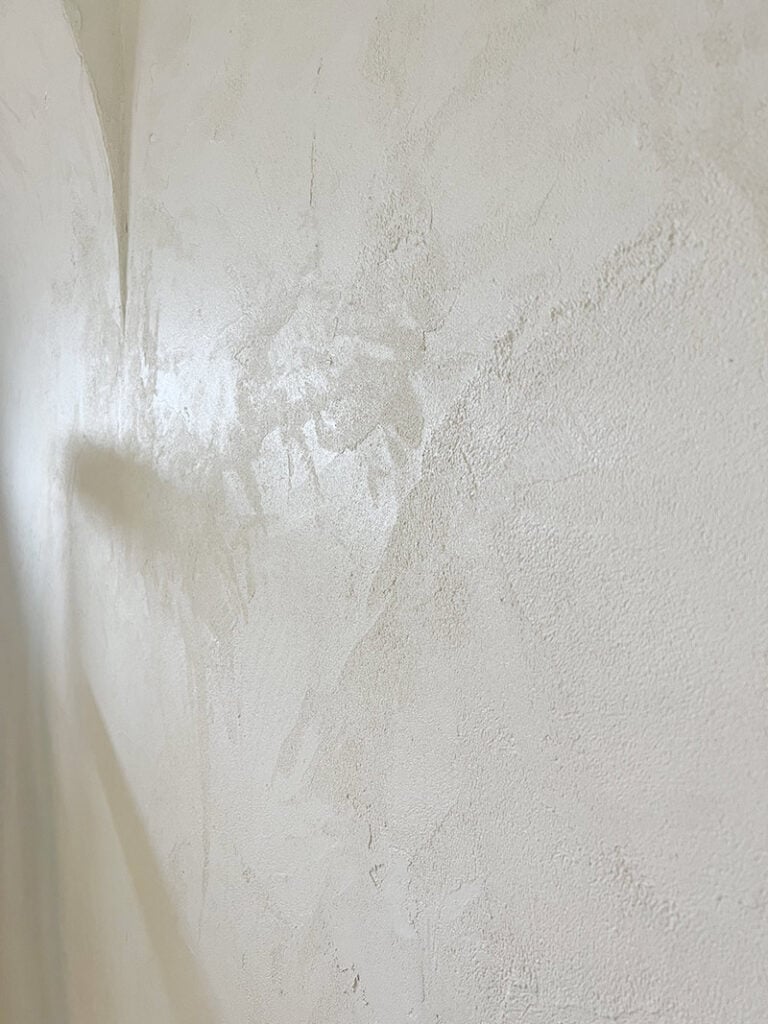
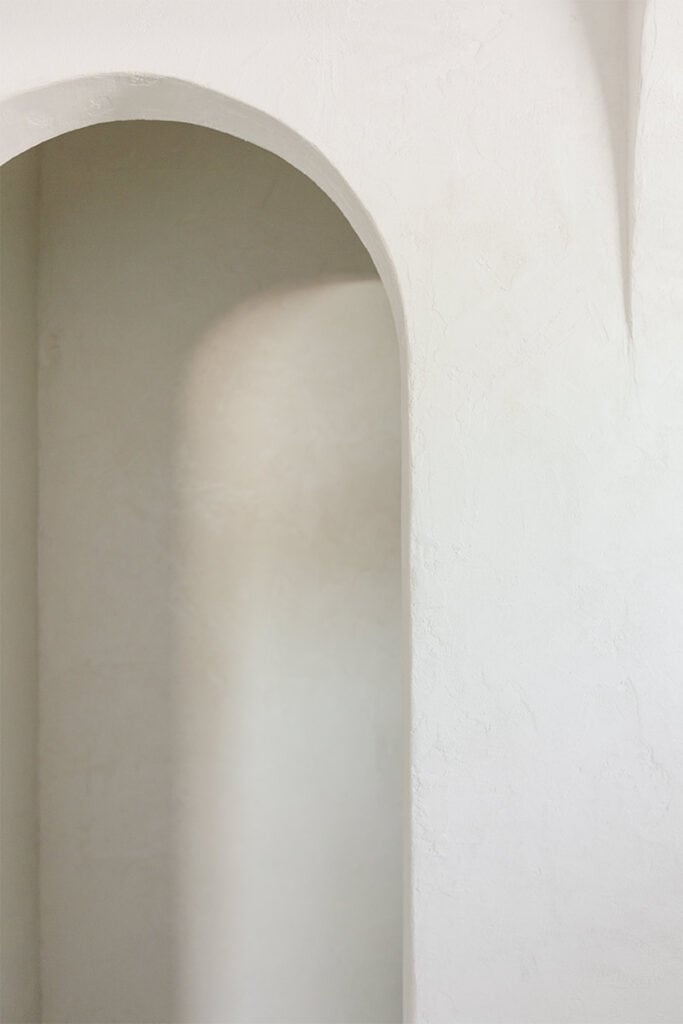
This is where you will choose how you want the end result to look—smooth and even, rough and rustic, or somewhere in between.
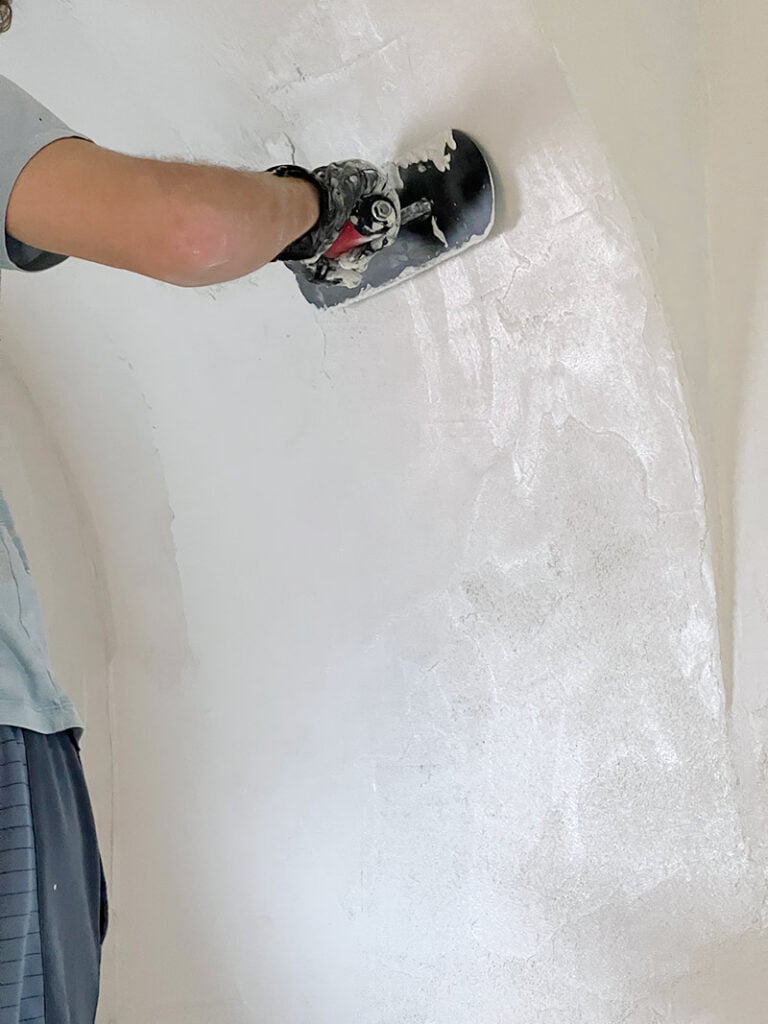
The beauty of this product is that there’s no right or wrong way to do it. And you can even try various tools (like a squeegee) for different textures and effects.
There is definitely a learning curve to this process, and I didn’t really get the technique down until the very end. But you do have to be consistent across the room (which can be tricky with two different people working together!)
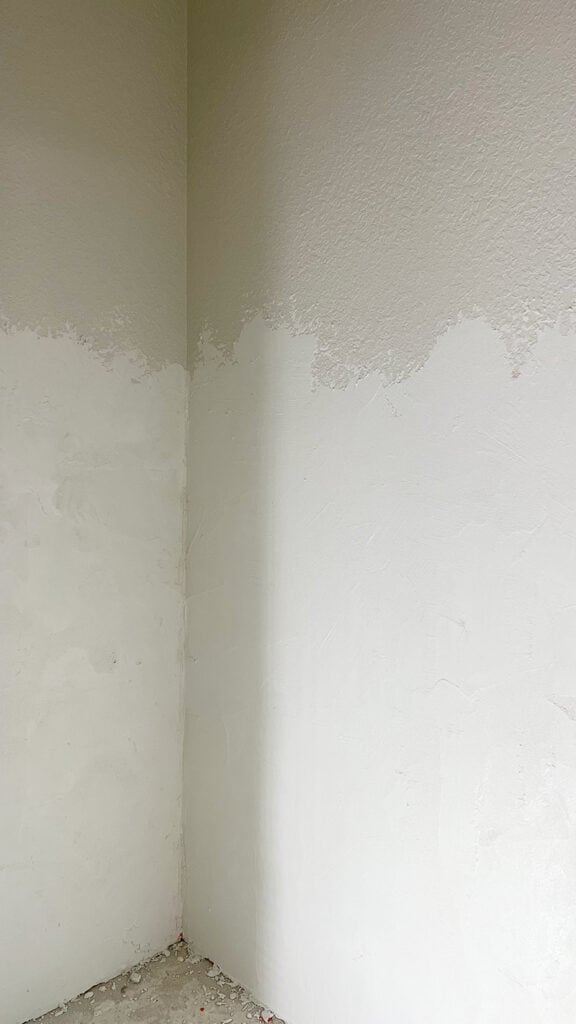
Below you can see how different the color can look after diluting the mixture with water. The bottom half was from a fresh batch of microcement, and the top section was applied using a diluted mixture on a different day. We had to go back and apply a third coat to cover this wall.

For reference, we covered over 700 square feet between all of the walls and ceilings and it took us more than 20 hours. I would recommend starting with a smaller room 🙂
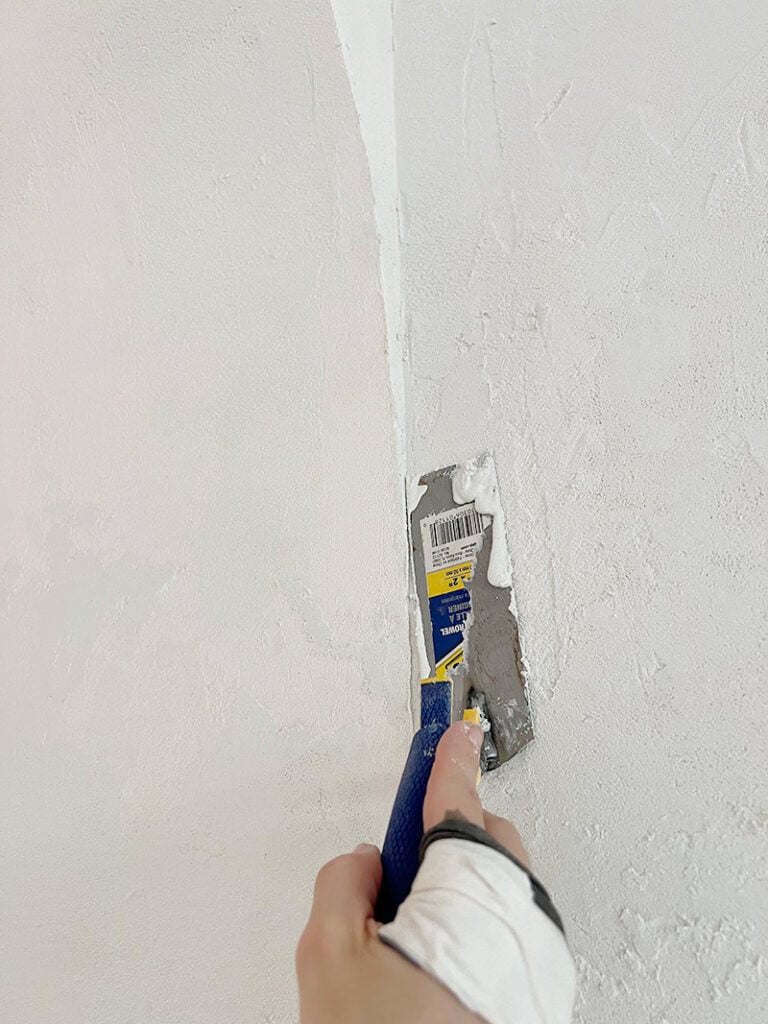
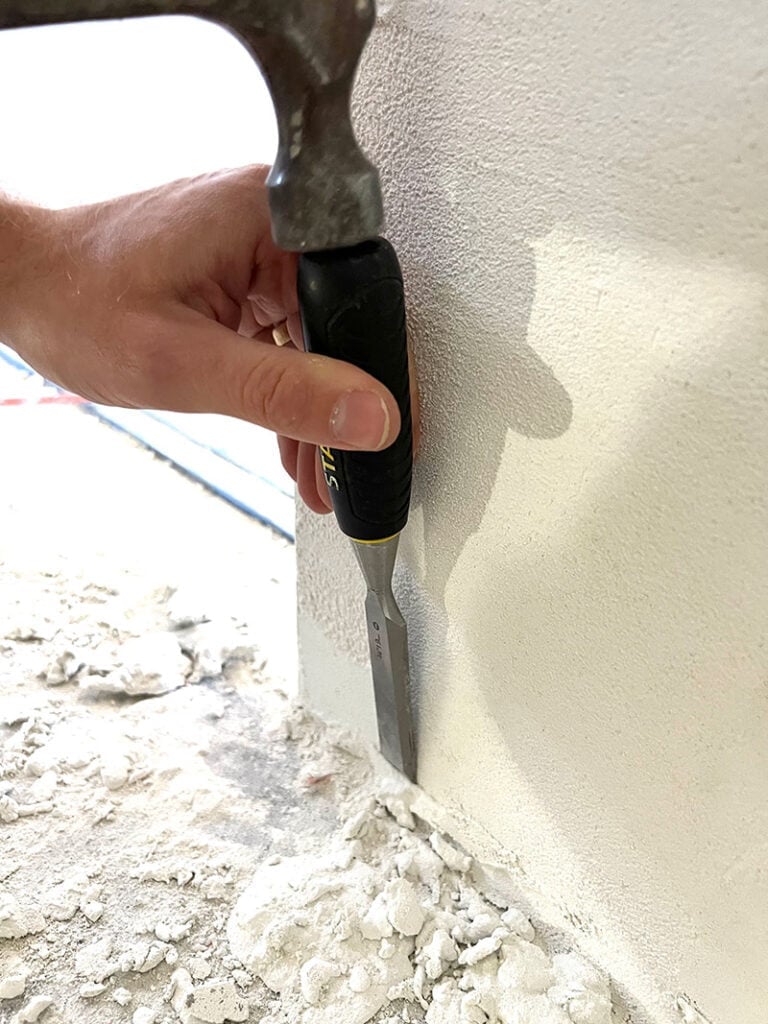
Step 4: Sand imperfections
There will likely be a few drips, or areas that are too rough and need sanding down (especially the corners and edges of walls/doorways). This is done fairly easily with a rub brick made for concrete.
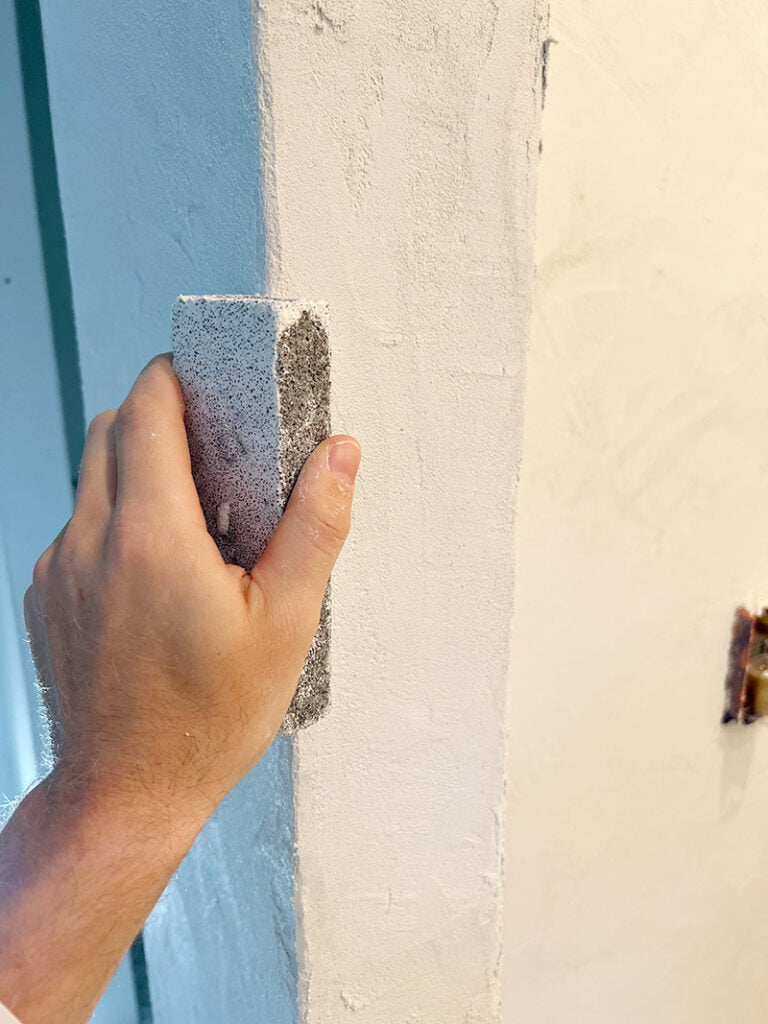
In our case, we also had to chisel several areas along the floor where globs had dried and hardened (make sure to wipe those away while it’s still wet!)
Selective sanding is also not a bad idea to do after the first coat, but you don’t have to worry about it too much in the beginning, since the second coat will cover most imperfections.
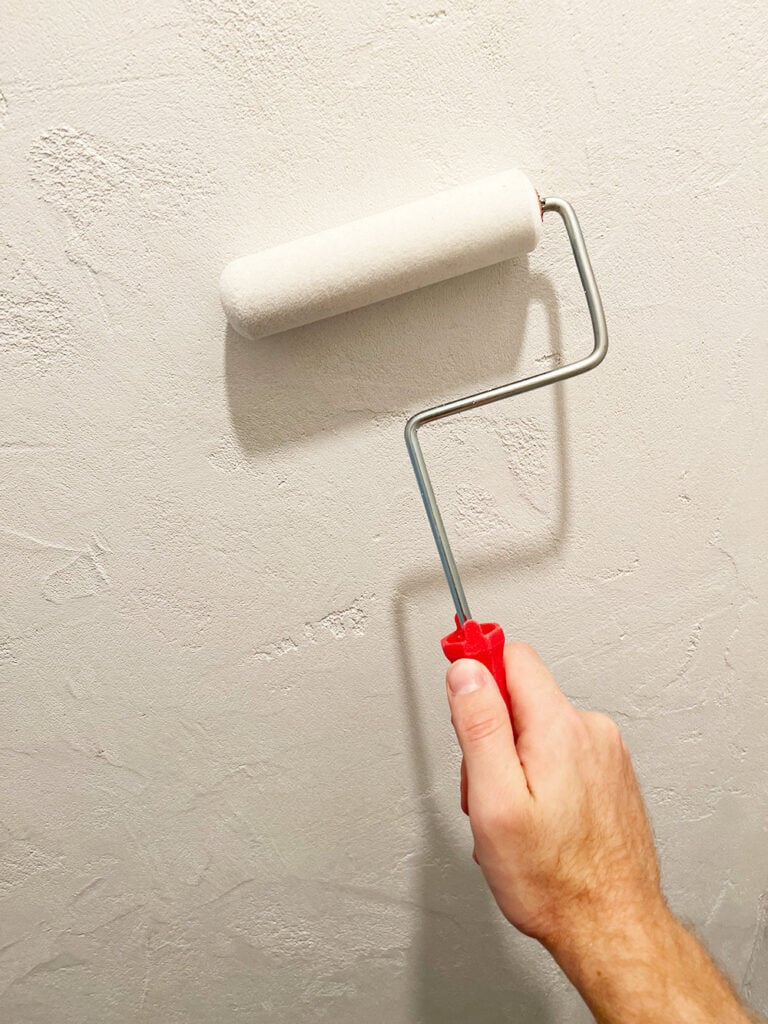
Step 5: Apply a sealer
After the second coat has dried for 12 hours, you can apply a sealer. A sealer is necessary to protect the finish and make the walls easy to clean. SureCrete recommends a water based acrylic sealer—specifically their SuperWB or XS327.
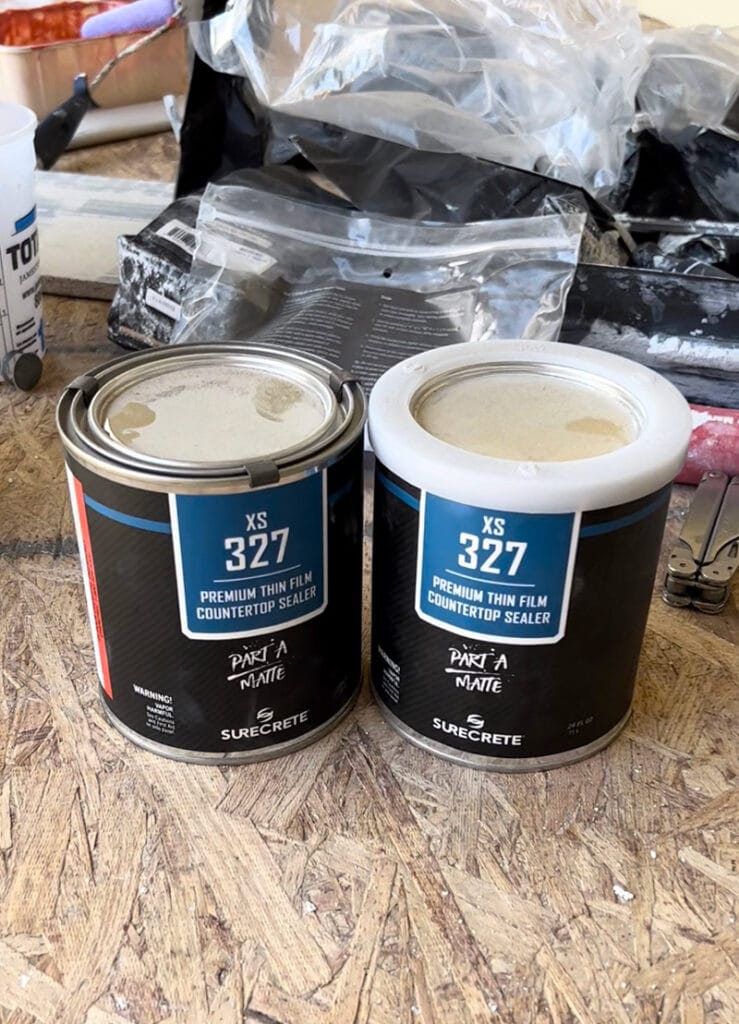
We purchased their XS327 matte sealer to use in the shower, but it’s on the pricey side and requires a lot of steps, so we used this budget-friendly matte sealer for the rest of the bathroom walls.
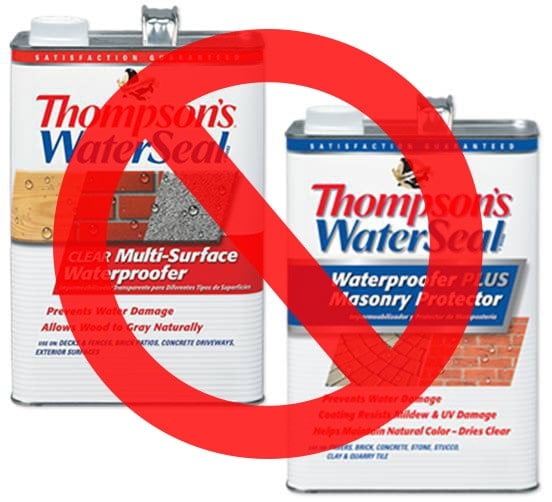
WARNING: I’ve seen a few others mention using Thompson’s waterproofing sealer indoors. We called their support line to confirm if their products could be used for this application, and they warned that none of their products are safe for indoor use. They have an ingredient called “mildicide” which is toxic and emits harmful chemicals even after it dries. Make sure your sealer is safe for indoor use!
We used a roller to apply the sealer, which went on clear and dried to an invisible matte finish. After five days, we were finally done!
DIY Concrete Bathroom Walls Reveal
See the full bathroom reveal in this post!
Microcement application tips
- Cover EVERYTHING that you don’t want to get ruined. Dried concrete is not easy to get up. Also, don’t wear anything that you don’t mind throwing away.
- Try to remove any large drips/globs before the cement cures. It will be more work to sand or chisel after it dries.
- To maintain a pancake batter consistency, you’ll need to add water and re-mix every so often.
- Note that adding water dilutes the color, so make sure to complete one wall at a time (using the same batch) and don’t jump around the room.
Frequently Asked Questions
Note that these answers specifically relate to SureCrete microcement products, and may not apply to all manufacturers.
How much does microcement cost?
It’s extremely cost effective. We paid $33 for each 50lb bag, and our project came to around 85 cents per square foot (for the cement mix). After the waterproofing membrane and sealer, it was still under $1.50/sf total. Significantly less than any tile!
Where can microcement be used?
MicroTek, SureSpray and Wall Spray can be used on both walls and floors, indoors or outdoors. It bonds strongly to nearly any surface including drywall, wood, concrete and tile.
Can you apply microcement on any wall surface?
Yes. It can be applied to any drywall—textured or smooth, painted or primed. Product can also be applied directly over cement board or existing concrete walls as long as they are in sound condition.
Can microcement be used in showers?
Yes. You must waterproof the cement board first, and then apply a waterproofing sealer at the end. SureCrete recommends using two coats of their ElastoShield before applying the microcement, and finishing with their XS327 sealer.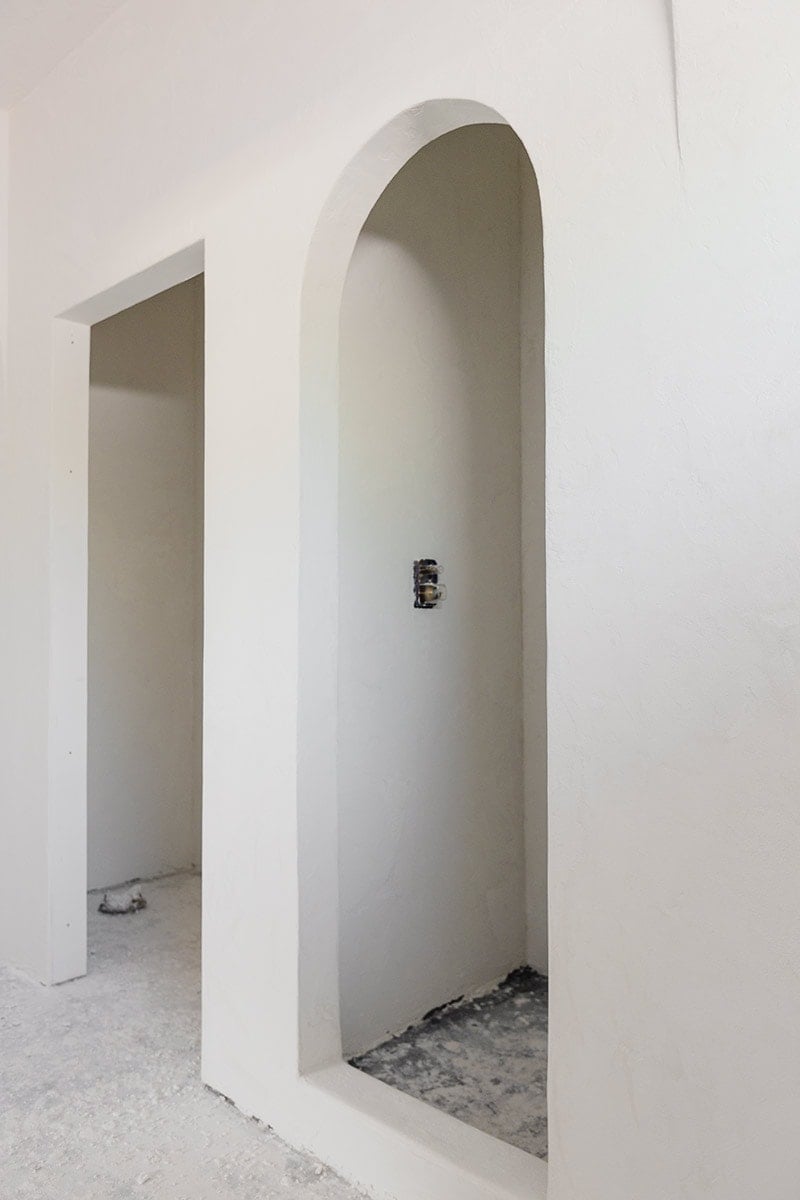
What is the best method to apply microcement?
The fastest way to apply SureSpray is with a hopper gun, and then a trowel to smooth. We opted to trowel it on. A large pool trowel is ideal, as the edges are rounded which will minimize any hard lines.
Can microcement be applied over tile?
It’s technically not recommended by SureCrete, but they said it has been done successfully before by following these steps: 1. Sand down the tile to remove the shine 2. Apply two coats of ElastoShield 3. Apply microcement 4. Apply sealer
How much microcement do I need?
SureCrete says that one 50lb bag should cover approximately 125-175 sq ft depending on how thick you apply it. We used 12 bags to cover around 700 square feet with two coats.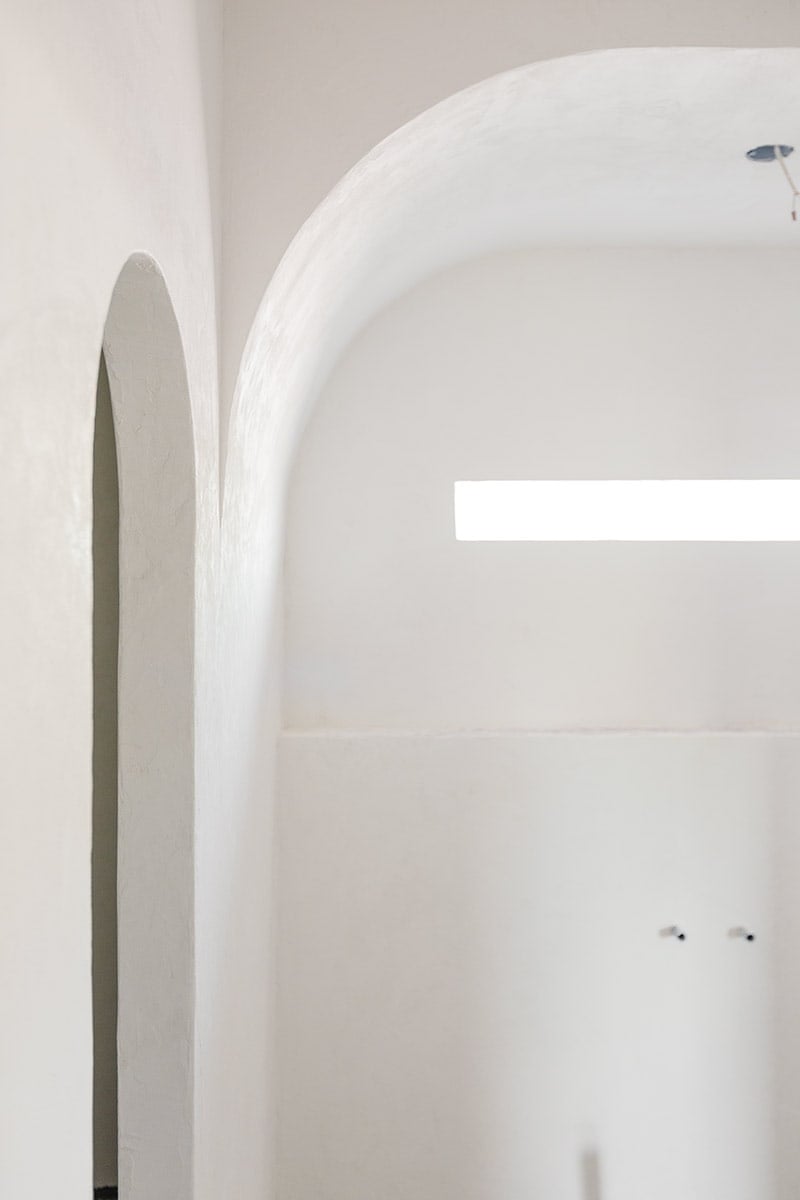
How many coats of microcement are recommended?
Typically, two: one base coat to cover the surface, and a second coat to achieve your desired look/texture. You can get away with one coat if it completely covers and you are happy with the texture, but it takes some practice to get your desired technique down.
How long should the cement dry in between coats?
6-8 hours, depending on temperature/humidity/room conditions.
How long should the cement dry before sealing?
Approximately 12 hours, depending on temperature/humidity/room conditions.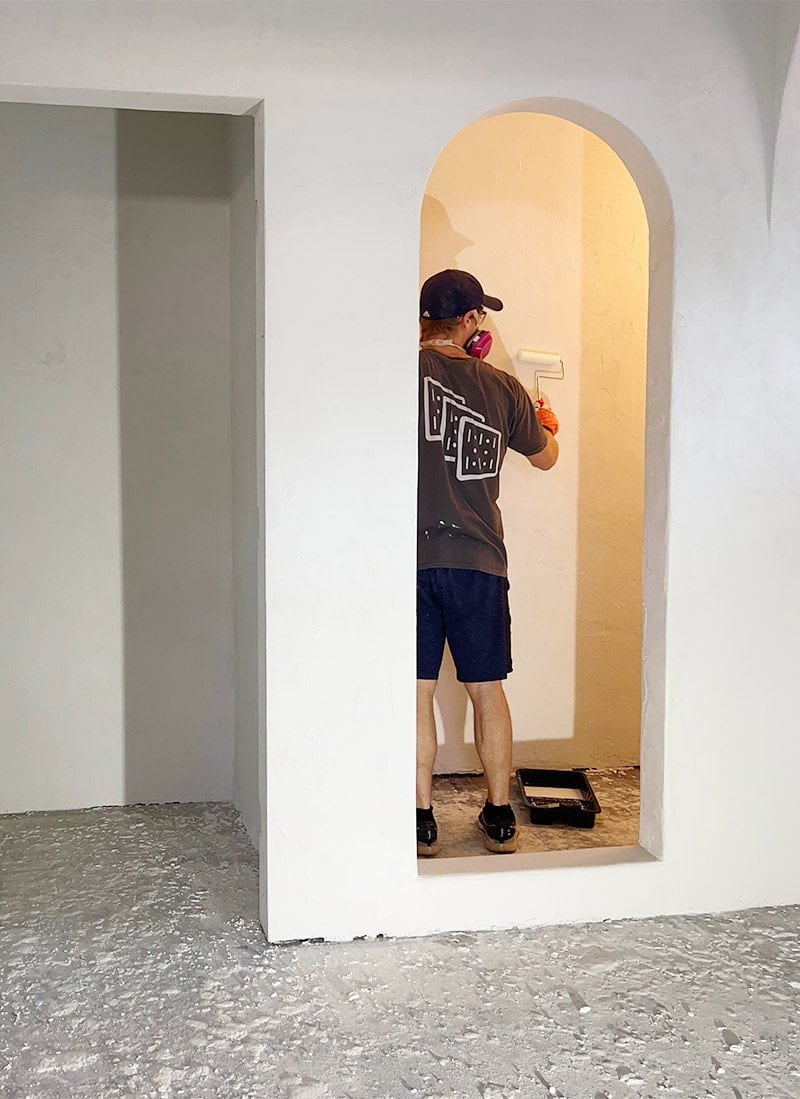
How do you seal microcement?
Any water based acrylic sealer will work. We had trouble finding one in a matte finish, so we used a water-based penetrating sealer (on the non-shower walls).
Where can I purchase microcement?
We purchased ours through a local landscape supplier. You can find a dealer near you on their website.
Helpful resources
- Instructional video
- Leanne Ford’s wall texture guide
- Another DIY’ers experience
- Flex Flooring FAQ
- Topciment FAQ
Whew, I think that covers everything for now! If you have any questions, please leave them in the comments, and I will do my best to find the answers. We plan on using microcement again in the next bathroom in this house (a much smaller bathroom, fortunately!) and will shoot a video tutorial for our second go around.
This technique has quickly become one of my favorite new DIY tricks and tools of the trade. I can’t get enough! What about you—are you sold on microcement?


Bec says
Hi Jenna! This was amazing – thank you.
Do you think I can do this with absolutely no DIY experience ? I’m up to the challenge but am worried it could be a disaster!
Did you also do the ceilings? Or were these just painted ?
Alana says
Hi Jenna!
My heart soared when I found your blog post! We are in the middle of our master remodel and I didn’t want a lot of tile and grout to clean so we decided on the SureSpray (walls, ceiling and curb) and a marble pebble tile on the floor. It is difficult to find tutorials or videos on installing this stuff. So I appreciate you and sending you a virtual hug. 🙂
Thank you. 🙏🙏🙏
Jenna Sue says
I’m so glad it was helpful Alana! There isn’t a ton of information out there on this process so I’m glad to share our experience.
Lethe says
Oh, this looks like it might be a good solution for my kitchen! Do you know if this can be applied over an existing, structurally sound but tired-looking laminate countertop? Thanks!
Jenna Sue says
Hi Lethe, that’s a good question! I would think that’s a possibility but I would definitely reach out to Surecrete to confirm.
Pat Mues says
We have put waterproof board on the three shower/tub walls. Do you know how we would need to seal the joints at the corners and where it butts up to the rim of the tub? Or would we need to membrane it all first? Yours looks great.
Danielle says
Love this so much! Would you consider using this in a vacation rental shower or is that a crazy idea? Does the texture catch anything or is it easy to clean and hopefully durable long-term? I know you have a vacation rental and Im sure you know how the showers and bathrooms get beat up and cleaned very often.
Jenna Sue says
This house will be a vacation rental, so yes 😉 From my research, the walls are low maintenance with proper sealing, and using the right cleaning tools. We will find out!
Danielle says
Awesome! I totally missed that part 😆 Thank you.