Who is ready to get the party started with the first bathroom renovation at the Hacienda Hideaway??
Let’s jump right into how it looked when we bought the house…
Jump to:
Before
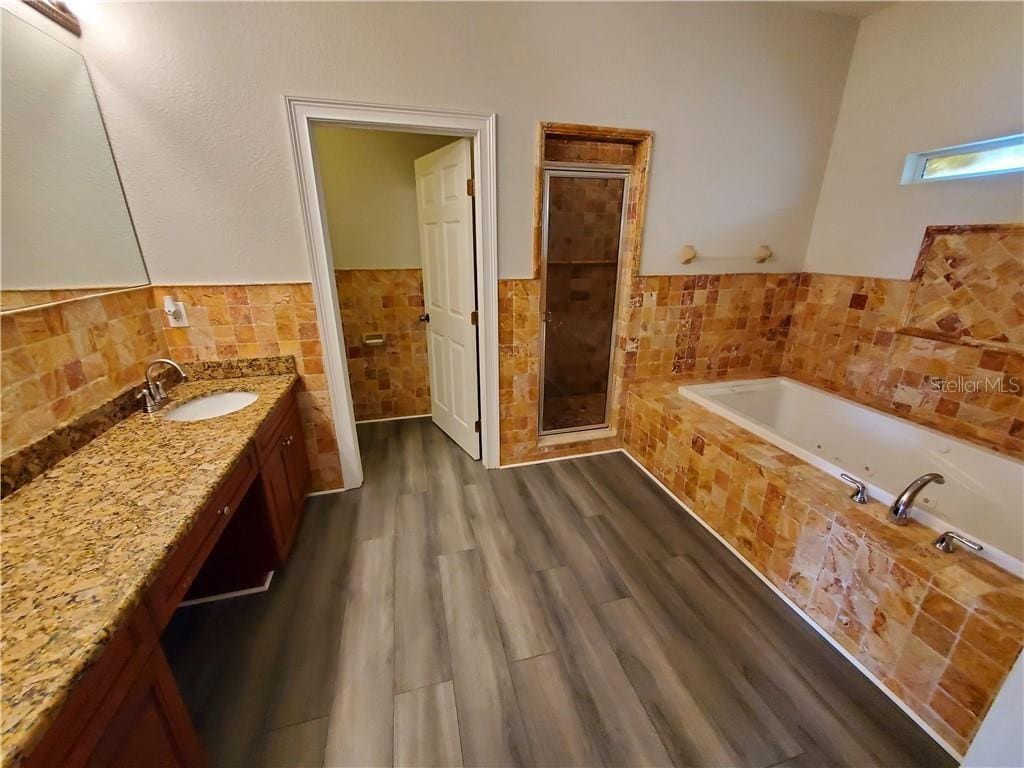
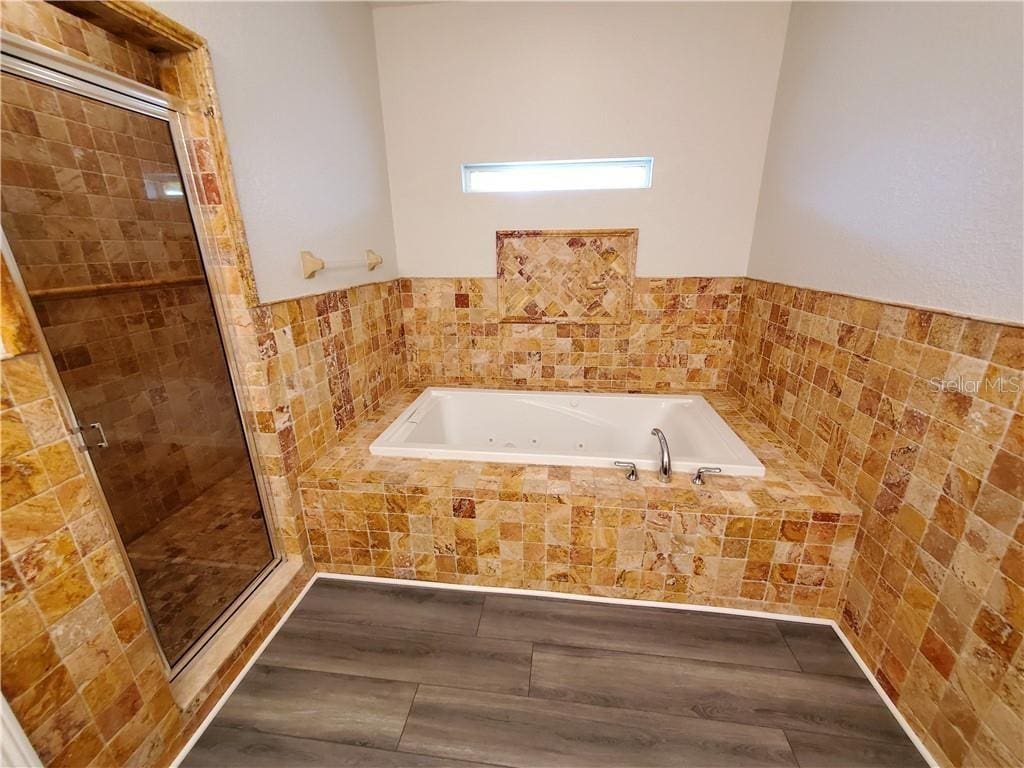
One thing this bathroom has going for it is size. It’s pretty spacious at around 150sq ft total—certainly the largest bathroom I’ve ever owned/renovated.
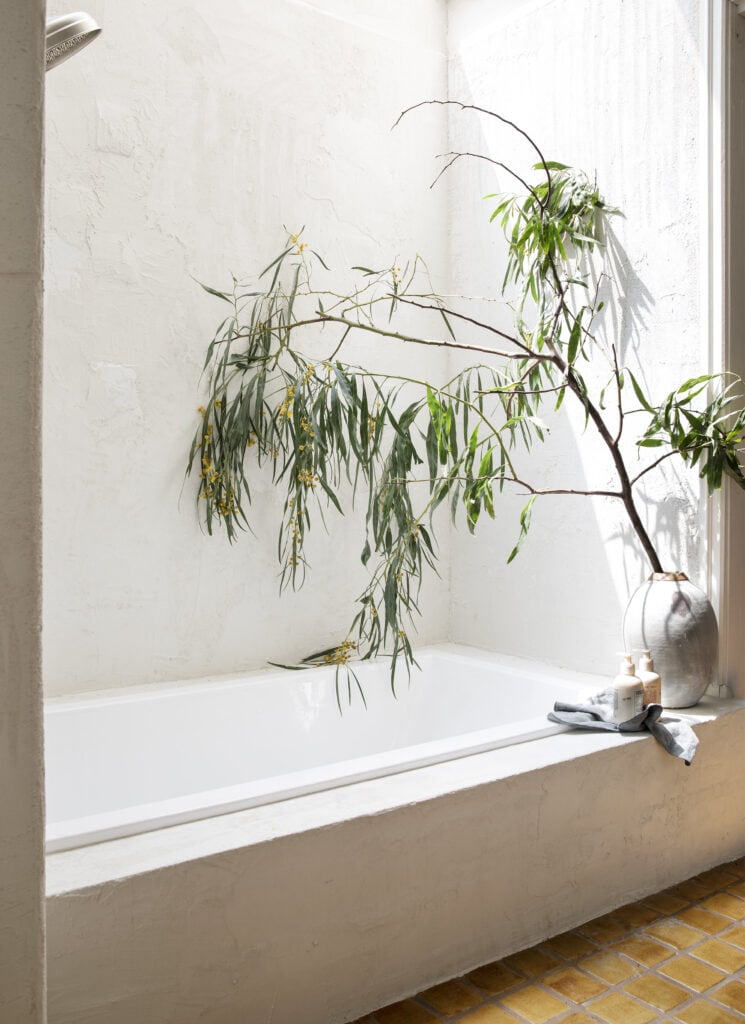
We debated keeping the existing jacuzzi tub insert, but decided to remove it and go with a freestanding instead (one less thing to break in a rental).
I love that there’s a separate toilet room for privacy (this will come in handy when larger groups are staying here) and a large vanity wall to accommodate two sinks.
Don’t mind the extremely distorted fish-eye view from the listing photos…
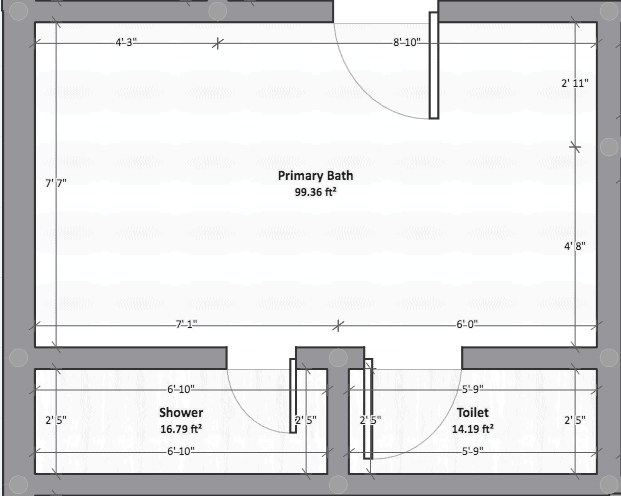
Here’s the floor plan, which we are keeping as is. We’re happy with the arrangement, and knocking down walls is not in the budget:
Ready to see what this room is about to become? Here’s my top design inspiration saved from Pinterest, and the ideas I’m incorporating from each space…
Inspiration
I’m calling this style a mix of Mediterranean, Moroccan, Rustic, Minimalist.
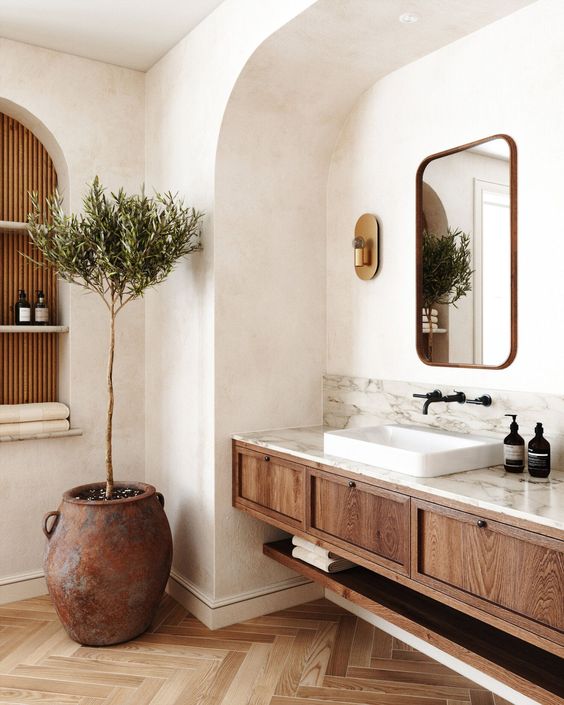
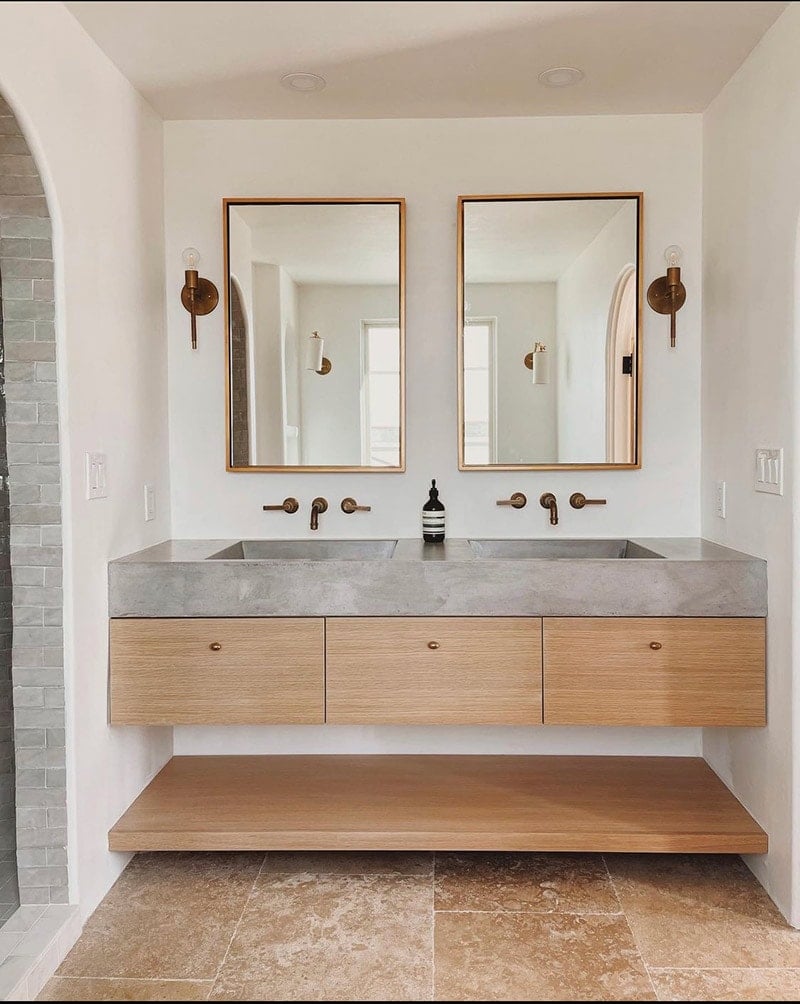
What I love: arched alcove around vanity, floating wood vanity, rustic walls, rich amber and gold tones
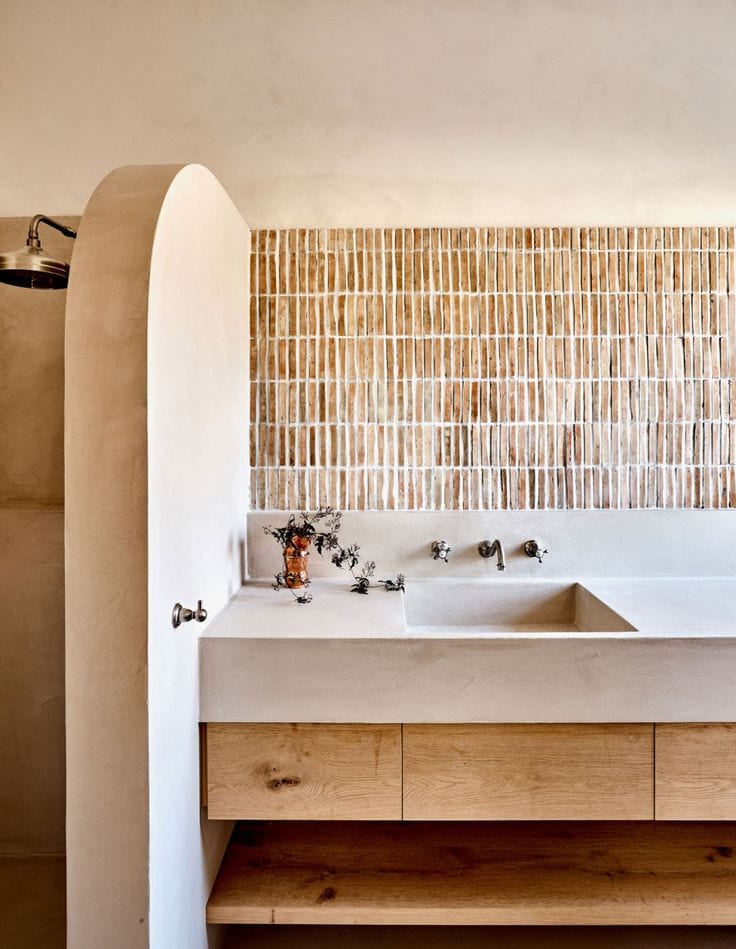
What I love: curved shower entrance, floating wood vanity/shelf, light gray stone counter with integrated sink, terracotta tiles, rustic walls
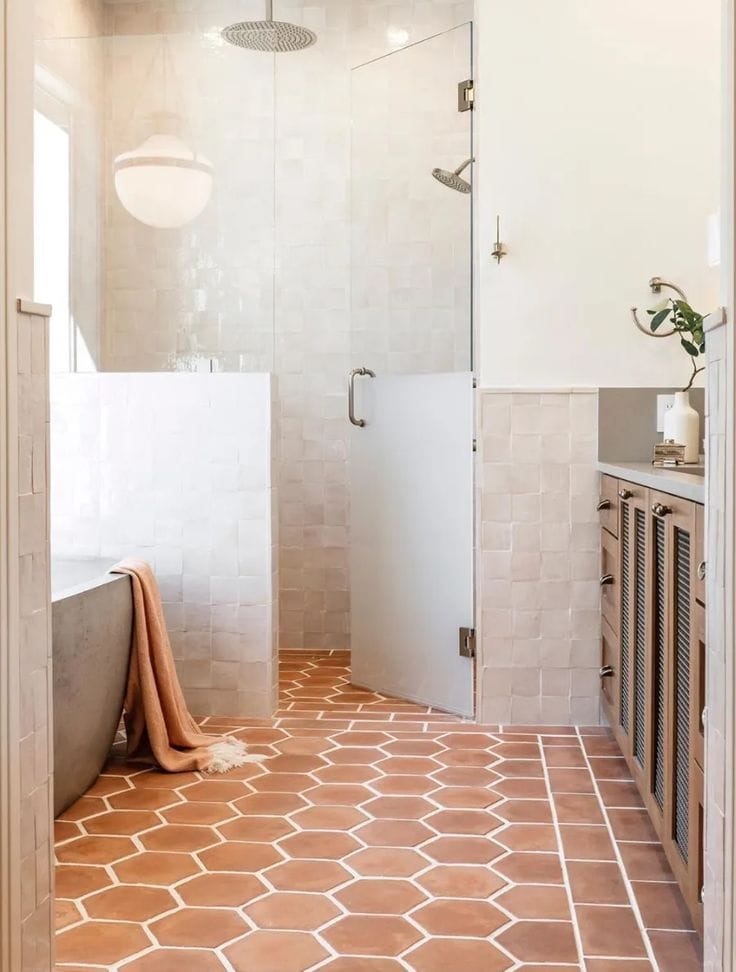
What I love: geometric terracotta tiles, wood vanity, white walls, minimalist/airy feel, warm monochromatic color palette
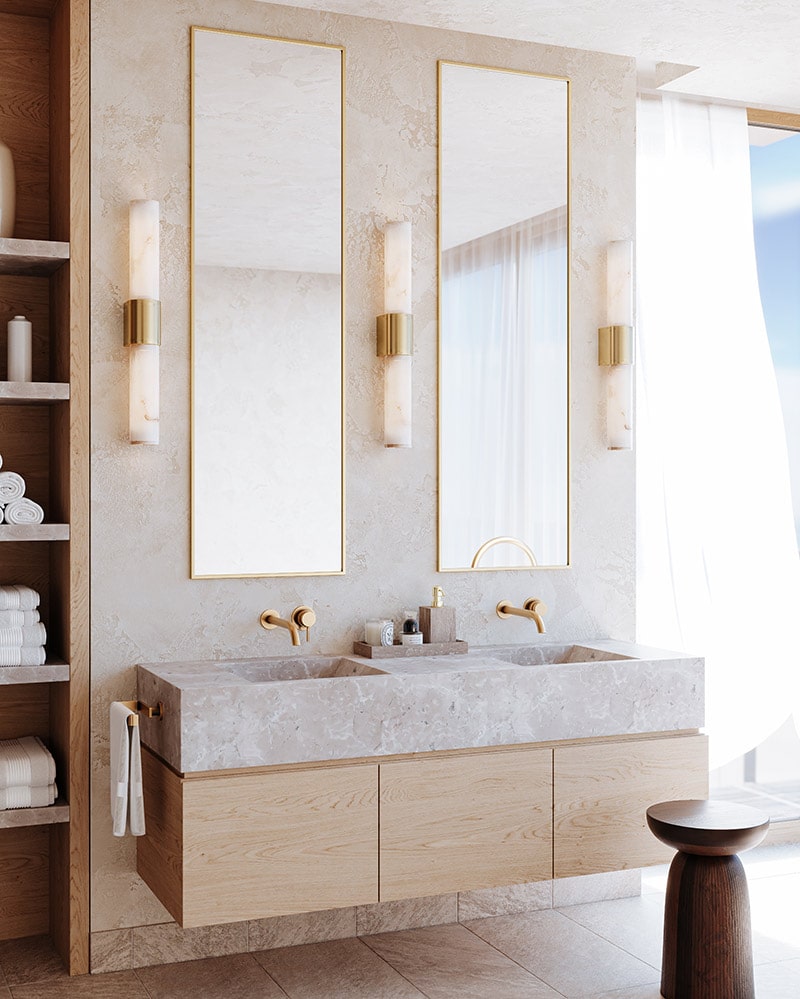
What I love: light wood floating vanity, light stone countertop, brass wall mounted faucets, alabaster + gold sconces, rustic-minimalist style
Can you start to picture these styles together? Let’s dive into the design elements!

Floors
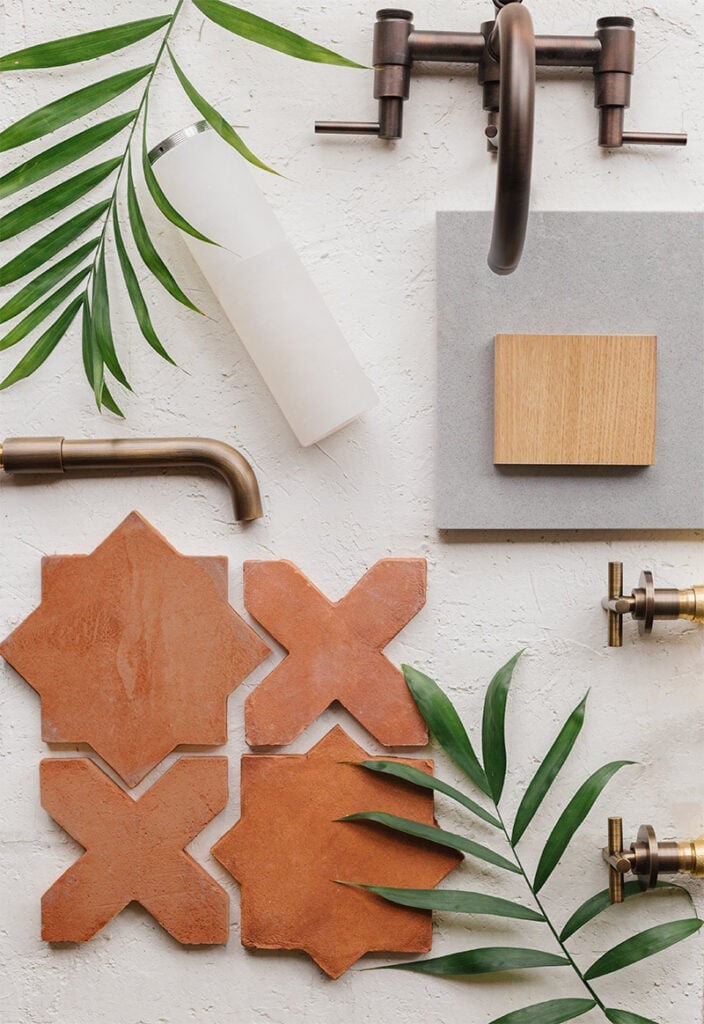
The handmade Star + Cross cotto from Zia Tile was the very first selection made, and what inspired the room design:
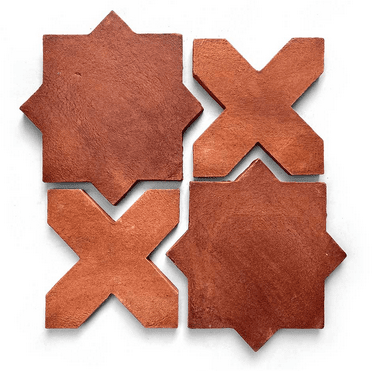
I’d been wanting to use this for years—ever since admiring the pattern on the floors inside the Taj Mahal in 2017. I almost used them in our own primary bath, but I’m so glad I waited for the right opportunity with this house.
These tiles will cover the entire bathroom floor (including the shower—assuming we get the OK from our tile installer to use there). The pallet was delivered last week after months of waiting, and we hope to have them installed next month!
Vanity
The vanity will be a semi-custom DIY, using two Ikea Godmorgon vanities with Brushed white oak doors and cover panels from The Cabinet Face. The end result will look similar to my friend’s space at Enchanted Berkeley, including a floating shelf underneath:
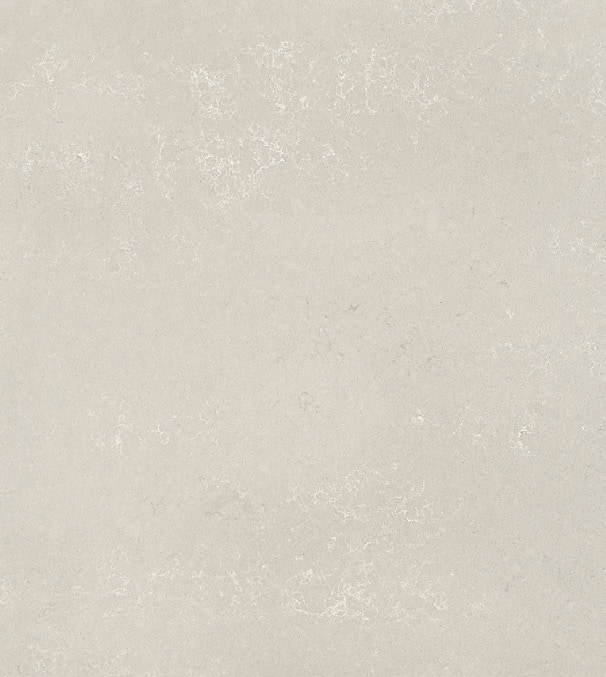
The countertop will be 3cm Hanstone quartz in the color Coast. It’s has a matte finish with a river-washed texture and cement-like color variation. It’s gorgeous in person!
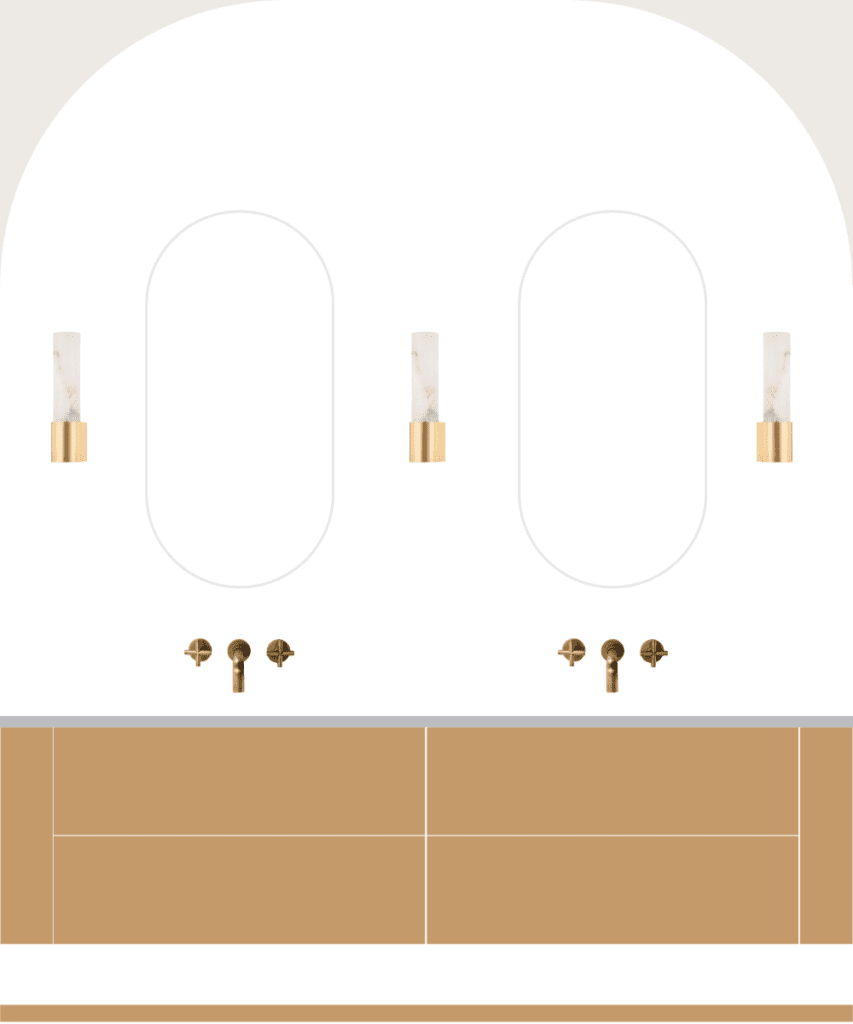
Here’s a mockup I put together of the vanity wall (to scale) to give you an idea:
Tub + Faucets
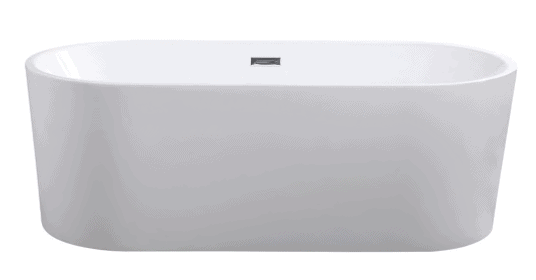
I haven’t pulled the trigger on the tub just yet, but I’m leaning towards this one (it’s 30% off right now!)
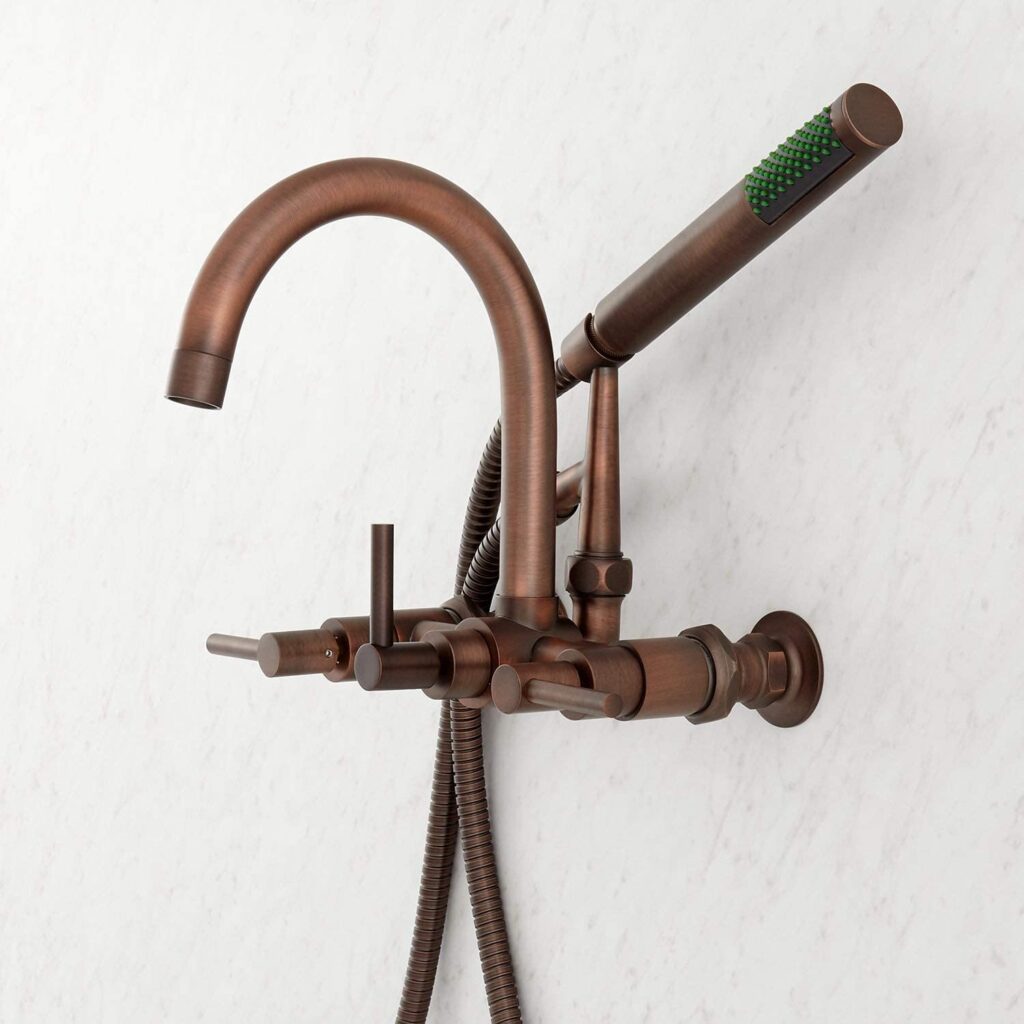
I also bought this wall mounted tub filler for a great price (the price has since dropped even more). I think the warm copper tone will coordinate nicely with the cotto tile floors.
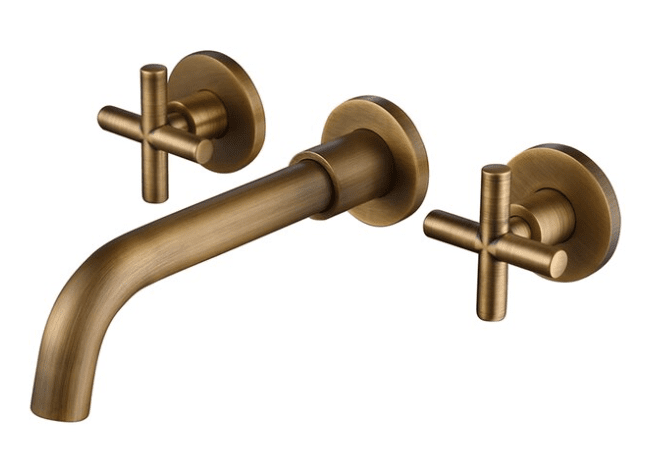
And I purchased two of these inexpensive wall mounted sink faucets for the vanity area. I like the minimalist design, and mix of modern/vintage. The color is darker in person, more of a light bronze than gold:
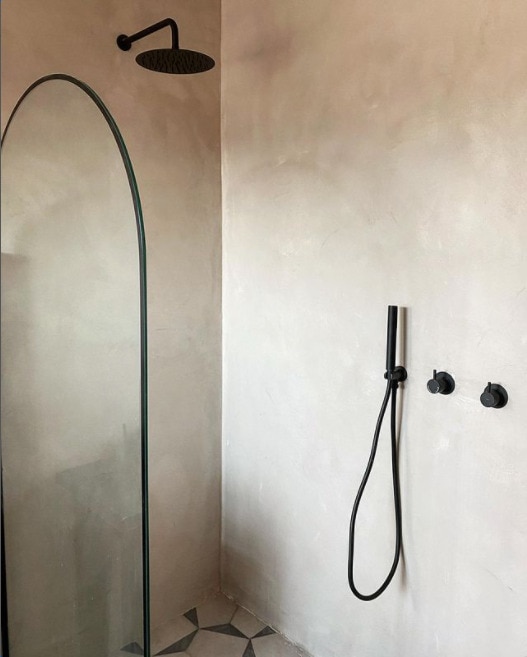
I’m a big fan of mixing metals in a room—especially when there aren’t many options for matching every fixture. I found this rain shower system for a great price, and I love that there’s a separate hand sprayer.
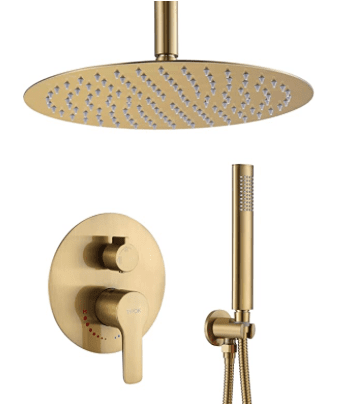
The shower hand and wand will be farther back inside the shower “cave”, so you won’t see them until you walk in.
Lighting + Mirrors
When mocking up the vanity wall design in Illustrator, I was able to pin down the specific mirror size and shape I wanted. Fortunately, I found exactly what I wanted and for a great price:

I bought it in silver, but I’ll be painting the frame white to blend in with the walls.
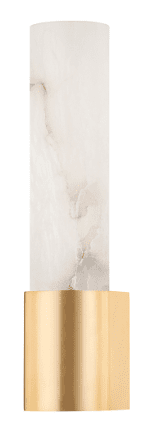
I’ve had to make a conscious effort to choose simpler, more minimalist style pieces than I would normally for my own home. I was immediately drawn to these alabaster + gold sconces from HVL Group’s latest release, and they offered to send me a few to try out in person:
I’m loving the juxtaposition of the elegant, refined sconces with the aged, rustic walls and floors. Contrast = interest! Speaking of which—I had this vision of a wispy, boho-style hanging pendant above the tub—something across between these two:
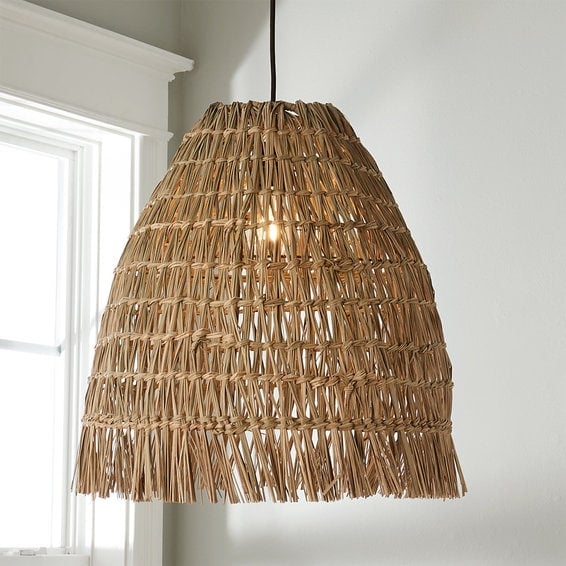
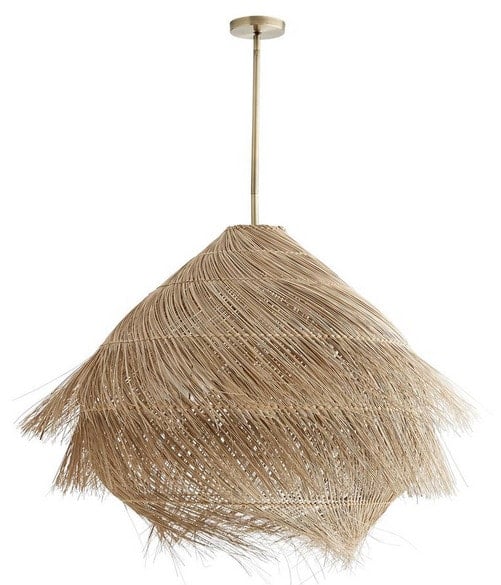
But alas, hanging lights over bathtubs are not allowed by US building code.
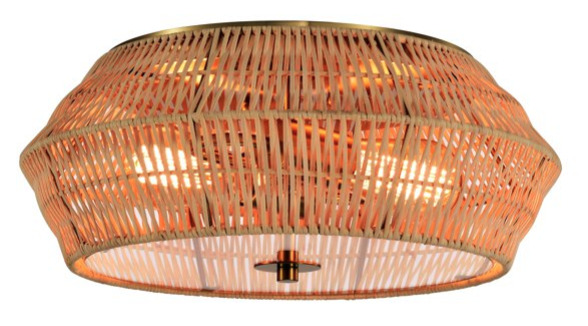
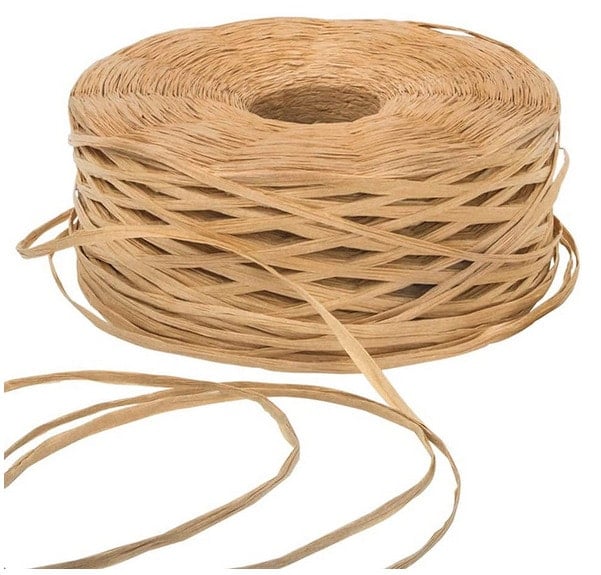
However… flush-mount lights are. And that means a DIY project is in order! I found this rattan flush mount light for a great price, and then bought 459 yards of raffia. This will either prove to be a genius idea, or I’ll be kicking myself after 5 hours of tying knots… but I’m willing to give it a shot 🙂
Walls
Alright friends, here’s where we take this bathroom to the next level.
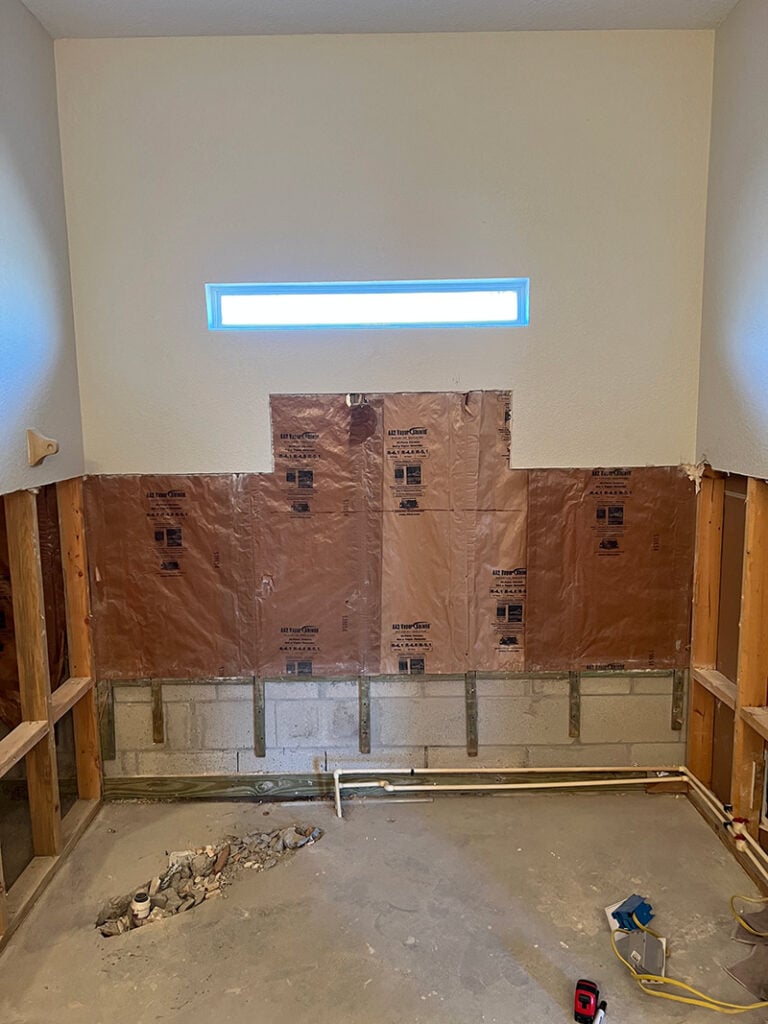
The original space was very boxy and modern, with no curves in sight (don’t even get me started on that cringey off-centered tub window that we can’t afford to replace). I knew the only way to really capture the feeling I’m after was to add curves and arches. Fortunately, Lucas has had some practice (hello fireplace and range hood) so we knew this was DIYable.
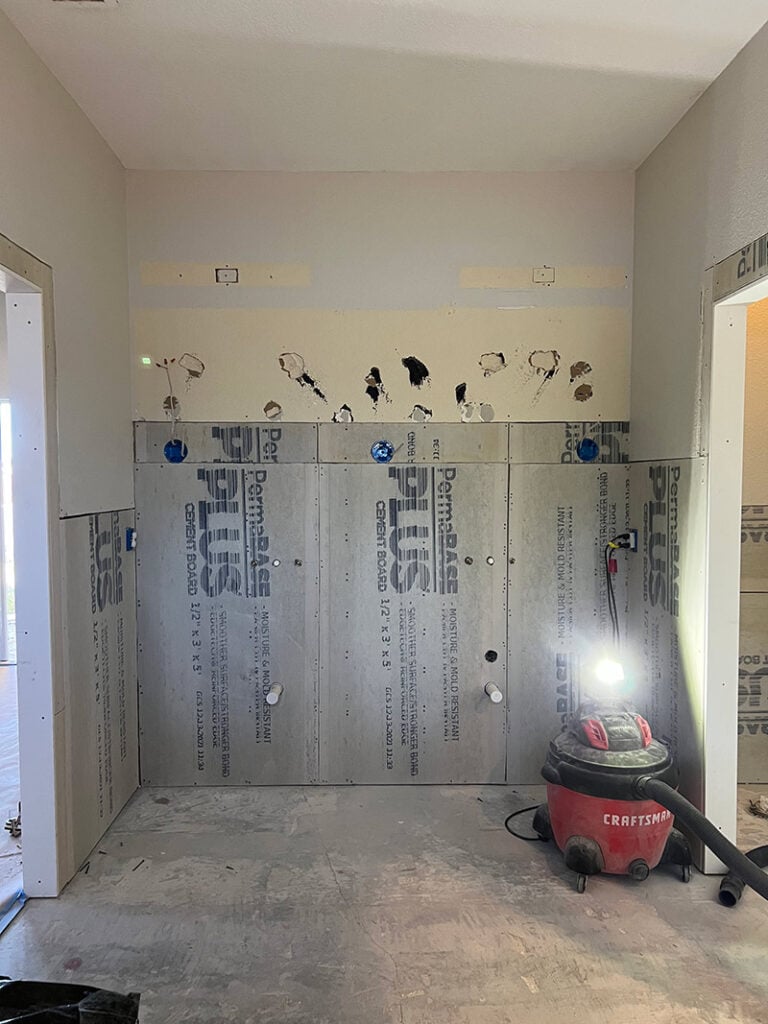
First, we eliminated the shower door and built a curved, open archway. Much better already! We also pushed out the wall below the window for the faucet plumbing, and will be adding a wood ledge along the top.
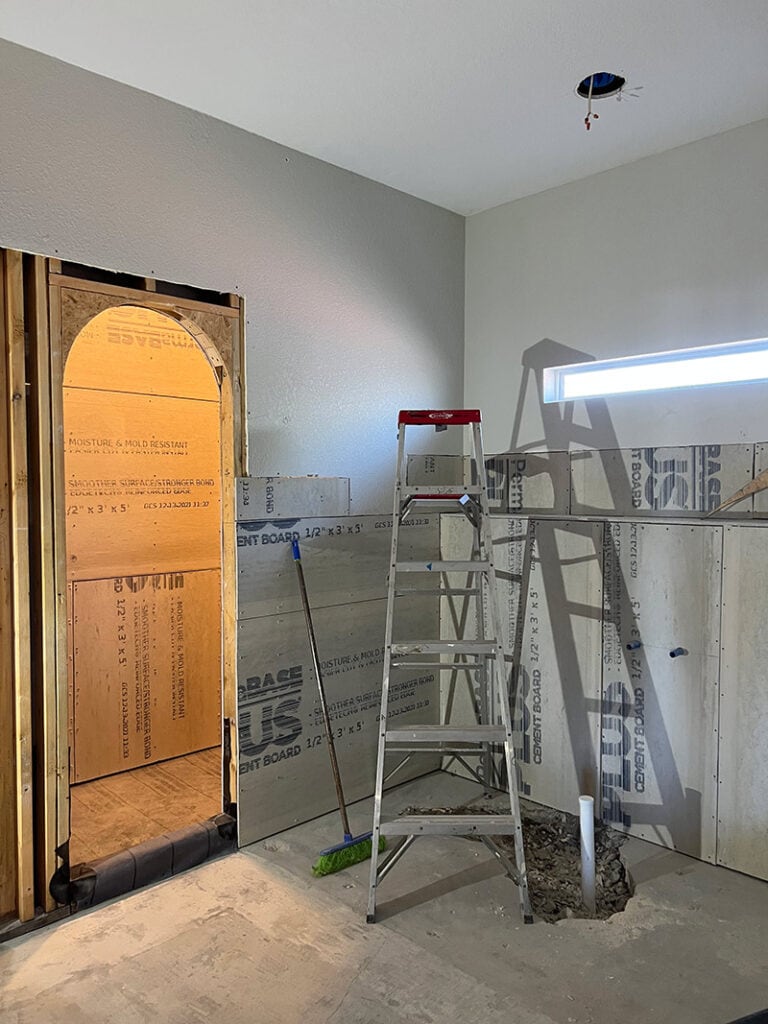
Then, after your feedback in Instagram stories, we decided to build an arched alcove above the vanity…
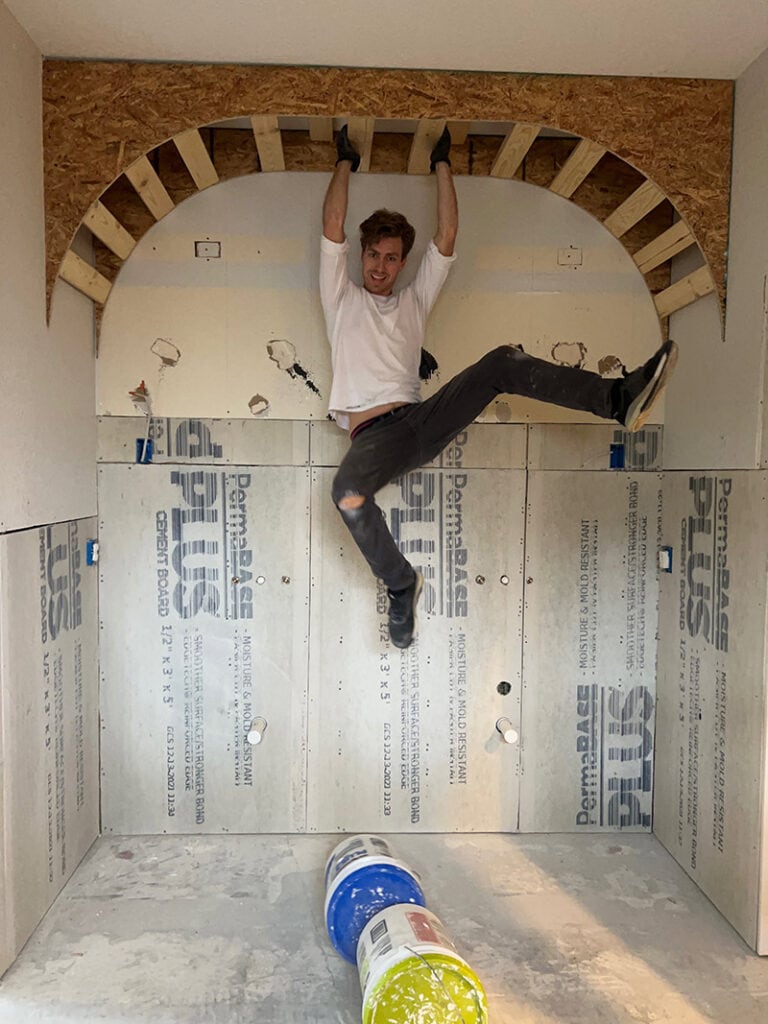
And another above the tub. Tutorial coming soon:
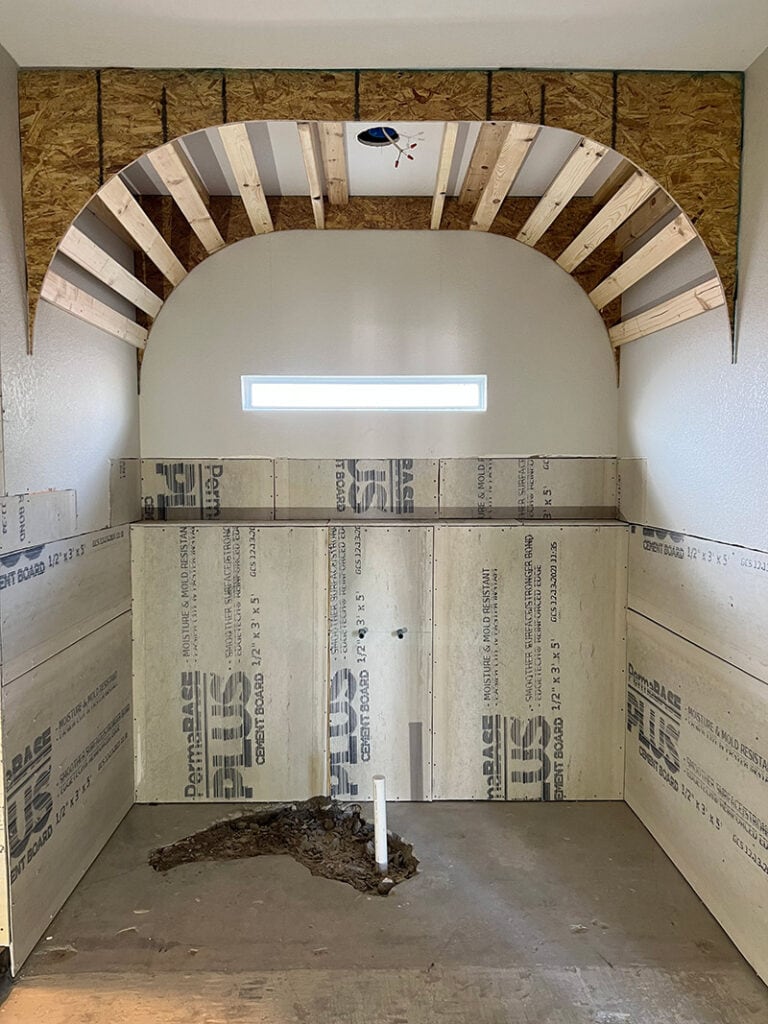
Lucas is finishing up the wall prep as I type, just in time for a very exciting DIY project next week—concrete walls! I got the idea from Leanne Ford—have you heard of this micro-cement technique?
It’s a thin-concrete overlay that you spread over any wall surface—and it’s safe for showers too! We’re applying a Red Guard-type waterproofing membrane to the shower walls to seal it before adding the Surecrete. And of course, I’ll be sharing a full tutorial and videos of the whole process.
If this turns out well, we plan to do the same for the other ensuite bathroom. It seems like a great way to cover up unwanted textured drywall and achieve a rustic, spa-like feel (and more cost effective & lower maintenance than tile).
Okay friends—I think we’ve covered everything—any questions or thoughts so far? Between the laundry room floor tile install this weekend and unforeseen delays, we’re a bit behind schedule so I might not get the next few posts out on time.
Rest assured, we’re hard at work behind the scenes, and I’ll be popping in on Instagram stories as often as I can. Make sure to check there for all of the latest updates!


Madeline says
In regards to the light fixture about the tub… I feel like every influencer I follow with a fancy house has what is practically a chandelier above their gorgeous free standing tubs?! Are they just all breaking code?! Sorry I’m fascinated, but love everything on this plan and can’t wait to see it!
Jenna Sue says
Yes, everyone just ignores it! Building code does not allow non-recessed or flush-mount fixtures within 8 feet of the top of the tub. Essentially, your ceilings would have to be at least 12′ and the fixture would still have to be close to the ceiling. Check out this infograph: https://uploads.tapatalk-cdn.com/20180311/f5bf1d80e39a9b4f2f420a441e0b7c03.jpg
Julie says
I’m so interested in the concrete walls. So basically a tiled shower without the tile? And it will never fail? It sounds too good to be true, I can’t wait to see you do it, and I want to try it myself.
Tina Diaco says
All I have to say is “WoW”! That sums it up!