I’m here today to talk about a long overdue project I completed over the weekend: a headboard for our bed!
I took my time figuring out exactly what I wanted for this one (over a year, to be exact), and I think it’s a perfect fit for our room.
I found a handful of tutorials such as this, this, this, and this, began to gather my supplies.
First thing to get was a large piece of MDF from Lowe’s (around $20, they cut it to size for me). We have a King size bed, so the measurements were around 78×35 for ours (I actually could have made it a few inches narrower though)

Next, I stopped by Walmart to pick up a few foam mattress toppers (the tutorials said it was much cheaper than 2″ or 3″ foam, and worked just as well). I wanted it extra thick, so I grabbed three for $10 each, and then headed to the fabric section just for kicks.
And then, I saw it:
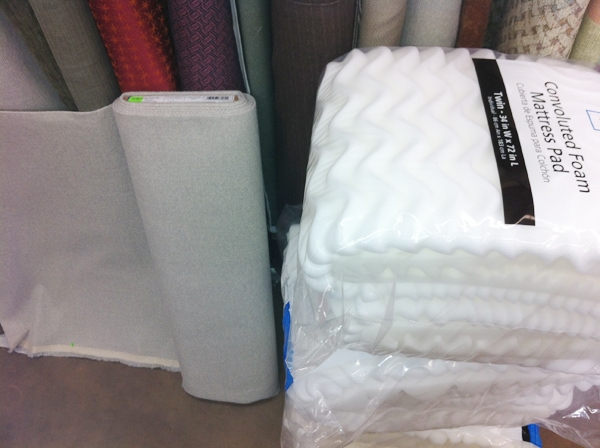

It was beyond perfect. Not only was it $2.50/yard, it was the perfect mix of grey and tan and woven texturedness I had dreamed of. I knew I wanted something natural and woven, and not the typical orangey-yellow burlap, but more of a soft gray. I seriously lucked out with this one.
And look, it matches our couch!

I bought 2.5 yards, along with a roll of batting and the three mattress covers. The total came to around $50, but luckily I still have some Christmas gift cards leftover… so my total: free.
Next I headed to Joann’s and picked up the rest of my supplies:

A button cover kit, decorators needle and upholstery thread. It was around $13 (after a coupon) for these.
Once home, I laid out my fabric and ironed it out as best as I could (this is an important step that people tend to forget):

Once it was nice and smooth, I began drawing my template for the headboard shape. I used a large piece of cardboard, measured to the center of my headboard, and made the cardboard exactly half the width it. I then freehanded the curved shape I wanted:

Once I was happy with it, I used an Xacto knife and traced over the line, then traced the shape onto my board:

Then I lined it back up to the middle, flipped it over, and repeated:

The next morning I woke up to find Brad in the garage, cutting the shape with our wireless jigsaw.

Unfortunately, wireless power tools are worthless, and it only got this far before the battery died:

So he borrowed our neighbor’s jigsaw to finish the job.
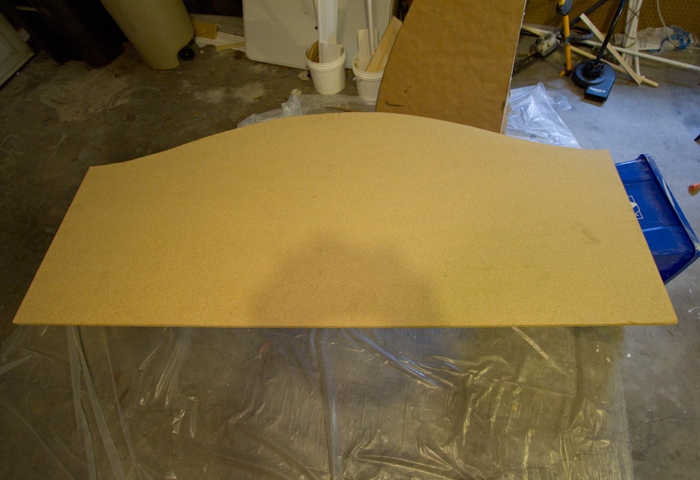
Ta-da!
The edges weren’t perfect…. which isn’t a huge deal, but I took my hand sander out and smoothed out a couple small areas just to be safe.
Next it was time to measure for the buttons. I decided to go with two rows: 3 on top, 4 on the bottom, in an alternating pattern.

I already had my center line marked out, so it was an easy process from there. I placed them 15″ apart from each other, made my marks, and drilled holes all the way through.
Here’s a visual of the intended placement:

Next came the hardest part of this entire project… trying to ar
range the foam and cut them all perfectly to size.
But there was a problem.

I didn’t pay attention to the length when I bought them… oops.
So I had to revert to plan B: using just two layers, and cutting a small section to fill in the gap from the third.
Luckily, the width was the exact height of the headboard… I lucked out here.

The problem with these things though is that they are flimsy, don’t lie completely flat, and the factory edges are not straight at all. Also, I don’t think I had the right tools to cut these… I was using a steak knife.

Here is a tip: apply pressure to the foam when you are cutting. The flatter and more condensed it is, the easier it will be to slice through.
After a good 30 minutes though, I finally had everything as smooth as I could get it, and it was time to wrap it all up with batting.
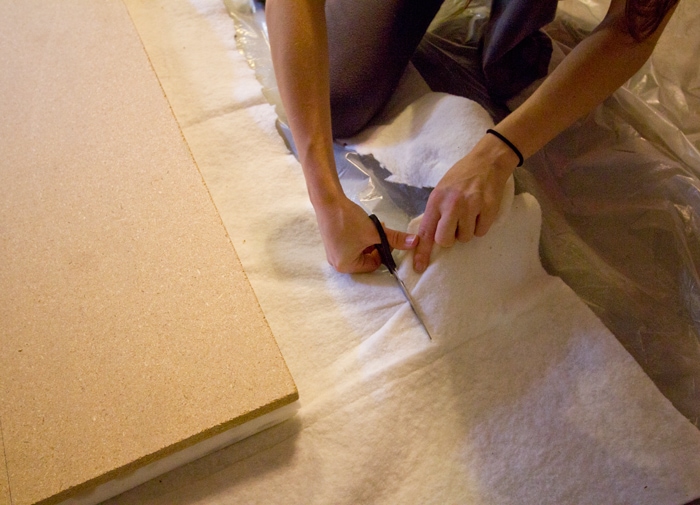
I lined everything back up as best as I could, set the batting down, trimmed the excess off around the edges, and stapled it up.

And it was starting to come together!


I repeated the batting process with the fabric, and then it was ready for tufting:


I went inside to figure out this button covering process, which was actually really simple…

After all 7 were completed, I headed back into the garage and got to work. I don’t have any in-progress shots of this because Brad wasn’t home, but here is the basic process: thread the needle, attach a washer to the end, push it through the hole and through the button, come back through the same hole, pull it tight, use a staple gun to hold the thread down, and wrap back around through the washer and around the staple to secure. After breaking the threads a couple times from pulling too hard, I double threaded my needle (so there was 4 strands). Make sure to push the needle through as straight as possible, so your buttons stay level.

Finally, I attached a french cleat (my favorite method of hanging large objects… super easy!)

I measured and attached the other half to the wall:

And we had ourselves a headboard!

After this pic was taken, we ended up spraying some of the areas down with wrinkle releaser, which smoothed everything out perfectly.
And now, for the first time ever, this bedroom has a headboard!


Now for the cost breakdown (these are rough estimates, since I suck at keeping receipts)
MDF board – $20
Fabric, batting, foam: $55
Buttons – $13
total: $88
-$55 gift card: $33
$33 for an upholstered tufted King size headboard… I’ll take it!


Drew says
This comment has been removed by the author.
hvac training California says
Can any bed frame accommodate a headboard? Does the bed frame come with a headboard or do i have to purchase it separately? Where can i buy a bed frame from? Thanks
Jenna Sue says
Sorry for the delay! I just measured, it's around 24″ tall on the sides.
Jenna Sue says
I don't remember exactly but I want to say either 3/4 or 1″.
Chelle says
Just found your blog…..just googled upholstered headboard DIY and yours popped up! Brilliant idea to use the washers when doing the button tufting! Thanks!! We're right in the middle of building our bed and your tutorial is great! Thanks!!
Richard Duncan says
What thickness of MDF did you use?
Katie Rose says
I just made one myself – I actually used egg crate foam mattress toppers…just turned the egg-y part towards the wood so the whole thing wasn't bumpy. Probably no cost savings there except for the fact that I had an extra one lying around so it was free for me 🙂
Other than that, turned out great! Super easy! 🙂
PS: Also..I found this exact same fabric in my walmart…also for $2.50 a yard. Worth checking out if you like this fabric!
Anonymous says
I'll soon be doing a headboard…just trying to decide on the right fabric. I was going to throw away old mattress covers, but washed and kept to use as batting. Why don't you do the tile project yourself? Lots of do-it-yourself info. online and most tile stores have classes. Hubby did ours and is very nice.
Glamorous Mommy says
I'm attempting a tufted headboard this weekend! So glad I came across your post, it's gonna make it much easier for me 😉
– Fotini { https://glamorousbride.blogspot.com }
Amanda says
Been dreaming about this DIY headboard since your post last March and I finally got all the supplies to do it today 🙂 I know the height from the lowest to highest point is 35″ but would you mind telling me how high it is on the sides? We also have a king size bed and I love the shape of yours – going to try to make as close to the same size as possible. Thanks so much 🙂
Ally says
Awesome! Thanks 🙂
Jenna Sue says
Valspar's Stillness (there's also a full paint/room source list in my Florida House page tab!)
plumbing says
Decide on what kind of aura you want for the bedroom. This can help you choose the kind of headboard to use and the design to apply.
Ally says
Good job! Off topic, what color and brand of paint do you have on your walls? I love the 'simplicity' of your room, the colors, decorations, so peaceful and beautiful. I am trying to figure out what to do with some of the walls in my bedroom and I really like the empty frame you've got on yours.
Thanks!
Maggie says
This comment has been removed by the author.