I was expecting to have a finished, beautiful new foyer to show off tonight.
Instead I have this:
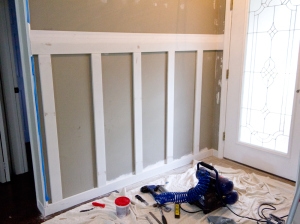
A few boards on the wall and a two part post.
If you can remember earlier this summer, we installed this faux board and batten in our dining area. It was a long process but we learned a lot, and I felt we were ready for the more advanced board and batten.
I’ll make this short because I’d rather not relive it again, but I decided Friday afternoon that we might as well just tackle our foyer project since nothing else was lined up. Brad was less than thrilled with the idea of spending yet another weekend on one of my projects, but he complied and off to Lowe’s we went.
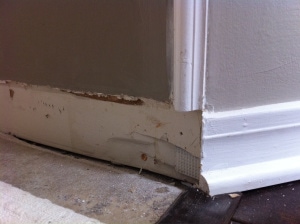
We picked up several 1×4’s (painted MDF) and some chair rail for the long wall. The plan was to remove the old crusty baseboards and use 1×4 boards instead. Sounds simple, right? Well we forgot to take into account that it has to meet up with the old baseboards around the corner and they are nowhere near the same size and/or shape.
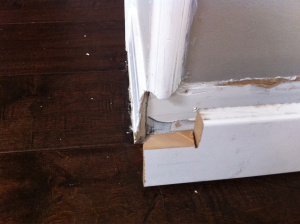
So we had this issue:
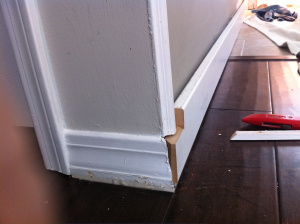
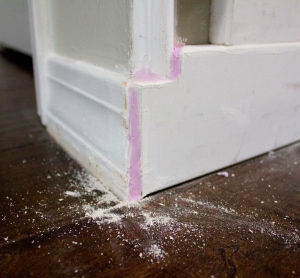
You can see where we tried to make a bunch of cuts to sort of piece it together and make it work… the other side was the same story:
Anyway, things were going well until this happened and Brad was not in the mood to deal with it so he gave up and spent the rest of the day in the Man Cave. I was over it too so I took the day off.
Today we came back, refreshed and regrouped, and decided to just make it work. I knew I could mold something decent from putty and sort of merge the pieces to the point where nobody would know just by glancing at it. It was either that or no project at all. And so the project continued.
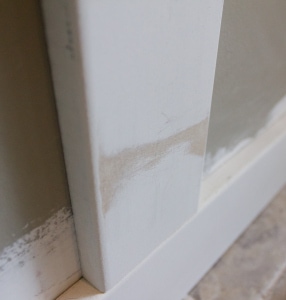
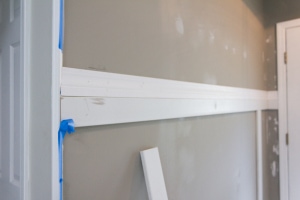
Here’s what the seams are looking like after some sanding a first coat of putty:
It’s obviously nowhere near perfect, but I’m going to work on it little by little this week until I can make it work.
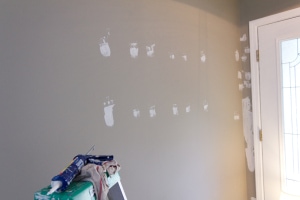
Iin the meantime…. we had a lot more patching and sanding to do elsewhere…
We’re also going to have to repaint the entire top half of the foyer, because we ran out of paint and the paint we used was a Wal-Mart color-match to Valspar. Walmart no longer carries that paint brand, so we are SOL with all of the paint colors in our house. Ugh.. never use Walmart paint. I probably won’t ever color match again at all because of this. But anyways….
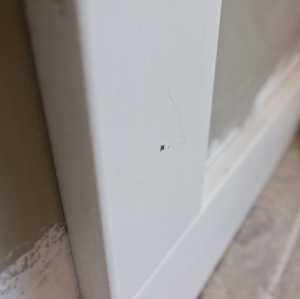
The lifesaver of this whole project was our metal nail file set we recently purchased. I used it to carve down the baseboards, and also to perform this magic trick on finishing nails that stick out:
Check out what happened to this nail….
Approx 20 seconds later….
 |
| Nail? What nail? |
Nail files: Highly, highly recommended.
Moving along.
We went ahead and installed the top horizontal pieces FIRST after learning our lesson from the first time around.
Early on, we discovered that none of our walls are exactly straight… including the slope of the floors, so one end of the wall could need taller vertical pieces than the other. This foyer wall was no exception.
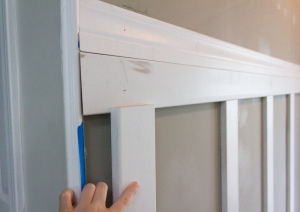
I had cut all the vertical boards to 48″ (for an overall height of 58″ from the floor), and the first board fit perfectly, but by the time I got to the end….
It was nearly half an inch too long on the other end. I had to trim each piece down a bit, but this method ensured a perfect fit for each board rather than having to fill the gaps in with putty like last time. I spaced them 13.5″ apart, but I could have used any width for the gap—it’s all personal preference and planning around obstacles (like outlets).
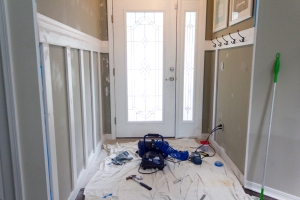
And viola:
Everything has been putty’d and it’s ready for sanding & paint. I miscalculated my measurements a bit for the other wall, so I still need to run back to Lowe’s this week and get a couple more boards. Then it’s smooth sailing from there!
So next week, I promise, there will be a finished foyer reveal. And it should be worth the week long wait 🙂




Chas says
Like your blog and your board and batten project. I did this in my sons room at my previous house and intend to do it again at my new house. I may give MDF a try this time, as I used pine in the first go around. Its never as easy as you think it’ll be when you set out either. Walls aren’t square, floor isn’t level, wavy walls and base board issue… on your base board issue, you could have also opted to use a corner block or plinth type piece. (Like these here: https://bumbleberriesboutique.blogspot.com/2013/04/my-new-baseboards.html#.VqqPW1I3l88)
Anyways, keep it up! I also may be tackling some similar faux beams to yours. Thanks for all the guidance and inspiration.
Jenna Sue says
Valspar's Magic Spell (all home sources are listed on the House Tour pages: https://jennasuedesign.blogspot.com/p/florida-house.html) Hope this helps!
Anonymous says
What is the paint color on your wall?
Christina says
I really like your wall color. What color is it?
Jenna Sue says
Anonymous – 13.5″
Anonymous says
How far apart was each vertical board from one another?
Pine Tree Home says
Funny you had the “corner” incident. I ran in to the same problem while working at my dad's house. We used a dremel to notch out the molding and I am hoping caulk will do wonders. Looking good.
Jacqueline says
Its looking good…I'd love to do this!
jbsoffel says
You have inspired me to try this in one of our rooms! I am excited to see the finished product.