The idea of creating a custom built-in pantry was the first thing that came to mind when I first laid eyes on this back wall in the kitchen:
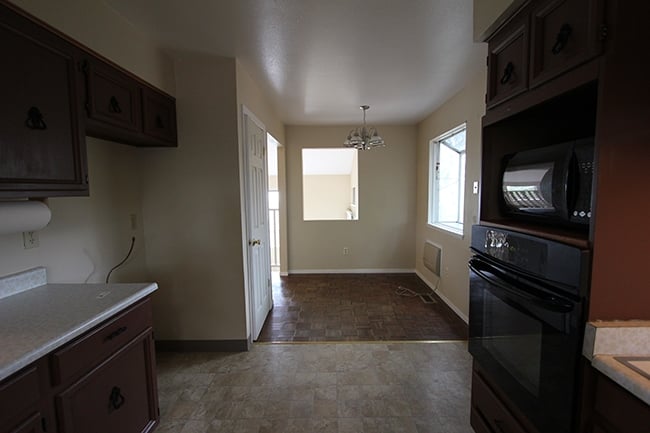
It was an ideal setup—hidden storage that’s shallow so you don’t have to dig through to get to the back, and a small footprint to keep the kitchen nice and open.
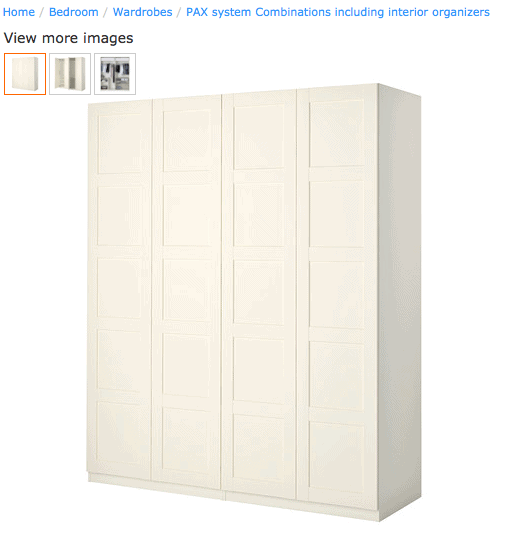
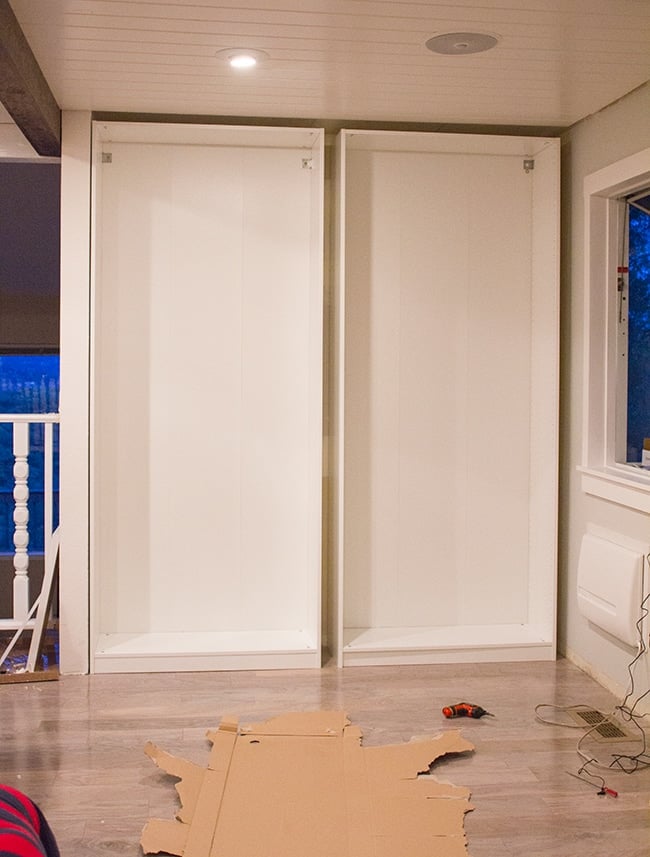
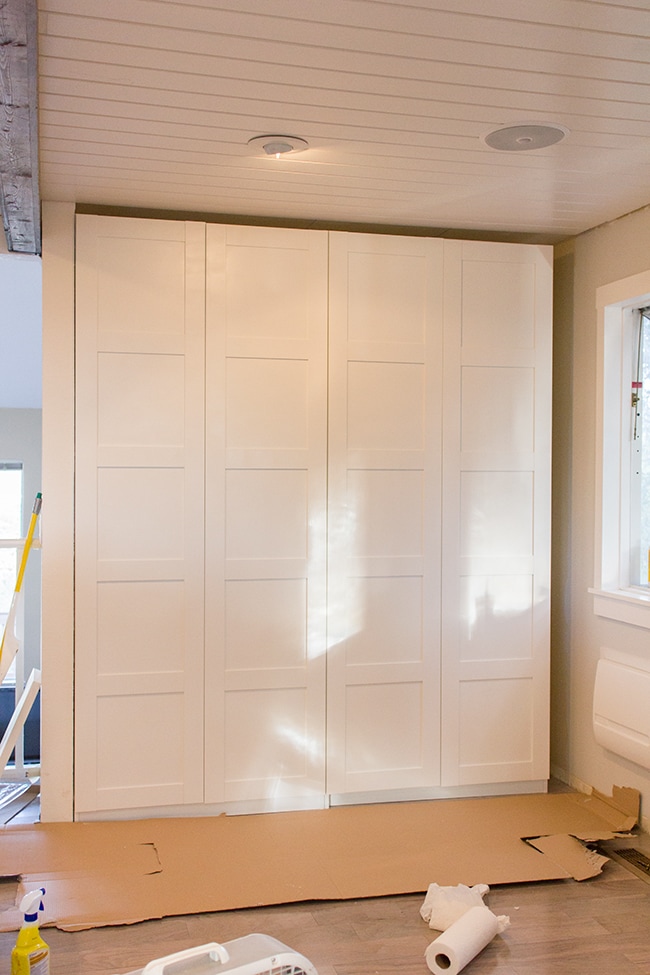
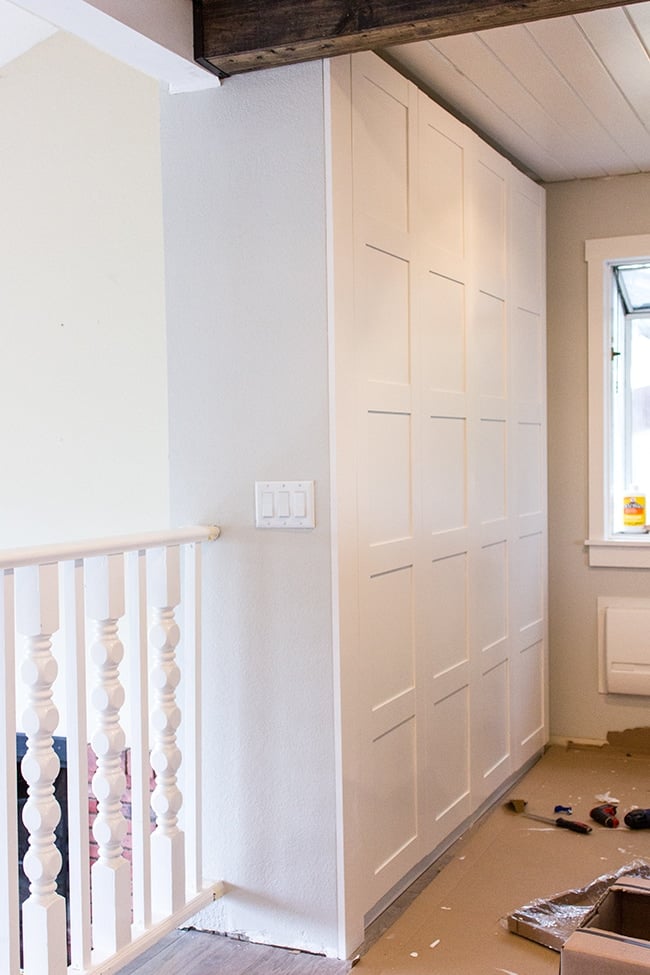
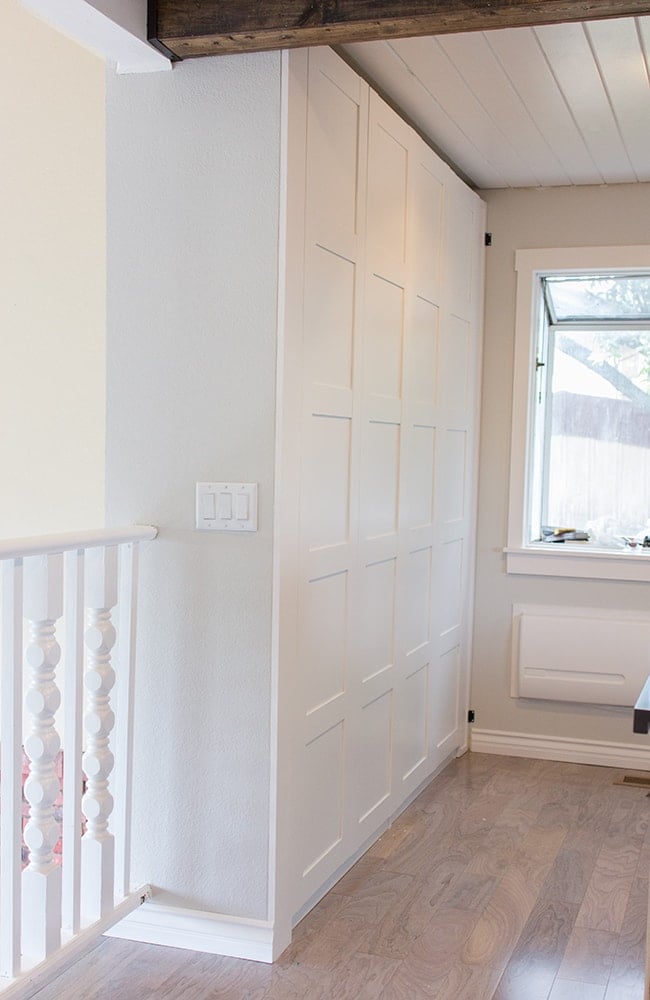
You may remember me mentioning that I picked up a couple Pax wardrobes in my Ikea Trip post. They were perfect—just the right height for our ceiling, not too wide, and only 14″ deep.
For a built-in look, I had our subcontractor extend the wall to 14″ so it would line up with the pantry (he also filled in the pass through to the living room):

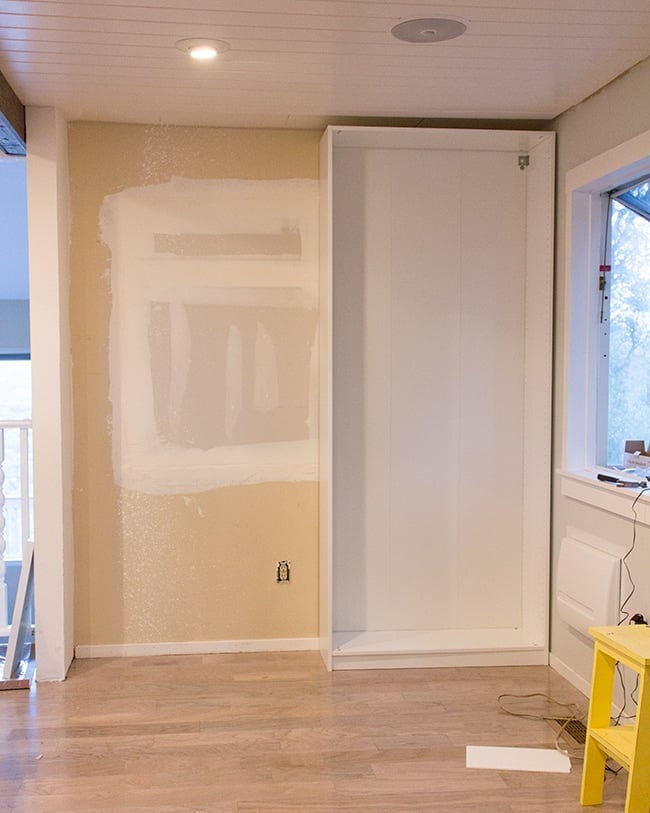
Assembly was nice and straightforward—one of the easier Ikea pieces we’ve done.
Here’s the first one up!
And the second one:
At first wasn’t sure how I was going to space them out. I knew I’d have to add trim somewhere to hide the gaps, but when I pushed them to the left, I discovered the empty 6″ of space on the right would be perfect for storing our mop and brooms.
I’ll get to that in just a bit, but first, the doors had to come up:

It’s not obvious in this photo, but the doors were not a true white—of course. Ikea loves to drive us crazy by making every “white” piece of furniture a different shade, so you’ll just have to trust me when I tell you that these doors are off white.
Here they are in their final position, secured to the wall (and to each other). Again, looks white enough, but it’s not. You can tell a little at the very bottom where the Pax wardrobe shows (the Pax frame is a truer white).
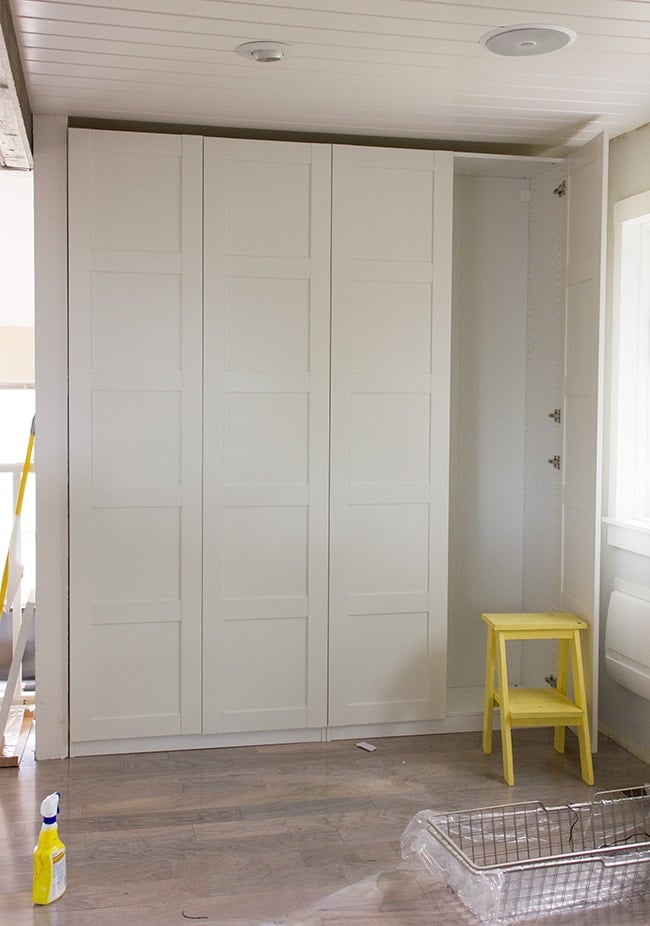
I was hoping it would be something I could live with, but I just couldn’t, so I decided to paint them.
I’ve painted cabinets before (remember our last kitchen makeover?) but this was different—we’re not talking wood here. This is foil coated fiberboard—a lot trickier. I needed a game plan.
I remembered Jenny’s Pax Wardrobe makeover and was so thankful to find she had written a post about it. If she could go from white to dark gray without a problem, surely I could transform my doors from off-white to white.
So I picked up my supplies, and thanks to Jenny’s post (along with other tips & tricks I’ve learned along the way), here’s how I painted these doors…
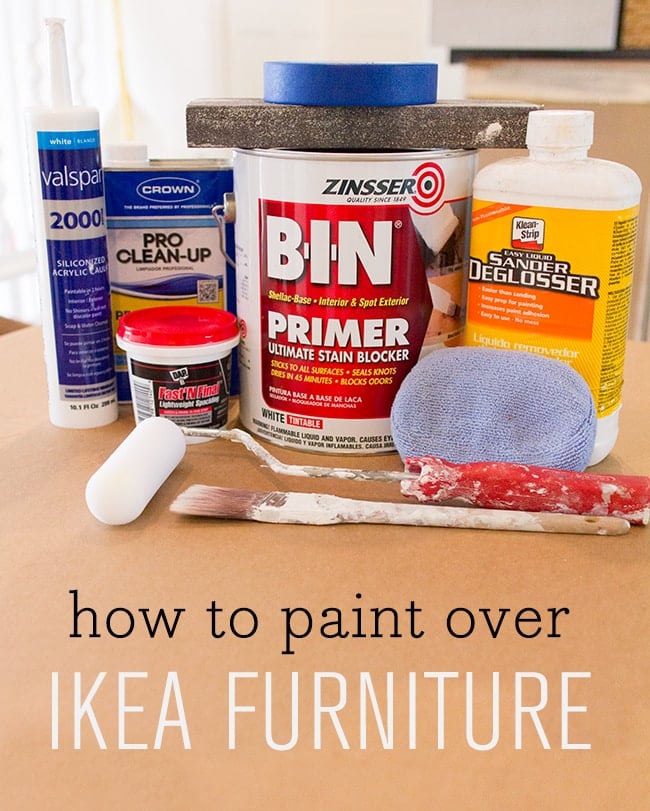
First of all—primer. To cover anything other than wood (ie most Ikea furniture), you’ll need shellac based primer. I picked up a gallon for $42 at Lowe’s and this stuff will last me a while.
Other supplies include deglosser (I had this on hand already—still not entirely convinced it’s necessary but more experienced people use it, so…), a fine sanding block (I used 150 grit, but 200 or 220 might even be better), painters tape, some sort of paint thinner/acetone for cleanup, a dense foam roller, and a good brush. If you’re filling seams or patching holes, you’ll want spackle and caulk (though I didn’t need it for these doors).
Alright, Step 1. We decided to paint the doors already hung to make it easier and save time. After taping off the hinges and thoroughly wiping down with deglosser and a clean microfiber cloth, we rolled on our first coat of primer.
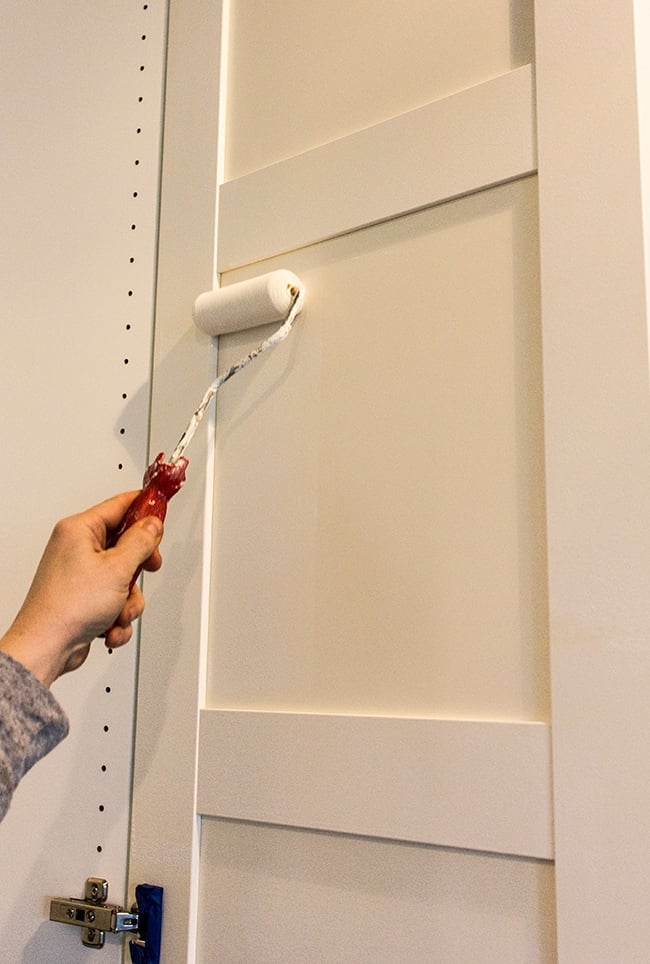
You can see a bit more here where the white primer went on vs the off white door color.
To get into the grooves, I used a small brush…
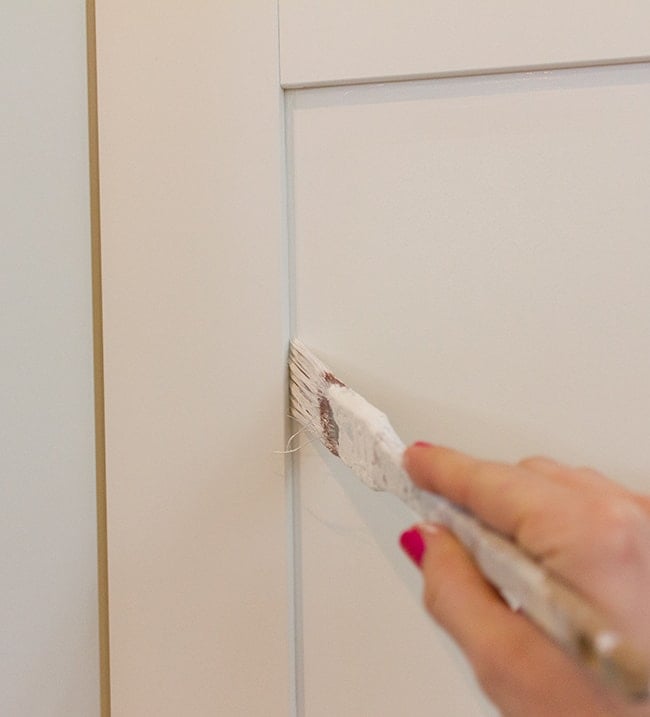
but you’ll want to use the brush as sparingly as possible because you can see the brush marks left behind. The roller provides the smoothest finish.
This primer has the consistency of thick milk, and we used super thin coats. It becomes tacky in under a minute so you have to work fast. Put a quick coat up and move on.
The can says drying time is 15 minutes and you can reapply a second coat in 45—this is much quicker than the Zinsser Cover Stain we used last time, FYI. Which was great because it meant this project would take a weekend instead of a week.
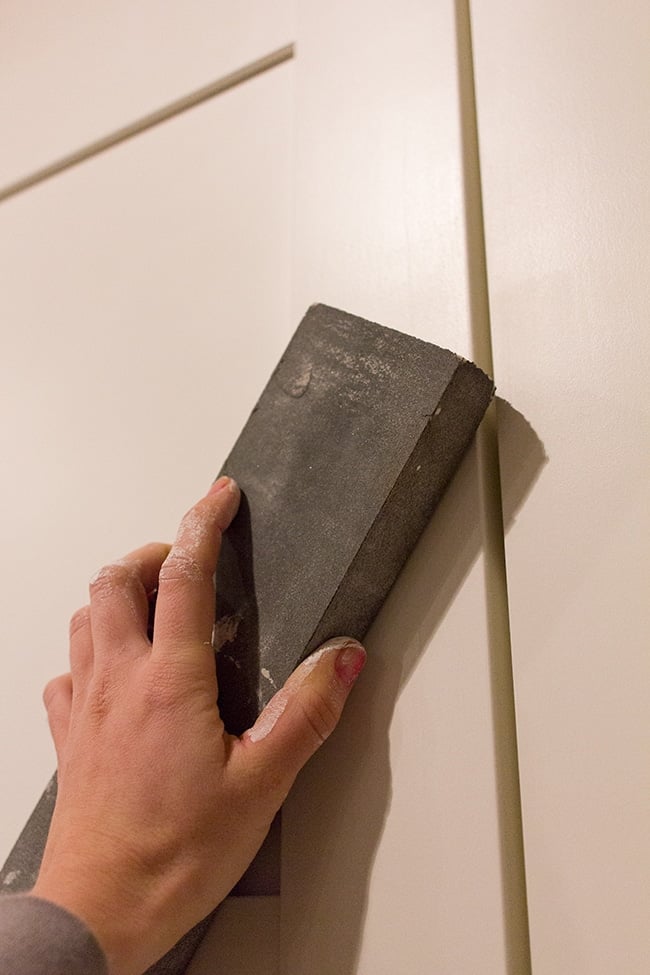
After each coat, you’ll want to check for any rough patches and lightly sand. Because our coats were so thin, they were super smooth and most of it didn’t need to be sanded at all.
The first coat took maybe 30-40 minutes, and since it felt dry to the touch I decided to start the second coat. But then this happened in a few spots…
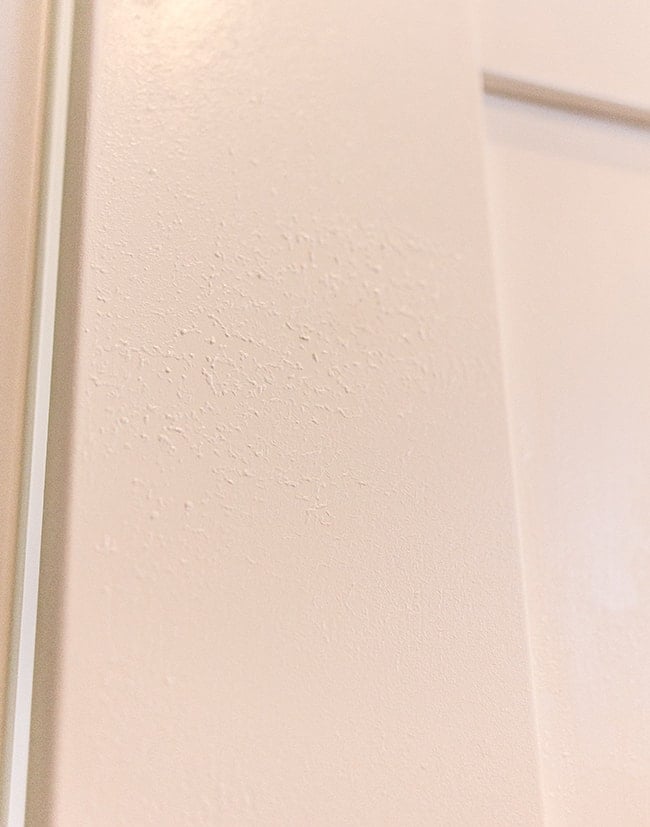
I wasn’t sure if it just needed more time to dry or what, so I left it alone for a while. I came back and sanded those areas down and it seemed to be fine after that. I think the key with this is to leave enough time between coats, and make sure they are thin.
The paint I used was the same white paint I used on all the plank walls—Valspar’s Signature line color matched to our trim (Kelly Moore’s Swiss Coffee), in satin.
Because the paint color was very close to the primer and it has great coverage, I used two thin coats (no sanding once the latex paint goes on) and called it a day.
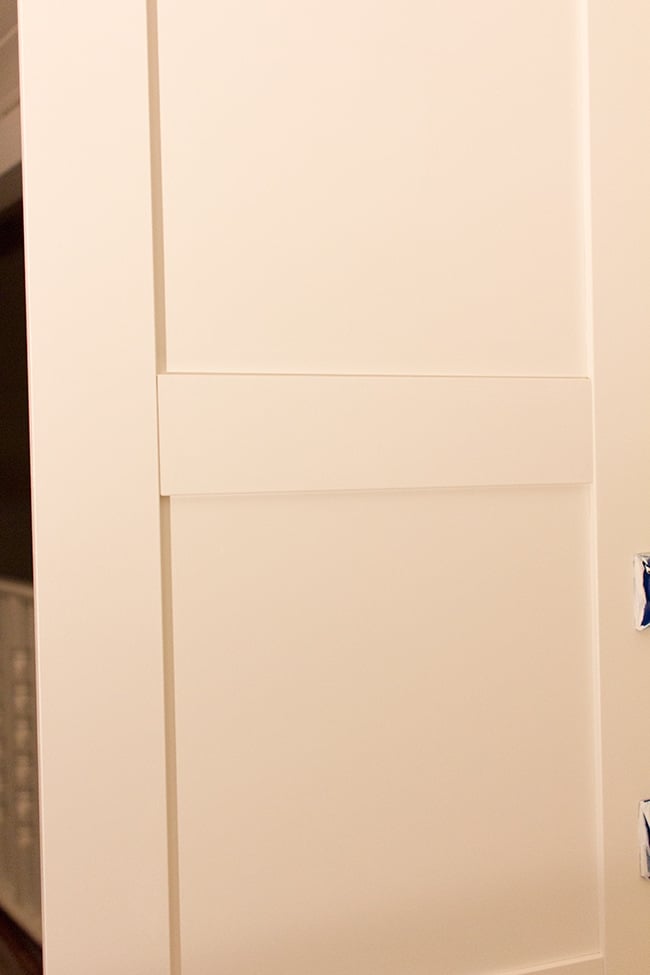
Ahhhh…. bright white.

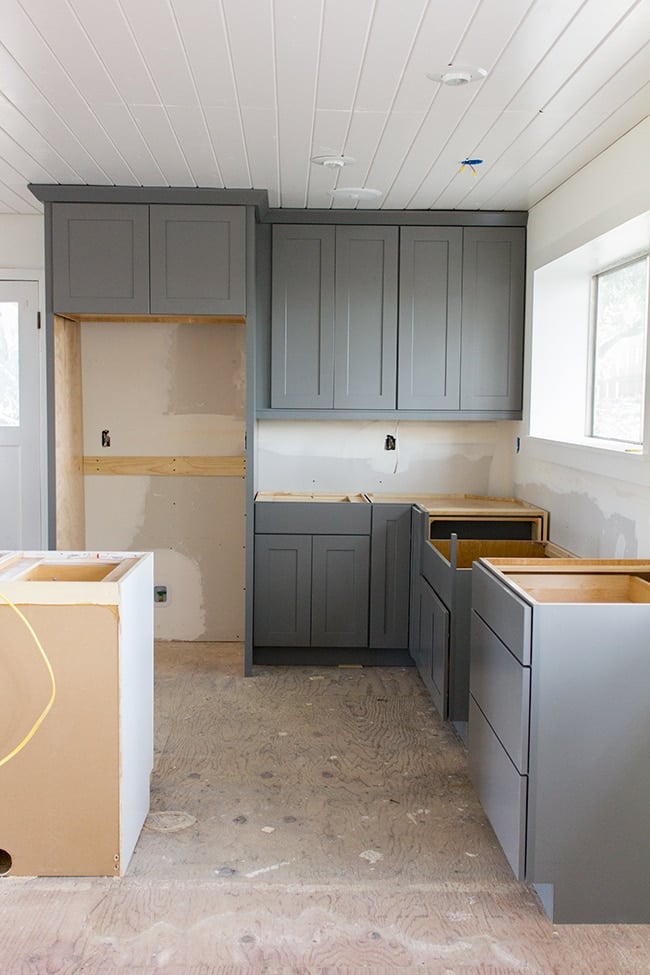
Switching gears for a second here—during this this time our kitchen was in shambles…
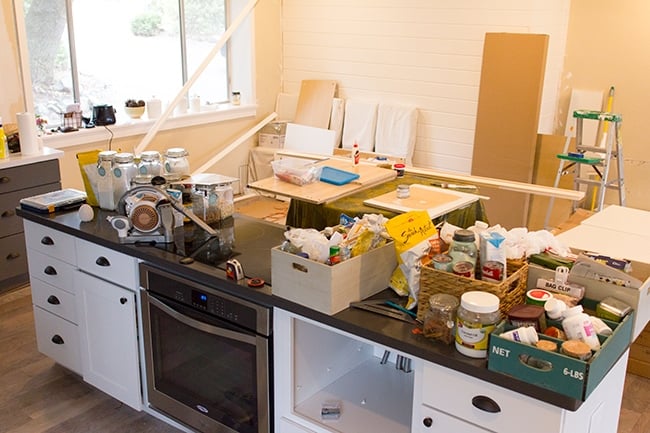
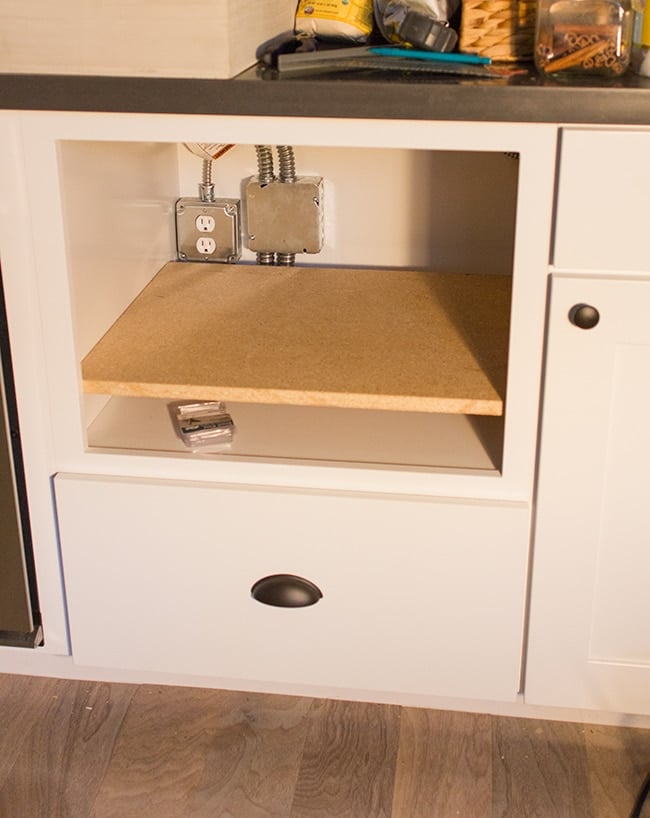
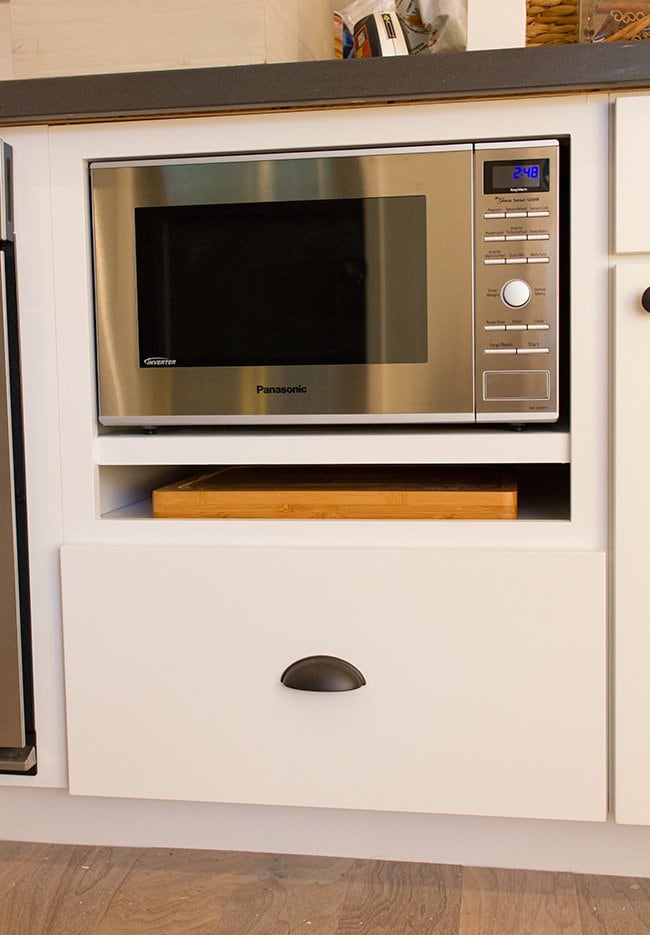
We had a paint station set up in the dining area and decided to go ahead and take care of something that’s been bugging us for a while—this microwave cabinet:
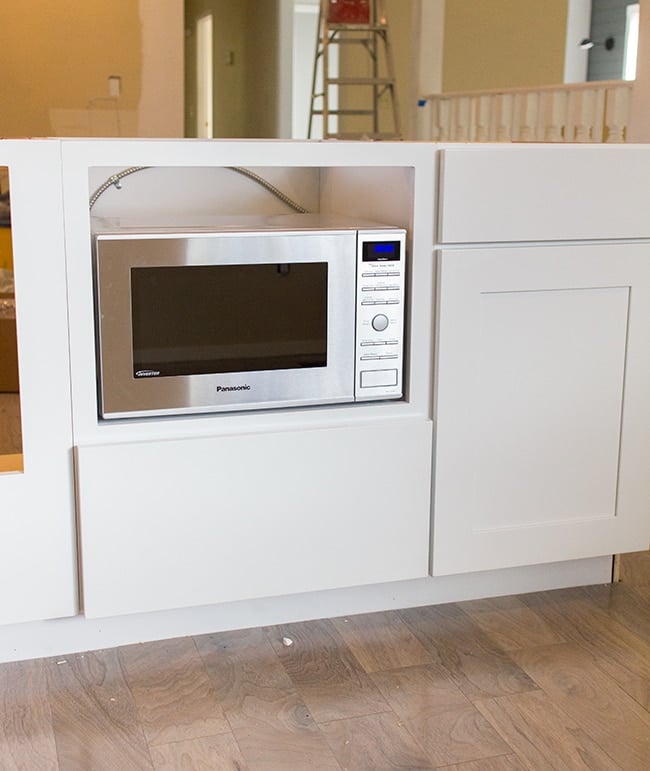
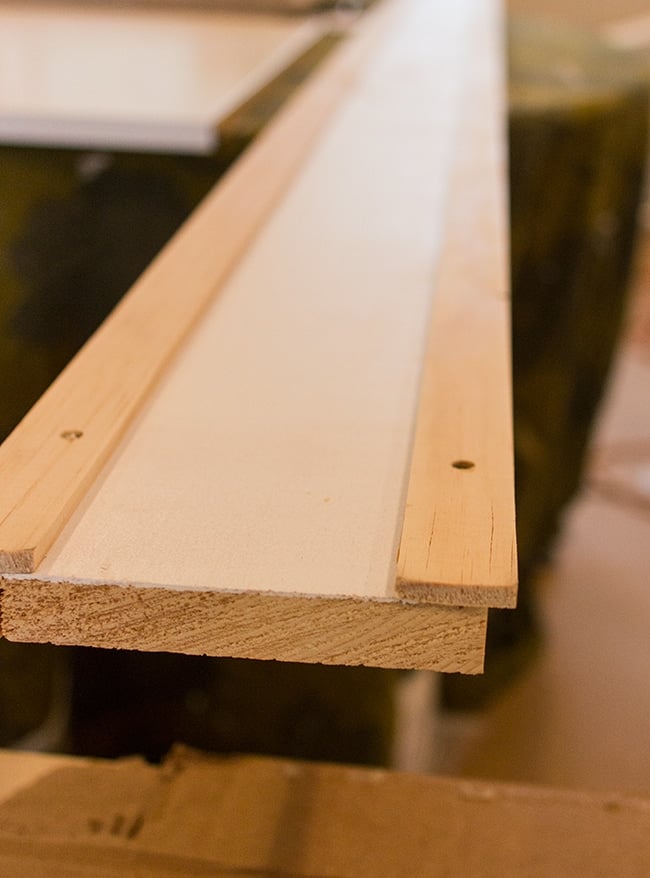
It fit like a glove on the sides, but there was that big gap at the top. Solution? Build a shelf, of course.
I thought about using 1×2’s along the side as the supports (the same way I built our old pantry shelves), but Brad mentioned drilling small holes and using those little plastic shelf support inserts instead. That was a much better idea, so we picked up a few packs at Lowe’s.
After measuring the height we needed it to be and making our marks using a level, we drilled the holes using a drill bit that matched up with the insert size:
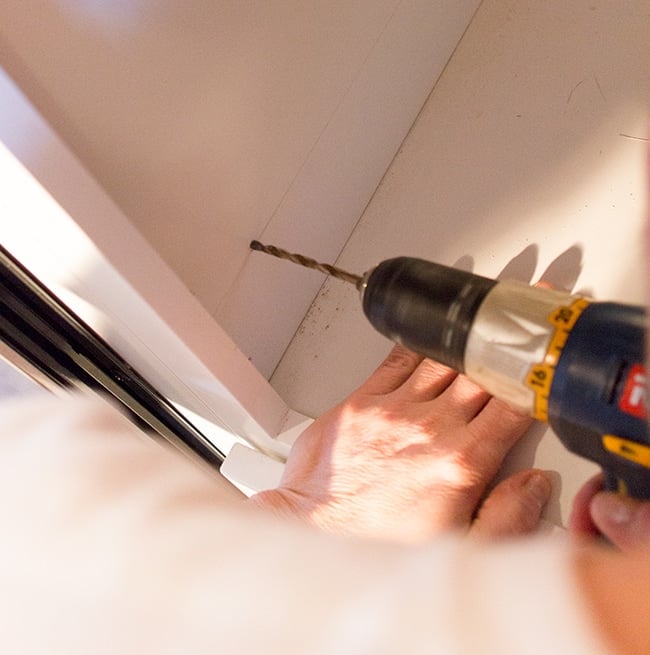
We went with 3 on each side for extra support.
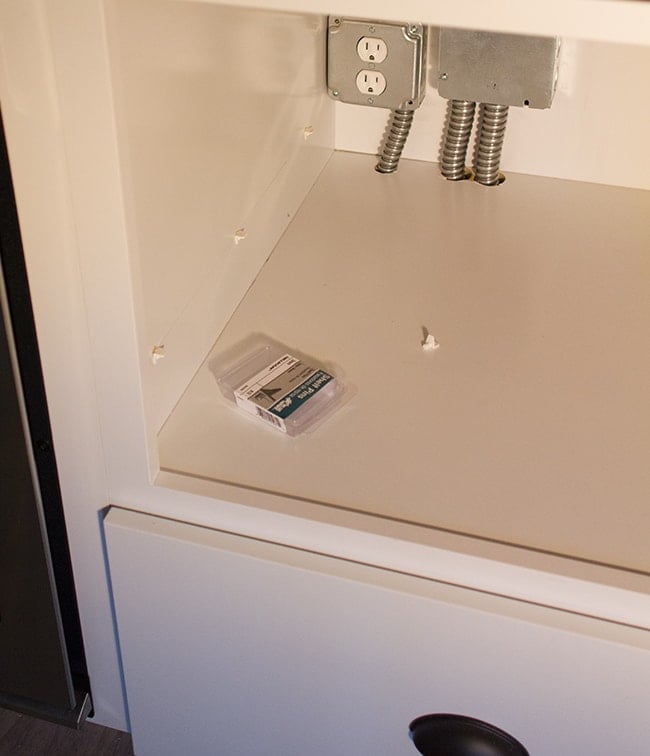
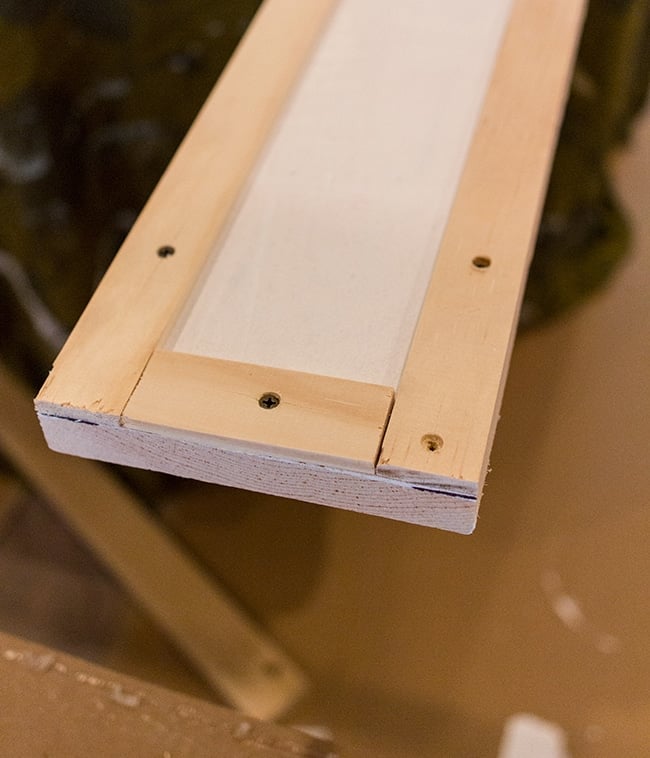
For the shelf, we cut down a spare piece of particleboard we had—this wouldn’t be my first choice as it’s really dense/heavy and has a rough surface, but it was free and the microwave would be hiding it anyway.
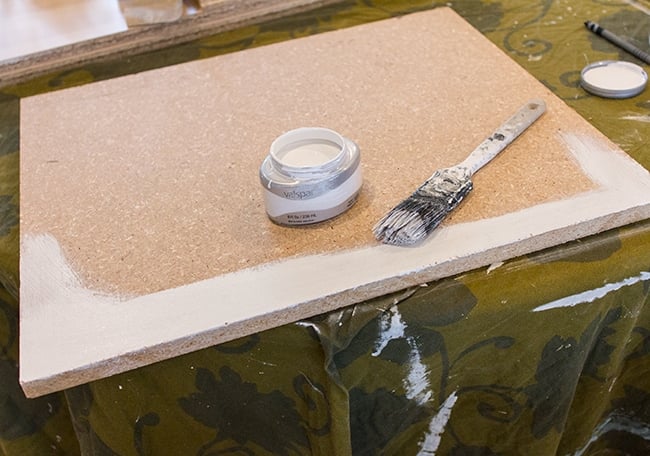
A while back I grabbed every white paint swatch Lowe’s carried and brought them home to find the closest match to our cabinets. I found one that was almost identical and bought a $3 paint sample to take home.
To keep the microwave from sliding backwards, I cut a piece of spare wood to size and nailed it onto the back.
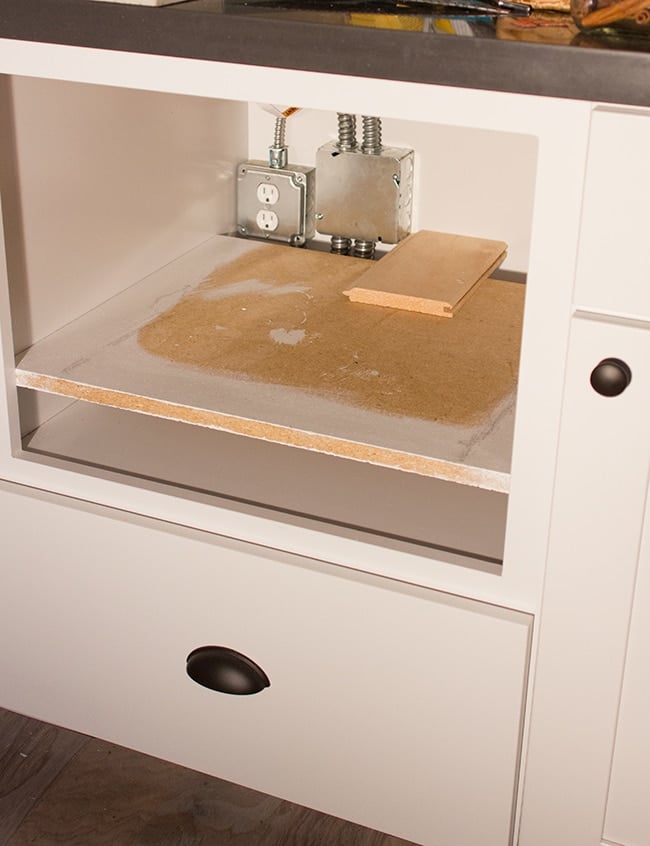
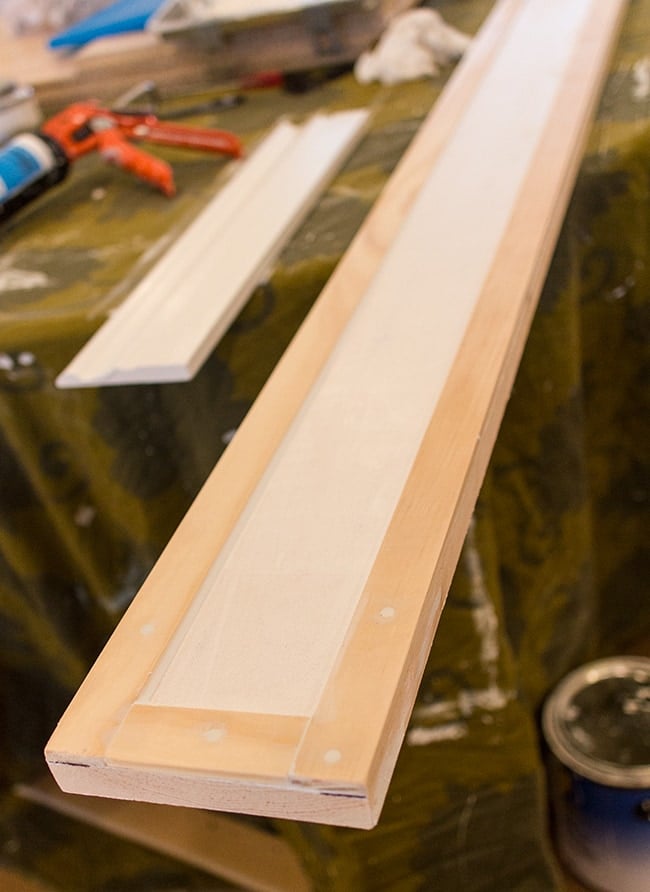
And to finish it off, I painted a piece of lattice and secured it to the front with a nail gun.
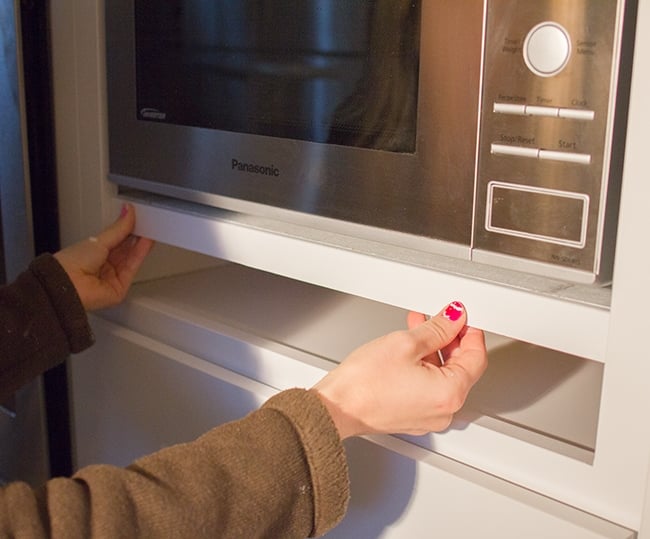
Now it really looks custom! And it makes the perfect storage cubby for my cutting board.
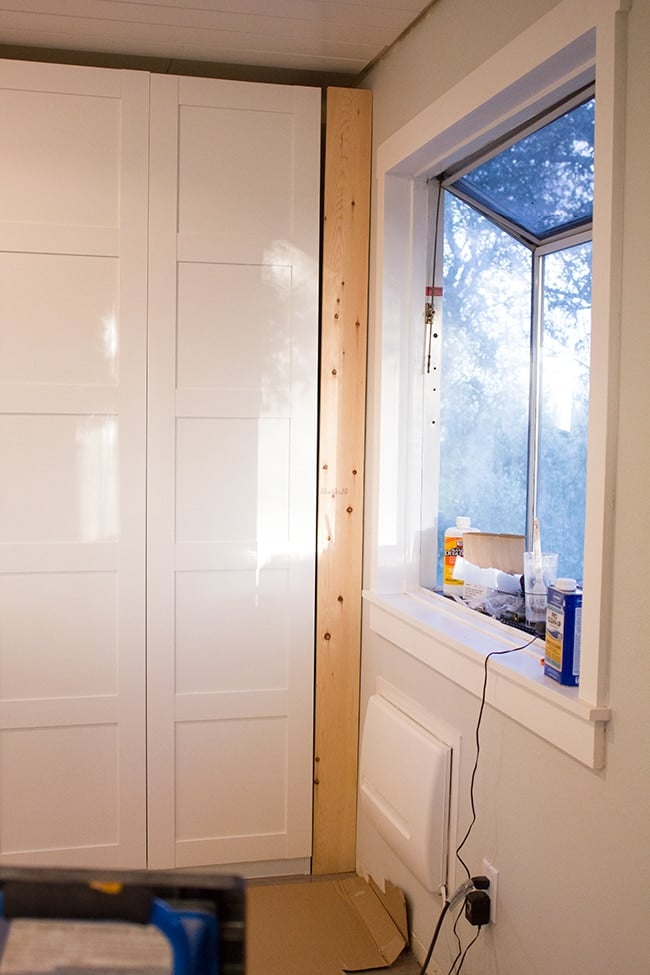
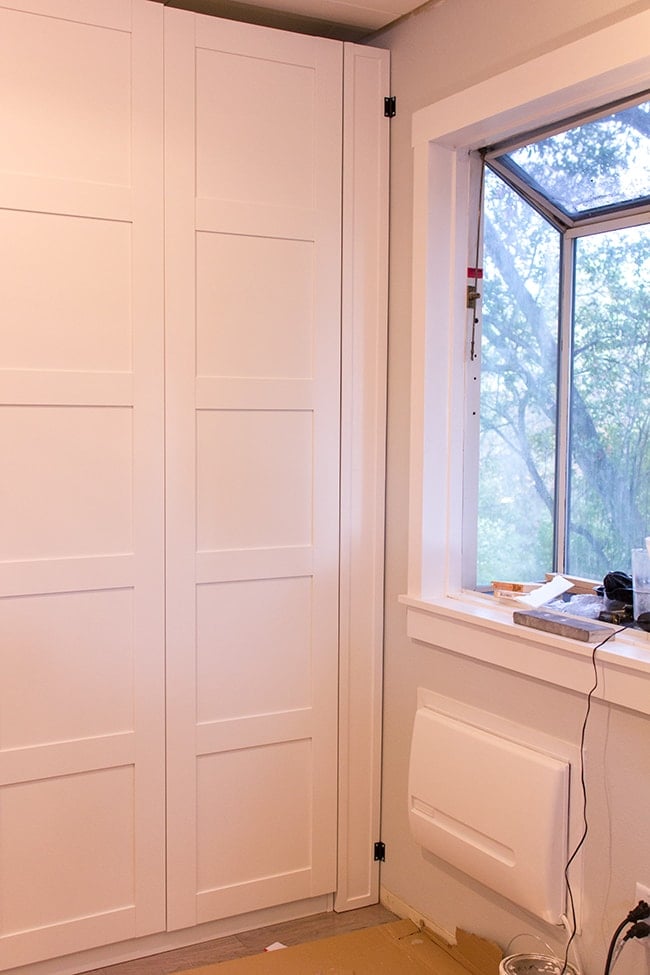
Okay, back to the pantry. Now that the wardrobes were in, it was time to address the sides.
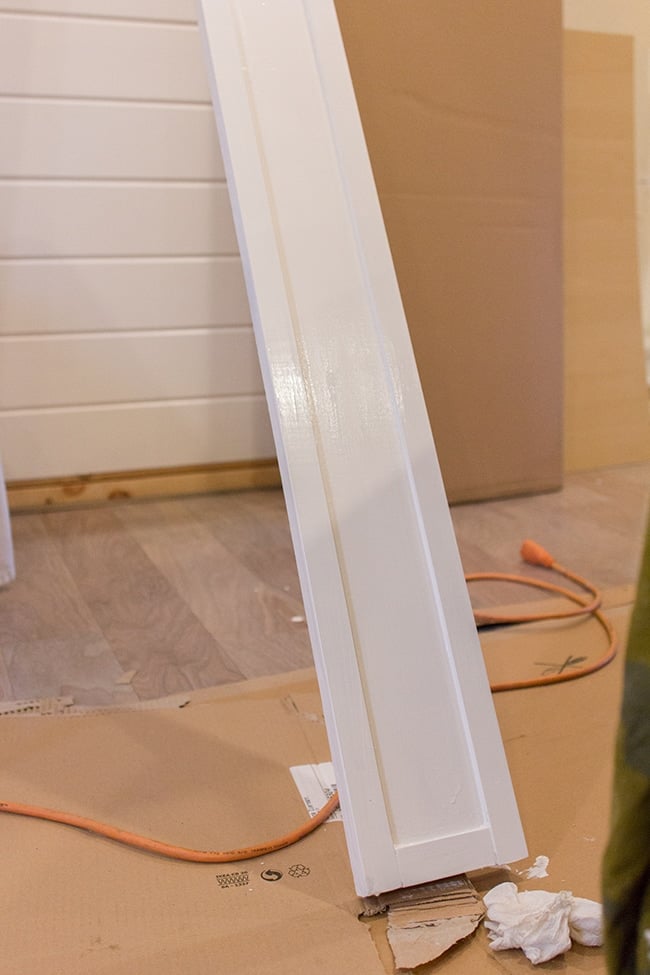
For the left side, we ripped down a 1x6x8′ board to match the width of the wall and nailed it up:
The doors were sticking out before, so just that piece made it look so much more built in and finished.
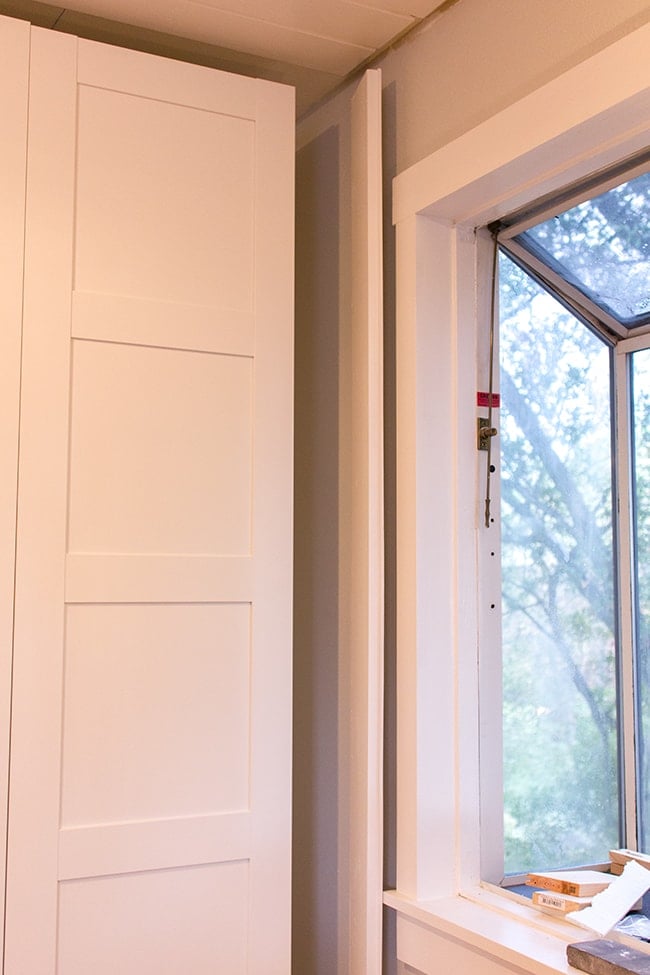
And finally, painted:
To transform it into a door, I picked up a couple cheap-o hinges at Lowe’s and spray painted them black. Don’t mind the silver screws, I plan on painting them black as well..
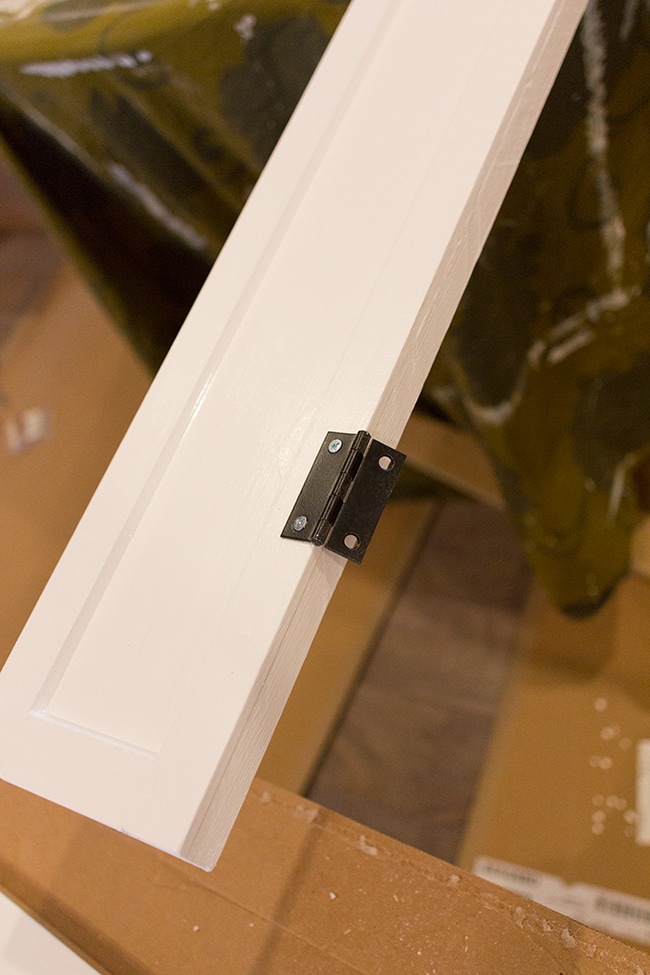
There was no stud where we were attaching them to the wall, so we used walldogs (best invention ever, no idea how we ever lived without them).
To keep the door from swinging inwards and secured when it’s shut, I used this little magnet kit from Lowe’s:

The magnet attaches to the cabinet and then you screw a little plate onto the door—simple as that.
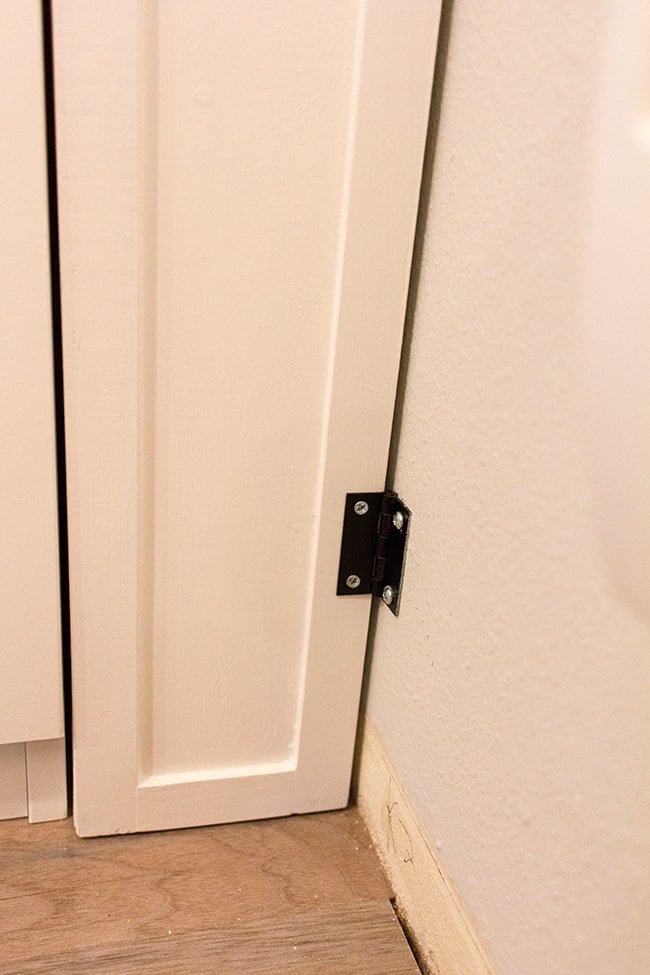
And we have a door!
It doesn’t swing open all the way, but it’s plenty to grab what you need.
The last thing we did this weekend was add some fresh baseboard.
This is how it looks now:
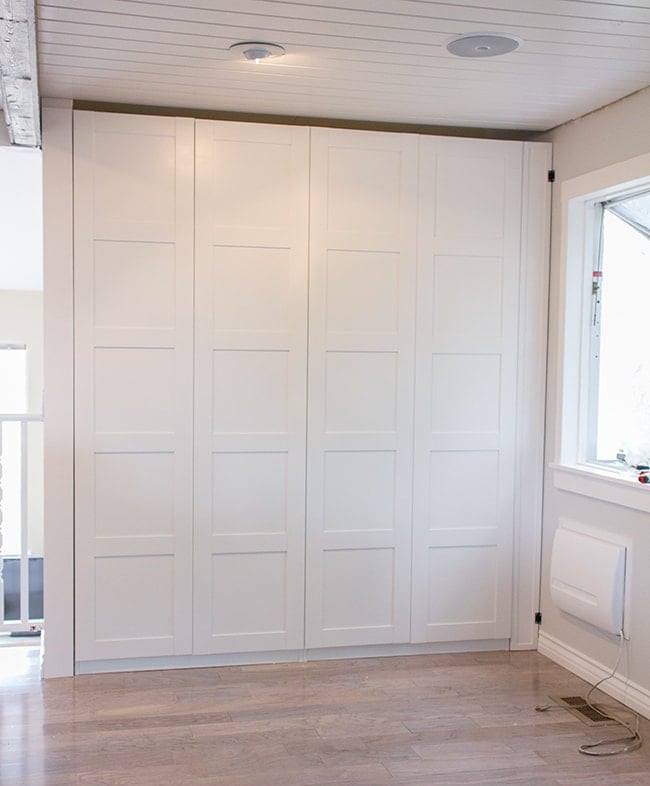
We still have to add crown molding and knobs, then assemble and organize the insides. I cannot wait for that part. Hardware is on the way and should be here in a few days, so as soon as everything is ready I’ll have a completed pantry post for you guys.
Tonight we’re getting started on assembling our bar, so that will be covered soon as well… things are really coming together now!
Before I go—one last very important matter of business. I’ve been working on a sequel to my Jenna Sue font forever now, and I’m thrilled to announce that Nella Sue is finally here!
As part of the Introduction Special, you can download it right now for just $5 (today only!) with the code NellaSue at checkout. You can also preview your custom text first.
This font was truly a labor of love, and I’m so thrilled with the way it turned out!
Thanks so much for your support! <3


Jenna Sue says
If the wardrobe wasn't next to anything bright white I probably would have left it the way it is! Let me know how you like the font 🙂
Anonymous says
Looks great! I think you could make it look super custom if you changed the door opening the other way (hiding the latches more) and shortening the door so that you could do the baseboards all along the pax wardrop and your little door so it connects to the side baseboard. Are you planning on building in the top as well?
Ginet says
I used the same doors for my Pax wardrobes! I like the off-white, but I understand why it would bug you if it didn't go with the rest of the room. I'm loving the progress and I think I'll buy your font 🙂
Jenna Sue says
Thanks Crystal! We decided to skip the hood after researching and talking to our kitchen designer at Lowe's. The room is really open (and opens to the living room), plus there are plenty of doors and windows nearby if we needed more ventilation. It also would have required a lot of work/$ to route the ducts in the attic, and it would have blocked the view and closed off the kitchen a bit. After cooking in it for a week, I'm so glad we skipped it!
Jenna Sue says
Thank you! We used this one: https://www.lowes.com/pd_424846-45395-ATG1633432_0__?productId=4713065&Ntt=latch&pl=1¤tURL=%3FNtt%3Dlatch&facetInfo= So cheap!
nahe1109 says
I love your blog, I stock it daily in case you decide to post more. It sounds creepy but I just love your style. Give us more than once a week please? =P
I have to agree with Cindy, the black hinges doesn't seem to achieve any design purpose, unless you were thinking about adding faux hinges to your pax system. I guess I have to wait until I see the knobs you're planning on installing.
Crystal (theweekendhomemaker.com) says
Looks great! We are planning to do an Ikea kitchen in the next few months. I love the idea of the cooktop and oven in the center island. Are you using any sort of vent or hood over your cooktop?
Lisa @ Fern Creek Cottage says
You're a genius! It looks great and is so practical! Love!
Deb says
Looks fantastic!
Jenn says
I can't wait to see the completed pantry. Looks awesome thus far! Love the built-in look, complete with special DIY little door! Great use of all space! I'm very impressed with everything you've accomplished in such a short time on your new house. I look forward to more updates!
Anonymous says
Wow looks amazing! Cant wait for the final reveal. Can you link the magnet kit you used? Looking for the same sokution for a stubborn old pantry door that no longer latches. Thx!
J
Jenna Sue says
Thanks Cindy! We probably could have figured out a way to install the soft close/concealed hinges but we honestly just didn't look into it. They don't really bother me and I'm hoping once I get the black knobs installed everything will tie in together. We'll see what happens!
Cindy @Made2Style says
You always manage to knock every challenge out of the park! Question…is there a way to hide the hinges on the side door?
Jenna Sue says
Of course, I can't wait to share! We went with a mix of shelves and pull out baskets 🙂
Shel says
I hope you gives us a peak inside the cabinets, I'm so curious to see what you're doing. Is it strictly shelves? Drawers at all? I never even gave it a thought to use the PAX system…I can't wait to see!