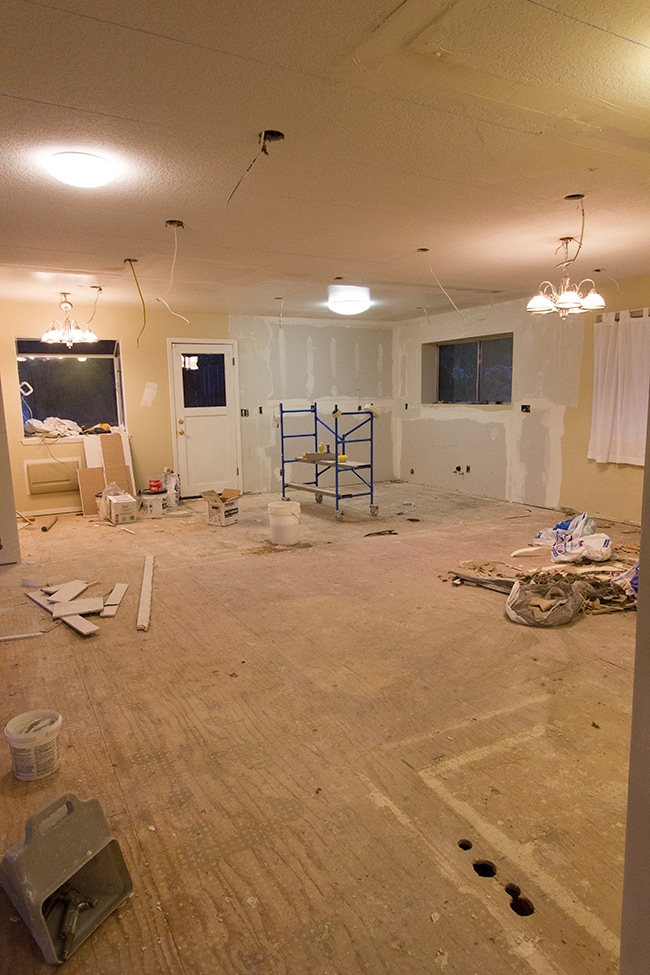
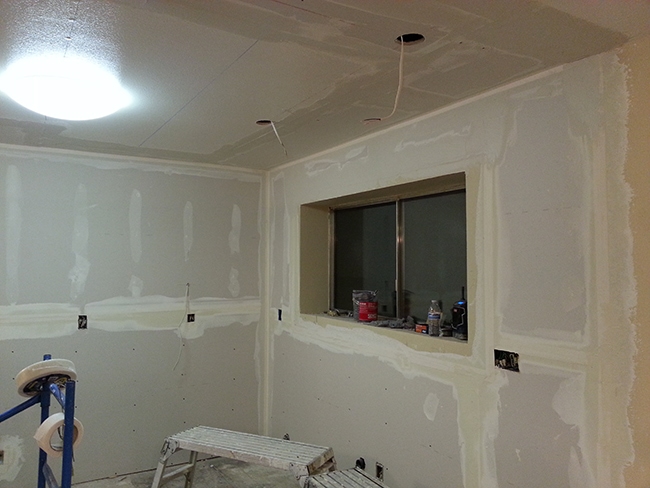
Here’s how the kitchen looks as of an hour ago:
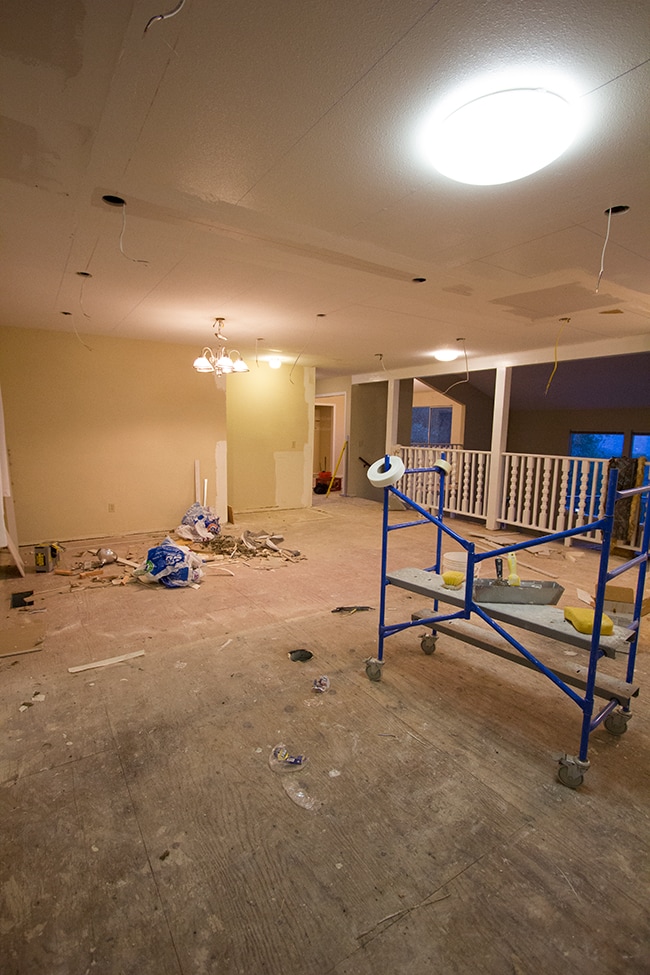
Yes, our house is a full on construction zone. It’s not just the kitchen, either. The hardwood guys came yesterday to rip out all of the old carpet/parkay in preparation of the wood installation.

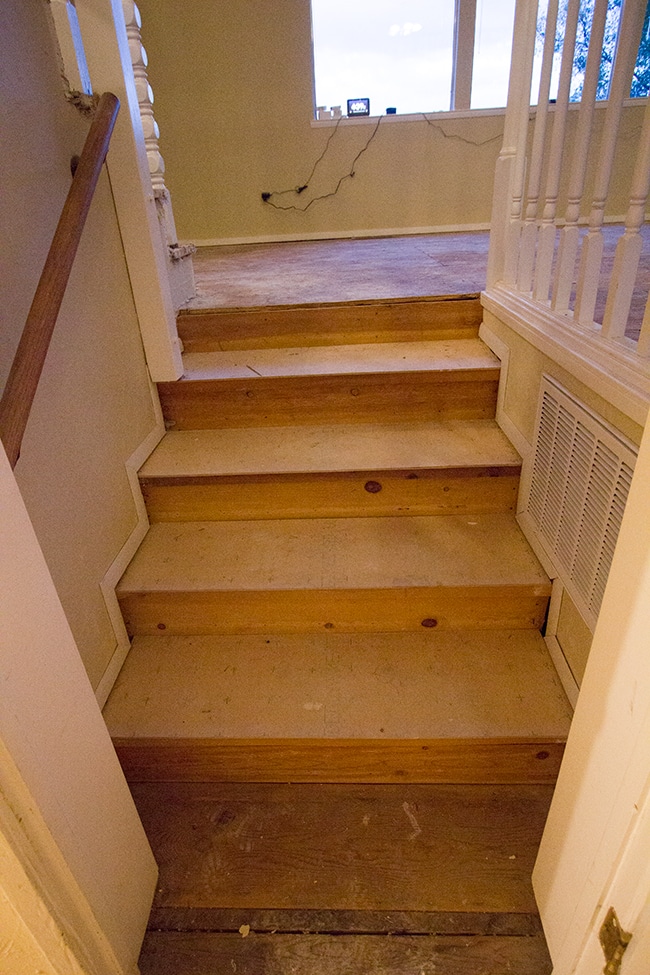
Everywhere except downstairs is currently rocking the subfloor.
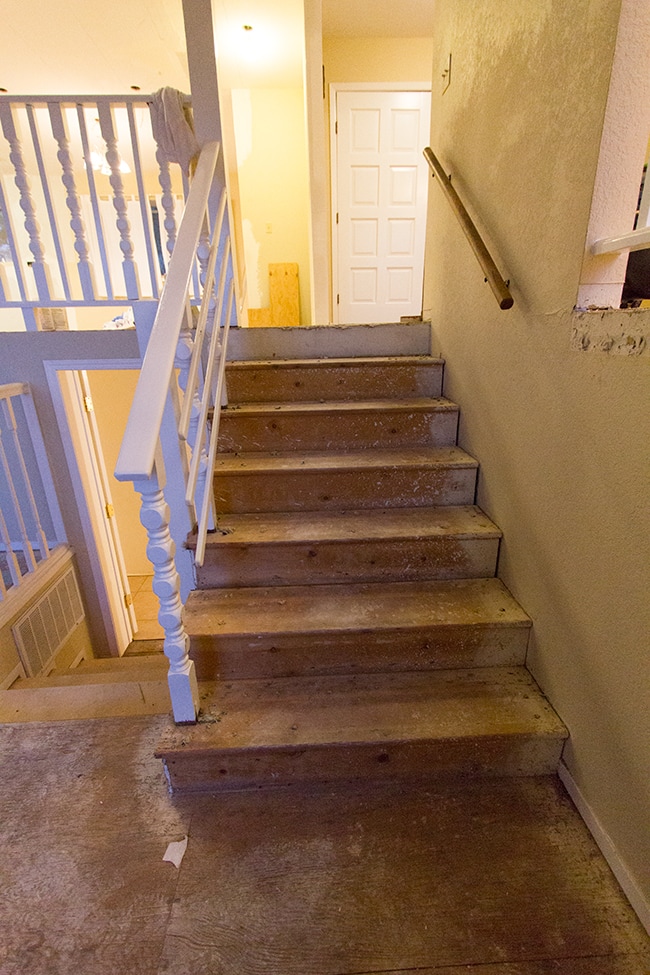
They actually have to redo the top steps because there is some wonkiness and wobbliness of the railing. A while back they did the same thing to the lower flight:
So while we’re on the topic of flooring and stairs, this is the floor we bought:
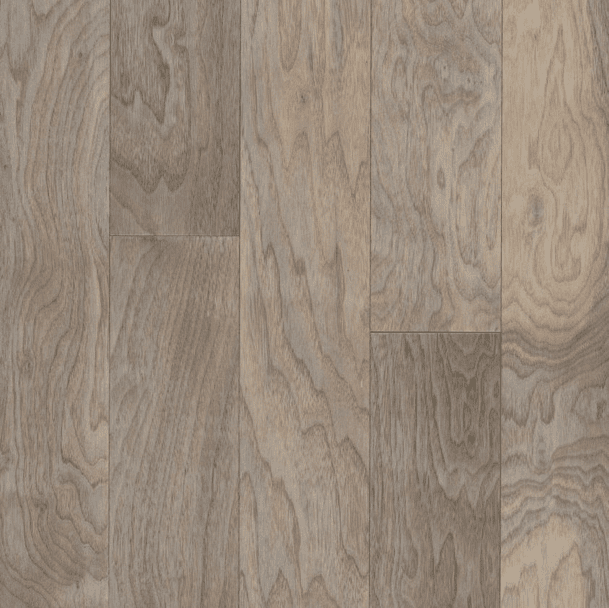
It’s Armstrong Shell White Walnut engineered hardwood, and I lo-o-ove them. I was looking for a lighter whitewashed warm gray wood this time around (after two houses with super dark floors) and these fit the bill.
Here’s a shot I instagrammed after we had received the wood (ignore the purple cast):

And you’ll never guess how much we paid. MSRP is $6.99 (most retailers stayed in this range) but after a ton of googling, I was able to find it for $1.99 here. It was part of their Timberland Collection which is a value grade, so the pieces are selected due to “natural character markings in the wood, which may include knots, mineral streaks, and natural grain variation.” Since this wood is meant to look a little more rustic, I was down with that.
When we checked the website again before Thanksgiving, we saw that the price had been marked down to $1.89 shipped during a Black Friday sale! They told us that once the wood was gone it was gone forever and they probably wouldn’t get anymore in stock, we jumped on that right away (this was before the house even closed—that’s how bad I wanted that wood).
The total cost for the entire upstairs (almost 1600 sf) came to $2,952 shipped. Total bargain.
But just when we thought we hit the jackpot… our installer told us we needed to buy stair nose to finish off the edges of our steps:
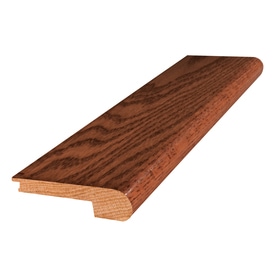
Holy crap—have you guys ever shopped for pre-finished stair nose?! It’s a 2″ wide by 6.5′ piece of wood. And it was SEVENTY DOLLARS FOR ONE PIECE (that’s $70, not $7) And I needed 13.
I tried every solution possible in my head and but none of them seemed to work. I consulted with our installer who said they were pretty much necessary to do the job right.
After procrastinating for a couple weeks, I finally, reluctantly made the purchase today.
I was able to find them slightly cheaper on efloors.com, but seeing that number at checkout still made me nauseous:
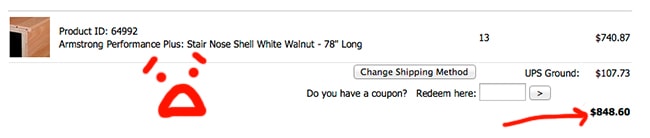
So these 2″ strips of wood cost almost 1/3 of what the whole house cost. Absurd.
Anyway, those should be here in two weeks at which point the installers can begin laying down the wood. They won’t be able to start on the kitchen until the cabinets are in (4-5 more weeks) so they’ll install everything except the kitchen for now.
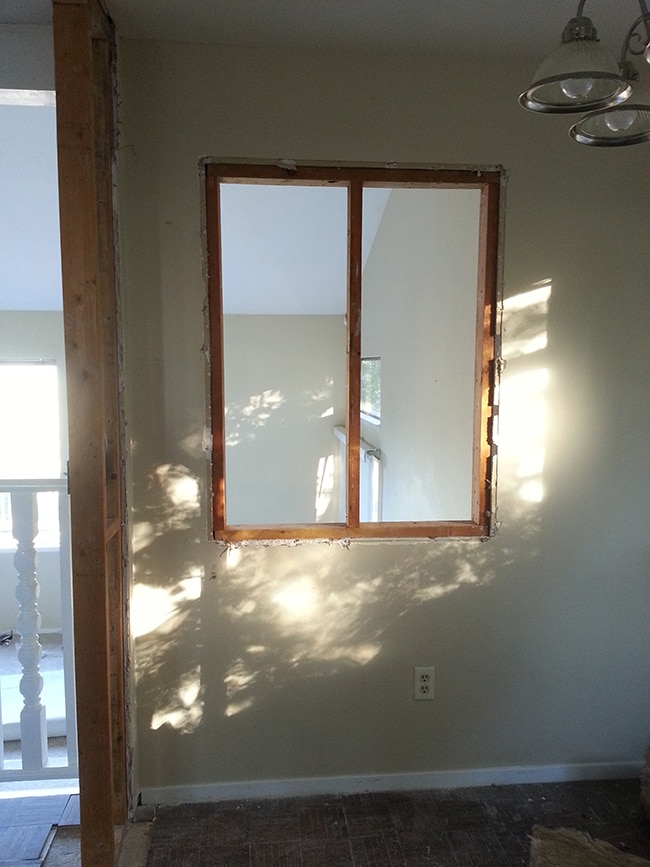
And back to the kitchen progress. Here’s how we left off last week:
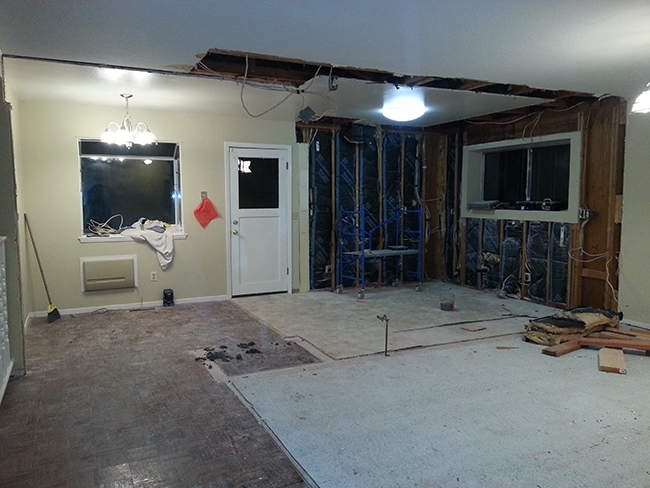
Doug had just started taking down the drywall so they could work on the plumbing and electrical.
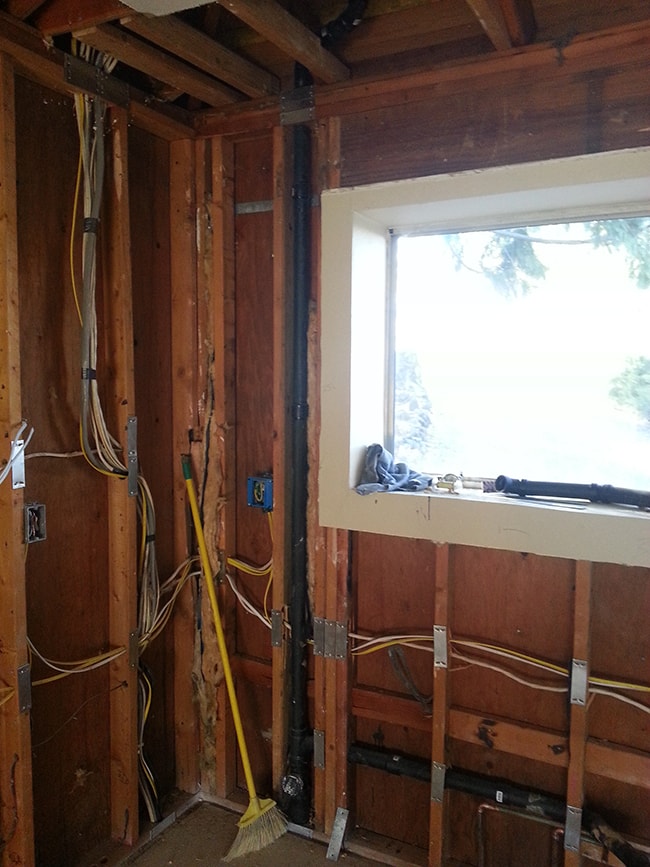
Here’s the new wiring and piping in progress:
He also framed in a 14″ wall where the new built in pantry will sit:
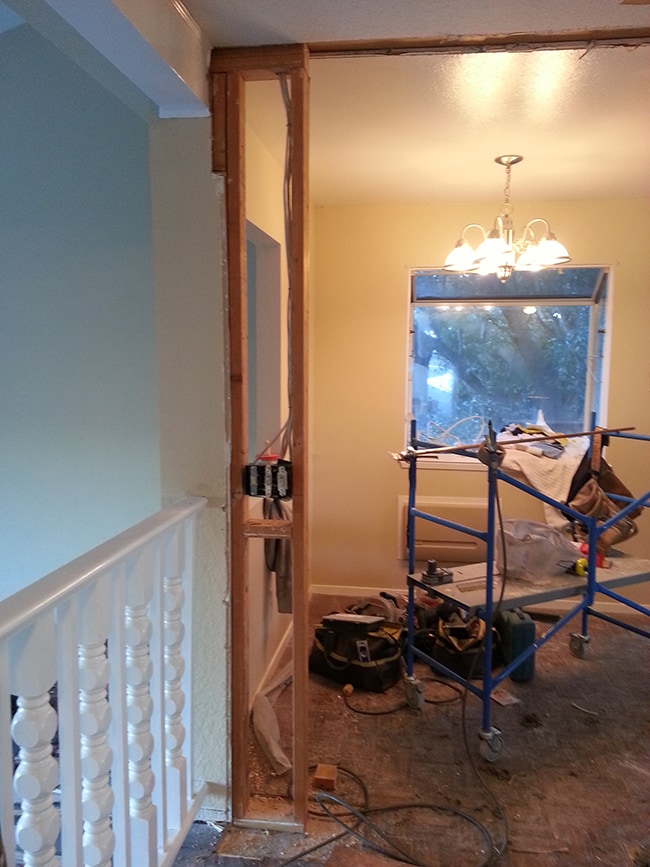
And filled in the cutout to the living room as well:
While the ceiling was cut open, we thought it’d be the perfect time to start on the recessed lights. Brad and I spent a few hours Sunday planning and wiring. There’s 13 ceiling lights total which we split into three circuits. Excuse the rough sketch. I used what I had on hand.
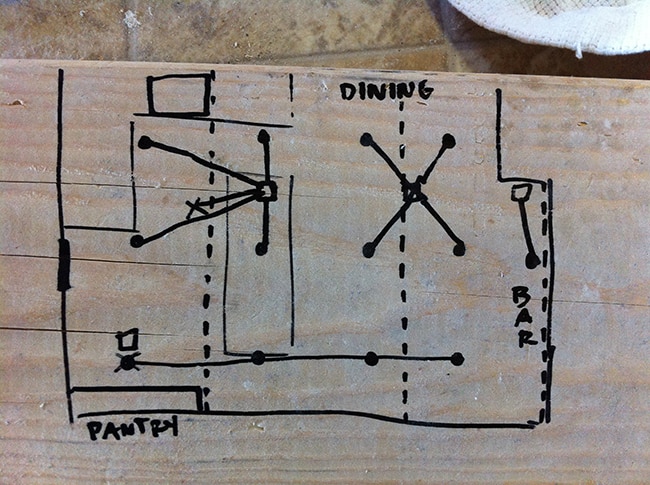 |
| Circles: Light locations Dashed lines: Wood beams |
In the top left (above the sink/main cabinet work area) there will be four lights on one switch. In the top right in the dining room there will be another four lights on one. And for the bottom row, that actually changed a bit after we realized that the switch over the bar area was connected to what will become pendant lights over our dining table, so the light over the bar is now connected to the four linear lights at the bottom. We had to split the lights up because more than four could be too much for one circuit to handle. Make sense?
Brad picked up a chalk line at Lowe’s which we used to mark all of the studs (which will come in handy later on when we’re installing our wood planks and beams!) But it was also necessary so we knew where to drill the holes for the ceiling lights.
Here’s a shot of it after they patched up the drywall:
And a shot of the drywall going in:
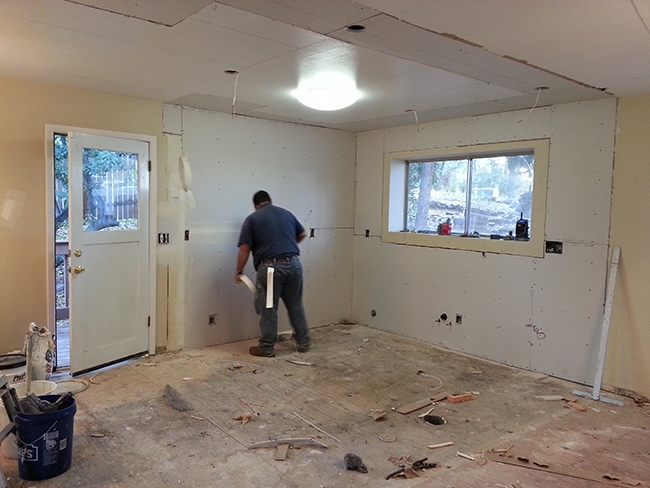

The mud is still drying so they will begin sanding tomorrow.
Okay, now for the fun part… we bought our cabinets!
Here was the sketch we started with at Lowe’s:
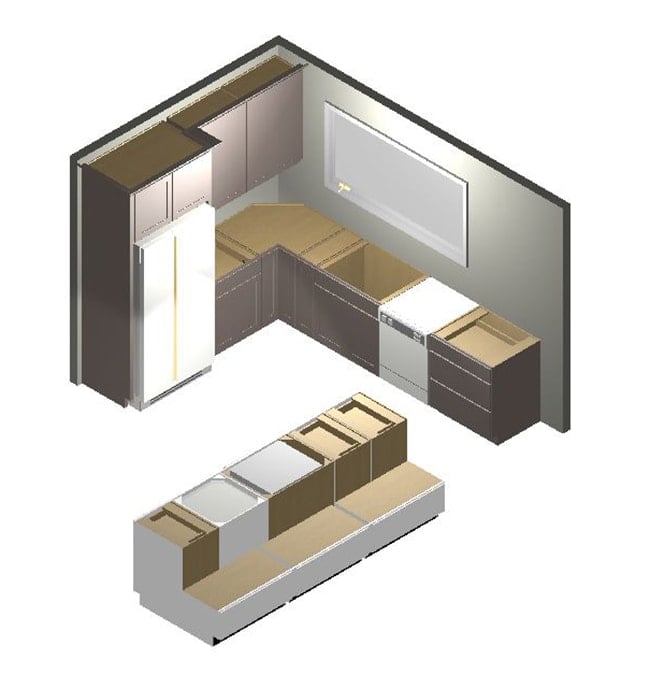
There have been a few changes but the overall layout is still the same—an L wall with gray cabinets and a island with white cabinets.
Here’s a real shot of the gray cabinets, in a very similar style to ours (from Kraftmaid’s website):


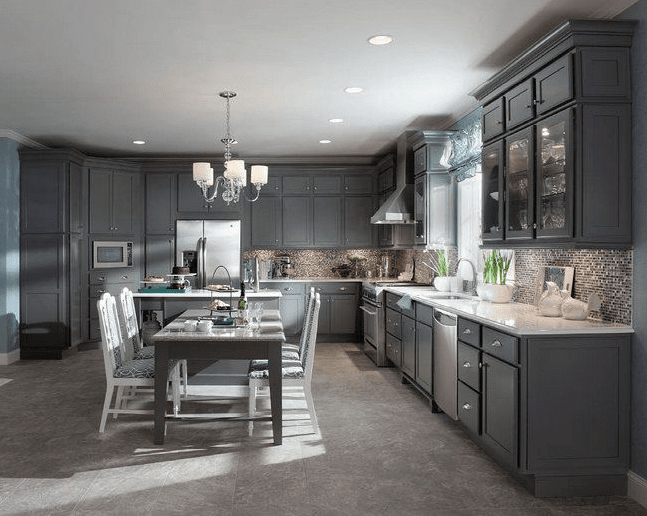
The style is called Durham Maple Square and the color is Greyloft. I originally chose a lighter gray, but after holding it up next to our backsplash (90% sure we’re going with this one), I felt it needed more contrast and the darker gray won out:
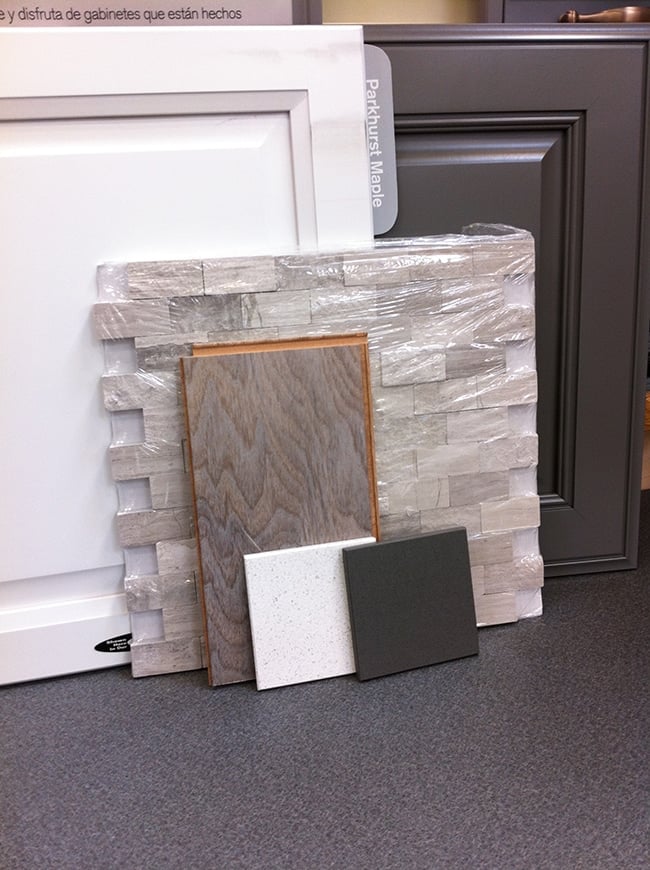
Ignore the cabinet styles, we’re just using those colors. I brought in a sample of our floor to make sure everything meshed well together. The counter swatches are not final at all, we just pulled them out for ideas. But I think we will go with a white counter on the gray cabinets and a dark gray counter on the white island (probably quartz). I realize this is a whole lotta white and gray, but once all of the wood pieces and accessories are brought in I think it will be really nice.
And now for the price breakdown. We knew Kraftmaid was running a promo for $1000 off if you upgraded to all plywood cabinets, so we took advantage of it. The day before ordering in we also found out that for just that weekend they were offering a 10% gift card. AND they were offering $1200 off if you spent 10k or more.
Here’s how it broke down…
Subtotal: $11,322
-$1000 promo: $10,322
-$1200 promo: $9,122
And we’ll be getting a $912 Lowe’s gift card in the mail so essentially we got $11,322 worth of cabinets for $8,210.
Because we are using their installers, we also don’t have to pay any sales tax on the cabinets or installation. All in all I think we got a good deal and we feel confident about our decision—especially because we can just let the pros do the work and not have to worry about it (we really have enough on our plates!)
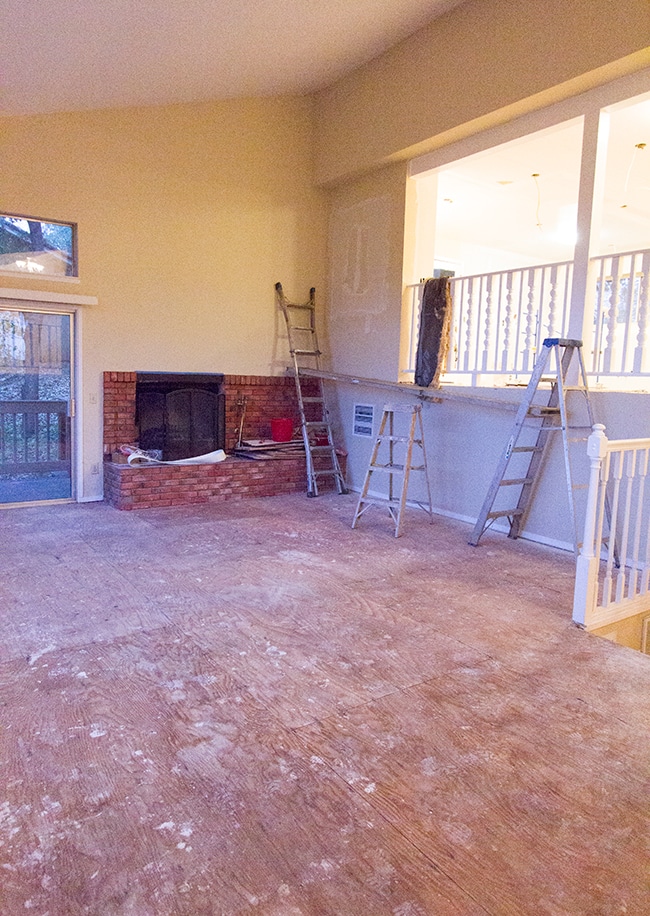
I have a couple more things I was going to cover in this post (like a major update downstairs) but it’s getting late and I have to meet the electrician at 8am to talk wall sconces in the new studio and living room (yay!). This weekend I plan to frame out the windows in the kitchen and studio, so there should be a lot to share next time.
I hope you all have a wonderful holiday break! I’ll be here next week with an update 🙂


Jenna Sue says
I considered that but our flooring is such a unique pattern with multiple colors that you wouldn't be able to replicate it with a stain, unfortunately! In our next house I we'll definitely just buy unfinished wood and stain everything.
Jenna Sue says
Ooh love that!
Christa says
We had the same cost issue with stair nosing when we installed our laminate. Our handyman recommended we buy unfinished oak stair nosing from a big box store and then he cut it to match the thickness of our laminate and stained it to match the color of our floor. It looks great and no one ever notices that it's actually a different material.
Kari Davis says
Have you seen these photos from HGTV? They immediately reminded me of your new house. I love the glass rails and the light wood floors. There is a bar and fireplace too. https://www.hgtv.ca/realpotential/photo/?gid=4820d55ec570b56941c95d34eebcb28b&pid=c867f7e9905f64e897af60eaba0ac95f#/11
Amanda Comeau says
Sooooo exciting! Can't wait to read more next week 🙂
Pine Tree Home says
Such fun stuff and I really like everything you picked out so far. I think the finished product will be crisp, clean and classic.
Ginet says
I'm loving it!! The wood will warm up all the gray and white, I'm sure.
Christine says
I obviously have to do more flooring research. In the basement remodel we are doing, luckily, the space contains some areas where we can do tile (cheaper), but the main floor covering will be either hardwood or engineered hard wood. We should have taken care of this during Black Friday, but there were so many other purchases to make, that we were waiting… now I feel silly having not done it. So happy for your amazing find!
Yolande Leake @ Co-Construct.com says
It's nice to see that you're having constant progress with your renovation. I've been renovating my old house for the past months too, and it's fulfilling to watch those fantastic changes take place, isn't it? Hehe! Anyway, rough sketches are always fascinating to me. It's like there's an on-the-spot change in plans. I'll wait for the final results of this project. Good luck! 🙂
Paula from Jersey says
Luv the choices you made! Can't wait to see it all done!
Bobi says
Looks like you've been busy! Can't wait to see the cabinets installed:)
Kenia Gonzalez says
Love all of your pictures and the the details you give on pricing and quality of everything. thank you! It will def be easier when I'm remodeling my house to know what to expect. 🙂 You're Awesome! <3
Lisa @ Fern Creek Cottage says
So exciting! Loving all your choices and I can't wait to see them installed! Holy cow on the price of those stair nose thingies…that is ridonkulous!
Heidi says
Wow, that is a great price on flooring! I thought we made off like bandits paying $3.49 a square foot for solid hickory floors, but your deal blow our deal out of the woods! I had hoped to redo our stair cases at some point, but I imagine that's going to get pushed down the priority list if the materials are that expensive!
https://jax-and-jewels.blogspot.com
Deb says
Love the gray – it's going to be gorgeous…