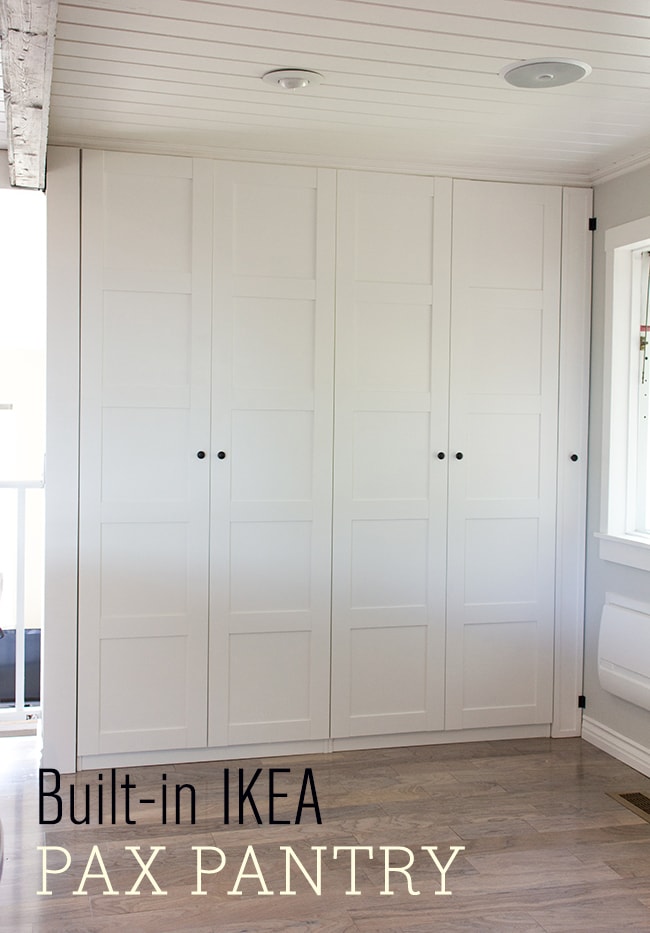
Ladies and gents, I present to you our finished Ikea Pax Pantry:
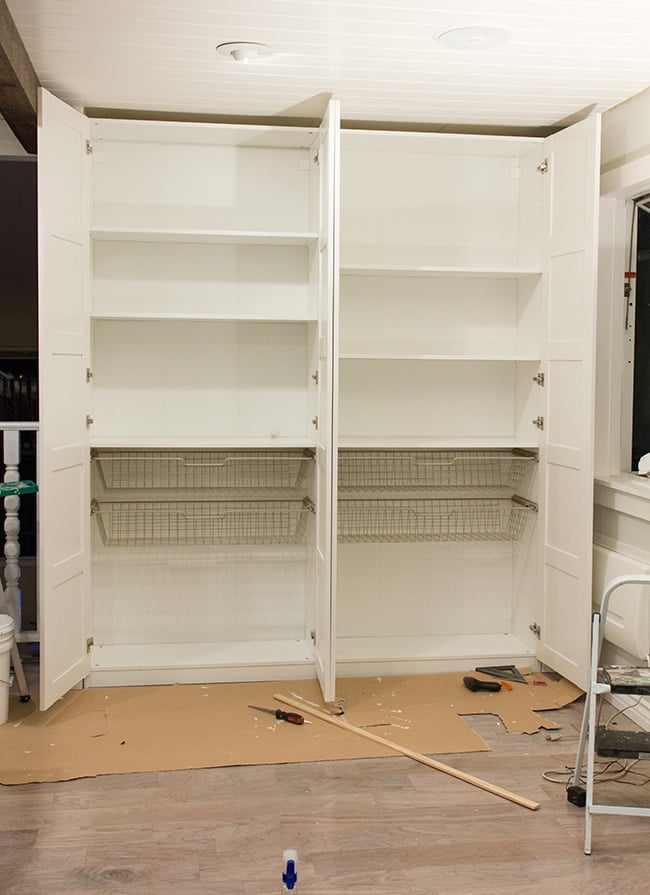
First, make sure to read through Part 1 of our Ikea Pax Pantry build which explains how we installed the Pax wardrobes:
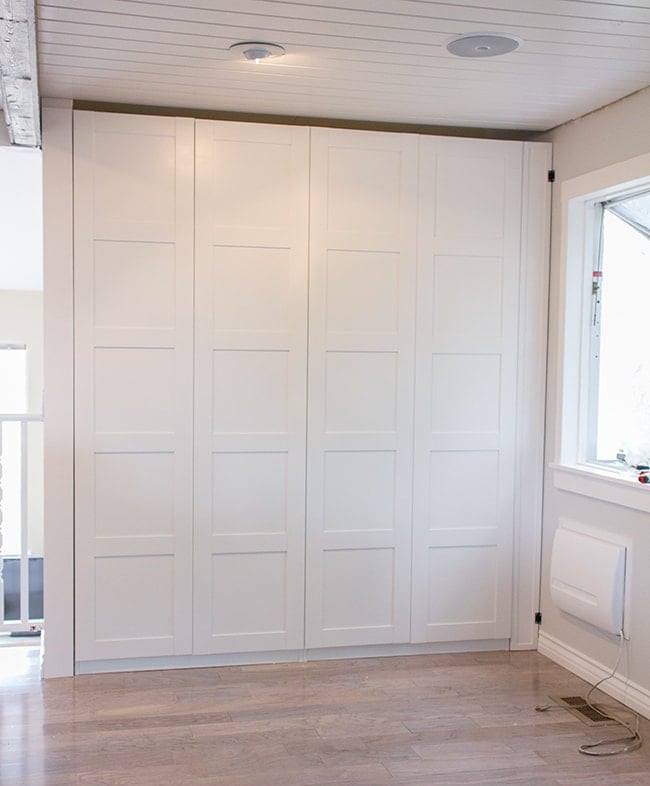
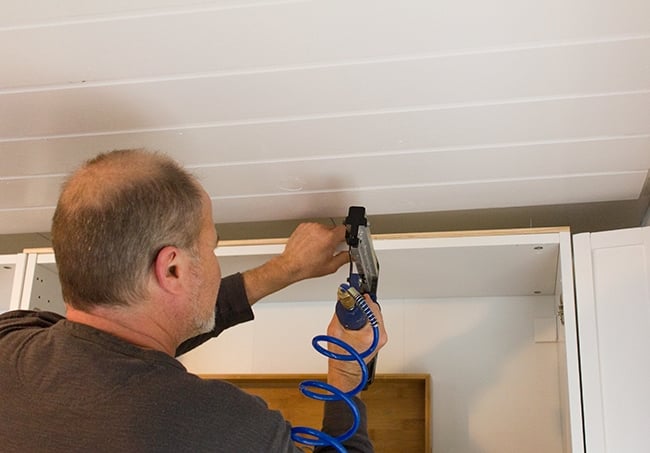
After completing part 1, the next step was adding crown molding. I had my dad come over to help, which was a good idea because this project came with more challenges than anticipated.
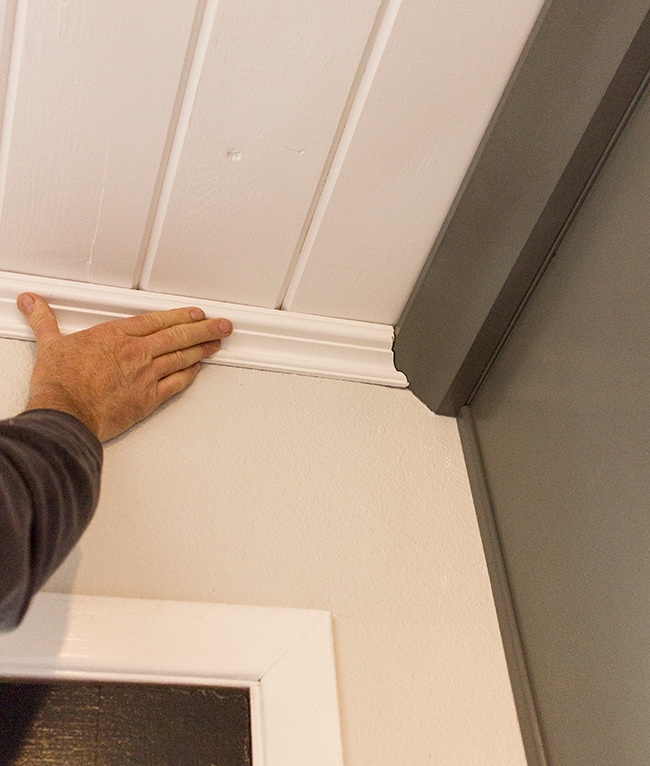
Obstacle #1: Cutting a special shape out of the molding where it met up with the cabinets above the door. My dad knocked this one out of the park—a perfect fit.
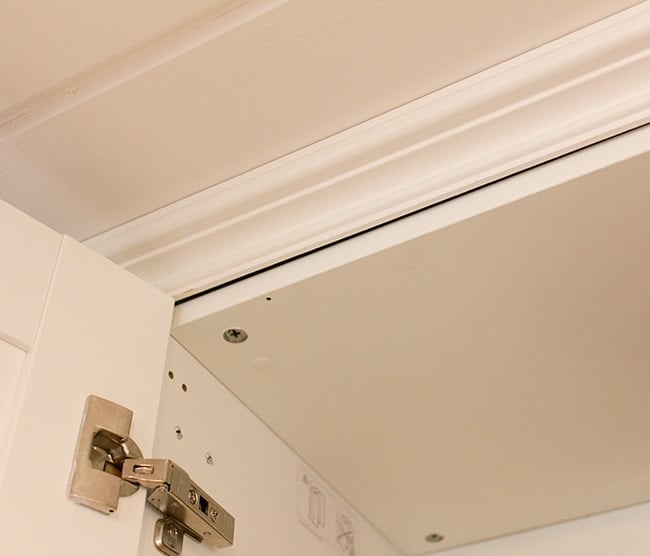
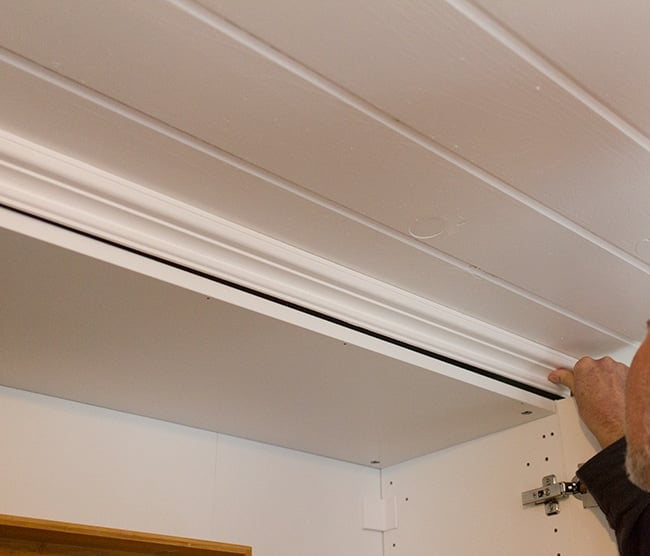
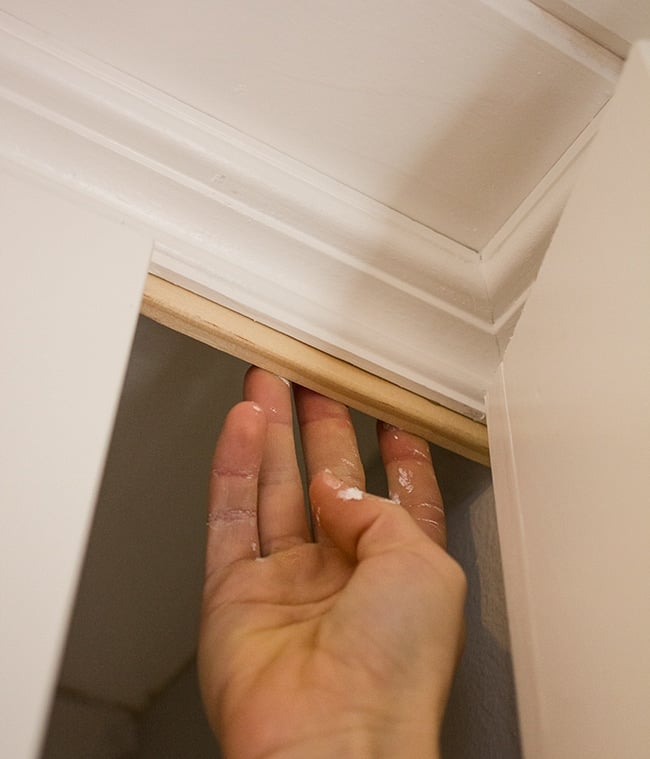
Obstacle #2: Getting the crown to squeeze in above and be level with both cabinets. The crown height and gap between the cabinets was the same, so we had to sand down part of the crown where the fitment was a bit too tight. Then, we discovered the left wall stuck just a tad more than the cabinets so we were left with this gap:
Not only that, but the gap was quite a bit worse on the right side (walls, ceilings and floors are rarely ever perfectly square, so this was bound to happen….)
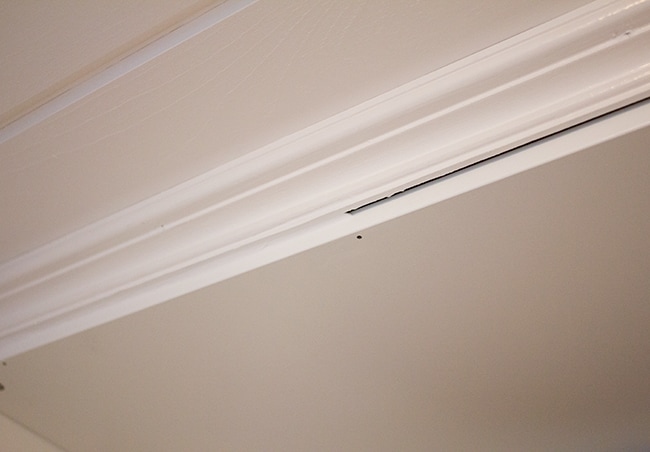
To help close the gap, we nailed up a small piece of wood (just on the right side where it was really bad:
I was able to caulk everything in to completely hide the gaps. What would we do without caulk?!
Obstacle #3: There was still a visible gap above the makeshift door on the right:
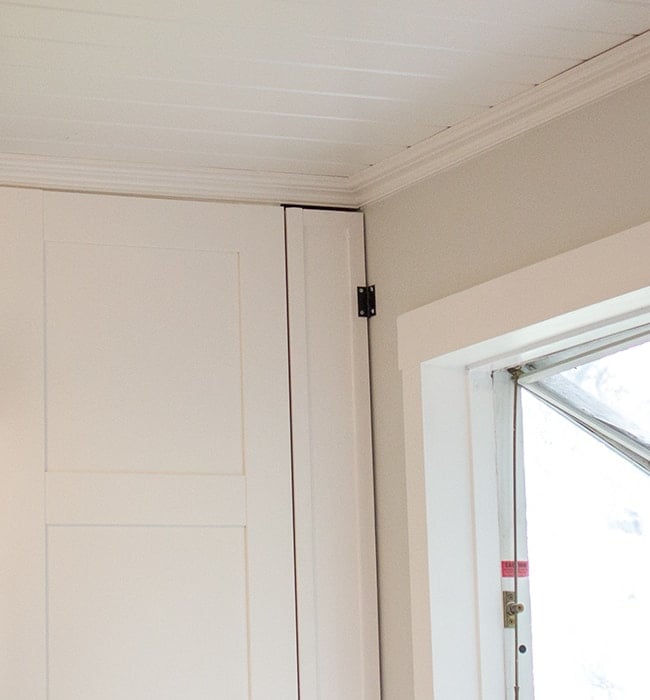
To fix this, I cut a scrap piece of wood and glued it on to the back of the crown.
There wouldn’t be any pressure on it (the door magnet was keeping the door from swinging back), so the glue will hold just fine. I caulked & painted and now it looks like part of the crown.
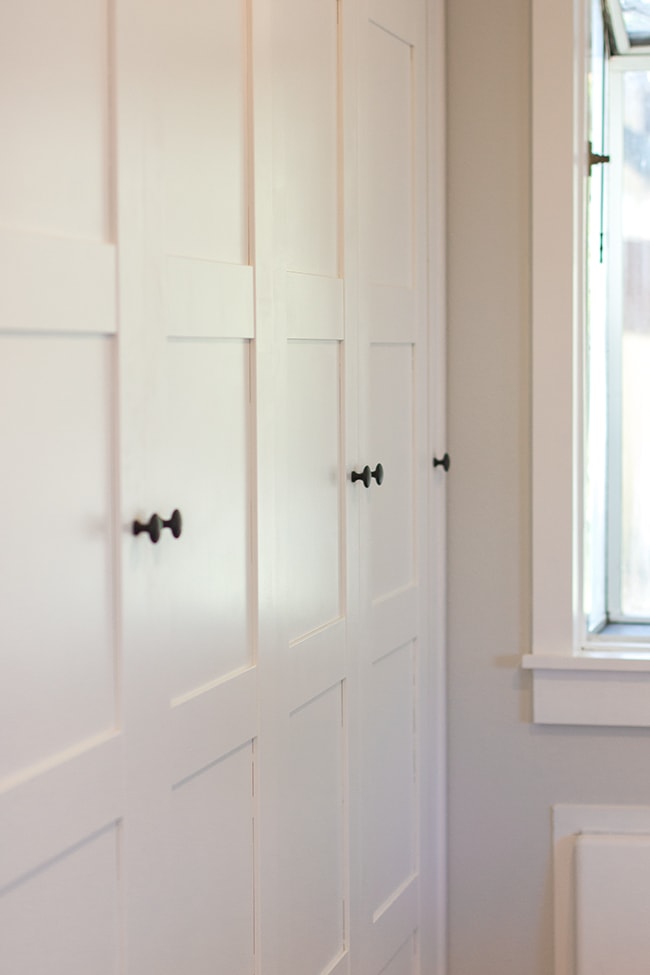
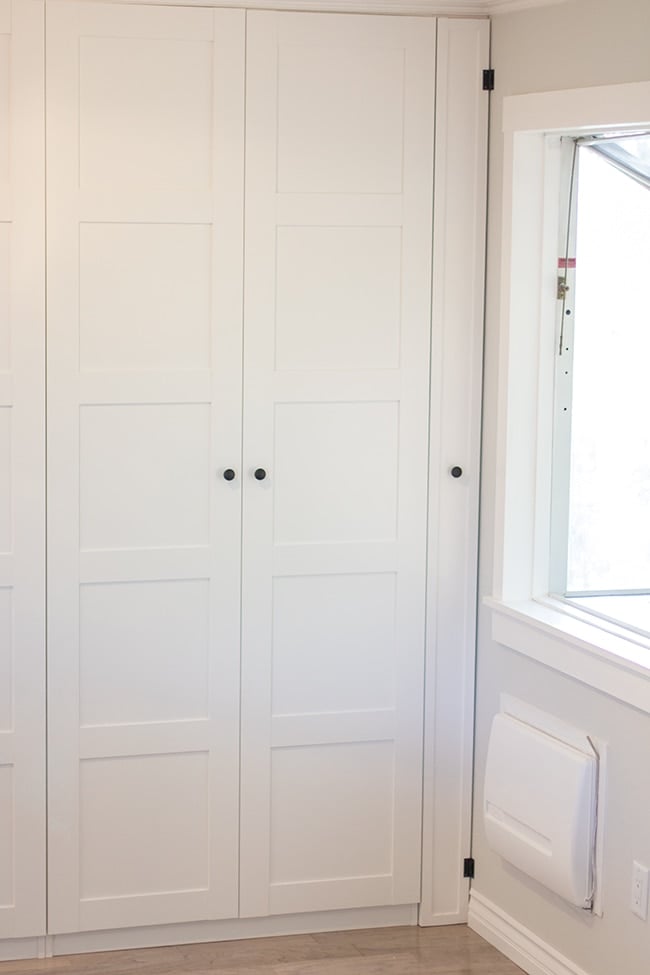
Just in time, our knobs arrived in the mail and we got those on last night (these are the same ones on our cabinet to tie them all in):
And now our pantry is finally complete and ready to enjoy!
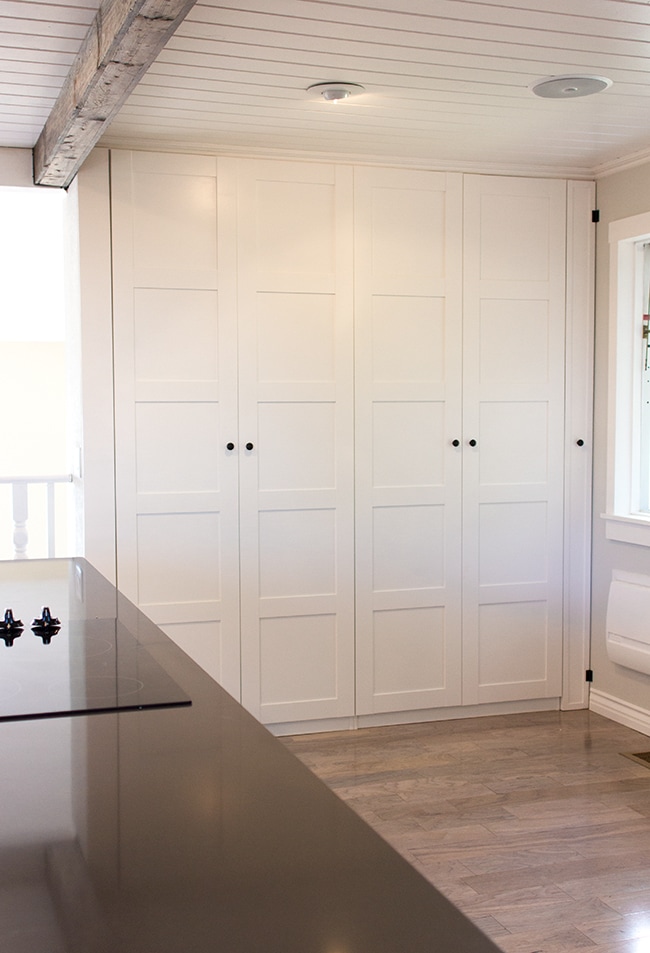
I’m loving how built in and coordinated it looks next to the rest of the cabinets:
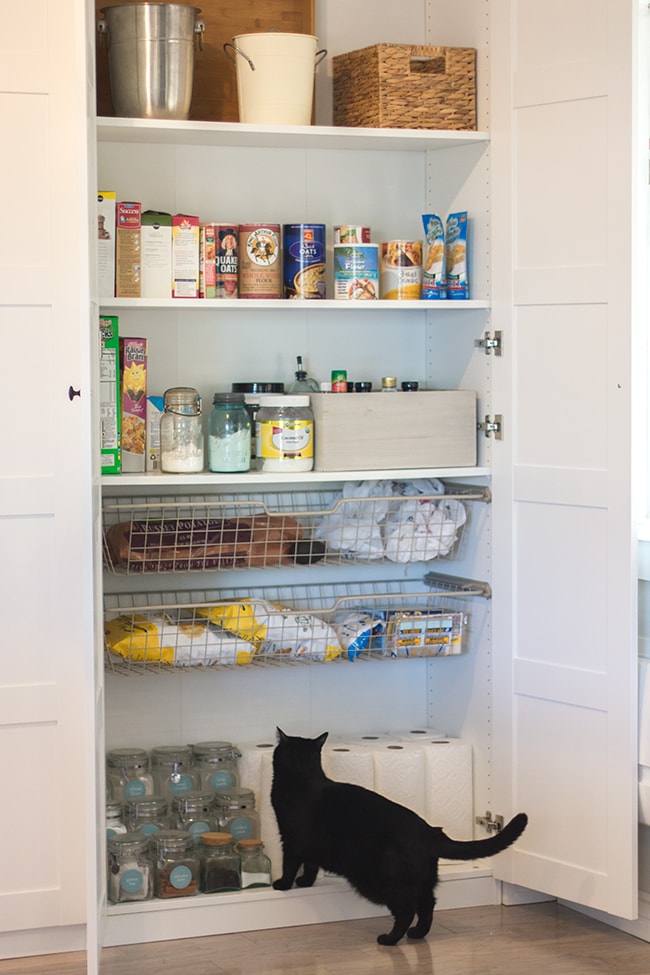
Ready to see the insides?
We went with affordable Pax shelves and Komplement wire baskets for organization:
The arrangement may change as time goes on, but for now there’s more than enough storage.
Let’s see what’s behind door #1, shall we?
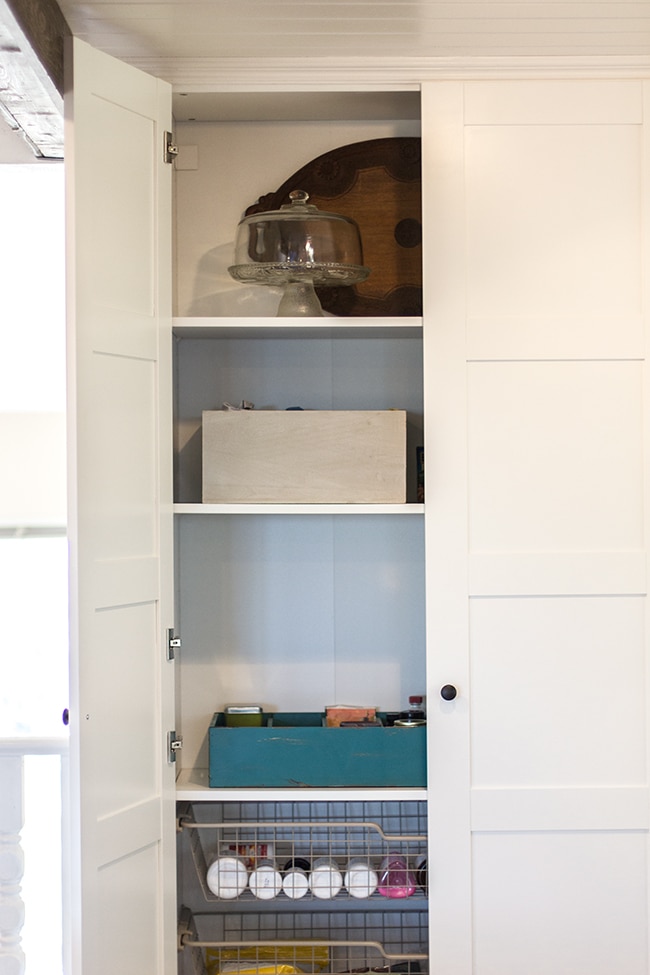
The top shelves house our less frequently used dishware, baking supplies and canned foods.

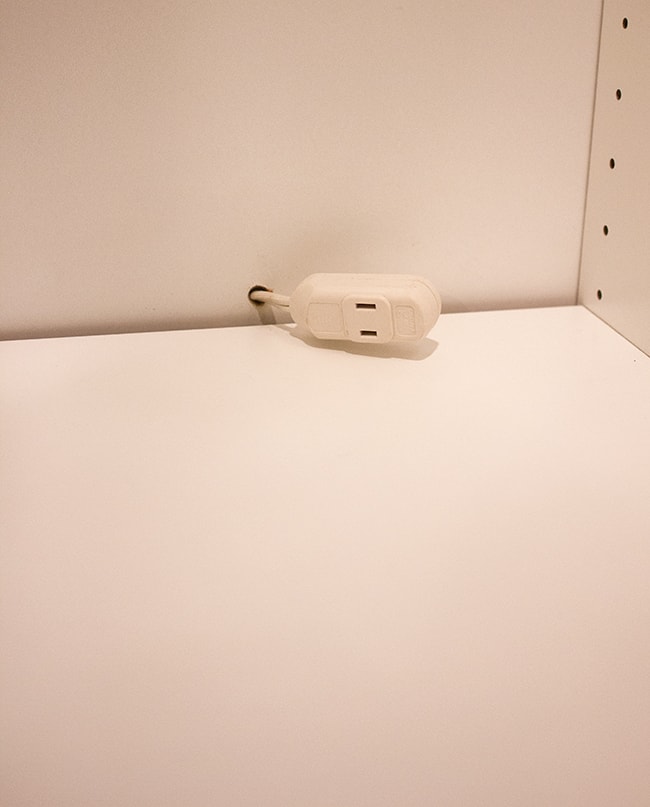
To free up counter space, we decided to store our toaster here. Before putting the pantry up, Brad drilled a hole through the back and connected an extension cord to the outlet so it’s plugged in and fully functional:
We very rarely use it so this was the perfect place for us to keep it.
These pull out baskets are my favorite. So convenient, and just $15/ea! We use them to keep our vitamins/medications within easy reach, along with dry goods we use on a daily basis.
I arranged our small appliances on the bottom so they are within easy reach.
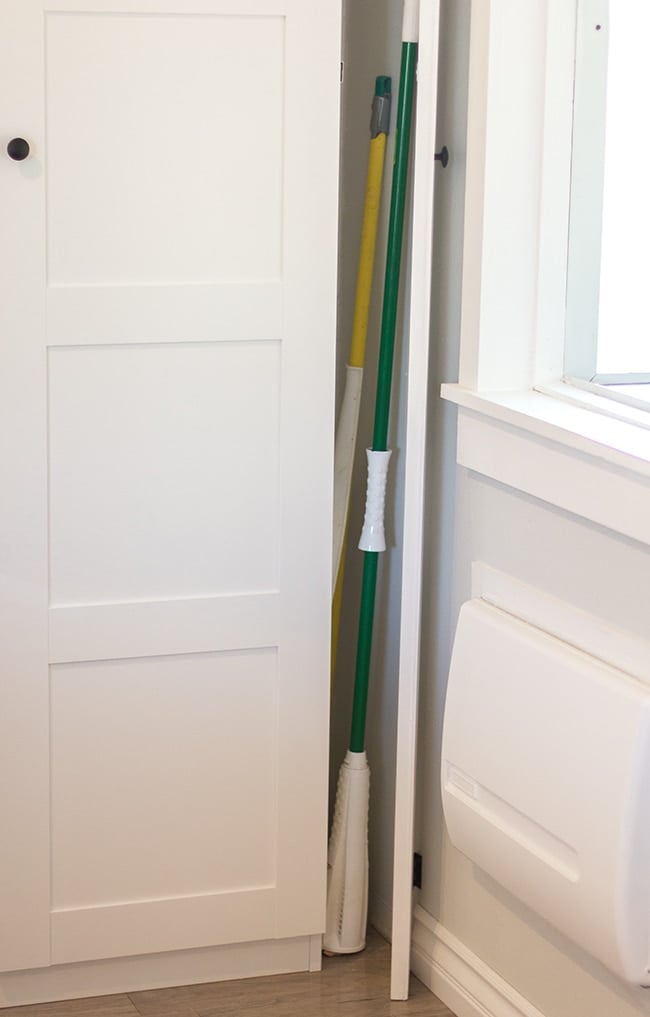
Let’s see what’s behind door #2…
Here we have more rarely used entertaining items, pasta/oats/starches, then cereal/condiments. We keep larger dry food storage and chips/snacks in the baskets, then our glass jars with miscellaneous goods/spices and paper towel storage on the bottom.
And of course, our mop and broom storage behind the door on the far right:
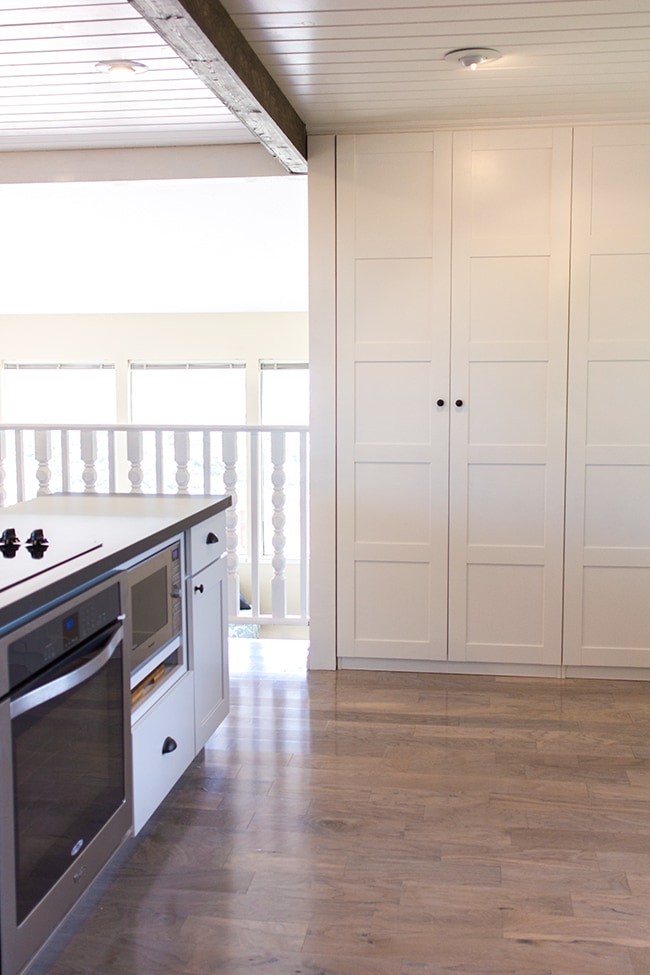
I just love walking into the kitchen every day now with this view greeting me…
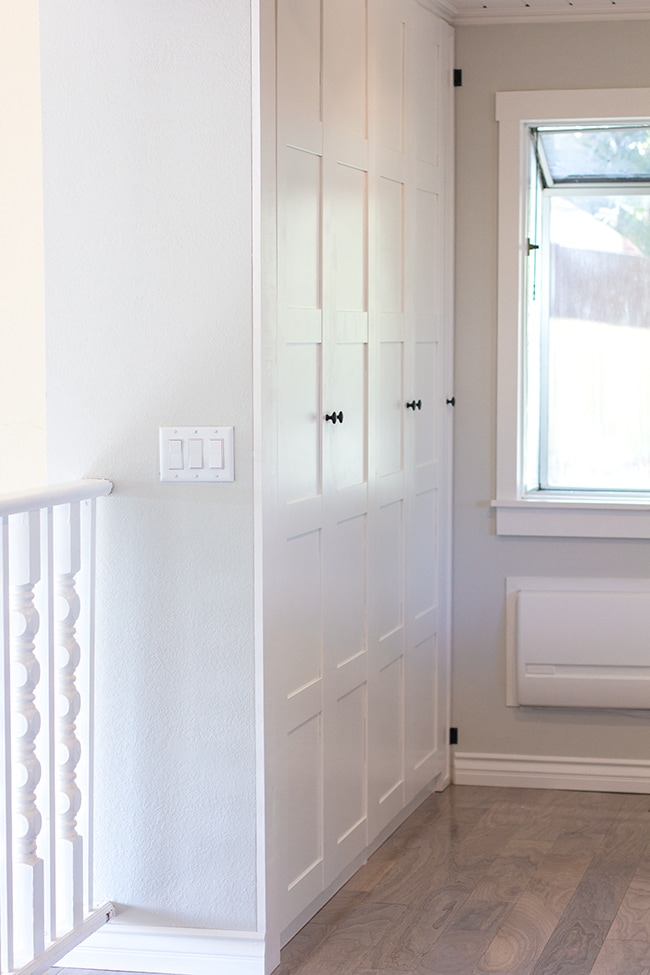
Quite an improvement from a few months ago, right?
Looking for more high end Ikea hacks? Try these DIY projects!


Jenn(ifer) says
Well, if you turn them 180° and put them on the side of the door, not the back (just like regular doors)…
But if it doesn't bother you, who cares 😉
Jenna Sue says
I hope he agrees to it! The cat situation is improving… Biscuit is totally fine with Susie now but Susie is still defensive. Susie will get right up in Biscuits face and they'll touch noses, but as soon as Biscuit makes an advance Susie freaks out/hisses. We're still working on it!
Jenna Sue says
I actually just realized/remembered something else… the door won't open if you install the hinges on the inside. It will close but it won't swing out, you need a special cabinet hinge for that. I think we tried that first and then realized we had to mount them on the outside 🙂
Jenn(ifer) says
I was wondering the exact same thing…
Loving everything else though.
Sunny greetings from northern Germany
Jenn(ifer)
Anonymous says
It all looks amazing I am trying to convince the hubs to put planking on our main wall in the kitchen I keep showing him pictures of your's and saying how easy it would be lol Can't wait to see it all finished oh and how are the cat's getting a long now hope they are both settled with eachother Sian xx
Hanne Jørgensen says
Hi! I just want to tell you that you have fans in Norway (me!). I follow your blog and I love it. You inspire me so much. So I hope you keep up the blogging! 🙂
Jenna Sue says
Thank you Sherri! I'm fairly certain it is vintage—it was in an abandoned garage. I'm trying to figure out somewhere I can display it because I love it too!
And yes, are renting out our FL house to a sweet couple 🙂
Sherri says
Jenna- love following along on your blog. I am a Florida girl , so I have been following along since your Florida home. This house just takes the cake though. You have such vision, and you are able to successfully fulfill that vision. Everything is coming together so well. I am hearting that wood tray behind door #1 in the pantry. Is it vintage? I think I would be tempted to let it shine somewhere on the outside where all could see its beauty! Btw,are you renting your FL home?
Jenna Sue says
Thanks Nicole! We had trouble getting our small cordless screwdriver in between the cabinet and wall so we just decided to mount them outside. I agree it probably would look cleaner if they were hidden but I don't really mind them since we have so many other black pieces of hardware/accents in the room. I might revisit it down the road but for now we have so many other things to work on, so I'm just trying to focus on those!
Jenna Sue says
Thank you! I know the gaps would be larger than code if we removed them. We plan on replacing all of the railing eventually, it's just not in the budget right now. We understand our house won't be toddler friendly but we don't ever have toddlers over so I think we'll be okay for a bit 🙂
Jenna Sue says
Never heard of that stuff, what great idea! I'll definitely look into it. It looks like they only have three color options, none of which were exactly what I had in mind so I'll have to compare costs to see if it's worth it. Thanks for sharing!
Nicole Kinney says
It looks so built in now! I really love it! Howeverrrrr….I'm still confused by your choice with the hinges on the broom door.Obviously it's not my kitchen but I just wondered why you guys chose to put them on the outside? Were you unable to hinge it from the inside? If the hinges weren't there that door would practically disappear!
Anonymous says
Beautiful Kitchen and future plans!!! Love it!
Just an FYI .. before you cut out decorative spindles in railing check code in area for distance between railing spindles. In some places it can be 3″ others 3.5 and others 4″. this will matter when/if you have a child to visit or your own or if you sell house.
Brooke says
Have you looked into AirStone for the stone for the bar wall? It's totally DIY and looks/feels like real stone. We're planning to use it on our fireplace wall that juts out in our living room. It's sold at Lowes and has great reviews online and pinterest. Here's 2 links I've pinned about it:
https://inmyownstyle.com/2012/07/diy-fireplace-makeover-on-a-budget.html
https://www.momtastic.com/diy/173847-diy-stone-fireplace/
Tamara says
Jenna, I can't get enough of your new kitchen. Your pantry is awesome, I'm in LOVE with the ceiling/beams, your cabinets make me drool, and I can't wait to see the finished result!! Thanks for sharing your adventures with us. I officially have kitchen (and studio for that matter) ENVY! 🙂 Happy Weekend!