Our sunroom renovation has officially begun.
Step #1: Get rid of this:
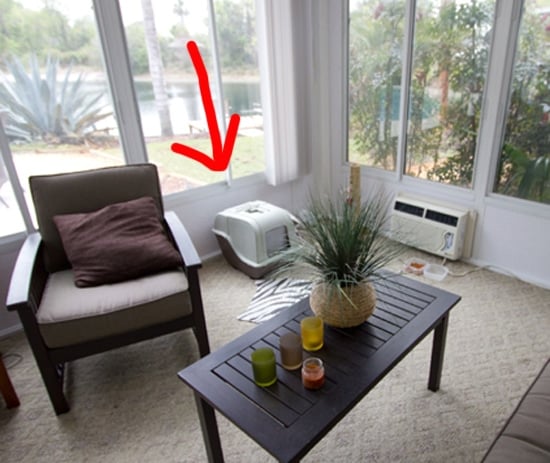
Any indoor cat owners in the house? I know you feel my pain.
This litterbox situation has been a seemingly unresolvable issue from day one. We don’t have a traditional laundry room (which I assume would be the most common place to keep it), and we nixed the garage idea due to safety concerns (cats + cars = bad news).
This meant we had to find a place for it inside. In the beginning we kept it in the most unused, unseen place in the house: the guest bathroom (in the bathtub hidden behind the shower curtain). Of course, this was not a good long term solution.
When it got cooler outside, we relocated her to the sunroom which seemed to be a better solution, but still only temporary.
We had tossed around the idea of some sort of external box that she could access through the house. This would not only eliminate the ugly plastic box out in the open, but the smell seeping into the room as well (let’s face it… cat waste is foul).
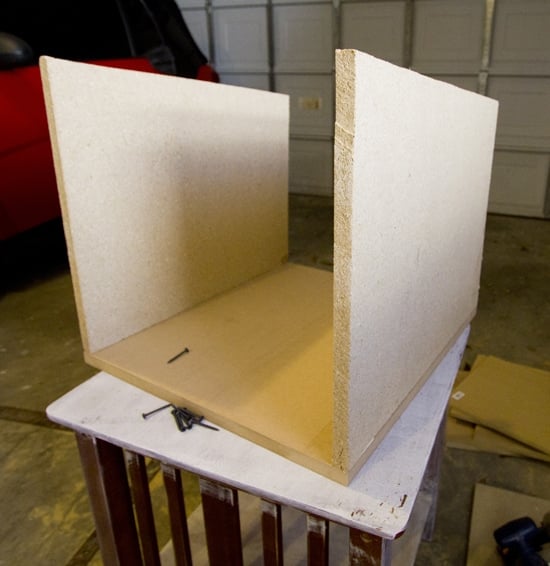
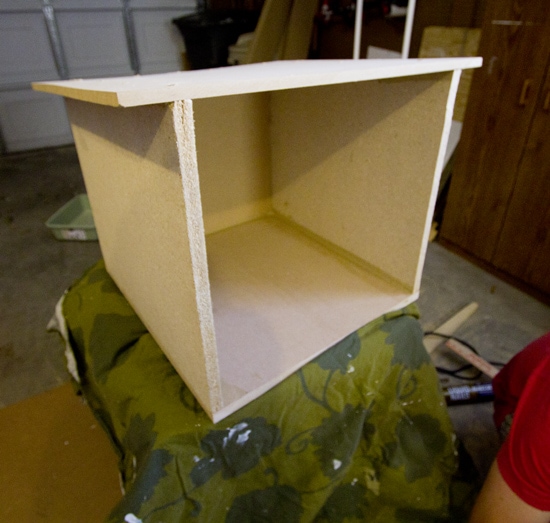
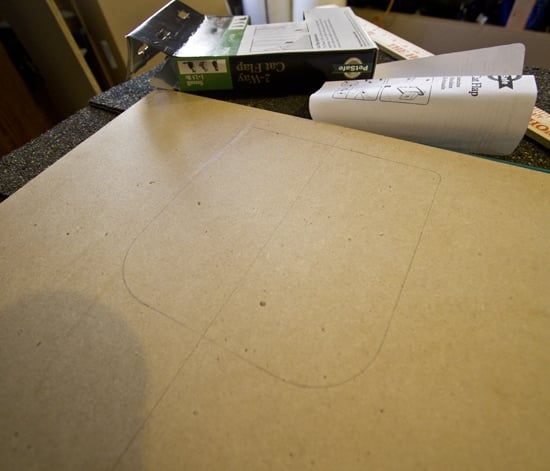
After trying to find a premade box, we realized our dimensions were too specific and we had to custom build it.
So I measured and sketched out a plan:

And we headed to Home Depot to grab our supplies: 1/2″ and 3/4″ MDF, roof shingles, cat door, litter pan, liquid nails, and spray foam (we had the rest at home). Total cost came to around $75.
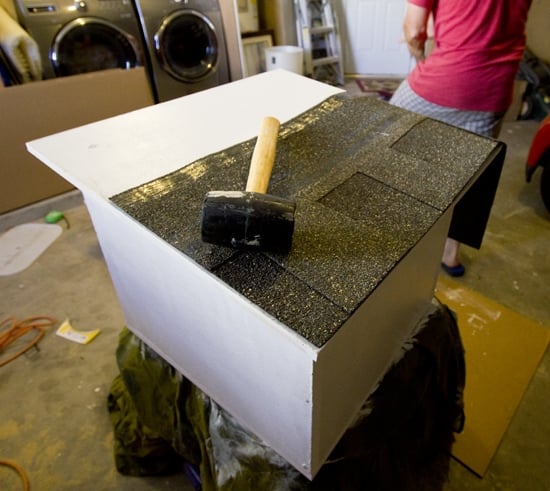
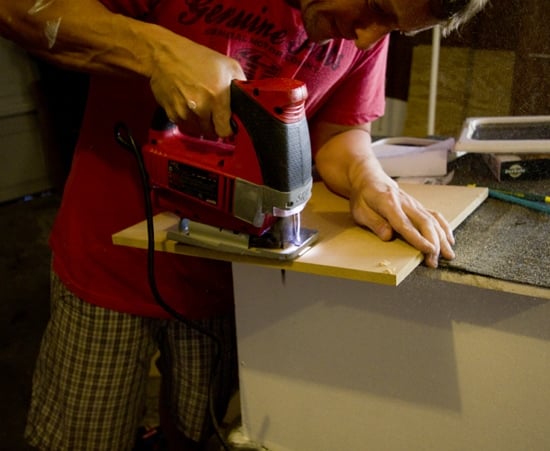
We had the square pieces of wood cut to size, and we cut the angled sides with a jigsaw at home (we made the roof angled for easy water runoff.)
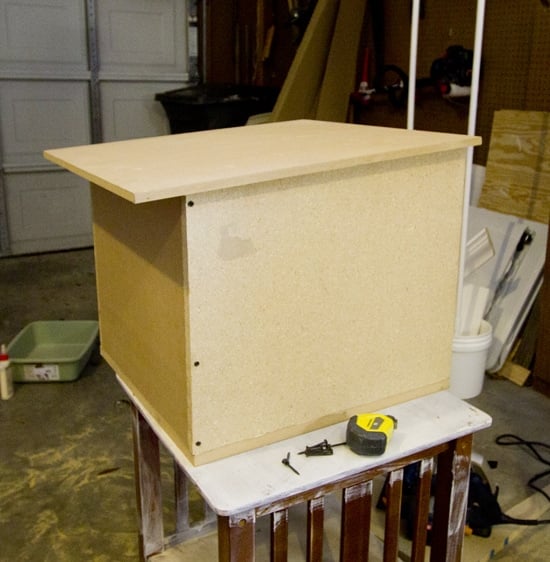
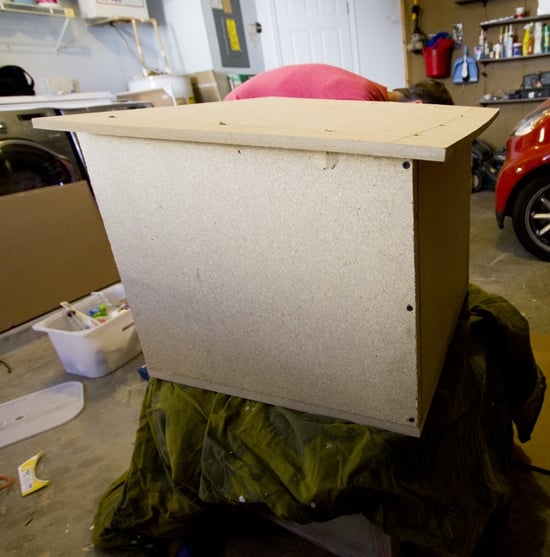
Here is the construction process, demonstrated in pictures:
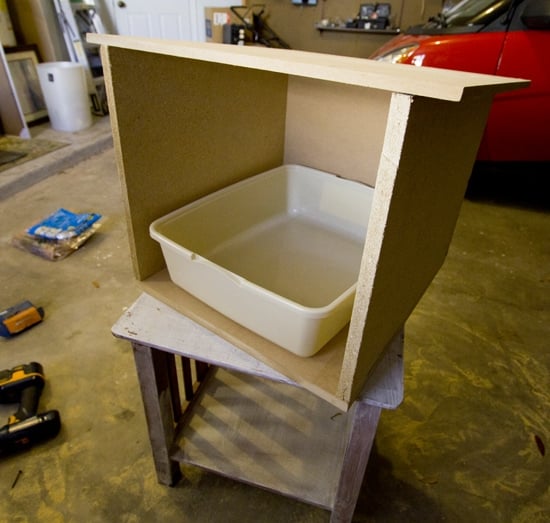
Woohoo, it fits!
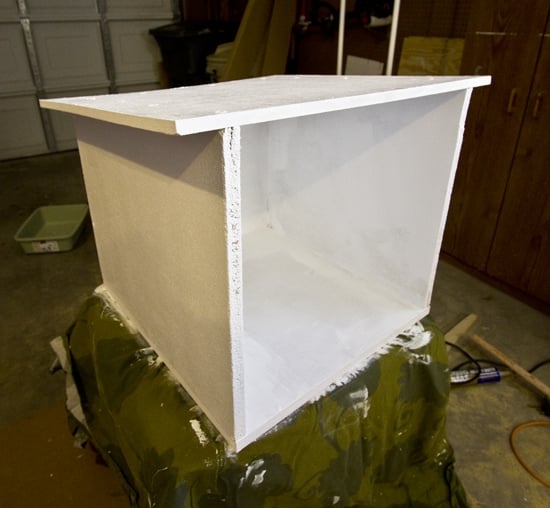
Once everything was screwed together, we gave it a few coats of paint for extra wood protection (and also to make it prettier).
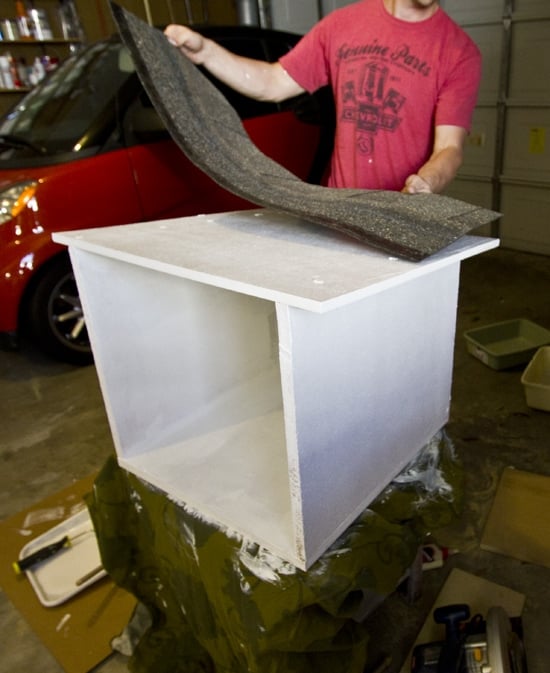
As the paint was drying, we got started on the roof.
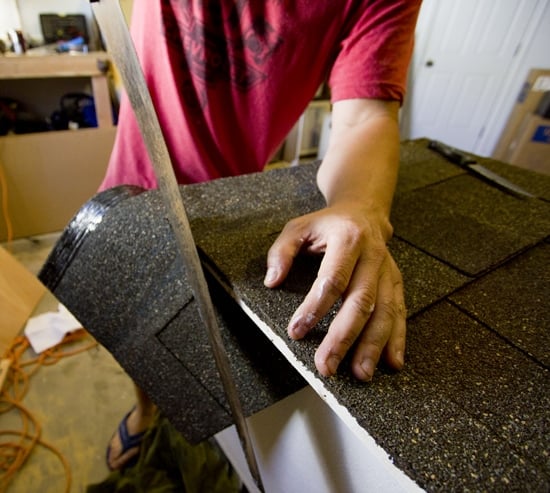
We picked up a couple sample shingles for $2 each, which was just the right amount for this project.
A couple nails on the edges was all it took.
Once in place, we trimmed off the excess (this stuff cuts like butter):
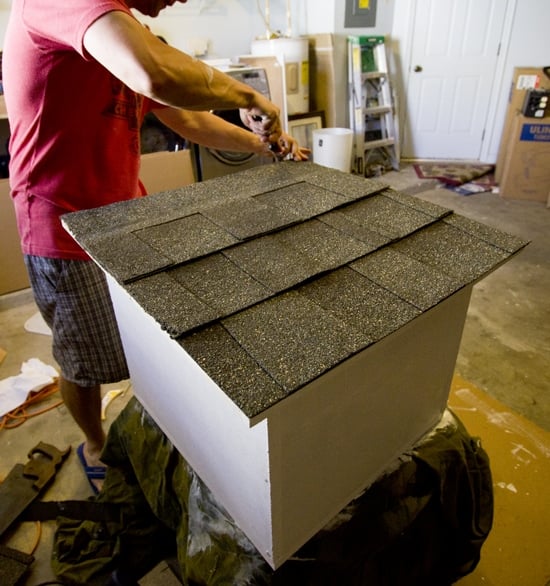
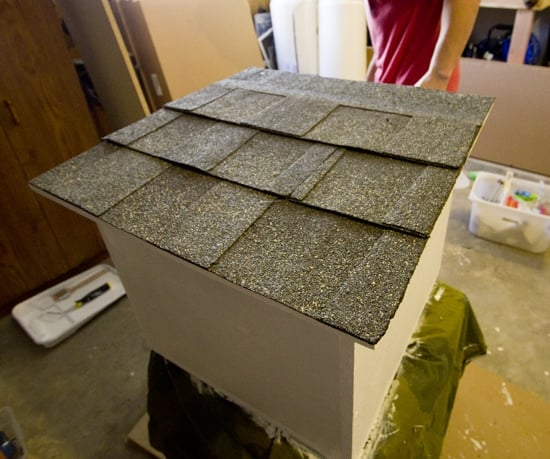
And our box was done!
The next step was fabricating a door (along with a kitty door inside of that).
We used the kitty door template and traced the hole…
and Brad cut it out with a jigsaw:
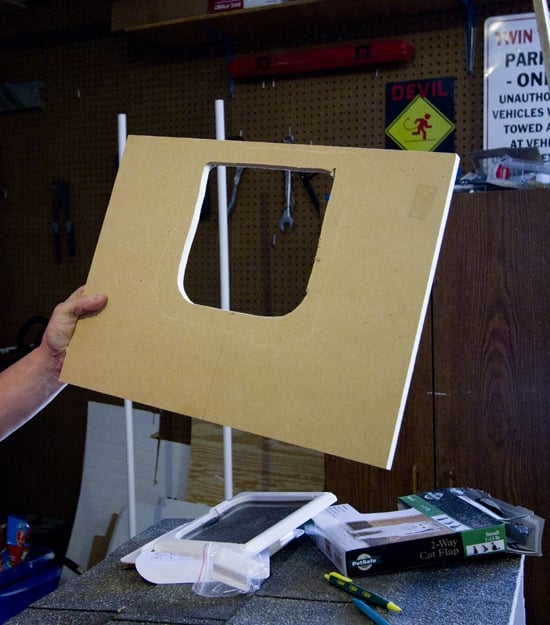
Ok, so it wasn’t the straightest cut… but it would be hidden so it was good enough. (Maybe I’ll try cutting next time).
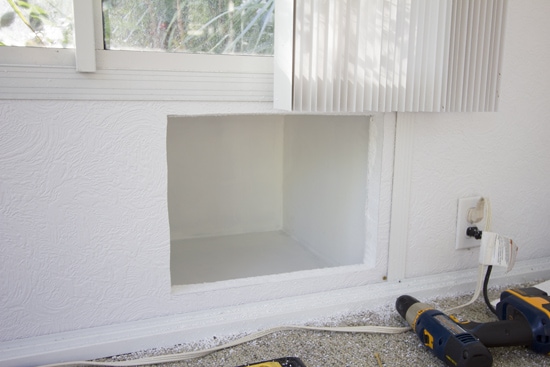
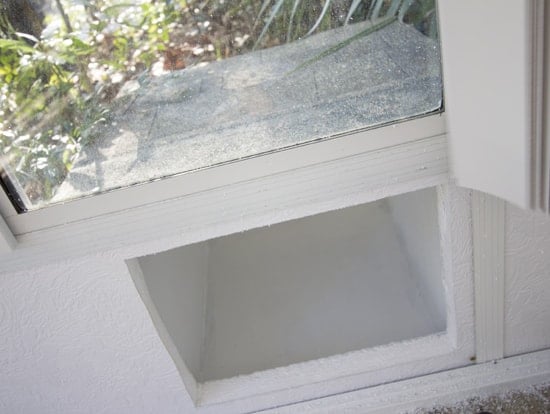
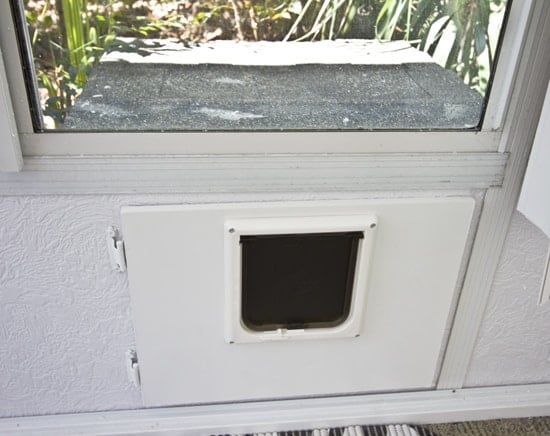
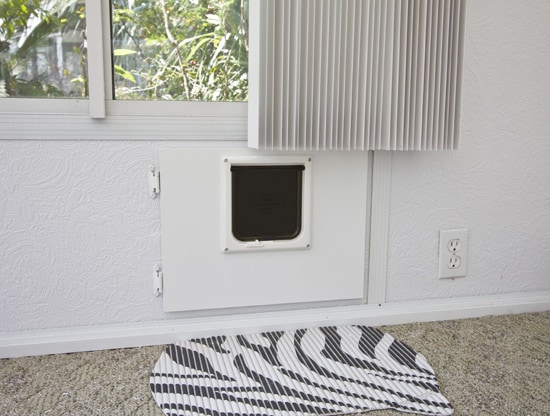
Back inside, we measured our opening and used the jigsaw to cut a hole in the sunroom wall.
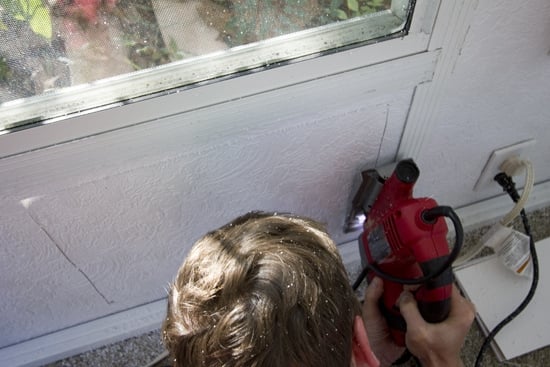
Ta-da!
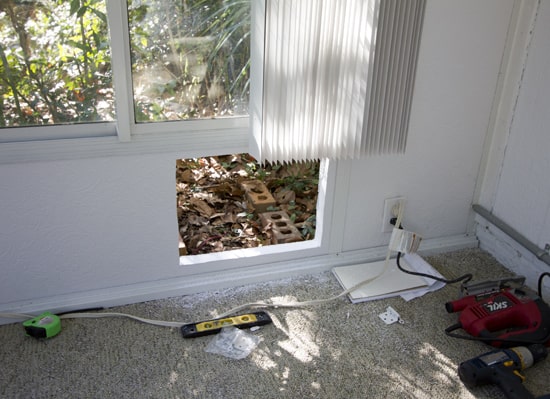 |
| Stop laughing at our vertical blinds… Brad doesn’t want to part with them yet for some reason. |
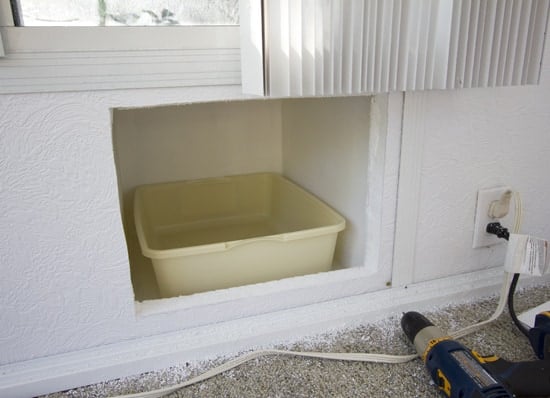
Outside, we wiggled our box into place…
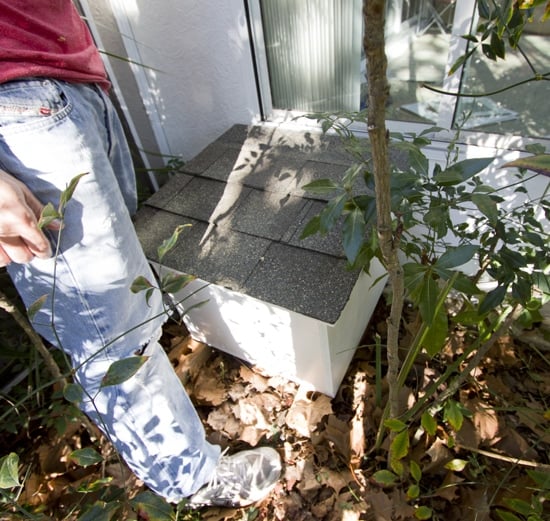
And used bricks to set it flat and level against the house.
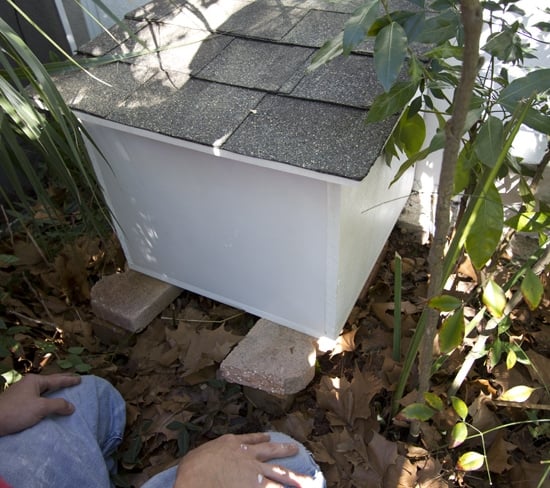
For a waterproof seal, we applied weather stripping around the opening and drilled long screws from the inside to secure it to the house. Brad also applied caulk and foam all the way around the outside. I think it’s safe to say nothing is getting into this box!
 |
| I know… this line isn’t straight either…. luckily it’s hidden also! |
Perfect fit!
The last step was drilling the door into place. We used simple white self closing hinges, so the door pulls shut on its own. No knob or latch needed.
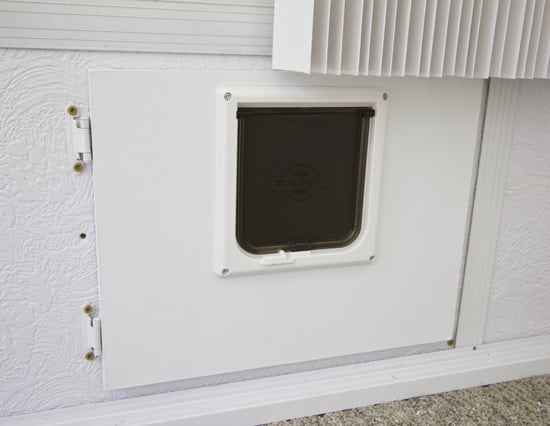
And finally, I touched up the screws with white paint to make everything blend in so it’s as low profile as possible.


Sara {House Bella} says
How awesome! I'm glad she likes it.
Lena says
I admire your meticulousity… (Is that even a word?:)). To spend so much time on a small project like this! You must be a perfectionist:) Awesome job!
Brad D says
The panels in the sunroom are replaceable. It isn't like we cut a hole in the side of our house. Second, there isn't a hole there anymore. There's a door.
Anonymous says
Yeah all those people who install pet doors so their animals can use the bathroom are very very strange. I would never do that.
Anonymous says
There is no way I would cut a hole in my house so my cat could go to the toilet. Very strange :O) but like my friend always says everyone is different :O) Michelle x
In The Night Sky says
I've been thinking of doing something like this in our house as even though we have a laundry, it's not really big enough for the litterboxes (we've got 2 cats). So thanks for posting this, the way you've done it looks great!
Melissa@thecre8tiveoutlet says
this is great I want one and I don't even have a cat! J/J!
Andrea says
This is genius. It won't work for my house, but makes me want to be creative. Thanks for posting!
Deb says
I hope Susie knows how lucky she is!!
Sonya says
What a smart idea and a cute kitty! I think it looks nice too.
Jenna Sue says
Thanks for the tips, Teri!
Teri says
Great idea. To cut down on the stink, add baking soda (or the pet safe powder rug freshners) to the litter. When you scoop, make sure you stir the litter up well. That lets the clay absorb the moisture – and that is where the real stink comes from – the ammonia in the urine.
There's a product called “Odo-ban” (I buy it at Sam's) that is a safe natural cleaner. We'd spritz the pans with it when we changed them.
I used to breed show cats and have had plenty of litter pans. People were always surprised at how many we had since there was no 'cat smell'.
Lexi M. says
What a clever idea! I HATE having to have a litter pan! The smell is HORRIBLE! May have to implement your idea! 🙂
Jenna Sue says
Erica — There are no vents yet. I just added a sidenote to the post that I meant to publish originally about installing a fan in the back. We're going to play it by ear right now and see how it does with the smell. If the smell becomes an issue, we will definitely add the fan.
Erica says
How does this keep the smell out of your house? There are no vents or anything in it, right?