Let’s start with the sunroom.
Last week I posted the official, messy, cluttered sunroom “Before” pictures.
Here it is again, as of a few days ago, with most of the furniture cleared out:
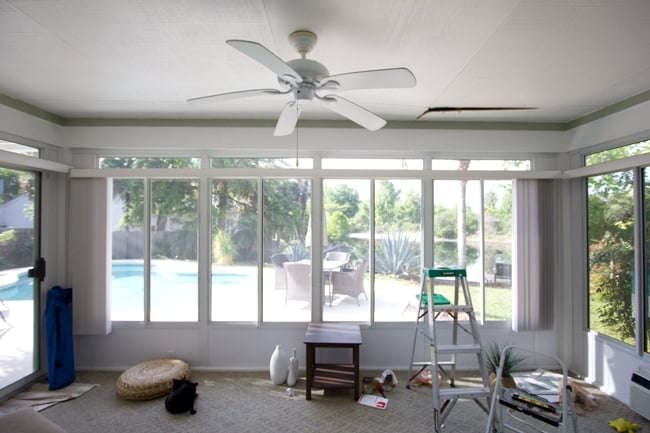
You’ll notice a hole in the ceiling to the right. This is because we’ve decided to rip out the ceiling and replace it with fresh drywall, for a couple reasons. #1, the ceiling was sagging a bit where the hole is and we had to make sure there was nothing weird going on up there, and #2 (most importantly), we wanted to install recessed lighting and in ceiling speakers.
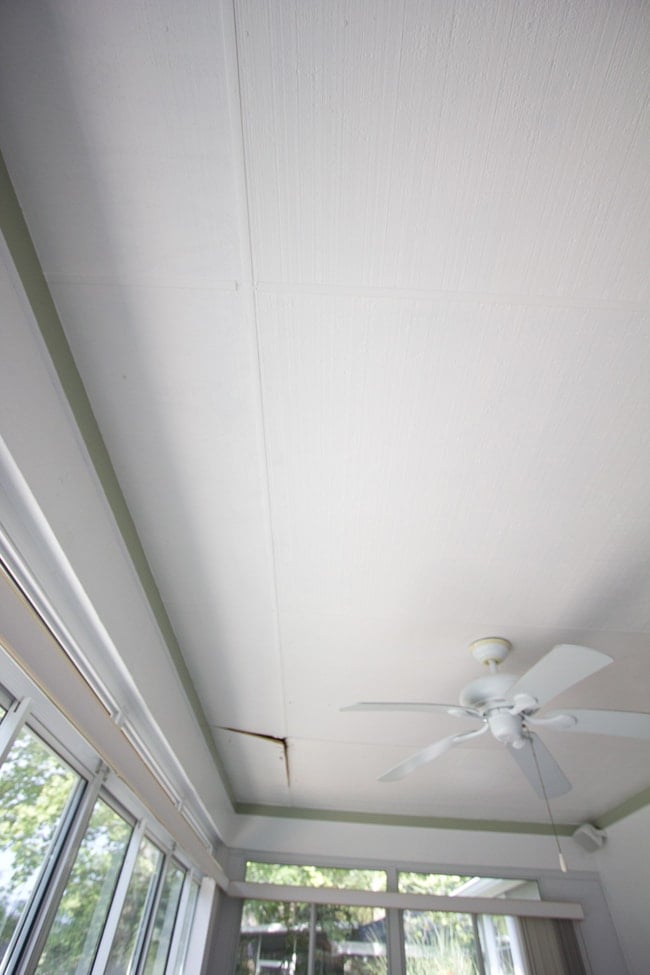
The existing ceiling was made of this textured plywood paneling…
And it was wedged in between the trim and 2×4 beams, which made for a long Friday night of demo.
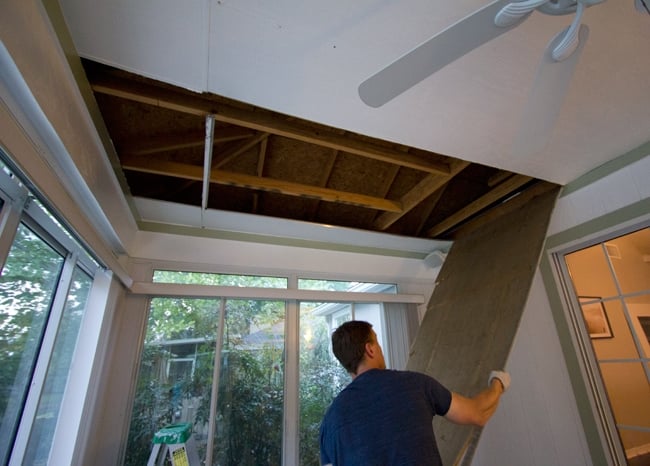
The aftermath:

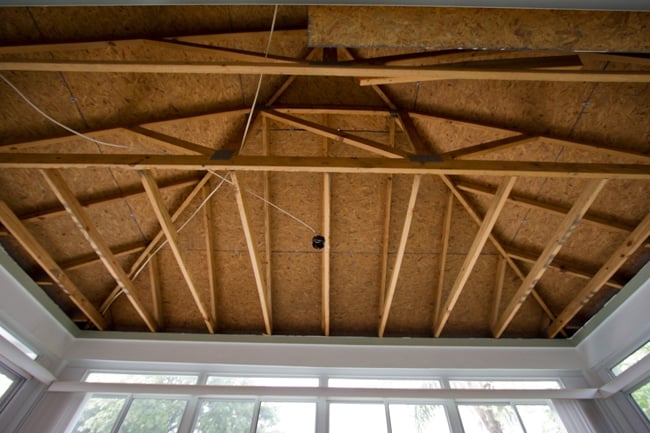
Once the ceiling was gone, Brad ran the wiring for the new lights (there will be four—two on each side) and speakers (two—one on each side).
This meant removing the existing speakers Brad had installed last year and rerouting the wires through the attic:

The only existing light source was from a single porch light, which was completely insufficient for this room. The sunroom was actually added on to the house; this wall used to be outside.
Mid wiring shot:
I failed to take a picture with all of the wiring completed… but pretend there’s some more wires up there. That’s how it looks right now.
And now for the console table project…
Remember this table?

My super talented Dad built it for me a few years ago for my birthday. At the time, it was the perfect fit in our tiny living room… (see it on the right?)
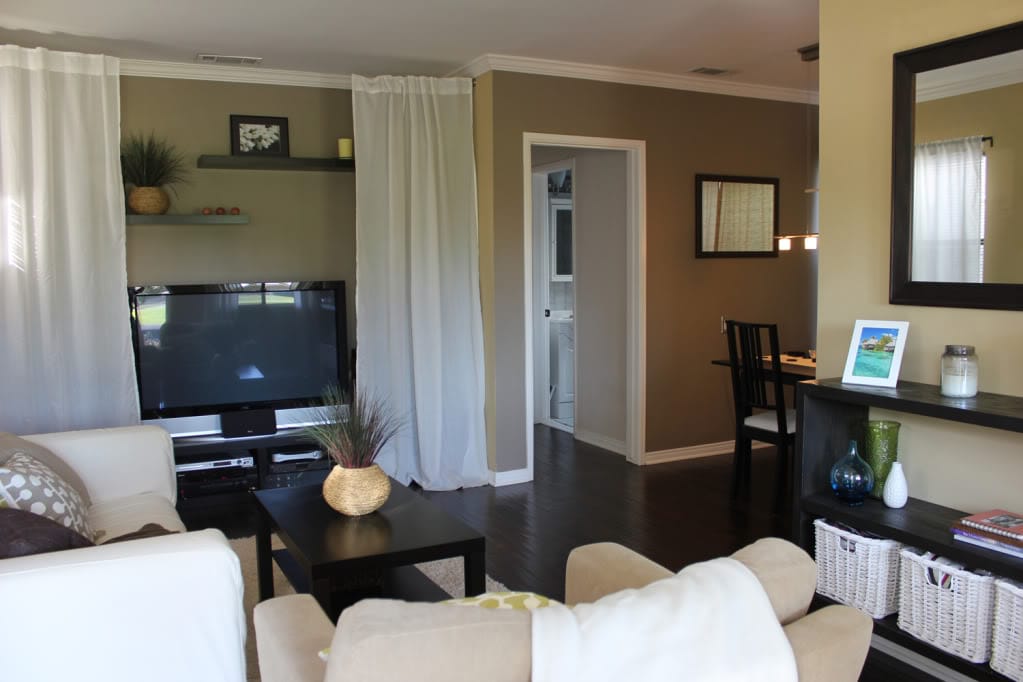
All of our furniture was black at the time, which does not have a place in our house now. It really was a lovely piece of furniture, but it just didn’t feel right in our new home.
I hauled it out into the garage to evaluate my options:
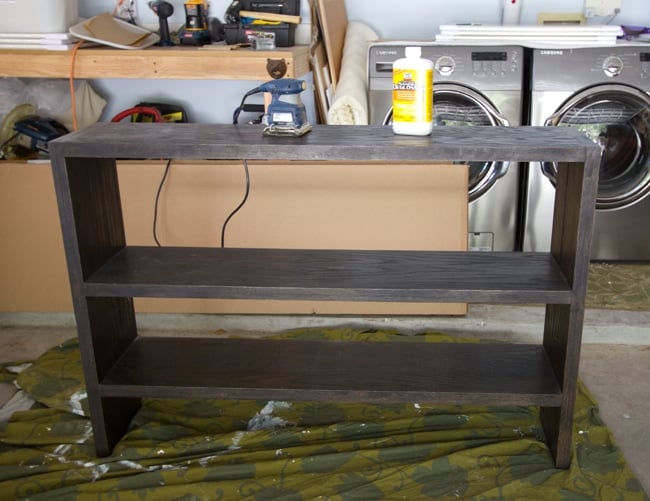
Originally I had imaged a soft gray, weathered wood look that would be consistent with the style of the room. That meant I had to sand all the stain off first.
Easier said than done, apparently…
I sanded until my hand went numb, but this stuff had really seeped into the grain (it’s oak veneer, for those of you wondering).
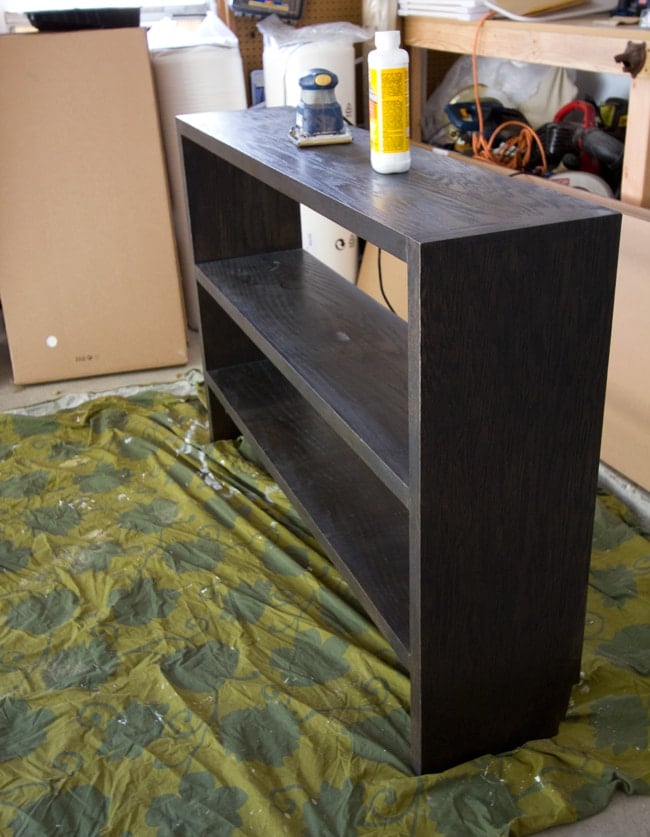
I decided to keep at it, hoping at the stain would lift eventually….
but it did not.

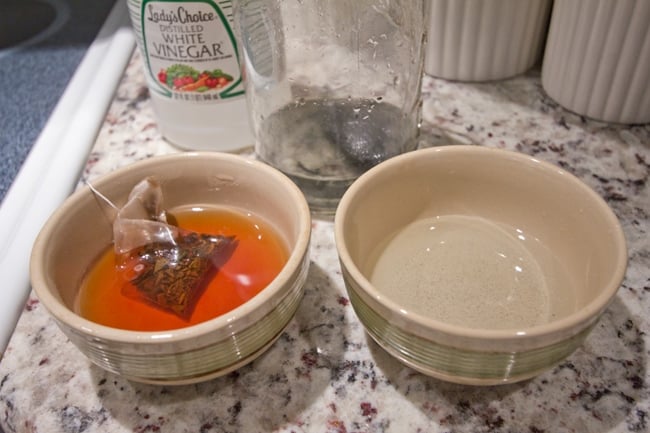
I looked up ways to remove stain and discover that strong bleach can do the trick. I applied heavy duty Outdoor Bleach onto the wood and tried scrubbing it down, but no luck there.
Determined to stick to my mission, I pinterested and googled ways to weather wood. I found some extremely helpful tutorials:
From Blue Roof Cabin:
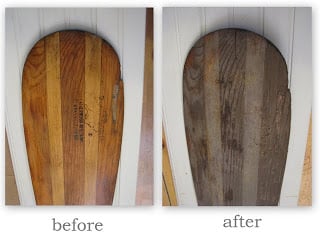


orials that certain woods react better with this process—oak being one of them. For those of you with oak wood looking to try this at home, I might skip the tea step (it simply helps speed the process up), and I’d use a sponge to lightly apply the mixture (rather than paint brush it on like I did).
Even at this point, I wasn’t quite ready to let my vision go… so I turned to my last resort.
Someone had mentioned using a baking soda + water scrub to bleach/weather their wood, so I gave that a try….
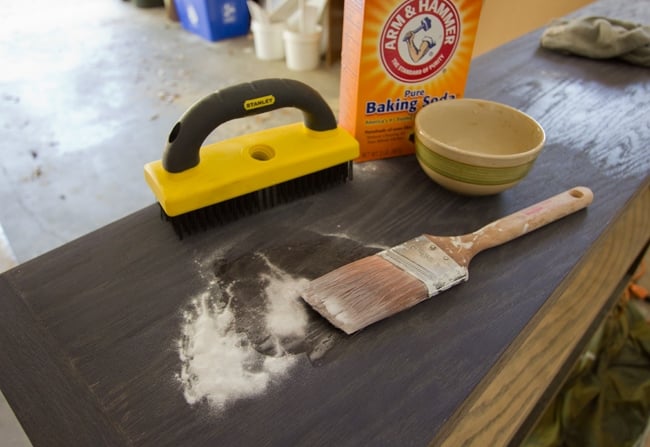

Fail. It just turned almost a reddish color. Once you apply the vinegar, I guess it stains the wood for good.
With all of my methods exhausted, I decided to let it go and move to plan B: Painting.
That meant I had to weigh my options… white is always the default, but I have a white (er, off-white) mirror sitting right next to it, plus a white frame that will soon be hanging above it. White was out.
I feared that any shade in the gray/brown family would clash with the taupe walls (it would also be a bit boring).
I wasn’t sold on introducing a new color to the room… as that requires other changes to be made.
The obvious answer…
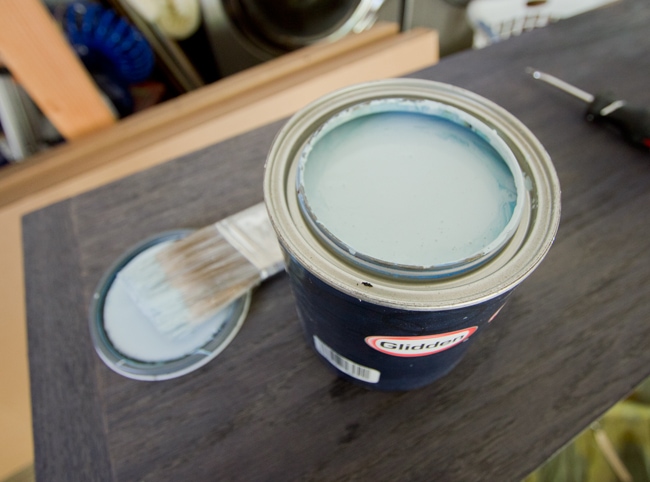
Yep, it’s blue. I can’t help myself.
This particular shade is Glidden’s “Sea Spray”, used on my Tea Time sign and metal flower bucket in the kitchen (it was mixed with white here):

Instead of painting it a solid blue, I wanted to hang on to at least some of the qualities of the weathered wood I had dreamed of for the table in the beginning—so I went with a thinner coat that still shows some of the grain through it, with a touch of distressing on the edges.
Here’s coat #1:
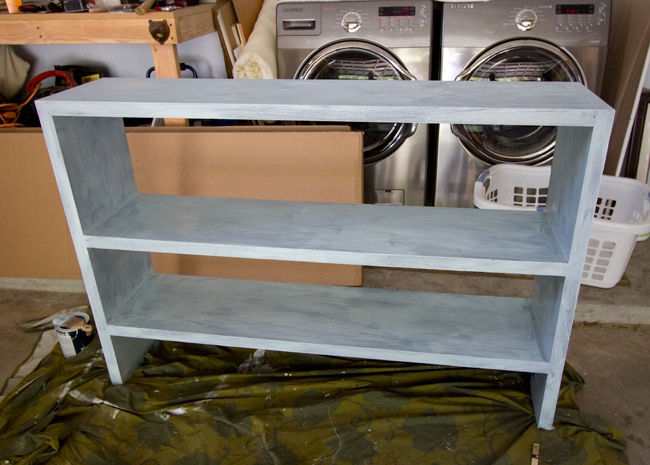
Coat #2:

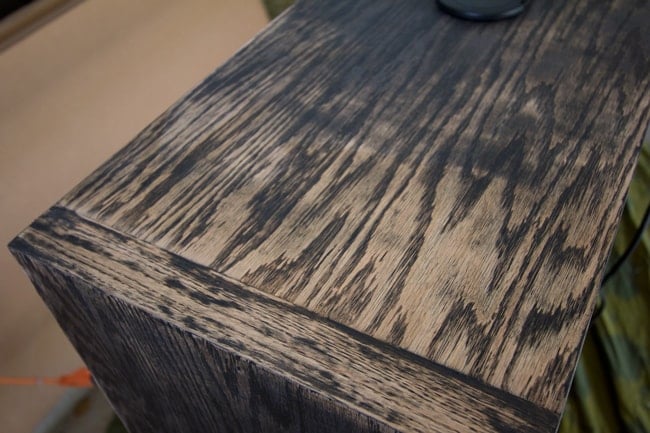
I gave it a light sanding after coat #2, made a few touch-ups, and sealed with Polycrylic.
Hard to tell with this camera, but here’s a close up of the detail:

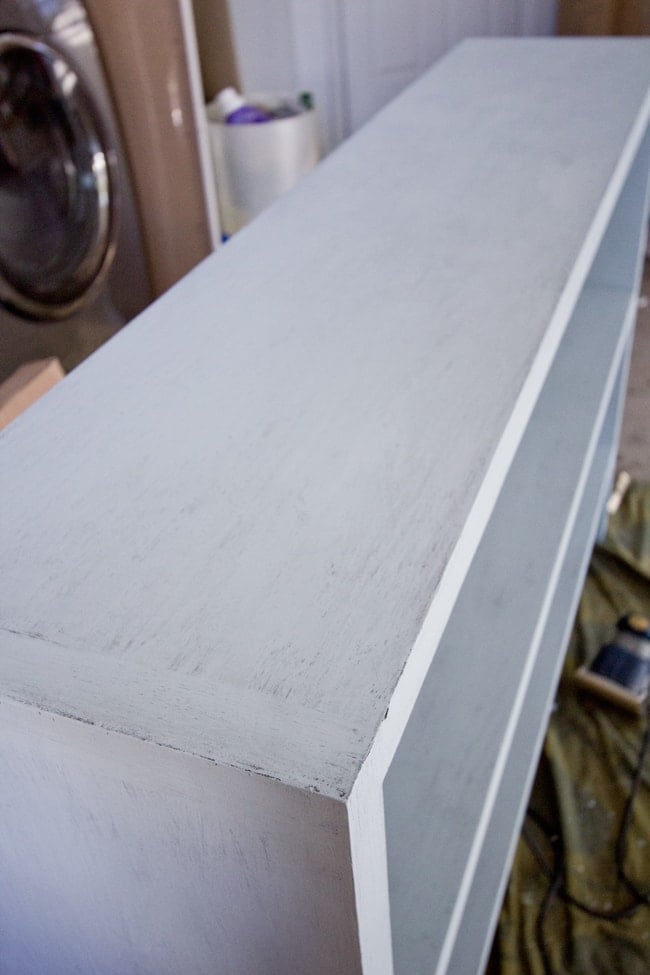
It looks white in these pictures, but trust me when I say it’s very blue. I’m a actually little worried that it will be *too* blue when it fully cures…. but I’ll cross that bridge when I get to it.
It’s currently drying/curing in the garage, so I’d expect to have it back in the house mid next week. Then I’ll hang my new art, work on some of the table accessories, and be back with an After shot.
I’m still planning on building that ladder I photoshopped in earlier, and I’m quite excited about it…
 |
| Btw, I changed the color of the blue map art to a darker taupe. No clashing with the table! |
I was originally going to paint the ladder blue, but now that there will be a blue table in the picture, I might just revisit the weathered wood technique. Hopefully it works as planned this time!


Matilda Lemons says
Like it better that way! You’ve transformed it into a timeless beauty in a flash. The dark flooring made the rest of the sunroom fairer. It’s a really good facelift. 😀 It’s more cozy, and I’m sure it would be easier to clean. 😉 Plus, weathered wood provides maximum resistance to seasonal changes.
Jamie Wright, REALTOR says
I LOVE the blue for the table…even though you didn't mean to end up there 🙂 I can't wait to see how your sunroom comes out…we are in the process of finishing/decorating ours, and could use some last minute inspiration!
annemarieblogs says
Beautiful! I'm so jealous of your room with all the tall gorgeous windows. I would die for that!
Anna Williams says
I'm sure it will look great Jenna and I love the idea of a touch of blue with the other colours in the room! xx
Anna (My Design Ethos)