This day is finally here! Our kitchen is D-O-N-E. It’s been many months in the making, so let’s do a quick recap…
Here’s how it looked when we moved in:

Pink walls…

Beige formica counters…


Outdated chrome and brass fixtures…


Empty, unused walls and lack of counter space…

Whitewashed 90’s oak cabinets…

Mismatched fluorescent lighting….
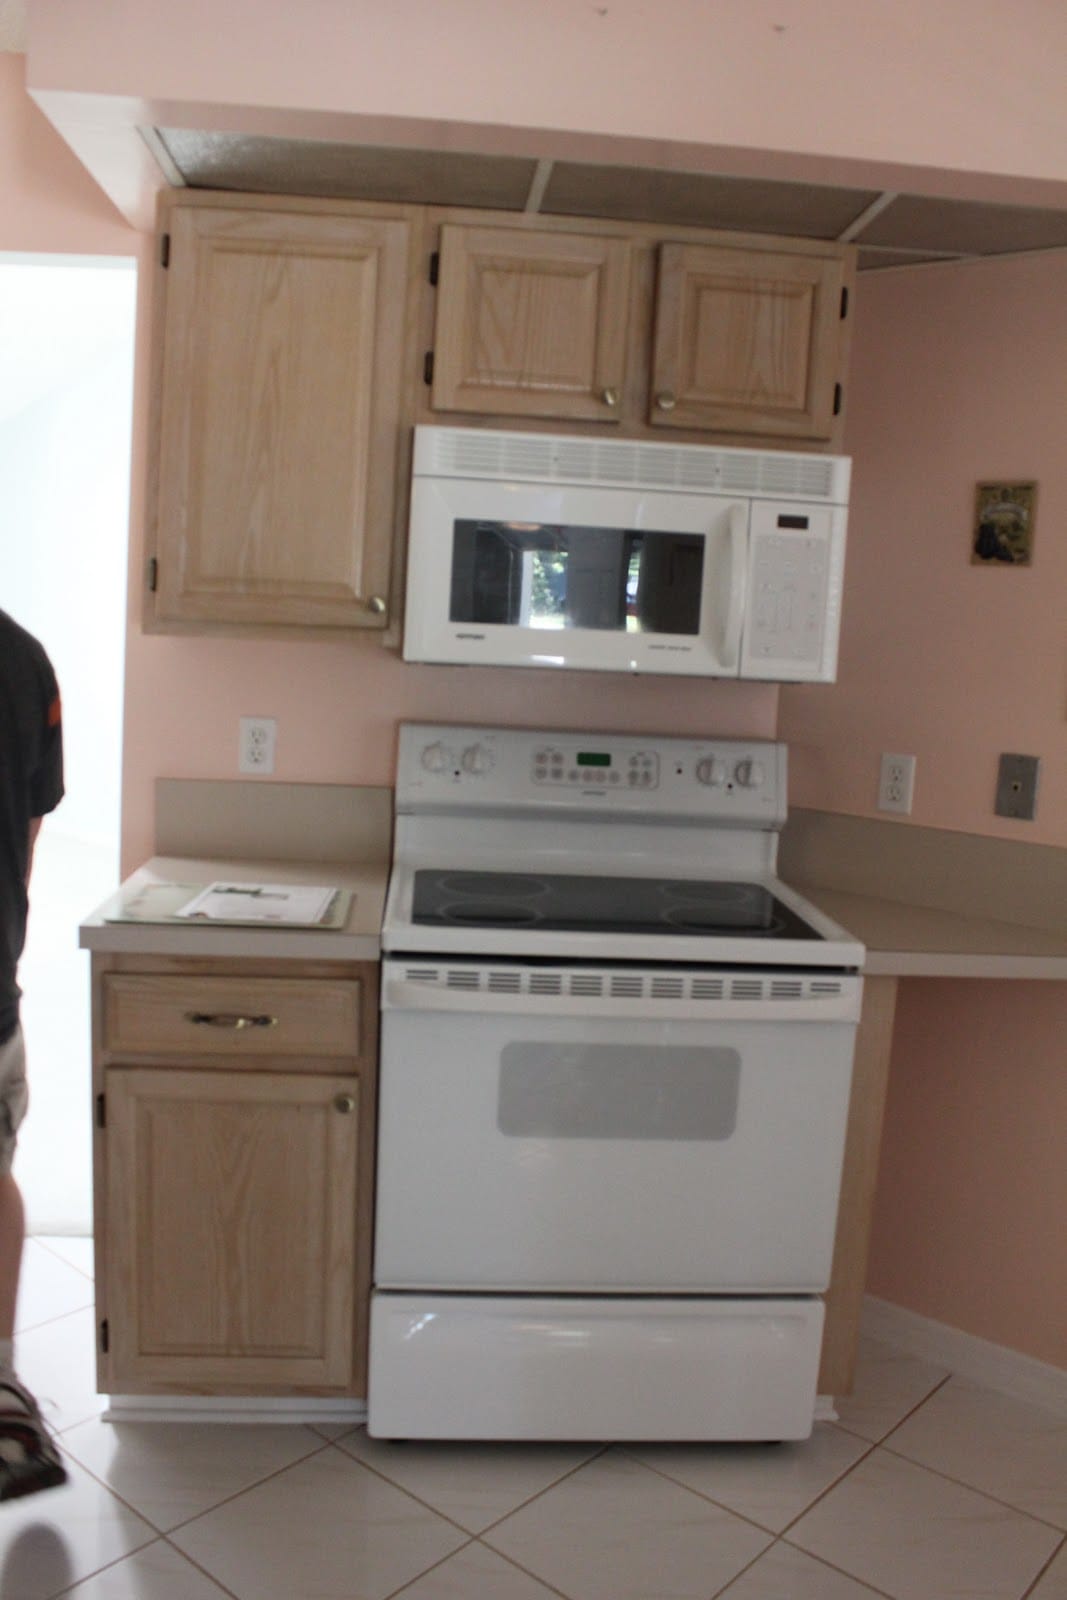
White linoleum floors…

and the list goes on.
Last summer we made a few big updates including recessed lighting, new tile floors, granite counters, stainless steel undermount sink, glass subway tile backsplash, and a built in bar area which nearly doubled our counter space!
 |
| Tile: Giotto Grey, from Lowe’s |
 |
| Granite: Kashmir White, from Lowe’s |
 |
| Subway tile: Special order from Lowe’s, Emser’s Lucente in Morning Fog |


We lived with it like this for a while… when last month I finally decided to bite the bullet and paint our cabinets. In addition, we had open shelving installed on the big empty wall. Here’s what the kitchen looked like in the midst of all this…

And now, finally, every last detail is in place and our little kitchen is ready for it’s big debut:


I was debating between oil rubbed bronze or brushed nickel pulls, and I’m SO glad I went this route. I picked up the entire set of 16 on Ebay for under $80 (after my Ebay bucks)!

We also ditched the old exposed hinges and opted for concealed “soft-close” hinges, which apparently is this new technology that allows you to just gently push the door in and the spring loaded hinge will slowly pull the door closed on its own (they’ve had this for drawers for a while, but the guy at the cabinet place said this has only been around less than a year for cabinets). The hinges were under $3 a pop each, so for around $100 we were able to do the whole kitchen. SO worth it.


These open shelves… oh my goodness. They must be my favorite thing in the house.

I had so much fun accessorizing them…


DIY wooden sign tutorial coming soon (the flower bucket was a diy makeover as well).

How cute is this lil guy? It’s an owl coin bank from ZGallerie. Brad and I always seem to have loose change on the counters, so this was the perfect solution for the kitchen.

Still loving my white canister set I scored at Goodwill for $4!
I did another fun project to fill a wall… a white chalk board using DIY chalkboard paint and an old frame…
 |
| The metal bucket holds our colorful chalk |

Tutorial on this also coming soon.
I had been searching for the perfect phone charging/organizing station to put on our counter, because this is how it was looking every day:

Not cute.
I had brought home a wire basket from Hobby Lobby (on sale of course) with no idea what I was going to use it for… when suddenly it clicked:


Jenna Sue says
It's easy! You just have to wipe it down every now and then, same as regular tile.
dressthisnest says
I am slightly obsessed with your kitchen. I think I am going to steal your backsplash. How is it to keep clean?
marufhosen says
Nice work .Thanks for the share. Keep up writing so that we can get more informative blogs like this one.
subway tile
Anonymous says
Thank you so much for posting about your kitchen remodel! For all the changes you made, you got a lot of bang for your buck. I too have white appliances (in a 90s kitchen) and have been looking for ways to update it. I love how yours turned out! Thanks for sharing all the details about what products and colors you used – very helpful!
Fan in California
Lisa E says
Looks beautiful. Would love to paint our cabinets but my hubby doesn't like the look. 🙁 I have to comment on the white appliances. So happy to see. We had stainless in the last house and I hated the upkeep!!!! Have white now and love them. I get so tired of realtors putting them down on TV because of resale. What about the people in the house right now?! Not everybody likes stainless! Great job. New to your blog, came over from YHL. You have great taste…
Alejandra Cocke says
Your kitchen looks splendid! I love what you did with the marble-textured sink. The white and gray overall scheme makes the entire kitchen appear very elegant. 😉
Darryl Iorio says
Oh wow, that’s quite the transformation! Changing the color scheme to a monochromatic white updated the whole look of the kitchen, and those drawer handles are gorgeous. Congratulations on the new kitchen! I bet it’s now a joy to cook in there!
Althea Tumlin says
Whoa! What a transformation! The Kashmir white granite is so lovely, and it matches the rest of your kitchen beautifully. You did a good job with your sink. I’m wondering if you changed the pipes too. Anyway, I love the overall look of your kitchen. Great job!
Jenna Sue says
It was just off the shelf BM Advance white paint 🙂
Dealpon Daily says
Hi, love your blog!! Which color white did you use for the cabinets?…
Jenna Sue says
Thank you! I used YHL's method. There's a link and quick write up in this post: https://jennasuedesign.blogspot.com/2012/01/well-this-is-exciting.html
Abby says
I love your entire house! In fact just bought one myself and am in the process of slowly ordering lots of your prints 🙂 Curious, how did you go about the cabinet painting? I have the same oak color as you did before and want to paint mine white as well.
Jenna Sue says
Crystal, if you take your time and do all those steps they should hold up. Small effort for big results. They still look good as new!
Crystal says
I REALLY want to paint my oak cabinets but I'm affraid they won't hold up. I'm wondering how well the paint is doing on your cabinets, any chipping or peeling yet?
Dwane Zelinsky says
I'm lovin' the new look! The whole kitchen feels much more serene and bright. You did a great job with making the place make use of its space and ability to be lit by the sunlight! Good job! It feels great to do such heavy work like this and see such results.