Today is Part 2 and the reveal of our DIY guest bedroom reveal! To refresh your memory, this is a budget makeover we are doing for our friends who just bought and moved into a new house. We had a few constraints like time (just a couple weeks to get it done), budget (our goal was to keep it around $1k, which meant no major demo/changes!) and we had to incorporate their existing murphy bed. Everything else was up to us, so we decided to have fun with the space and go for a bold look!
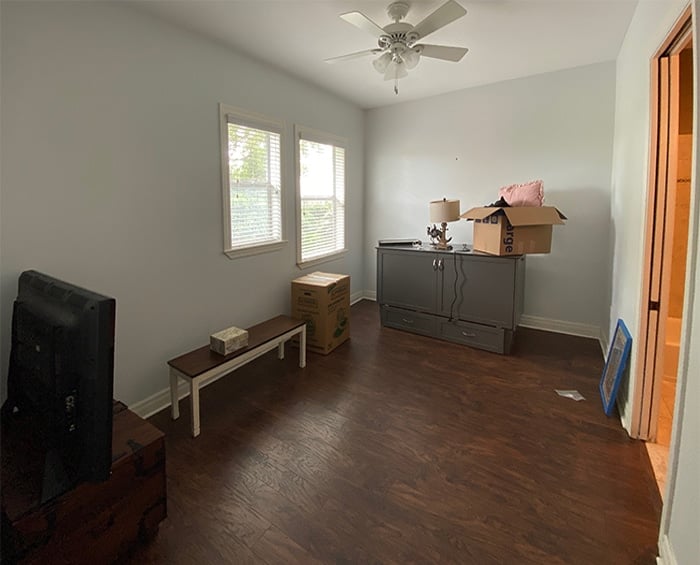
Let’s recall how it looked a couple weeks ago…

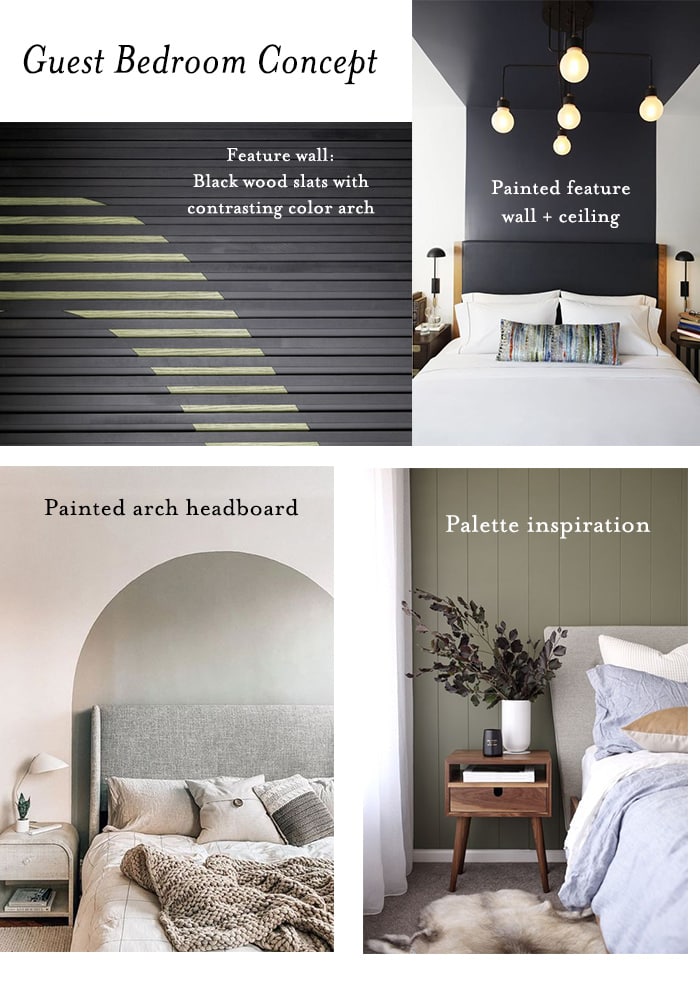
Here was my design concept:
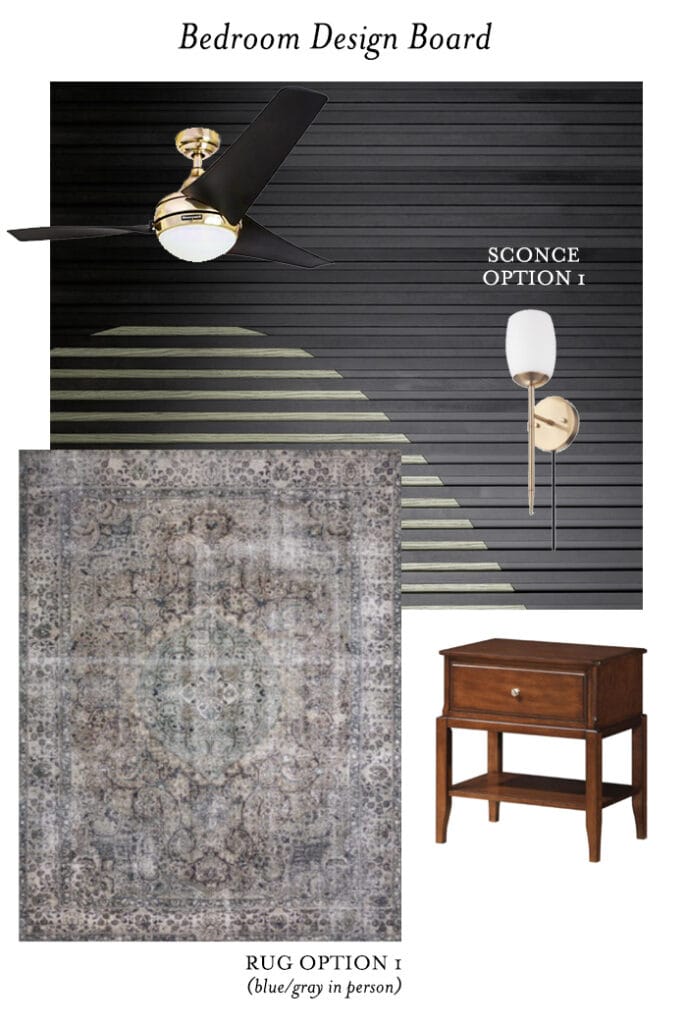
And the final design plan our friends chose:
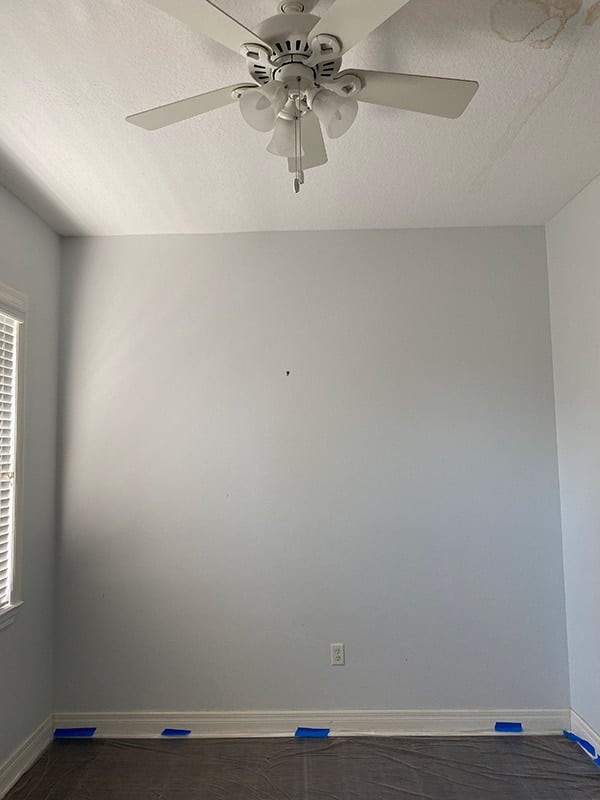
And how it looked last week after finishing our wood slat wall:
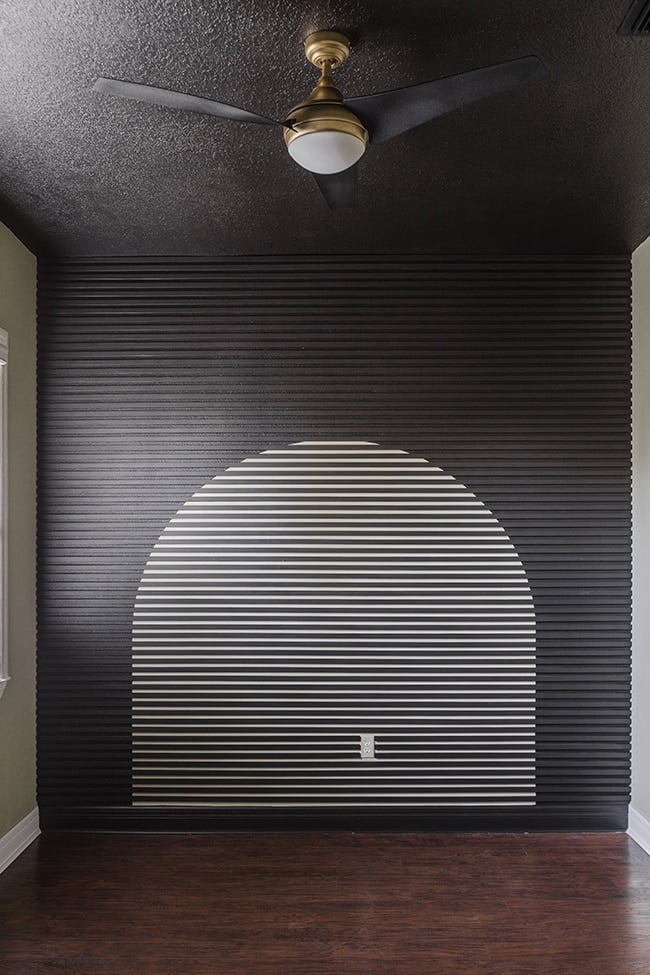
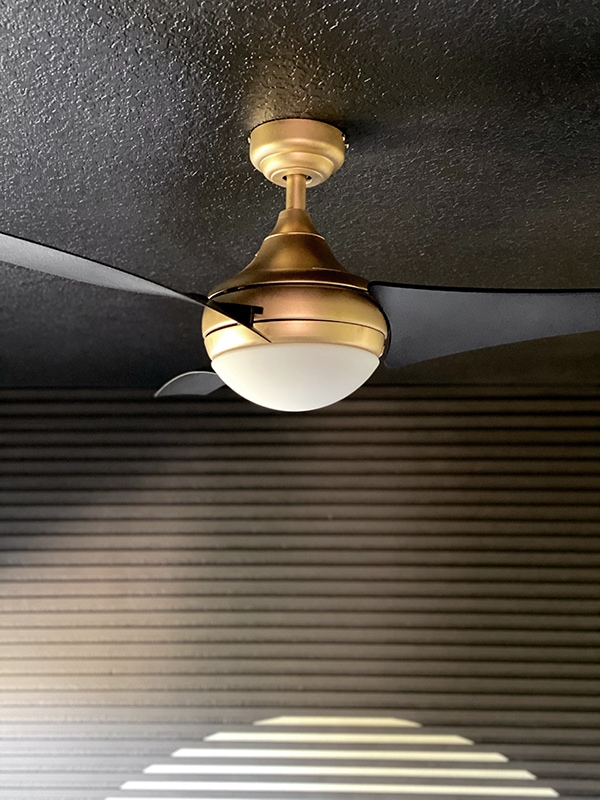
To complete the space, we partnered with Walmart who not only has a huge selection of budget-friendly decor, but also DIY supplies/materials for all of your project needs. A lot of you asked about the ceiling fan with gold trim when I shared a peek on Instagram—would you believe that I painted it?!
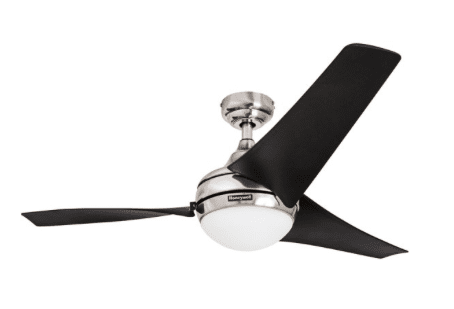
The sleek style, high ratings and low price tag caught my eye on Walmart.com, and the size was a perfect fit for this bedroom. Light fixtures are one of the easiest pieces to update with a new color since they aren’t handled and at risk for the paint chipping off. A good quality primer and spray paint is the way to go:
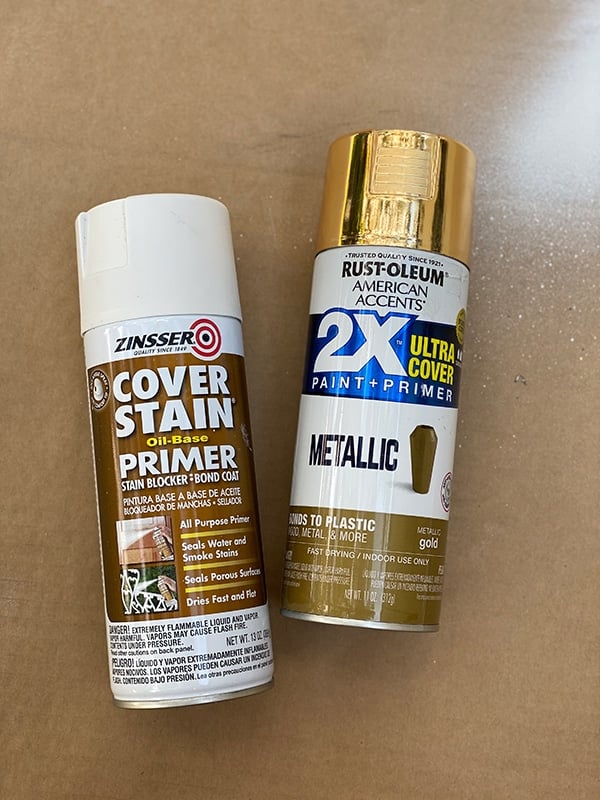
Zinsser Cover Stain is a favorite choice among pros and DIYers alike, and I was so impressed with this oil-base spray paint version. It provides even and solid coverage and grips slick metal, which is key for a durable finish.
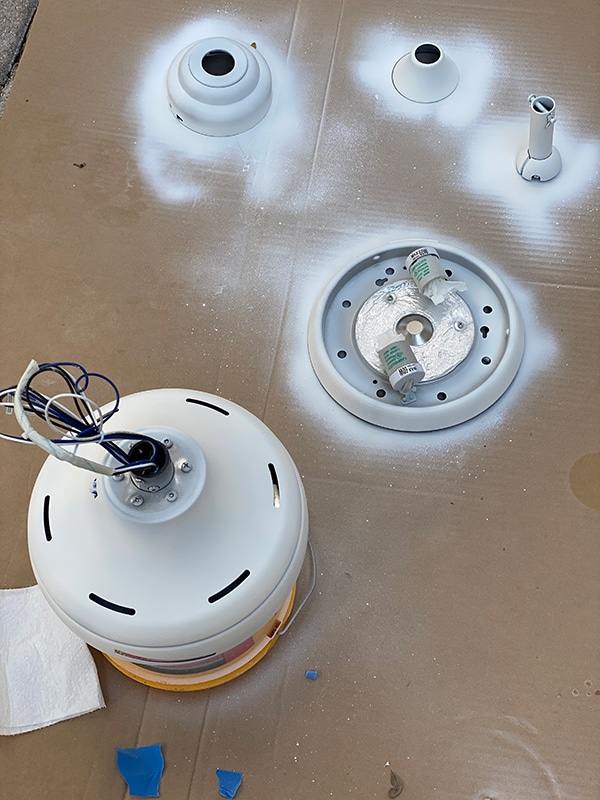
I researched several gold spray paint options and landed on this Rust-oleum metallic gold, which has a really nice warm champagne tone that isn’t too yellow or bronze.
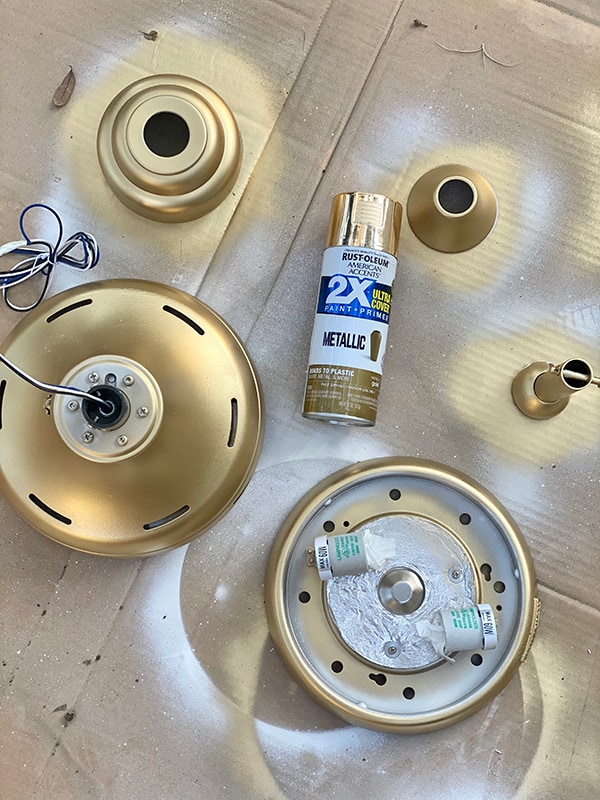
It covered in just one coat, and the fan was assembled and installed the next day.
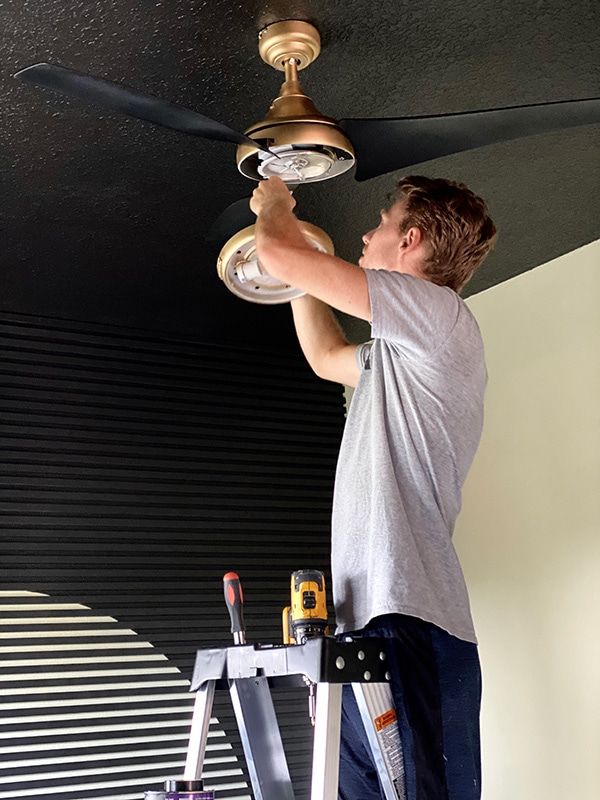
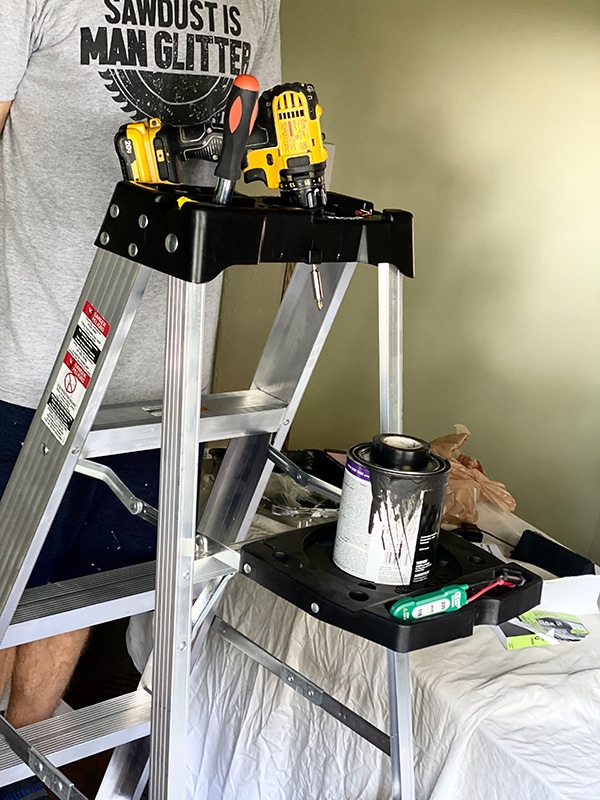
One upgrade we’ve been desperately needing for a while is a new ladder. Ours was bent and beat up, and didn’t even have a groove to place things in. We took the opportunity to grab this 6′ Louisville step ladder in-stock at our local Walmart, which not only has slots for both gallon/quart paint cans, but also spots to hold all of our tools. And you can’t beat the $60 price tag!
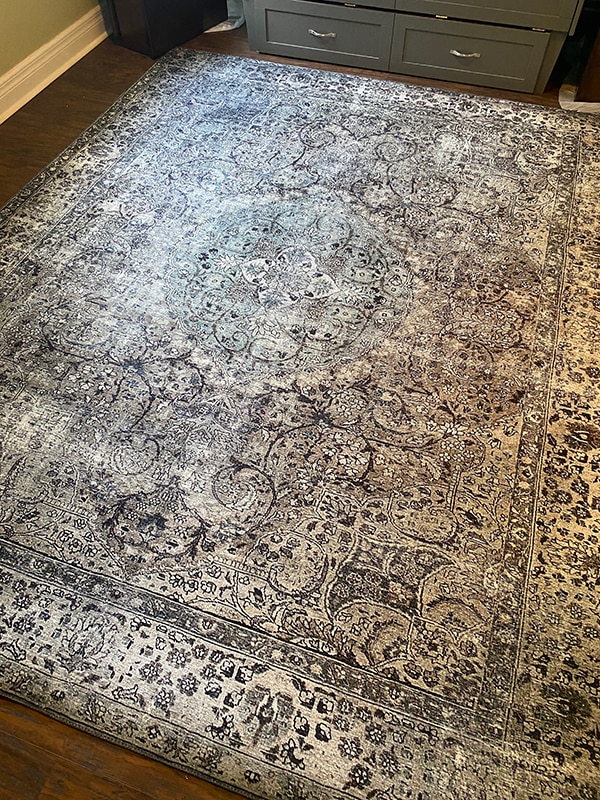
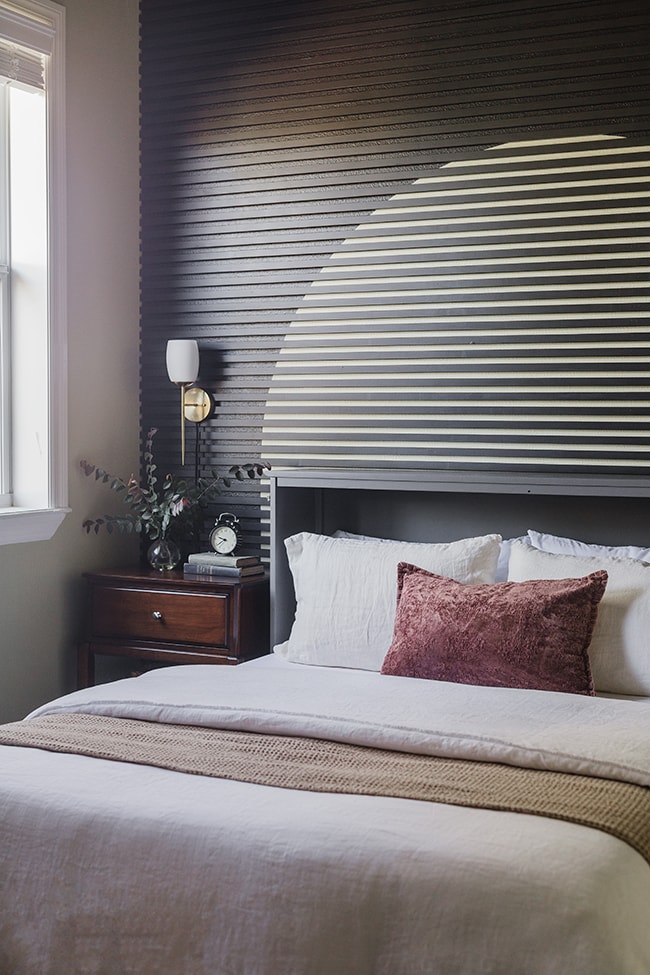
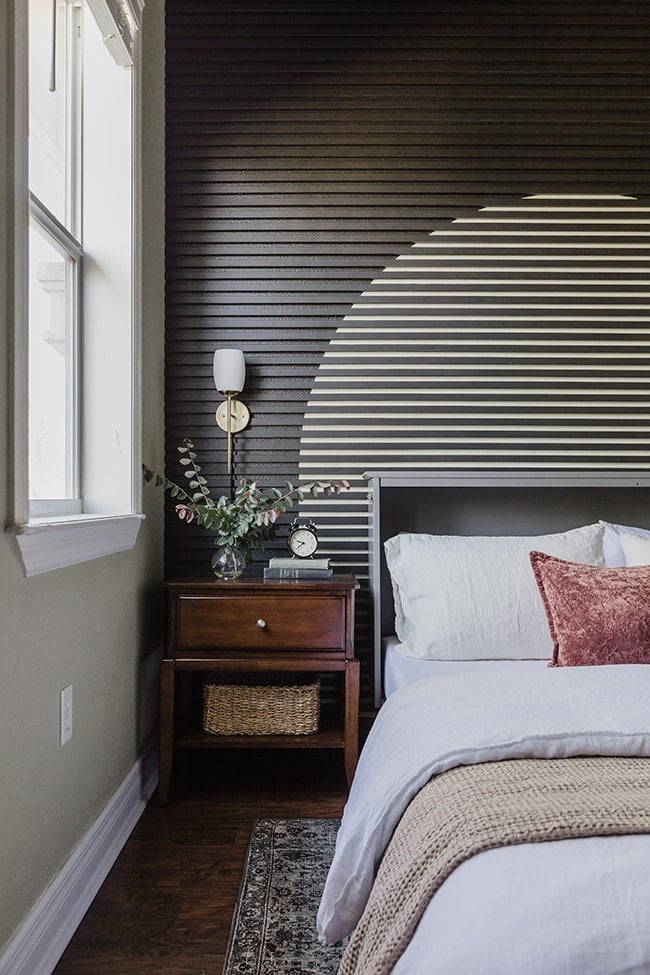
With the fan installed, it was time for the fun part—decorating! We already had a gray murphy bed to work with, so I wanted to incorporate that into the main color of the room through a rug. Fortunately, Walmart carries my favorite rug brand (Loloi) and I knew the Layla in taupe/stone would be perfect in here…
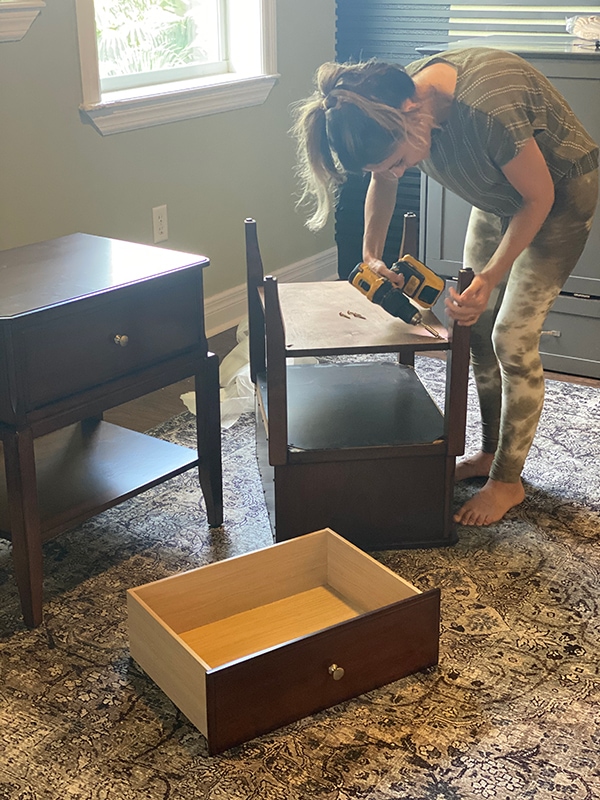
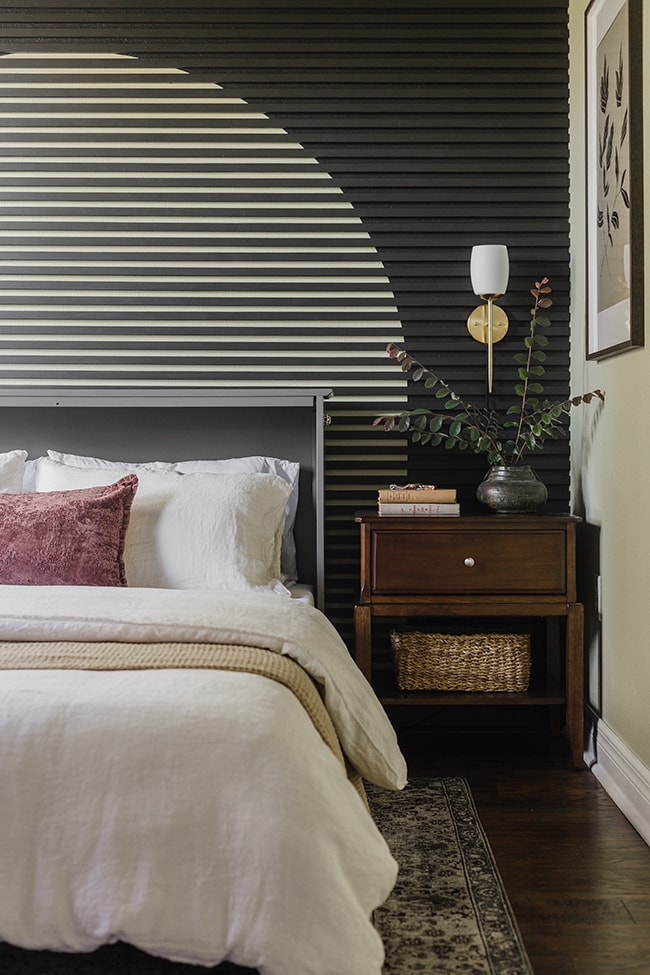
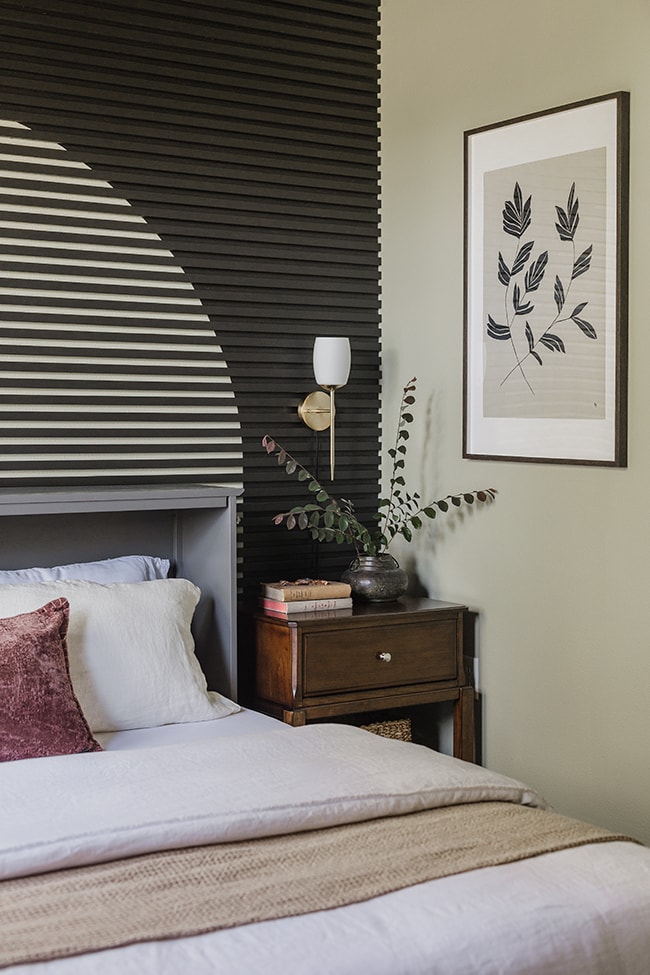
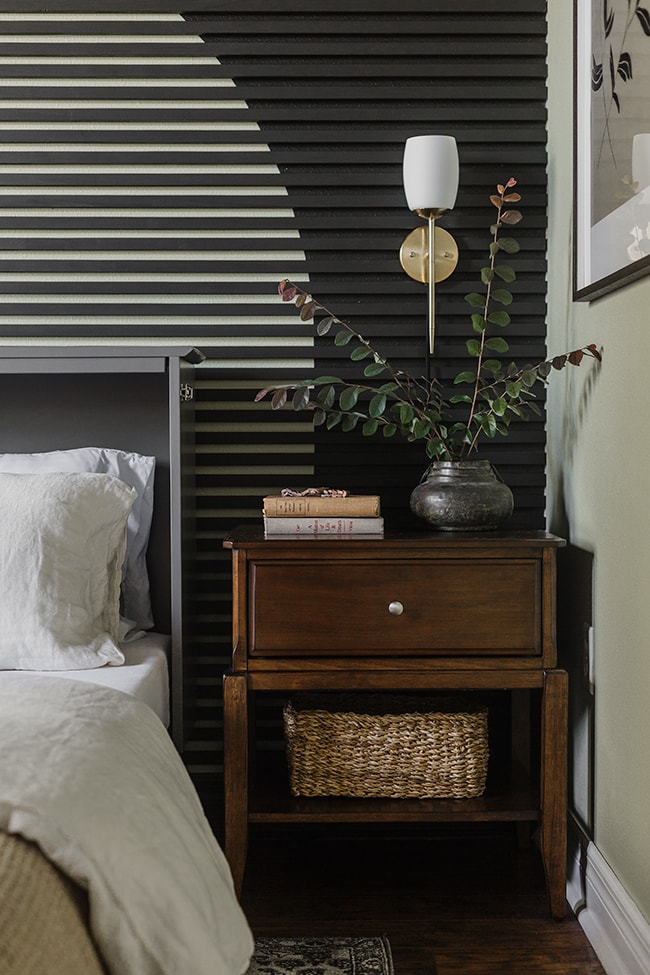
The next pieces I identified were a clear winner for me. These chestnut wood night stands have a classic shape, the wood tone matches their floors perfectly, the size was just right and they look very expensive—but only $69!
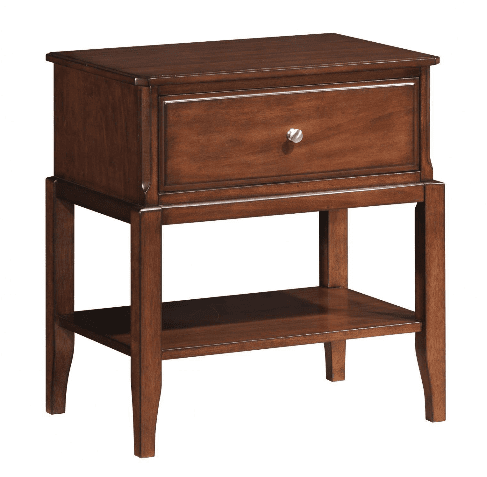
The drawers glide smoothly and the quality feels solid. I still can’t get over the price on these.
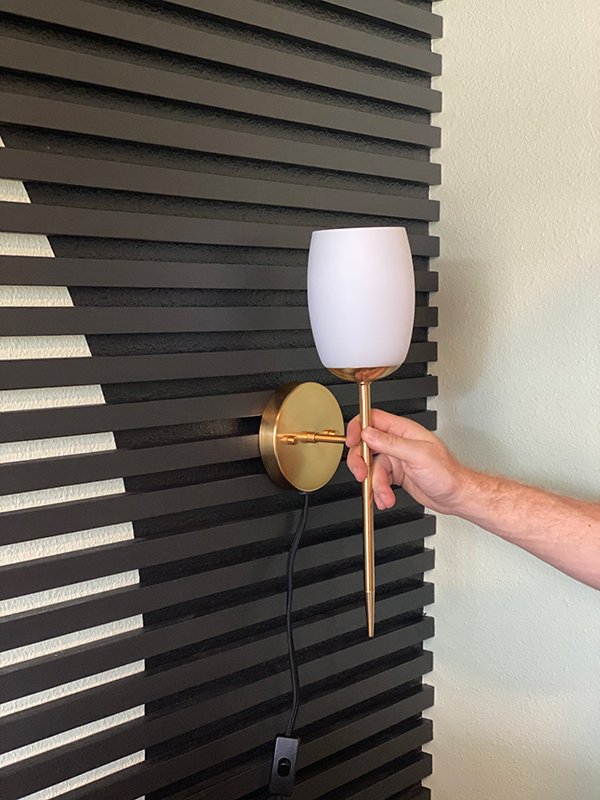
Walmart also has a large selection of lighting, and after narrowing it down to a few budget-friendly candidates: our friends selected these $40 beauties:
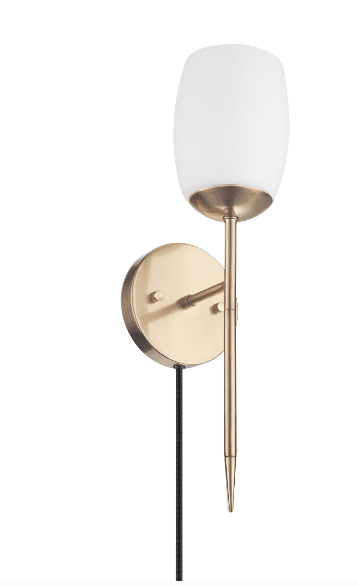
Yet another high-end look on a serious budget! The best part is, it’s plug-in so there was no hard wiring required. We were prepared to cut a notch in the slats to recess the base of the light against the wall, but after holding it in place, we realized that wasn’t necessary at all—it looked great as is! With that figured out, installation was as easy as screwing the mounting plate into the slats.
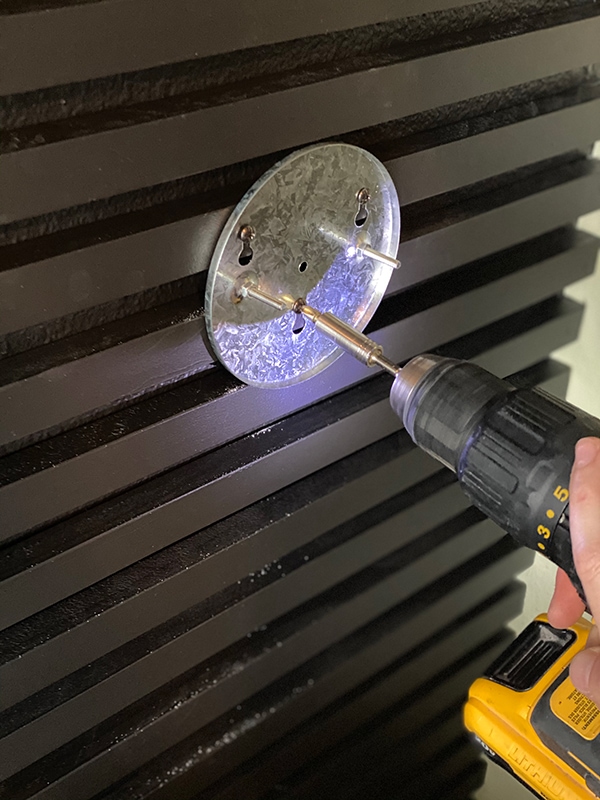
The sconce came with all the hardware needed, and our Dewalt drill made quick and easy work out of it.
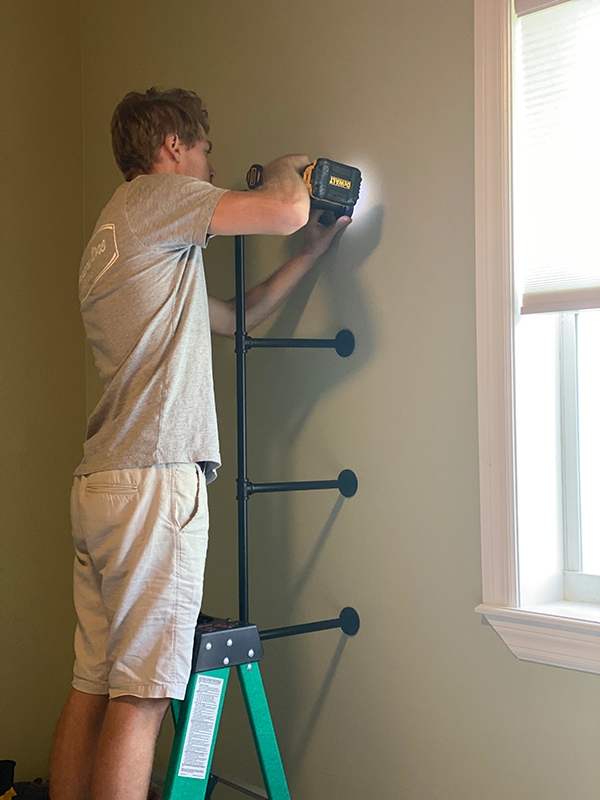
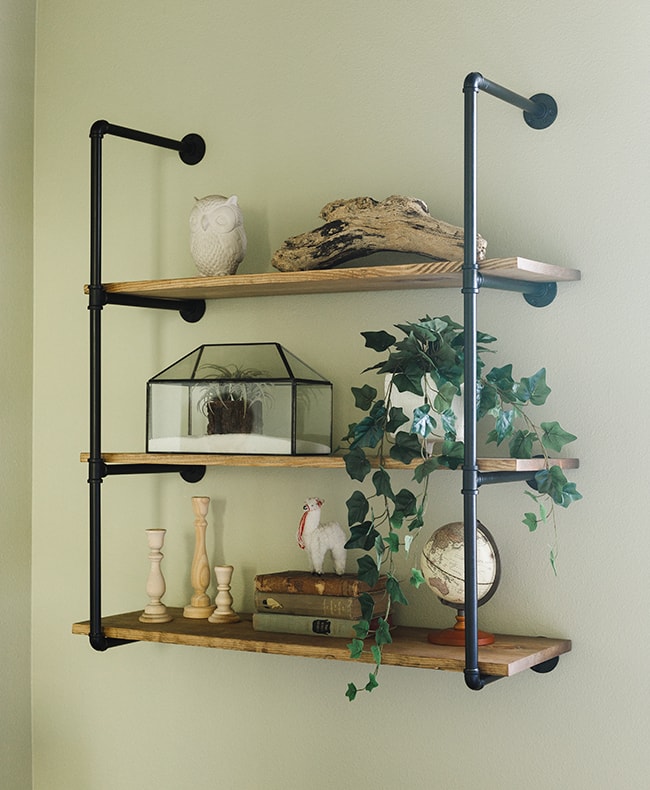
One more feature we decided to add to the room was open shelving. I found this DIY pipe shelf kit, which could be customized to any width using your own wood:
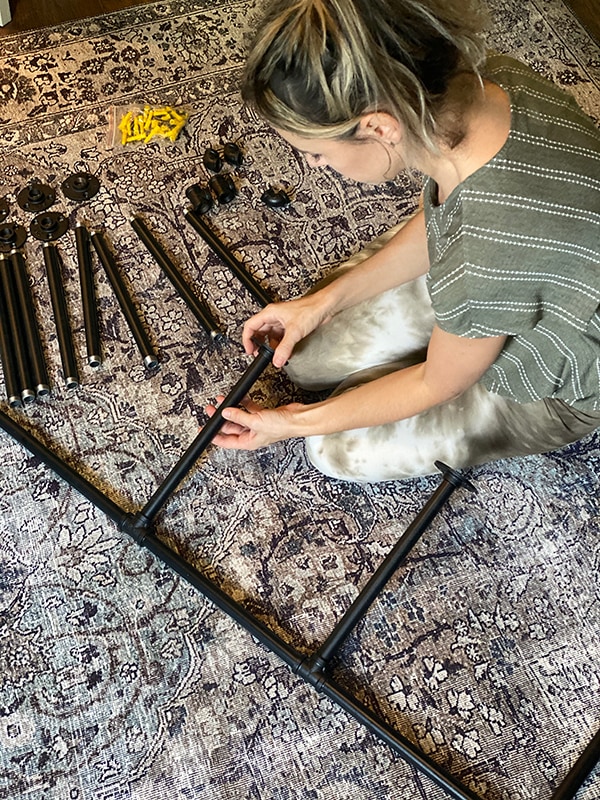
We cut down and stained a few 1x12x4’s (using Minwax special walnut) and attached them with anchors into the drywall.
I think the industrial look and black hardware right in with the style of this room.
And here’s the finished space, and the result of six days of work…
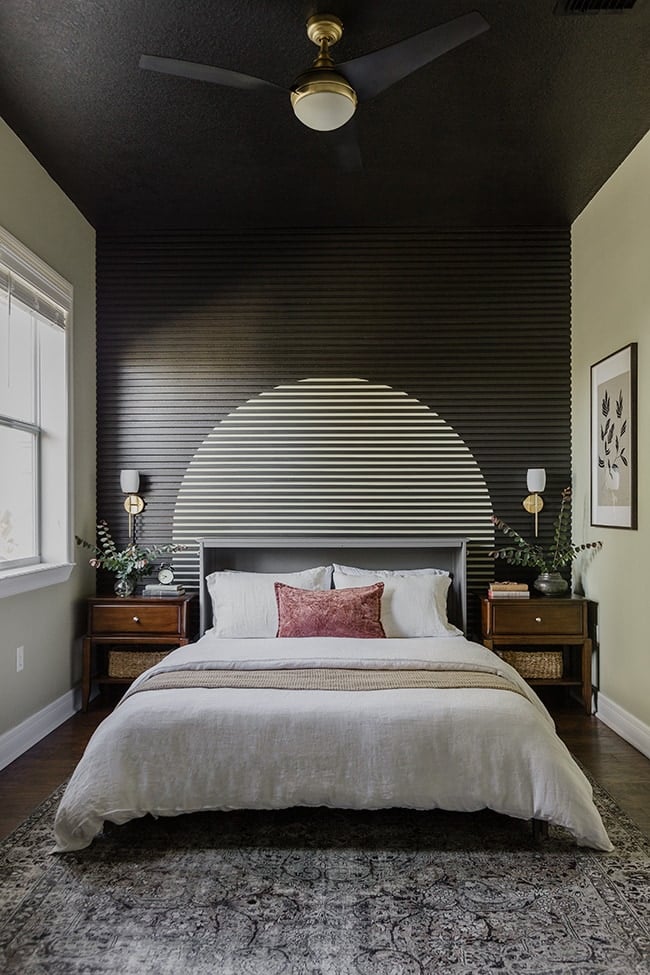
I love the balance of masculine and feminine, modern and traditional, sleek and soft.
I wanted the design of this room to reflect our friends and their unique personalities. They both come from interesting backgrounds and have great style, so I think this space is the perfect representation of that mix!
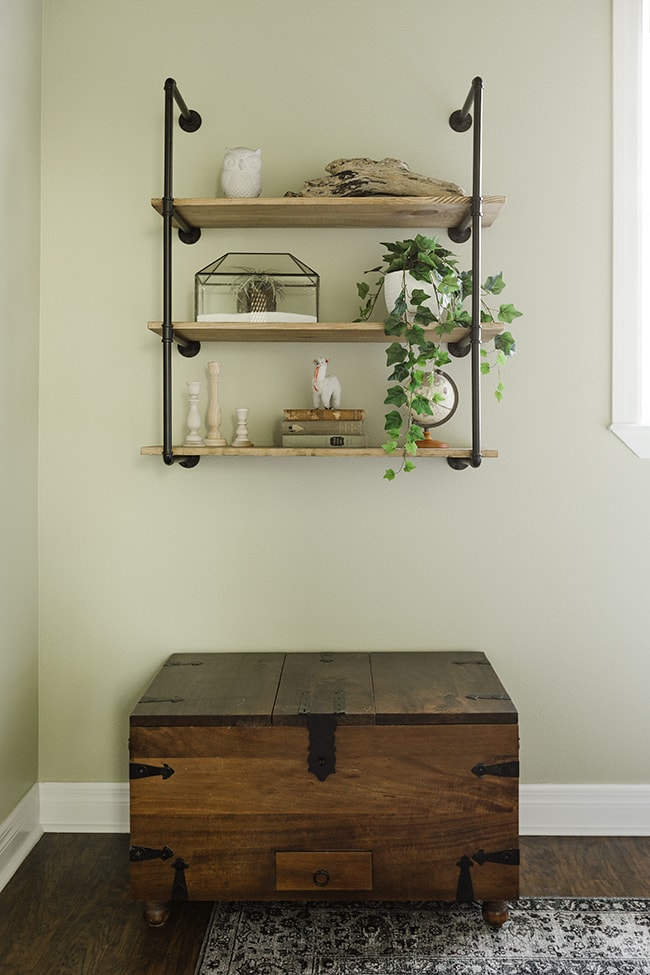
We were able to incorporate some of their own pieces, like this wood trunk, framed art and accessories.
We didn’t let them peek into the room on the last day while we were adding the finishing touches, and they were so excited to see the end result!
It’s such a rewarding feeling to be able to bring a space to life for someone else—especially when it’s done with your own two hands (or four, in this case ;))

I see more of these friend’s room makeovers in our future! Especially when we can pull it off on such a small budget. I added up our costs and it came right in at $1k—$360 for the wood slat wall/paint, and $640 for all of the décor/accessories.
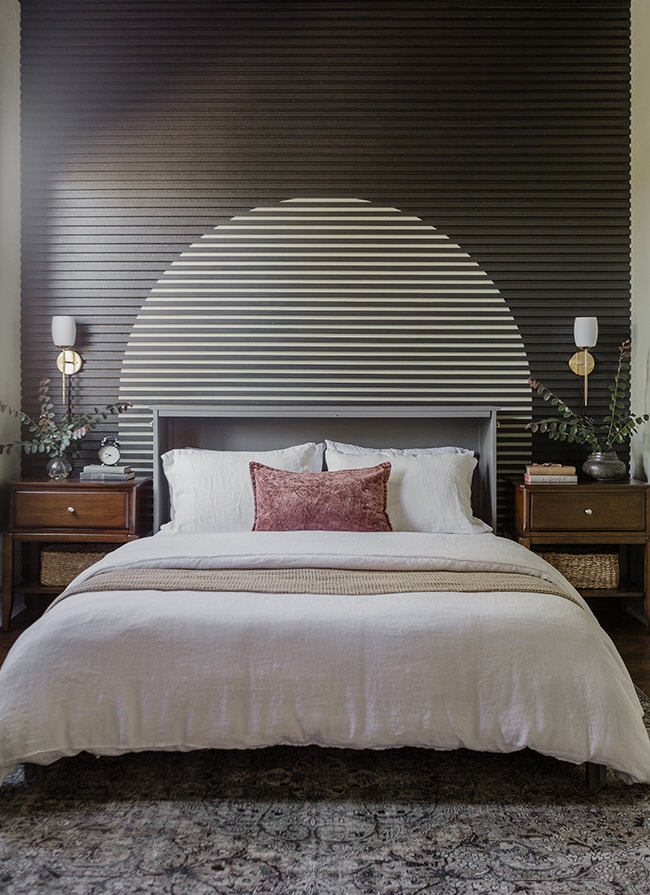
Trust me when I tell you this room feels like a million bucks in person. Such a unique and cool vibe.
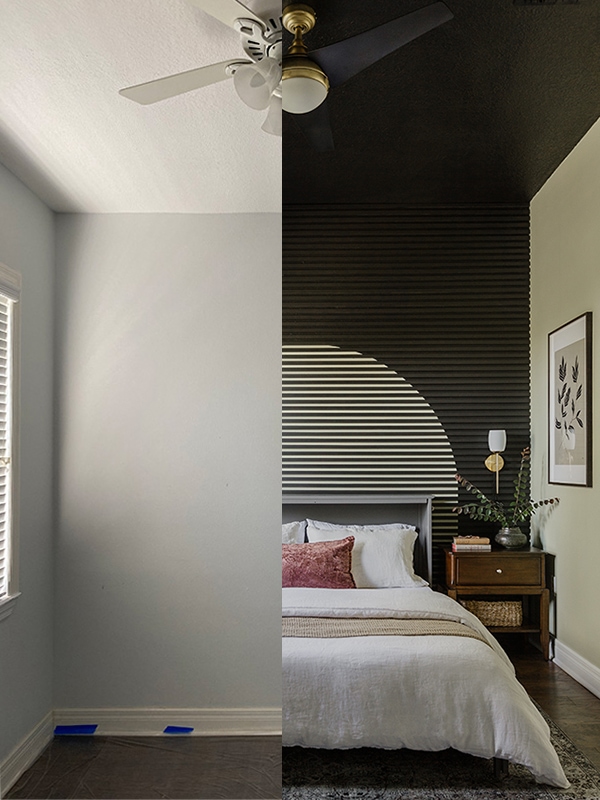
How about a little side by side comparison…
What’s your favorite part? Does this inspire you to take more risks with your own design, or tackle a simple DIY upgrade like swapping out your fan, adding sconces or shelving? Those are the details that make all the difference, and they’re definitely do-able for beginners!
Thank you to Walmart for helping us make this makeover possible—and stay tuned for more DIY fun here next week!


Brandi says
I had no idea Walmart carried Loloi rugs. The room turned out pretty cool! Also I love your tie dye leggings!!
Jenna Sue says
Thanks Brandi, and they carry a TON! Often the cheapest price too.
Ami says
LOVE LOVE LOVE! The slat wall is so unique! I’ve never seen a Murphy bed like that, do you know where they got that from?
Jenna Sue says
Thank you Ami! They bought it from Wayfair a while back 🙂
Bobbie T says
Lucky is the person/persons to be a guest(s) in this room. It is different but so inviting. Looking forward to more of your projects.
Tiffany says
Are these high ceilings? Would you do this type of thing on low ceilings (8′)? We live on a ranch house and I always get stuck with making the ceilings feel less claustrophobic.
Jenna Sue says
They do have 10′ ceilings but this would work just as well on standard 8′! Painting the ceiling the same color as the wall actually makes the room feel taller, so I would 100% give it a shot!
Tiffany says
Good to know! Thanks!
Morgen says
How much did the statement wall cost? Paint, wood, etc.
How difficult was the wood slat install?
Jenna Sue says
Hi Morgen! You can check out Part 1 here for all of those details: https://www.jennasuedesign.com/2020/10/diy-wood-slat-wall/
Rebeca says
Amazing transformation!!
Jenna Sue says
Thank you so much Rebeca!
Carrie Eastman says
You slayed that room!!!!!! Fantastic Job!
Jenna Sue says
Thanks a lot Carrie! <3
Martha says
As usual, looks great!! I spray paint a lot of my light fixtures!! I love the rust oleum paint in champagne gold!
Jenna Sue says
Yes! Light fixtures are one of the easiest things to change. And this paint is the prettiest gold!
Karen says
Outstanding!
Jenna Sue says
Thank you Karen!
Wendy says
This room is beautiful! Can you share where the duvet and pillow are from?
Jenna Sue says
Thanks Wendy! The lumbar pillow was from Home Centric, and duvet cover is from Pom Pom at Home.
Camille says
This space is beautiful and so many good finds and projects.
Jenna Sue says
Thanks Camille, it was a fun challenge to work within these constraints!
Allison says
Looks great! How does it look with the Murphy bed folded up-can you still see the arch?
Jenna Sue says
Thank you Allison! Yes, the bed height does not change at all — the mattress just gets folded up inside. You can see a photo of the bed closed at the beginning of the post 🙂
Teddee Grace says
Love the finished product! I hope this couple does have you undertake more projects.
Raesha says
This is absolutely stunning!!!! I love the DIY pipe shelf kit!
Jenna Sue says
Thank you Raesha, I’m so glad you like how it turned out! 🙂
Timur says
Literally can’t thank you guys enough for this amazing transformation. Watching you do all of this work from afar and on the blog is already jaw dropping – but to see it happen in person in one of our own spaces has been so special to us. The room feels like the most zen space in our house. We keep walking in there to look at how beautiful it is. Thank you thank you thank you!
Jenna Sue says
Aww you’re gonna make me tear up T! It was really our pleasure. Such a fun project to work on — there will definitely be more of these in the future! 😉