If you’re looking to transform any surface into a realistic brass or gold—this tutorial is for you! I reviewed every shade of gold Rub ‘n Buff, and I’m sharing the results—along with my technique for getting a perfect aged patina effect!
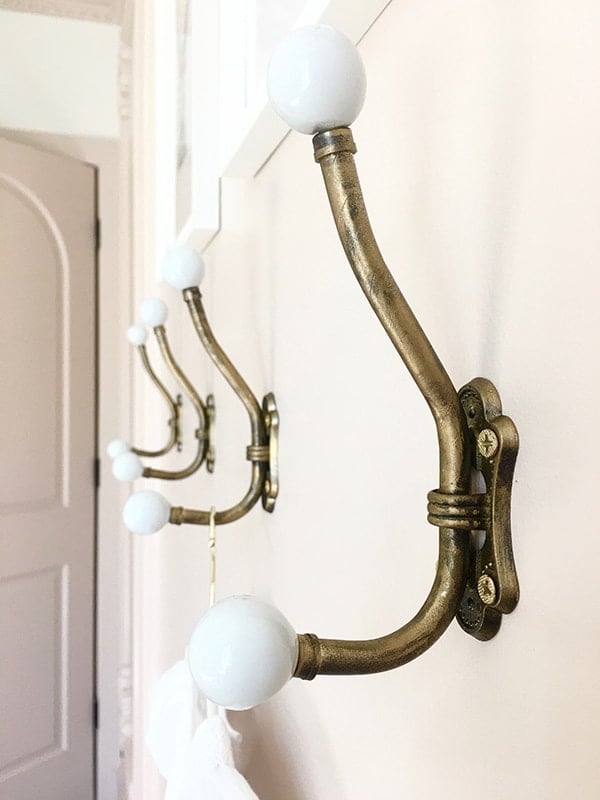
I discovered Rub ‘n Buff last year and instantly fell in love with it after testing it out on some knobs and hooks. It’s the easiest and quickest way to achieve a realistic antique metal finish, and it’s an enjoyable process too!
The application of Rub ‘n Buff is unlike anything I’ve used before (different than paint, wax, or gel) and requires a certain technique to get the aged look just right. It took a few failed tries and some experimentation, but I finally figured out the best way to get consistent, beautiful results. Let’s jump right into it!
Jump to:
How to use Rub n Buff
To get started, you’ll just need a few materials:
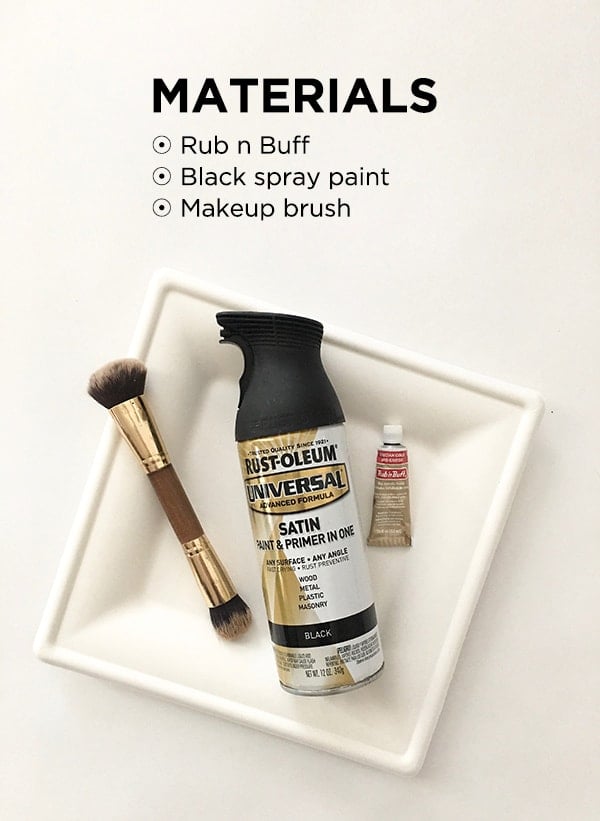
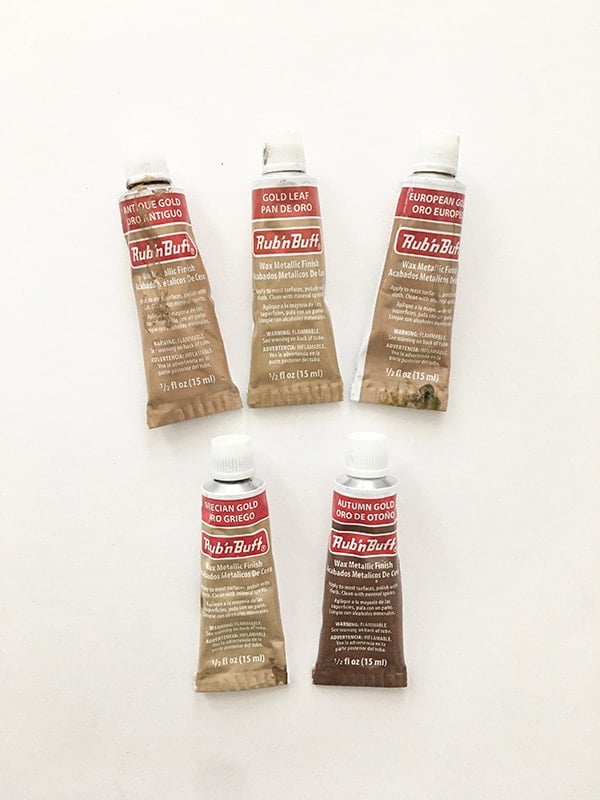
- Rub ‘n Buff — I purchased this set of five different golds that I’ve tested for you in this post (you can also find them sold individually here). I recommend getting more than one color to do your own experimentation!
- Black spray paint — Any kind will do, even Oil Rubbed Bronze or dark brown works.
- Makeup brush — Obviously you won’t be using it on your face again, so don’t use your favorite brush! It must be stiff and not fluffy (a blending brush works well) and you’ll want super fine/soft bristles for best results. If you don’t have any handy, I love this inexpensive brush set and use it for makeup, but the stiffer large brushes will work for this project. Make sure the makeup brush is completely clean and dry.
- Spray lacquer — Only required for objects that will be handled, like door/cabinet knobs.
- Spray primer — Only required for objects that will be handled, or for better adhesion on slick surfaces.
And of course, you’ll need the object you’ll be transforming along with a paper plate, paper towel or any clean surface to blend the Rub ‘n Buff.
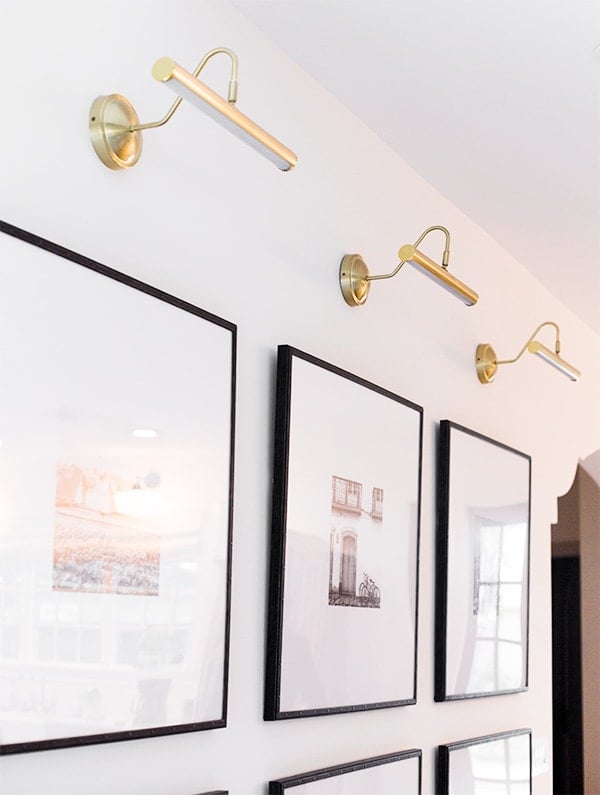
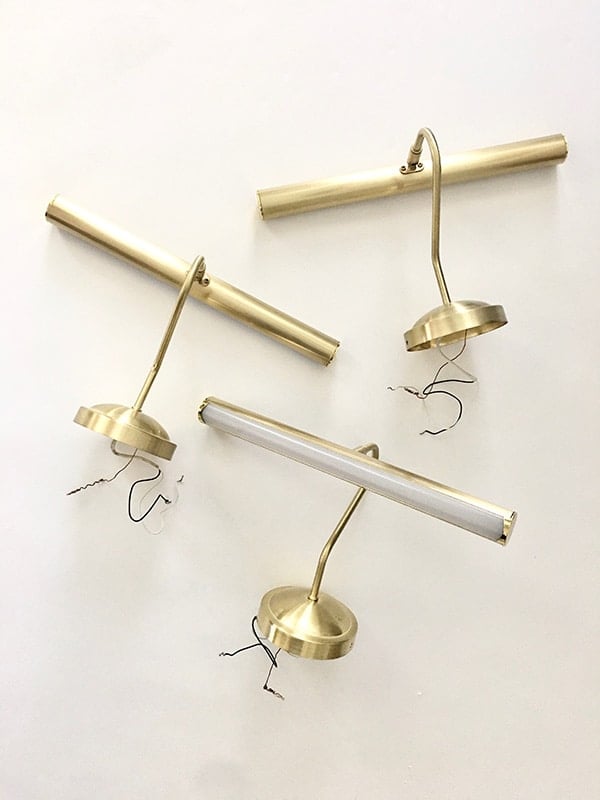
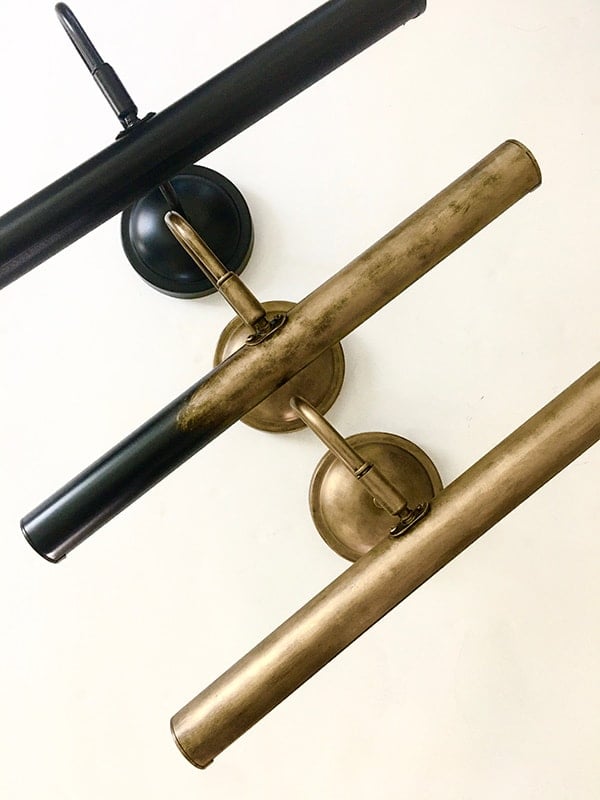
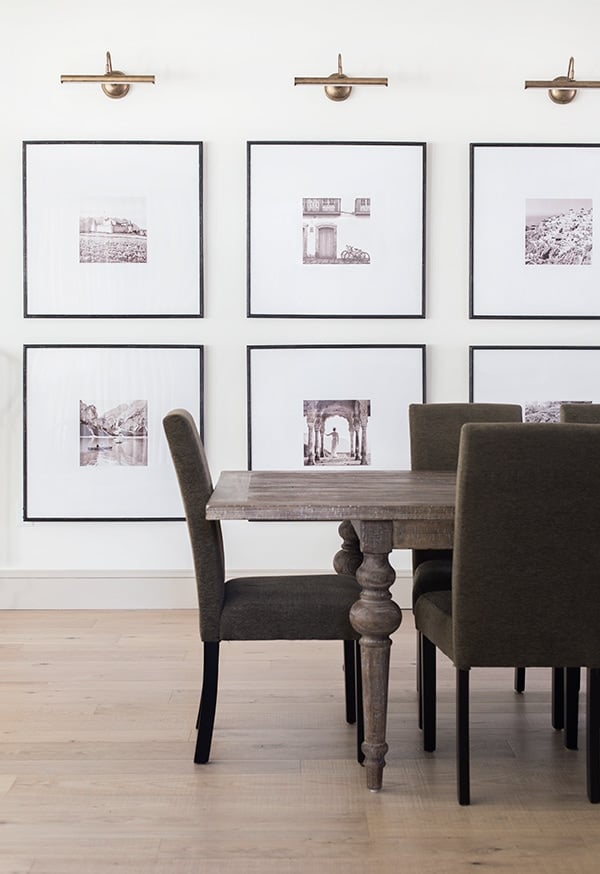
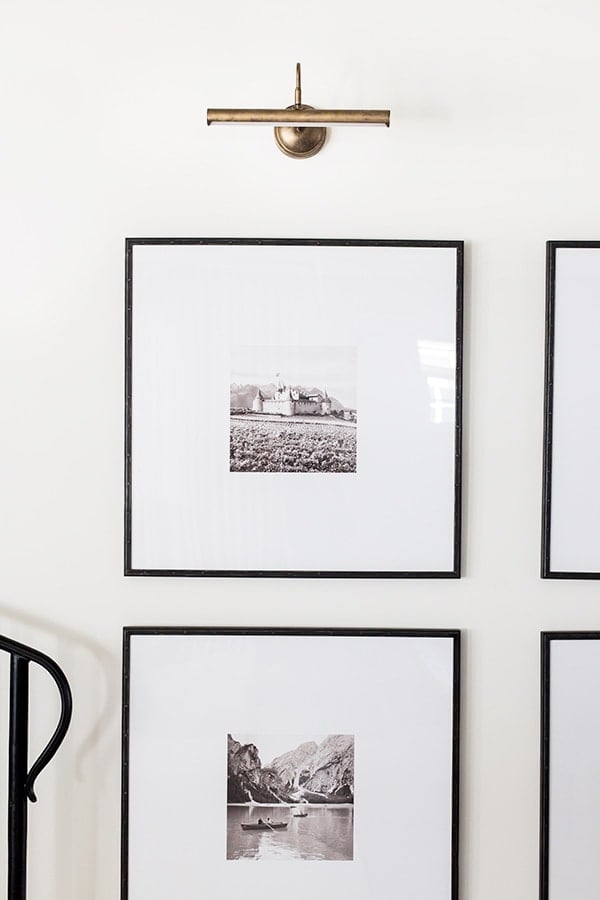
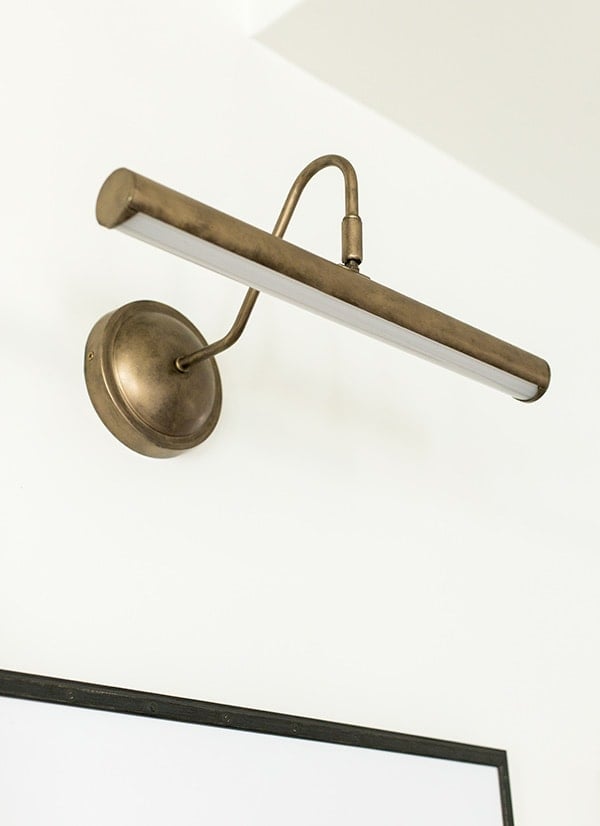
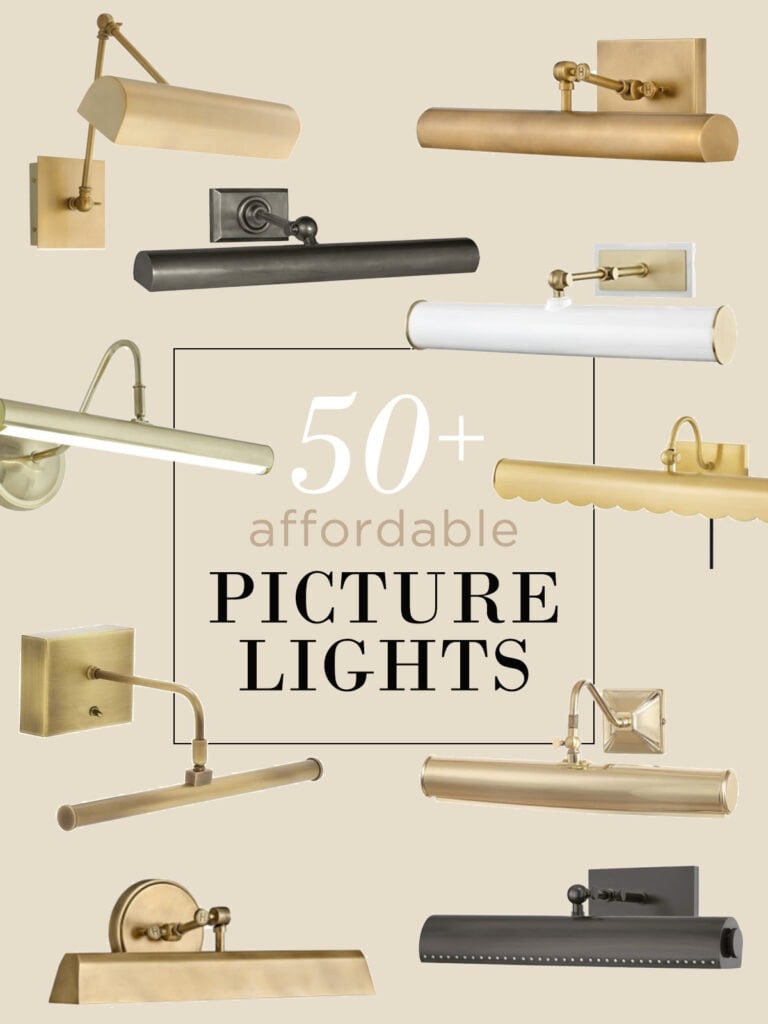
During our build we installed these brass picture lights in our dining room. They were just the right size, style and price point. (If they’re out of stock try this link, or a similar option in my roundup of 50+ budget-friendly picture lights).
We’ve lived with them for almost a year and I liked them, but I wasn’t in love with the brass finish.
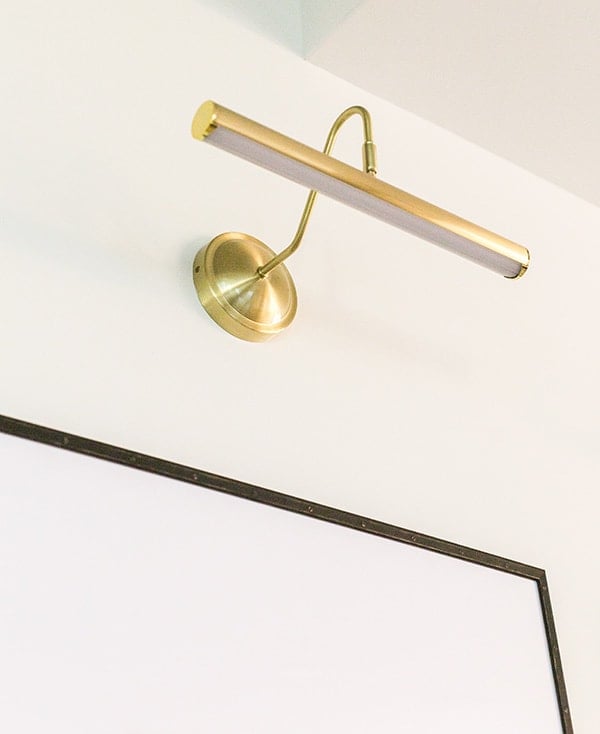
They just looked a bit too new, and the color wasn’t quite right with the decor in our home.
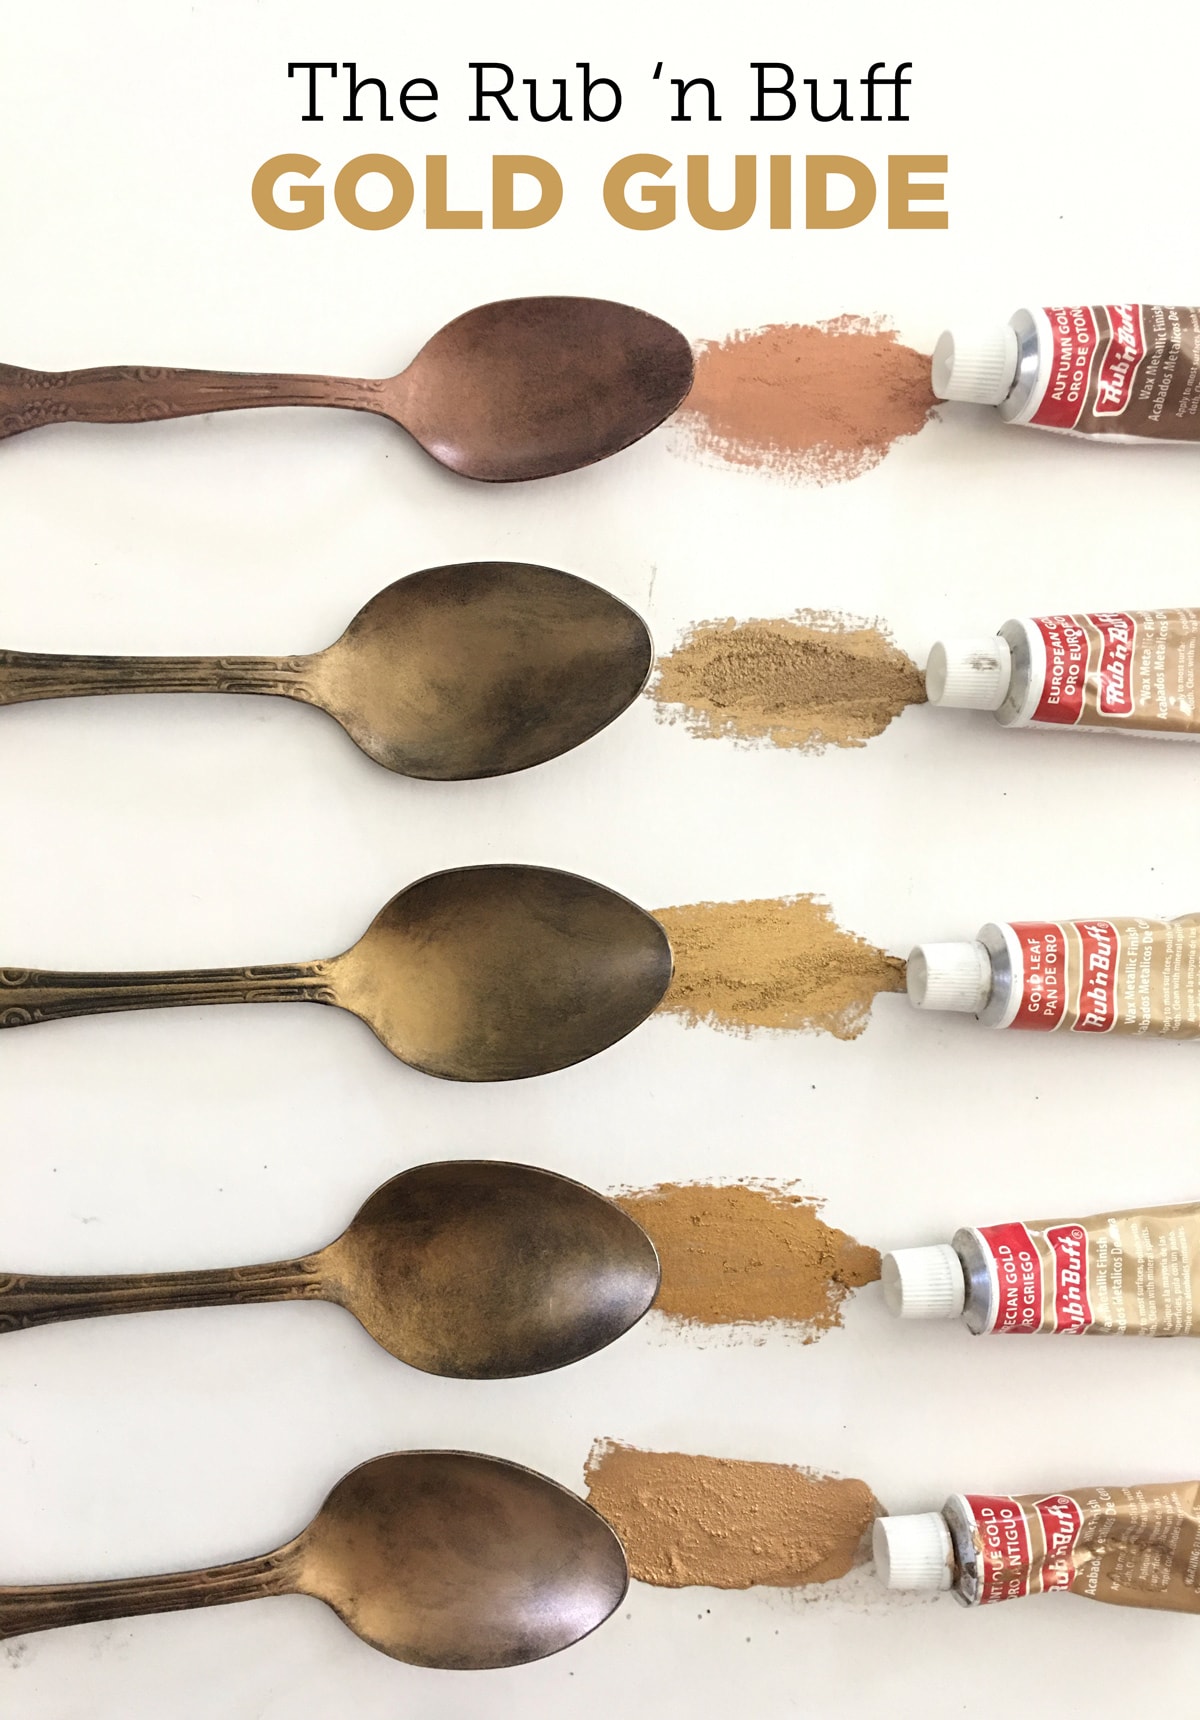
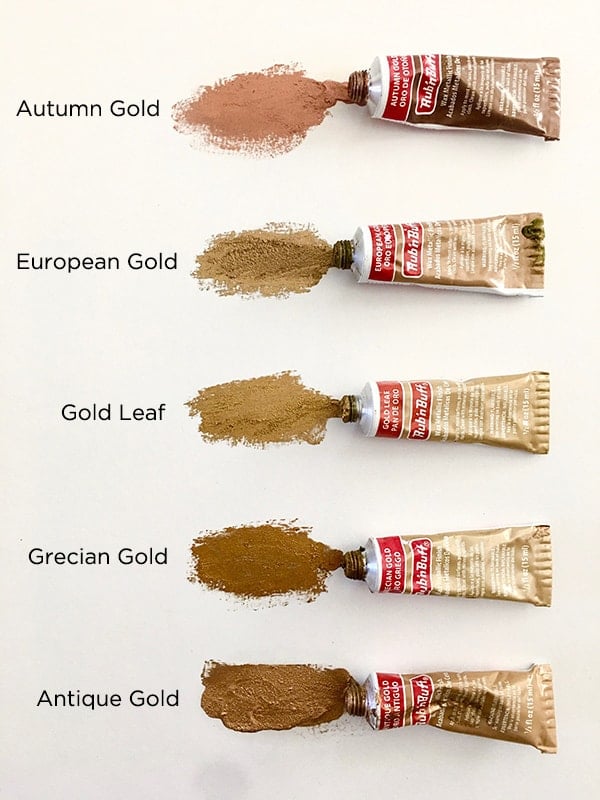
Five Shades of Gold Rub ‘n Buff
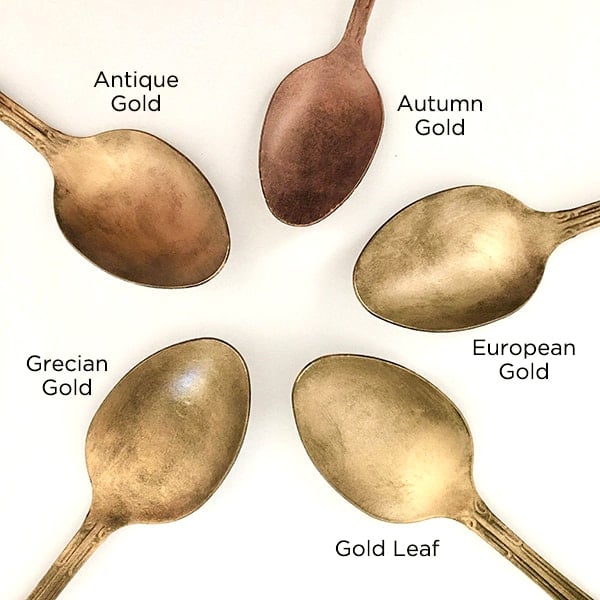
I knew Rub ‘n Buff was the answer, and I was finally able to carve out some time last weekend to make it happen. But first, I thought it’d be fun (and helpful for everyone!) to test out all five shades of gold.
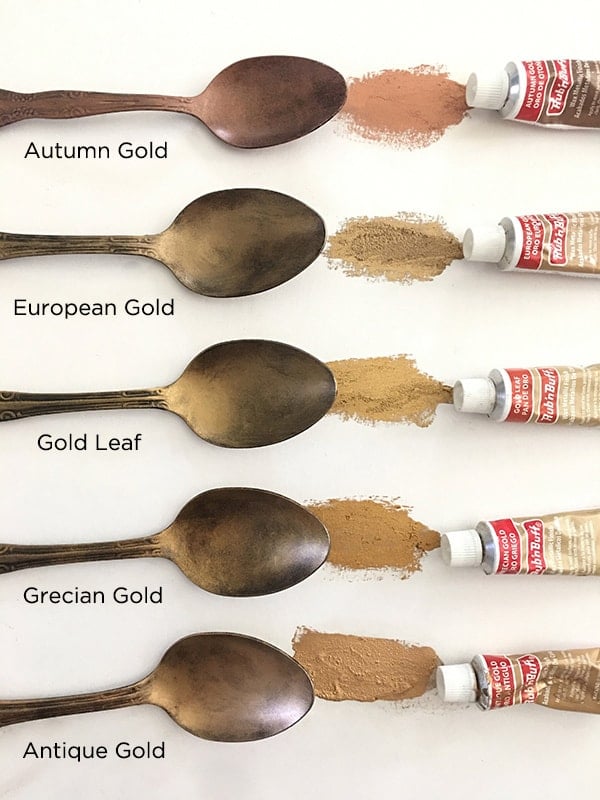
Autumn Gold: More like a rose gold or a copper.
European Gold: The most desaturated gold of the bunch, similar to champagne bronze.
Gold Leaf: Similar in tone to European gold, but darker. Closest to an “unlacquered brass” finish.
Grecian Gold: The darkest gold with bronze tones.
Antique Gold: A warm gold with peach undertones.
How to apply Rub n Buff for an aged effect
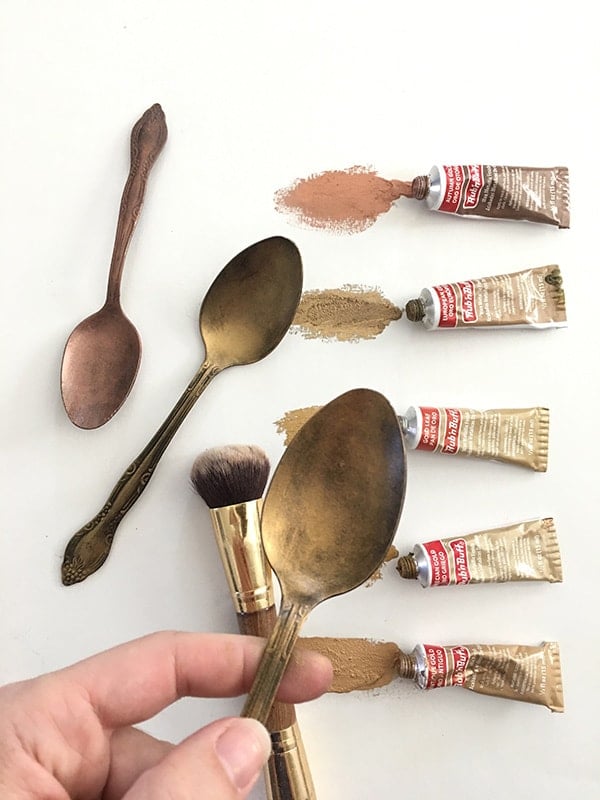
Here’s a secret to getting a vintage look: paint it black first! A dark base coat will create the depth and dimension required for a patina effect. If you don’t want it to look aged then feel free to skip this part. For this color test, I sacrificed some old spoons and gave them a couple coats of black spray paint:
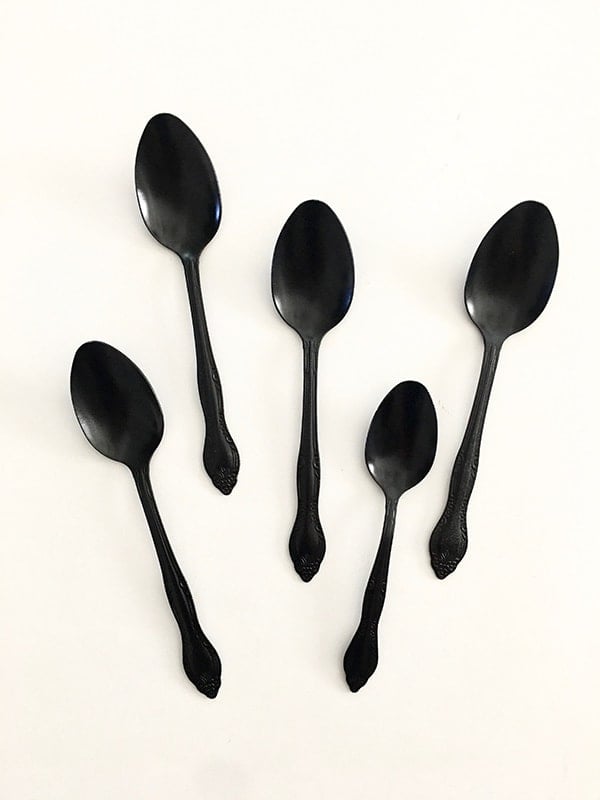
The black paint doesn’t have to be perfect or even cover completely, we’re just aiming for a darker base coat. I found that the spray paint will also “grab” onto the Rub ‘n Buff and make it adhere to the surface very well.
I dabbed a small amount of Rub ‘n Buff onto a paper plate, grabbed my makeup brush and used the stiffer end to blend thoroughly. A tiny bit goes a long way.
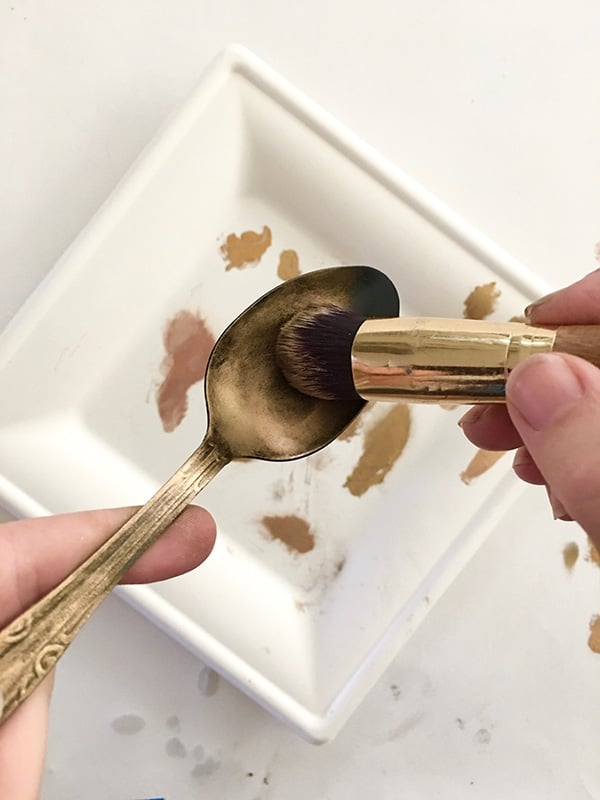
You’ll want to start very lightly, because the black paint grabs the pigment and unlike paint or wax, it ‘dries’ right away—meaning you can’t blend it in or spread it around. Think of it as a concentrated powder paste that immediately transfers to the surface. Remember, you can always add more pigment but you can’t easily take it away. This is why a fine bristle blending brush is so important. The first time I tried using a cotton ball and that didn’t work at all, so take my advice and use a good makeup brush!
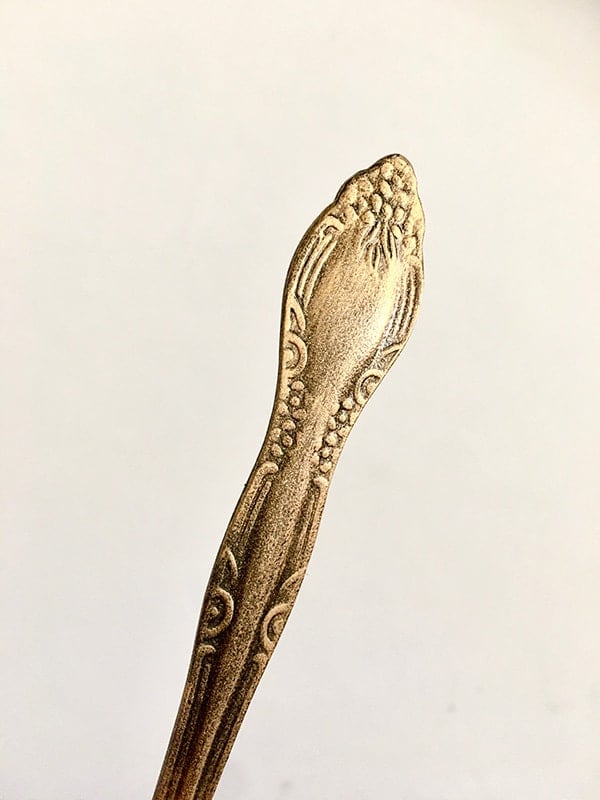
I found that shorter movements and a swirly motion helped to eliminate any visible brush strokes. You can experiment with the patina effect and go for more contrast by letting the base coat show through, or a subtler look by adding more layers of gold (including multiple colors, if you choose).
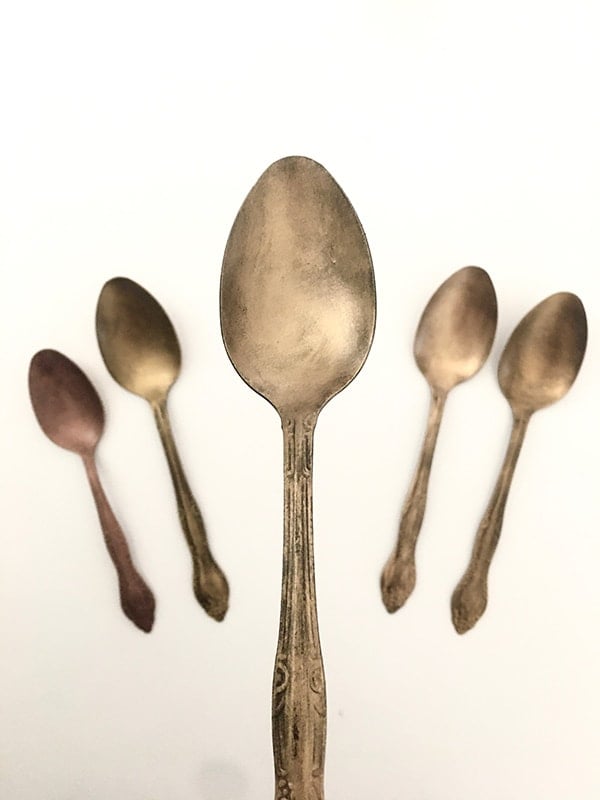
I gave each spoon a coat of a different shade, allowing the black to peek through just a little. Here’s how they turned out:
It’s tough to capture the metallic qualities through a photo. Do you have a favorite?
Honestly I would have been happy with a few of them, but the more subtle European Gold was my favorite:
With the winner chosen, it was time for the transformation to begin!
Step 1: Prep your surface
If you are using Rub n Buff on a surface that will be handled regularly (knobs, faucets, etc) it’s important to sand and prime first for best adhesion. Since these are wall sconces that won’t be touched, primer was not necessary.
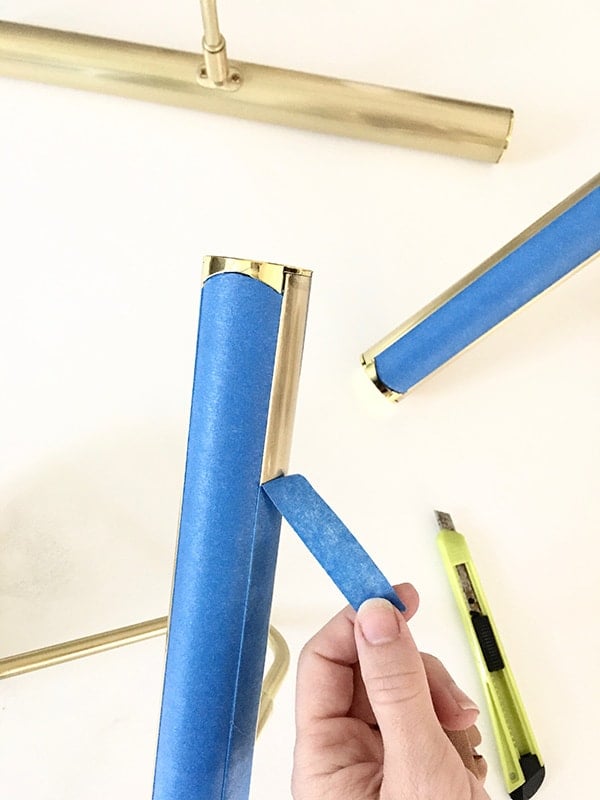
To prep the sconces, I first used painters tape to protect the light.
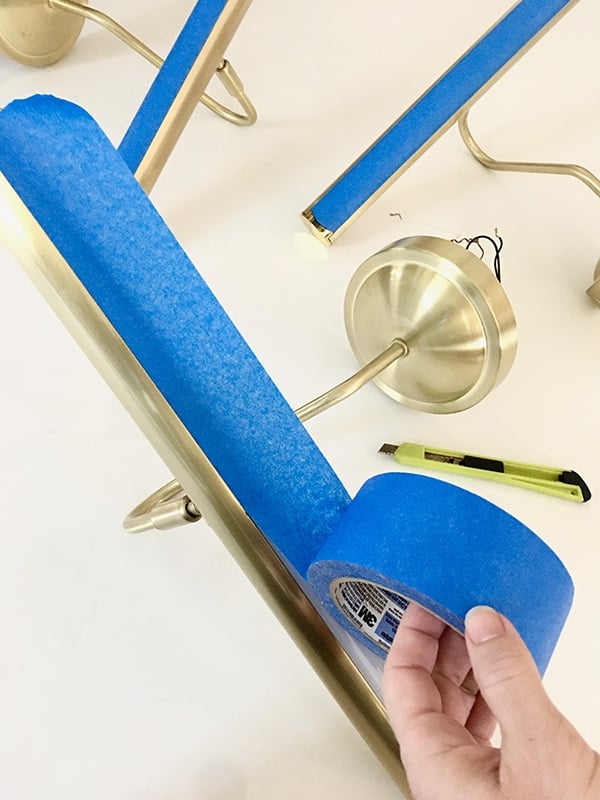
This is a little trick I use when I don’t want to paint all of something. The shape is easily cut away with a razor blade knife.
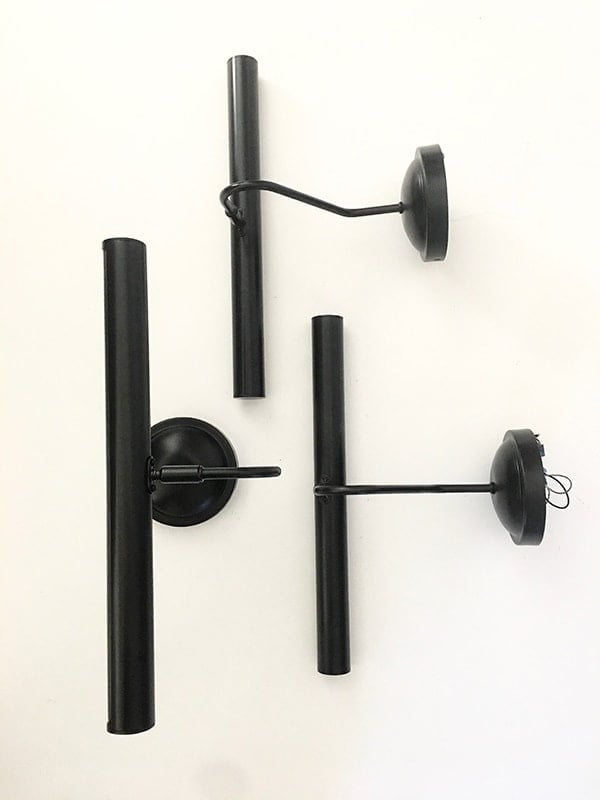
Step 2: Paint it black
This step is only required if you want an aged/patina effect, but paint gives the Rub n Buff better adhesion and is a good idea for a slick surface. I gave them a coat of oil rubbed bronze Rustoleum spray paint.
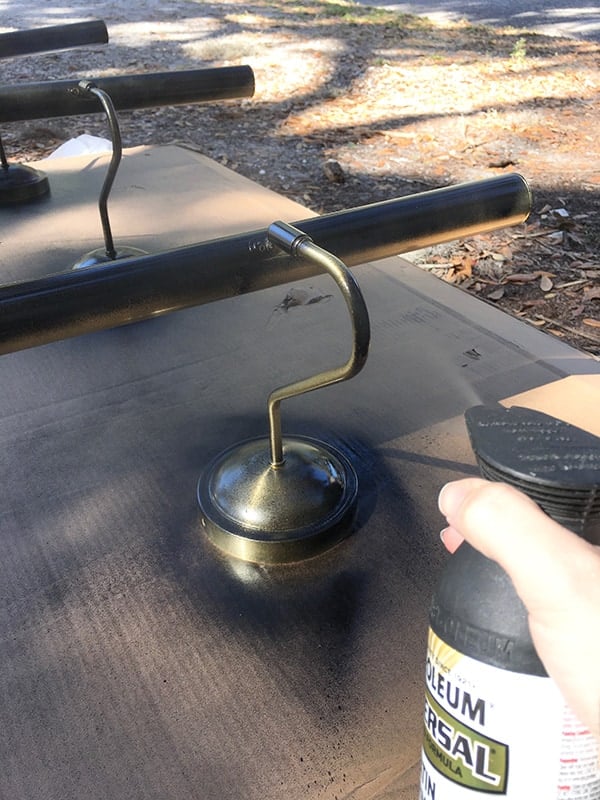
You’ll want to make sure the paint is completely dry—I’d give it at least a couple hours so the finish won’t rub off.
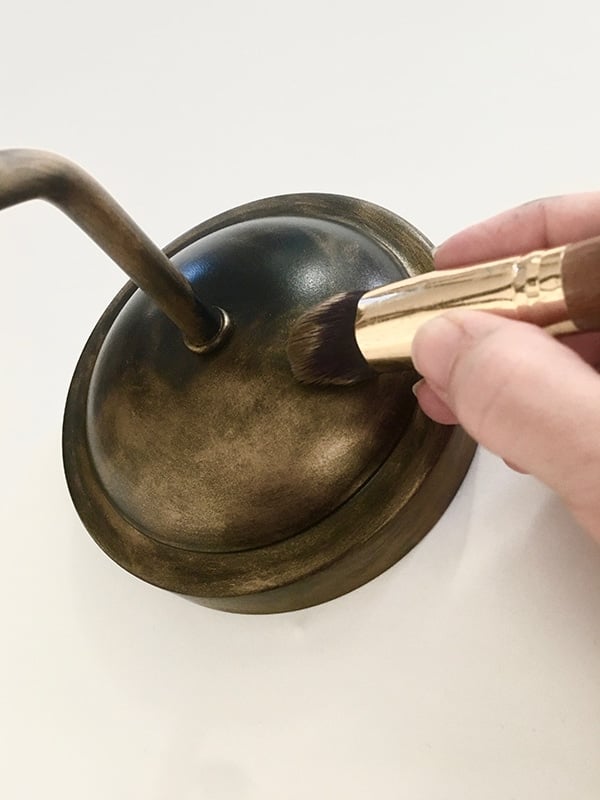
Step 3: Apply Rub ‘n Buff with a makeup brush
Now it’s time for the fun part! I loaded up my brush with European Gold (making sure to thoroughly offload the color first) and gently swirled it on.
The process didn’t take long at all (I posted a timelapse in my Instagram stories, in case you want to see a video of it!)
Here’s a little before, during and after progression…
I was aiming for a more subtle patina, so two coats were needed. I found that brushing side to side on the top layer gave the finish a more realistic texture. At this point the brush had been sitting overnight with the Rub ‘n Buff dried on (I forgot to wash it out) so it wasn’t going on as smoothly, and even buffing parts of the first layer off. I switched to using my finger to apply a thicker finish and cover completely in some areas.

In total, it took around 15-20 minutes per light and I used maybe 1/3 of the tube. And had fun doing it!

A huge improvement, I’d say!
Don’t these look like super expensive antique lights?
I’m amazed at how authentic it looks. You’d never know these weren’t the real deal.
FAQ
Rub ‘n Buff is ideal to use in the following scenarios:
1. On small to medium sized items
2. On fixtures that aren’t easily removable to spray paint outside
3. For an aged look instead of a “new” factory smooth finish
4. If you want more color variety than the few gold spray paint options
Yes! You will need to properly prep and seal the finish. Prep includes scuffing up the surface with fine steel wool or a sanding block, then using a good oil based spray primer. 2-3 coats of a quality spray lacquer is also recommended. Avoid any abrasive cleaners or metal-to-metal contact for best results.
It depends on the look you are after, but I use European Gold and Gold Leaf the most often.
Make sure the surface is clean and dry. Slick metal surfaces may need to be primed/painted first. Your brush must also be clean, dry, and dense enough with fine bristles (see my brush recommendation linked in the materials list at the top of the post). Allow the first layer to dry completely before applying a second.
I hope this post was helpful if you’ve been wanting an easy and inexpensive way to antique almost anything. There’s several other color options like silver, pewter, white and ebony, so the sky is the limit. Leave a comment and let me know what you plan to makeover!
If you like this project, check out these popular beginner budget DIYs from my Project Library!
- How to realistically age wood (the easy way!)
- How to antique a mirror
- How to instantly age shiny brass
- Faux stone planters


Carrie says
I am so impressed and grateful for your detailed analysis! Love it. Since you are kind of the finish expert (in my mind), maybe you can help me? I want to make a mirror that is kind of just a grey/tan plastic wood grain finish look much more silvery (think tiara) and was wondering what would be the best product to use? Help!!
Jenna Sue says
I would give the Rub n Buff silver leaf a shot for a subtle vintage look. If you want more of a chrome/metallic newer looking finish, try using a metallic spray paint. I always google the color first to find real life photos before purchasing!
Carrie says
Thanks for that input!! Fingers crossed.
Lynn says
Wishing they had some for a silver color.
Jenna Sue says
They do! I shared a link to all of the colors on Amazon: https://amzn.to/2GyUpMH
Nicole says
Do you think it work just as well on something that came in a matte black finish, rather than something spray painted black? Any steps you would do different in that case?
Jenna Sue says
Yep it should! It may actually be easier to blend that way since the surface isn’t as tacky and won’t grab the pigment immediately.
Marijean says
You always have amazing diy projects. Thanks for sharing.
Jenna Sue says
So glad you like this one Marijean!
Leann says
I SO needed this tutorial and color guide!! THANK YOU! New build and plumbing fixtures are champagne bronze – light fixture came and TOTALLY clashes! Plan to use this on light fixture! With your tutorial I think I can do it and it will look great!
Jenna Sue says
Awesome, this is the perfect solution then!
Cindy says
Ummm, I’m assuming your hubby is holding Susie, cause I don’t think she’s that tall 😉
Jenna Sue says
Susie has magical powers ✨