Now that our microcement bathroom walls are done, it’s time to share how we built the curved shower entrance and arched wall alcoves! These are simple additions that make a HUGE impact—and they require minimal tools and experience!
Here’s what you’ll need for this project:
Jump to:
Materials
- 1/2” plywood (any grade)
- 2″x4″x4’ board (any grade)
- 2” wood screws
- 3” wood screws
- Wood glue
- Drywall or cement board
- Tape and joint compound or thinset
Tools
- Drill
- Jigsaw
- Circular saw
- Drywall saw
- Piece of string and pencil
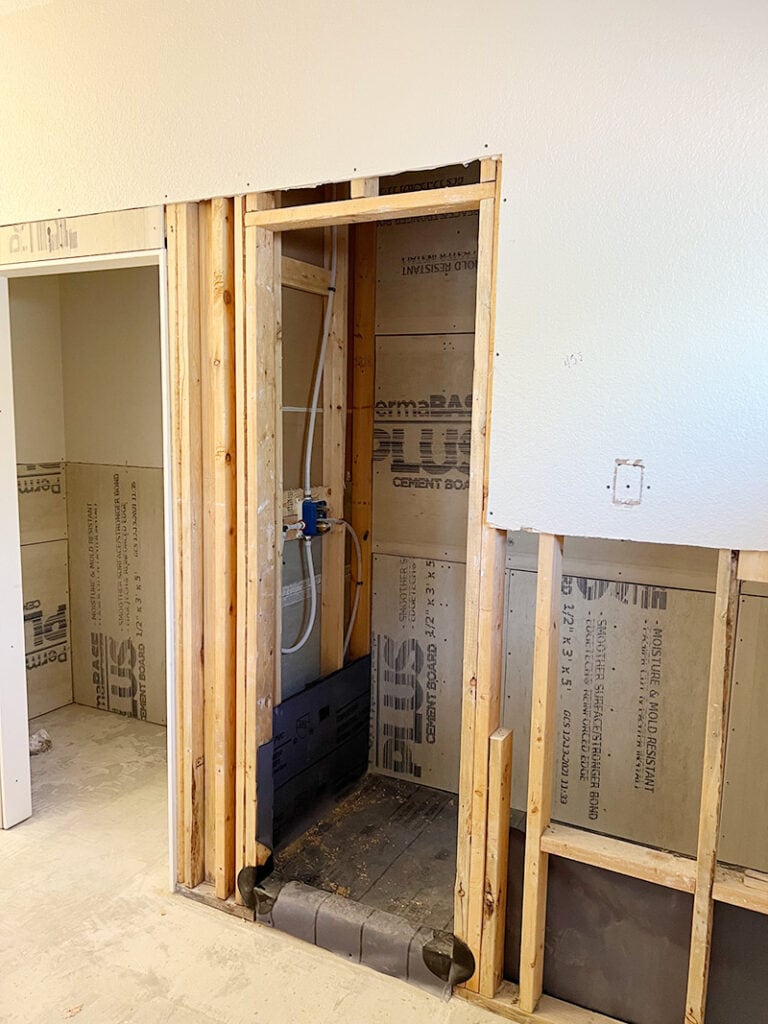
If you can recall, here’s how the primary bathroom at the Hacienda Hideaway looked before. Certainly not in line with the rustic spa-like Mediterranean design plan…
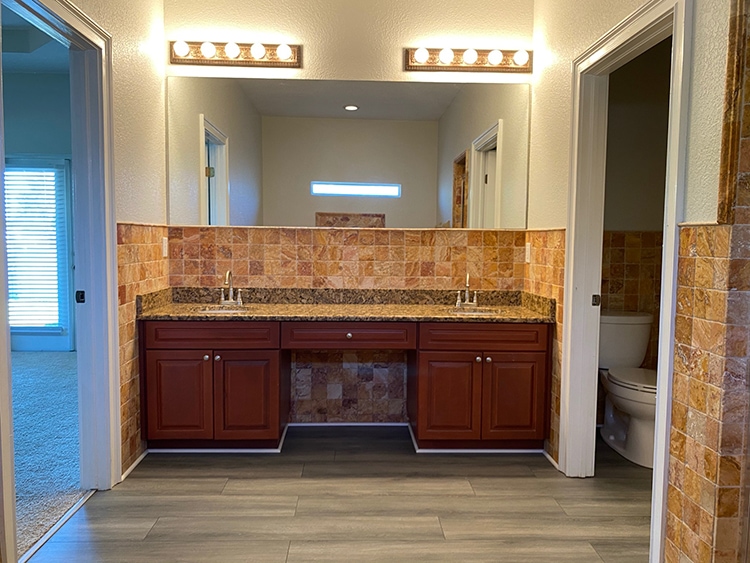
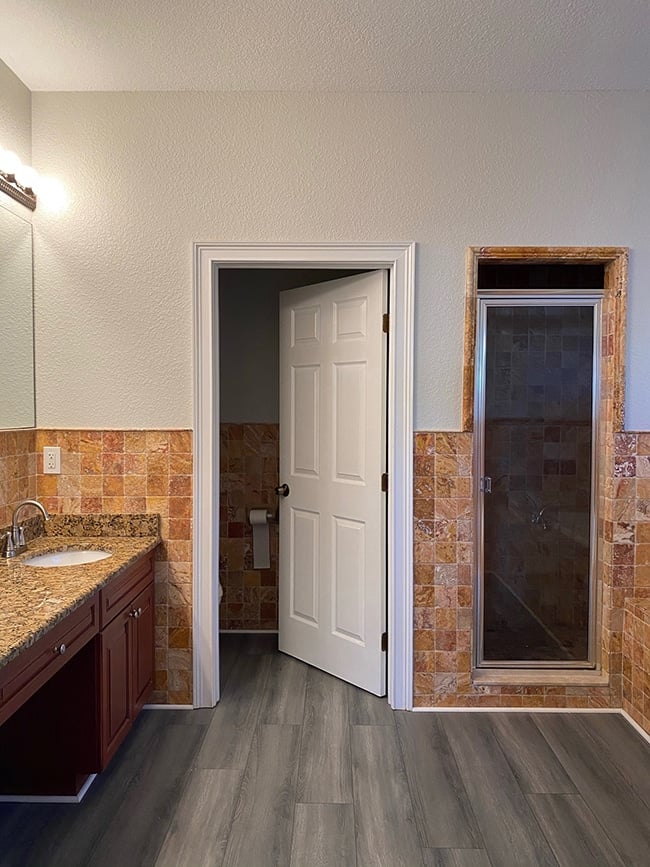
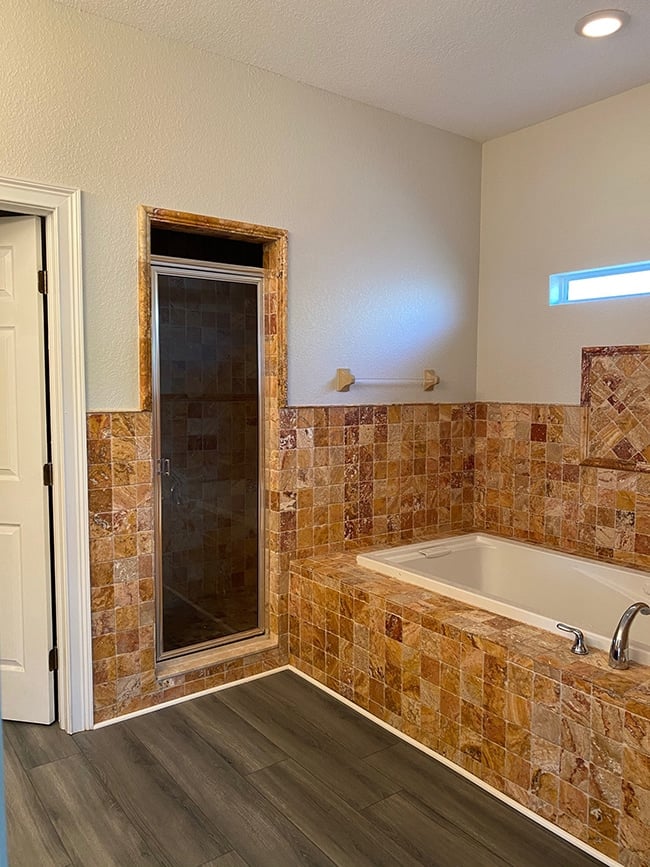
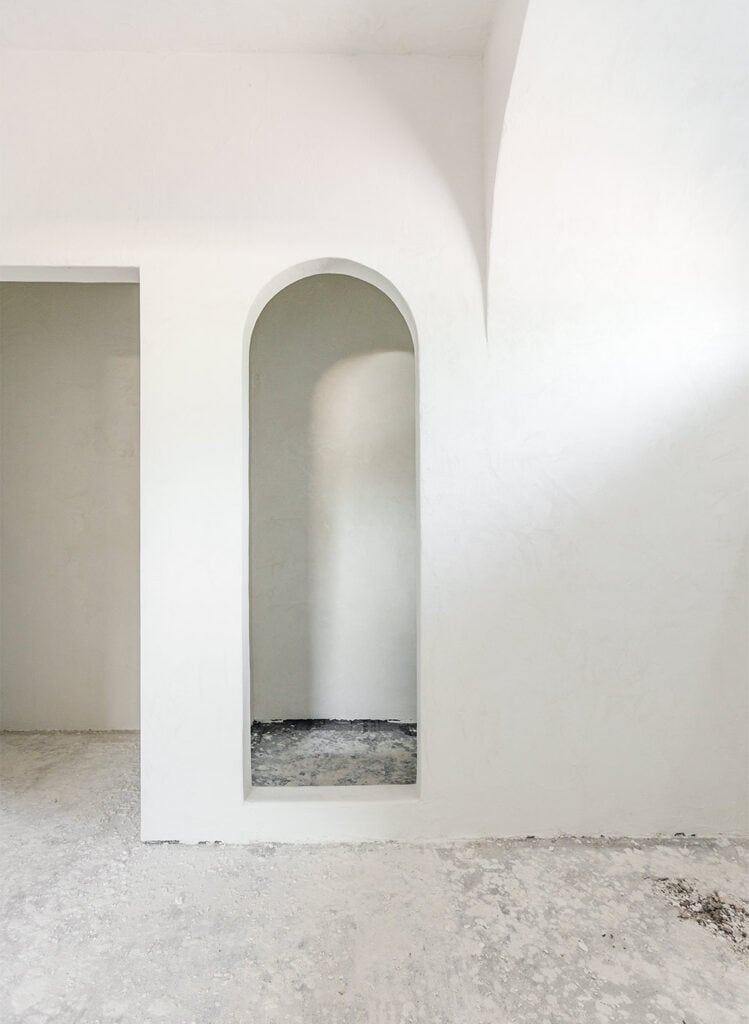
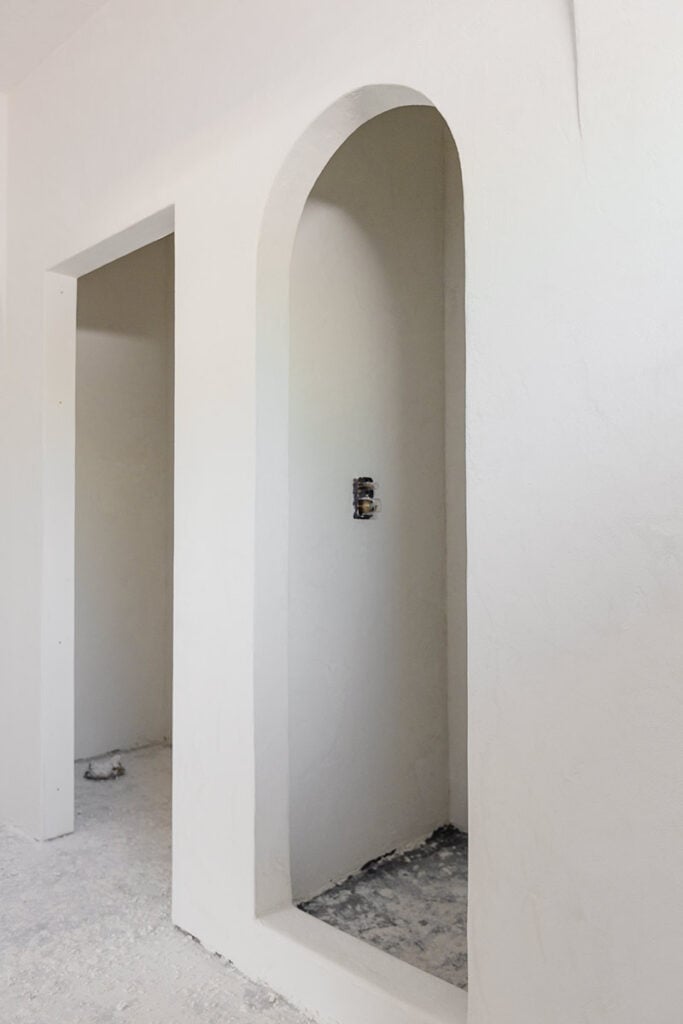
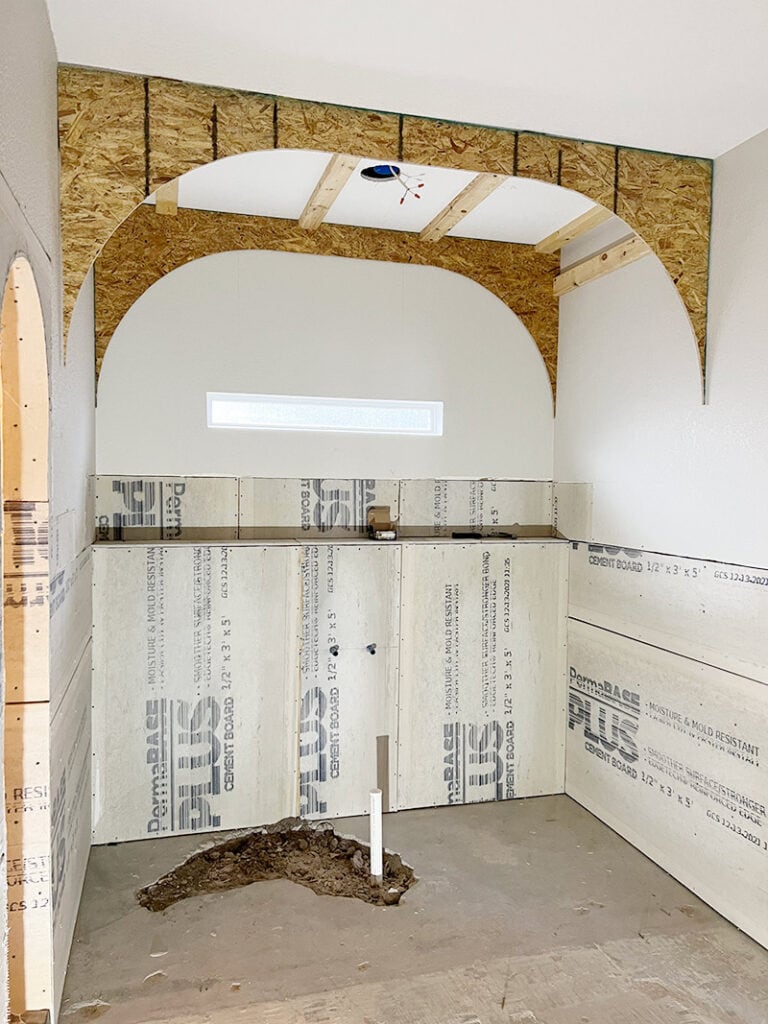
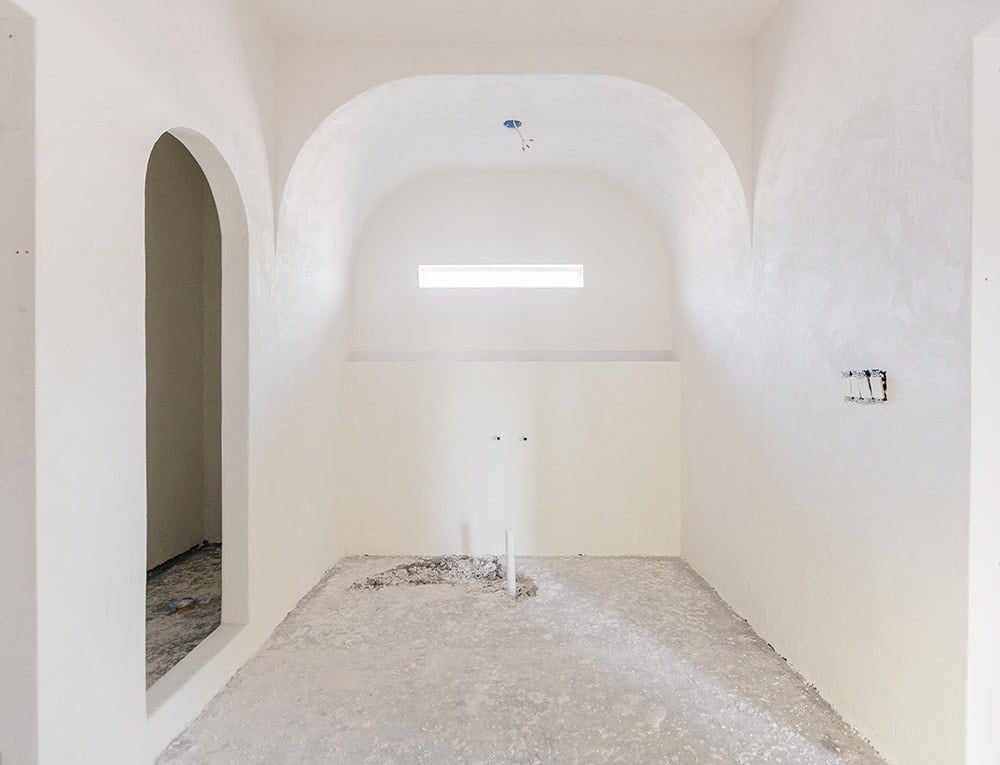
The room desperately needed curves to reinforce the Spanish-style influence throughout the rest of the house, so we decided to add three: one for the shower opening, and an alcove above the vanity and tub.
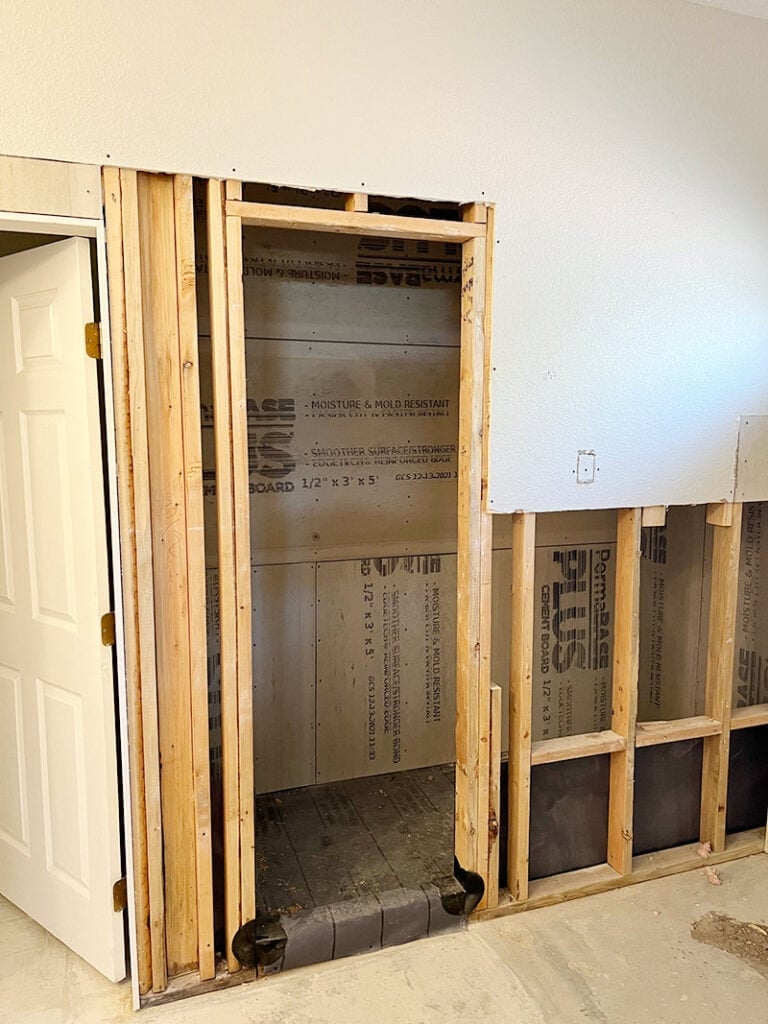
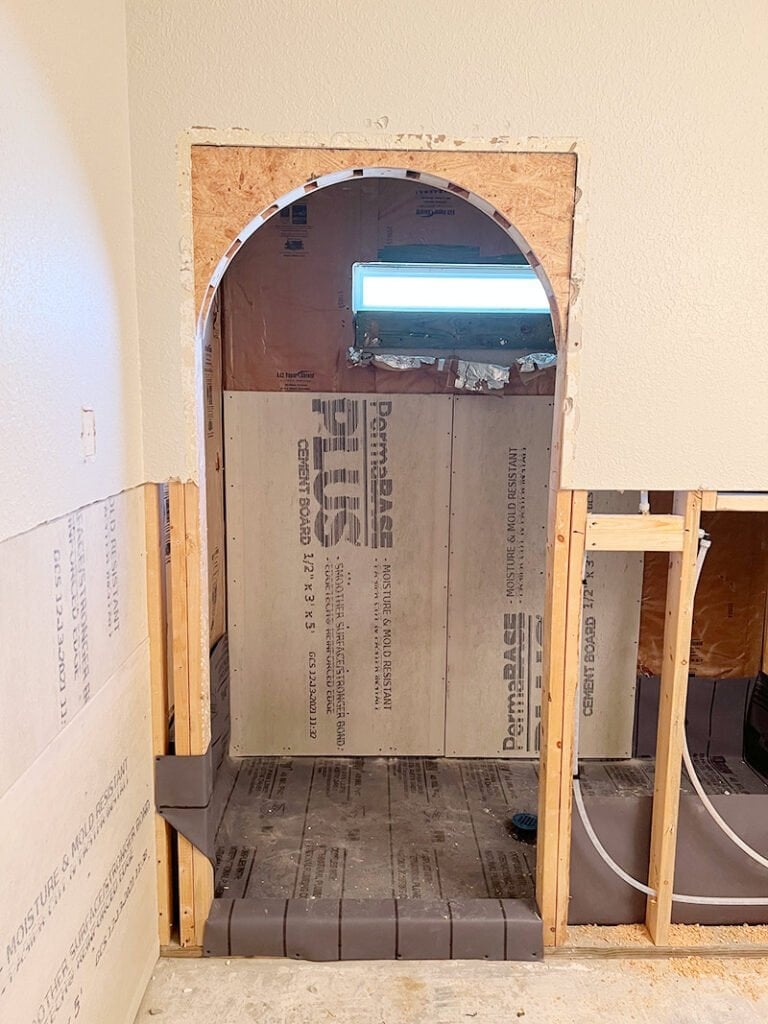
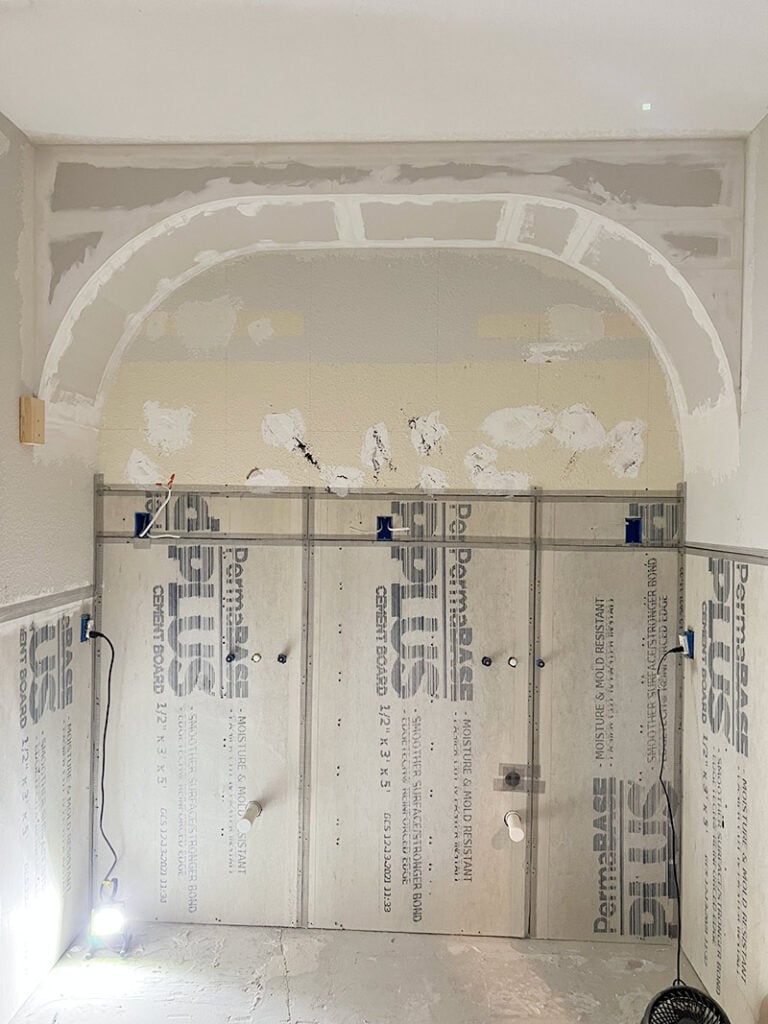
The old tile walls were removed, and patched with cement board:
This tutorial will outline the steps for building the arched shower entrance, with modifications at the end to show you how to customize them for walls as well. Let’s get started!
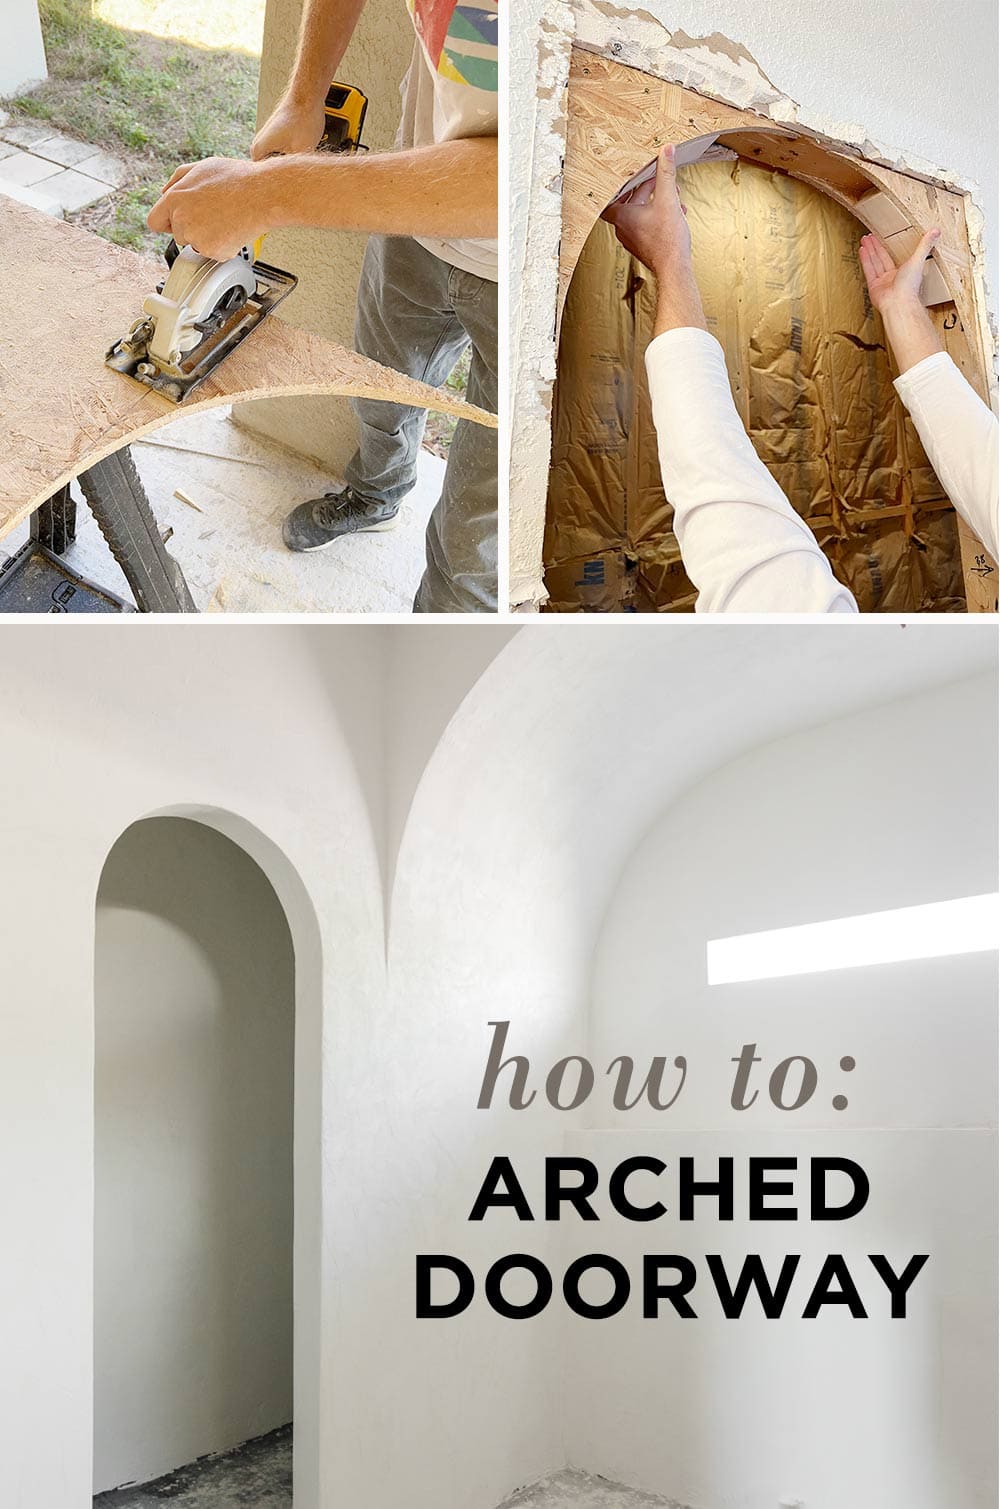
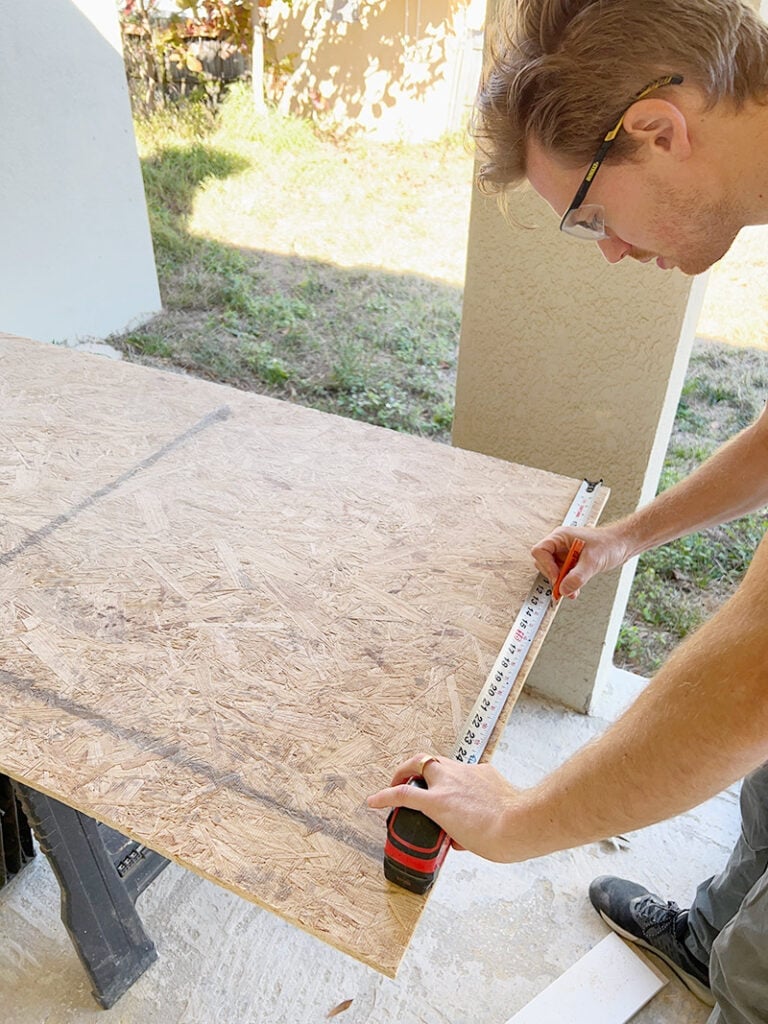
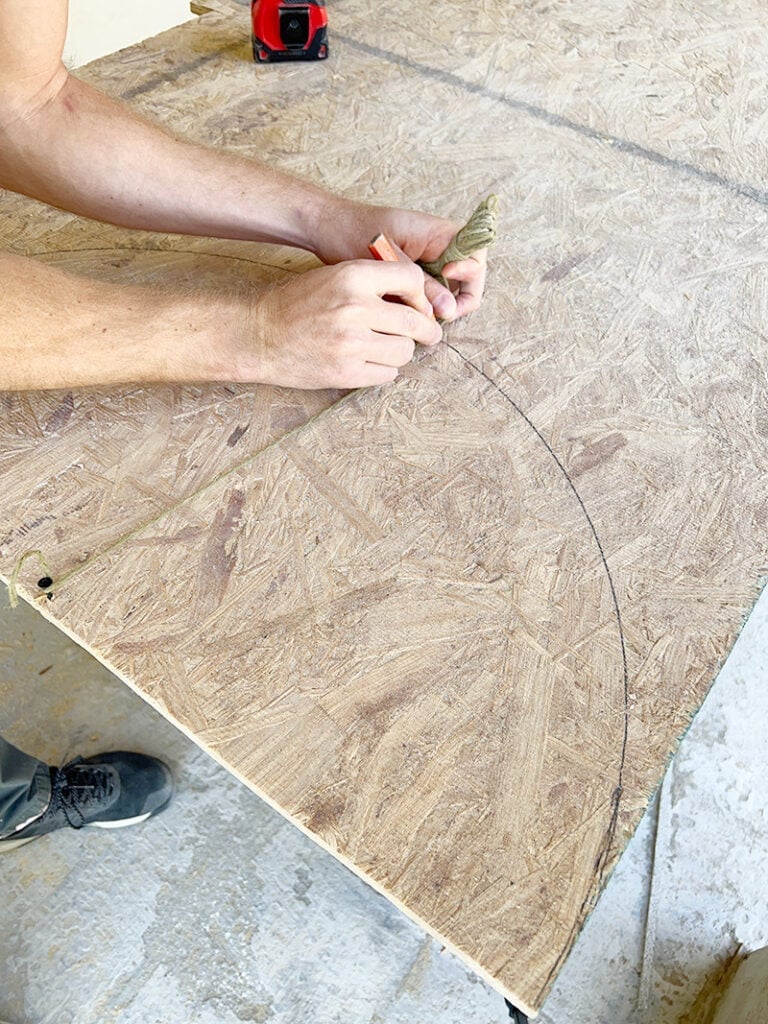
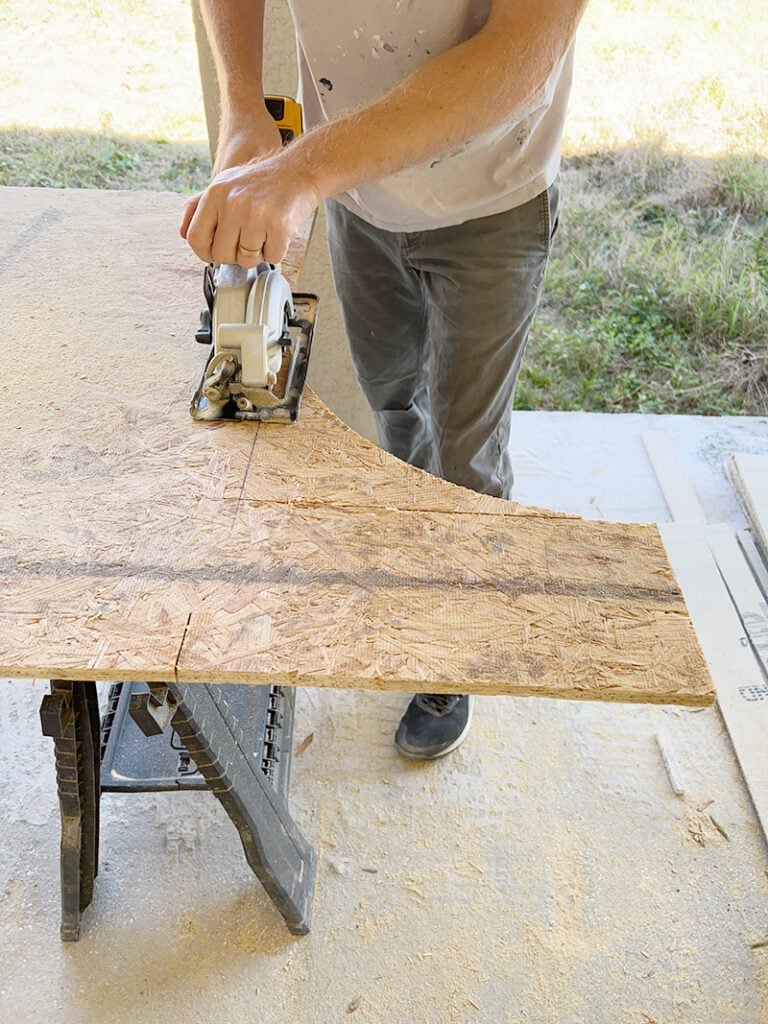
Step 1: Measure opening and trace arch onto plywood
First, measure the doorway opening (between the studs), and mark half of that distance on a piece of 1/2″ plywood. To trace a perfect half circle, secure a screw at your mark, tie a piece of string to one end, and hold a pencil at the end of your plywood.
Keeping the string taut and the pencil steady, you’ll be able to trace a perfect half circle.
Step 2: Cut arch, trace and repeat
After the arch is drawn, trace a line along the top and side edges with a straight edge. Then, cut along the curve with a jigsaw.
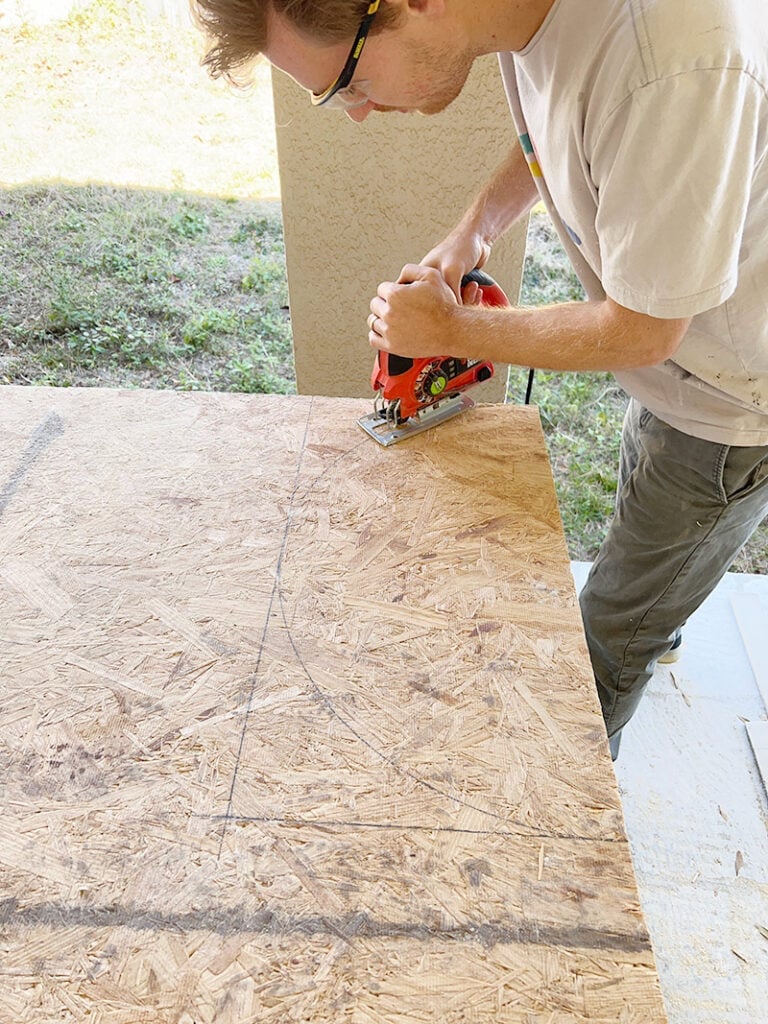
Finally, cut the straight lines with a jigsaw or a circular saw.
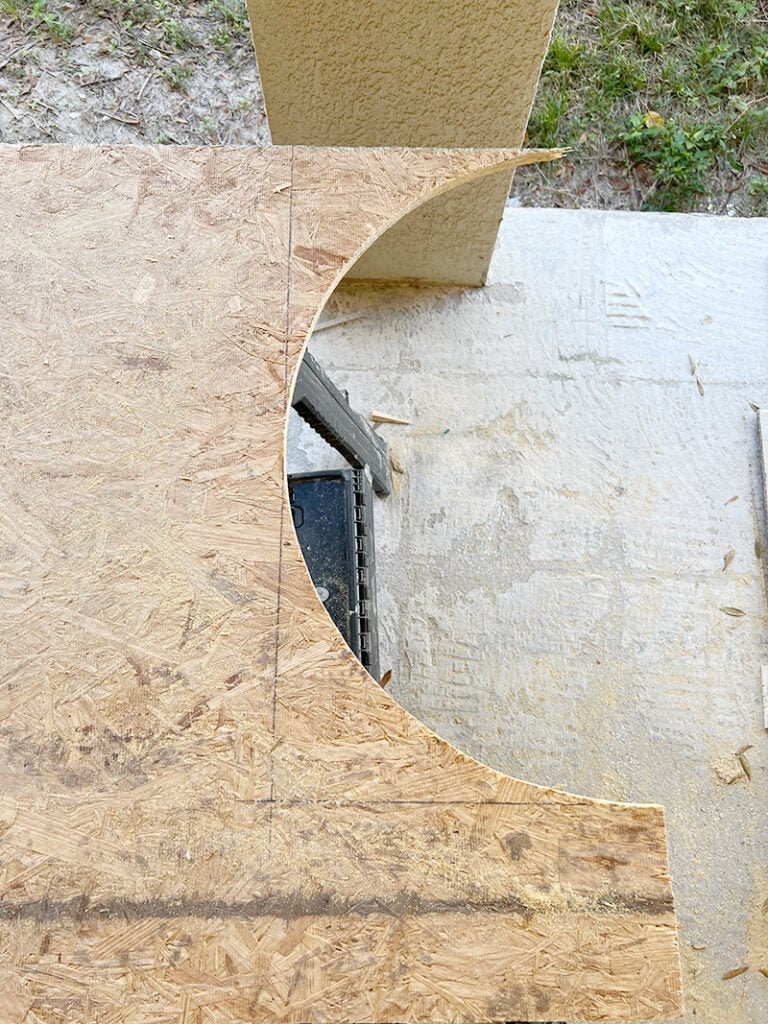
You should end up with two equal pieces:
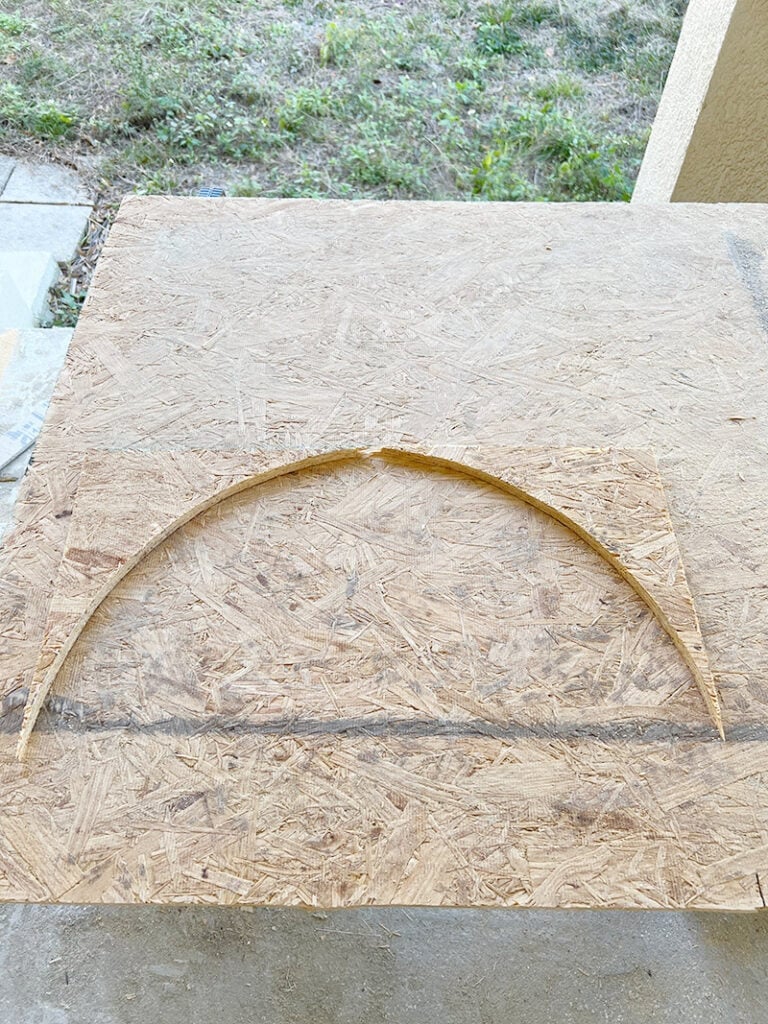
Note: You could also trace the top line a couple inches higher to give you one single arched piece instead of two corners. This is easier to work with, but it will make the height of the doorway lower. We didn’t want to lose any height on this doorway, but we did make an arch from a single piece in another bathroom:
Repeat this process one more time, until you have four identical corners (the pointy ends are fragile and might break off, but that’s ok!)
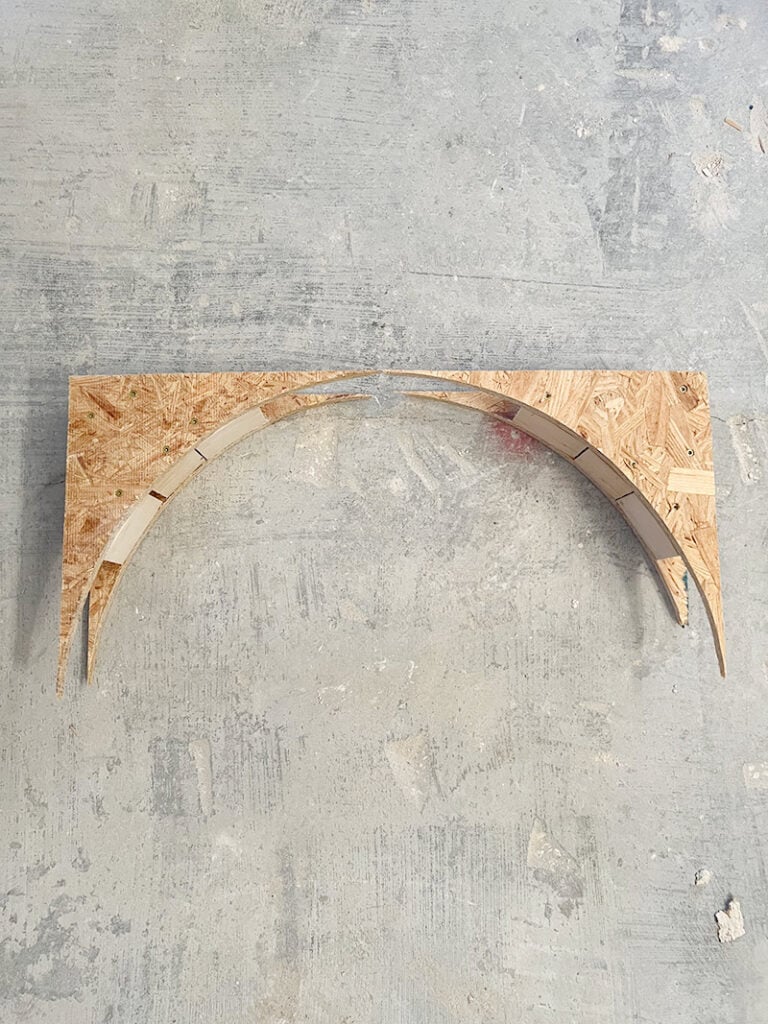
Step 3: Rip and cut 2×4” blocks and attach between plywood
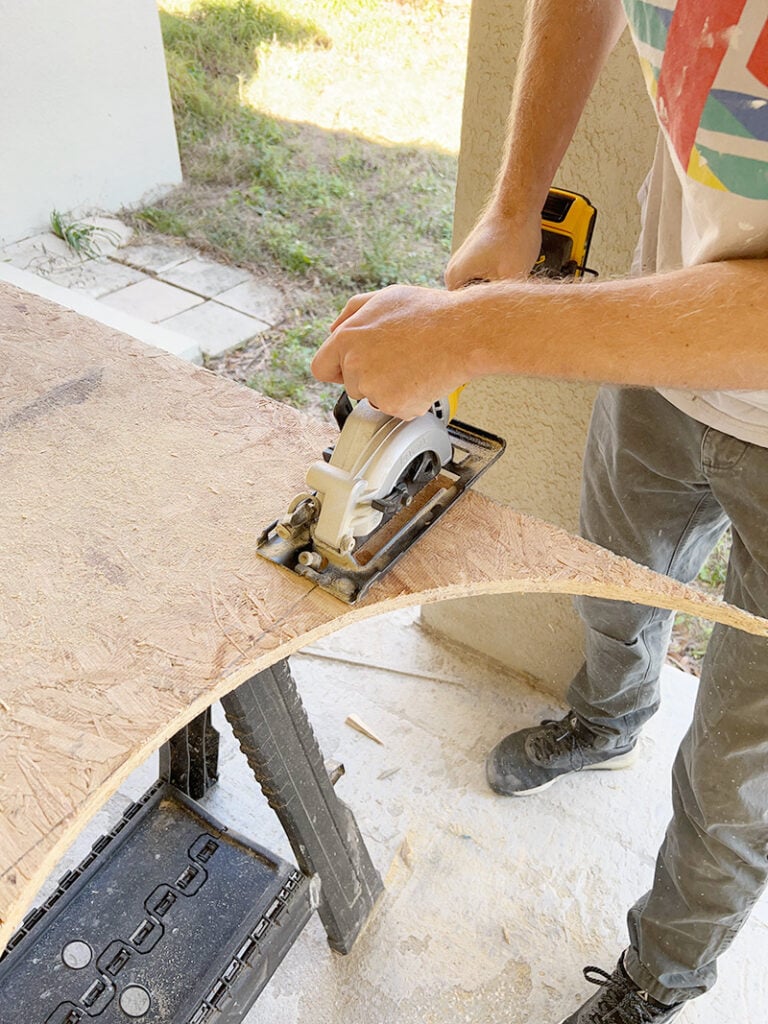
Measure your door opening width. Typically, doorways are framed using 2×4’s, which have an actual width of 3.5″. Since our plywood was 1/2″ (times two sides), that meant our 2×4 blocks had to be ripped to 2.5″ to match the door framing width (you can rip these using a table saw or circular saw).
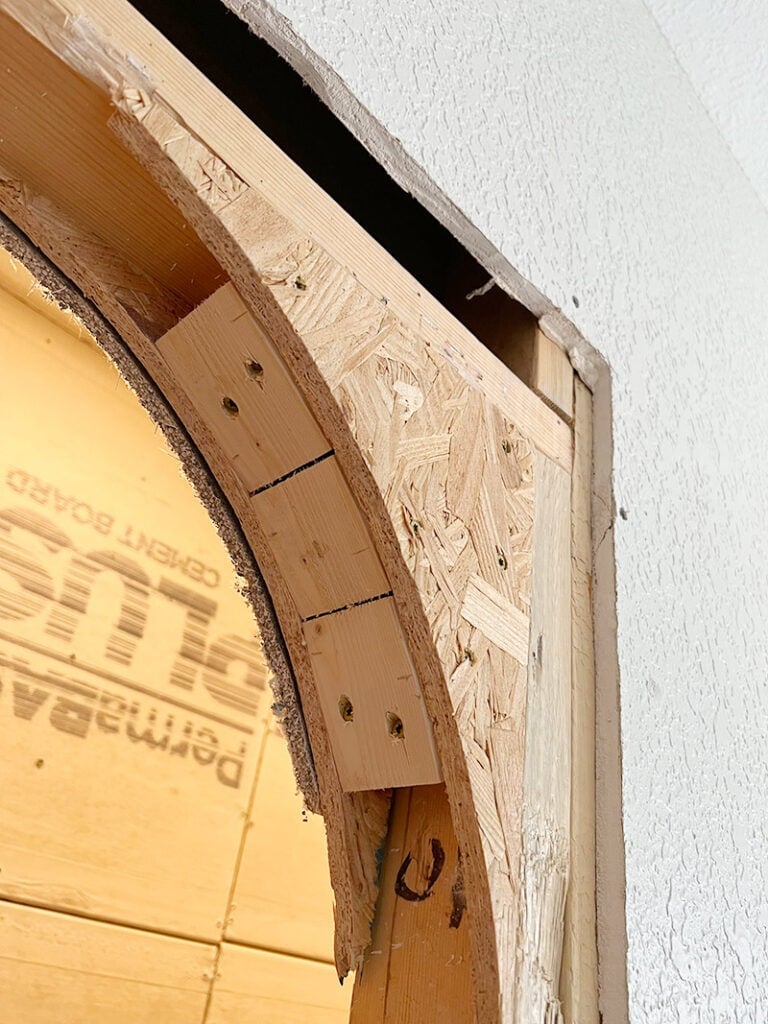
After ripping down the 2×4, cut as many blocks as you are able to fit along the curve. I used three, plus two more in the corners for stability. Here you can see how they all sandwich together:
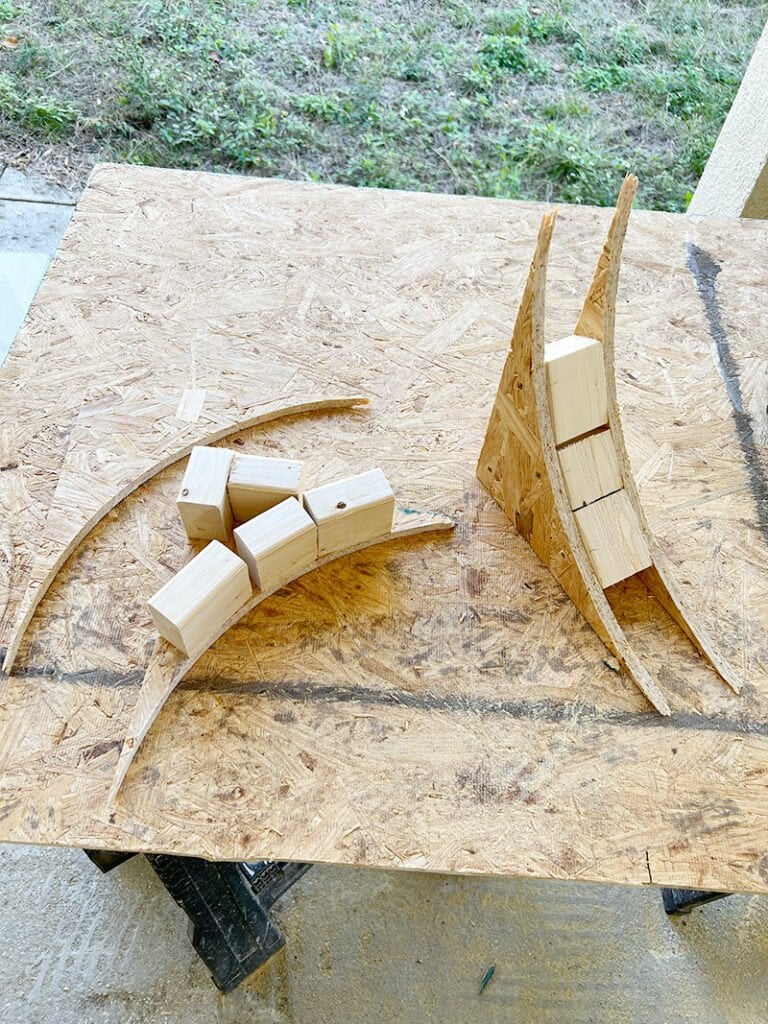
The “arch sandwich” was assembled using wood glue and 2″ screws.
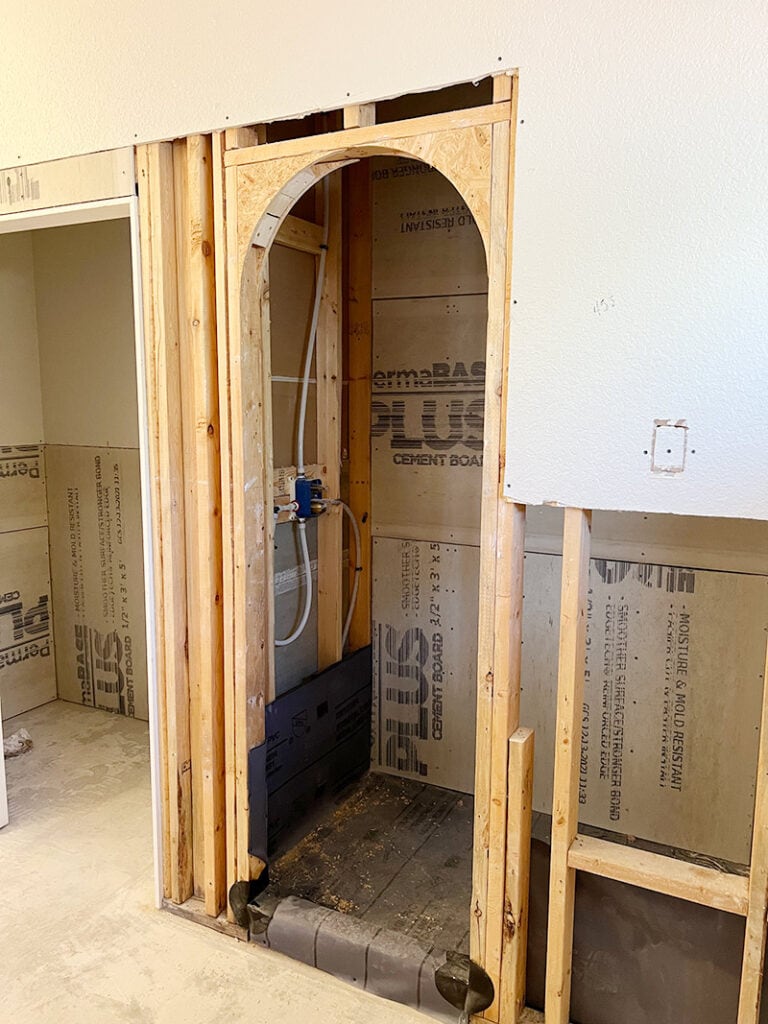
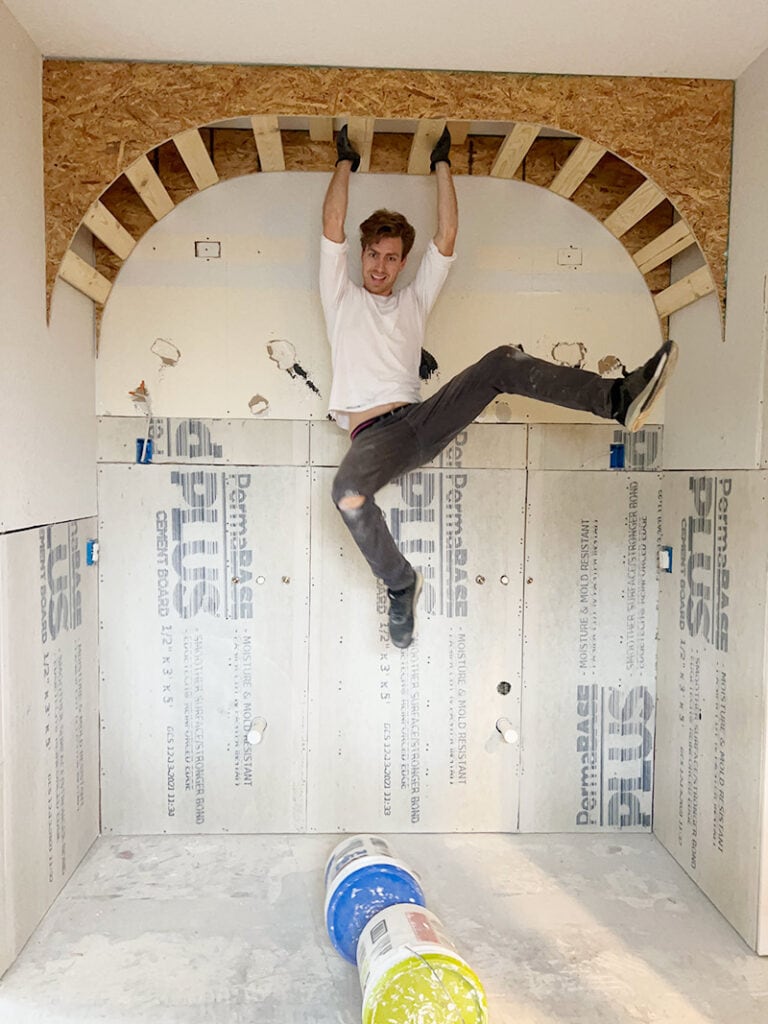
Step 4: Secure arch to the doorway framing
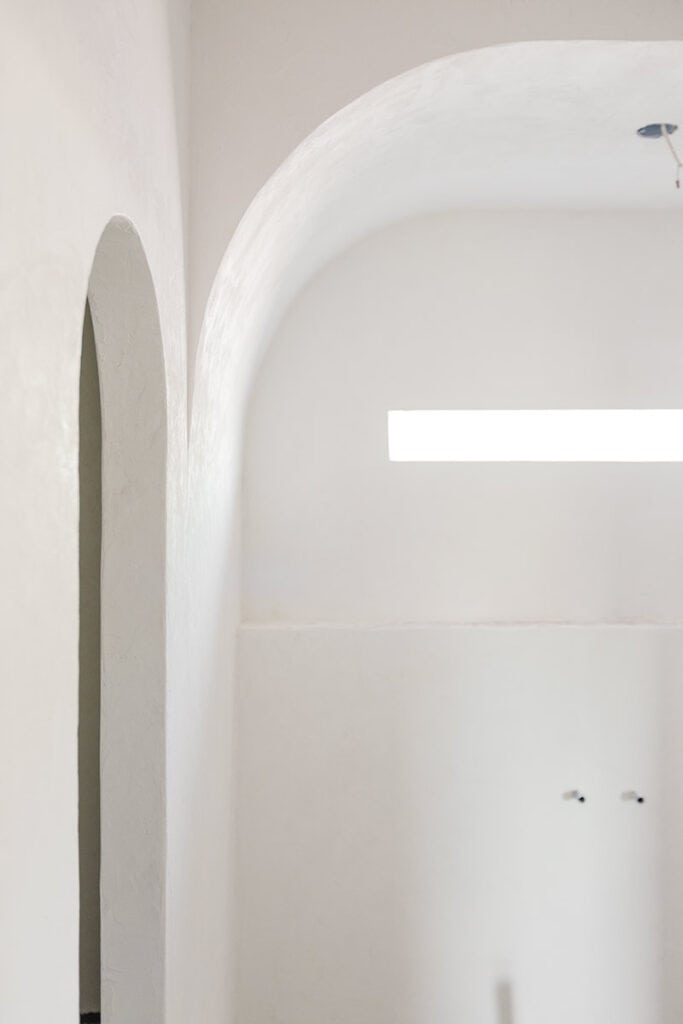
Here’s how the two curves fit together to form an arch:

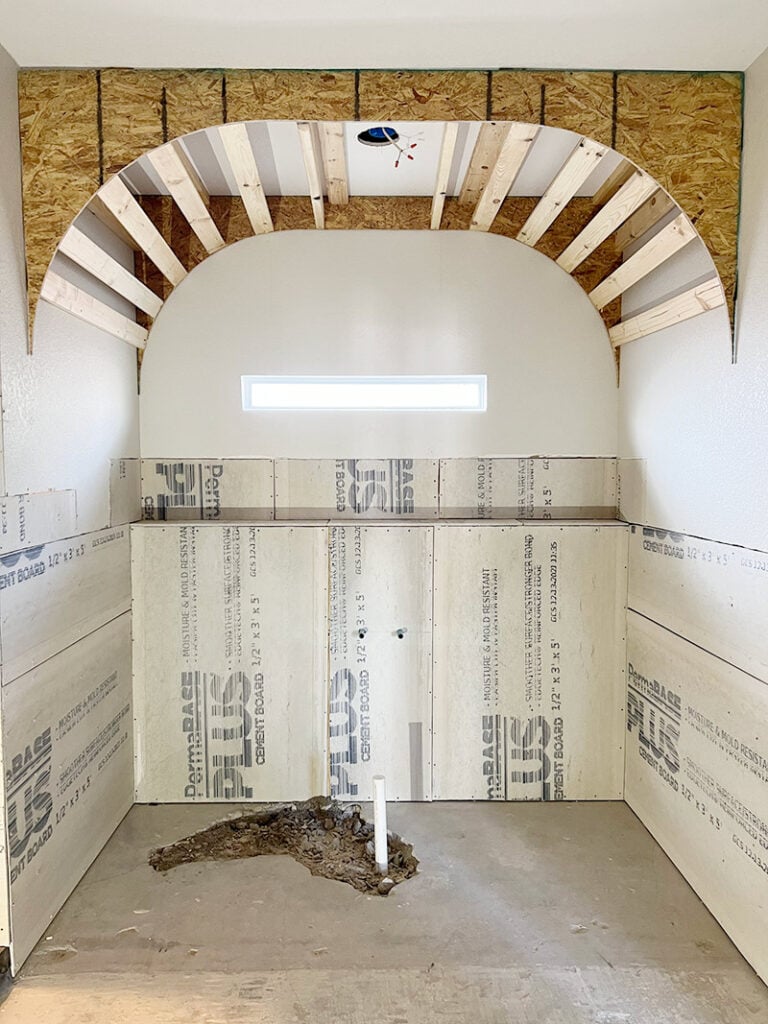
Using 3” screws, I attached each arch to both the sides and the top framing through the 2×4 pieces.
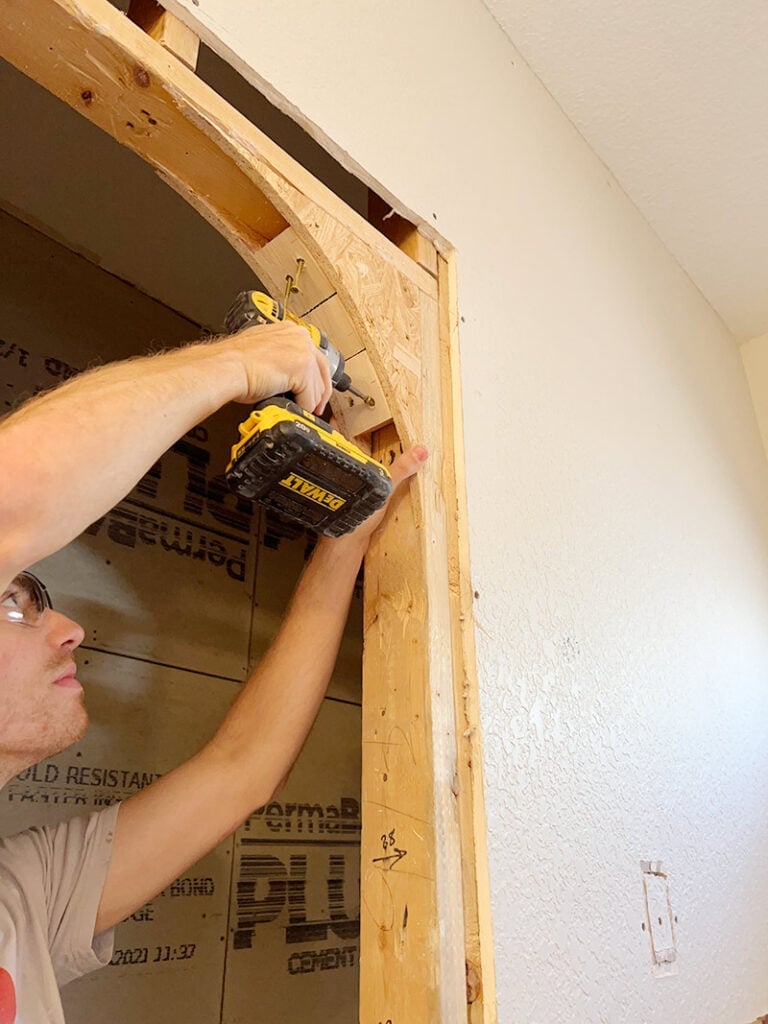
Important: you must pre-drill these holes, otherwise your 2×4’s will split!
Ahhh, much better already.
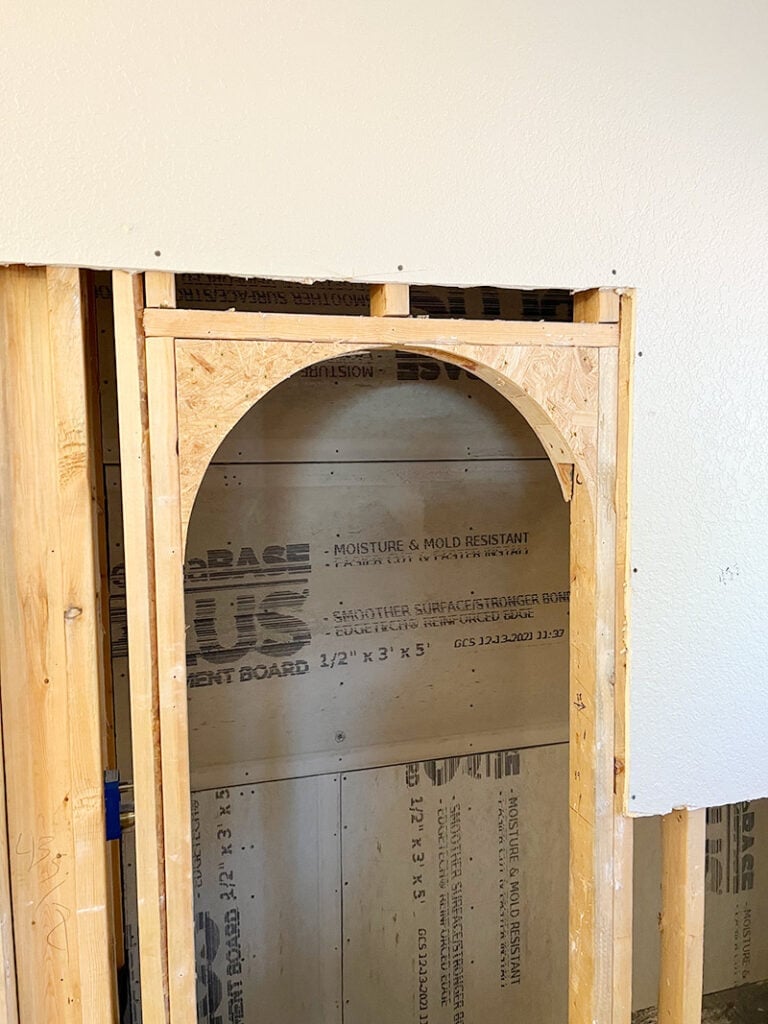
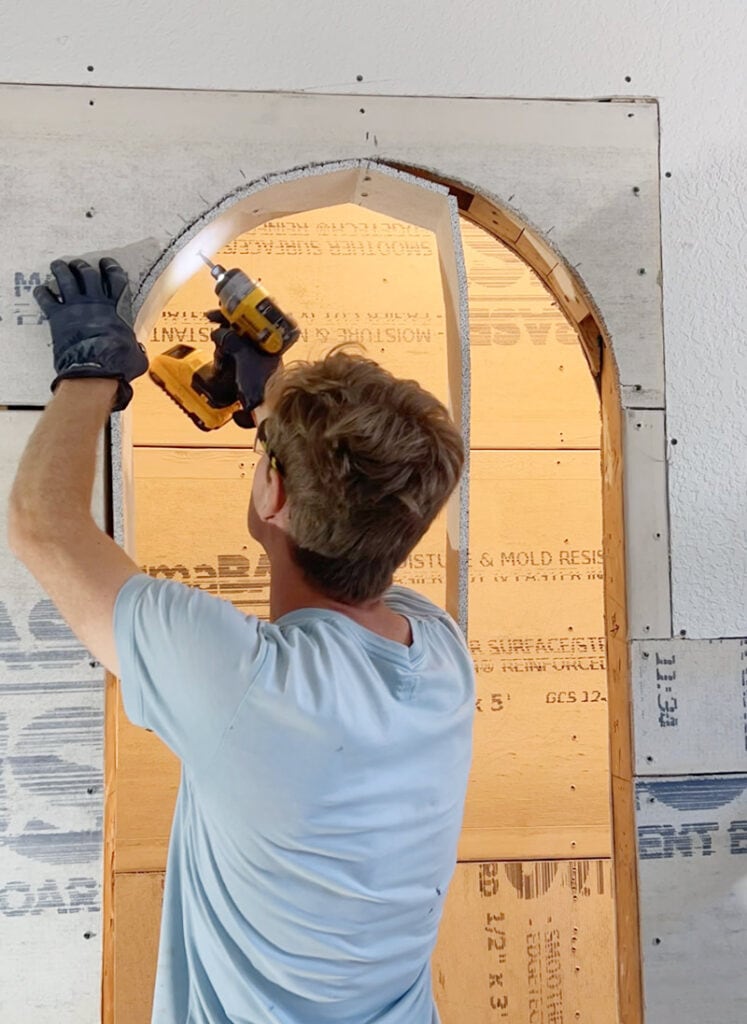
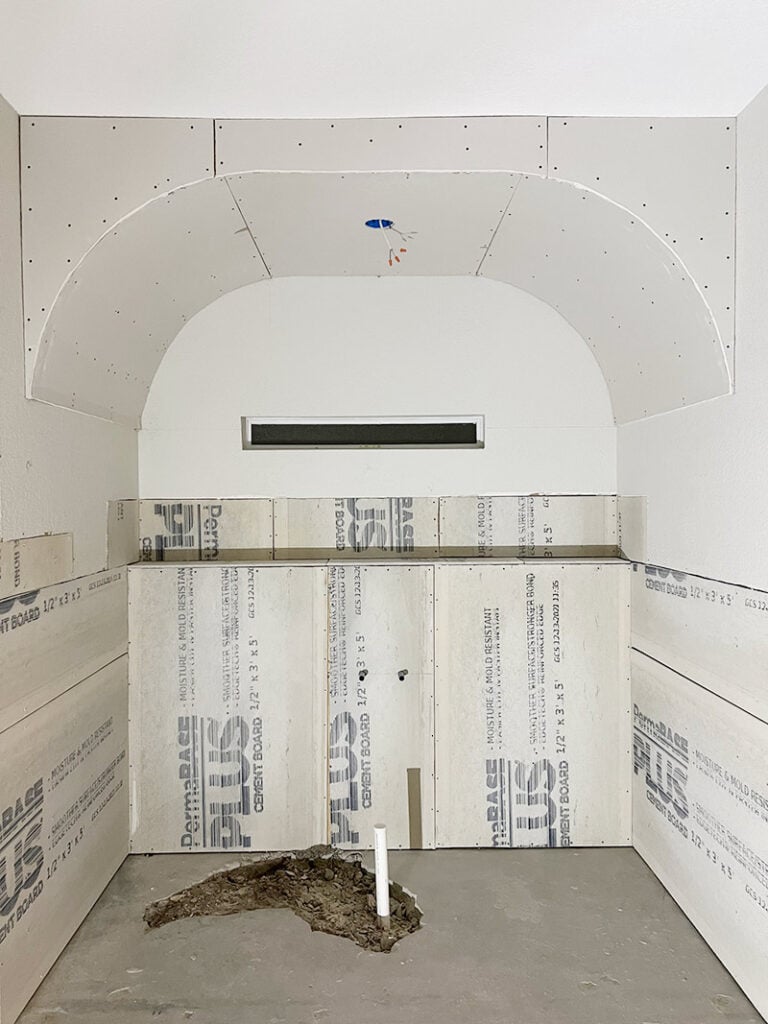
Step 5: Finish with drywall or cement board
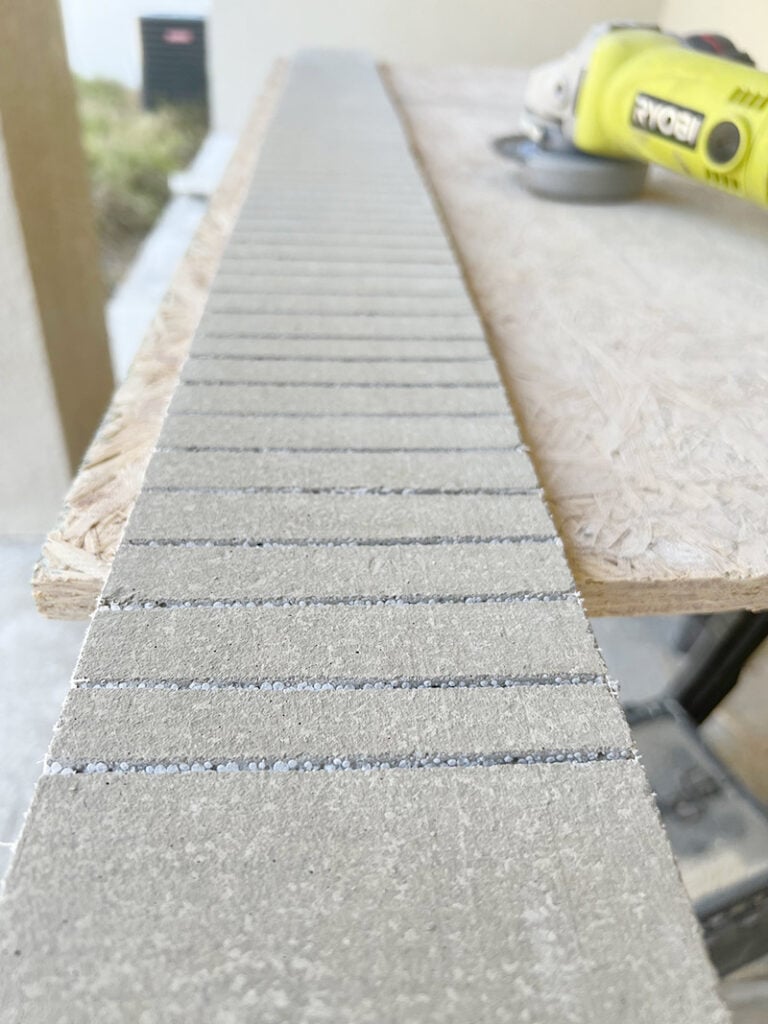
I won’t go too much into detail about this step in this tutorial, but we used cement board to finish our shower opening since it is a wet area.
For the face of the wall, simply attach your drywall or cement board, then cut out the opening from the other side.
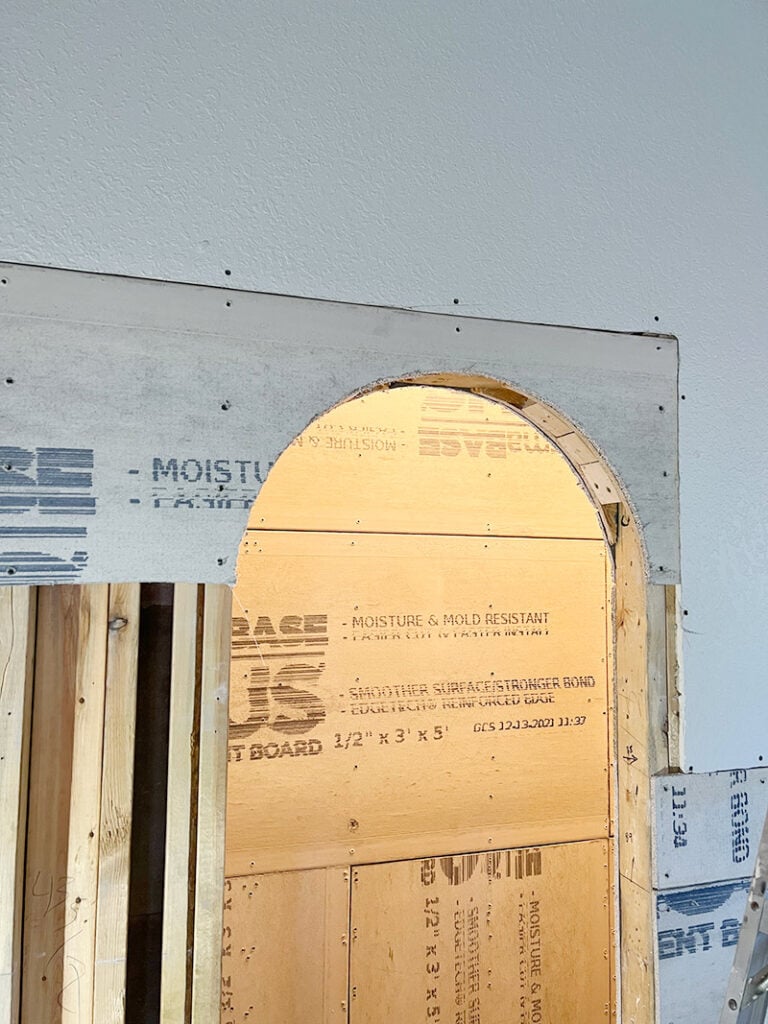
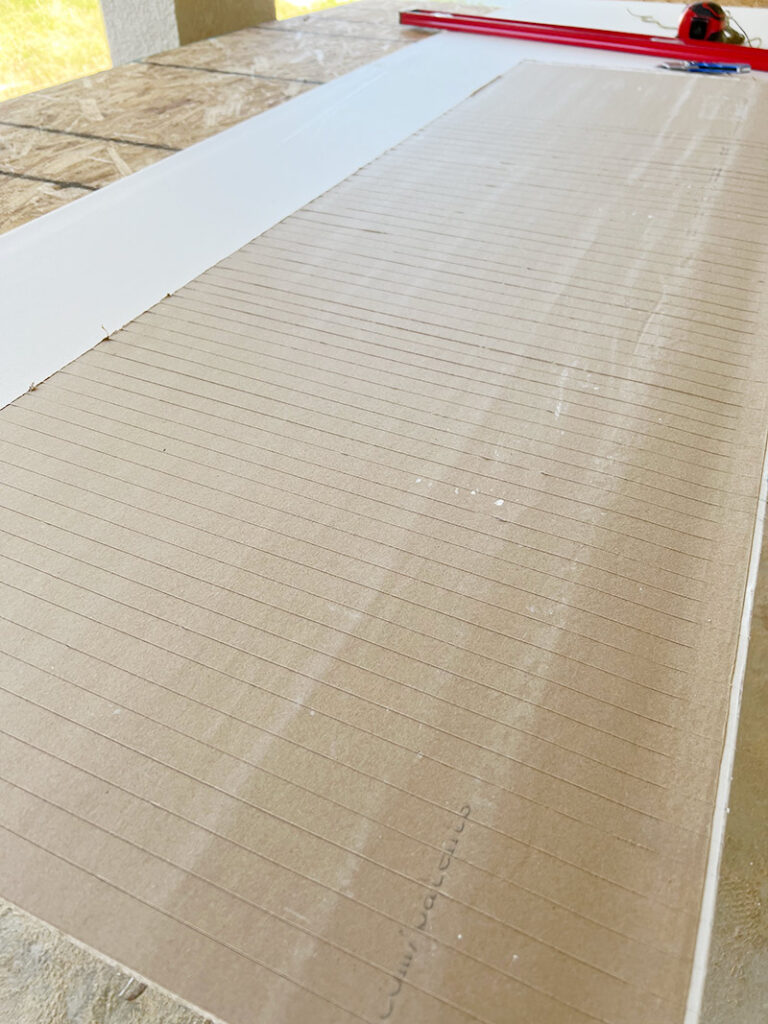
I’ve shared more about curving drywall (in our DIY fireplace and range hood tutorial) and the technique is similar with cement board—score along the back edge to help it bend.
Then position it along the arch, and screw it in place.

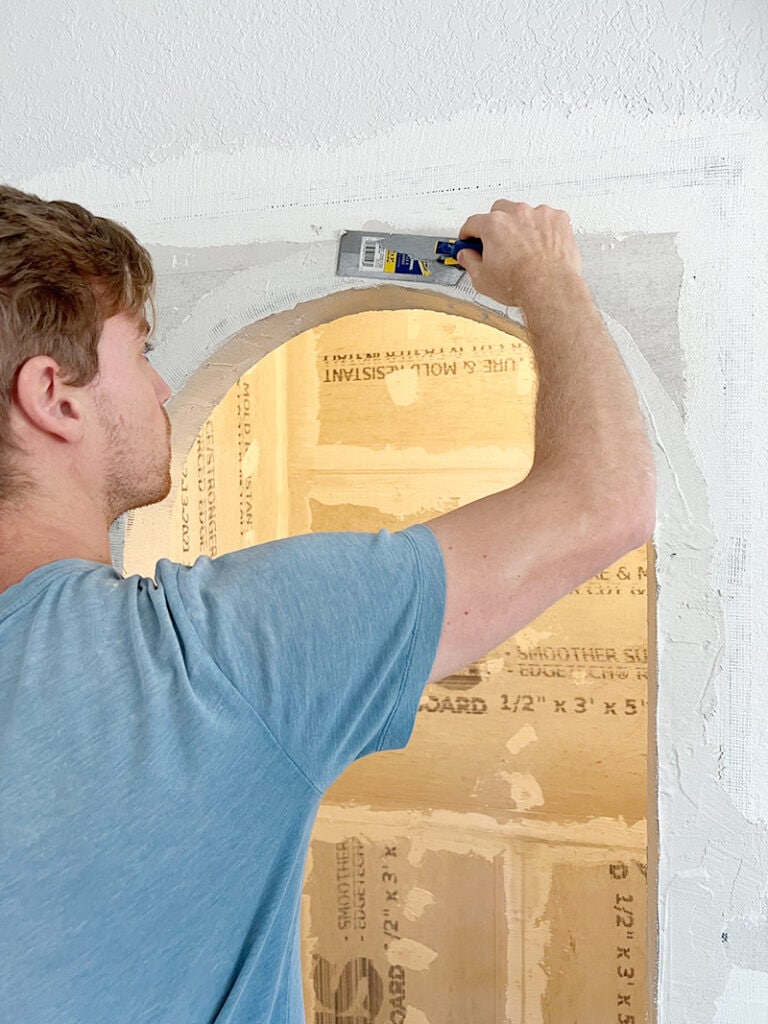
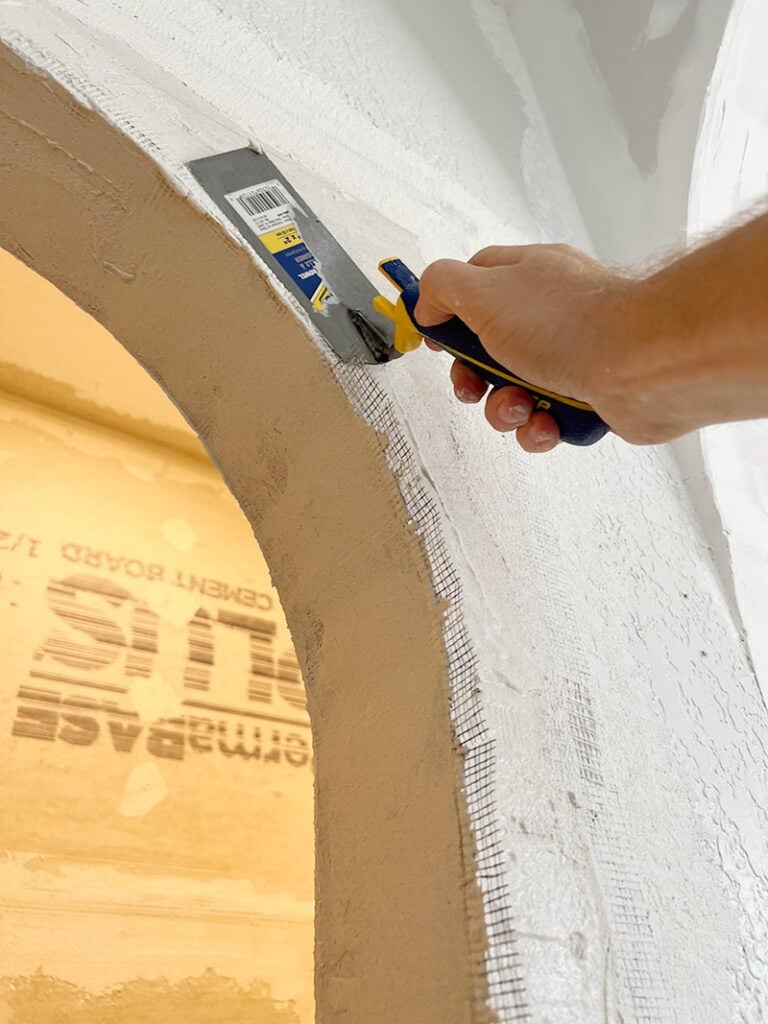
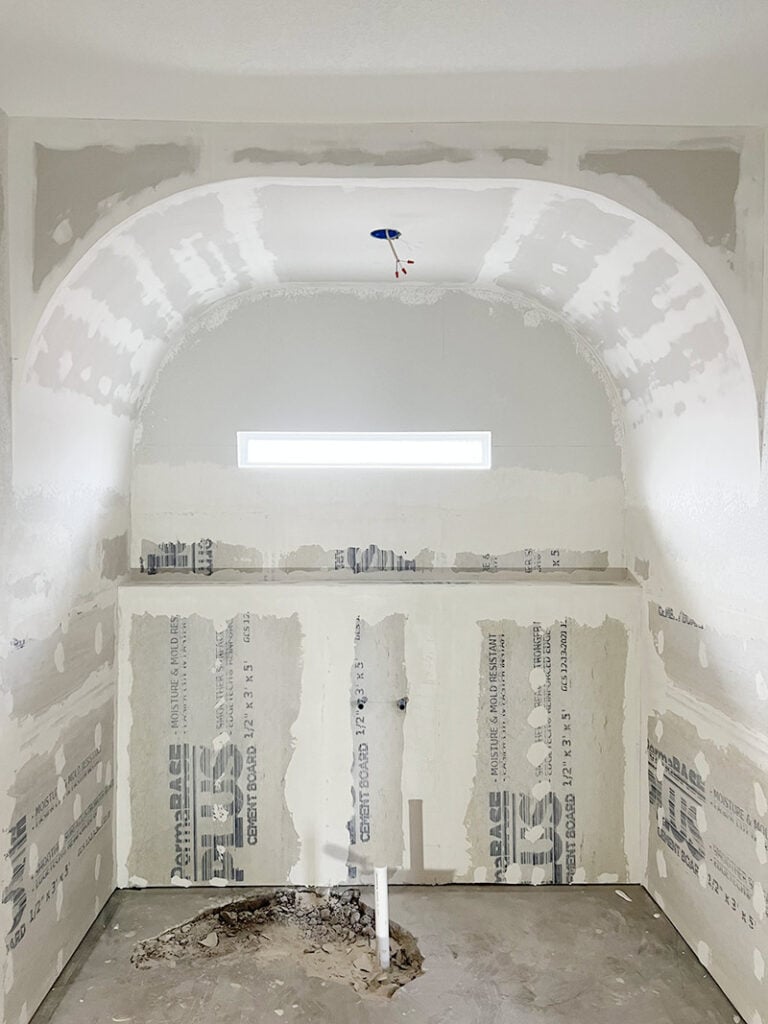
Finally, finish the seams with mesh tape and thinset. Fortunately, this part didn’t have to be 100% perfect, since we’d be covering it with microcement.
And here’s our beautiful arched shower opening! I think we might have to put one of these in every bathroom from now on…
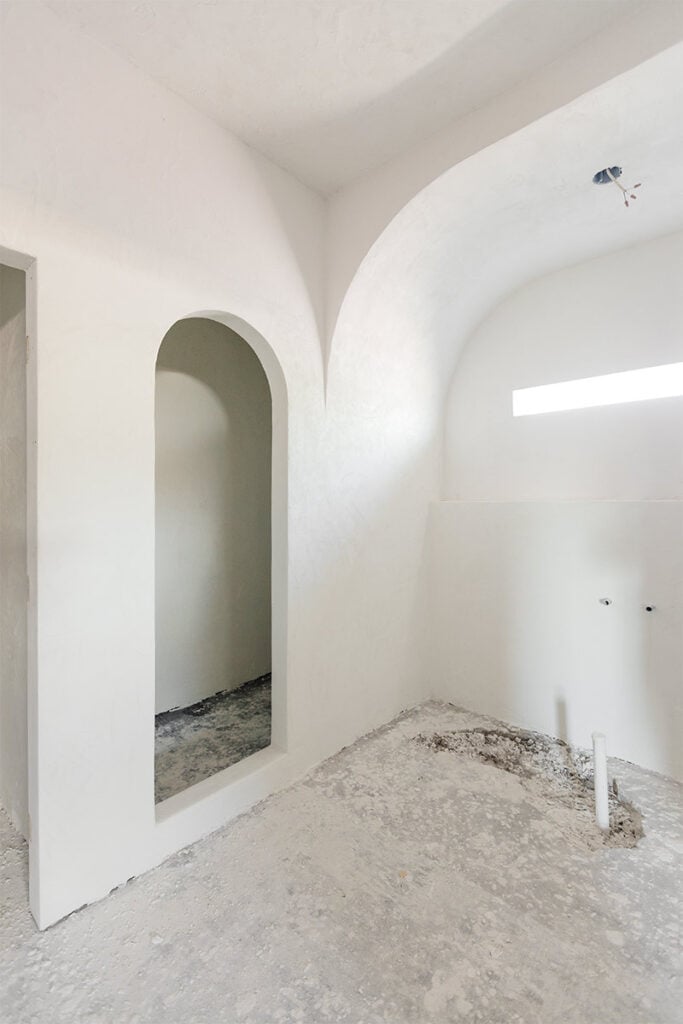
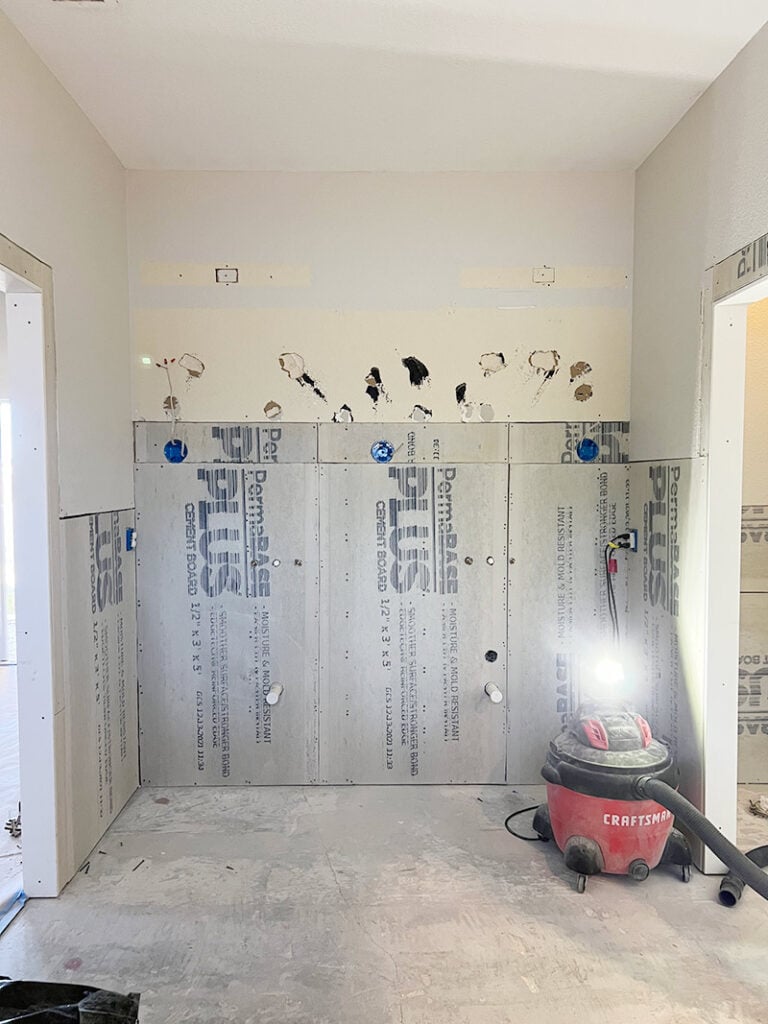
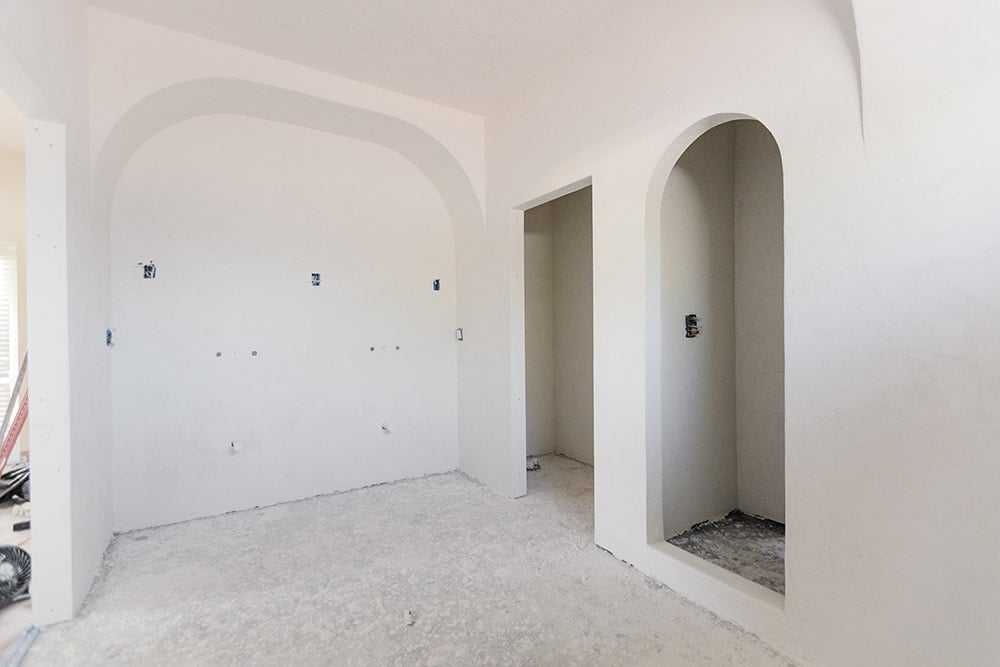
Building arched wall alcoves
We followed essentially the same process to build the arched wall alcoves, just on a larger scale. The vanity wall alcove was made from two 8′ sections of 1/2″ plywood, connected by 2×4’s cut to our desired depth.
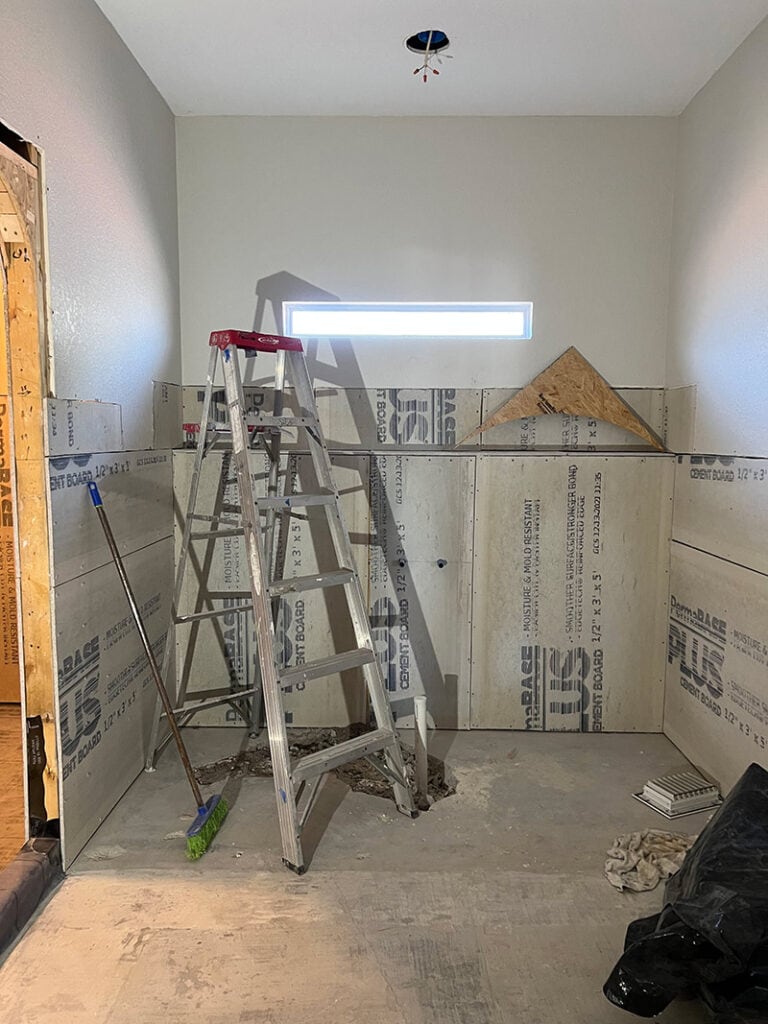
The tub wall alcove was too large to hoist in place by myself, so I assembled that one in place.
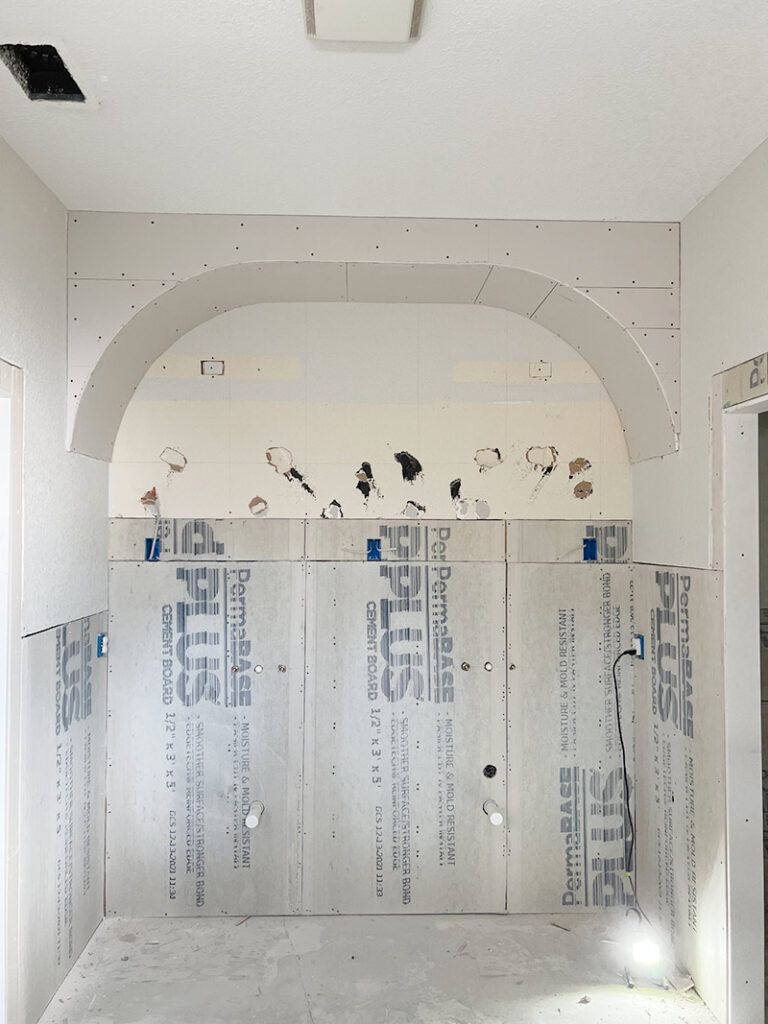
These were finished with drywall, which was also scored along the back to help it bend:
Drywall tape and mud were used to patch the seams and smooth out the transition between the arch and existing drywall:
Same process for the vanity wall alcove:
Here’s the finished result after applying microcement:
A simple and inexpensive change, with dramatic results! Here’s a step-by-step recap:
How to build an arched doorway opening:
- Measure opening and trace arch onto plywood
Use a screw, piece of string and a pencil to trace a perfect half circle onto 1/2″ plywood
- Cut arch, trace and repeat
Cut out the arch corners using a jigsaw, then trace them onto another sheet of plywood and cut those out so you have four identical corners
- Rip and cut 2×4″ blocks and attach between plywood
Determine your total width, and rip 2×4″ blocks down to size. Cut several blocks and arrange between two plywood pieces to make an “arch sandwich”
- Secure arch to the doorway framing
Secure both corners into the doorway framing using 3″ screws
- Finish with drywall or cement board
Cover the exposed framing with either drywall or cement board, and tape/mud the seams and edges
Frequently Asked Questions
Is there an alternative to building an arch from scratch?
Yep! You can buy prefabricated kits such as this universal arch or pre-curved drywall. You’ll still need to finish out the wall, however.
Can you arch an opening where you plan to hang a door?
Building a curved door jamb is different—you must use wood, add a door stop, and it must be very precise for the door to fit. This requires more advanced skills and tools (and the added expense of an arch top door). Check out this video for one way to do it.
How do I trim an arched doorway?
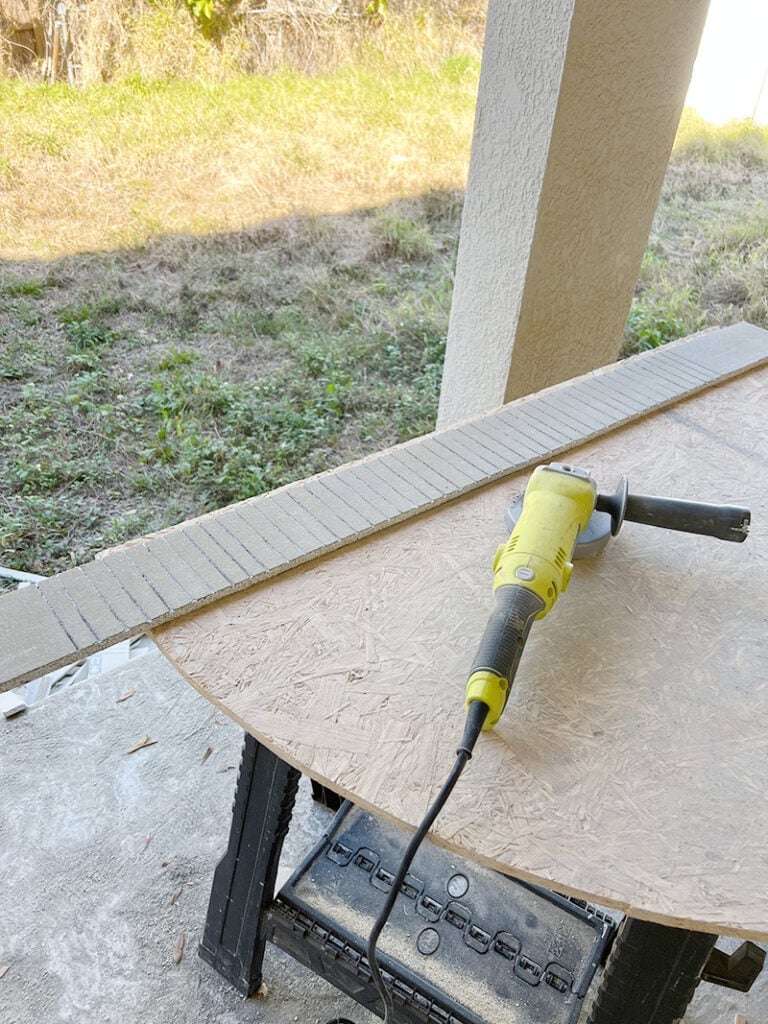
You can use flexible, curved molding to trim out an archway. There are several companies that will custom make this to fit your radius. We’ve used FlexTrim for our front door molding.
Do you have a doorway in your home that you could turn into an arch? Let me know if you try it!


