If you’re in search of a large arched mirror but can’t find the right size or it’s too expensive, I have good news: it’s surprisingly simple to DIY your own! Keep reading to see how we made our own custom arched mirror for the Hacienda Hideaway entrance.
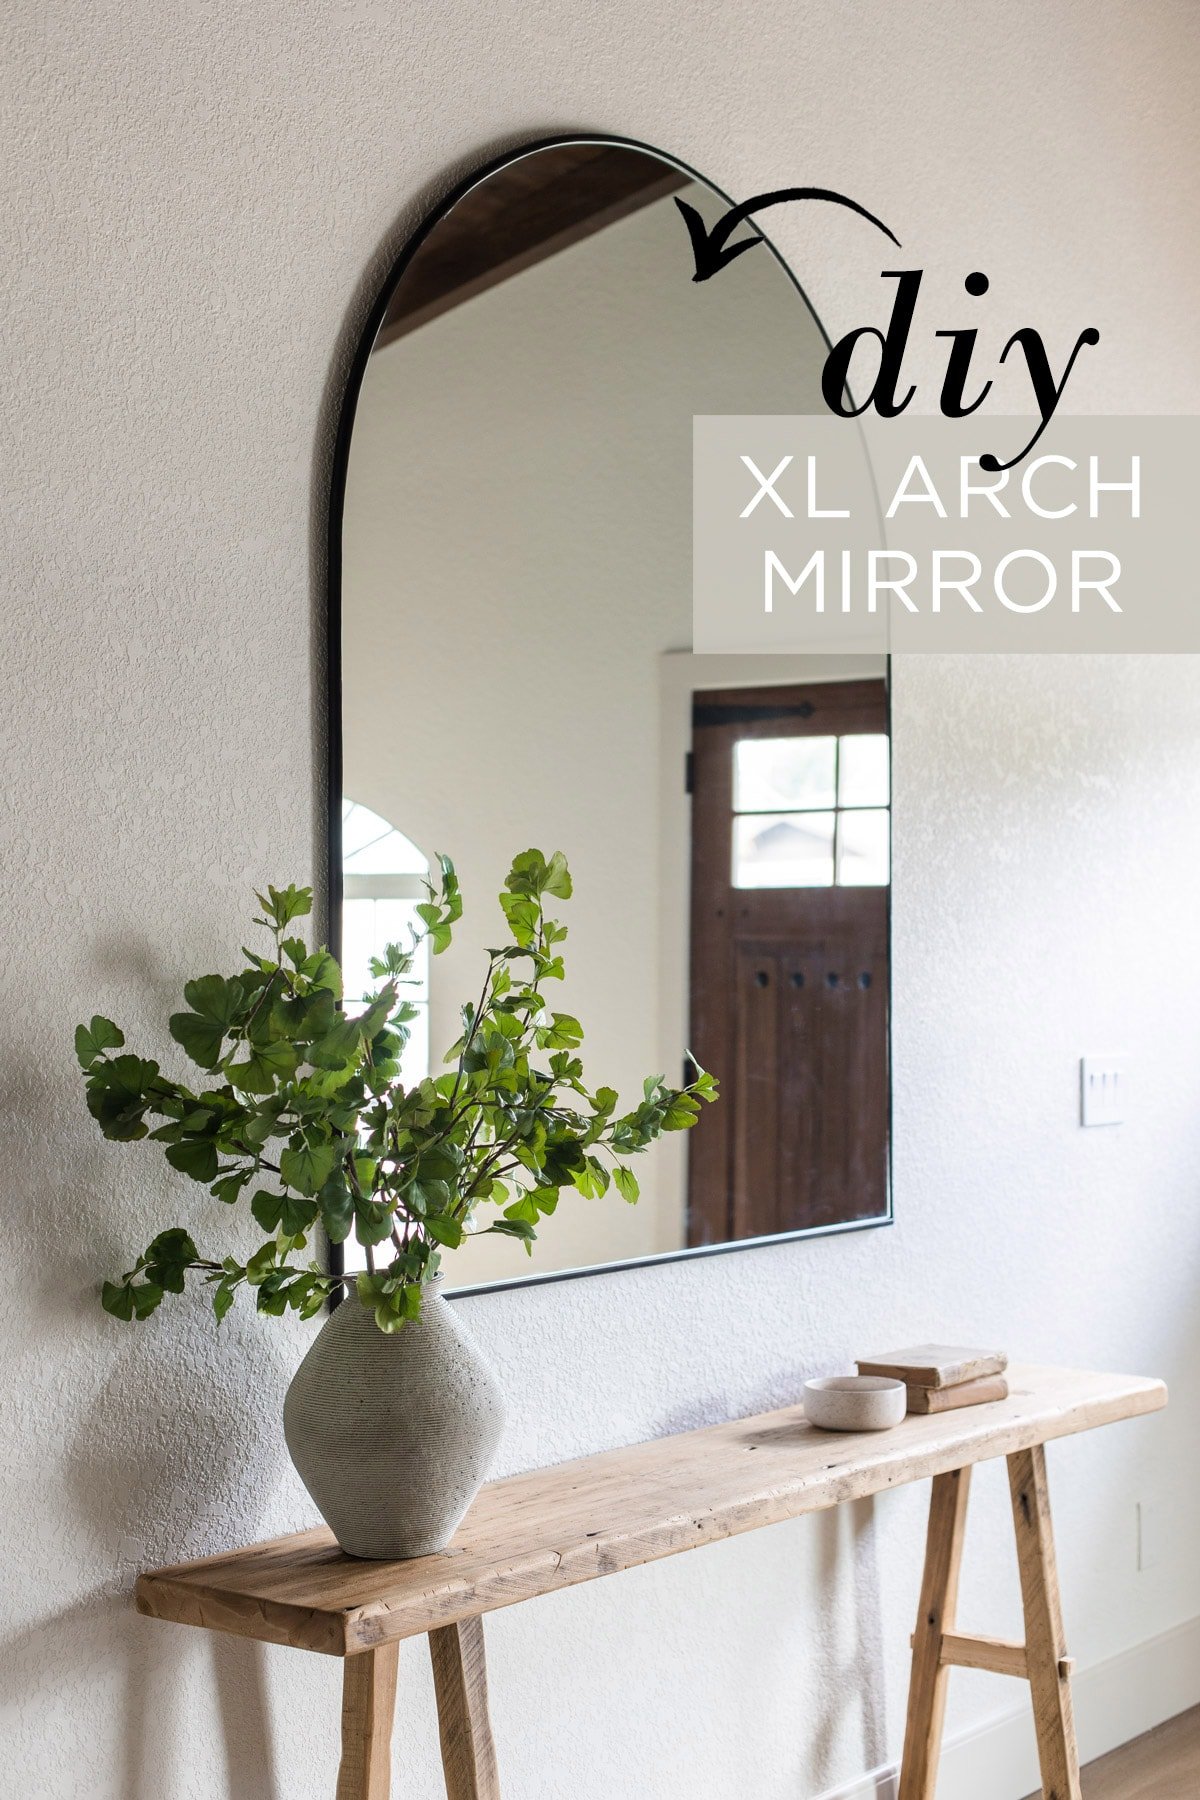
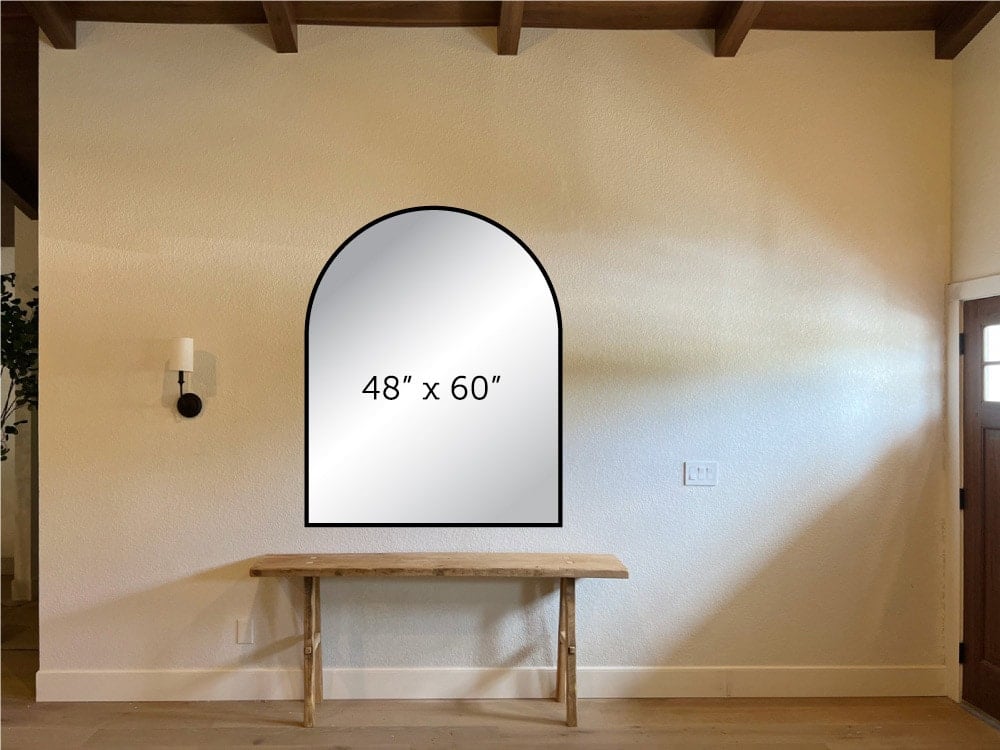
When searching for a mirror for the foyer wall at the Hacienda Hideaway, I had specific criteria: arched shape with a black frame, and proportionately sized to fit above our 6′ console table and fill the large wall. I played around with the scale in Photoshop, and landed on an ideal size of ~48×60″:
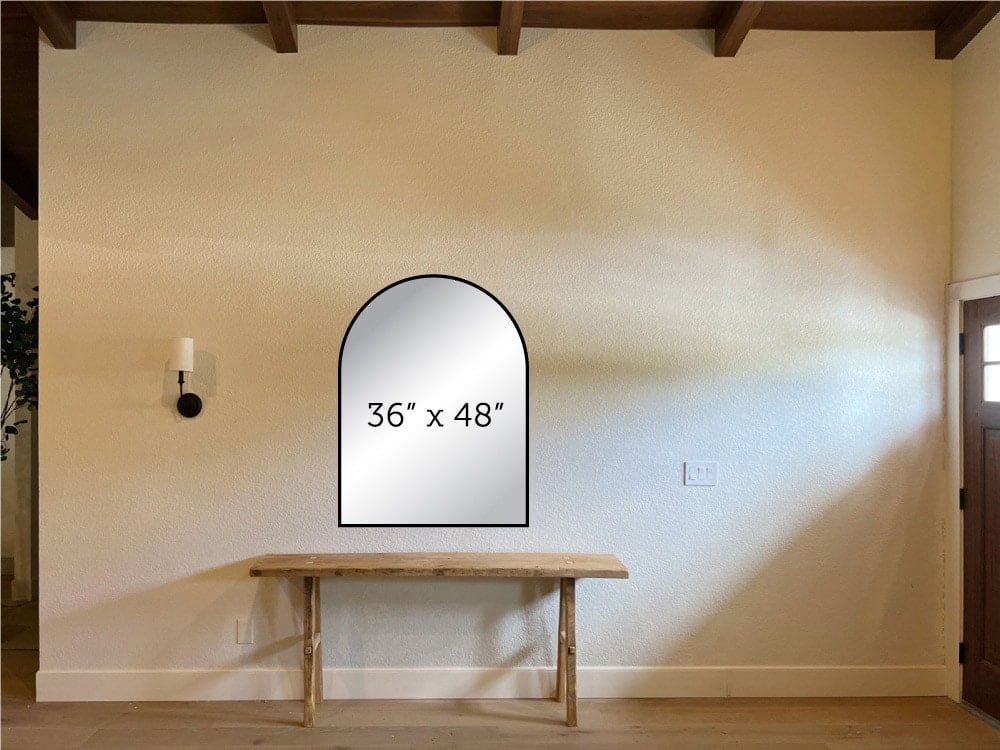
After weeks of searching, all of the results were either too small, or too tall and narrow. The closest I found was this (affordable!) 36″x48″ mirror, and I was this close to buying it, but ultimately decided it was just too small. Time to get creative and DIY my own!
Making your own custom mirror is surprisingly simple with the help of a local glass shop. Here’s how we did it:
Jump to:
Supplies
- 4×8′ plywood
- Mirror (from a local glass shop)
- Flexible molding
- Hanging cleat
- Super glue
- Clamps
How to DIY a large arched mirror
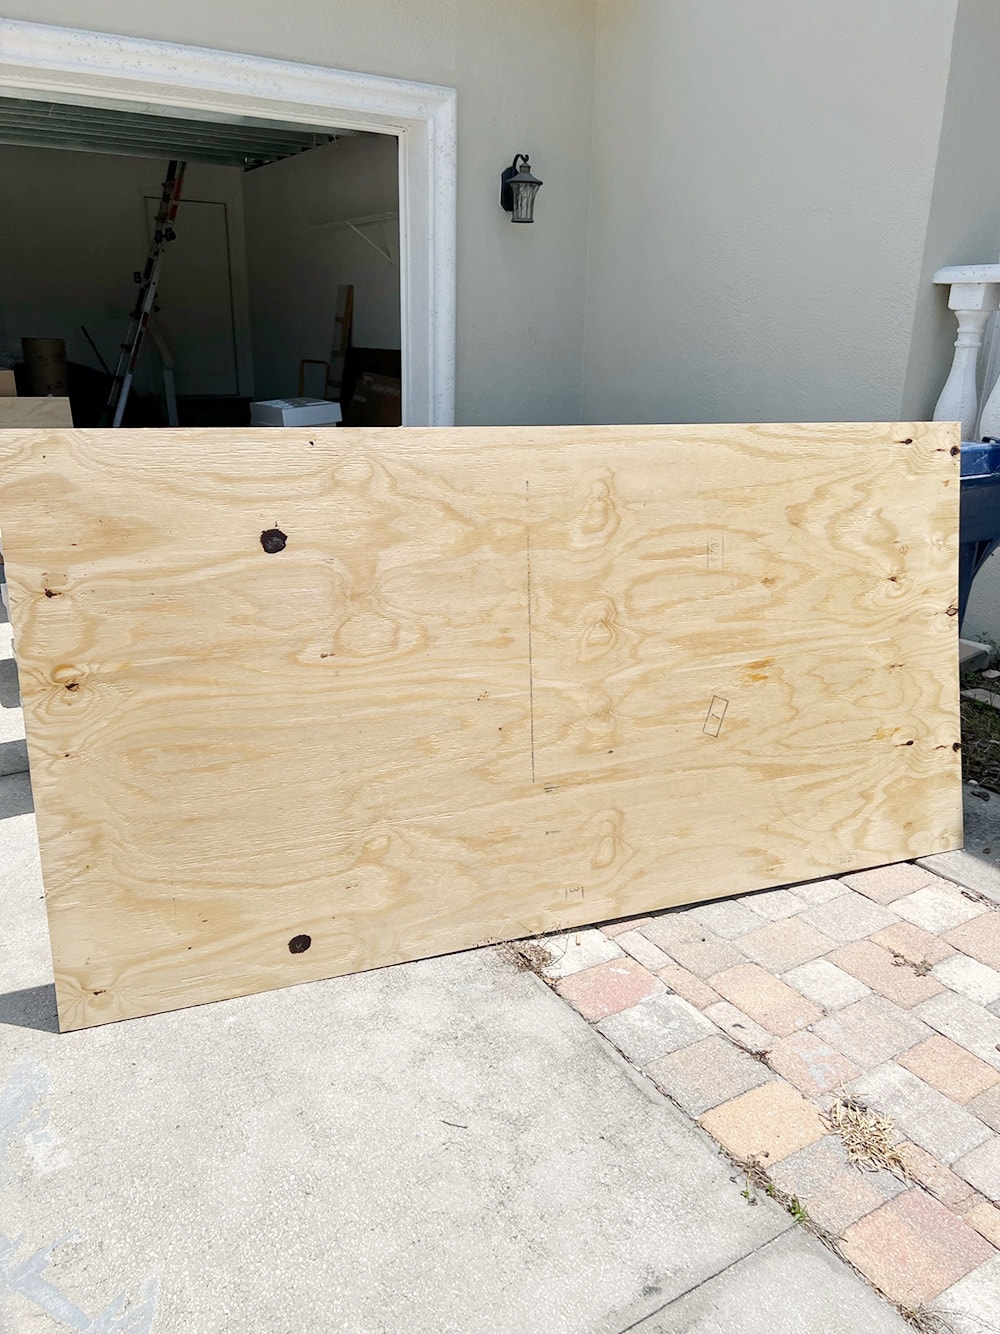
I bought a 4×8′ sheet of 19/32″ plywood sheathing to accommodate the screw length for the hanging cleat, but you can get away with a thinner material depending on your hanging hardware. It just needs to be sturdy enough to support the mirror.
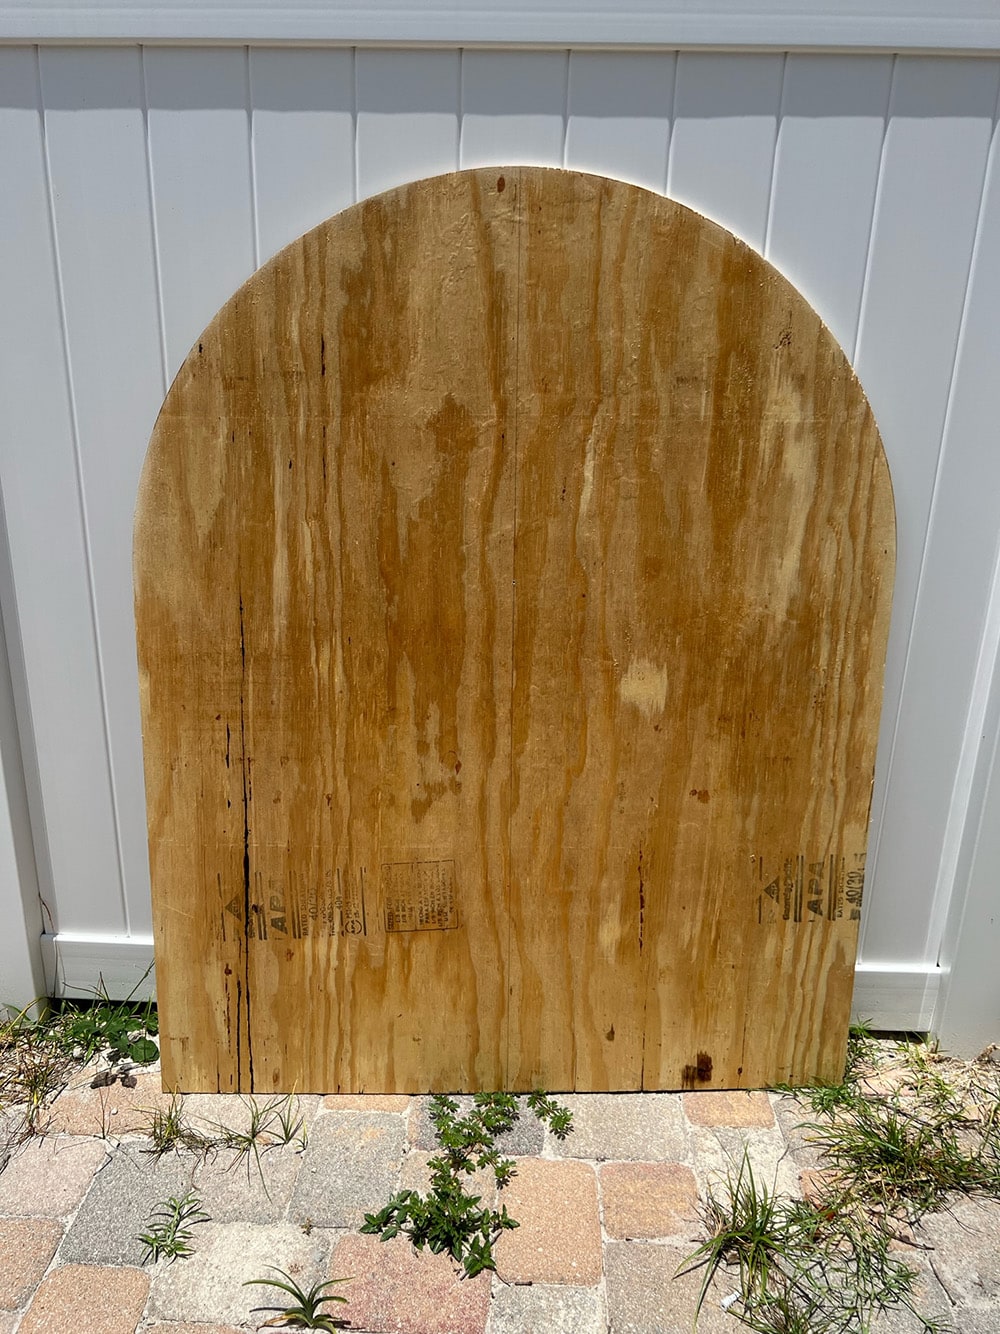
Step 1: Cut plywood to desired shape/size
I wanted a simple arch top for our mirror, so we used the screw/string method to trace a half circle.
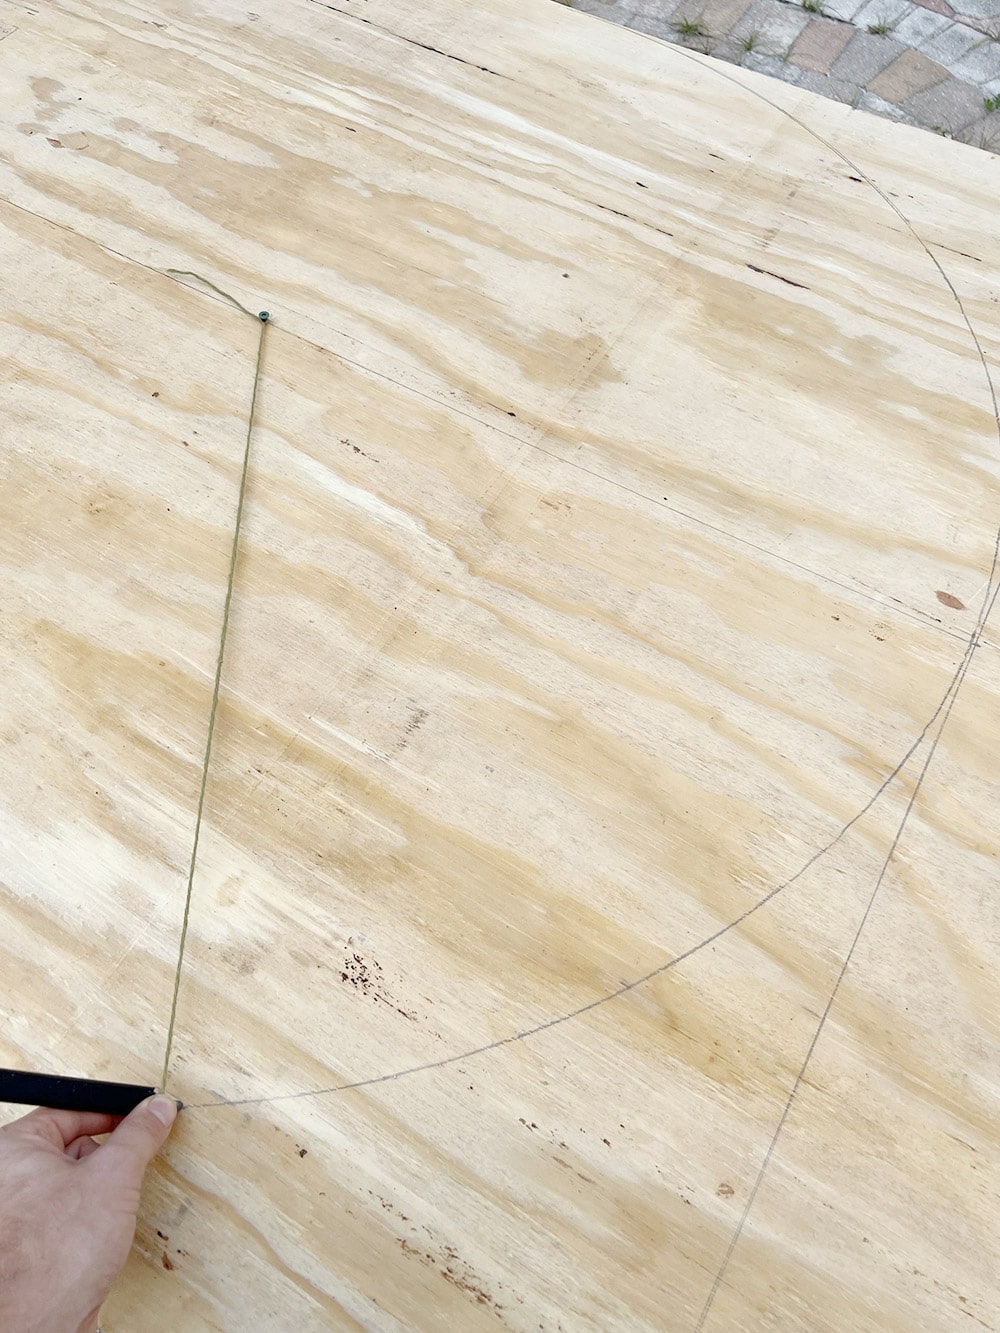
The shape was then cut out with a jigsaw, and sanded smooth.
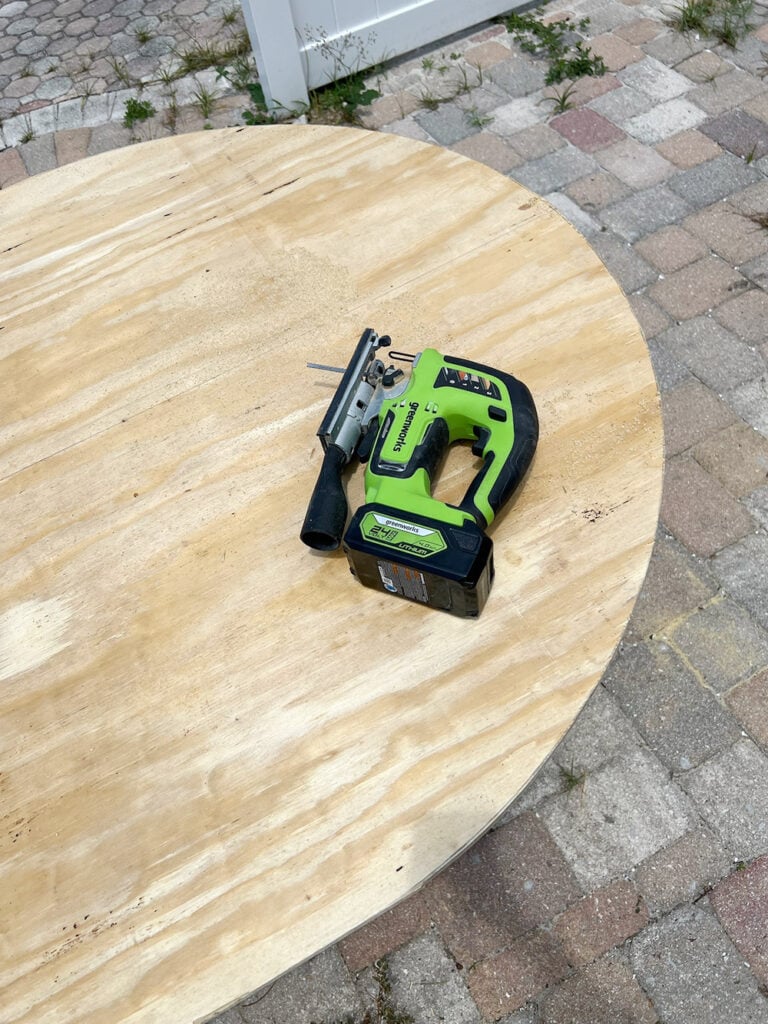
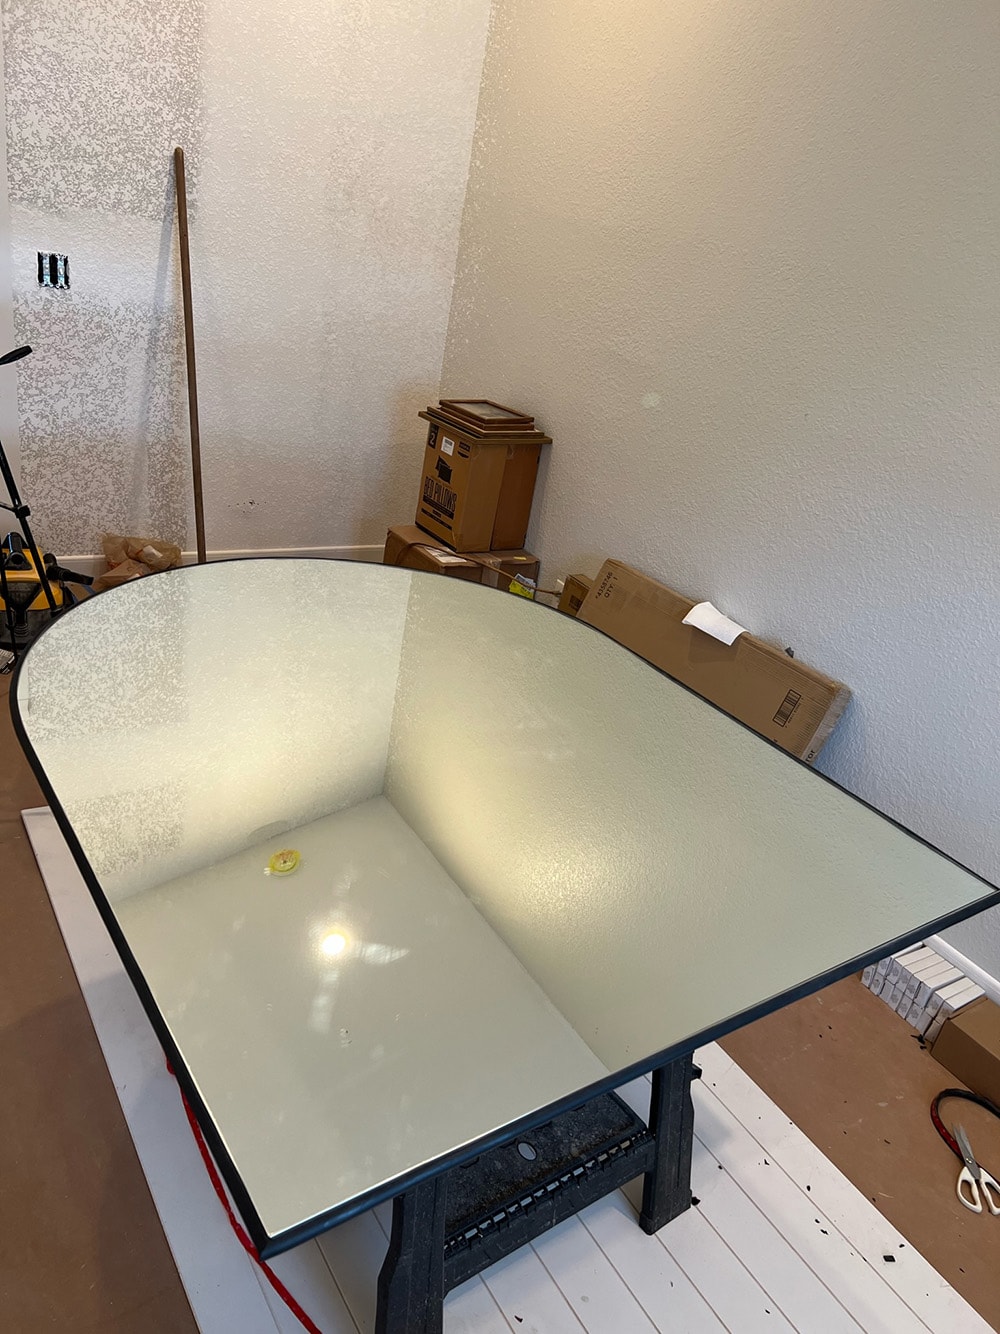
The end result was this 4’x5′ arched top plywood:
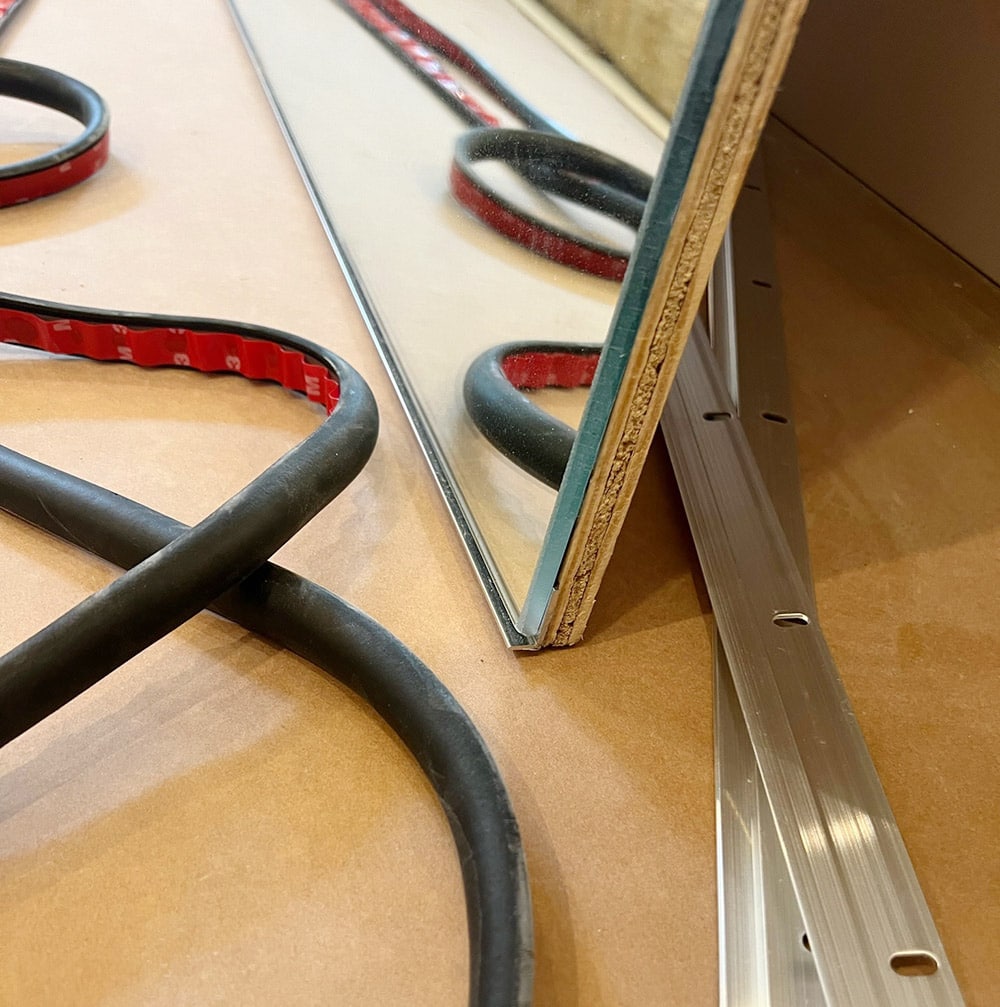
Step 2: Attach custom mirror
I called around to local glass shops to get quotes, and found a few that could cut and attach a 1/4″ thick mirror to our piece of plywood. This is a pretty standard request, so you should be able to find someone locally no matter where you live. One week and $333 later, our custom mirror was ready:
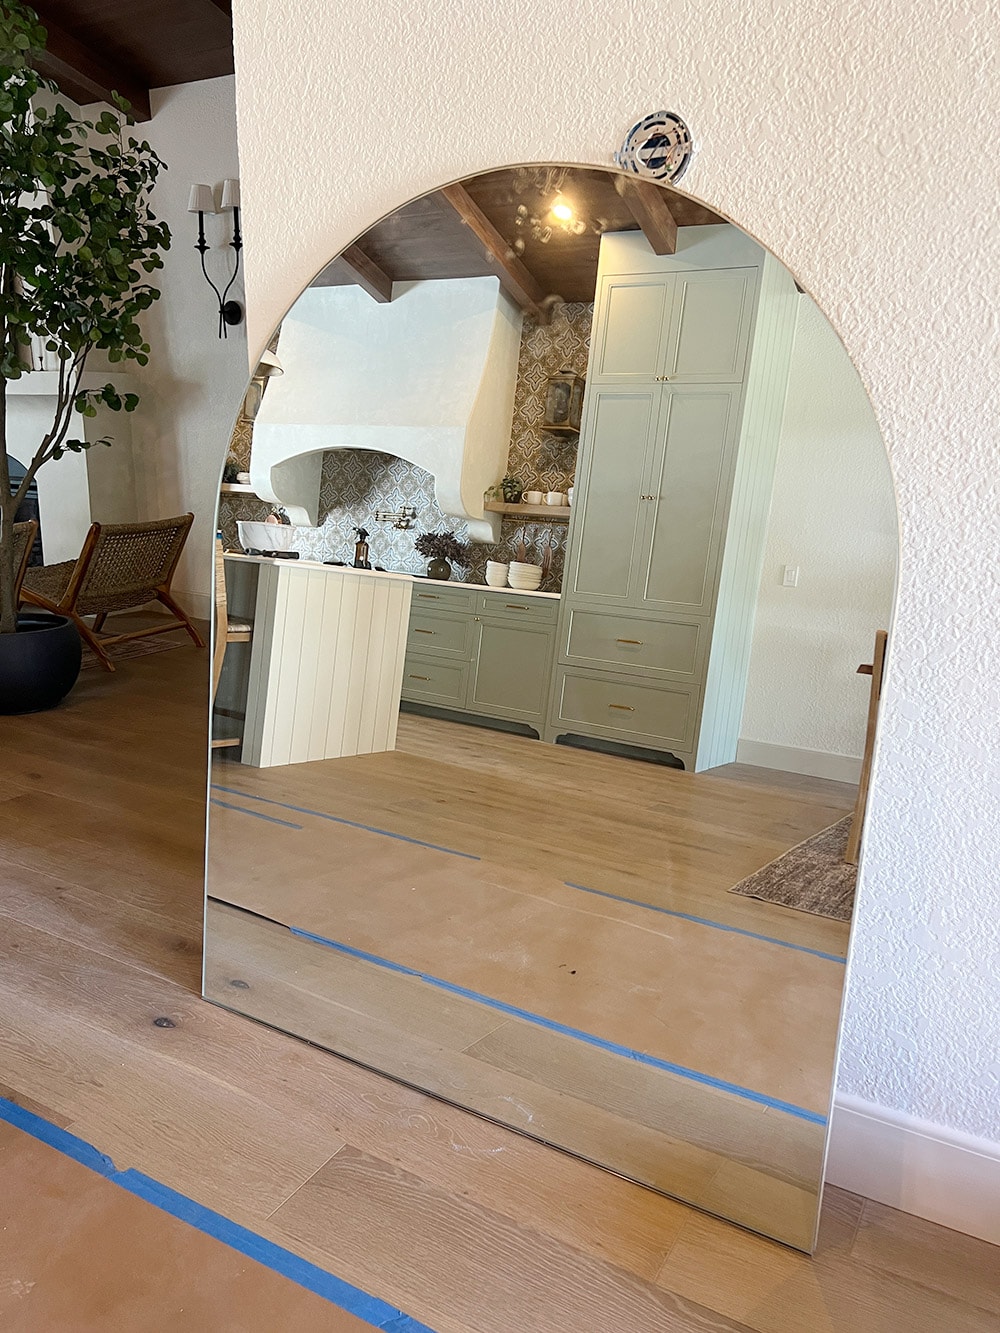
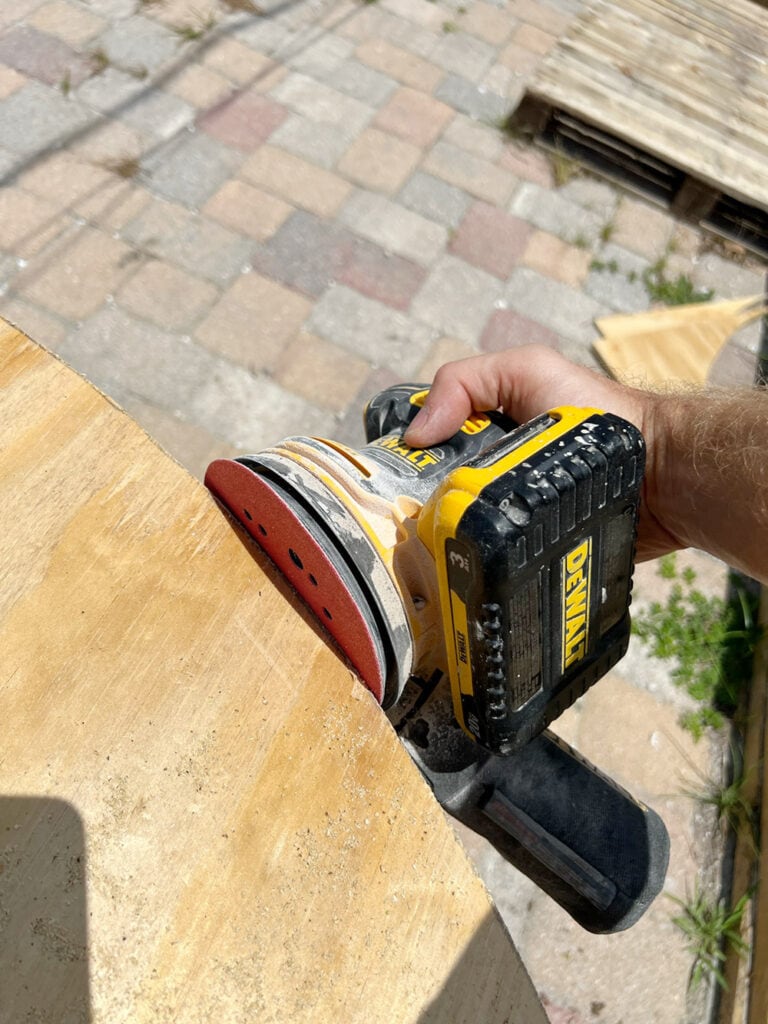
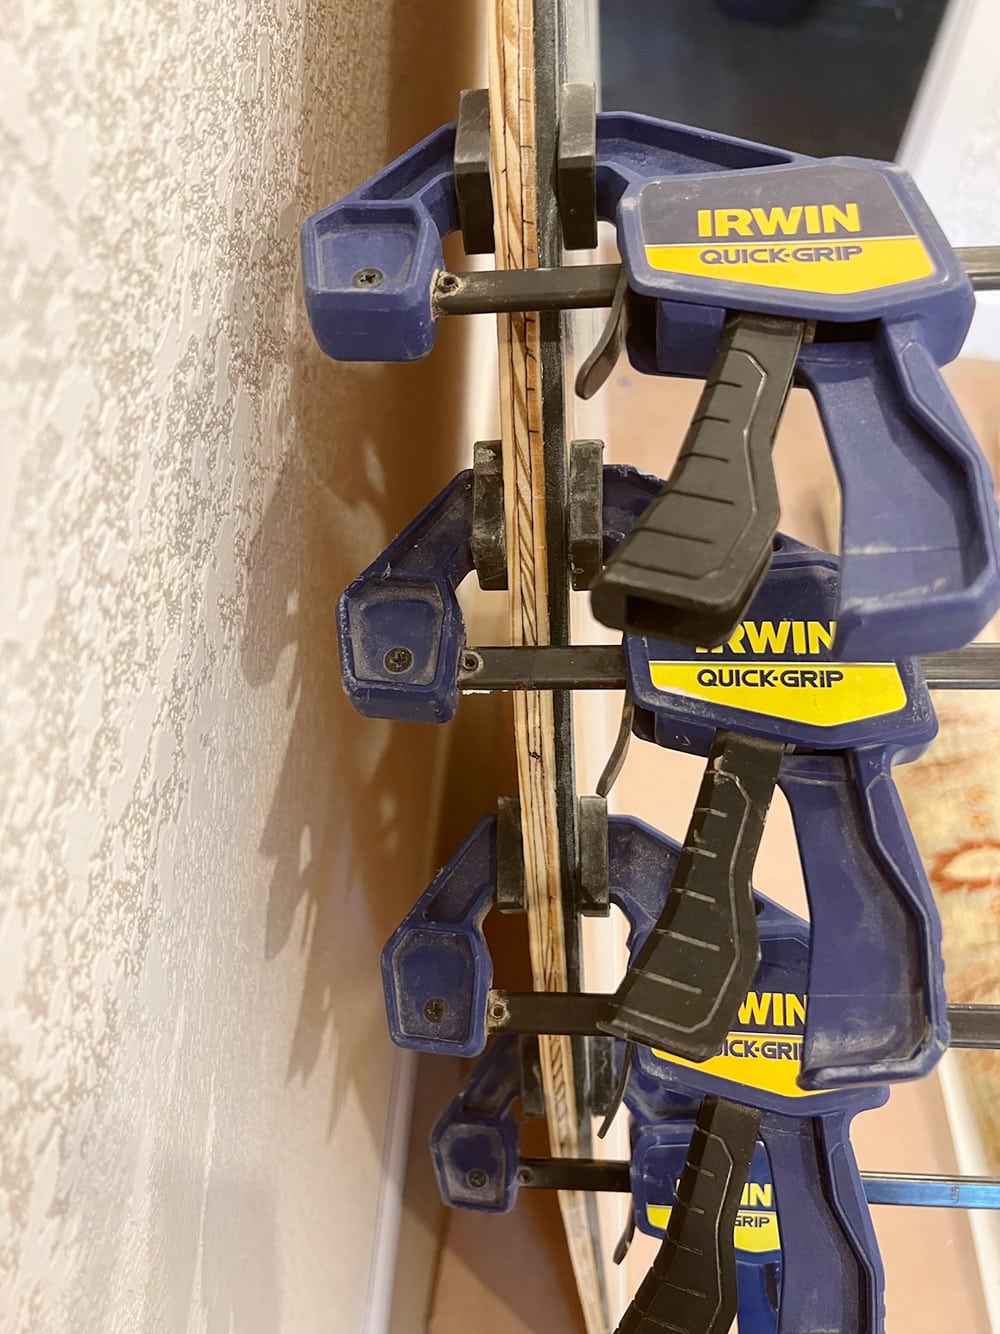
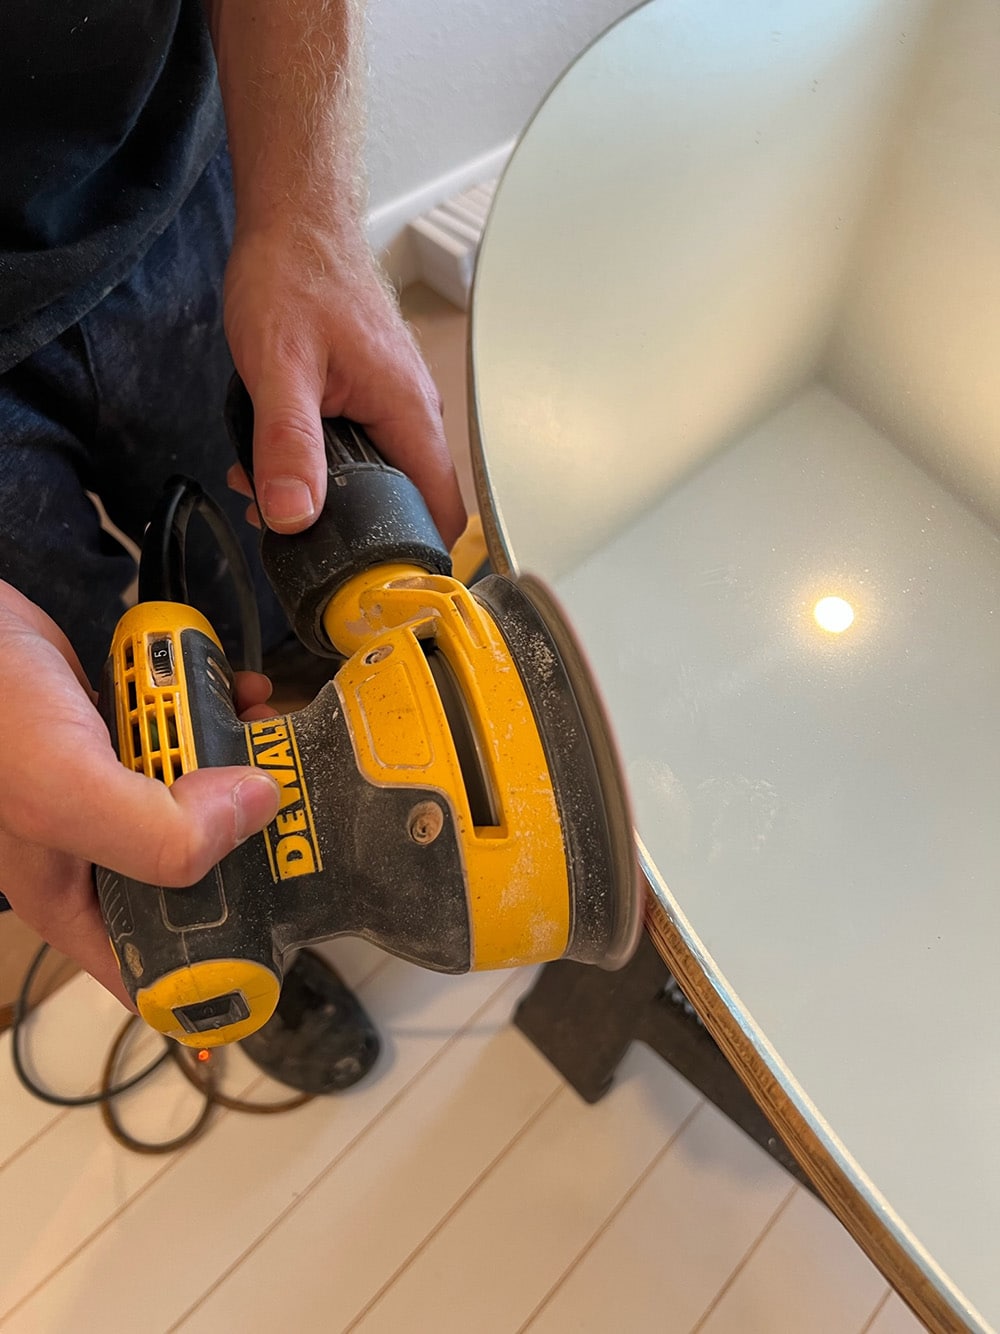
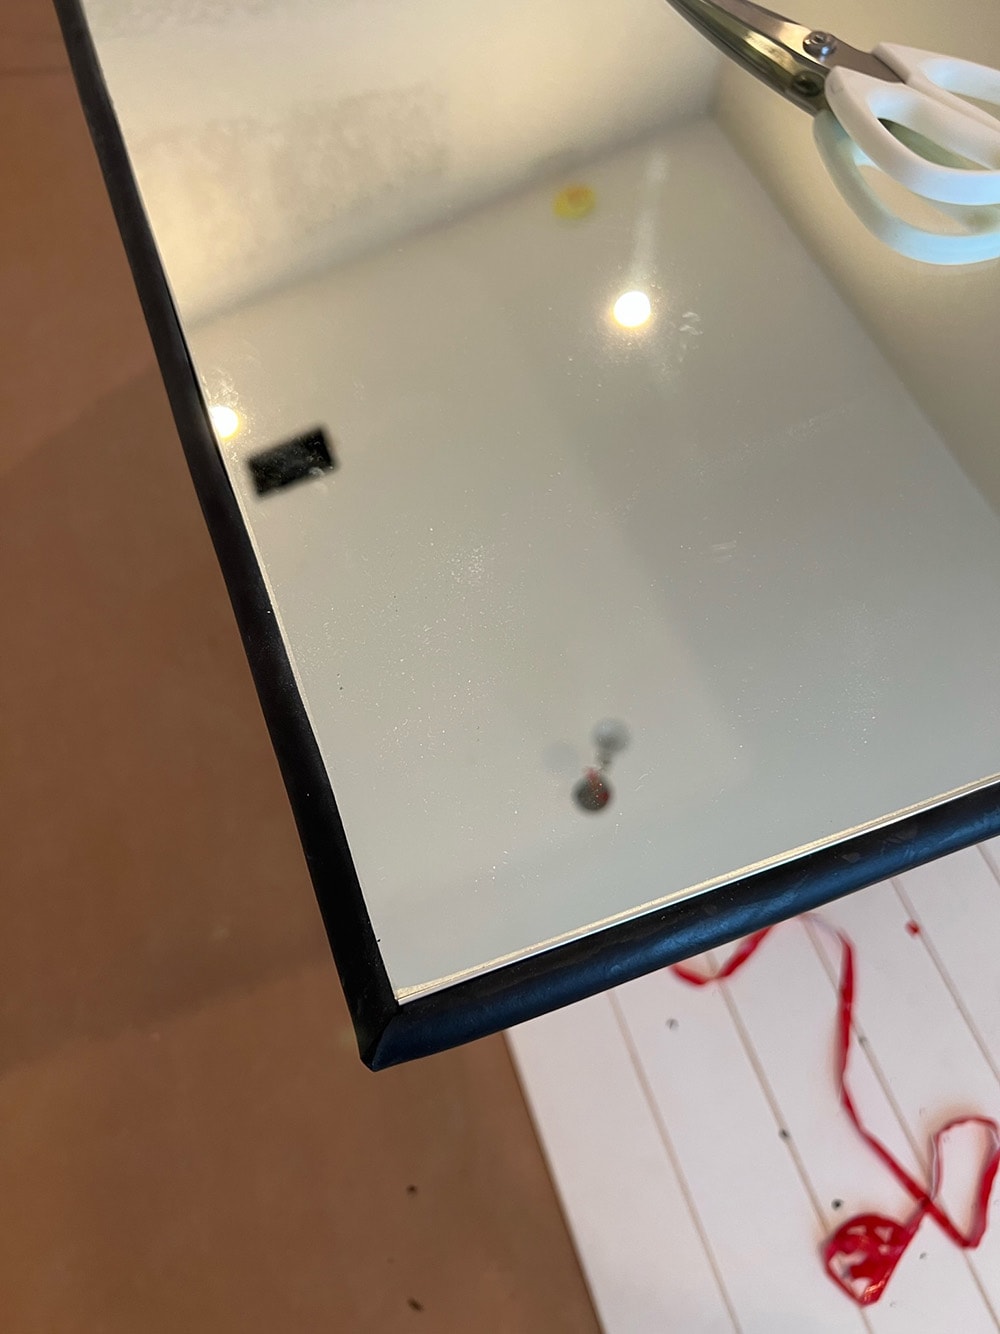
They did a decent job, except the edges didn’t line up all the way around, and there were some gaps. We fixed the gaps by applying superglue and clamping the pieces together overnight.
For the uneven edges, we sanded down the plywood with 60 grit on our orbital sander. It didn’t take long at all to get everything nice and flush.
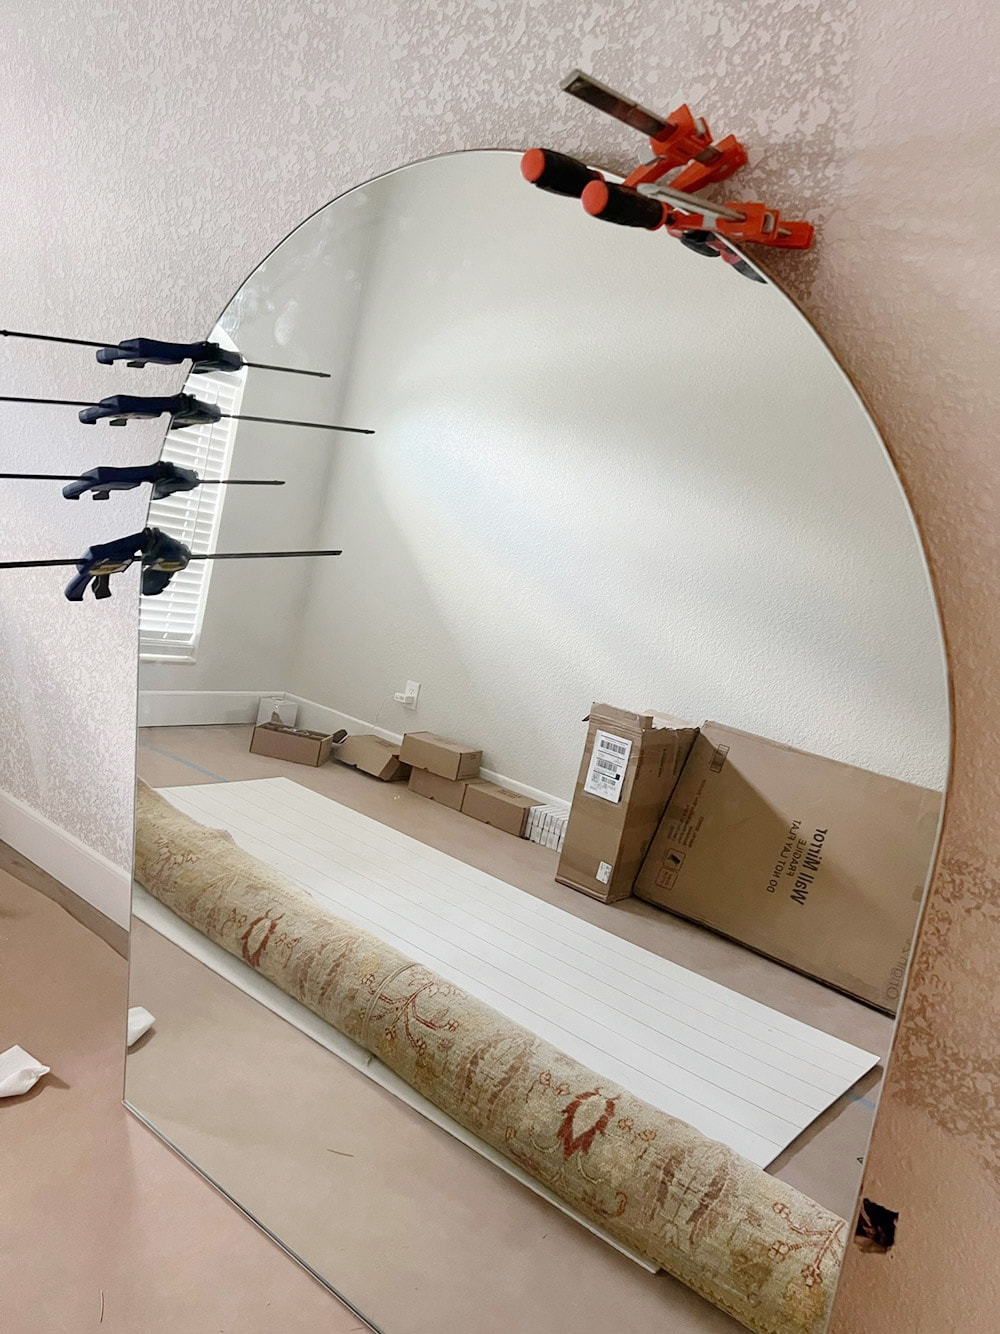
Step 3: Attach the edge trim
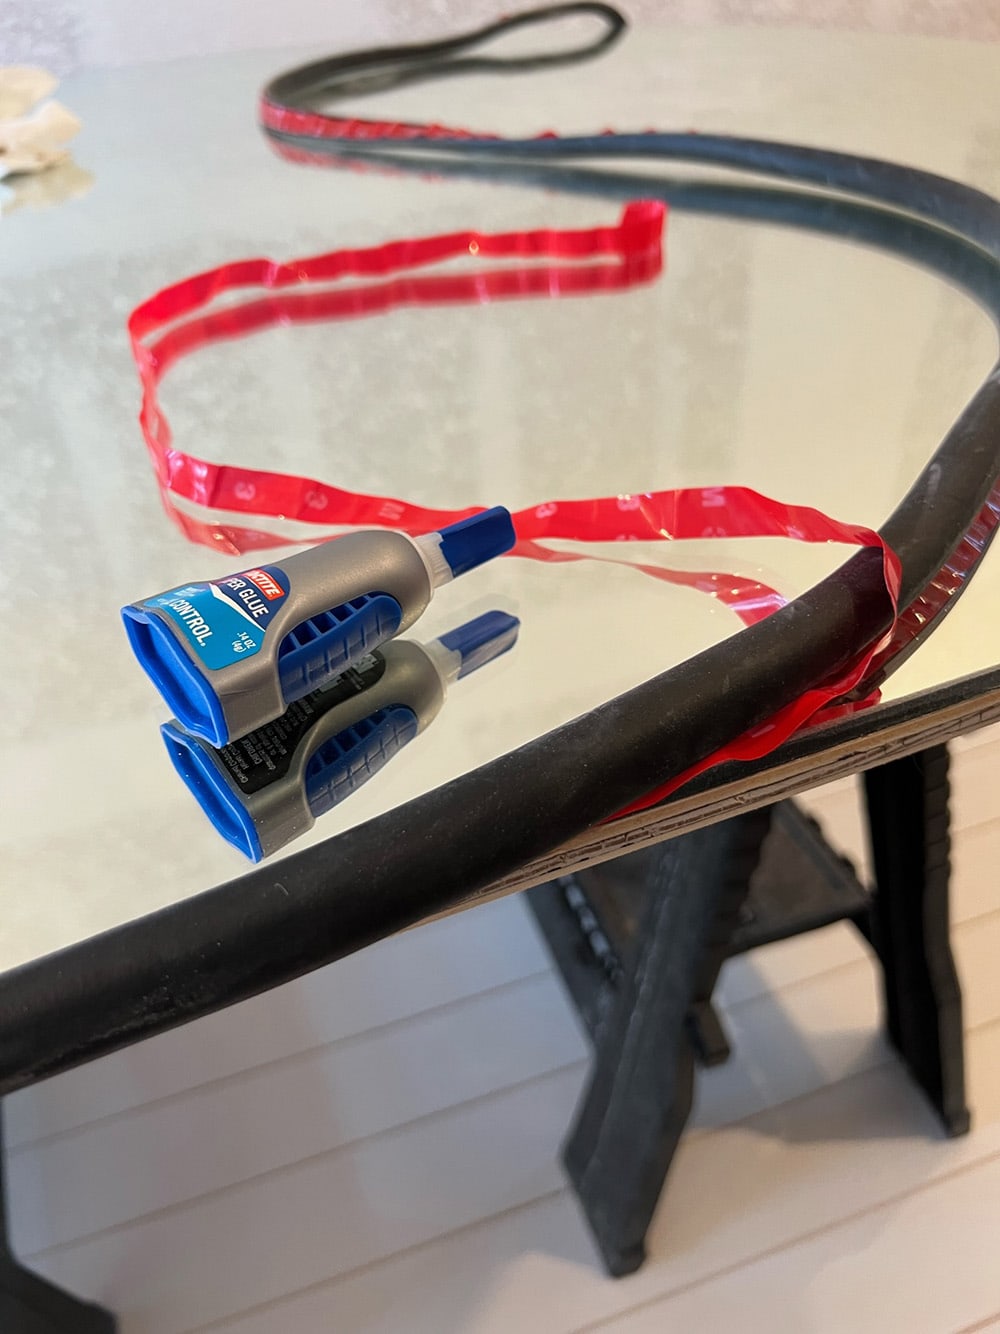
Here’s where I had to get creative. It proved very difficult to find flexible molding that was the right size and shape to fit around our mirror. I located some here on Etsy and ended up purchasing it—but then I came across this wheel arch trim on Amazon (automotive trim to the rescue, once again!)
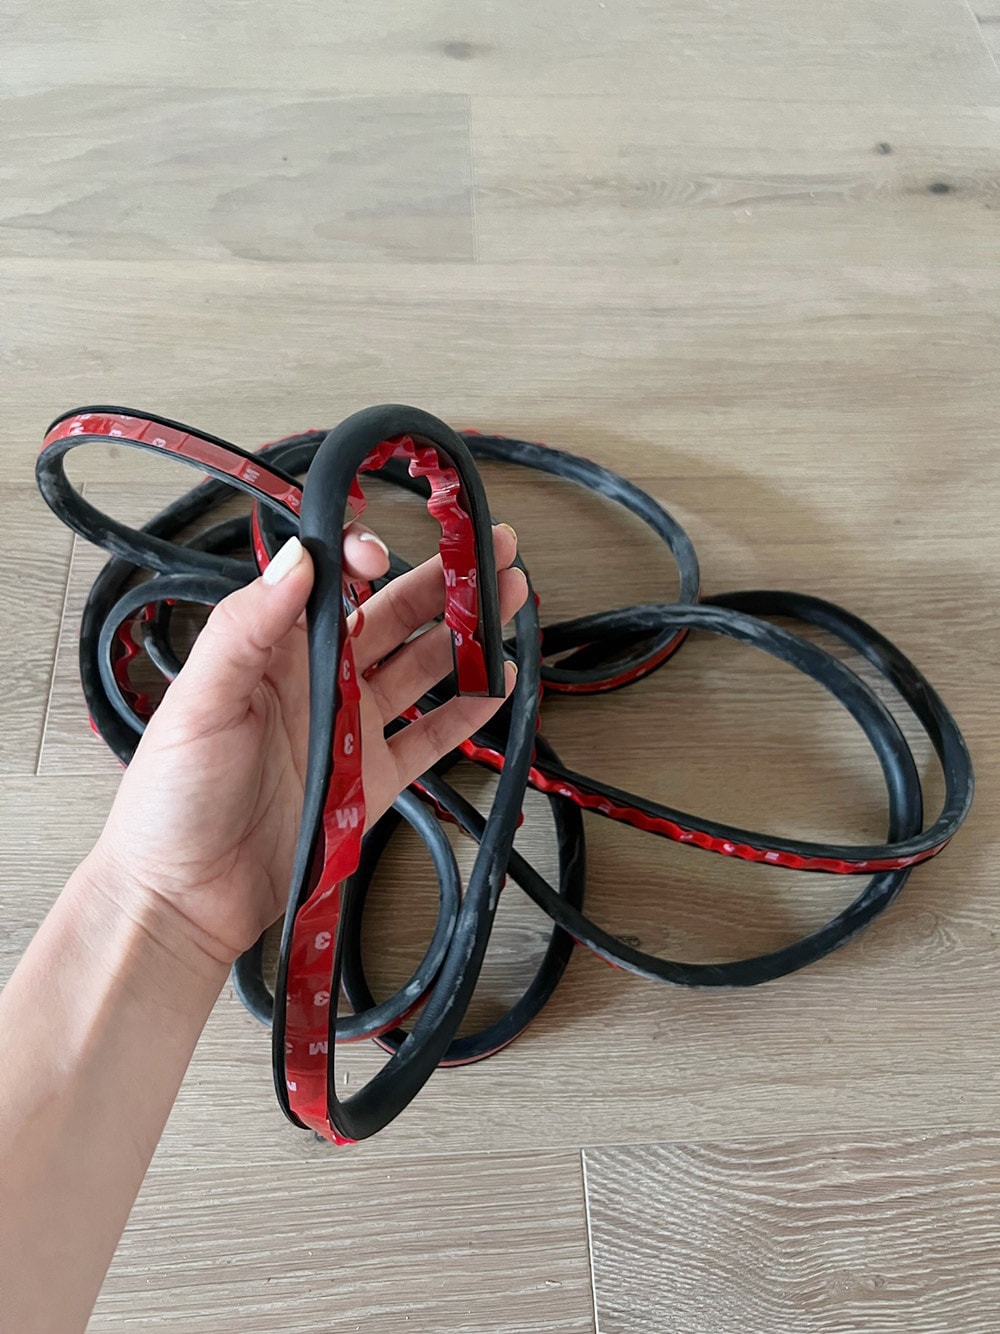
This molding was 1/4th the cost, and already black so I wouldn’t have to paint it. It was just barely wide enough to cover the plywood and mirror, and had a little lip at the top to help cover the front edge of the mirror:
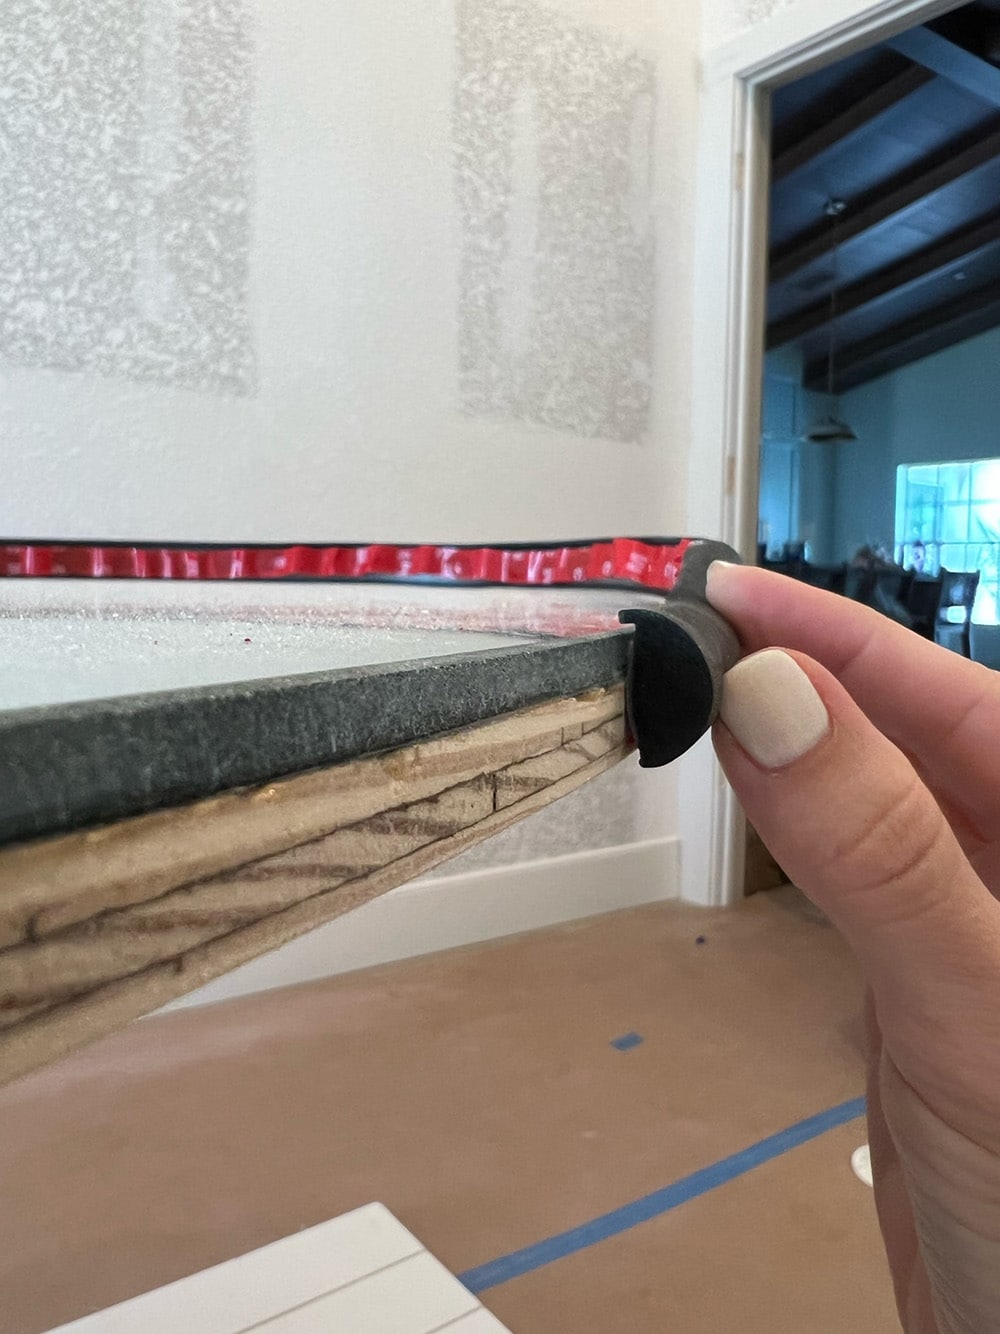
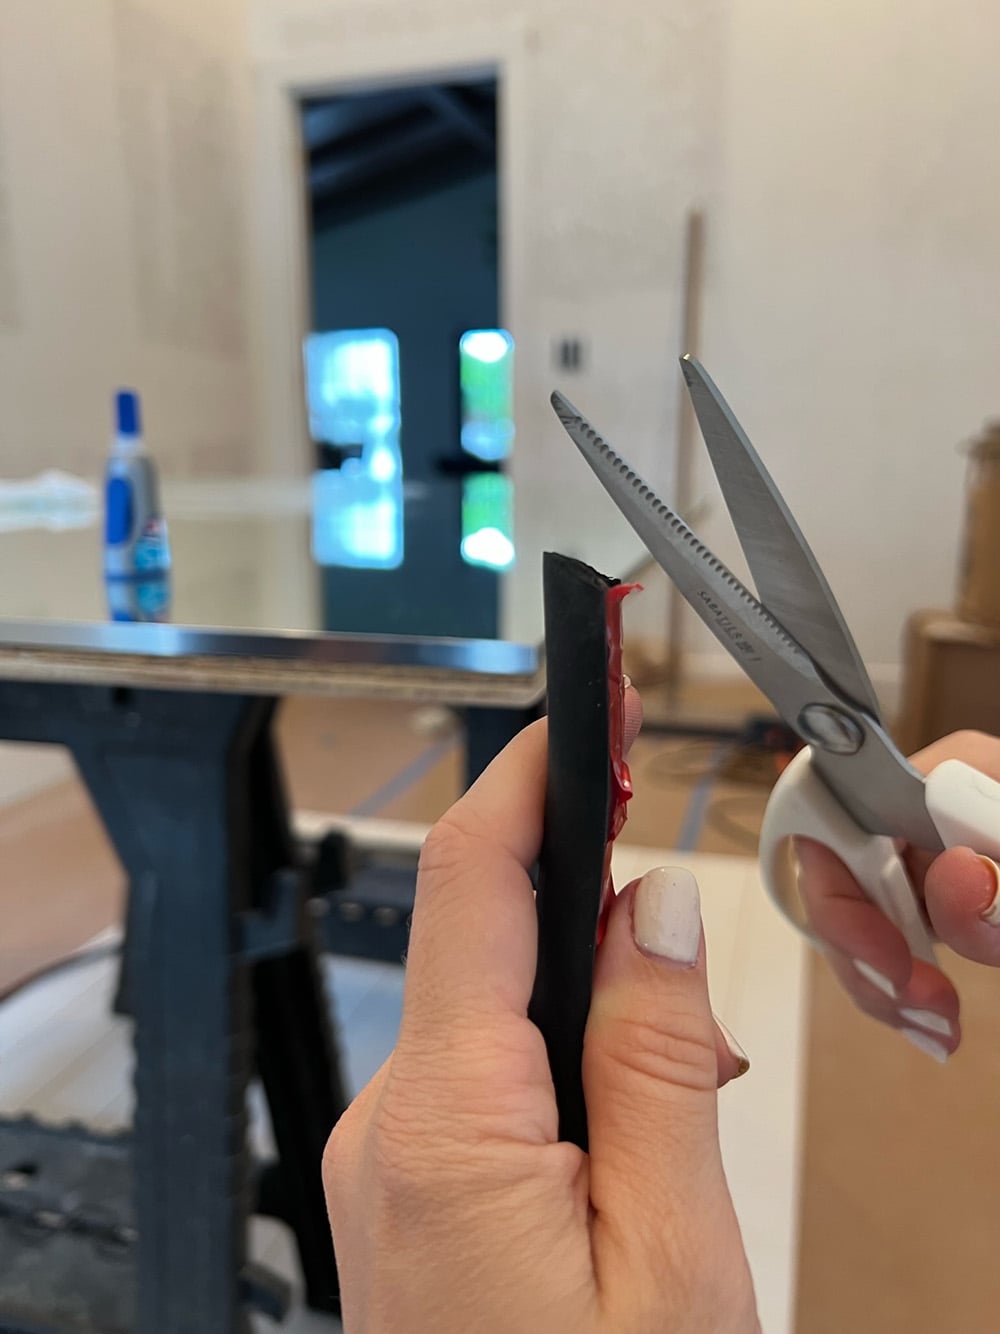
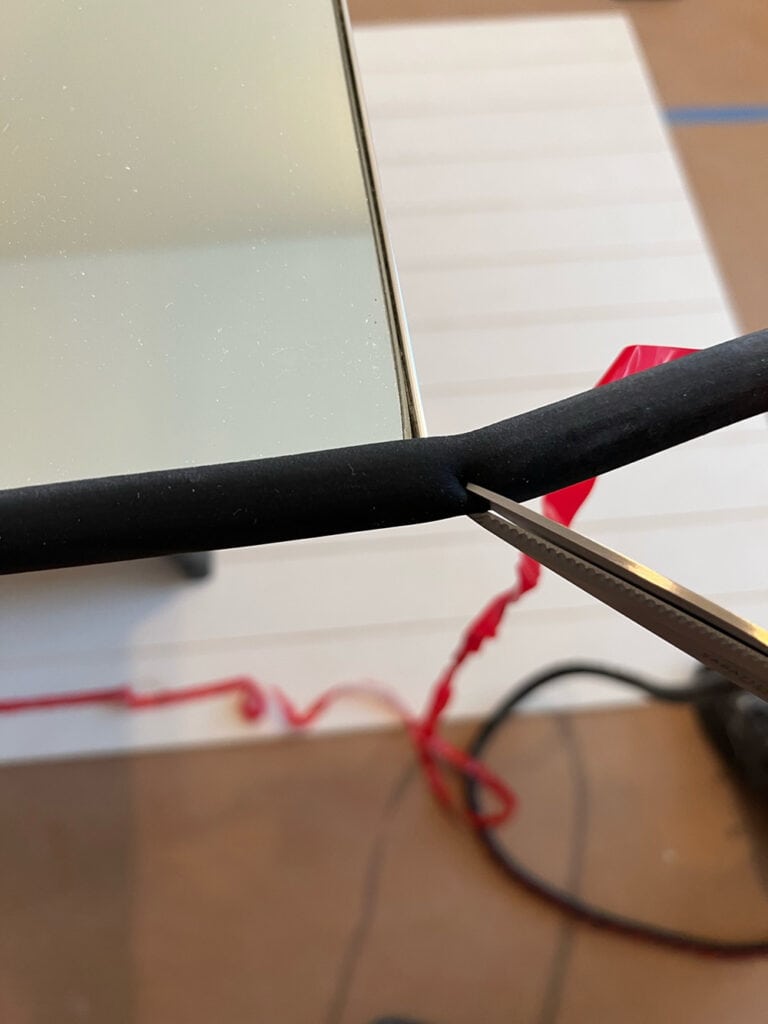
It’s a thick foam-like material so probably not as ideal as something more sturdy, but overall I think it was the best option (and worth a shot at just $20!) Cutting the edges in a miter was the most difficult part—I really just had to eyeball it:
I lined the trim up as best as I could, and slowly worked my way around:
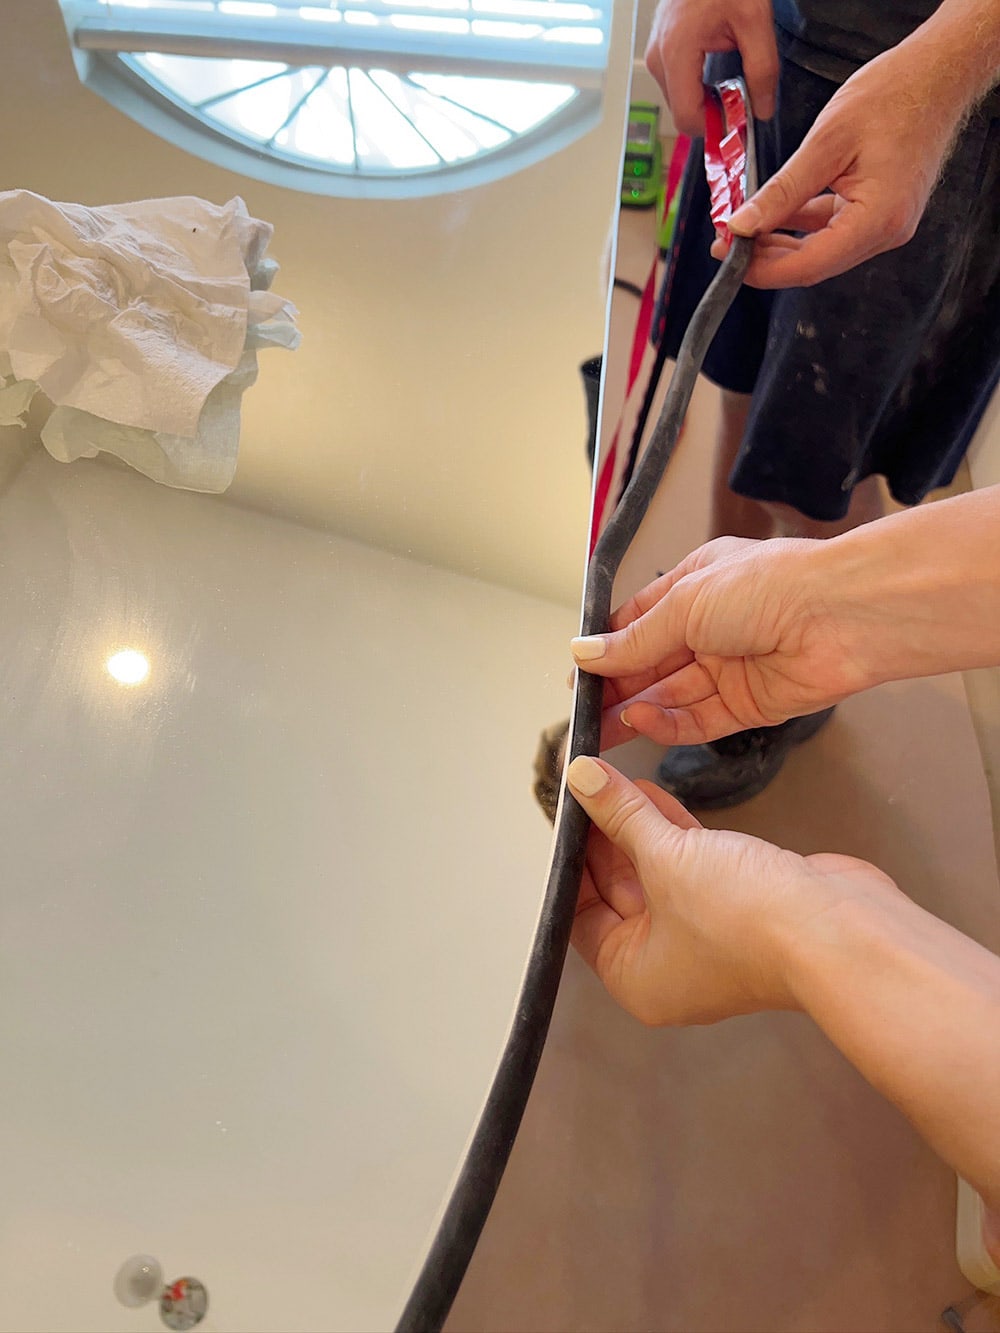
The adhesive strip it came with was sticky enough to attach it but not super strong, so we added a bit of superglue along the mirror edge for extra reinforcement.
Joining the two corners at the bottom was definitely the trickiest part, and it didn’t turn out perfectly.
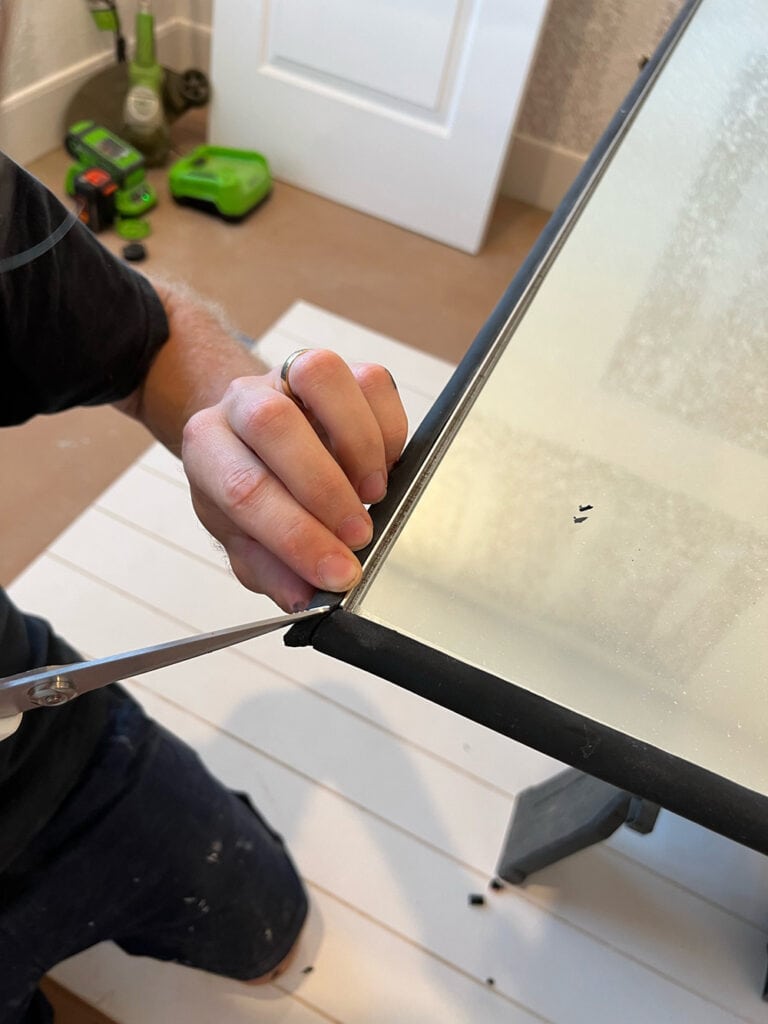
But, it was good enough, and a lot easier/faster than patching and painting.
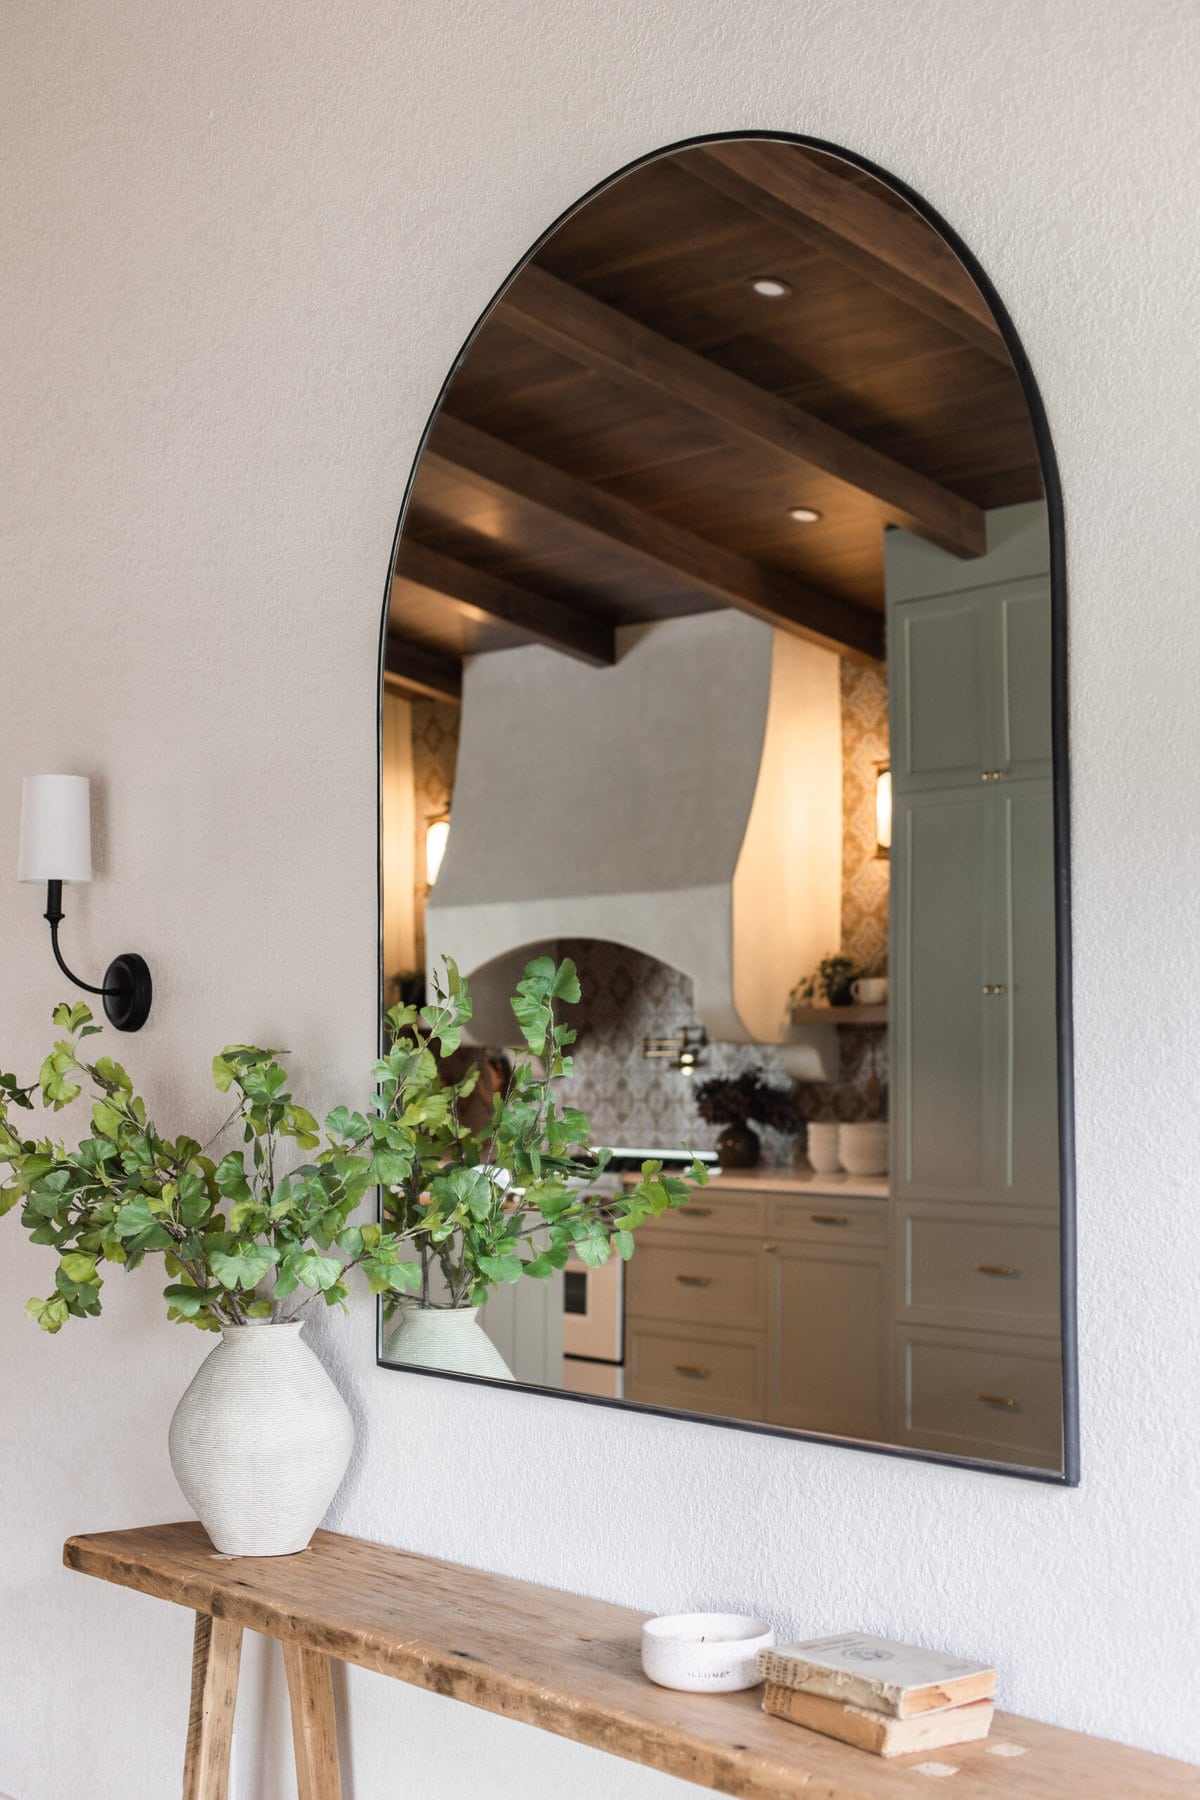
And just like that, our DIY custom mirror was finished!
Step 4: Attach cleat and hang
Since we were hanging the mirror on the wall, I opted for a french cleat—my preferred method to hang heavy/large objects. I found this 30″ cleat on Amazon:
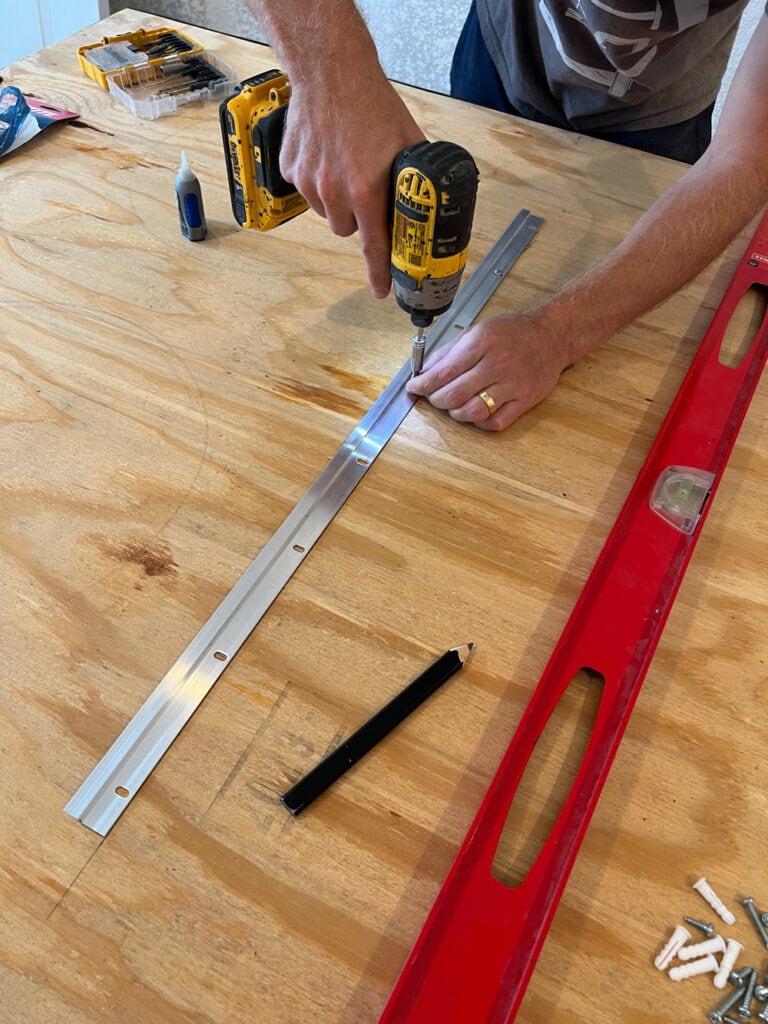
Installation is pretty straight forward—screw one side into the back of the mirror (make sure it’s level first!) then secure the other side to the studs in the wall. We were able to hit two studs.

Reveal
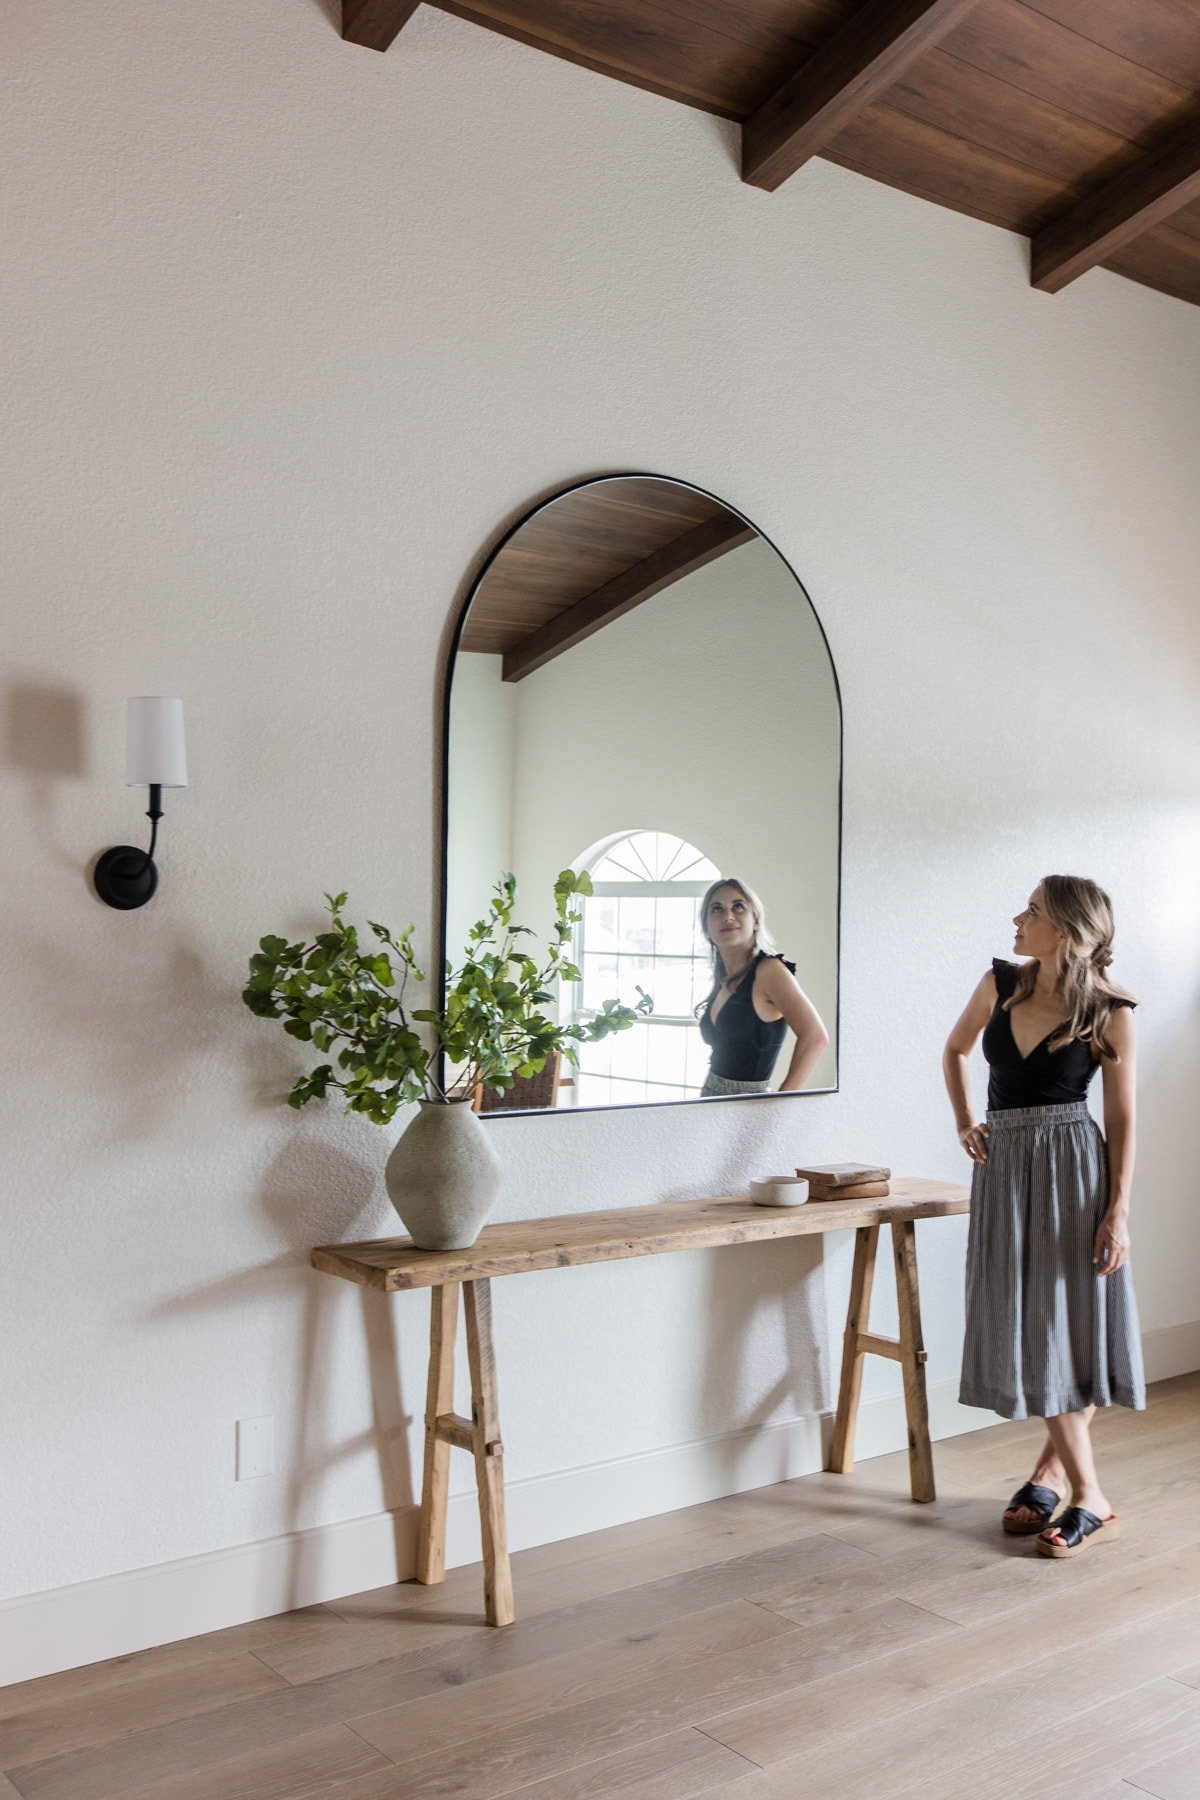
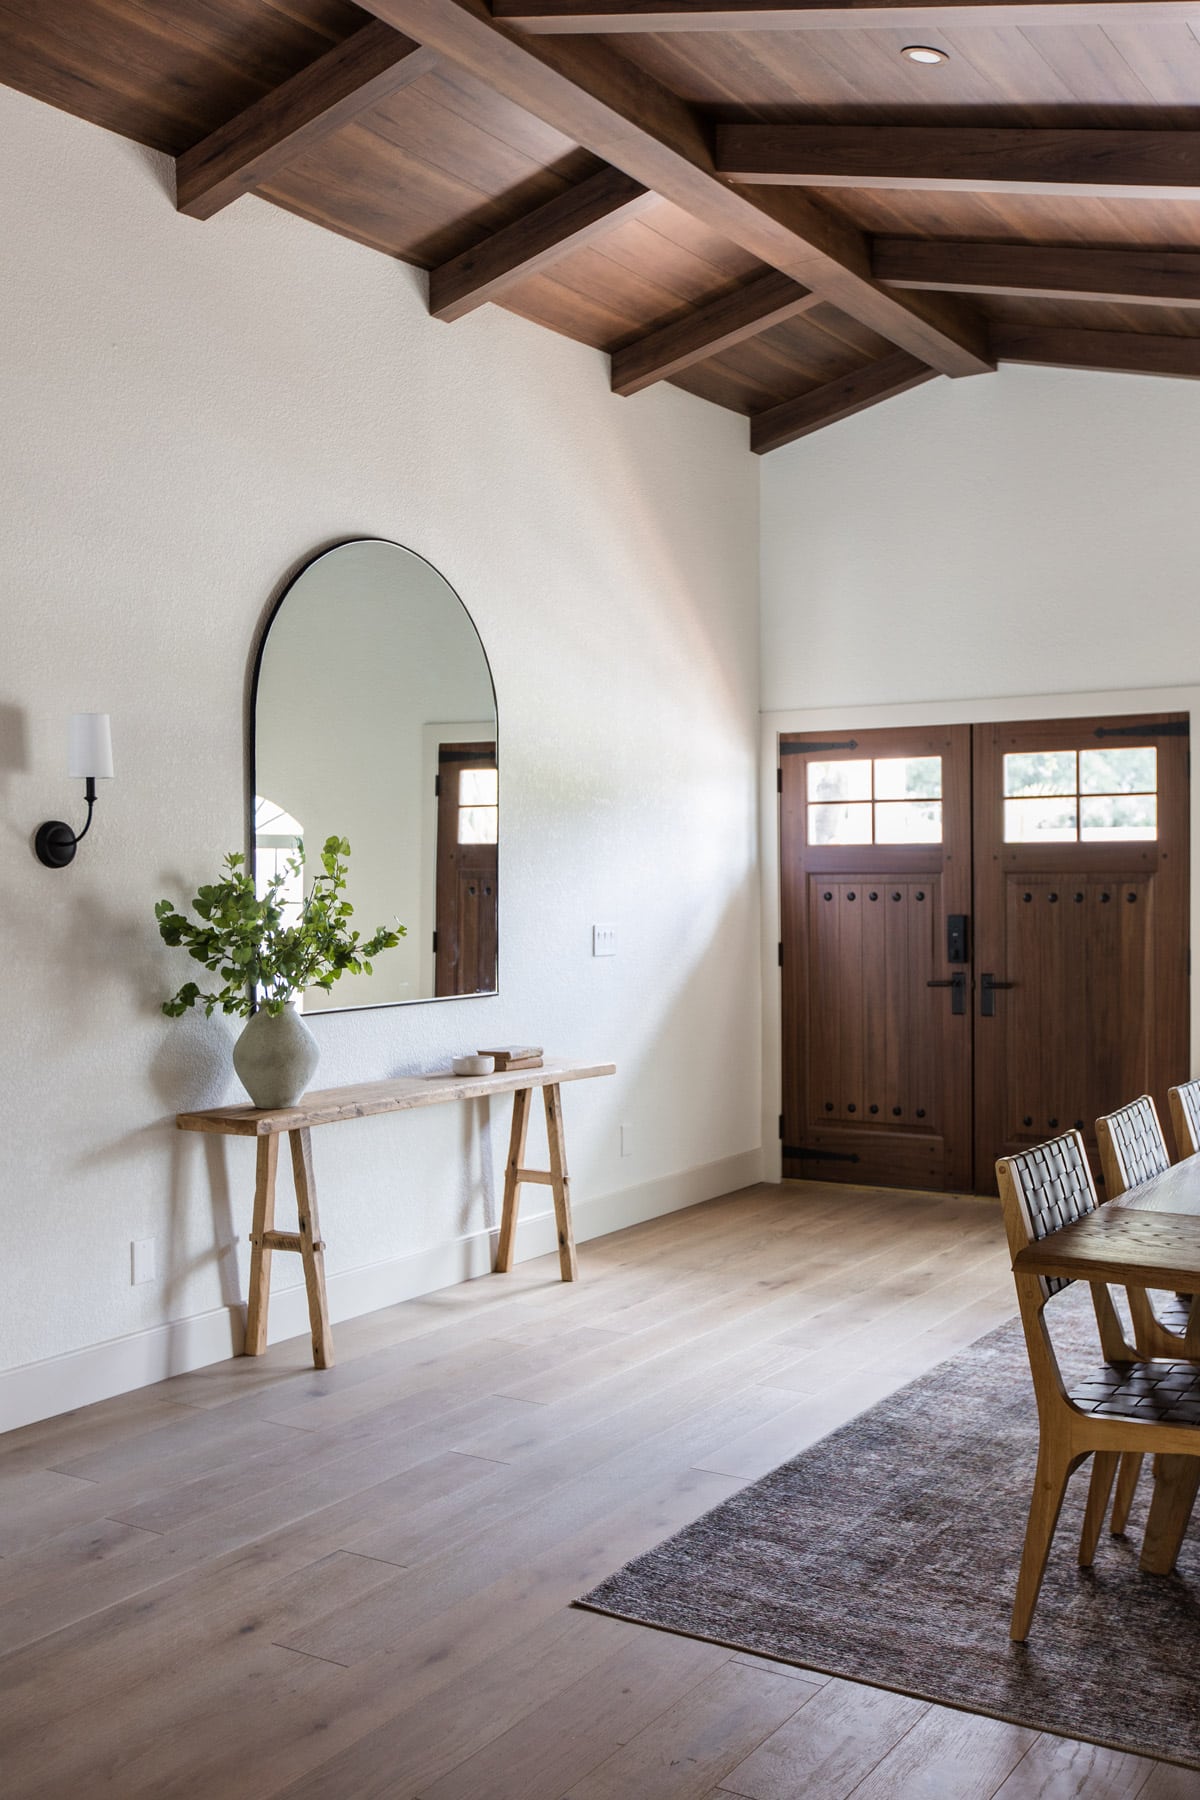
Here’s how the mirror looks in our newly completed foyer!
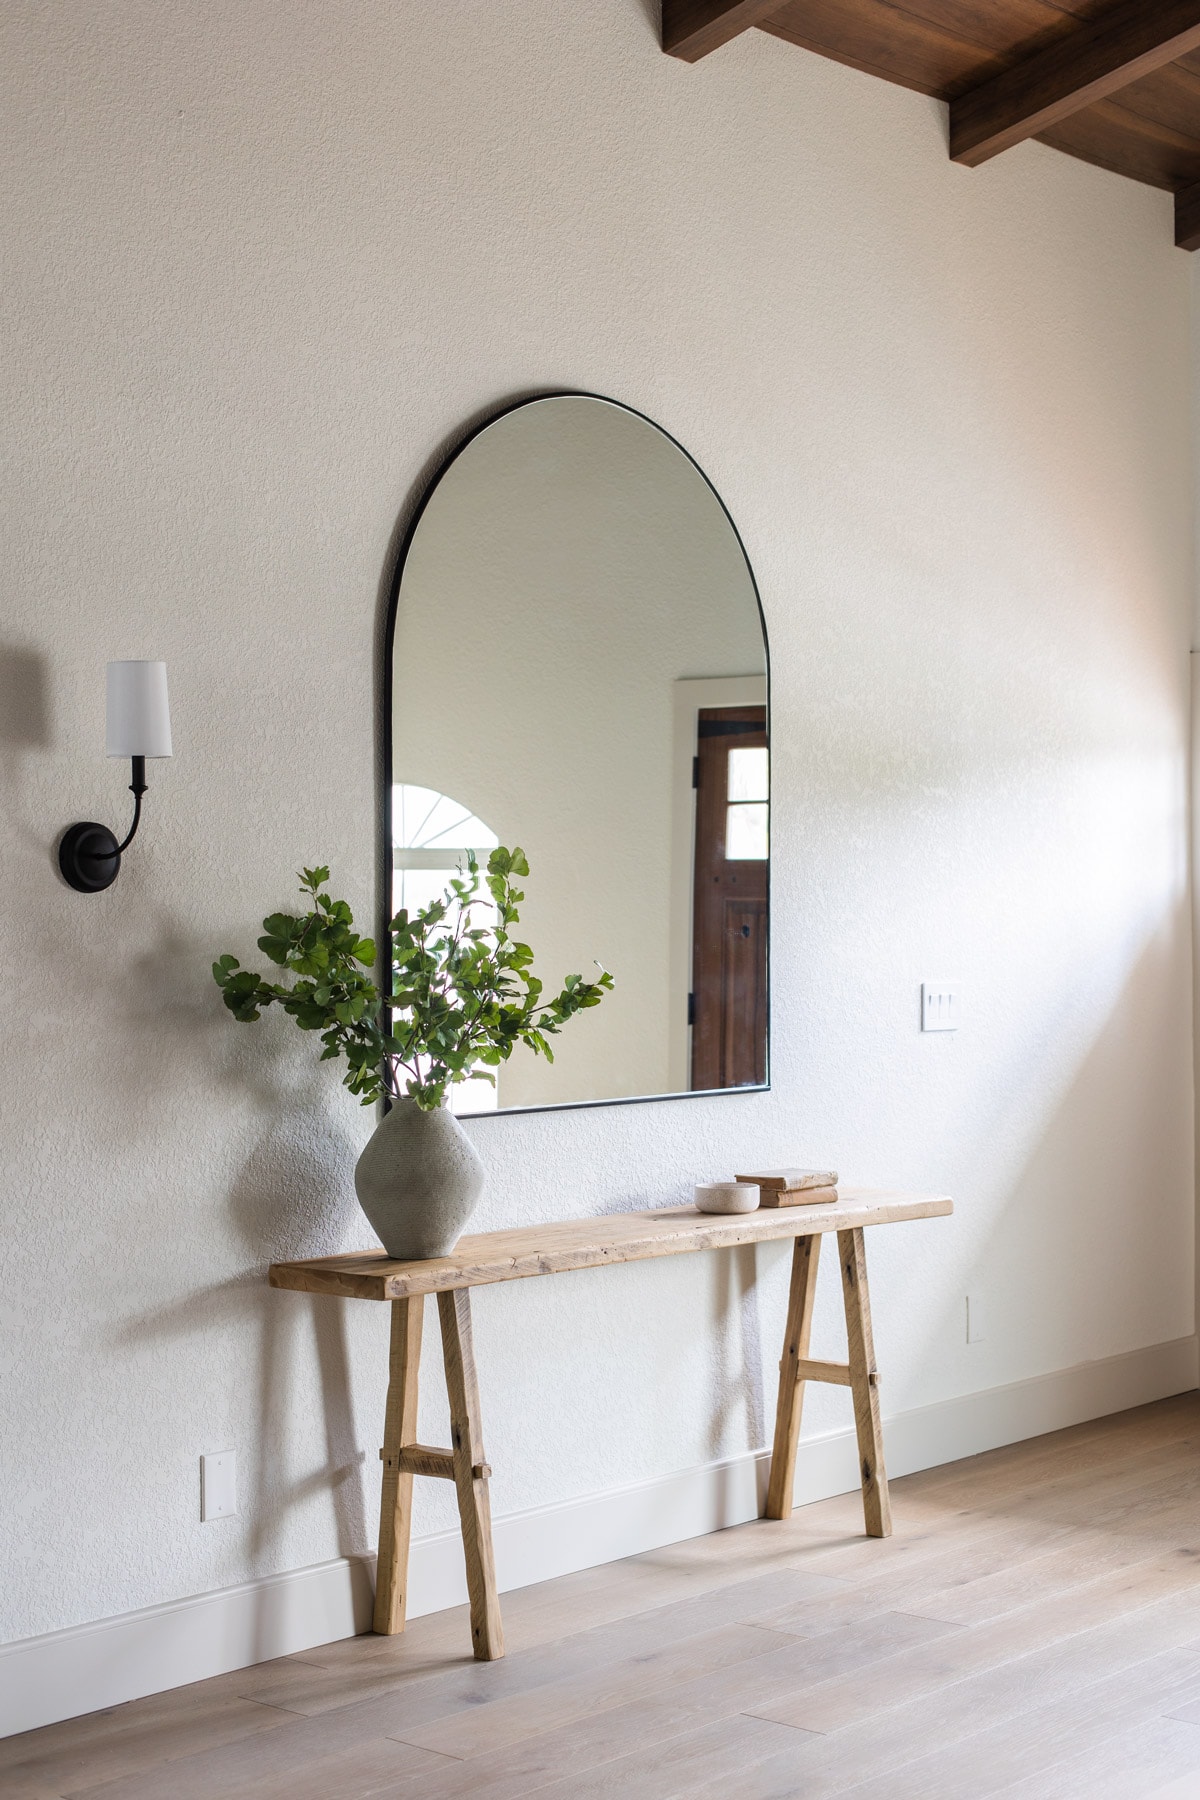
Not bad for around $400—you definitely won’t find a new mirror for sale in this shape/size at that price.
I’m so glad I went the DIY route instead of settling for a mirror that was too small. The larger size makes the space feel more open, and is the perfect way to welcome our guests when they enter the Hacienda.
There are just a few pieces left to finish the dining room, and then I can share the reveal here on the blog!
Next week, we’ve got a long overdue backyard pool update, plus a fall stem roundup. You won’t want to miss these!
As always, make sure you’re following me on Instagram to see video tutorials of all of our DIY projects in my stories! More to come soon,


Janet A says
Wow, I love how you figure how to DIY anything you can’t find. You two are rockstars. Incidentally, You can make your own french cleats for free-ish. I just take a scrap 2-3″ wide board (3/4″ thickness, sometimes 1/2″ is good enough) and rip the 30″ (or whatever length) in half at a 45 degree angle. One half of the cleat goes on the wall, mitered side is the top edge. The high side of the miter in front sloping down towards the wall. The matching/fitting side of the miter gets attached to the mirror and it lifts up onto the cleat on the wall. It’s so hard to explain this without using my hands, lol
Jenna Sue says
Thank you! I have seen cleats made out of wood too so that is definitely a great option as well for anyone looking to save a few extra bucks!
Karen Wallace says
You two are brilliant. This is ingenious. I’m still reeling from the front door makeover, and now you’re blowing up my pre-conceived notions about giant mirrors!
Jenna Sue says
Thanks Karen, so glad you’re enjoying these DIYs!
Gavin says
I have and existing mirror that’s 5′ x 3′ what kind of companies could cut that? Can an existing mirror be reshaped? Thank you
Jenna Sue says
Any custom glass shop should be able to do it for you, including cutting your own mirror! You’ll want to call around to confirm.
Lilah says
Once again, you guys amaze me with your ingenuity!! 💕💕
Jenna Sue says
Thanks Lilah!
Michele M. says
BRAVO!~!! You’ve done it again! Genius. And, Jenna Sue, your reflection is just lovely in that awesome new mirror. Hope your growing family is doing well.
Jenna Sue says
Aw thanks Michelle! ♡
Annie Brink says
This seems very do-able! Thanks so much for sharing your vision and all the details!
Jenna Sue says
It really is! The glass shop does all the hard work 😀
Suzy Charto says
brilliant – I enjoyed your creativity.
Jenna Sue says
Thanks Suzy!
Barb says
I’m in awe of everything you tackle and everything’s a winner! Unrelated to today’s post, can you tell me where you got the rug in your own living room? My daughter has been looking for one with those colors.
Jenna Sue says
Thank you Barb! Here’s the link to our rug: https://amzn.to/2oe7HZn
Barb says
Thank you!!
Karen says
Beautiful. Great job.