Well hello there & Happy New Year! We’re kicking off 2015 with a renovation that I am so excited about, because 1) it solves a major problem with our house, and 2) this might be the biggest before & after transformation ever.
In my 2014 recap post I spilled the beans that we’re doing a laundry room renovation. But it’s not just a renovation, we’re creating a new room from scratch!
Here’s what we’re working with now—I had to break out the wide angle lens for this space—it’s so tiny!

It’s not even a room—just a 60″ long pass through between the garage door and the hall door.
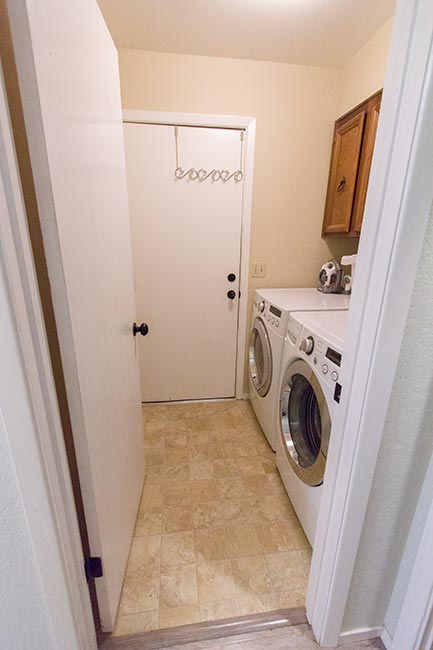
The layout is horrible. The washer and dryer aren’t configured properly, they stick out too far, and you can’t open more than one door without it hitting something else, let alone try to fit a laundry basket in there!
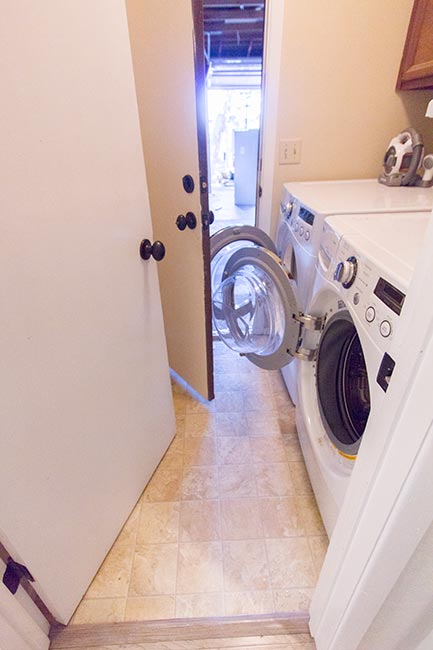
Don’t be fooled by the lens—I can easily reach my arms out and touch both doors. We tried to think of every way possible to widen the room but there’s a bathroom on either side and no way to knock out the walls. It was hopeless.
Then last month in a stroke of genius, Brad suggested we convert our empty room downstairs to a laundry room. Best idea ever!
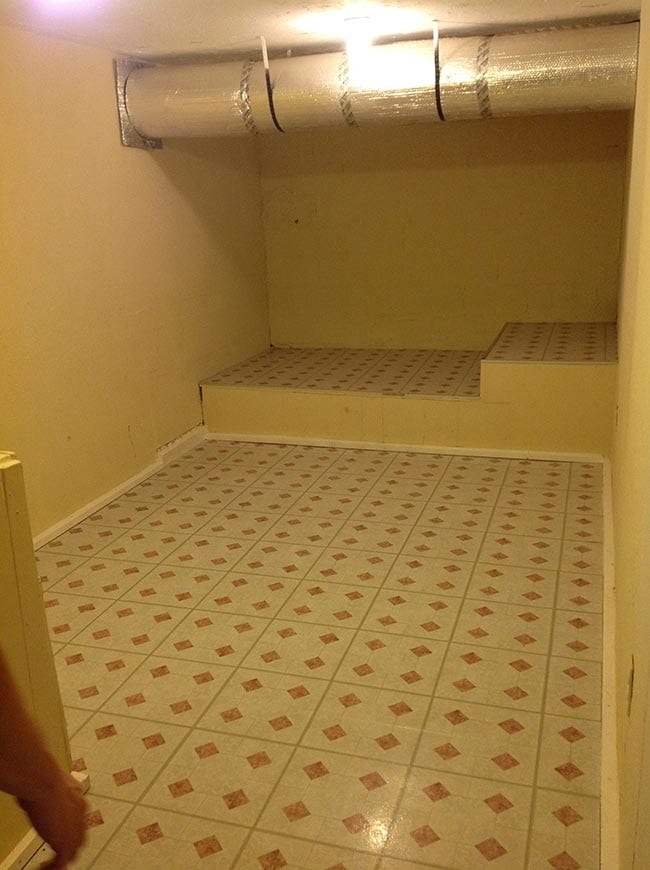
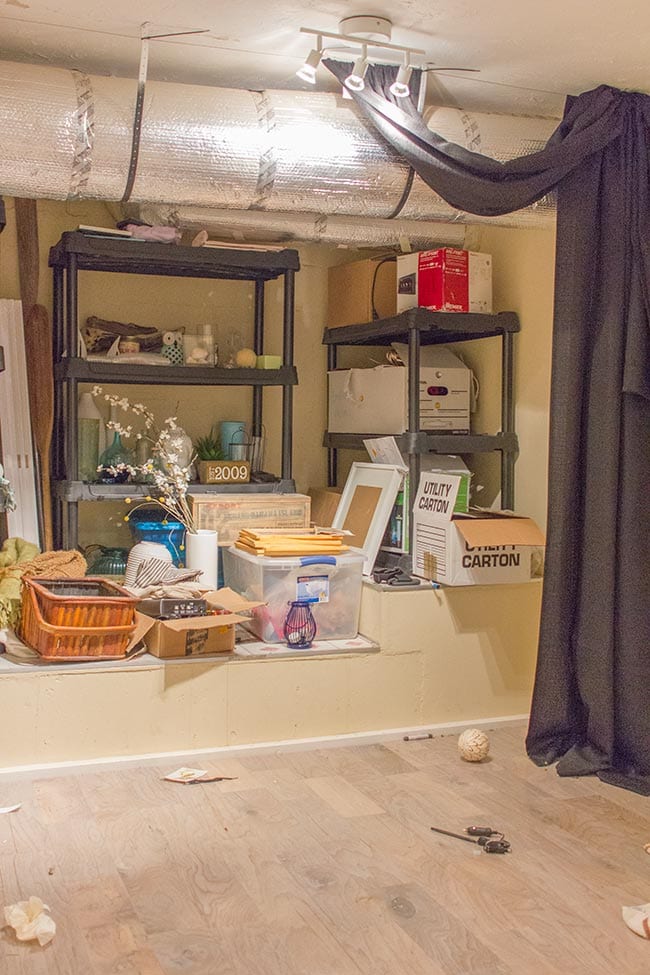
Now, this “room” hardly qualifies as a room. It’s a small and narrow dungeon-like space with 7′ tall ceilings, no windows/ventilation, and exposed HVAC pipes. It’s a small prison cell, basically.
Here’s how it looked when we moved in:
Brad decided to use the main area as a makeshift office and I filled the back with storage. Excuse the mess, this was right as we were cleaning it out.
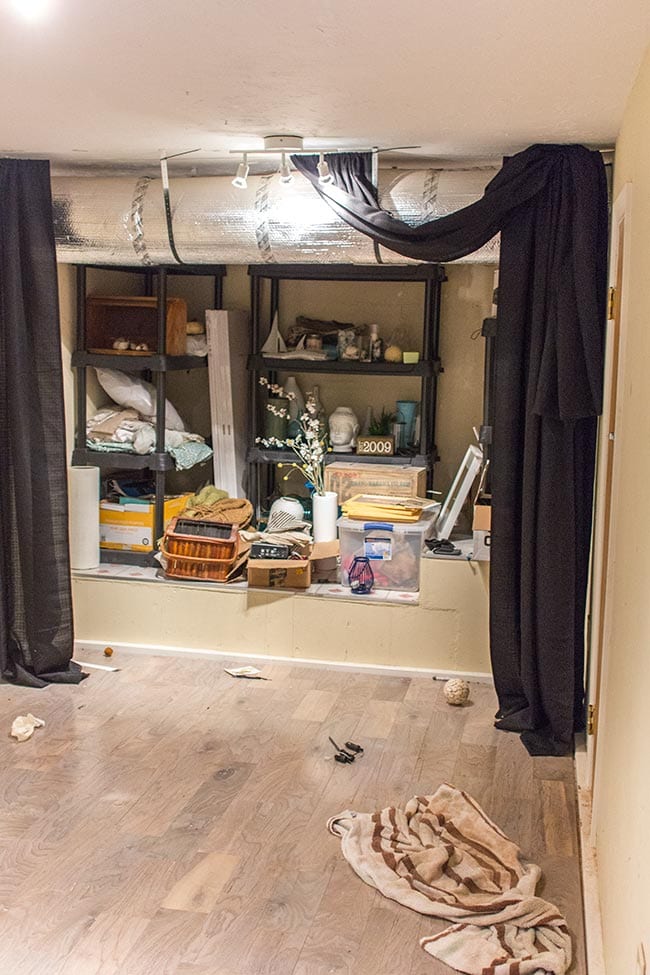
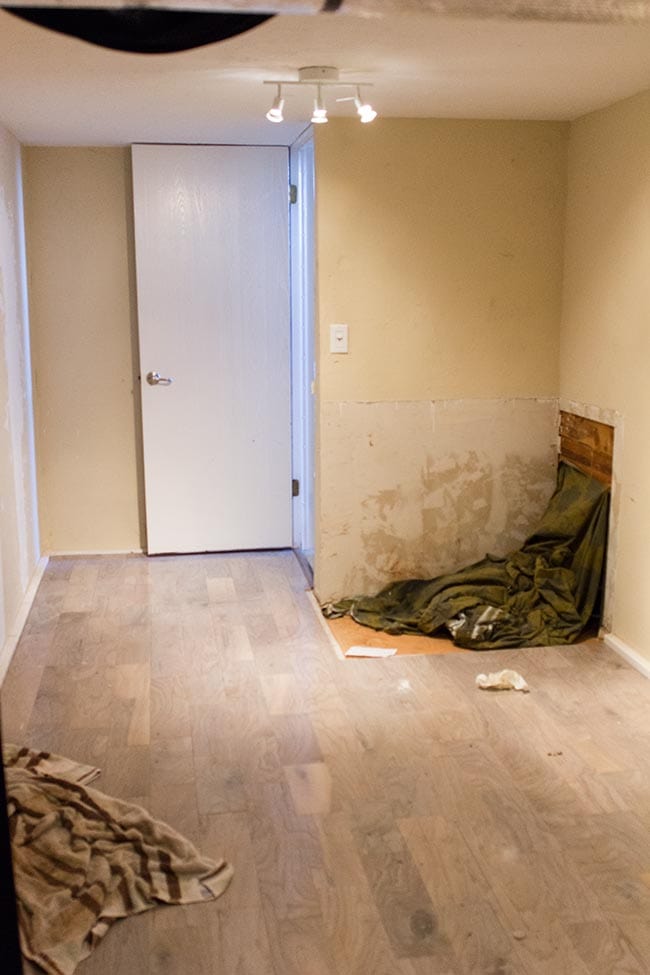
Looking towards the entrance:
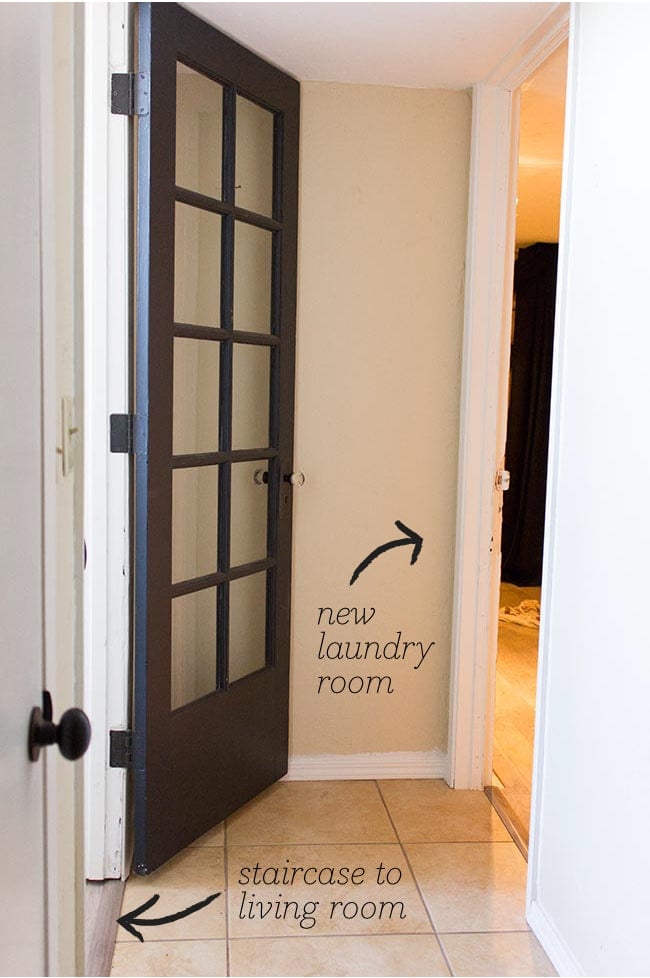
Just to give you an idea of where this is in the house, it’s just off the living room downstairs. Here’s the view of the entrance from the staircase (the living room is on a half level):

And here it is from the downstairs hallway:
Ready to see the plan?
Here’s our to-do list:
1. Rip out the ceiling We can’t raise the height, but by keeping the joists exposed we’ll gain an extra 8″ visually. I’ll have it painted a soft gray and go with a rustic-industrial-chic look.
2. Rip out the floors, insulate & tile Because we’re eliminating our ceiling insulation, we need to insulate underneath the floor which requires ripping it all out and starting from scratch. I plan to use a light colored wood-like tile all the way through.
3. Rip out the back platforms We’re working with a handyman on the demo who says he can dig out the ground and make the floor all one level.
4. Build a wall and add a storage room in the back Once the floor is level, A wall will go up and I’ll add Ikea wardrobes across the back wall along with other storage solutions to keep all of our home decor organized and easily accessible.
5. Recess the washer and dryer Behind the back wall of this room is a small open area underneath the house. Our handyman will dig out & create a platform, build a box for the washer/dryer and recess it so it’s flush with the wall and doesn’t take up any space inside the room. I also want to create built in drawers below the washer/dryer for extra storage.
6. Skim coat the walls There’s currently a mess of mismatched & poorly patched wall texture. We thought about covering it all with headboard then decided to keep it simple and skim coat it instead so it’s smooth drywall.
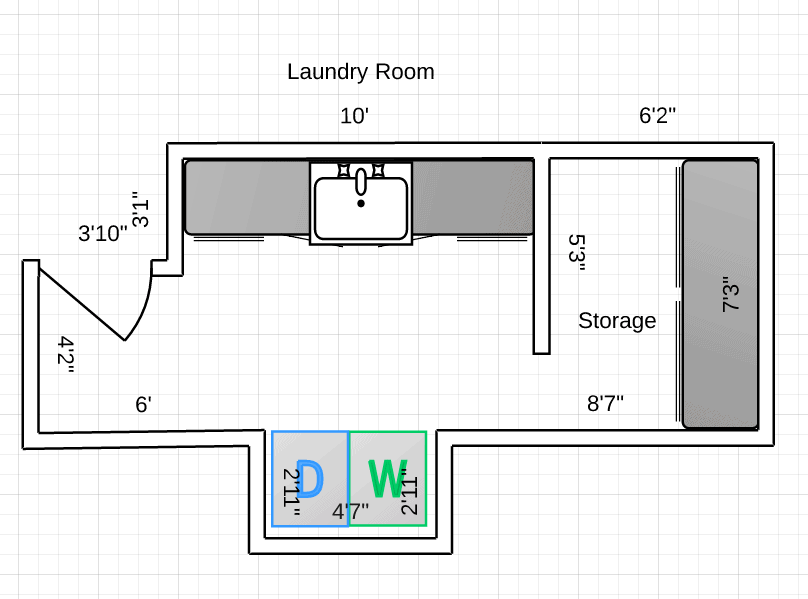
7. Add cabinetry & a sink along the back wall Here’s the general layout:
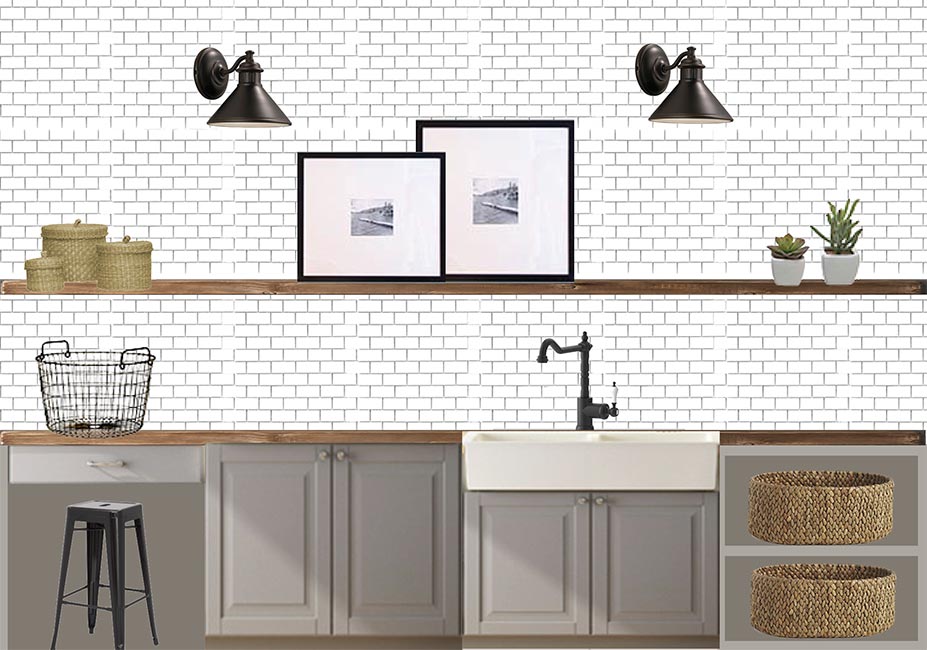
I used Ikea cabinets as an example, but what I want is fairly custom so I’m going to get a quote from Lowe’s to see if it’s a better option. I do know I’ll be using the ikea farmhouse sink and faucet, light gray cabinets, butcher block countertops, white subway tile, a reclaimed wood floating shelf and wall lamps.
8. Lighting There will be four wall lamps (shown in the photo above)—two on each main wall. We’ll also have two f
ixtures in the center of the room on the ceiling with spotlights to illuminate different areas. Since the ceiling is completely exposed, lighting is tricky and we need to keep it clean and simple to minimize the wires (we normally do recessed which isn’t possible here).
ixtures in the center of the room on the ceiling with spotlights to illuminate different areas. Since the ceiling is completely exposed, lighting is tricky and we need to keep it clean and simple to minimize the wires (we normally do recessed which isn’t possible here).
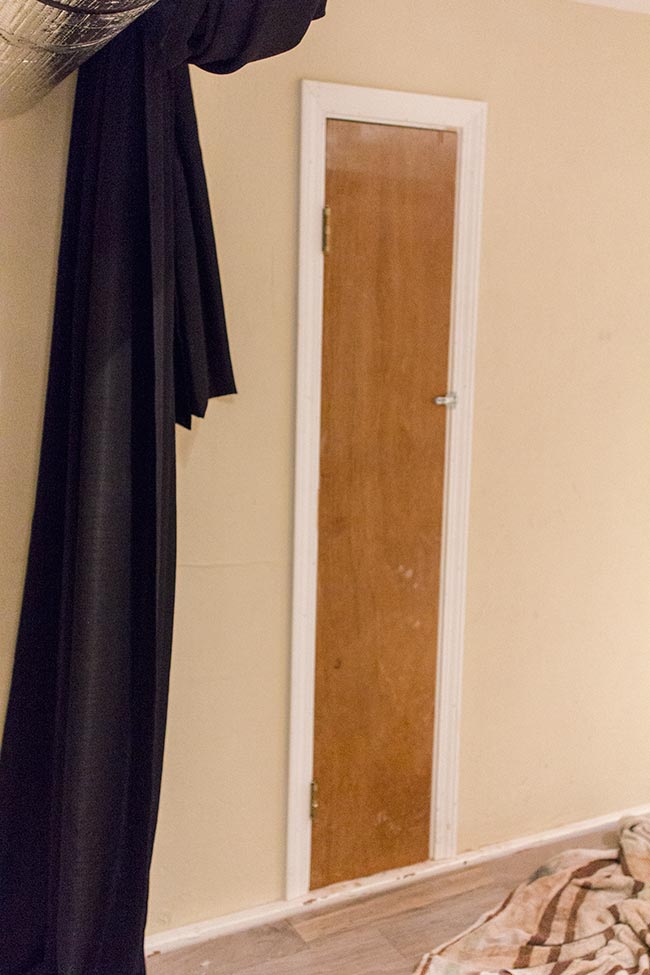
9. New doors We’re reframing the main entry door and I have something fun for that in mind. I’ll also be building a sliding barn door to separate the storage room, and we’re eliminating this useless sliver of wood and adding a pocket door (this leads to more empty space under the house for storage):
10. Hooks & storage solutions I’ll add hooks for hangers/clothes drying, as well as a spot to hang an ironing board and possibly an interchangeable gallery wall. Still working out the details!
It’s easy to break this down into 10 steps but of course there will be a ton of work involved behind the scenes—demo, electrical for ceiling lights, appliances & wall lamps, new plumbing for the sink and washer/dryer, rebuilding a floor, putting up a wall & doors, drywall, tile, paint, etc etc! It’s basically a small scale kitchen reno.
And then we have the old laundry room—that will be converted into desk/workspace nook for Brad with cabinets for storage. But I’m not even thinking about that until this laundry room is finished! We have our subcontractors lined up, and the project timeline will depend on when our handyman can start (we’re waiting to hear back). I would say a couple months as a rough estimate but hopefully sooner.
I also have big changes in the works for my website and this blog that will keep me occupied for a while so it’s going to be quite busy around here—can’t wait to share those!
Hopefully by next week I’ll have lots of demo to show you. We’ve been planning for weeks and are anxious to get this ball rolling. Here’s to starting the new year off right!


Jenna Sue says
Thank you! I used Photoshop.
Anonymous says
I love your plan! Also wondering about the program used in the drawing/depiction. Thanks!!
emily says
Just found your blog! Love your plan and your drawing.
Anonymous says
You have lovely ideas! I really admire how you pursue all your renewals – that is a remarkable quality.
No venitilation and no window? What will you do about the moisture? With drywall it dosent seem to be as bad as with stone or brick walls. With your beautiful and generous outsides you probably dont have to air dry delicates in the house, but i always loved the “luxury” of having them in the same room as the washing maschine – and being able to just close the door rather than having them in the living room or so.
Is that an outside wall behind the washer? How cold does it feel in winter? Might be a spot to collect moisture and cause mould.
Anonymous says
I'm sure it will turn out to be an amazing room. Just curious about what program you used to show the layout drawing. Thanks.
Holly says
wow will definitely be back to see the result! x
MyKEA Love says
I just wanted you to know that http://www.semihandmadedoors.com makes IKEA doors & drawer fronts, as well as an extensive variety of sizes of floating shelves. They are currently offering a 10% off discount on all IKEA Sektion door/drawer front orders until February 1, 2015. (FYI: Use IKEA's United Kingdom website to see their Metod cabinet line which will be very similar to their new U.S. Sektion cabinet modular system) And Semihandmade also offers a simple paint grade shaker door that would look classic with your beautiful design plan. They can also use http://www.stikwood.com reclaimed wood panels to create unique doors/drawer fronts which they utilized in their barn wood sample kitchen. And, http://www.waterlox.com wood tung oil will completely seal your IKEA butcher block counter tops. Also, maybe your handyman/plumber can build a washing machine “dam” & drain to direct any water hose breaks or washing machine leaks/overflows into it's own catch-basin. It's like a tiled curb to help block water from getting onto your beautiful wood floors! Anyways, have “loads of fun” in your new laundry room!
Peggy says
Long before we bought our house, the washer and dryer were in a space just like yours, between the garage and kitchen. When we moved in, it was just a walk-through with a very narrow bench and a closet for the water heater. We gutted it, moved the water heater and built a mudroom with a wide bench and hanging space above the bench. I love it! It's got space to put things down as you're coming in, or things you need to take along as you're leaving. It's one of the most useful spaces in my whole house!
I think if I had a desk there, it would tend to collect clutter, and wouldn't be too convenient when people are coming and going. Just a thought.
Go Against The Grain says
Wow very cool! Can't wait to see how it all comes together!
Brittany Fry @ The 26th of August says
Wow that will be so much better than what you are working with right now. I cannot wait to see what you do with it. Our laundry room currently resides in the spare bedroom, hopefully we don't have any children while we are living in this house (its a rental) because they will be sharing the room with the washer and dryer. Unless I can figure a way to conceal it in the kitchen. It would probably just be easier to hold off kiddos until we have our own house.
Lindsay Ava says
Wow this looks like an amazing project and I can´t wait to see the final result but also the process! I´m pretty sure I understood about 30% of the plan, as I´ve never done more than paint a room or build ikea furniture, but it´s so fun to see and also learn. Good luck!!
Samantha Fabris says
How fun! We're in the process of doing something similar. We've moved our washer/dryer down into the basement and are using the space where they were to create a mud room.
Lynne (lynnesgiftsfromtheheart) says
Wow.. you're going to love having all the space. Looking forward to following along as you take this journey.
fondly ~lynne~
Lynne (lynnesgiftsfromtheheart) says
Wow.. you're going to love having all the space. Looking forward to following along as you take this journey.
fondly ~lynne~
Ann Koehler says
How exciting! I know it will turn out to be absolutely beautiful. We are also in need of a laundry room makeover, but it will have to wait for some time since we just had to replace our furnace a few days before Christmas. I'm anxiously awaiting your updates. Good Luck!