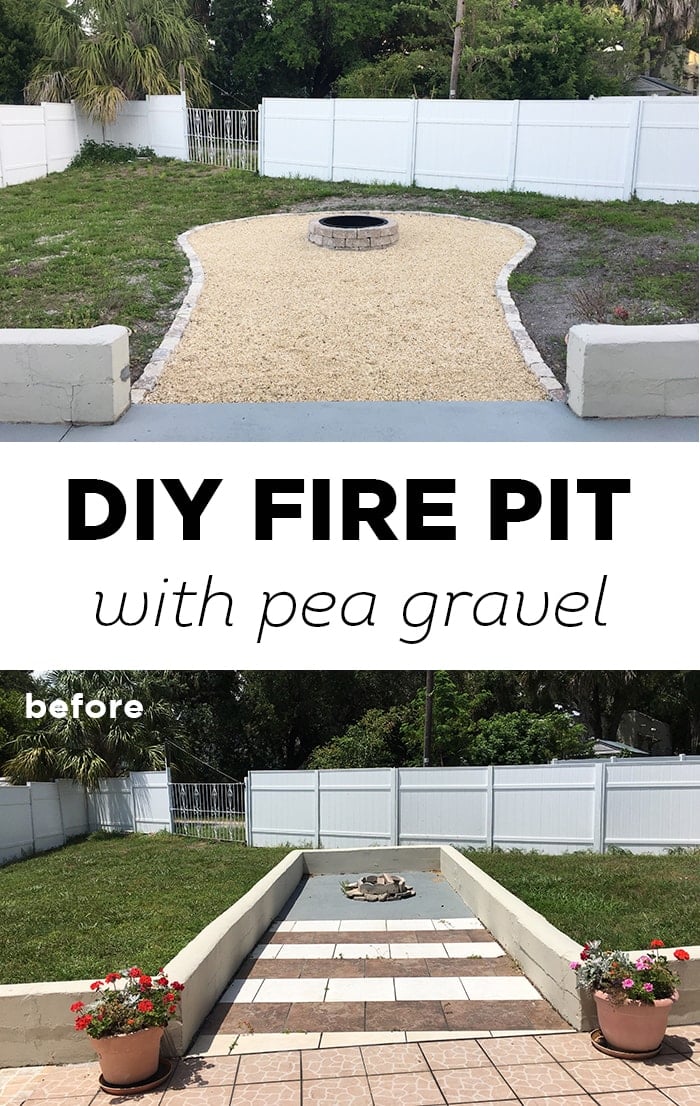
Here’s a fun backyard project you can do in one weekend: build your own gravel fire pit!
You really don’t need any DIY experience to tackle this project in your own backyard!
Jump to:
Supplies
- Fire pit kit
- Pea gravel + base layer
- Retaining wall blocks (for border)
- Concrete adhesive
Tools
- Shovel
- Rake
- Tamper
Click on each step below to see it in detail!
How to make a backyard gravel fire pit:
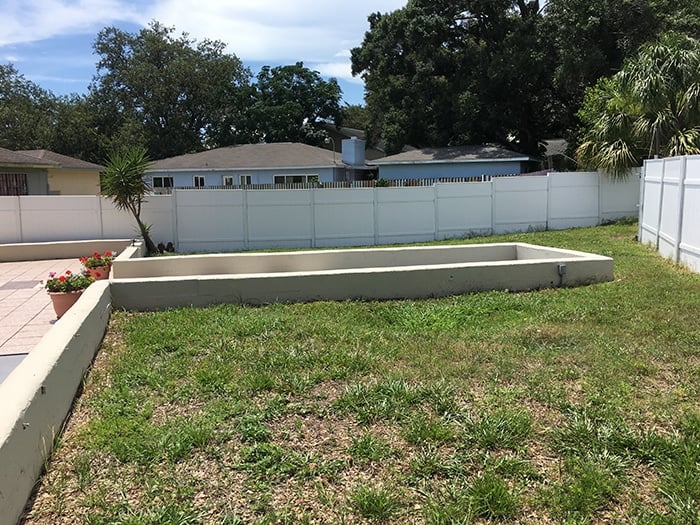
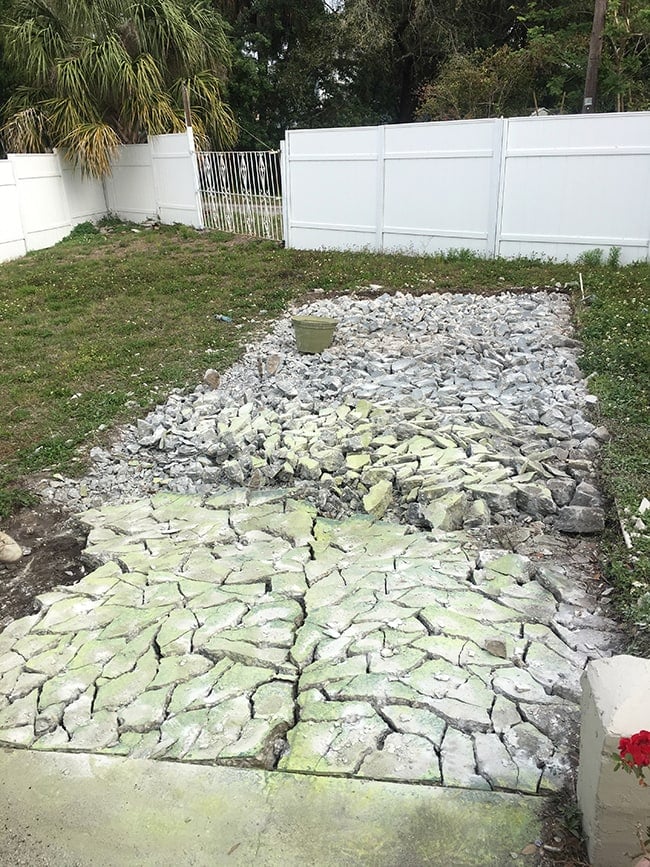
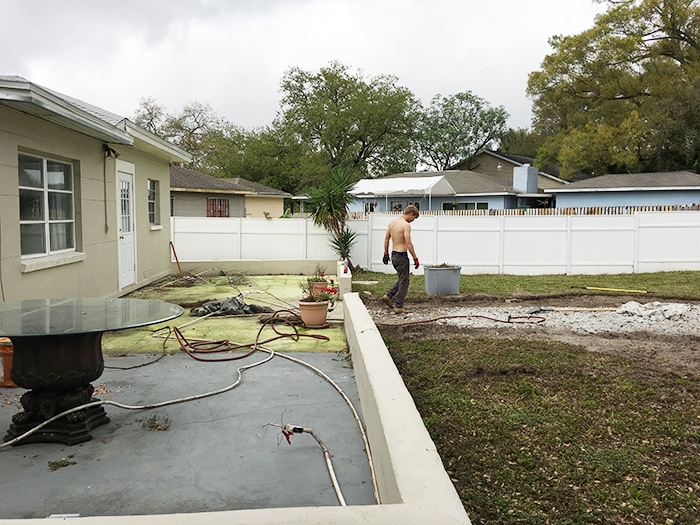
Here’s what our backyard looked like before:
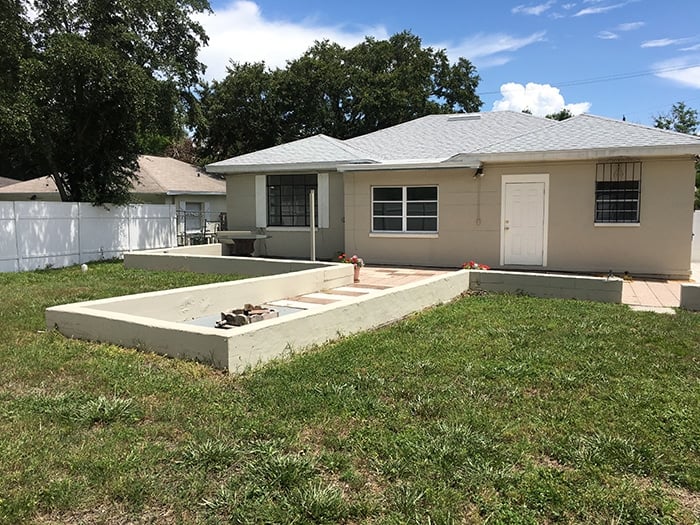
This concrete wall barricade is one of the many questionable choices that came with this house, and we couldn’t figure out what to do with it.
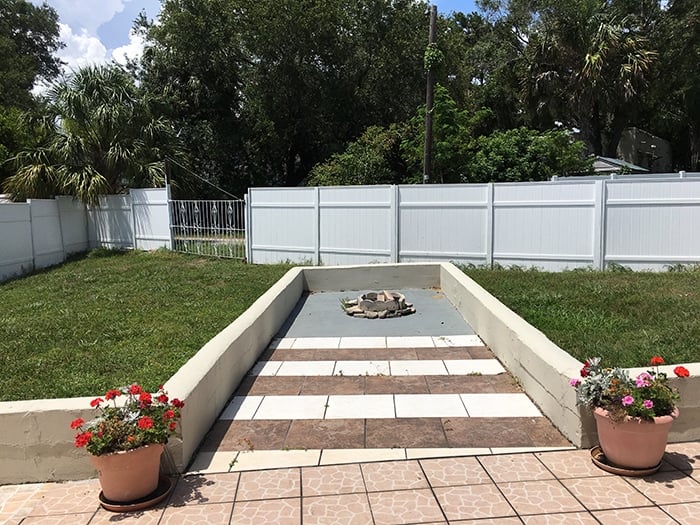
We really tried to come up with a solution that wouldn’t require tearing it all out and starting over. Cornhole? Shuffleboard? Mini bowling? Permanent Slip ‘N Slide? Nope, it was too small for all the games.
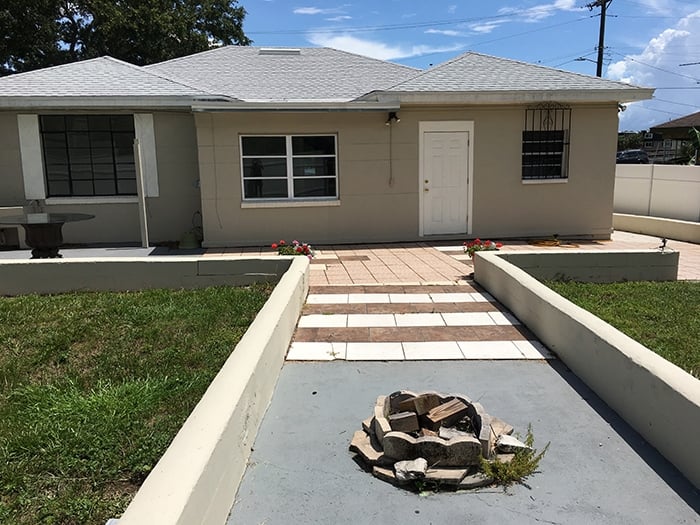
And definitely too small to accommodate seating around a fire pit (was that pile of rubble ever actually functional?) But the fire pit idea was pretty appealing, and would certainly be a great feature in a vacation rental geared towards groups and gatherings. (If you’re new here, we’re renovating this house to turn into a vacation rental on a very tight budget and timeline. That means lots of DIY, getting creative and embracing imperfections).
Step 1: Mark the area of your desired fire pit
Before we could start, we spent two days prying up giraffe tile and demolishing concrete…
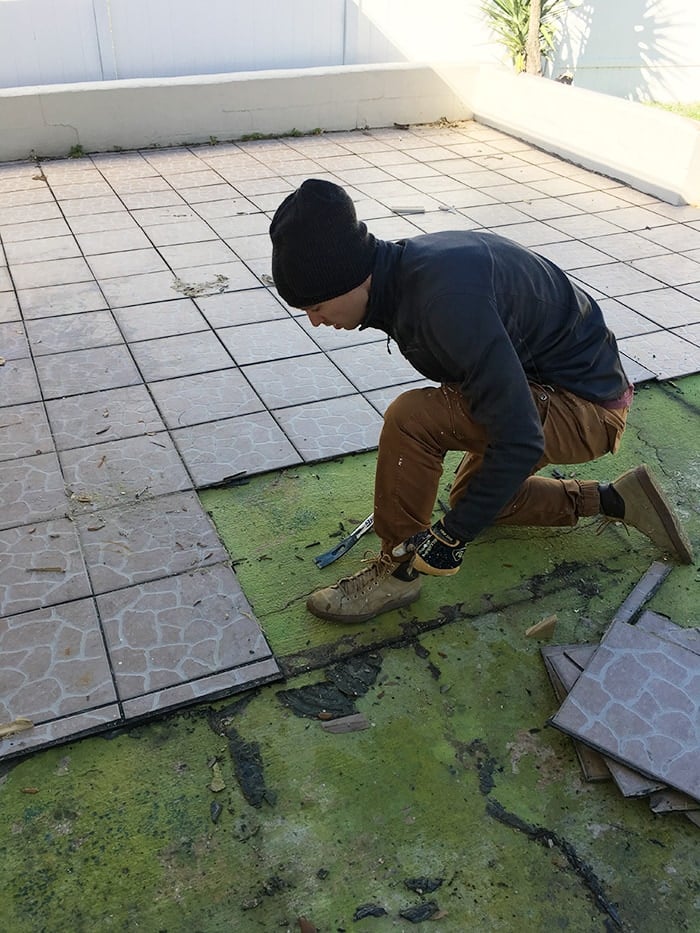
We were relieved at how easily these tiles popped right off (improper installation + years of Florida humidity and weather will do that for you…)
In no time, the patio was completely rid of the ceramic offenders and ready for Step 2.

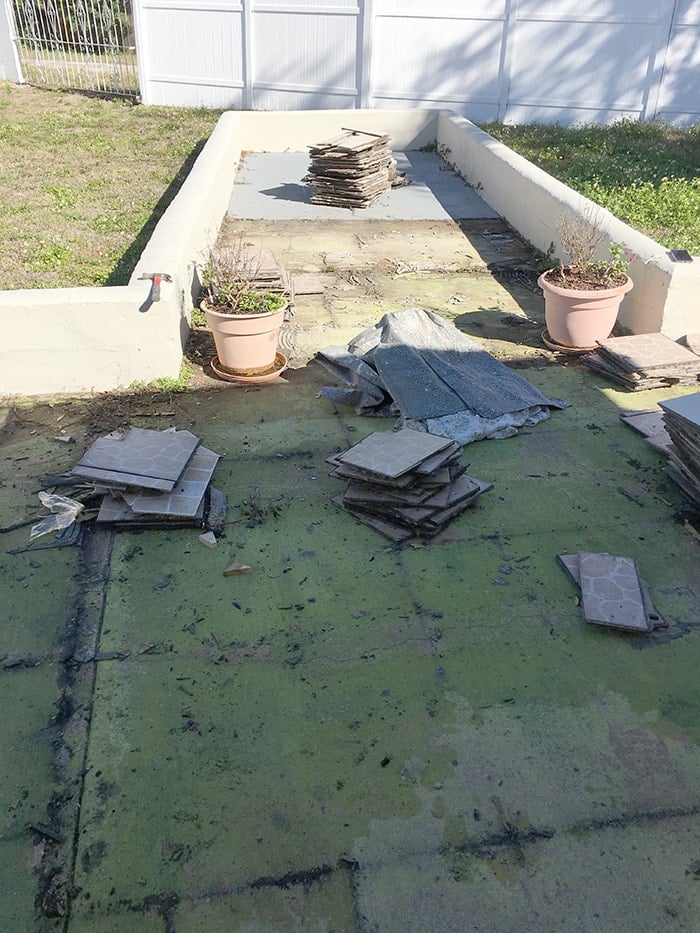
Goodbye wall!

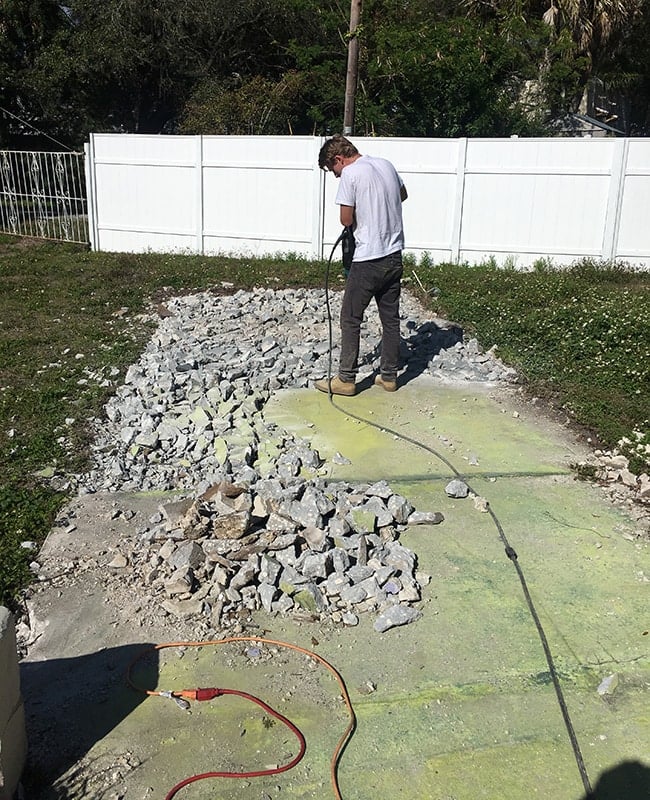
A sledgehammer and brute force was enough to take down the wall, but the concrete pad was another story. It took the poor guy 6-7 hours to complete over the course of two days, but we were dealing with some very stubborn concrete.
The smaller debris was left behind, as we figured it would make a good base for our pea gravel.
Step 2: Dig a small trench around your border
Now things started to get a little more fun, as we mapped out the border for our fire pit zone.
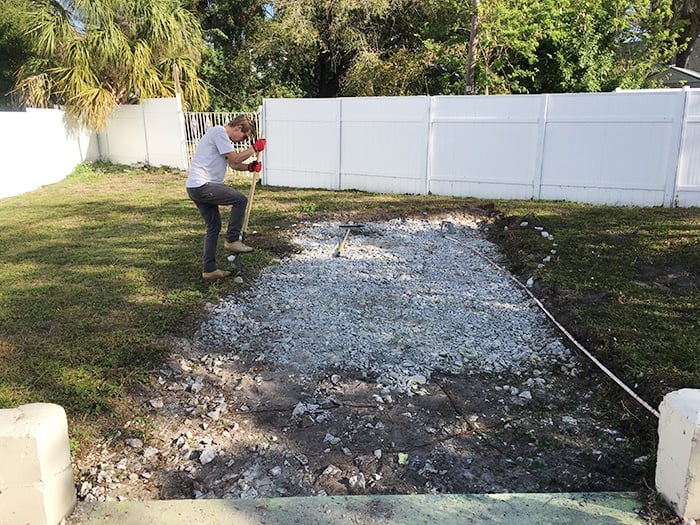
After (lots of) back and forth adjustments to the shape, Lucas dug out a small trench and removed the grass around the perimeter so we had a clean slate to work with.
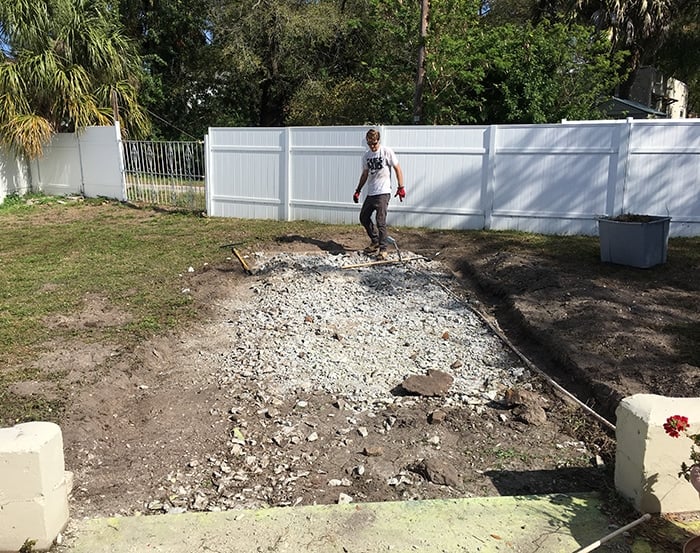
We ended up spending most of the weekend removing weeds/old roots and buried tree stumps, and leveling out the very uneven grade of the yard. Landscaping in the Florida heat (while pregnant) really takes it out of you!
Here’s how the rest of the yard is looking at this point… this is one of those projects where it gets worse before it gets better.
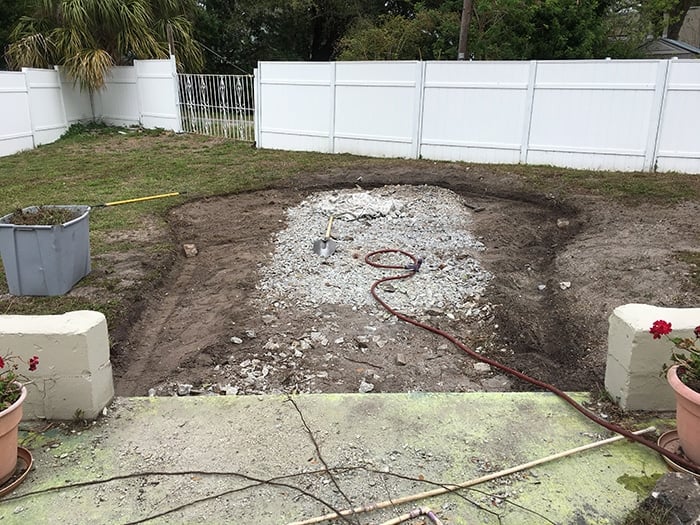
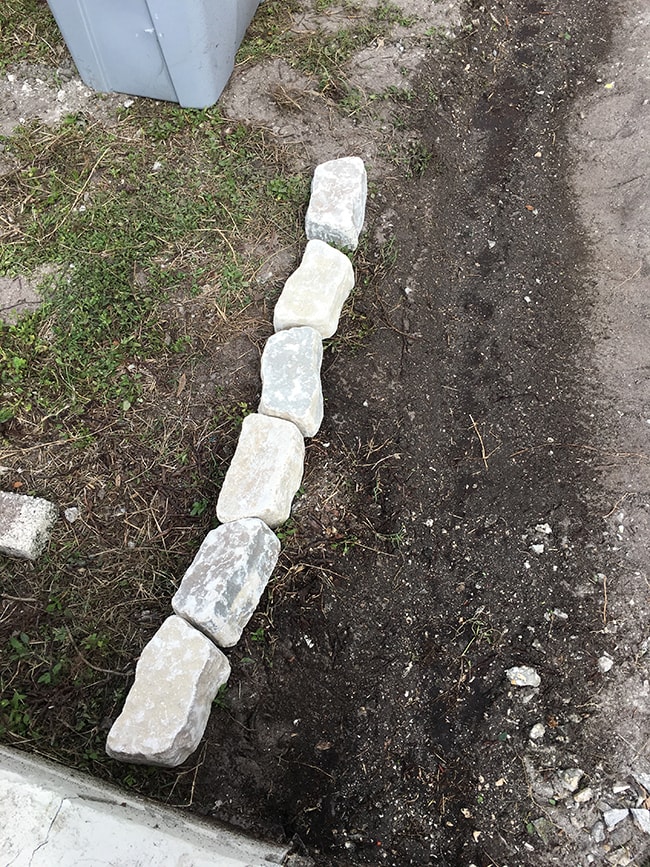
Step 3: Add a retaining wall along the border
After our fire pit area was leveled and ready, we loaded up our car with pavers (well, technically they’re ‘retaining wall blocks’) but they fit our needs.

Before setting them in place, we wet down and compacted the dirt so the pavers would have a more solid ground to rest on.
We opted not to use landscaping cloth, mostly because of the aforementioned reasons (lack of time/energy/budget) but I also learned it’s not always necessary and can create its own set of problems (I found this article from Remodelista helpful).
The fact that we already had a concrete rock base and nothing had been growing underneath it made the decision easy for us, although we’d reconsider if we were building this from scratch and it was our own permanent home. We fully expect to have to deal with a few weeds popping up here and there, and will use a weed killer of some sort to keep those at bay.
Once the trench was prepared, we lined the perimeter with our pavers to make sure they fit…
Then spread a little of the concrete sand over the dirt (no idea if this actually does anything to be honest, but we figured it couldn’t hurt!)
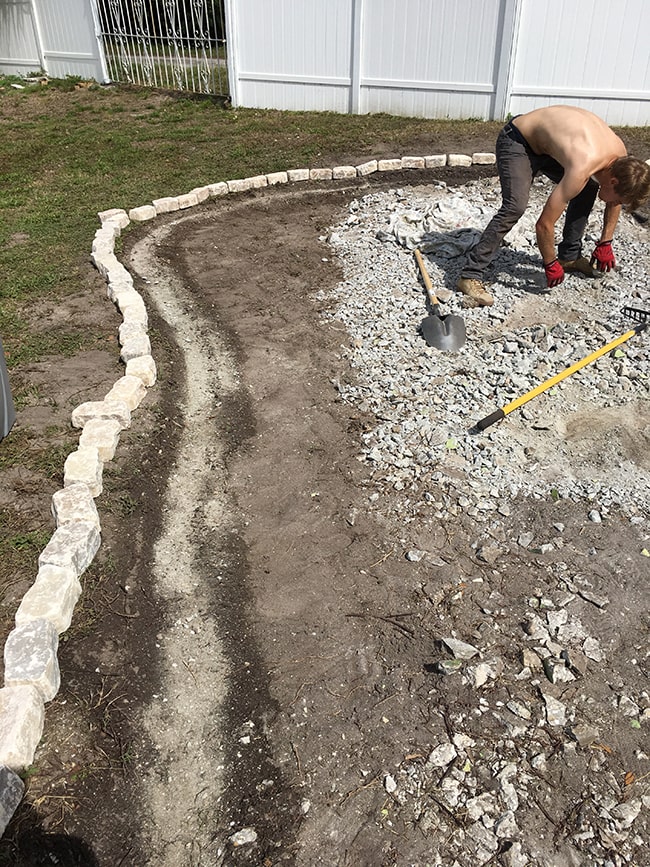
Then one by one, the pavers were set into place.
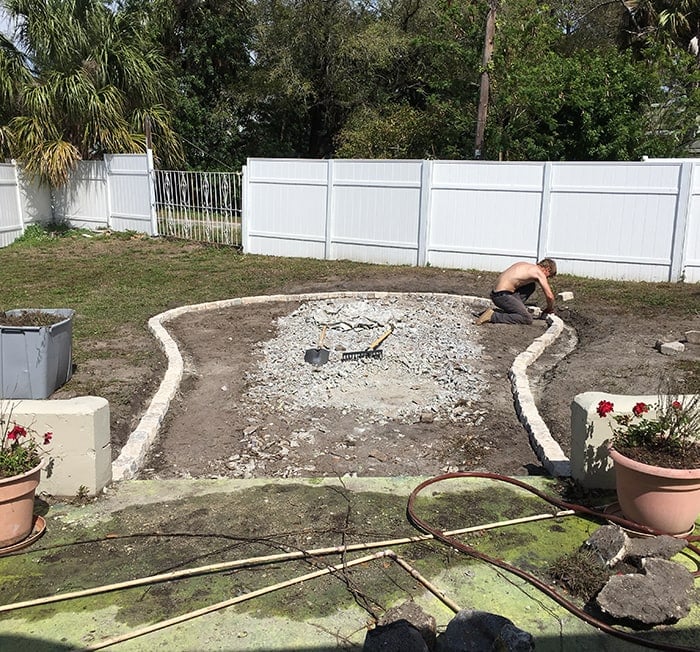
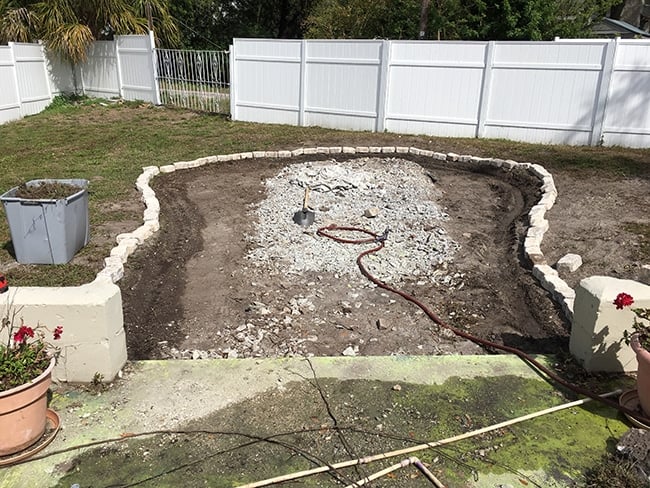
Then it was just a matter of filling in and leveling the dirt around the outside, and spreading out the concrete remnants on the inside.
That sounds easy, but it was actually the most time consuming part of this project. Lots of small adjustments, standing back and re-evaluating, and moving dirt back and forth.
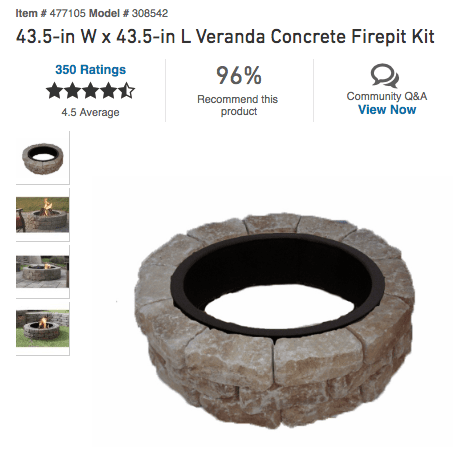
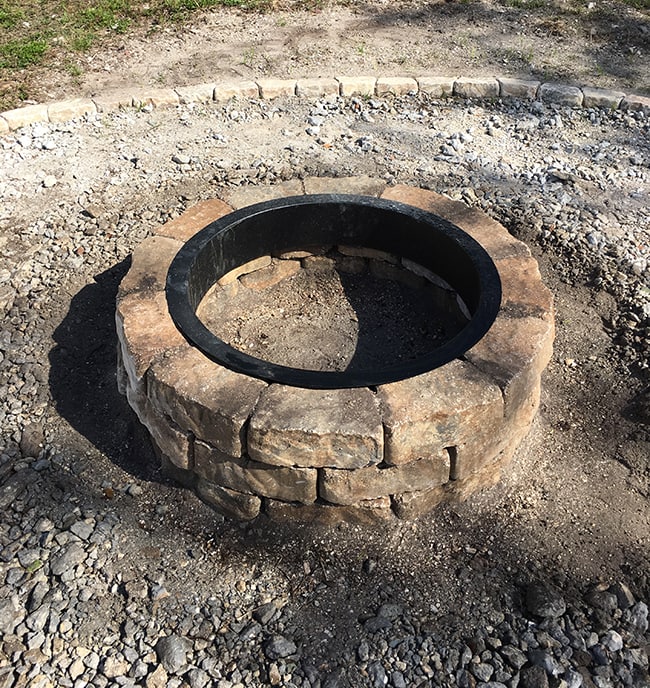
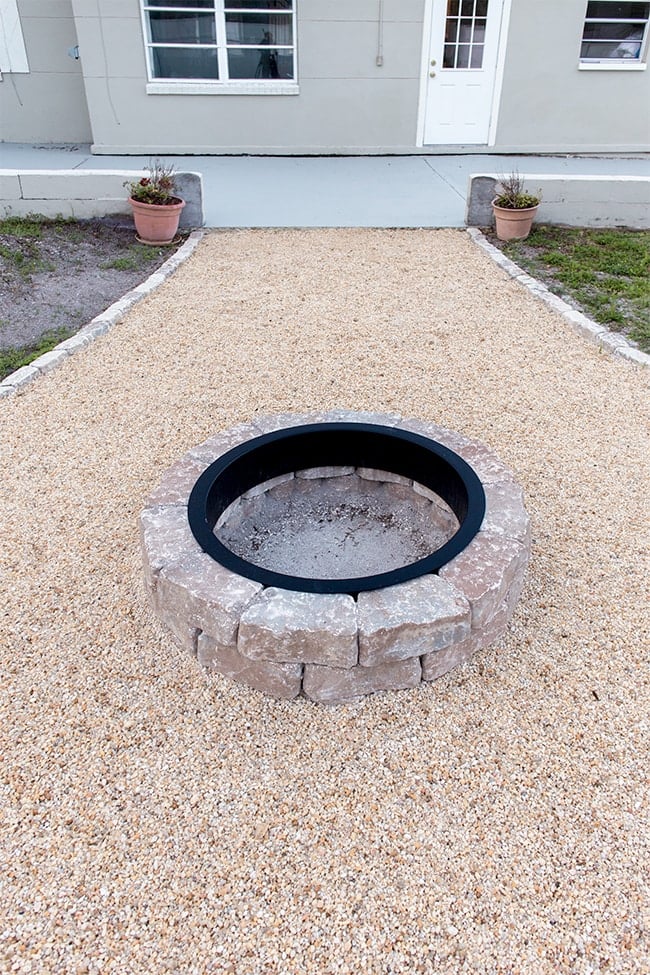
Step 4: Assemble fire pit kit
The next step was building a fire pit. We decided to keep things simple and buy a kit that had everything we needed, and we found this one at Lowe’s for only $199:
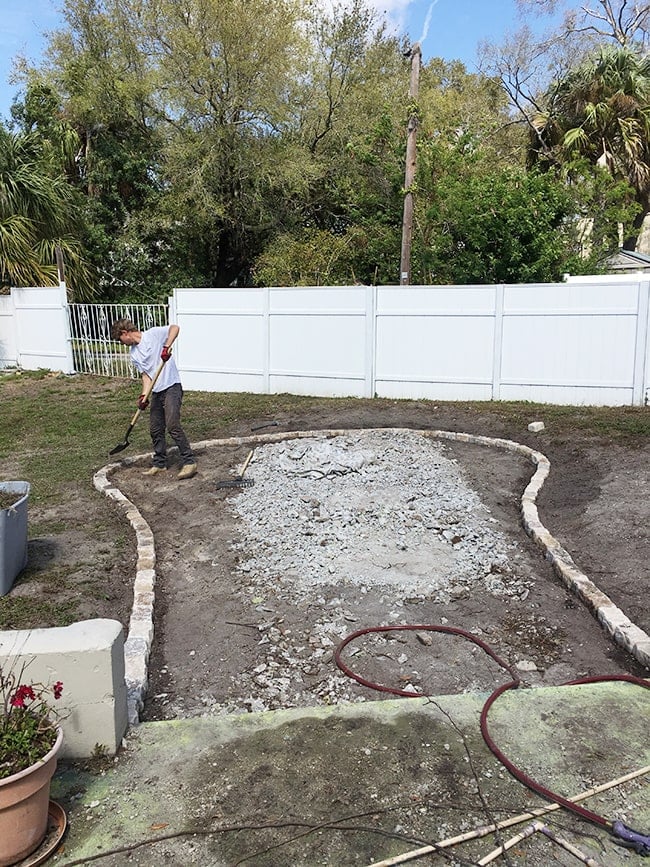
Assembly was by far the easiest step of this whole project. There’s no guesswork—you just decide where you want the fire pit, make sure the dirt is level and compacted, and start lining up the stones.
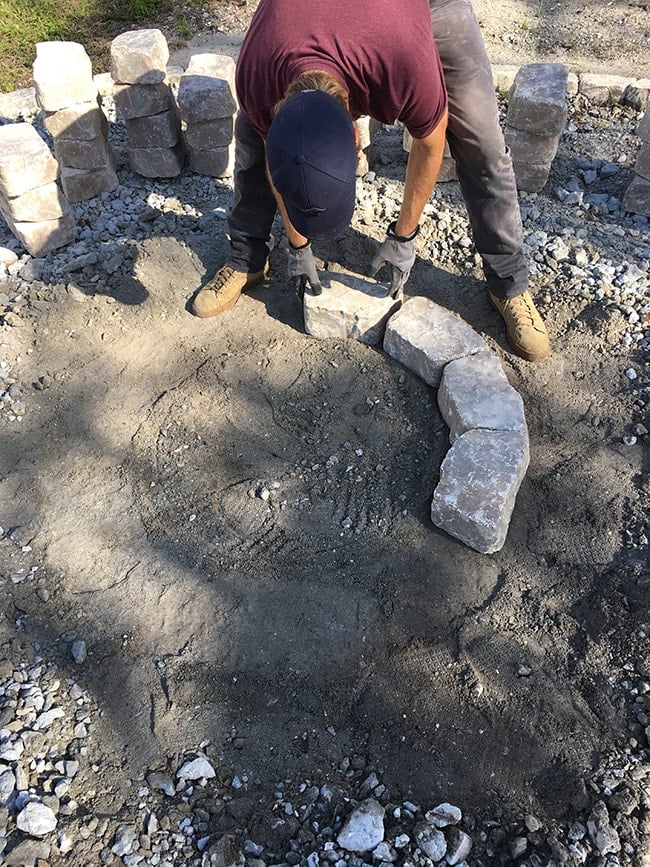
You can use concrete adhesive or polymer sand to bond them together, but we improvised and used leftover concrete dust and water.

Again, not sure if that’s useful, but it’s better than nothing! These stones are so heavy they don’t need anything to stay in place. Especially after the metal ring is inserted, you’d have to use some force to try and knock it down.
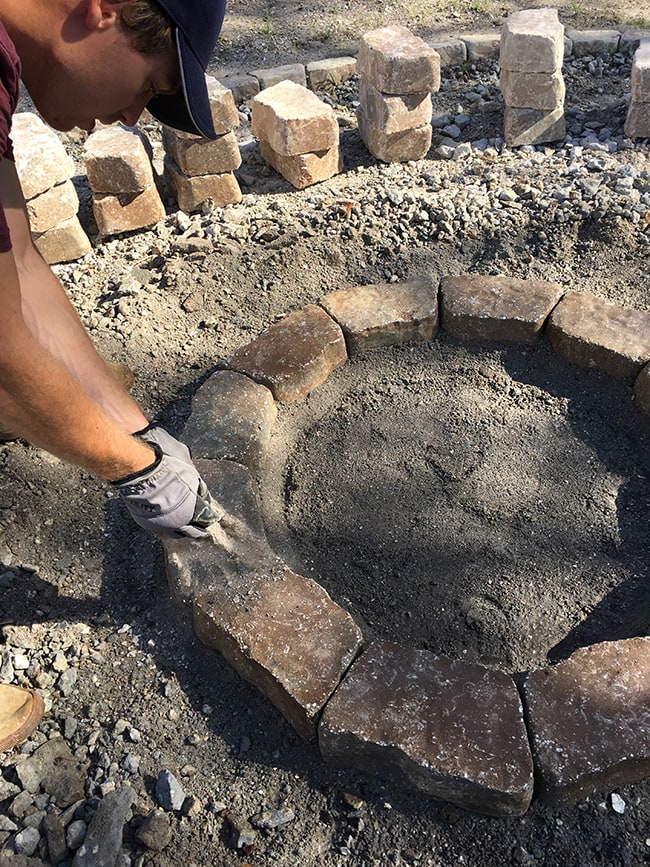
Rinse and repeat for the second and third rings.
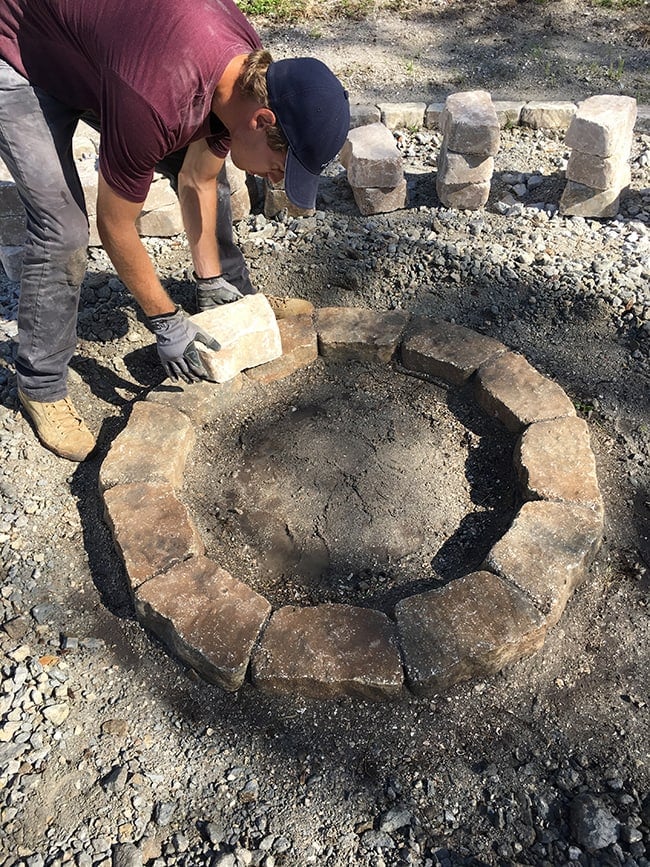
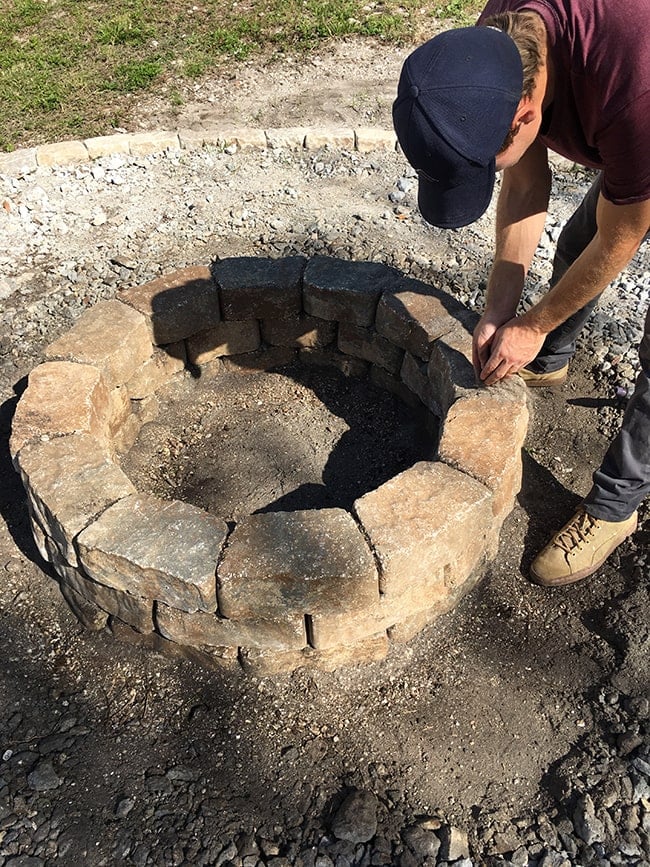
Less than an hour later, and we’re done! If only they could all go this smoothly.
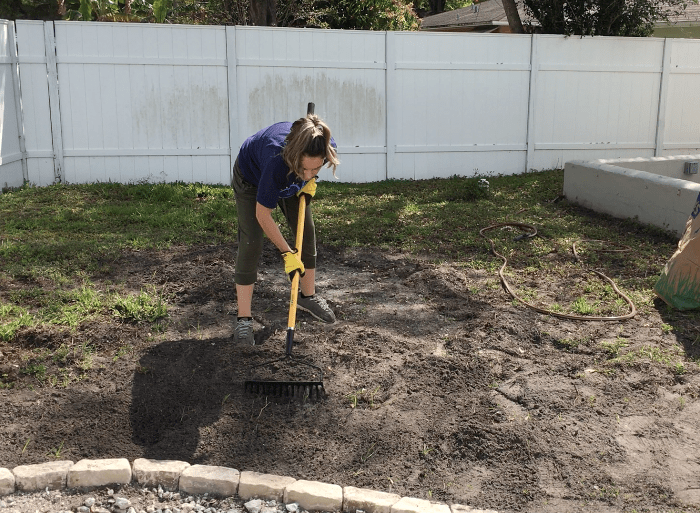
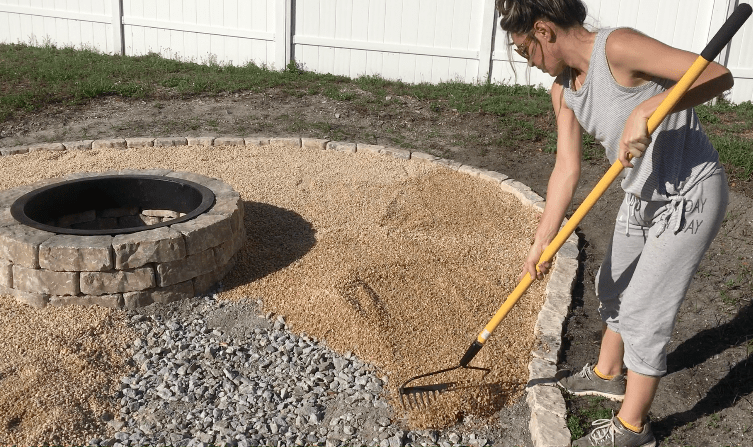
Step 5: Add pea gravel
The last and final step—pea gravel! I had my heart set on gray pea gravel, assuming it’d be readily available everywhere, but the big box stores only had rusty colored brown gravel (who knew that was a thing?) and they looked at me like I was crazy when I asked about gray gravel.
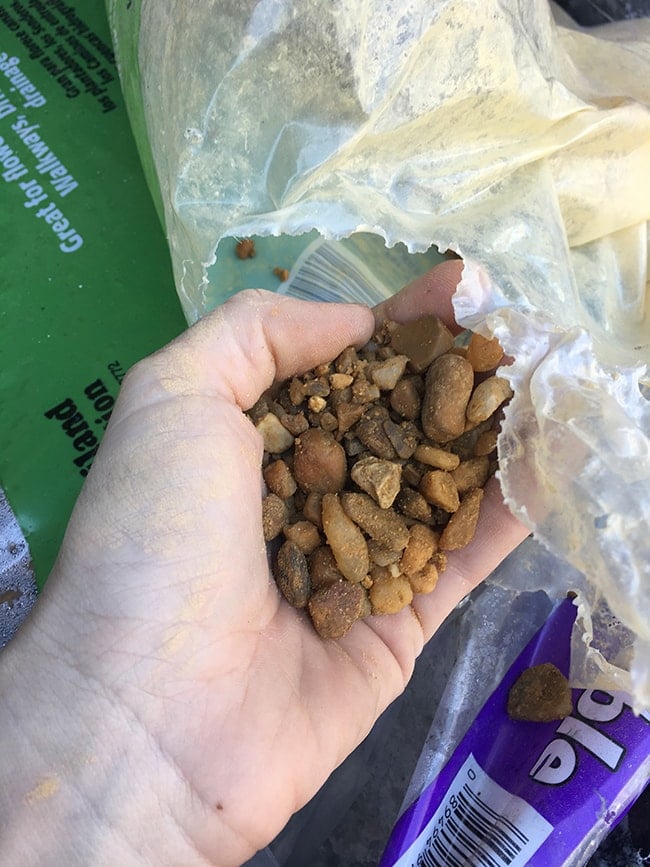
So I called around to every landscaping/gravel place within driving distance, and finally found ONE who offered white pea gravel (or 1/2″ river rock per their description). It was about the same cost as Lowe’s—$127 per cubic yard. We needed less than 1.5 cubic yards, and they had a minimum order of 2 cubic yards plus a delivery fee, but this was the only place that offered white gravel so I sucked it up and paid the $350.
You can imagine my dismay (devastation would be a more appropriate term, thank you hormones) when the delivery truck dumped this in my driveway and sped off.
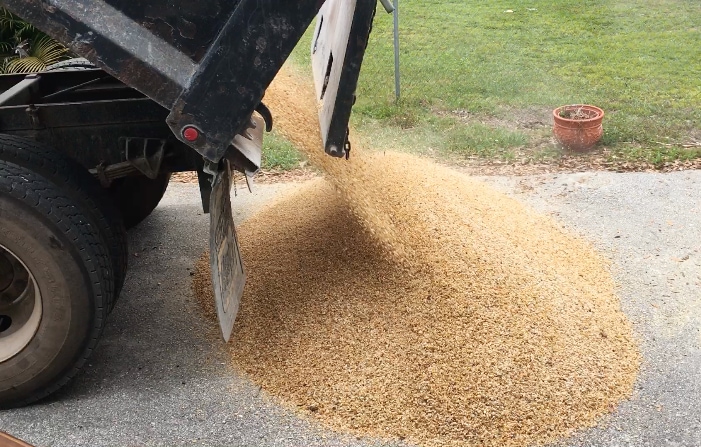
It sat there in our driveway for days as we debated what to do with it and made several ignored attempts to contact the owner/manager of the company. In the end, we decided it wasn’t worth paying another several hundred dollars to track down an alternative, and clearly Florida has a ban on gray and white pea gravel for some reason, so I filed this incident under “learning to let go.”
We still have 0.5 cubic yard of leftover stupid brown gravel in our driveway, if anyone wants it.
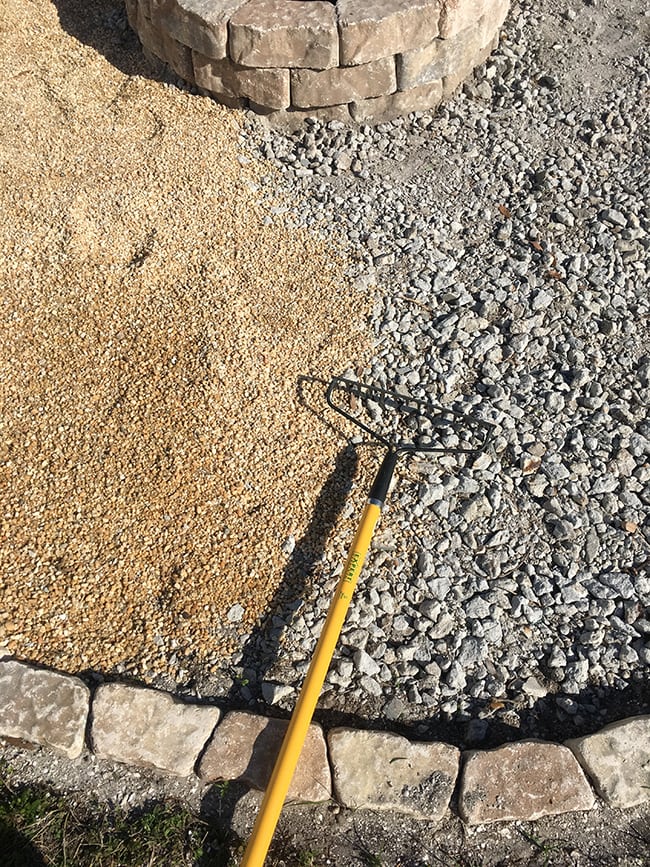
The good(ish) news is that the gravel does get lighter when it dries. Certainly not “white”, but less of an obnoxious orange. And raking it was quite cathartic… like my own life size Japanese zen garden.
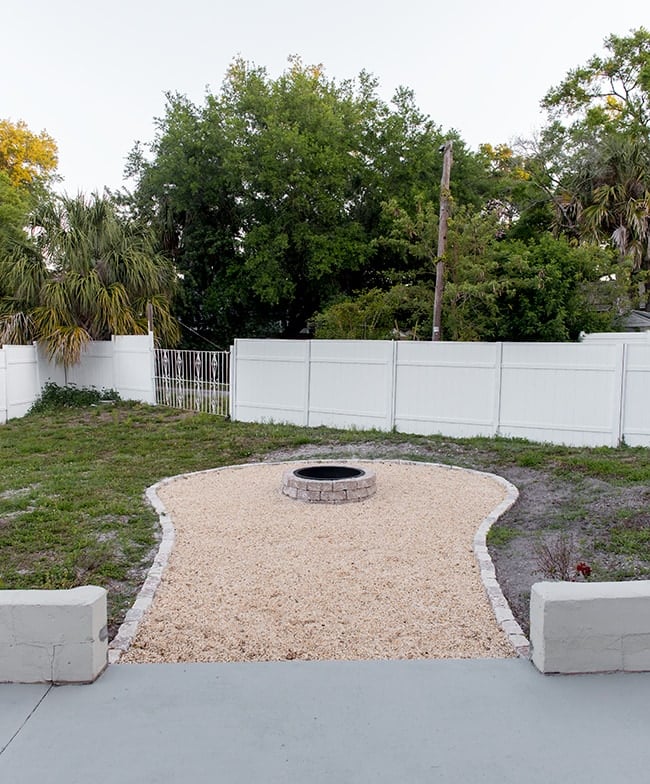
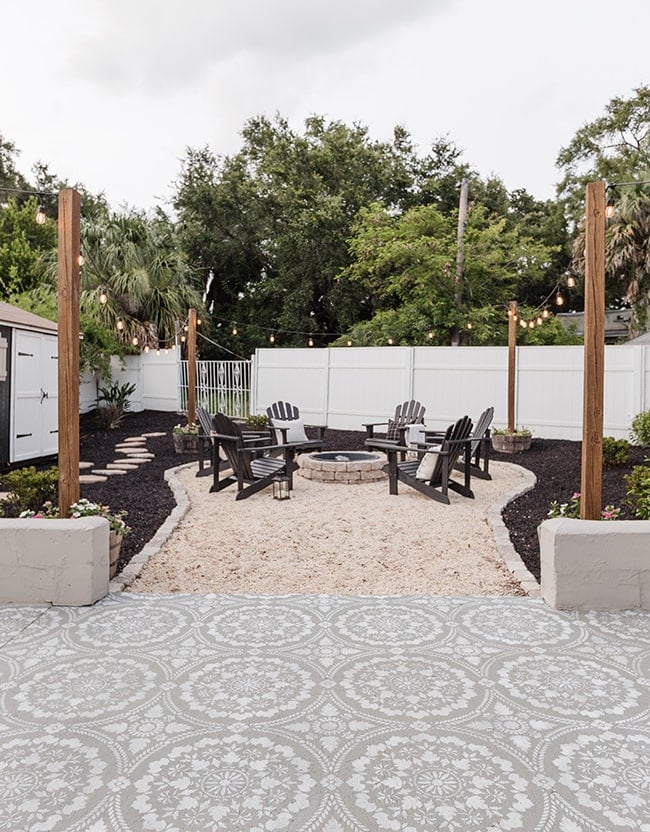
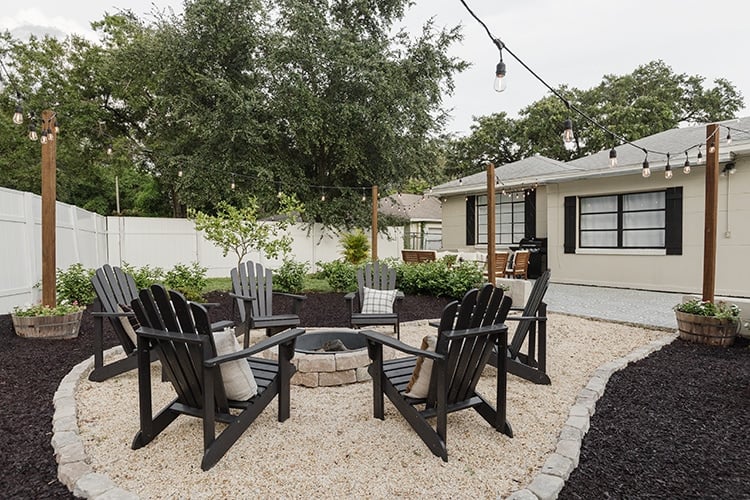
Pea Gravel Fire Pit Reveal
Here’s how it looks after!
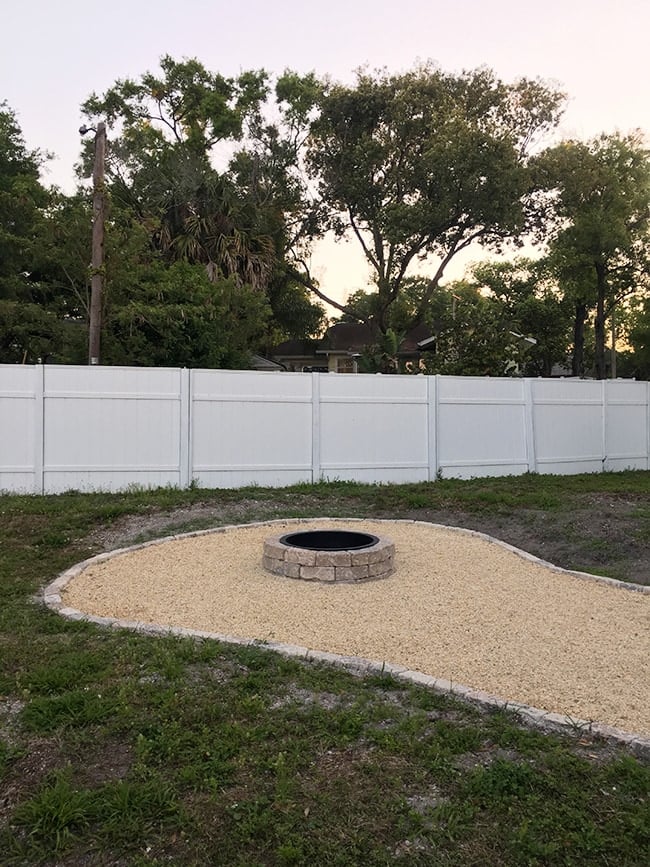
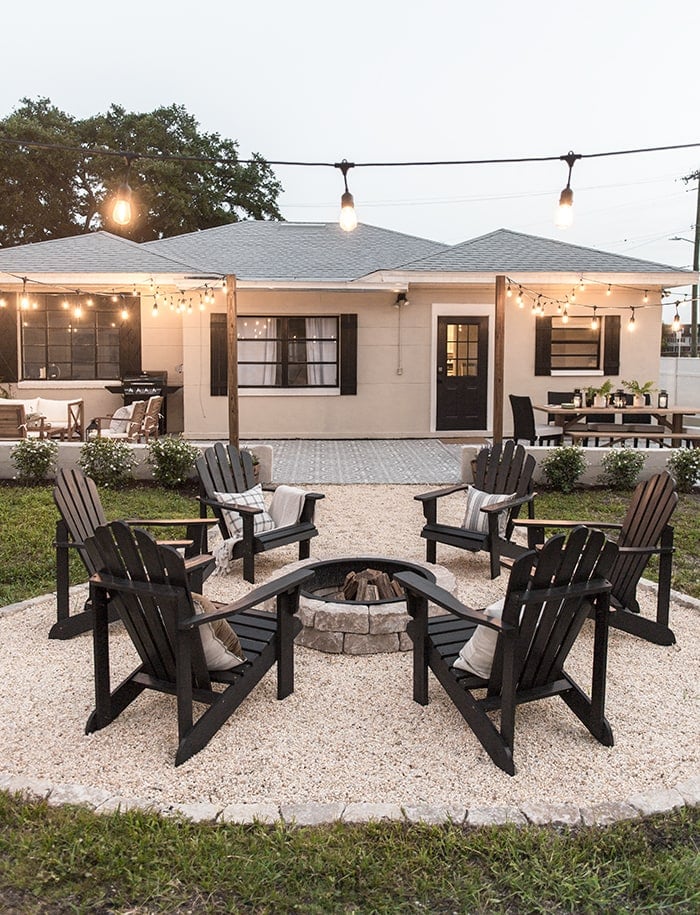
Update: and here’s the finished backyard, two years later!
How about this Before and After?
Looking for more backyard DIY projects? Check out these reader favorites!


RubberChickenGirl says
Growing grass. Been doing that for years. It works best with a sprinkler system because you need to be vigilant with watering/wetting down the soil 2-3 times per day for about 10 days at least and then taper off. I would till the soil (rent a tiller). Rake out the clods and smooth it out. Scatter some lime and starter fertilizer and then layer in a bunch of grass seed. Be super generous with the seed. Go back over it with a rake to be sure you have soil contact. People do all kinds of things like drag chain link fence over the area or do one of those water-filled (is is sand-filled?) drum roller to press the seed into the soil. I usually go stomp around on it. I then scatter peat moss over the whole thing to help retain moisture. Proceed to water 2-3 times a day (I do 10 minute intervals) unless the weather is cool and/or wet you can do less. You have to walk the line between keeping it moist but not over saturating and causing fungus. Baby grass will die in short order when the heat hits if you don’t water it regularly because it has a shallow root system so it has to be babied for the first year.
Jenna Sue says
Wow, thank you for all the info! We just planted the seeds last night so I’ll keep all of this in mind 🙂
Jackie says
Hi Jenna Sue,
Can you tell us more about the wallpaper you chose, please? It looks like a toile.
Thanks.
Jenna Sue says
Hi Jackie, it’s from Brewster Home and I’ll be sharing all about this bathroom on the blog soon!
Kathleen says
Wingate supply is a good resource, white marble chips, but not sure if small enough for your need. Also , neighborhood facebook or nextdoor pages are good to post a curb alert or Free, you pick up and take. I’ve gotten a lot of pavers that way and hope to start on my side yard walkway project for pennies because of free items. Good luck.
Ashley says
The fire pit looks great! We built and almost identical fire pit our backyard a few years ago and have really enjoyed it. Now that we have a baby, we will open a bottle of wine and sit by the fire pit to have an at-home date night.
One issue that we have started to have is grass and weeds growing in the gravel. How do you plan to prevent this from happening?
Jenna Sue says
That sounds so nice! Looking forward to finally getting to use ours. There shouldn’t be any grass growing in the center where the concrete pad was, but around the edges we plan to spot treat with a weed killer as needed 🙂
Jackie says
I could have written that section about wanting grey pea gravel (also for our fire pit area) word for word. I actually even drove to multiple sites to inspect what they had. I eventually found one that did have grey but it wasn’t easy to do! I was told the color is based on where they mine the rocks from but they have no choice or control over what they’ll get in. If I’m remembering correctly, the orange color means the rock has more iron. ??♀️
Adding string lights is next on my list for the area but our backyard list is long and our weather needs to warm up first. Hopefully we can get to these projects soon. Can’t wait to see your fire pit all finished and styled! 🙂
Jenna Sue says
That makes sense — we must have a lot of iron here in Florida! And we have the opposite problem with weather, we started these projects in the winter because it’s already getting too hot to work outside! ?
Vanessa says
Lucas is a champ for breaking up all that concrete! I have recently done battle with about 65 years worth of paint (many layers) on a window and it was touch and go there, as to whether or not I could get it off. I do think I spent 6 hours over a weeks time but it wasn’t as back breaking as “hammer time.”
Jenna Sue says
Yikes! We have that issue with our 70 year old windows too, it’s one of the most tedious jobs ever! I’d rather be crushing concrete if I could ?
Crystal says
Also, there is gray gravel, but it’s called drainage fill or drainage rock, we used it at another home, there’s also a multi color drainage rock that’s gray, with a bit of reddish brown, it sounds ugly but actually offers some nice contrast, is pretty subtle. So if you want gray gravel for the new house, search for drainage rock.
Ginger says
I can’t watch the video at work because of the web police. Welp 🙁
Jenna Sue says
Boo! It’s on Instagram too if you’re there 🙂
Sandi says
Loved this post! You two are the most beautiful couple. I am so glad you saw the fire as a blessing in disguise and you are both able to work on your dream home together.
Jenna Sue says
Aw, you just made my morning Sandi! Everything in life is a blessing in some way 🙂
sweetfe says
You might want to stop in at your local garden store and talk with them about ground cover. I think in the Florida climate there are drought resistant ground cover alternatives which may not require mowing…. I also think some plants with some color or a lemon tree or something might be nice back there. Good luck! The firepit looks great. I had no idea that pea gravel colors are regional!
Jenna Sue says
If the grass doesn’t take, we’ll definitely look into low maintenance ground cover options! It is always nice to have some yard area for kids to play in though. And yes, we will be doing landscaping back there including a lemon tree!
Rebecca says
Great job with this! I’m staying tuned to see what you’re doing with the concrete portion that remains, I have a very similar situation I’m going to be tackling soon! I live in a very different region but the biggest advice I have for covering bare patches from seed is to make sure you get the same species of grass!
Jenna Sue says
Thanks Rebecca! Our current ‘grass’ is mostly just weeds so hopefully anything will be an improvement 😉
Alyson Bird says
Looks good. I know you were disappointed about the color of the gravel. We looked for years, literally before finally finding the right color. In out area of Tennessee it is called Indian Creek color. It is a gray multi-color and very pretty. Just in case you need some for your dream home.
Jenna Sue says
It’s crazy to me that there’s only one color option here. If this wasn’t a rental I wouldn’t have let it go! Glad you were finally able to find the right color.
Leslie Wiesman says
Awesome post as always Jenna! Two things:
1.) I laughed out loud at the “Fun concrete fact of the day”. Hahaha! Informative and hilarious.
2.) My heart also sank when you showed thepicture of the brown gravel. What jerks!! But your comments on making the best of it and letting it go is why I love your blog. It’s so honest… And sometimes as much as we want to perfect a situation, you do just need to suck it up and create a Japanese zen garden out of lemons. 🙂 And it looks great!
Jenna Sue says
Thanks Leslie! Glad I could make you laugh 😉
Shauna | My Pinecone Home says
The fire pit looks so good! After watching the video, I’m curious why the wallpaper was so difficult this time around. As someone who is looking to wallpaper a room, I’m soaking up all the information and advice. Keep up the hard work!
Jenna Sue says
Thanks Shauna! It was because of all the tight corners and the window. This was our first time dealing with those obstacles and it was harder than we thought! Wallpapering a single wall is a night and day difference.
Kailey says
We live in the same neighborhood and growing nice grass is close to impossible unless you have a good sprinkler and fertilizing system. We got the quick grow seeds from Home Depot. It’s for temporary yards, but it’s grows between 3-5 days and cost less than $10, so for your pictures it might be a good option. Bahia is the only thing we’ve been able to “grow” without sprinklers, but it quickly it’s brownish and weeds often take over.
Jenna Sue says
Interesting, thanks for the advice! The yard was full and green when we moved in last summer (including weeds, but still green!) and we know it wasn’t very well maintainted so we’re hopeful that it won’t take much! New grass is already popping up on its own after raking it so fingers crossed the seeds will fill it in.
Crystal says
Hi Jenna, You may want to spring for a sprinkler system with a timer. There are also watering restrictions in Hillsborough County (twice a week right now) and if you are within the city of Tampa, there may be other restrictions as well. Bahia can grow from seed but it’s a pain. The best grass for Central Florida is St Augustine, but you’ll need sod. bonus , it’s instant grassy yard. but from the looks of your yard you’ll need to till the soil to make sure its loose, compacted soil won’t grow much of anything except weeds! Add compost to enrich it before laying the sod. St Augustine does require more water than Bahia, but Bahia goes dormant in the winter during the dry season, needs frequent mowing to keep the wild looking see heads at bay and thins out quickly. If you can, spend the money on the irrigation system and timer, and have someone do it for you, this isn’t a job to do on your own. For planting beds opt for a micro or drip irrigation system that had no restrictions at the present time, can run on a timer so you don’t need to be there to turn it on or off, provides shrubs and plants with the needed moisture and is a DIY. Starter kits can be purchased at either Lowes or Home Depot. Grass and gardening here has a learning curve but you can have a beautiful yard by taking care of the basics. Otherwise you’ll be pricing out synthetic turf! (Make sure your community allows it.
Jenna Sue says
Thanks for all the great info, Crystal! An irrigation system is definitely something we’d like to do in the future, but can’t swing the cost right now. We’re currently in the process of landscaping/irrigation at the heights house, and it is quite the steep learning curve. We’ll be using St Augustine sod there, per our landscapers recommendation (and 9 sprinkler/drip zones on timers!) For now, we’re just trying to get this yard looking presentable enough for renters, and then we’ll slowly work on it over time. I did find a gray crushed granite from another supplier but was really wanting the smooth pebbles for comfort — in hindsight, I would have preferred the gray crushed granite instead! Live and learn 🙂