This post is part of a paid collaboration with Lowe’s Home Improvement. All opinions are my own.
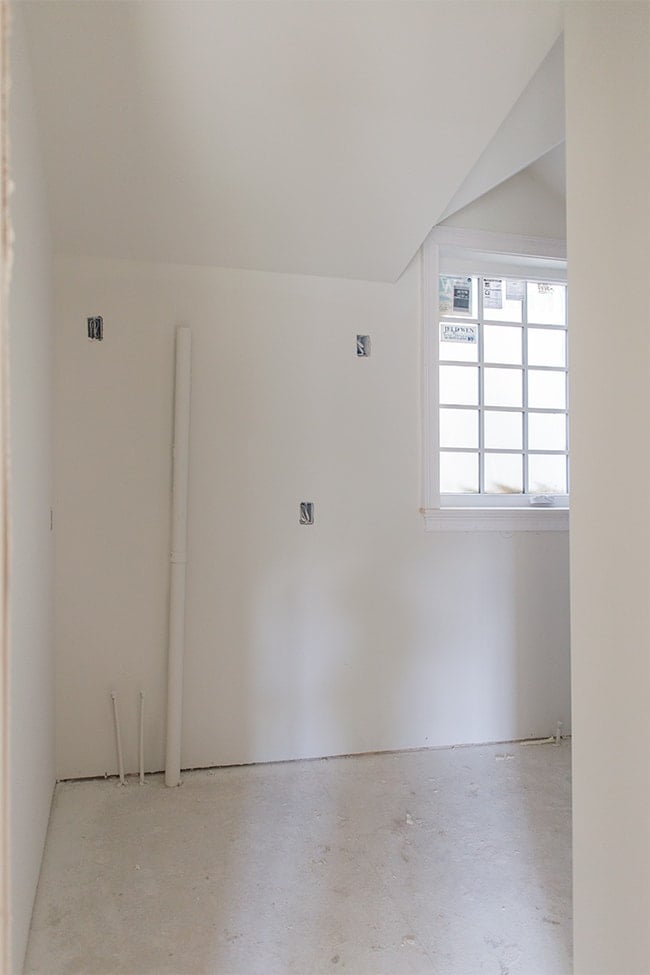
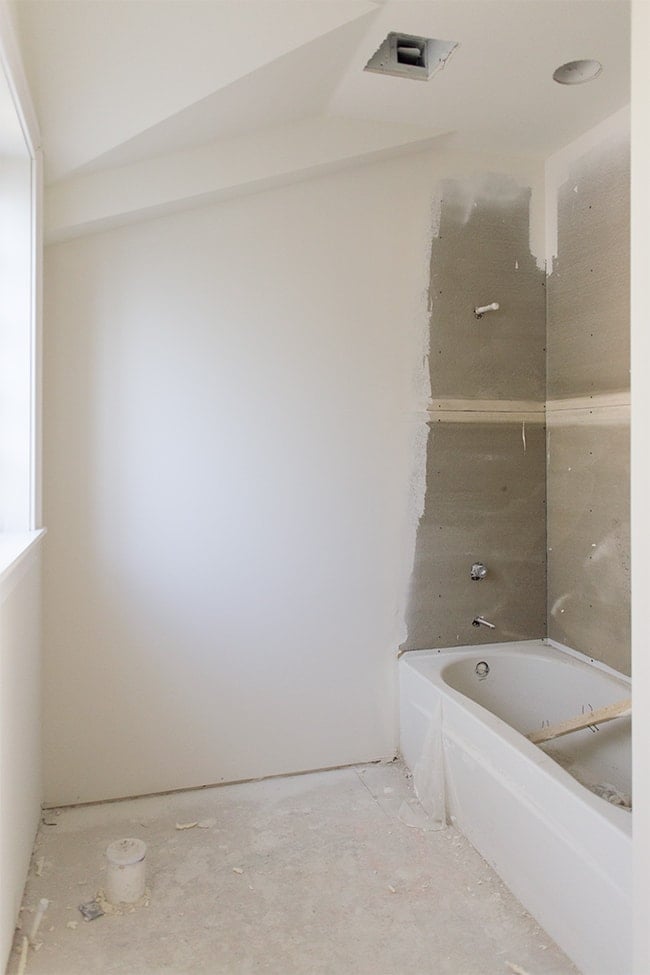
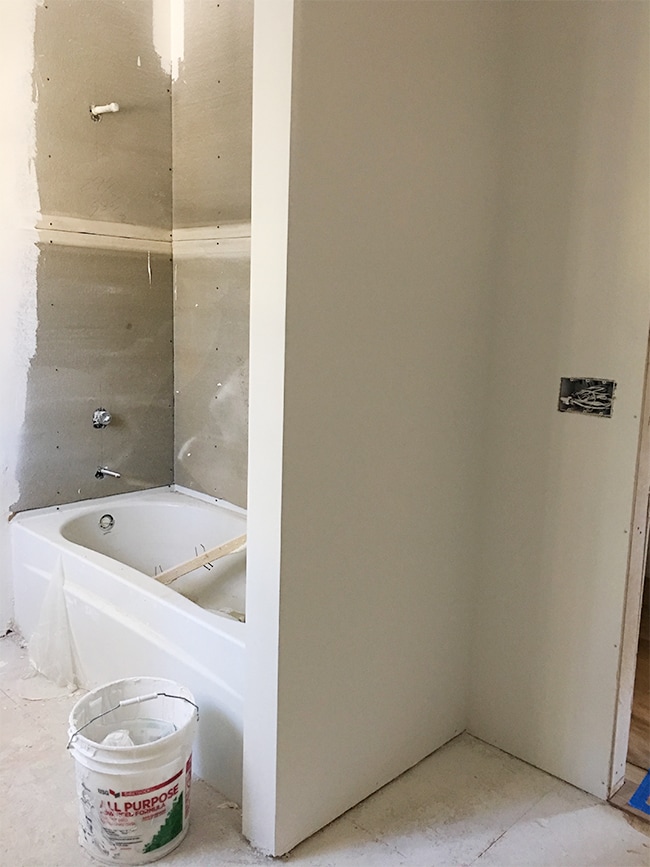
Today I can finally share the very first tiling project at the Heights House! We’ve been stuck in the drywall stage for what seems like forever, so it feels great to get some of the finish work started.
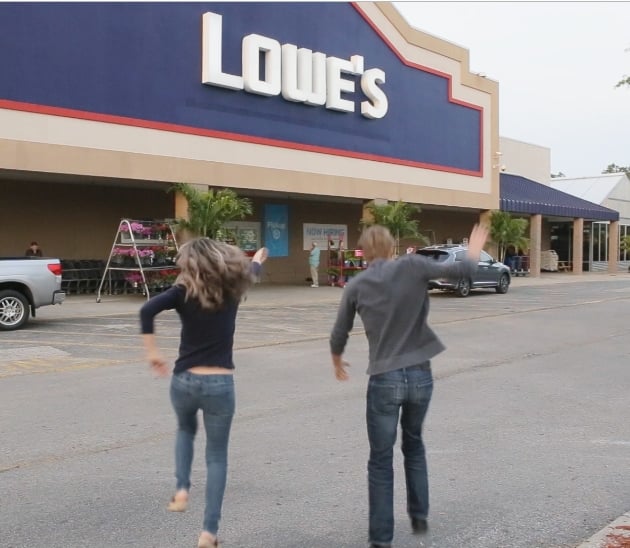
Before I dive into the details—join me on a tour of the bathroom before we started, our date night tile-hunting at Lowe’s, the tile installation and finished results!
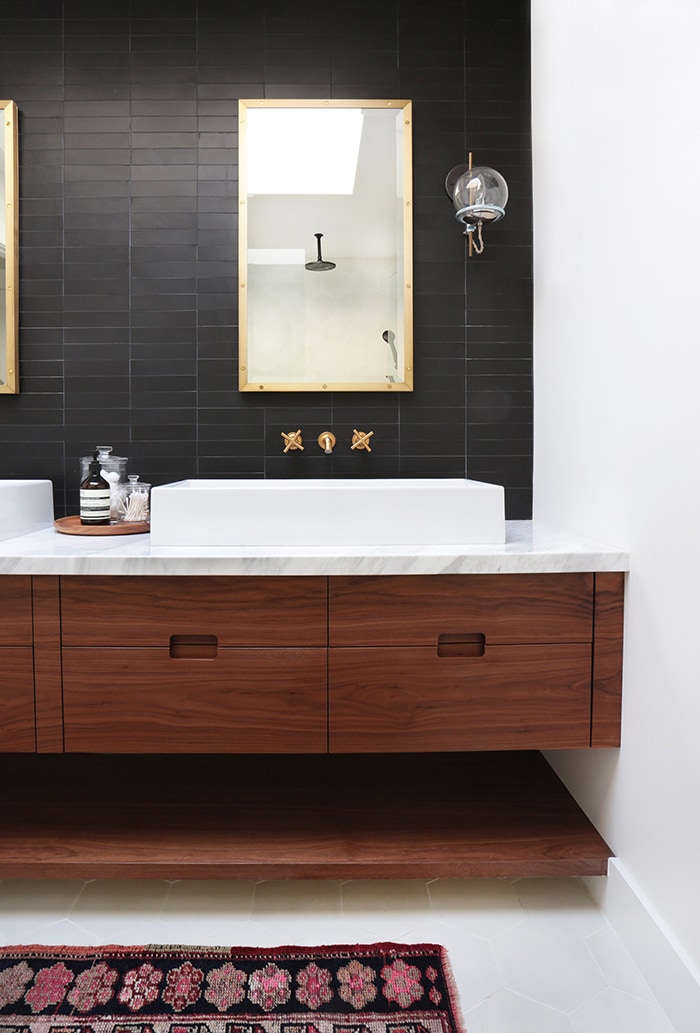
A few weeks ago I shared the full Guest Bathroom Design Plan of ‘bold luxury on a budget’:
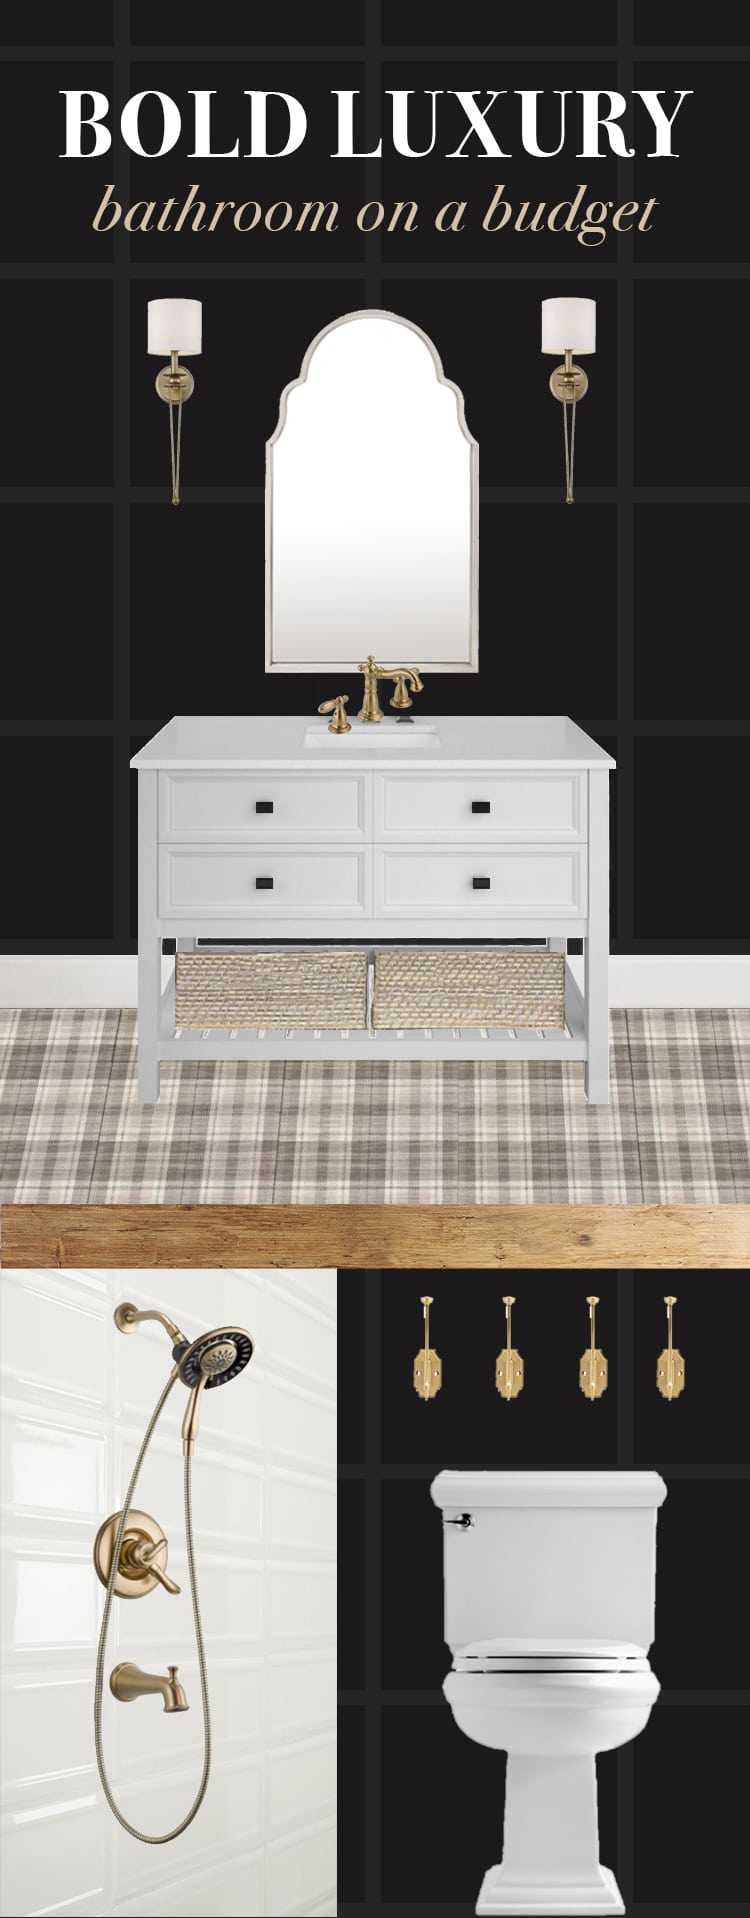
The goal is to finish this space in just a few weeks, and we sure have our work cut out for us!
The first project to tackle was tiling the shower, and I talked about the design process and my decision for this tile in the last post. Since we’re using a patterned/textured tile on the floor, it was best to keep the tile simple, and glossy white to offset the black walls. The timeless, sophisticated theme of the bathroom called for a simple and classic shape like subway.
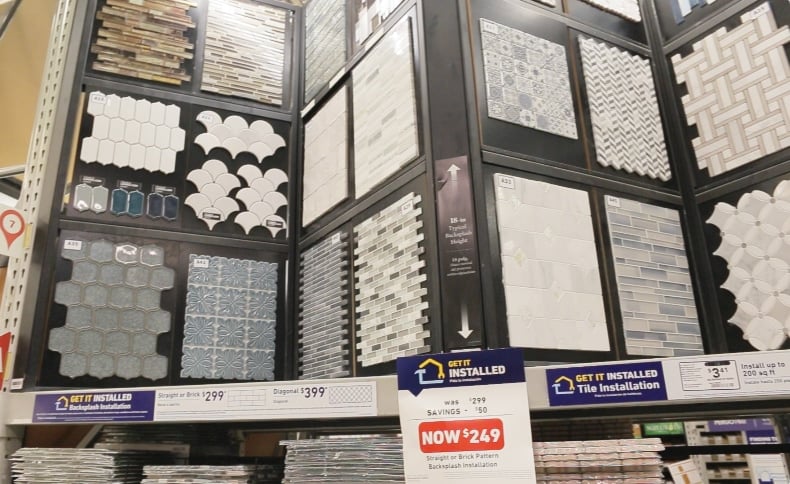
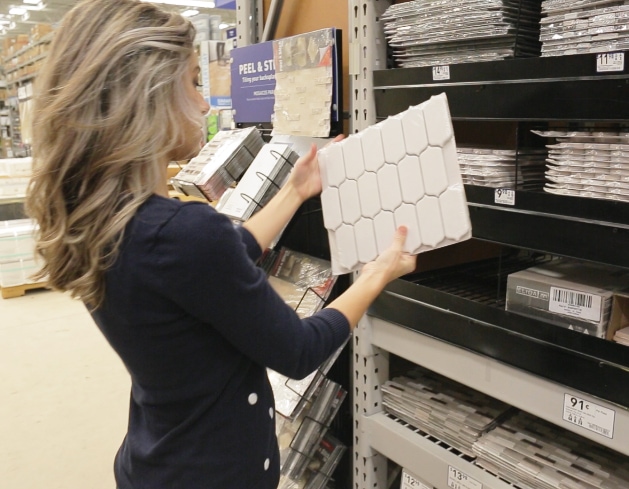
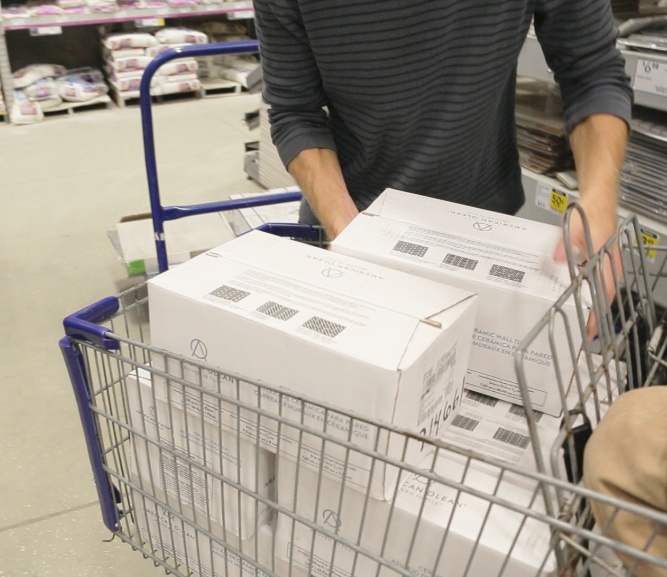
There are endless options when it comes to tile nowadays, and most importantly there’s so many great affordable options, so Lucas and I decided to check them out in person at our favorite Friday date night spot.
So many pretty distractions! But I had to stay focused on the mission: simple, white, classic, affordable.
I spotted these fun lantern shape mosaic tiles months ago and have them on my shortlist of “someday” tiles, but the price was a bit out of budget for this particular project.
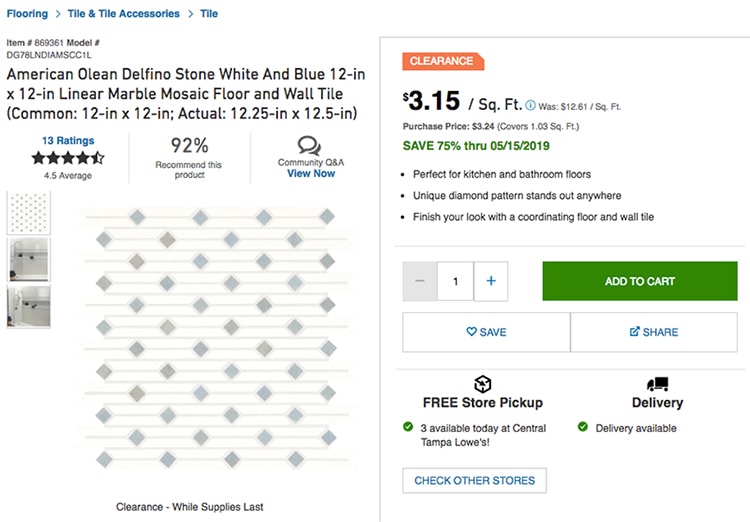
This marble white + blue tile caught my attention, and while it wasn’t simple enough for this design, I’m definitely bookmarking it for the future! My love for diamonds runs deep.
I went to look it up online and just had to share—they just dropped the price by 75%! Killer deal for marble… I wish I had a project to use this on.
Further down the aisle was the subway tile, and there was no shortage of styles (<- so many rhymes in that sentence).
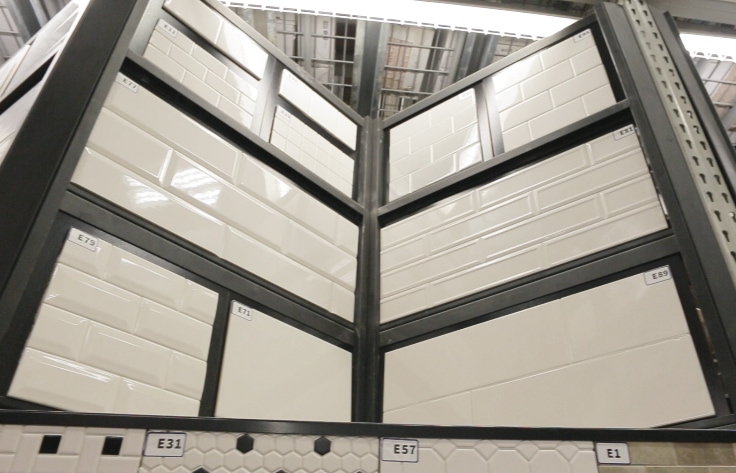
One of them jumped out at me immediately—can you guess which one?
If you guessed the middle right, you’re correct! Beveled subway tile is common but this particular design with the outlined edge was unique. And the long skinny shape gives it a clean, modern feel.
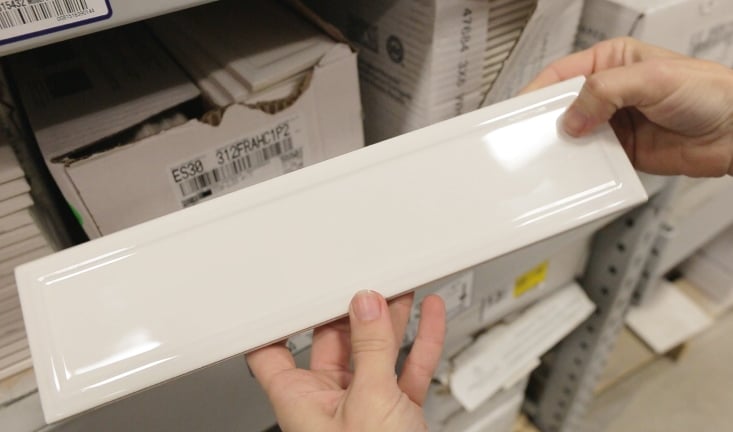
And after seeing the price, it was game over. I’ll take them all!
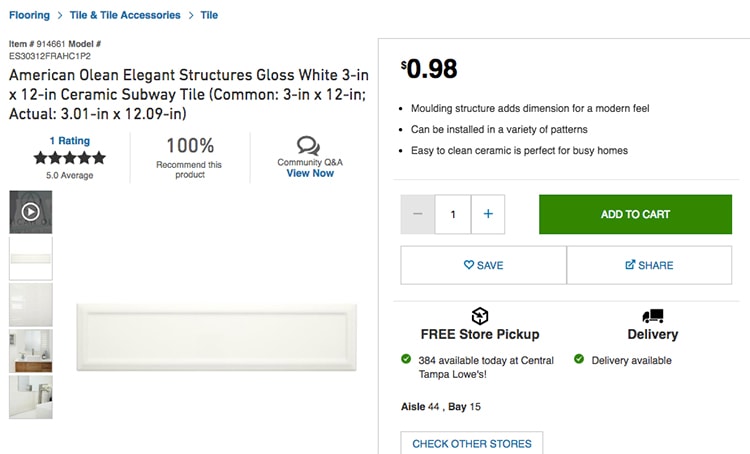
Fortunately Lowe’s had plenty in stock, so we loaded up our cart and called it a successful date night.
Now, it was time to figure out the tile arrangement. Most of us default to your traditional staggered subway tile, which I’ve done many times (tutorial here, here and here) and love—you can’t go wrong with a classic!
But this time, I wanted to try something new. My friends, are you aware of just how many different arrangements are possible? Here’s just a few, c/o A Beautiful Mess…
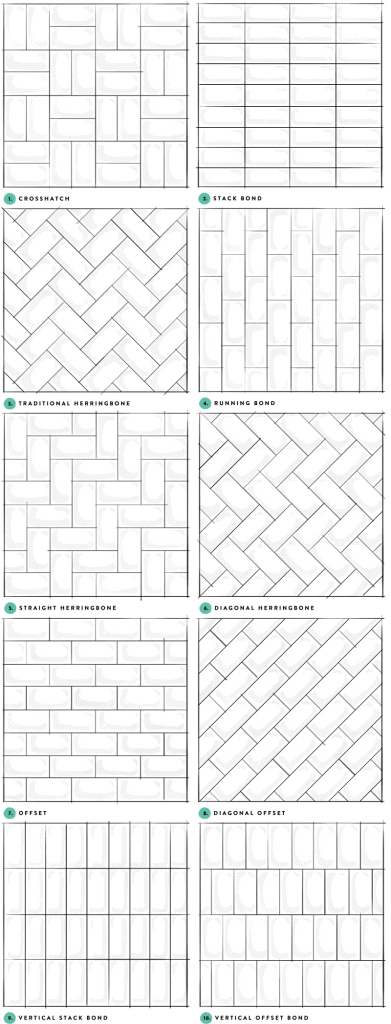
And a few more, if you really wanna get fancy…

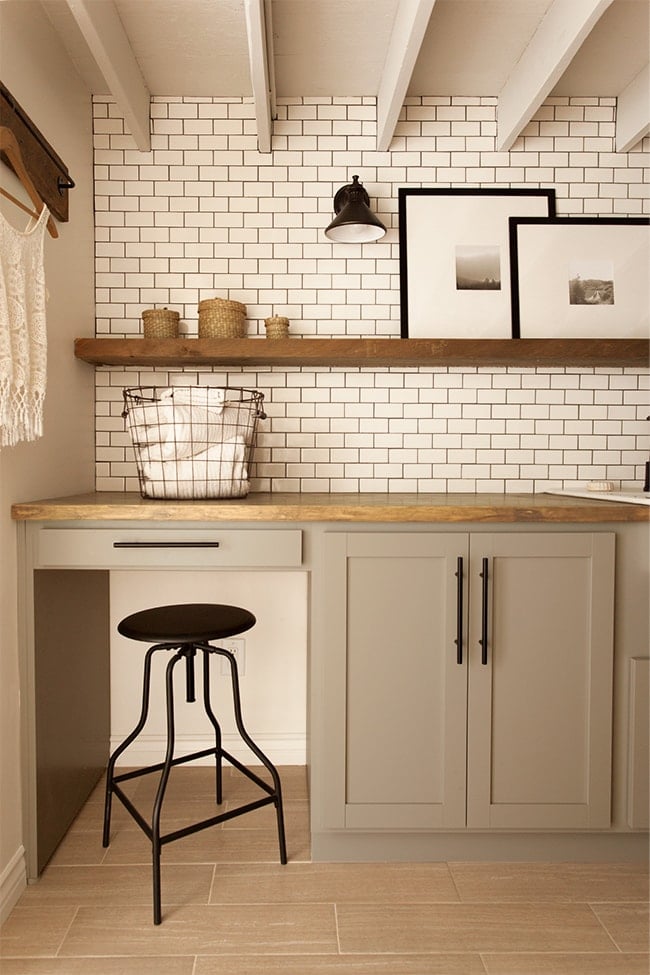
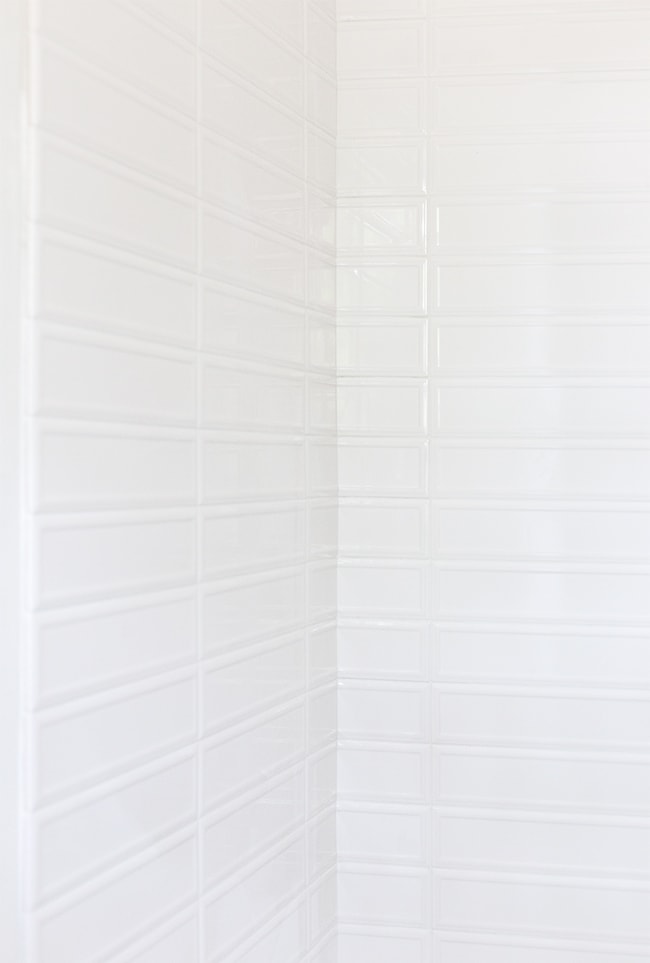
While some of those more intricate layouts could be really interesting in the right space, I still wanted to keep things simple, with just a little something special. The stack bond look has been popping up on my radar lately, and I’m liking what I see.
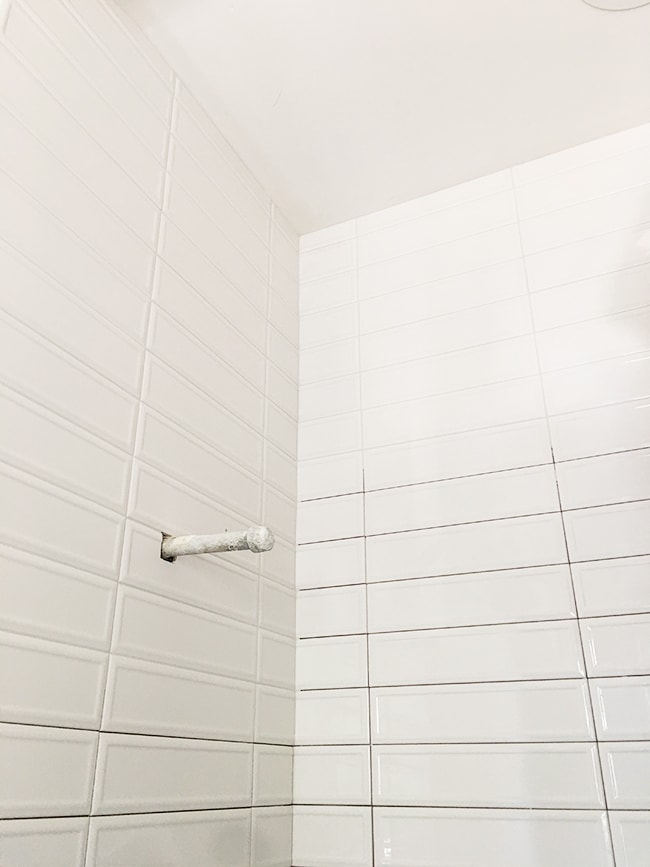
The tile I chose already had a unique design feature with the outlined edge, so there was no need to use an intricate layout to make it interesting. For this same reason, I opted for white grout, to emphasize the overall texture rather than the shapes of the individual tiles.
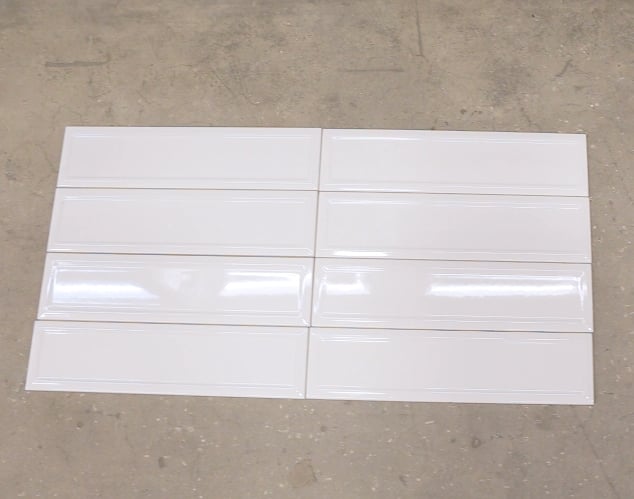
Our installer suggested skipping the spacers as these tiles already have a built in bevel the edges to allow for grout. I agreed and think it looks much cleaner this way.
Now for the fun part—installation! It was extra fun for me because this time I didn’t have to do any of the work (well, aside from placing a few tiles). Our time is running out to complete this house and fortunately, our builder has his guys lined up to get it all done.
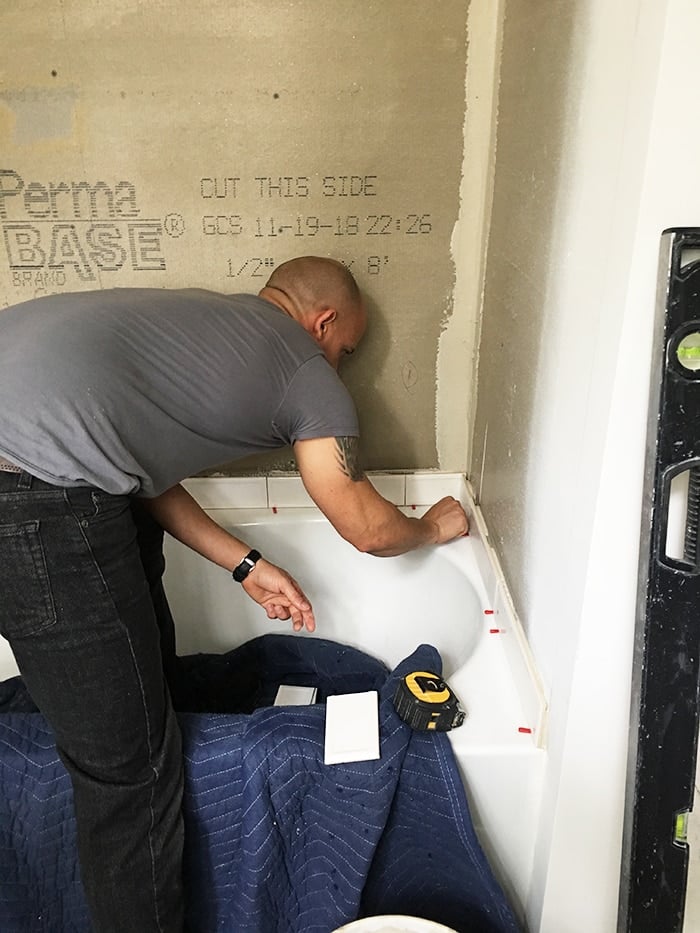
It’s always fun to watch a skilled craftsman do his thing. Lucas and I combined would have no chance to work even half as fast or as precise.
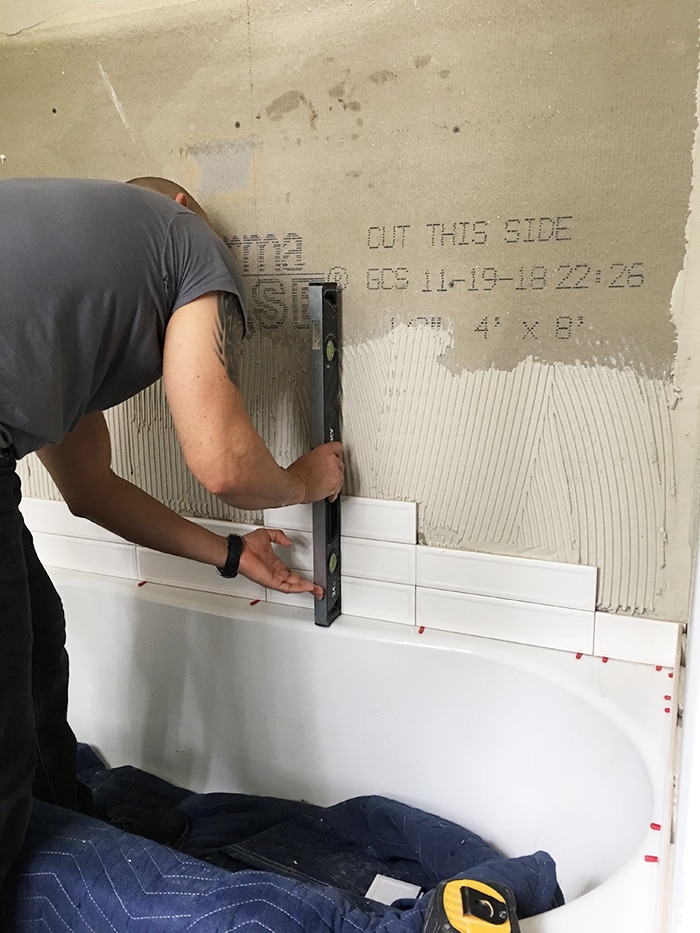
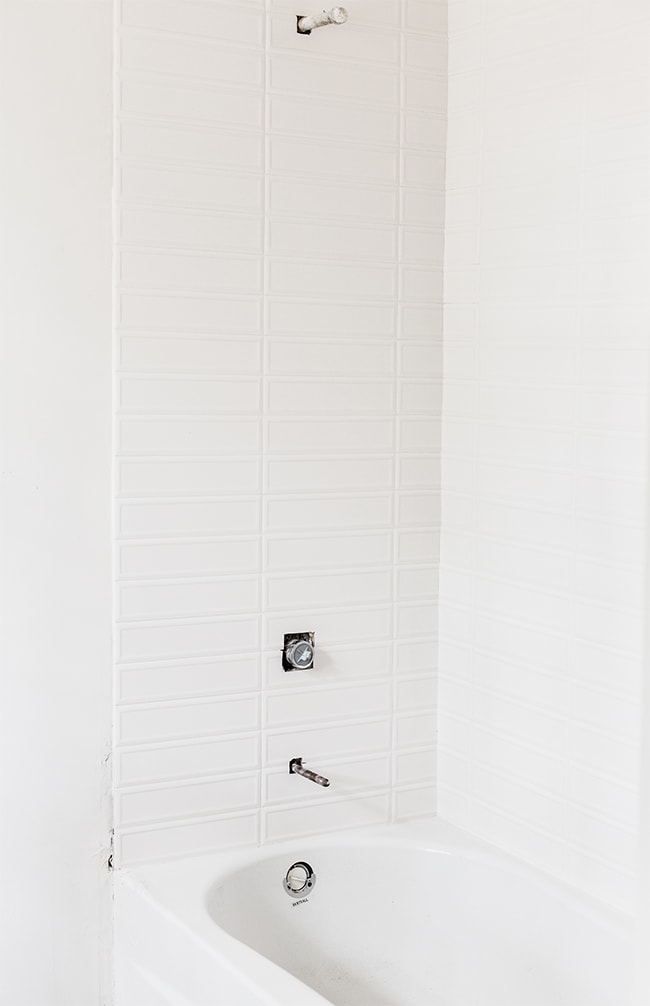
We had a decision to make about where to start and end the tile, and took our installers suggestion of starting on a center line at the back wall and “wrapping” the tile around the corners.
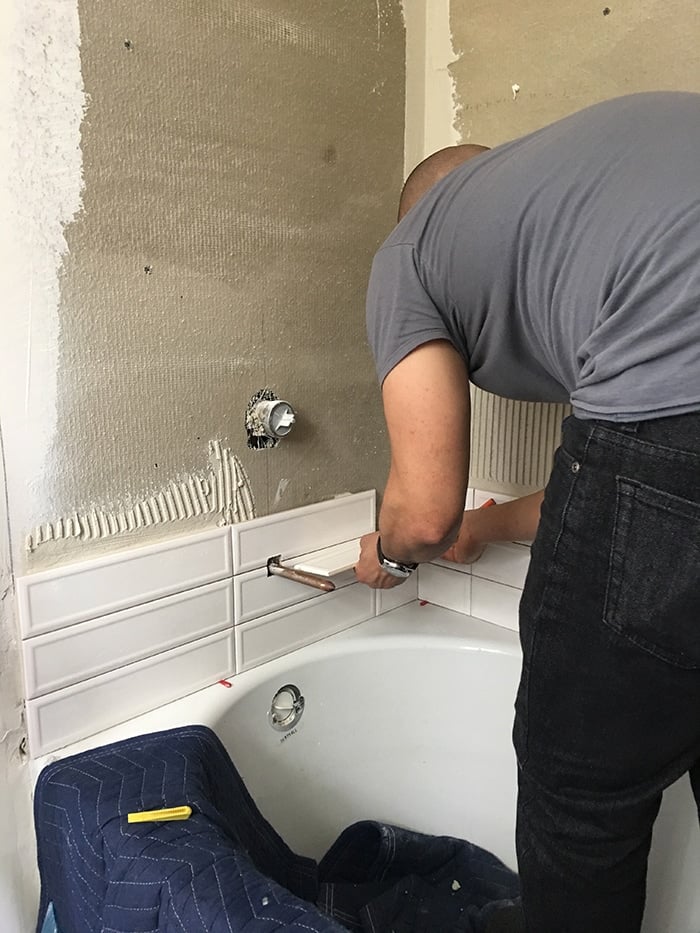
This would create symmetry overall, and also allow for a finished edge along the two walls, which is important since we plan to line that edge with painted trim.
About 7 hours of tiling later…
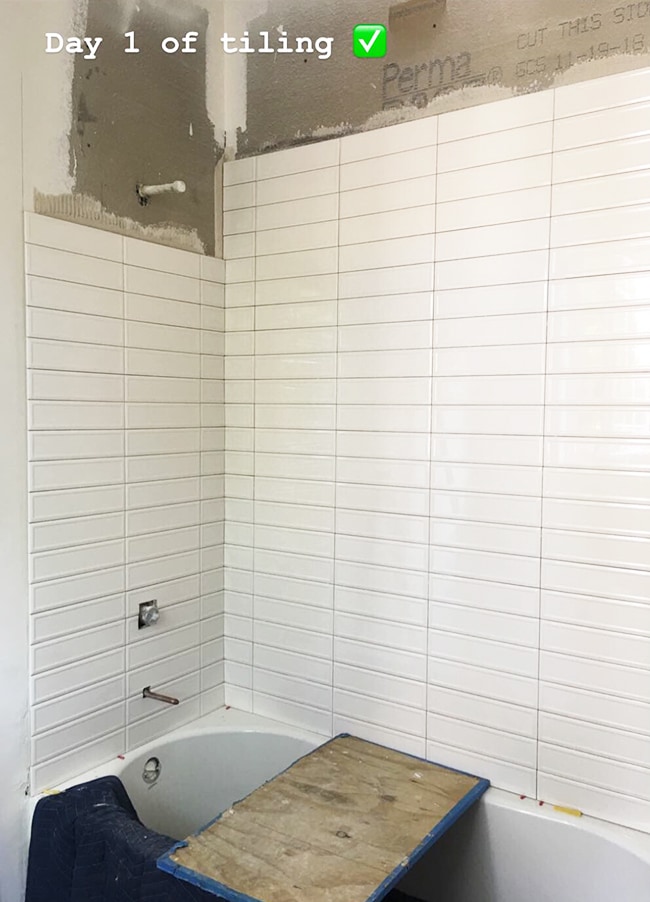
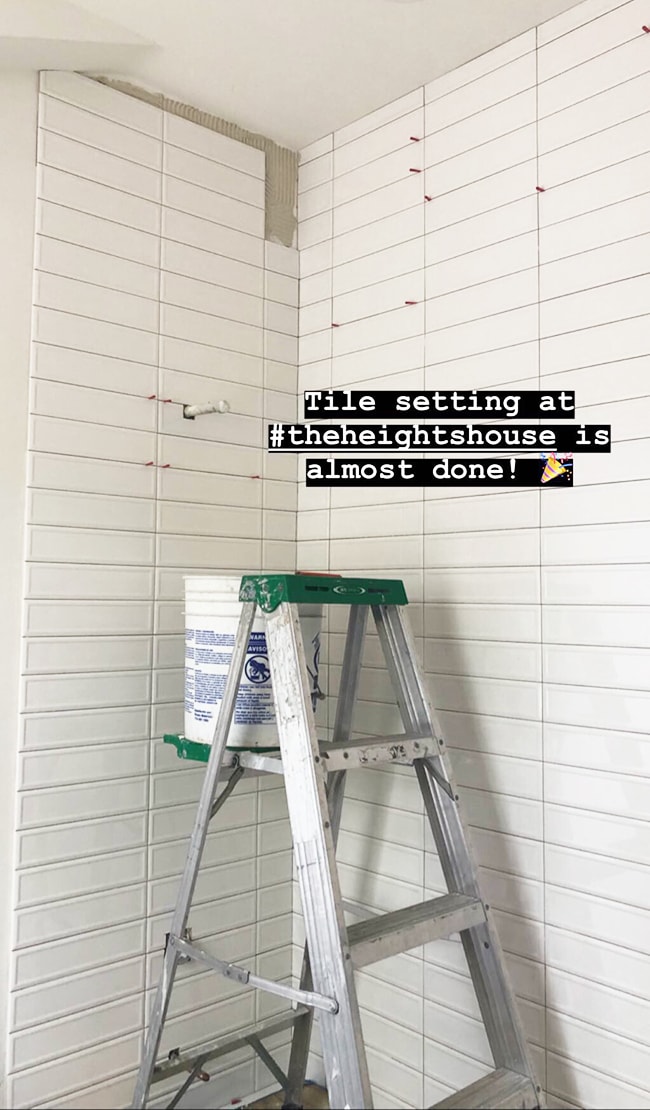
And by the next afternoon, the tile setting was complete.
And finally, grout. We used Mapei’s Keracolor in ‘Avalanche’ (the brightest white they offer).
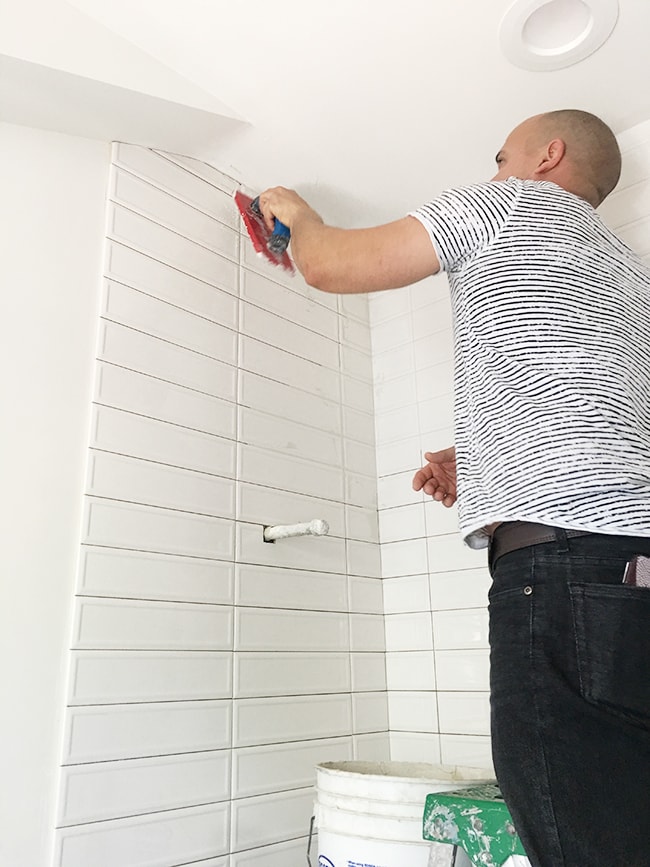
So satisfying to watch!
The white grout allows the tiles to blend together almost seamlessly, so from a distance it reads as an overall subtle texture.
I love the simplicity of the design, and the fact that you don’t see this same setup every day (or ever!) We bought (almost) 8 full boxes and ended up returning a box and a half, so this project came in at around just $300 for the tile (with the 5% discount using my Lowe’s card).
The room is a lifeless bright white box now, but deep black walls are lurking right around the corner…

That’s our next project to tackle in here, and I’ll be documenting and sharing the DIY in real time over on my Instagram stories, so make sure to follow along if you aren’t yet! I’ve been posting lots of progress updates lately as we’ve been working on multiple projects at once, trying to (finally) get this house move-in ready. Inching towards being able to share some pretty “After” photos… very soon, my friends! Until next week,


Jacob says
I bought a sofa. At first I ordered it on Amazon and they brought it to another city. I had to pull myself together and change the company to Housera
Monica says
I really like how this turned out. Nice and subtle, but still has that little something that makes it special.
Kristy says
love the hair color!
Jenna Sue says
Thank you, Kristy! <3
julia bill says
Looks beautiful! I want to use the same tile in one of my bathrooms. Thank you for the inspiration.
Jenna Sue says
Of course! Always happy to share my budget-friendly finds 🙂
Margery Schneider says
Was it by design that the raised outer edge of the subway tile echoes the same feature on the vanity drawers? I love it all!
Jenna Sue says
Ooh, I actually didn’t even think about that–how perfect! Thanks for pointing it out 🙂
Anne Demers says
It’s going to be sad when the homeowners figure out later that the shower wasn’t waterproofed…
Jenna Sue says
There’s more than one way to waterproof a shower, like adding a vapor barrier before the cement board. And we are the homeowners. 🙂
Leslie Wiesman says
This tile looks fabulous Jenna!! Love the clip of you and Lucas skipping into Lowes. 🙂
Jenna Sue says
😉