Update: make sure to check out the final porch reveal!
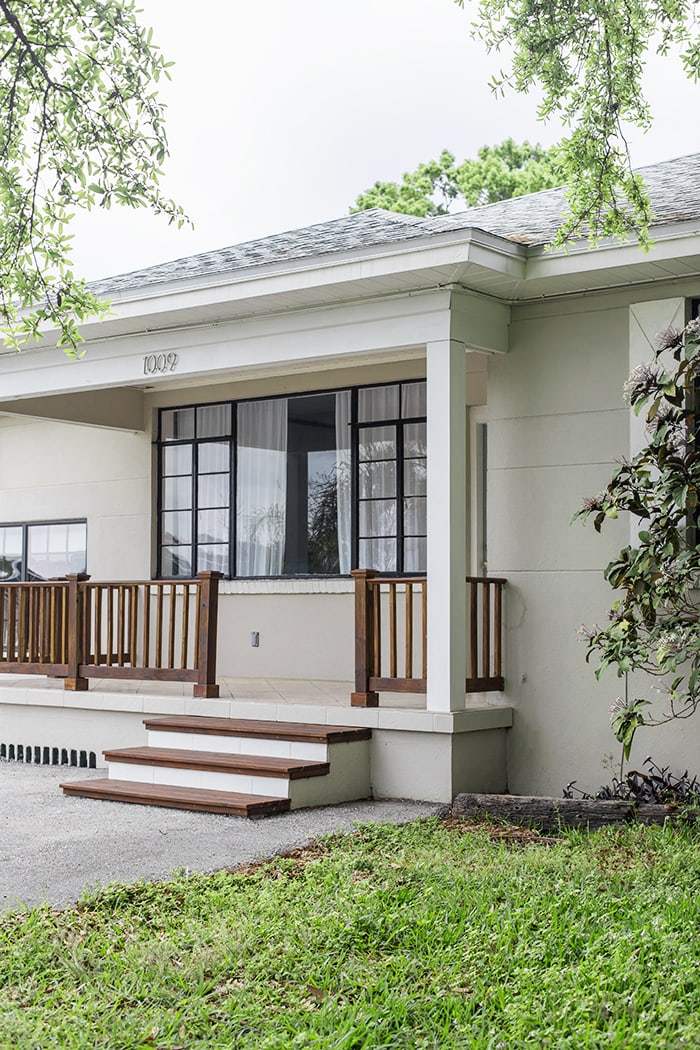
Last week I shared all the details about Phase 1 of our mission to maximize the curb appeal at the Riverside Retreat, and I’m happy to report that we’re one step closer to the finish line!
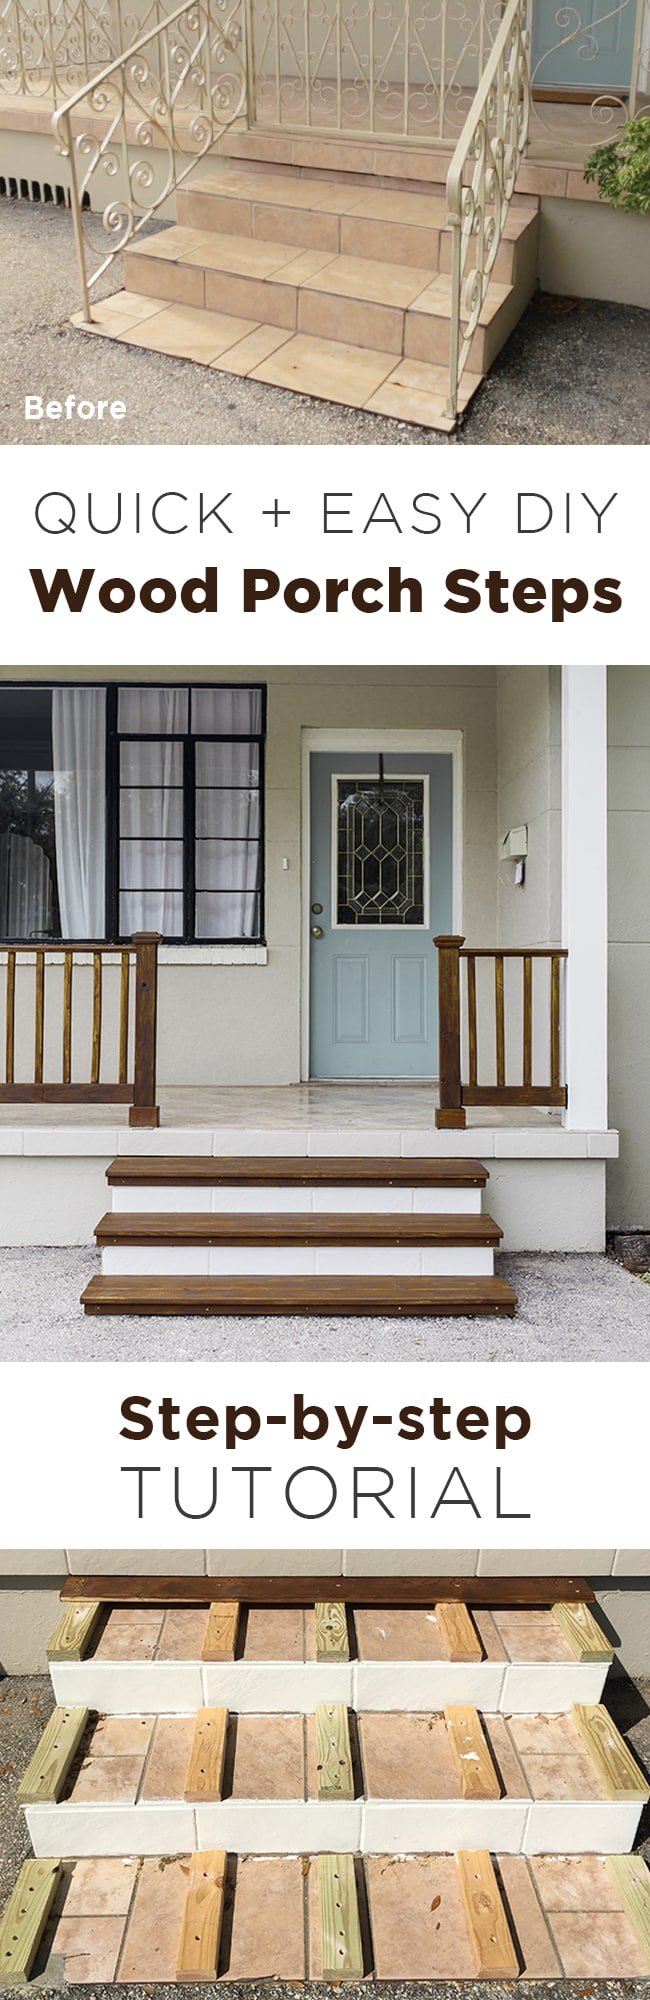
This project wasn’t in the original plan, but after a failed attempt at painting the tile, I turned to Instagram (and Photoshop) for help and came up with a new and improved plan of attack.
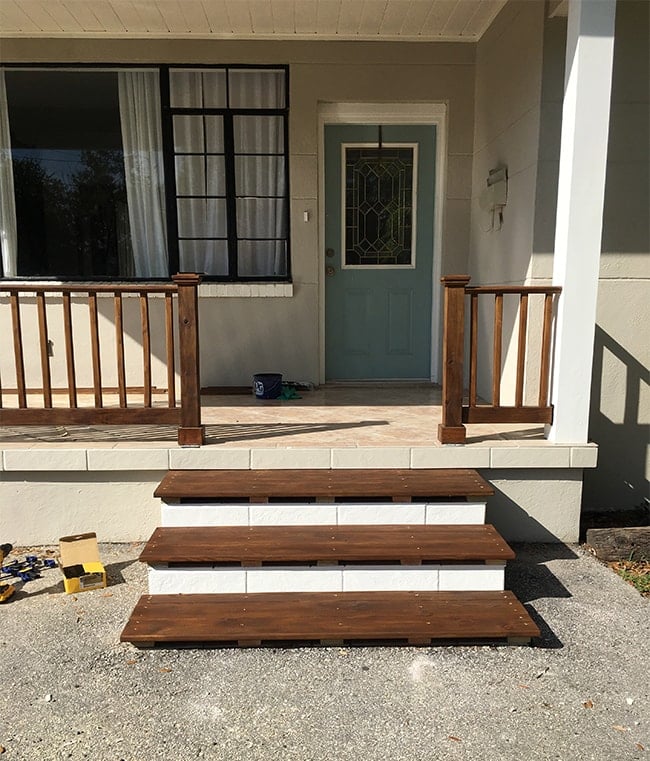
The plan was to cover the top of each step with stained wood (to match the railing) and paint the tile risers white. We could have wrapped the entire staircase in wood, but for our situation, that was unnecessary work/time/cost. Remember—the goal for this makeover is to maximize results with a minimal budget/timeline.
If this was our own house and not a future rental, we would have built a wood deck to cover the top of the porch too (I explained why that wasn’t an option for us in Phase 1) but cladding just the steps was much more do-able. I spent some time researching the plan, found several helpful tutorials on Pinterest, and was able to easily put together a plan.
Here’s what we used:
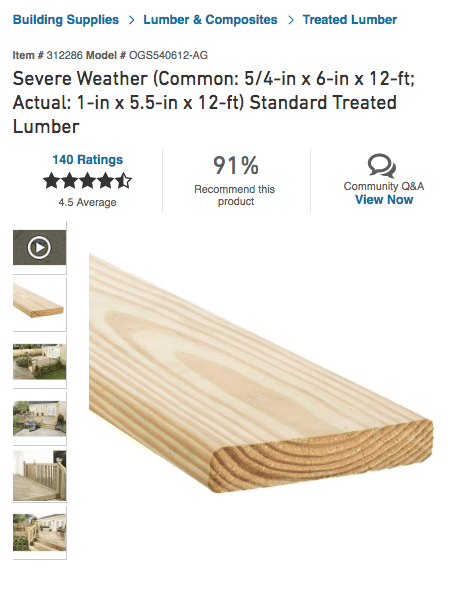
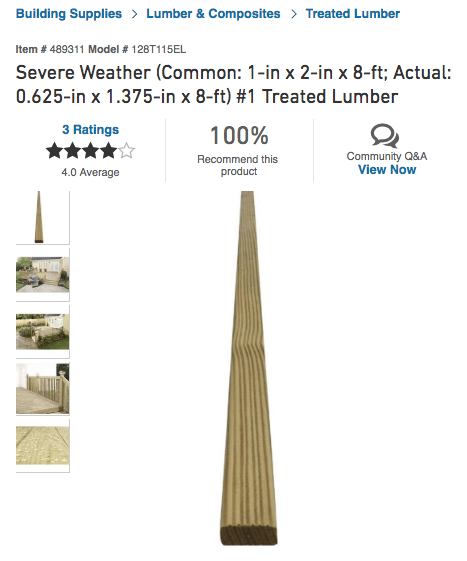
- 1×6 deck boards for the tops (we needed five 1x6x12″ boards)
- 1×2 furring strips for the sides (we needed five 1x2x8″ strips)
- 2×4’s for the spacers (we used about 16′ in total)
- A hammer drill
- A cordless drill (plus optional impact driver)
- Decking/exterior wood screws
- Tapcon/concrete screws
- Primer
- Exterior Paint
- Wood stain + sealer
- Optional: Table saw, if you need any boards ripped down
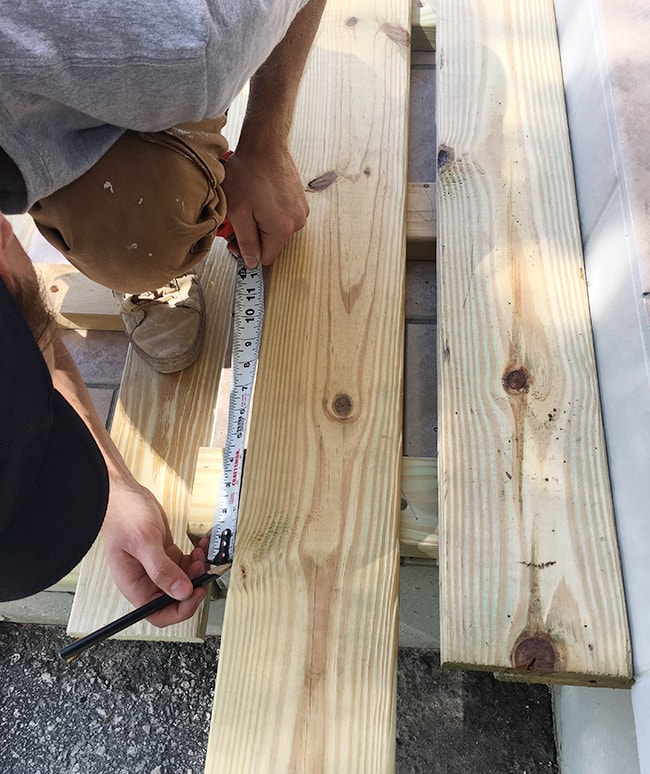
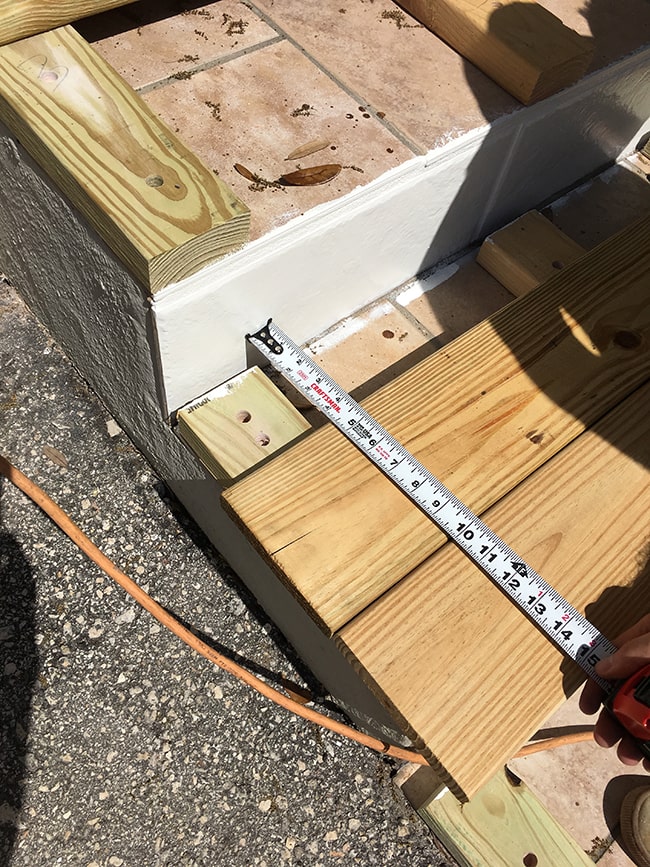
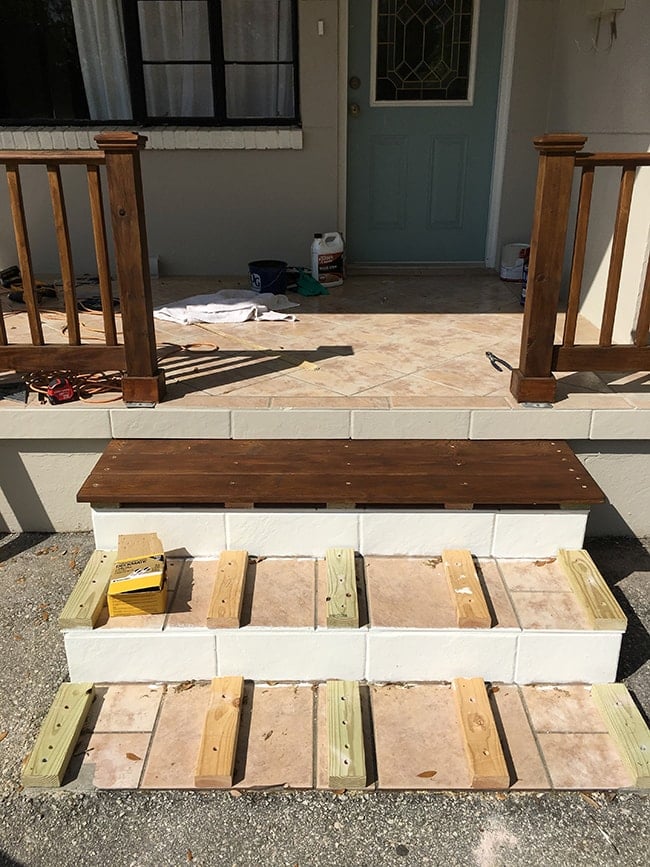
After sketching out the measurements, we were off to Lowe’s to grab our materials. Deck boards come in a few different sizes, and with the width of our steps (around 14″) it made the most sense to use 1×6 boards (which are technically 5.5″), to give us 3 boards on each step (2 full boards + one ripped down to 4″).
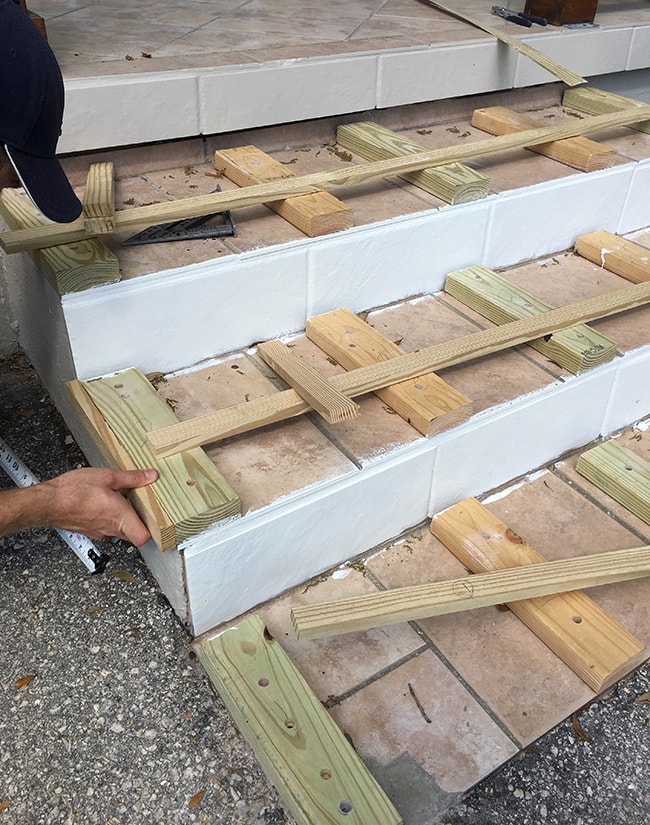
It’s not advised to attach these directly on top of the concrete steps, so we used 2×4’s as our spacers (or ‘sleepers’ as they’re called in this application), which we already had leftover from our DIY railing.
Since the deck boards would be sitting on top of the 2×4’s, we needed some sort of trim to wrap around the sides so you wouldn’t see the 2×4’s underneath. These 1×2 pressure treated furring strips were perfect, because they were just about the same height as the 2×4’s (1.5″). We bought five:
We had all the other tools and materials at home, so this project cost us less than $50! Score.
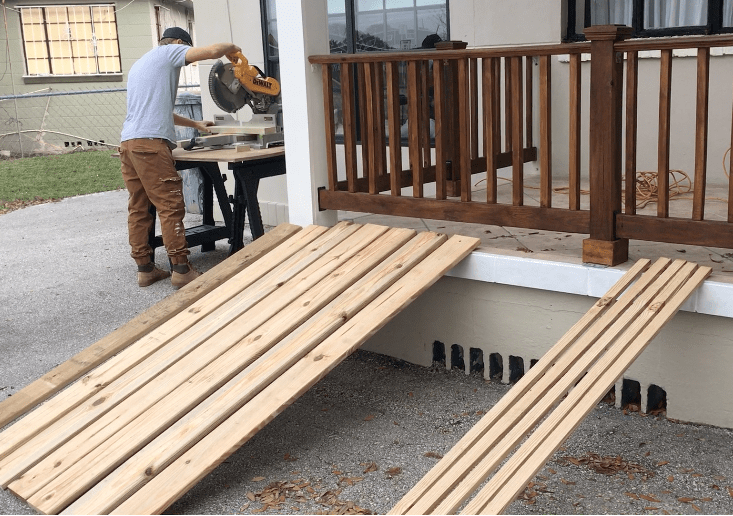
Back at home, we began measuring and cutting…
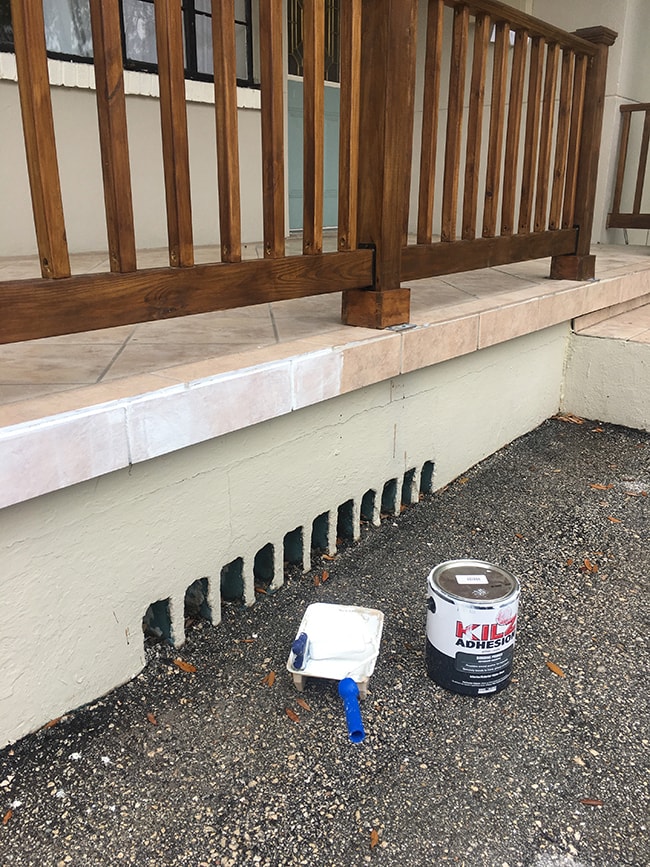
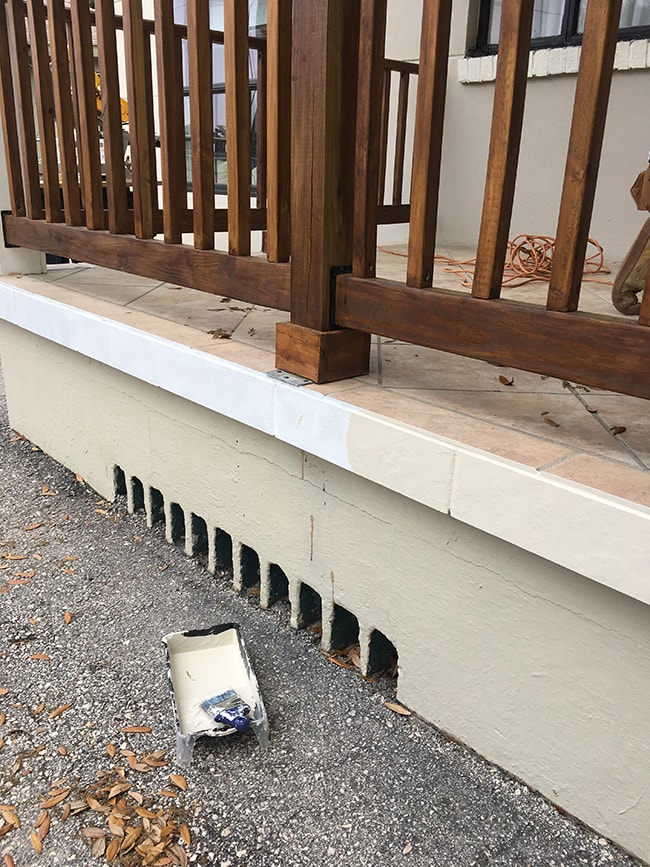
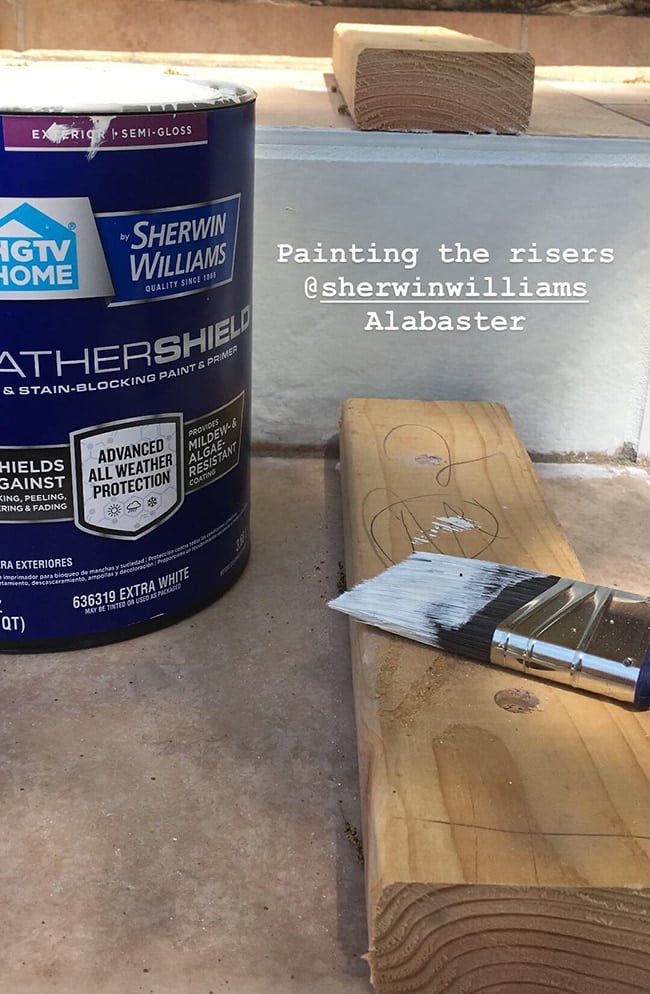
I had primed the tile border around the porch, including the risers, earlier in the week to give the primer time to cure before painting.
Applying a few light coats and letting it cure made me hopeful that this will last!

While Lucas was cutting wood, I was cutting in around the porch with a steady hand (using Behr’s Castle Path)—I repainted the entire porch since the old house paint wasn’t an exact match.
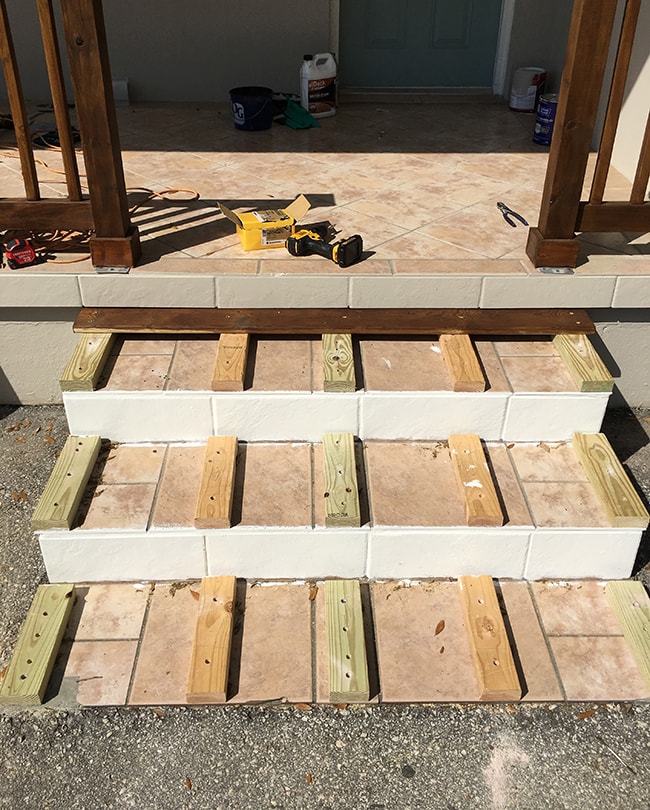
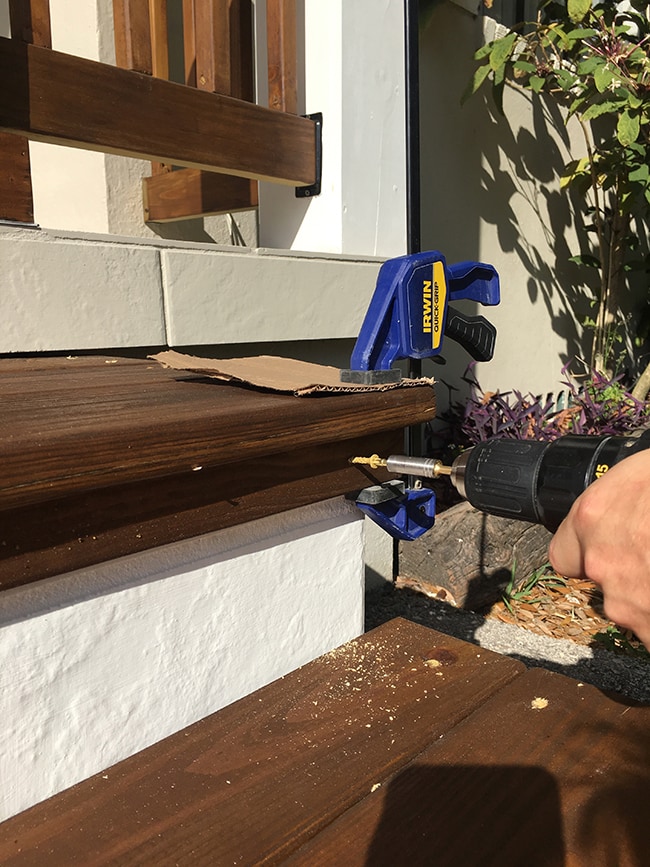
Then it was time to attach the sleepers. Living in a block construction house, Tapcon concrete screws have become our best friend, and fortunately they go right through tile as well. You have to pre-drill pilot holes for each screw, and our poor hammer drill was put to the test after a solid hour of drilling (it survived!)

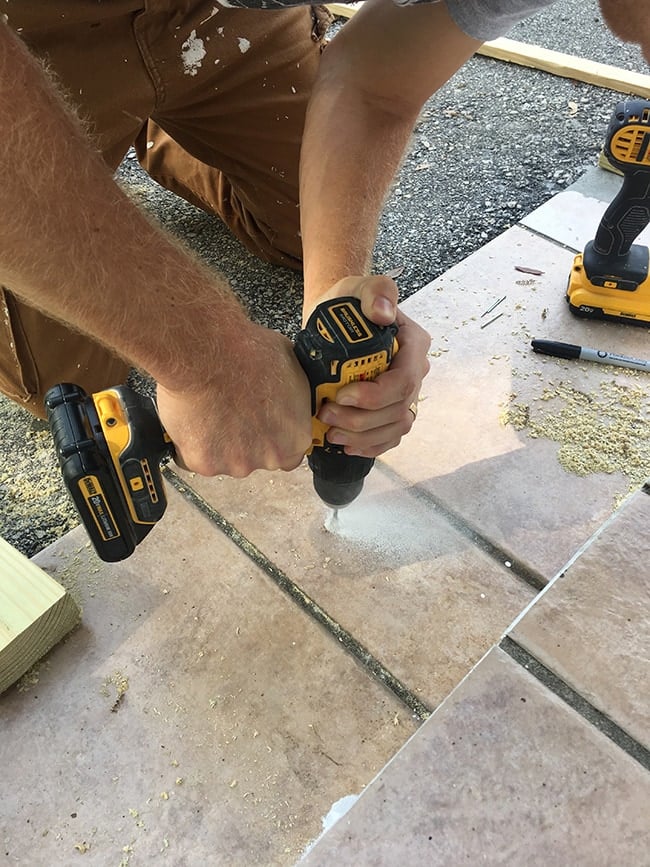
After marking and drilling the pilot holes for each screw, we used an impact driver fitted with a special bit to drive the tapcon screws into the 2×4’s and concrete (you could use a regular drill, but an impact driver has more force and is easier to use for this job!)
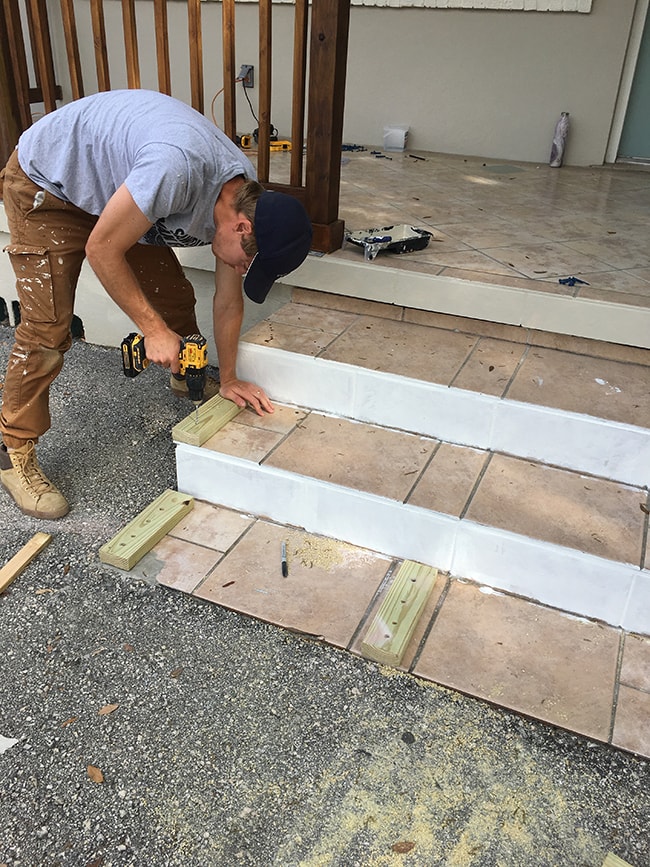
Just to be safe, we used 5 sleepers per step (with 3 tapcon screws in each sleeper).
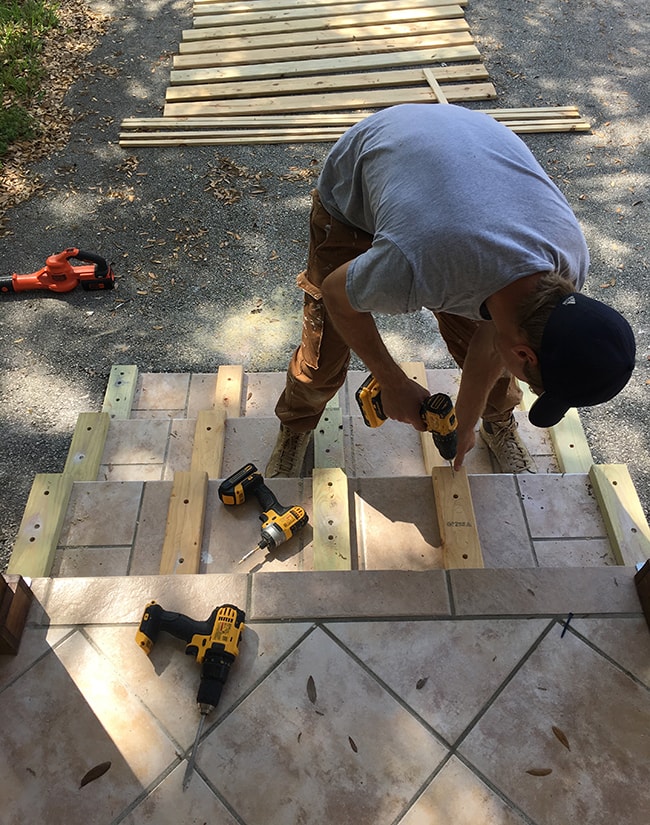
The regular drill (shown in the bottom of the photo above) had a paddle bit which was used to bore out the top of the 2×4, so the tapcon could be countersunk down and grab more of the concrete. This job would take so much longer if we had to stop and switch the bits out after each step—I highly recommend having all three drills in your arsenal!
Once the sleepers were secured, I gave the risers a couple coats of exterior paint (I shared the steps in real time in my Instagram stories, as usual!)
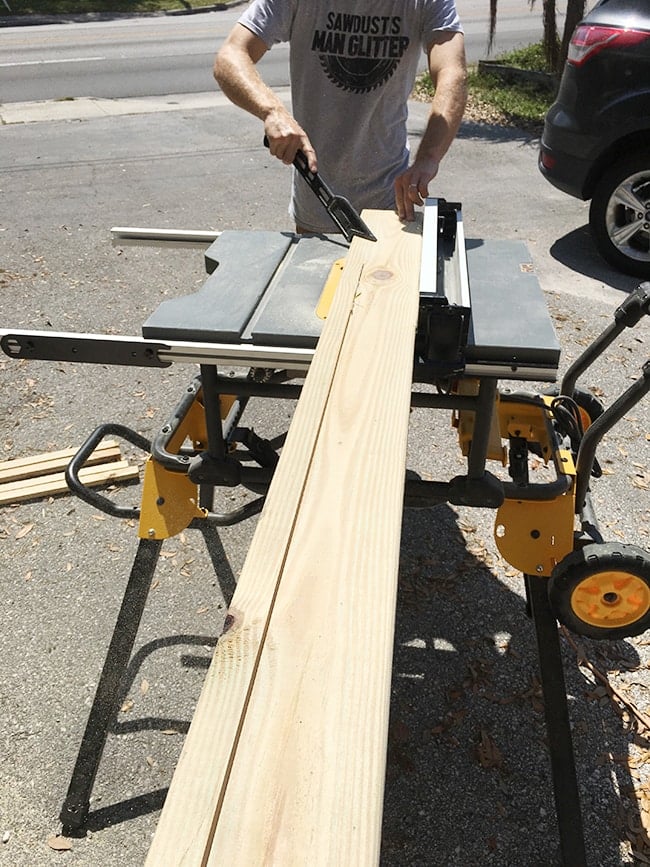
While this was happening, Lucas was cutting down the deck boards. Our steps are 60″ wide and we wanted there to be a little overhang on all sides, so each board was cut to 62.5″.
Two of the boards for the bottom two steps also had to be ripped down (we were able to slide the back board underneath the porch on the top step).
Accounting for a small gap in between the boards and overhang on the front, the back boards were ripped down to 4″.
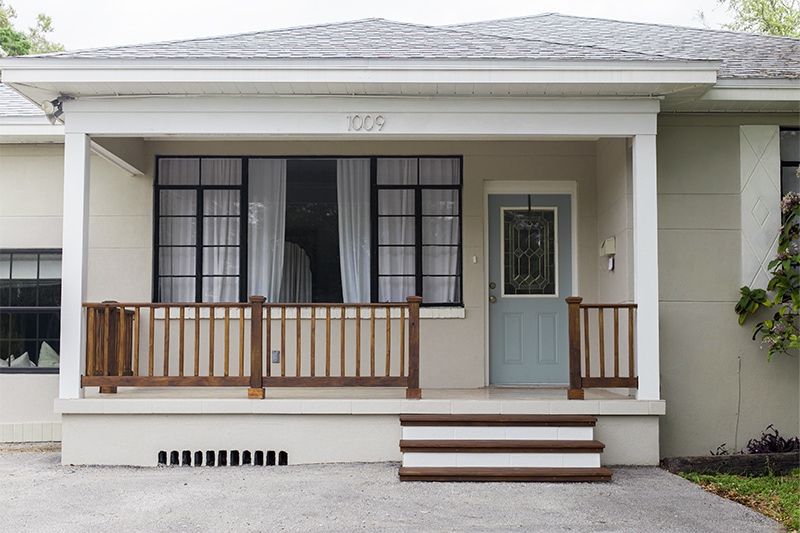
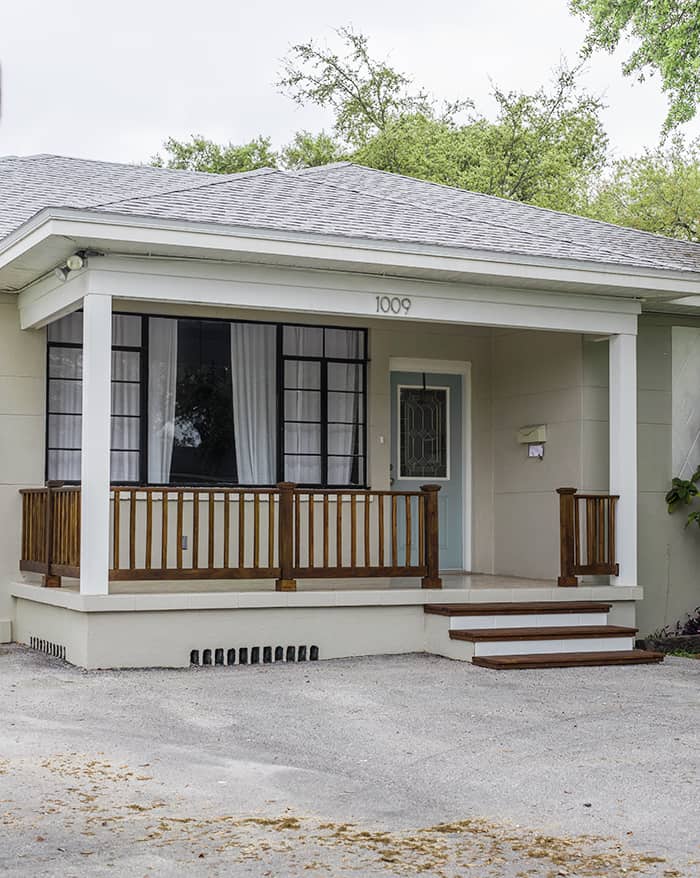
Ta-da!
The great thing about exterior projects is that they aren’t held to the same standards of perfection like interiors are. You can have dents and gaps and imperfections all day long—no one is looking at those details. It’s outdoors, it’s supposed to be rustic! So much less pressure.
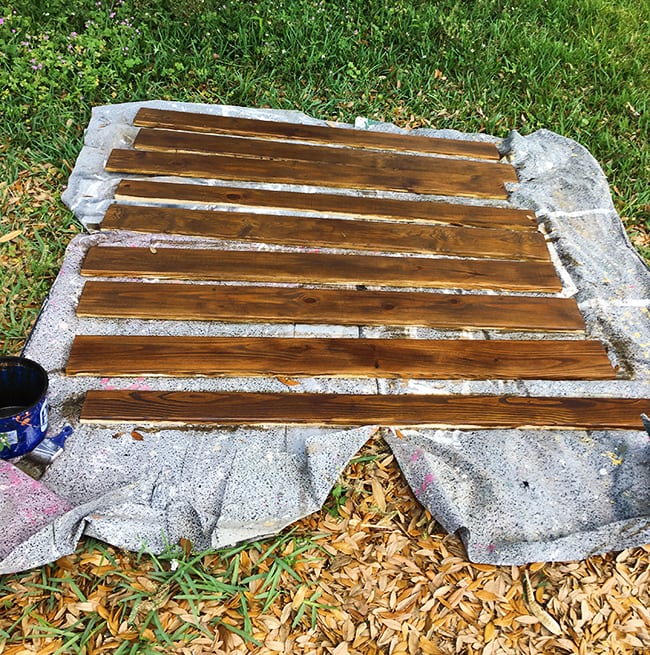
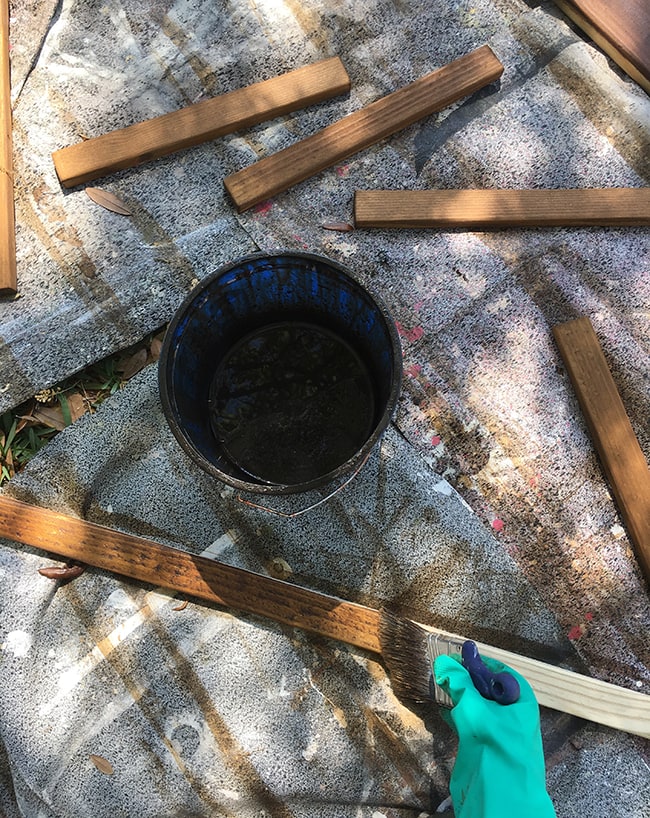
After all the deck boards were cut and sanded, I applied a couple coats of waterproofing wood stain + sealer to match the railing. I figured this would be much easier to do beforehand than trying to avoid splatters on the fresh paint afterwards.
Meanwhile, Lucas worked on measuring and cutting the 1×2’s for the sides:
Those pieces were then sanded and stained.
The stain took less than an hour to dry, and it was time to start fitting the first step!
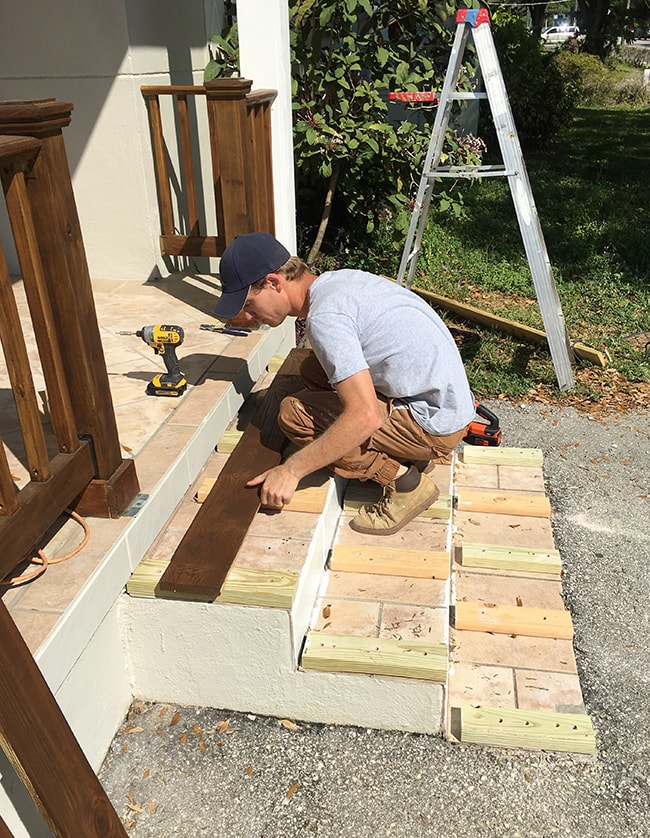
The first three boards were positioned into place, and we measured on all sides to make sure they were even.
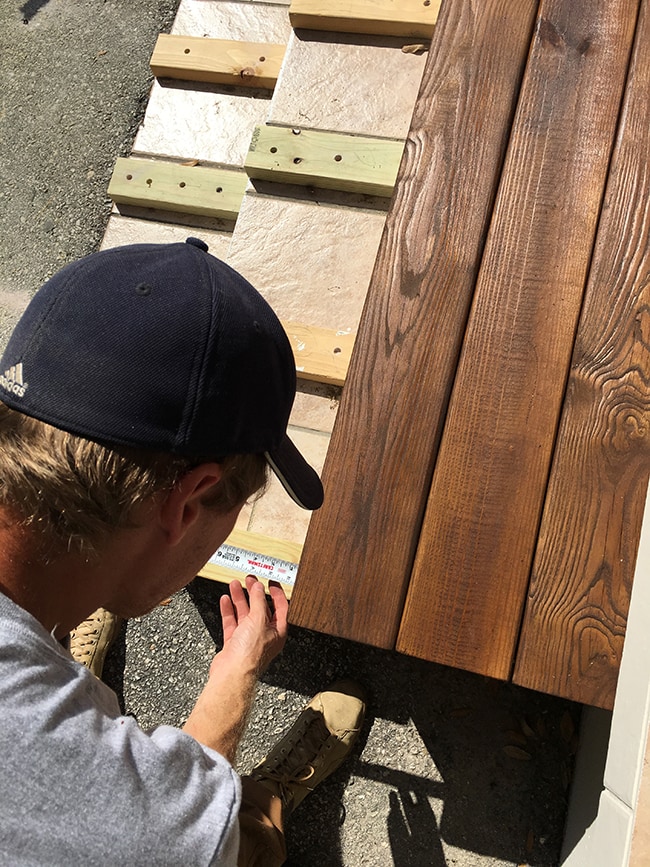
We had to do some adjusting (the wood is not perfectly straight—welcome to outdoor projects where nothing is perfect) and we made sure to leave a small gap between the boards for water drainage.
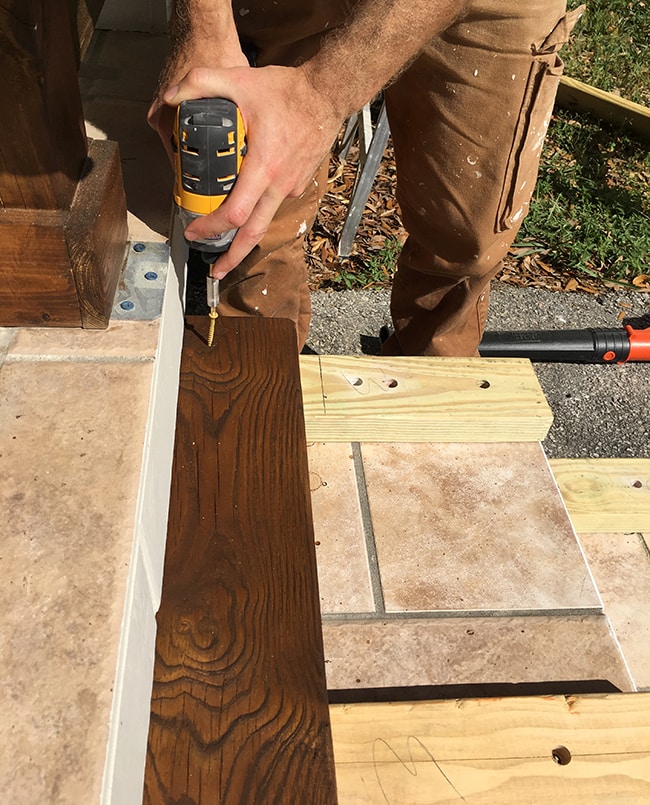
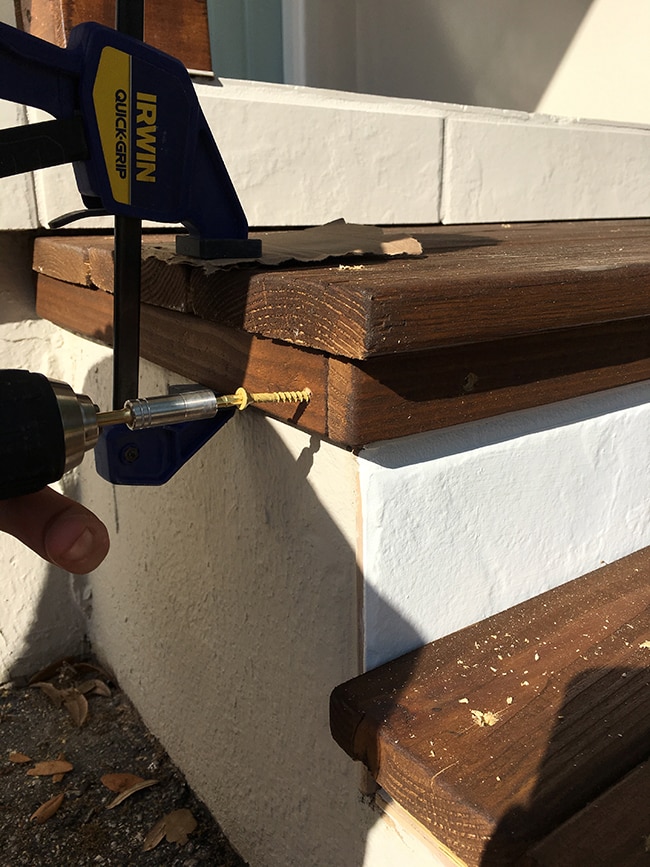
The deck boards were attached to the 2×4’s with deck screws, 2 screws on the outside boards and one in each middle board. Tip: to reduce wood splintering, make sure to pre-drill holes before securing the screws. In minutes, our first piece was in!
Rinse and repeat for the next boards…
Aww, our baby’s first step! 😉
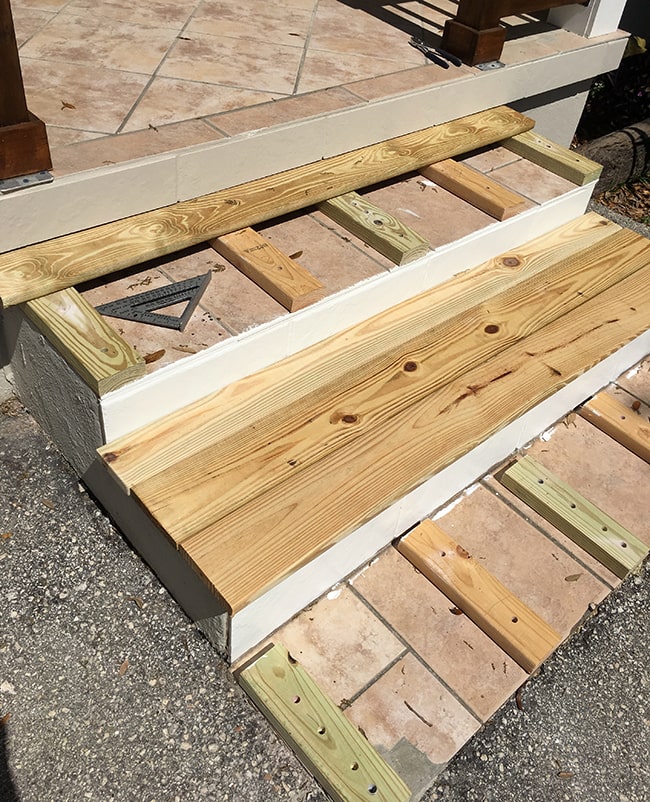
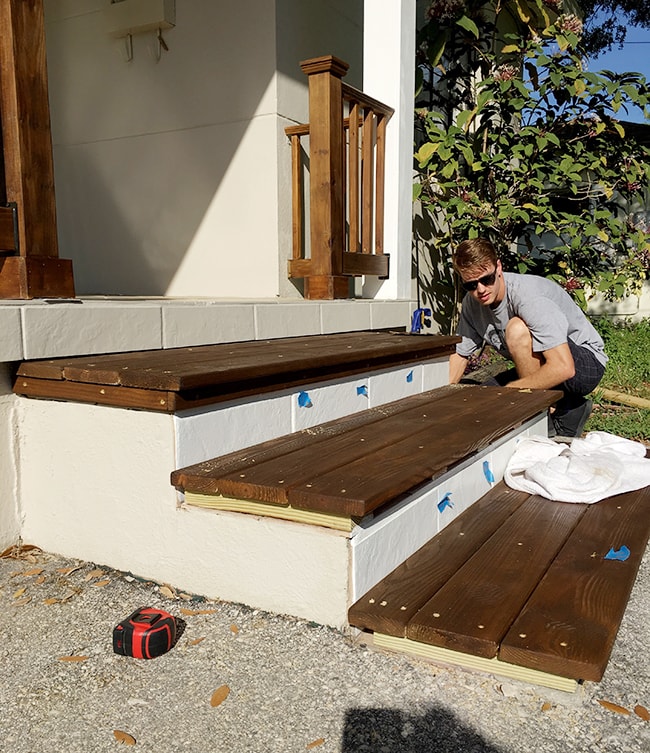
Six boards later, and the top of our steps are done.
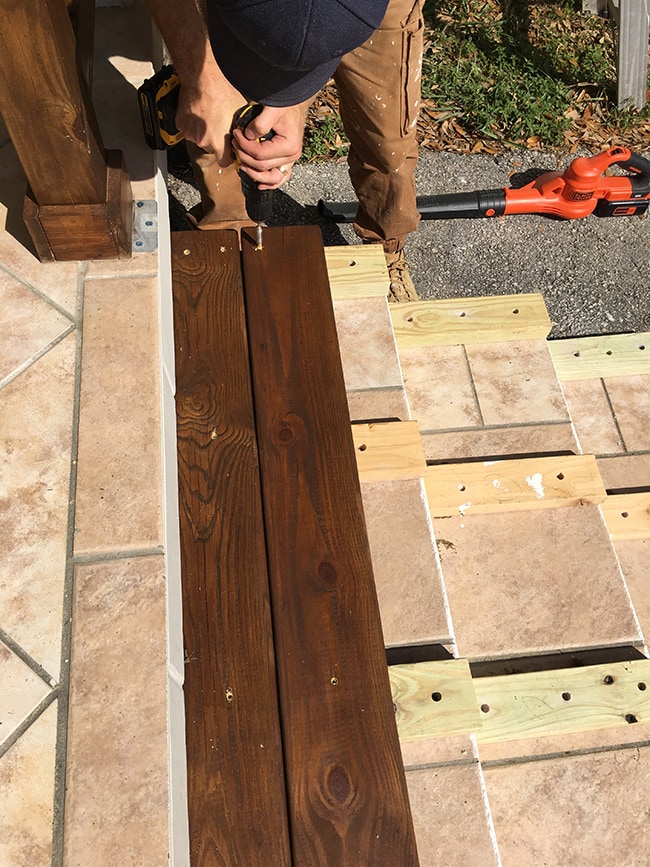
Next, it was time to attach the 1×2’s. We used painters tape to mark the locations of the 2×4’s before clamping the front piece in place.
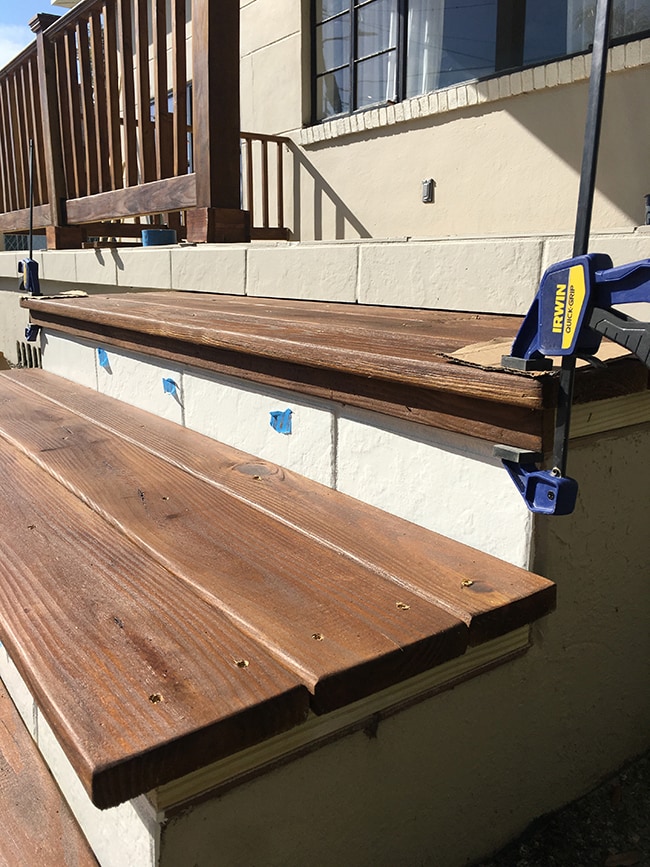
Pre-drilling first…
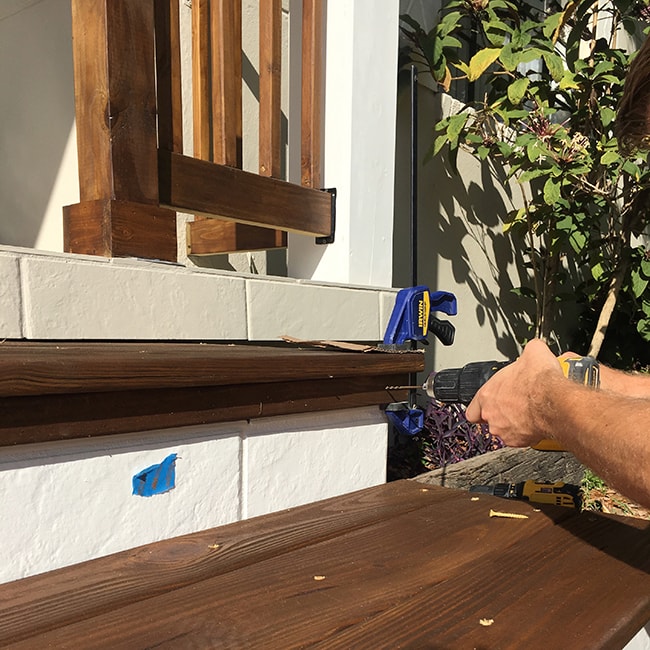
Followed by the screw (we did this at every stud location, so five screws for each front board).
Same process for the side pieces, but using three screws.
FYI, we skipped spring here in Florida and went straight to summer. I can only be in the sun for a few minutes without overheating, so poor Lucas was sweating it out by himself for this last part.
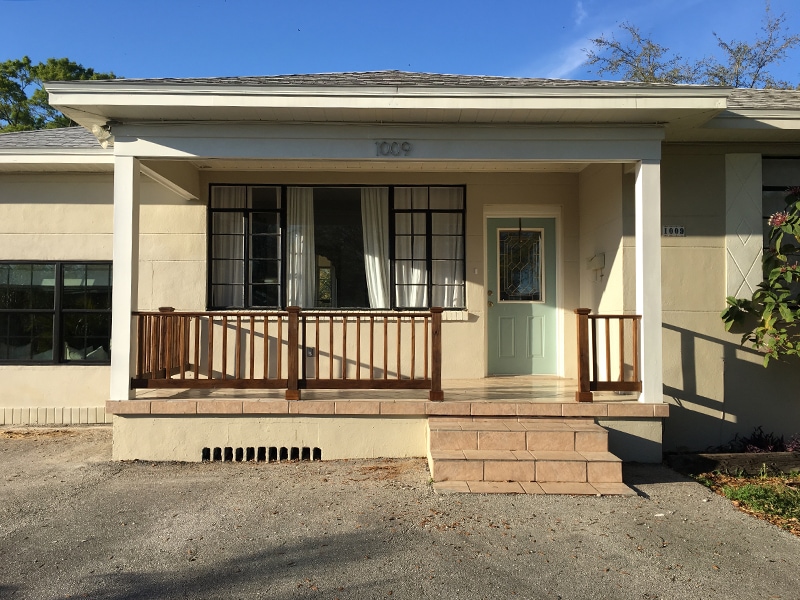
But thirty minutes or so later, he called me outside to celebrate our victory!
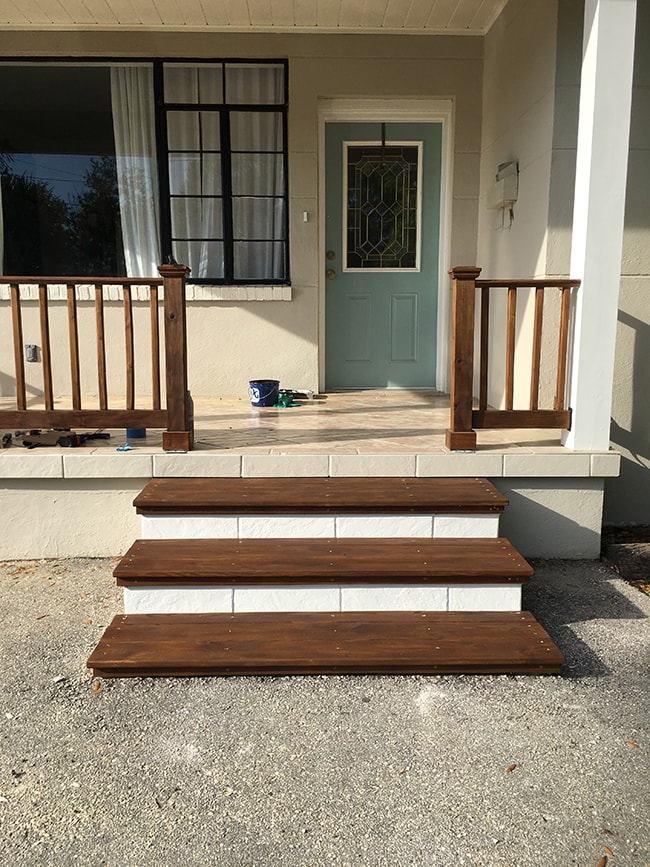
Happy dances for a completed Phase 2!

Well, almost. At dusk when it was cool enough to step back outside, I touched up the screw holes with a dab of stain on a Q-tip. Notice the finished middle row compared to the unfinished outside row.
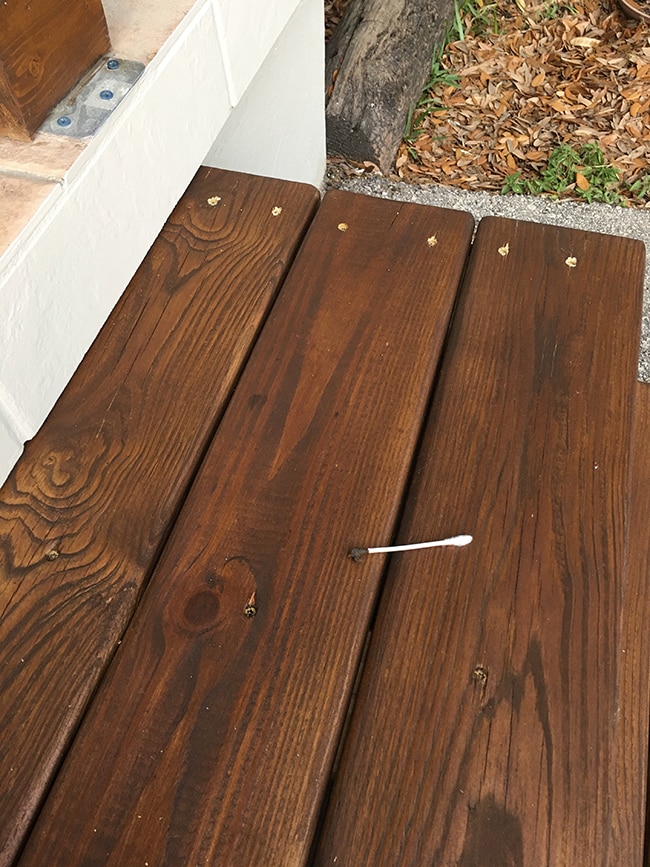
Ahh, much better.
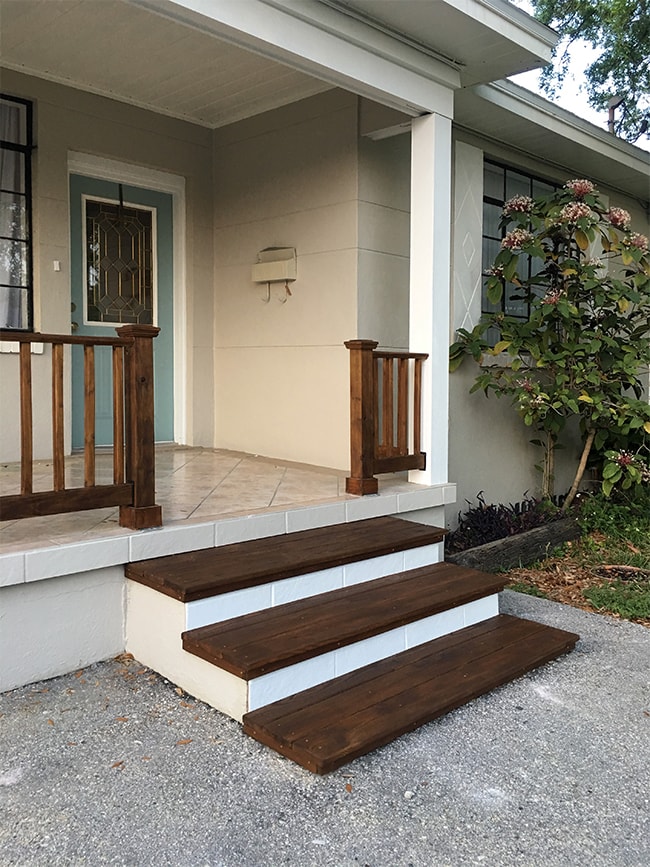
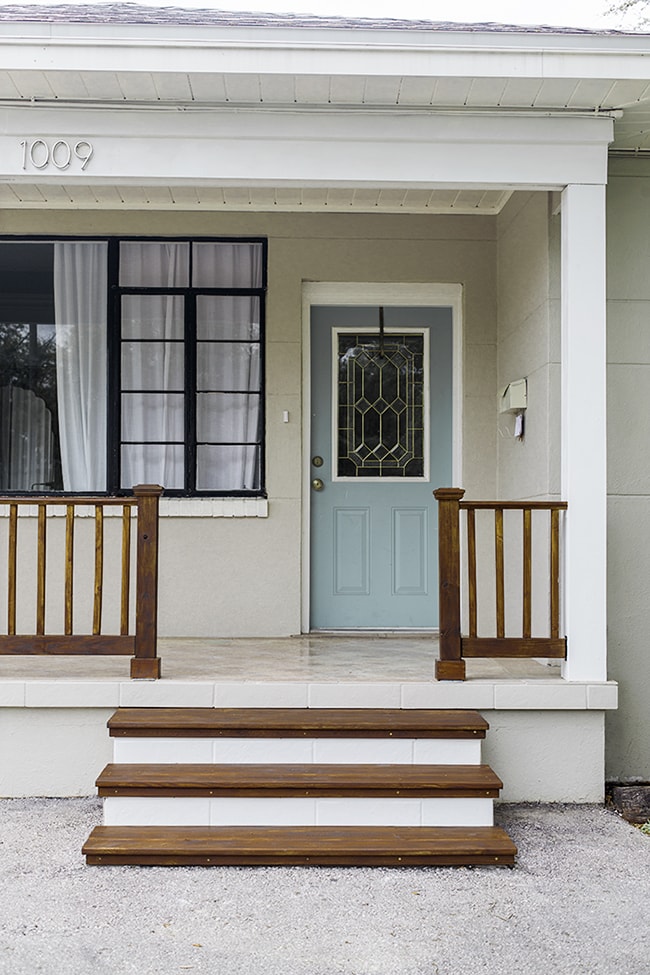
It’s amazing what paint and a few pieces of wood can do.
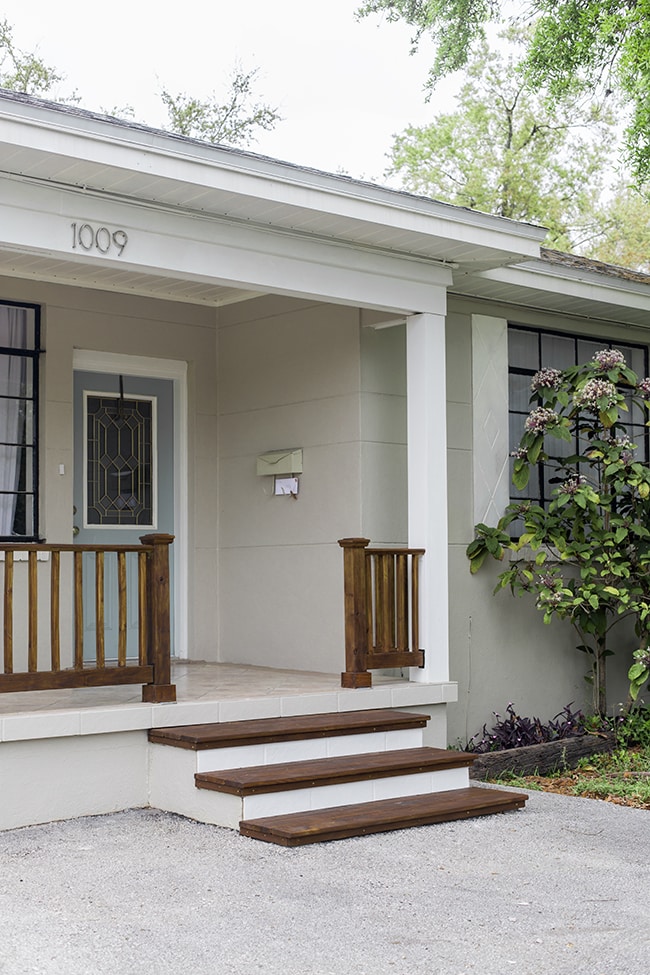
The wood treads also solved our problem of slippery tile (honestly, who puts slick tile on outdoor steps?!) Such an improvement from last week, don’t you think?
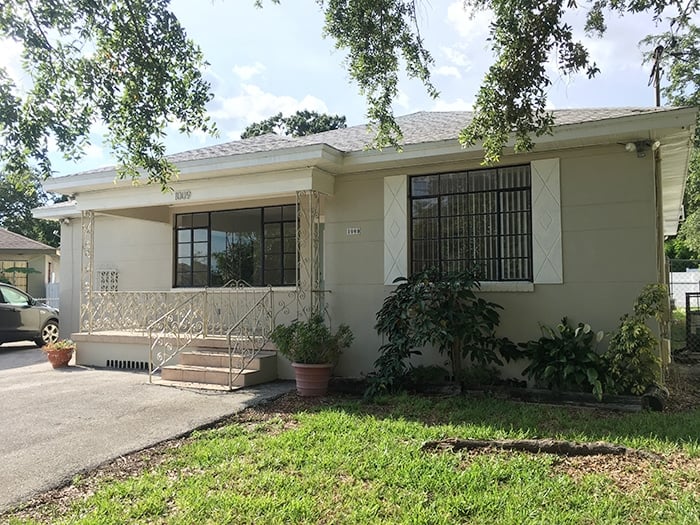
And especially from a few months ago…
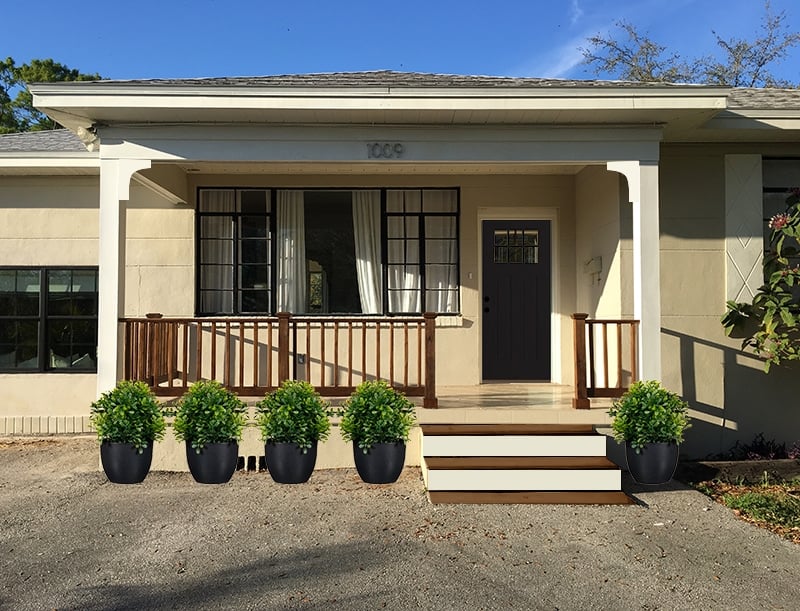
We have even more improvements planned for Phase 3 (which should be the last and final for this project!) including a mulch planter bed around the front of the house, a new front door, porch accessories and more.
That should be getting underway here in the next few weeks, but first we’re turning our attention once again to the backyard…

We started this project even before the front porch, but keep getting pulled away to other things so we’re looking forward to finally finishing our backyard Phase 1 this week (yep, this will have even more phases than the porch!) I’ll be back soon with all the details, and as always, you can see the progress right as it happens over on my instagram stories.
But first, back next week with our first tiling project at the Heights House!


Robin Langston-Jones says
Love your design ideas! Any chance you could do a quick tutorial on adding wooden handrails to the front steps? I find we could really use them and would appreciate your advice. Thanks!
Jenna Sue says
Unfortunately we didn’t add hand rails so I don’t have a tutorial for those, but I would check Pinterest!
Paul says
Wonderful job! It turned out so well. I look forward to the next project!
Pamela says
Big improvement. As to the remaining slick tiles there is a clear product you can roll on with a roller that has sand in it to give it some grit. We’ve used it on driveway pavers for extra traction to protect our aging parents.
Jenna Sue says
Good to know for next time, thanks Pamela!
Peter Martin says
Looks great. I love the contrast of color.
Linda Grubbs says
You guys never cease to amaze me!! Excellent job. Looks so nice.
That is such a cute little house!
Jenna Sue says
Thanks Linda! We definitely have to get creative and stretch our budget with this one 🙂
Kaitlin M says
WOW! What a difference the addition of wood and paint makes! This looks absolutely amazing!
Jenna Sue says
Thanks Kaitlin! Sometimes the simplest solutions are the best 🙂
Felicia says
This looks great! And when you get the porch furnished and styled, those hated, unpaintable tiles will vanish.
Jenna Sue says
Agreed! A big rug will help too 😉
Teri says
Good job! Maybe paint the house numbers black so they can be seen better and they will match windows.
Jenna Sue says
Thanks Teri! We’ll probably end up doing that before its rented 🙂
Kristen Eff says
Holy smokes. What an improvement. Good work! Go team!
Jenna Sue says
Thanks Kristen! We’re one step closer to the finish line 🙂
Tanya says
Where does the water the drains between the boards on the steps go? Are there gaps in the trim? Or are there already drain holes in the steps?
Jenna Sue says
There is a small gap along the front trim pieces, you can’t see it unless you look underneath though.