This post is part of a paid collaboration with Lowe’s Home Improvement. All opinions are my own.
Happy May, happy day… our front porch makeover is finally complete!
Before I get into the details, check out this timelapse I made of the final stage of our porch makeover:
If you’ve been following this renovation, you may remember we started it way back in January with the goal of finishing in March (ha!) but have been distracted with other projects like the backyard, guest bathroom and master bath in the Heights House.
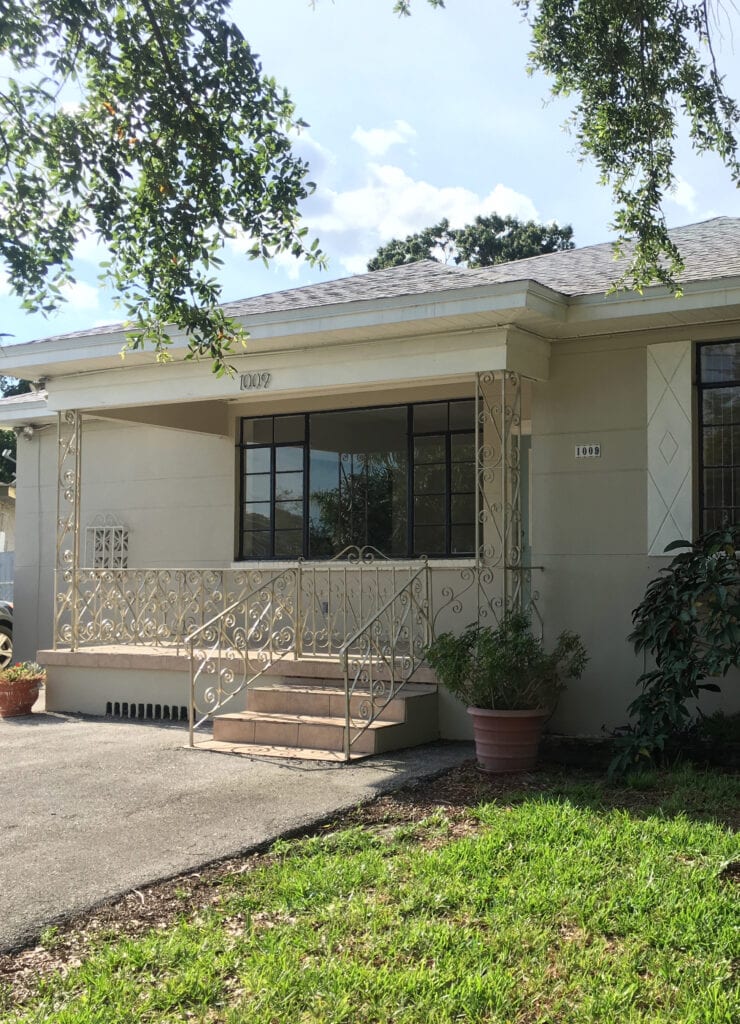
After adding a window on the left side of the house during our Reading Nook project, our first big porch project was to replace the old metal railing, which you can read all about in this DIY railing post.
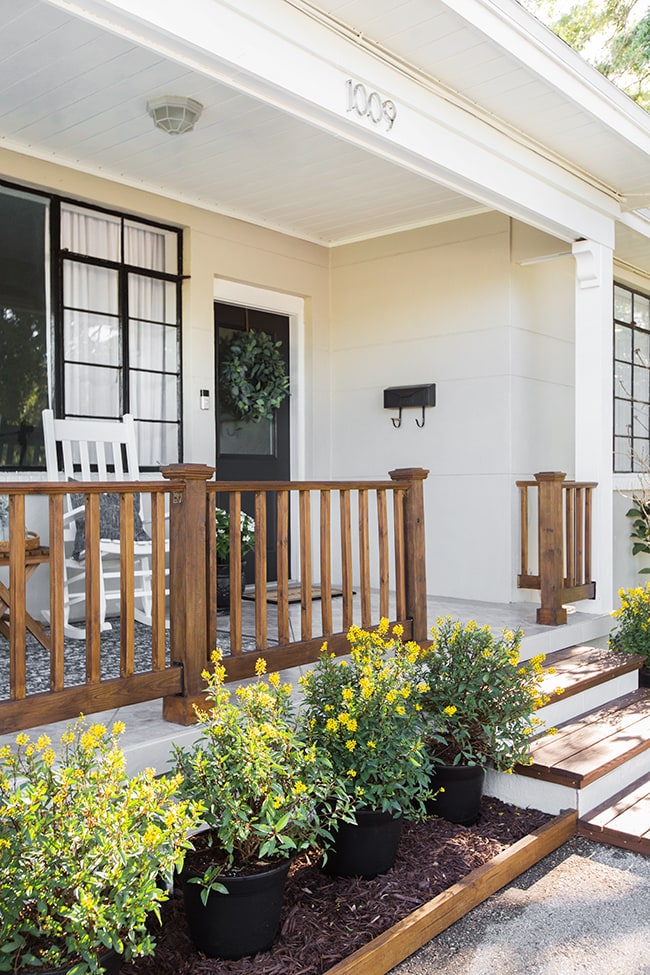
Next, we updated the tile steps with this simple wood & paint treatment:
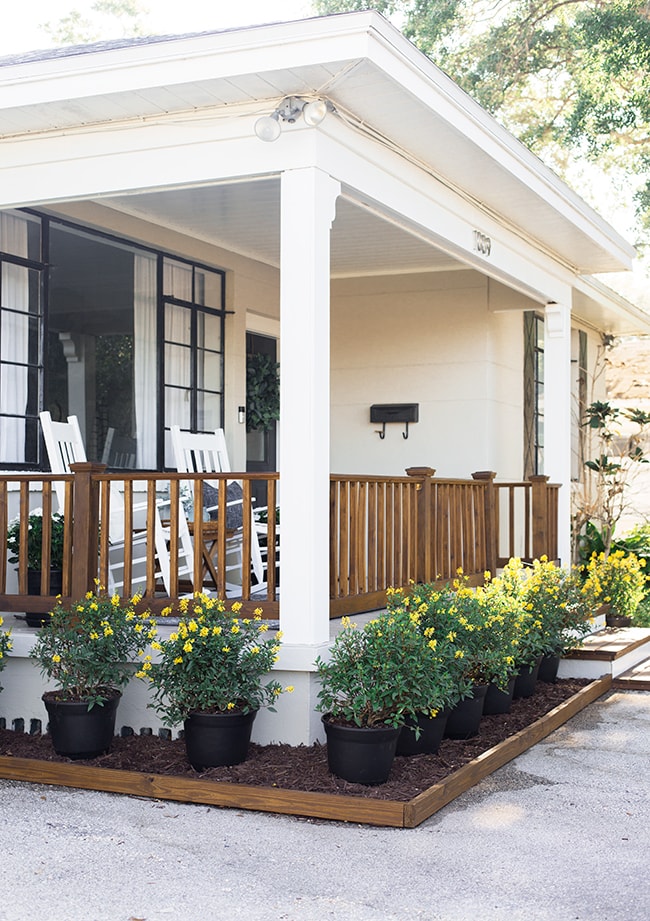
And that brings us to two weeks ago, when it was time to add the finishing touches. A follower on Instagram made a great suggestion to create a faux planter bed around the porch with potted plants, which would add some much needed greenery.
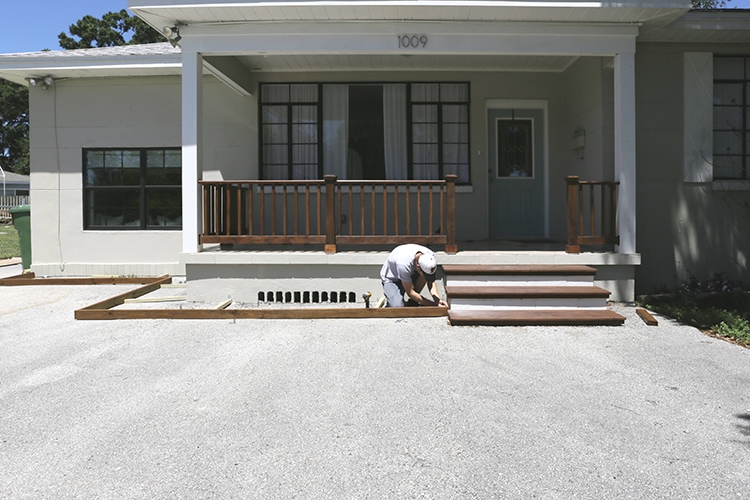
The idea seemed simple enough, so we measured out the area and bought a handful of inexpensive 2×4’s (pressure treated for outdoor use).
After they were cut to size, I stained them with a couple coats of the same deck stain + sealer used on the other porch wood (in Dark Walnut).
After the wood was dried and lined up in place, we used L brackets to attach them together.
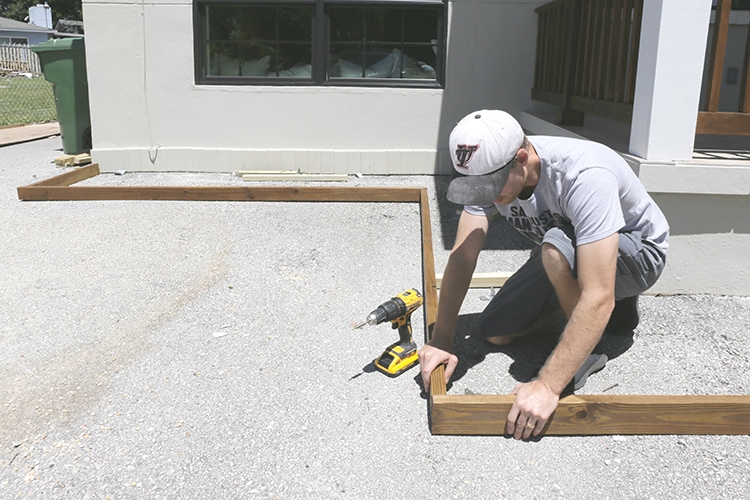
They were also attached to the house with brackets (using Tapcon concrete anchors).
2×4’s ripped in half were used as spacers for extra reinforcement and to keep the spacing consistent.
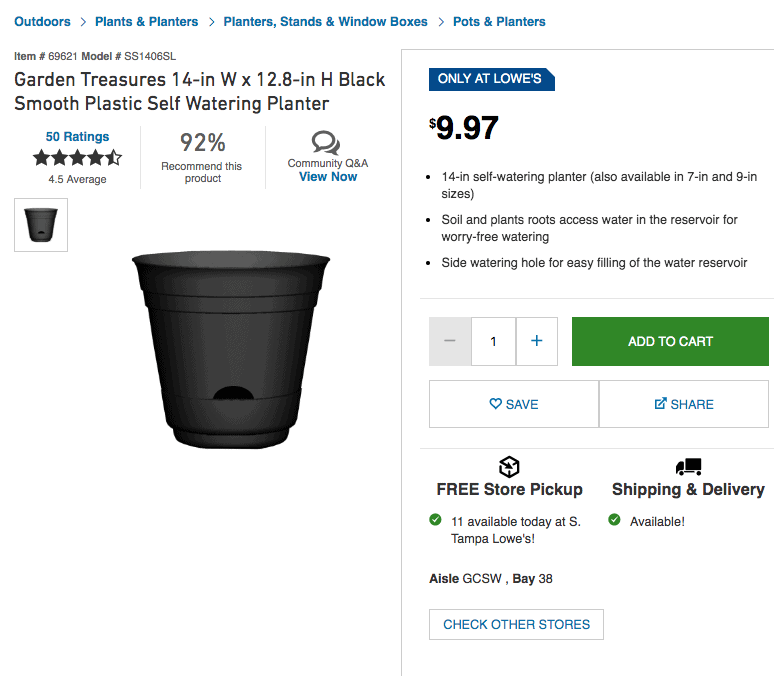
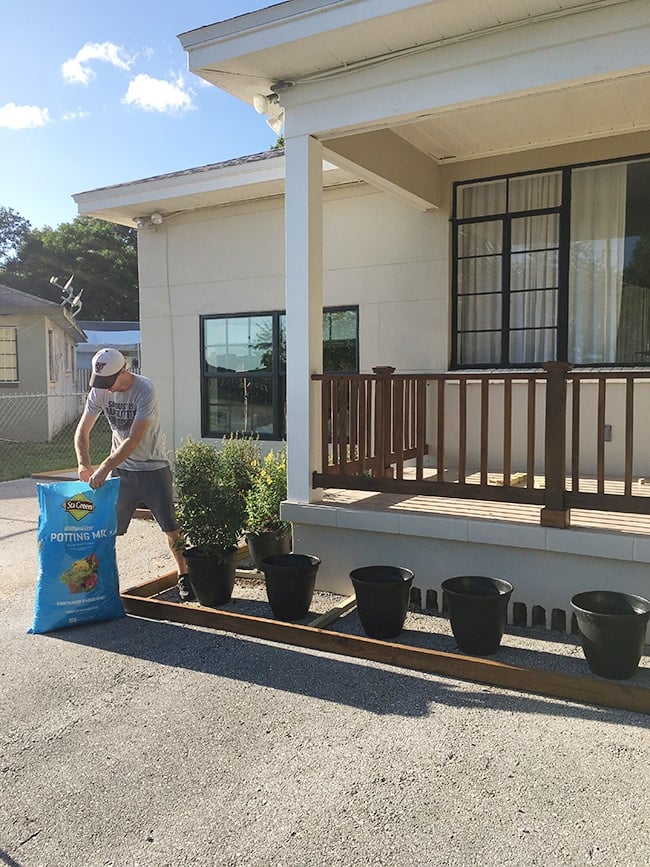
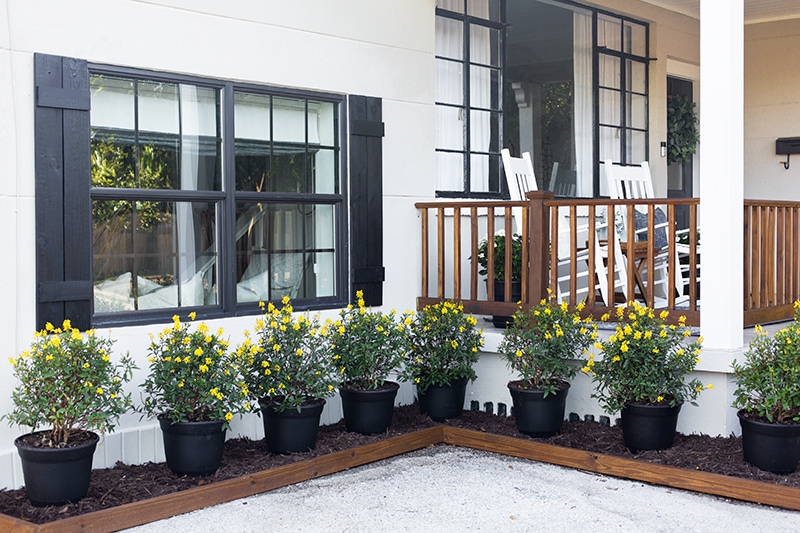
And the hardest part was over! Next, it was time to fill in our planter bed. Keep in mind we’re on a tight budget for this house, so we have to get creative and stick with low cost solutions. Fortunately, I found these black planters at Lowe’s for under $10 each and bought 14 without breaking the budget.
Bonus—they’re self watering planters, which is great news when you have a black thumb like us and can’t be at the property every day to water, especially once the house is rented! As complete novice gardeners, we asked the Lowe’s garden specialists for guidance and they recommended Sta-Green potting soil which has fertilizer to keep our plants fed for the rest of the year.
We loved these yellow flowering Thryallis (only $11/ea) and were reassured after learning that plants sold at Lowe’s come with a 1 year guarantee (did you guys know that?!)
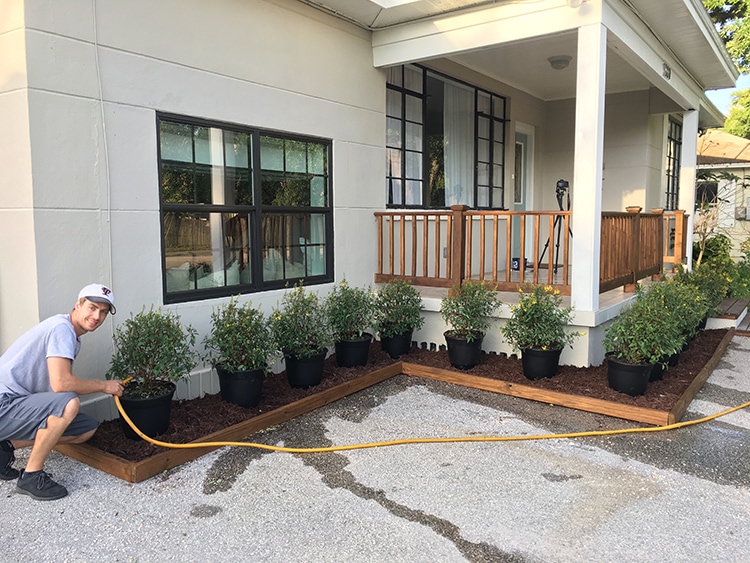
Even with the extra insurance, we’ve been diligent about caring for them and are doing our best to keep these beauties alive and healthy (so far, so good!)
We chose Scott’s mulch (in deep forest brown) to cover the concrete and blend in with the dark stained wood.
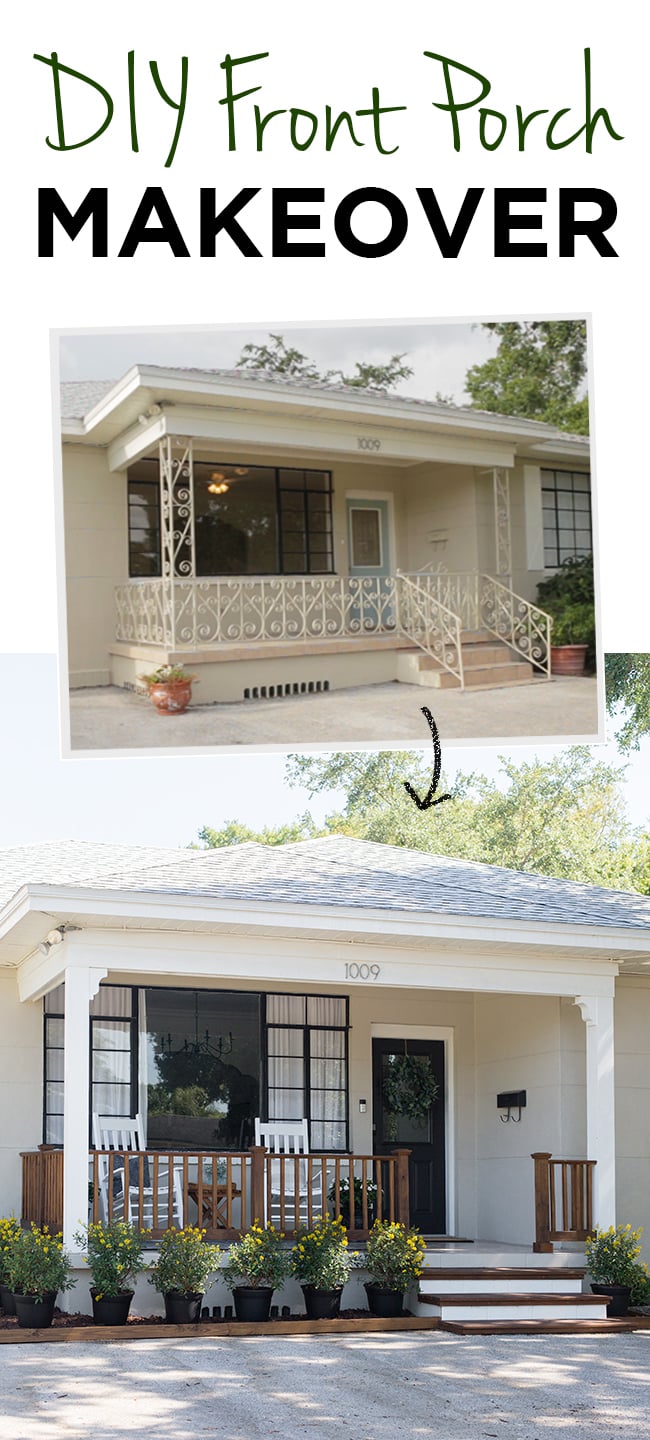
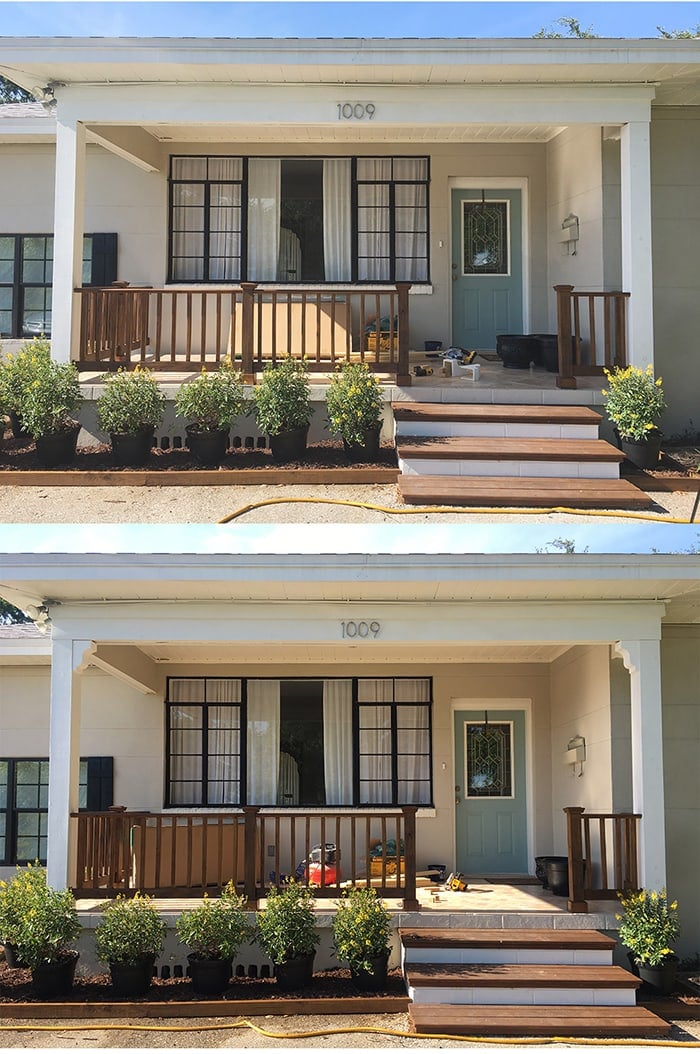
What a difference!
Next it was time to move onto one of my favorite easy bang-for-your-buck exterior upgrades: shutters.
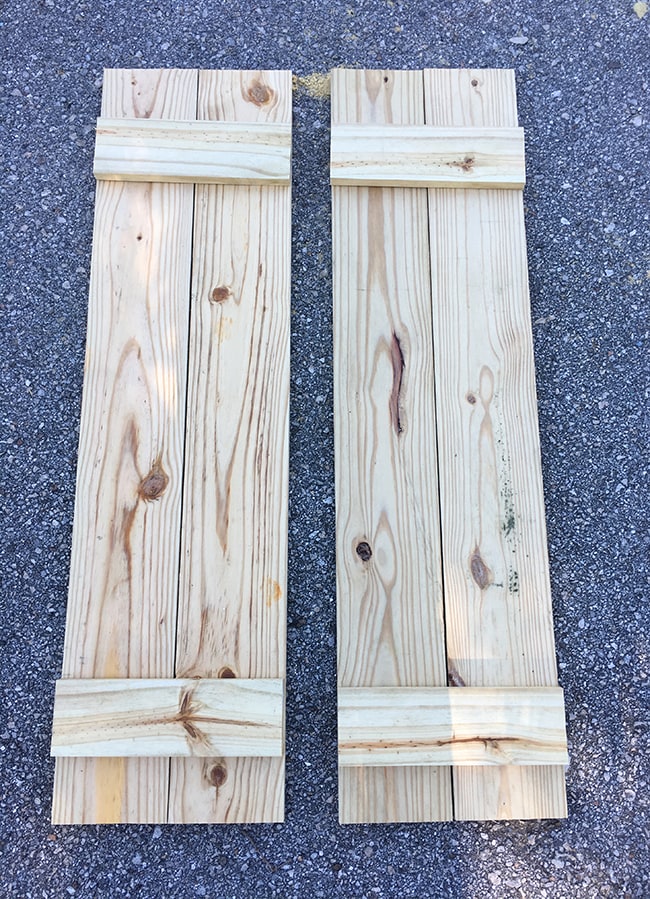
We used 1×6’s for the verticals and 1×4’s for the horizontal pieces (all pressure treated wood). The verticals were cut to the height of the window, and horizontals were cut to the width of the shutter (plus a small gap in between, just over 11″ wide total). A quick test fit before assembling:
I painted them in Valspar’s Cracked Pepper and let them dry before moving onto the next step.
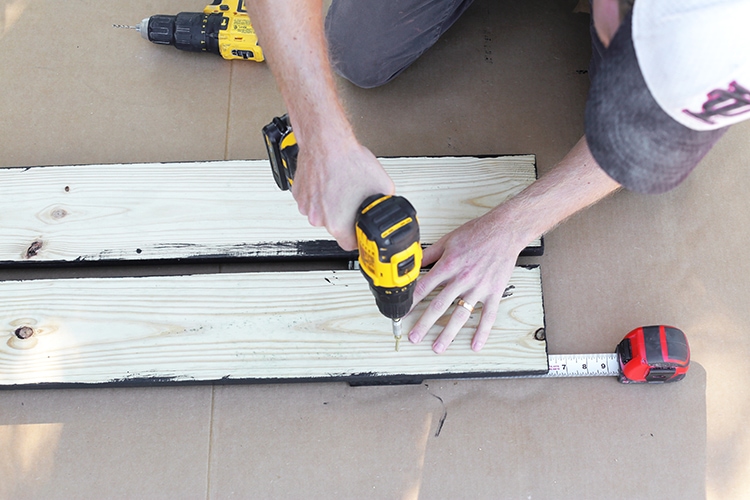
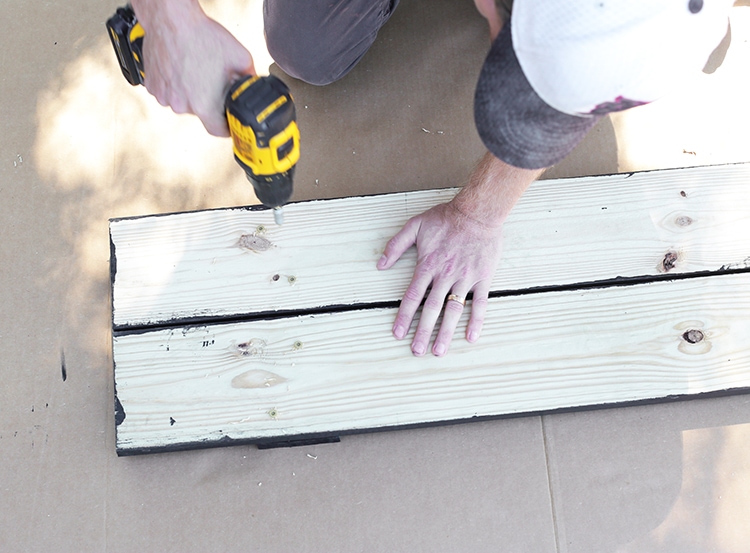
Laying the 1×4’s face down first, we positioned the 1×6’s on top (the 1×4’s can be as low or high as you’d like—ours was 6″ from the top and bottom) and pre-drilled holes for the screws—two screws per board.
The process was then repeated on the other side of the shutter…
Easy peasy! You can watch a timelapse of this process in the video at the top of the post to see it in action.
Here’s our window before…
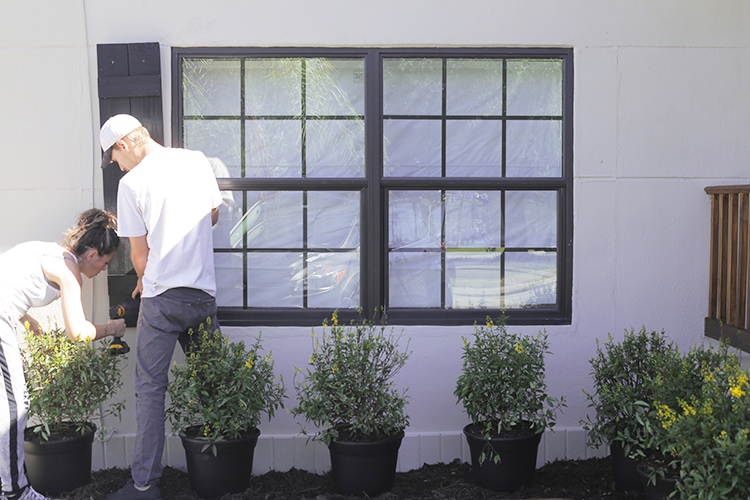
To attach the shutters to the house, we used tapcon anchors (special screws designed for concrete) which require pre-drilling into the concrete first with a drill bit they provide. We lined up our shutter and drilled through it to mark our locations, then predrilled the holes, then held the shutter back up and attached it with the tapcon screws.
Drilling into concrete/brick requires a couple more steps than wood siding, but anyone with a drill can do it (we can’t live without our hammer drill—a necessary tool if you have concrete walls!)
We also took the time to build shutters for the naked windows on the back of the house (more on that soon) and I painted the original dingy white shutters the same black for a more uniform look.
All of the old white trim needed to be refreshed as well, but before doing that, I thought it’d be fun to add corbels to the porch just to give it a little bit of extra personality.
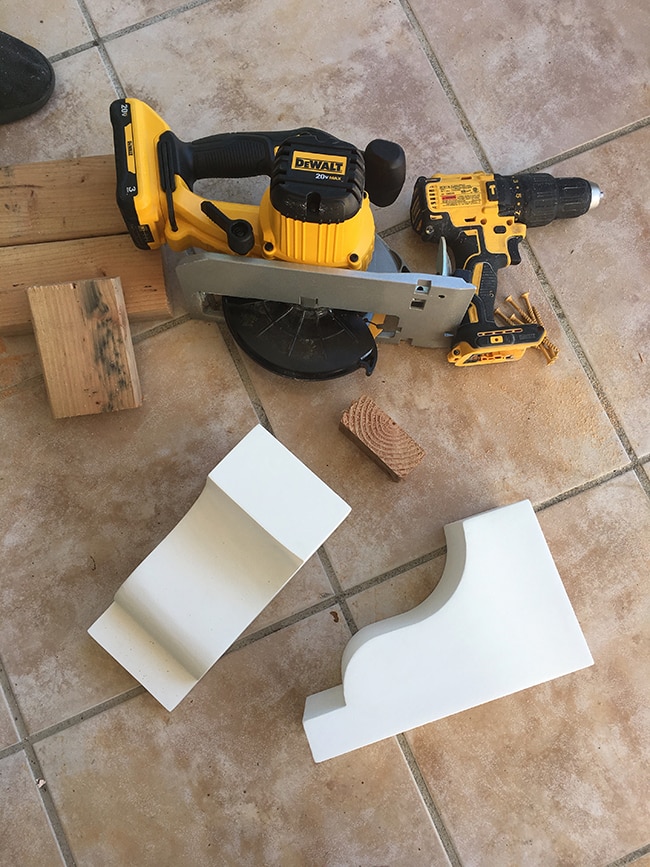
They’re primed polyurethane (extra durable for outdoor use), hollow and lightweight for easy installation. We cut down a couple blocks from 2×4’s and screwed those into the wood first.
Then we slipped the corbels snugly over the 2×4’s and attached on both sides with finish nails.
Repeated on the other side…
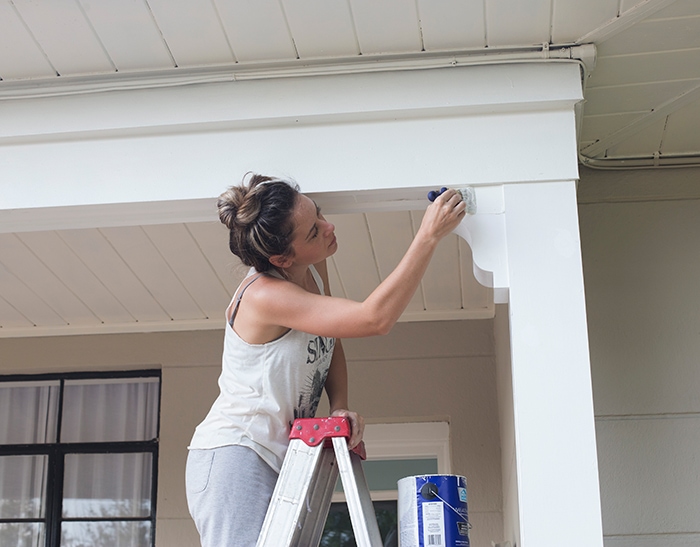
Then I caulked around the edges and gave everything a fresh coat of white paint (SW Extra White).
It’s a small detail, but I think it really adds character!
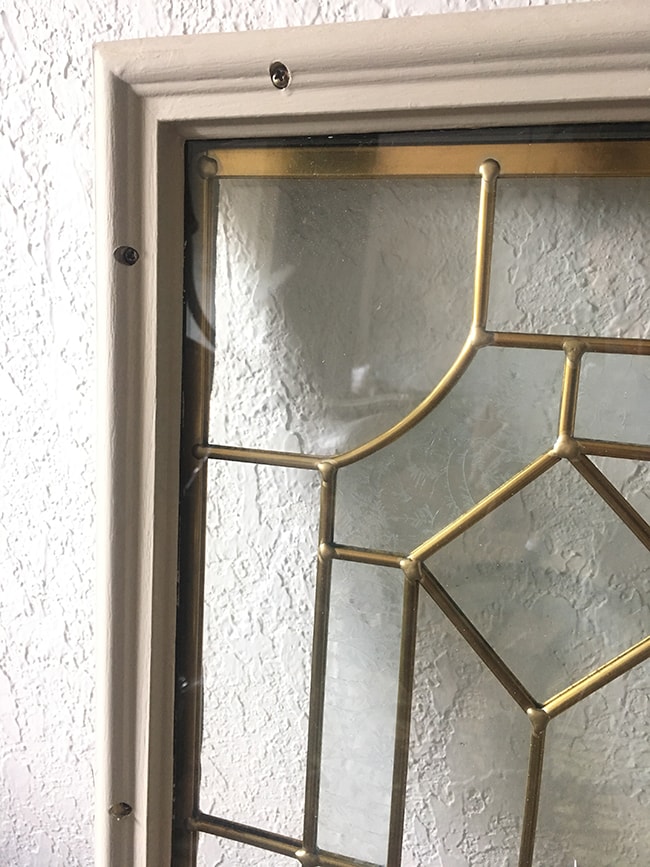
Moving along… I’ve never been very fond of this glass front door panel.
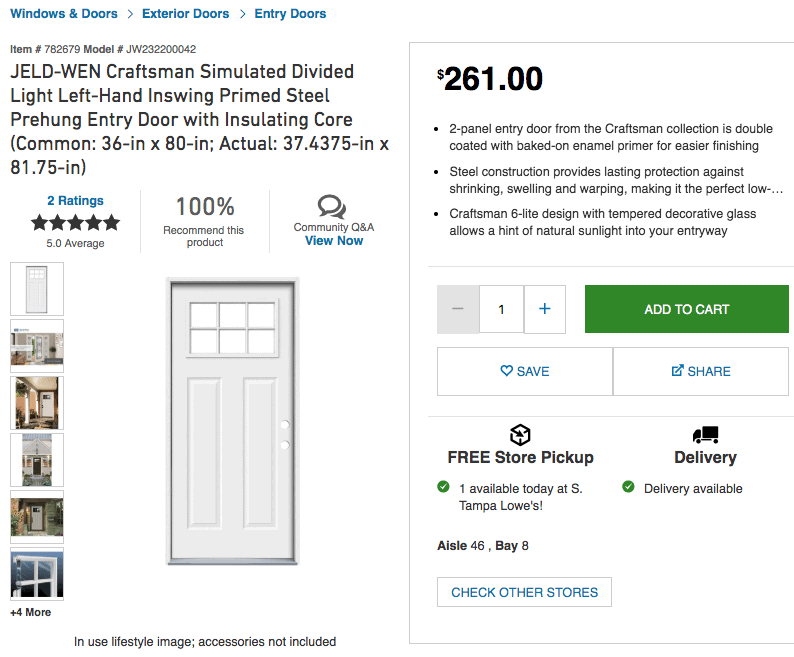
I looked into replacing the entire door and found some nice options at Lowe’s, like this Jeld-Wen Craftsman style for $261 which I almost pulled the trigger on…
But then you add in the cost of delivery plus added time and cost of installation and the hassle of removing the entire frame/door trim and starting over when we have a perfectly good door frame that closes smoothly—it just didn’t make sense in this situation. I called Lowe’s and talked to the millwork department, and they were able to order a replacement glass panel for just $50 delivered the next week—score!
Installation took just minutes—the panel is attached from the inside with screws around the trim.
Simply remove the screws, pull off the back piece of trim on the inside, then pull out the panel from the front.
The new panel is reattached the exact same way.
It’s great to know this affordable option is available and you don’t have to replace your entire front door!
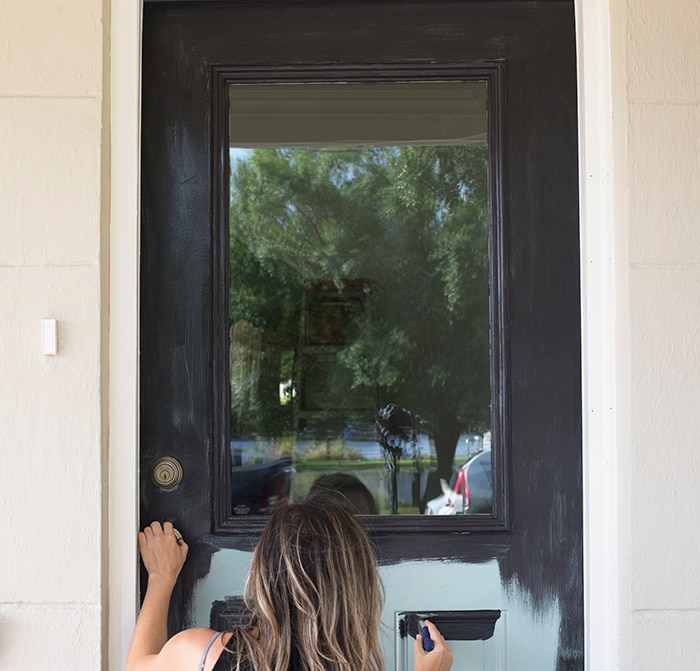
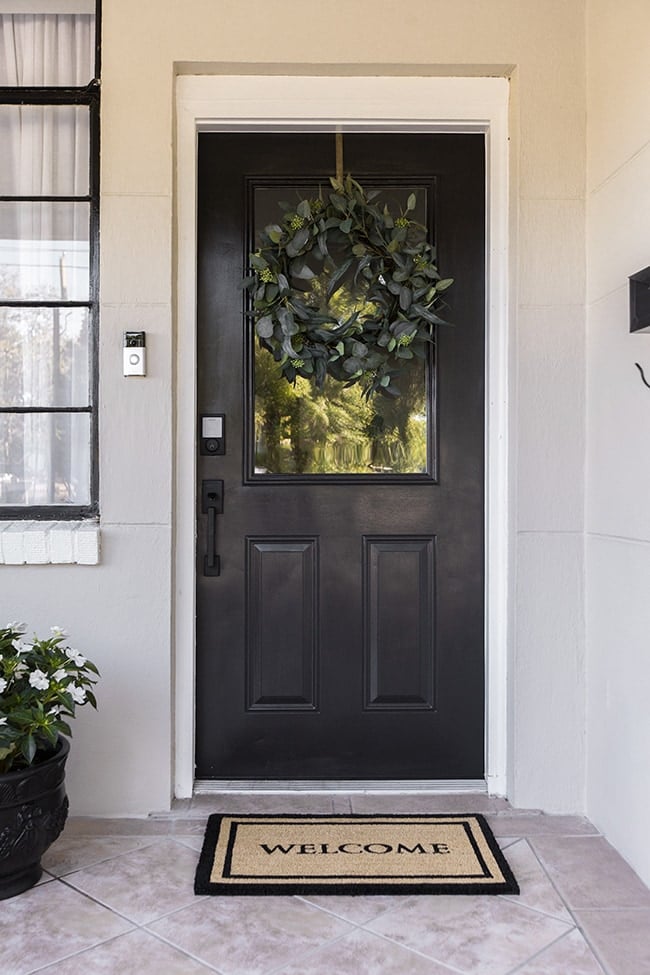
Once the new panel was in, I wasted no time giving the door a couple coats of Valspar’s Cracked Pepper in semigloss.
The mailbox and planters, too…

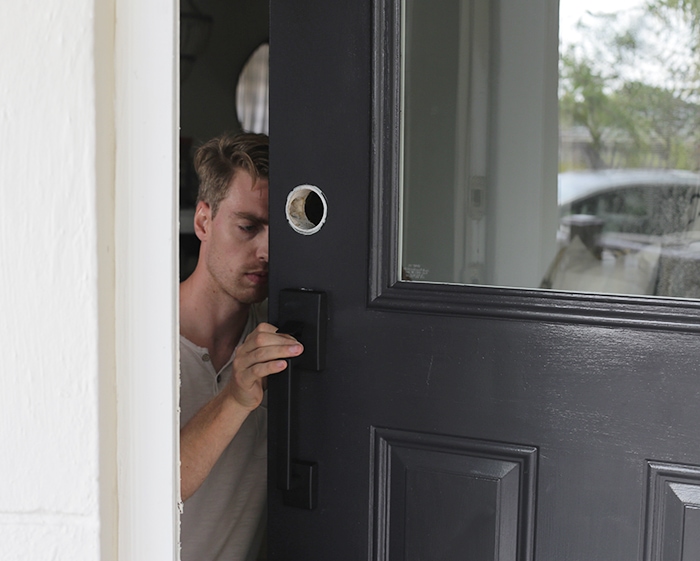
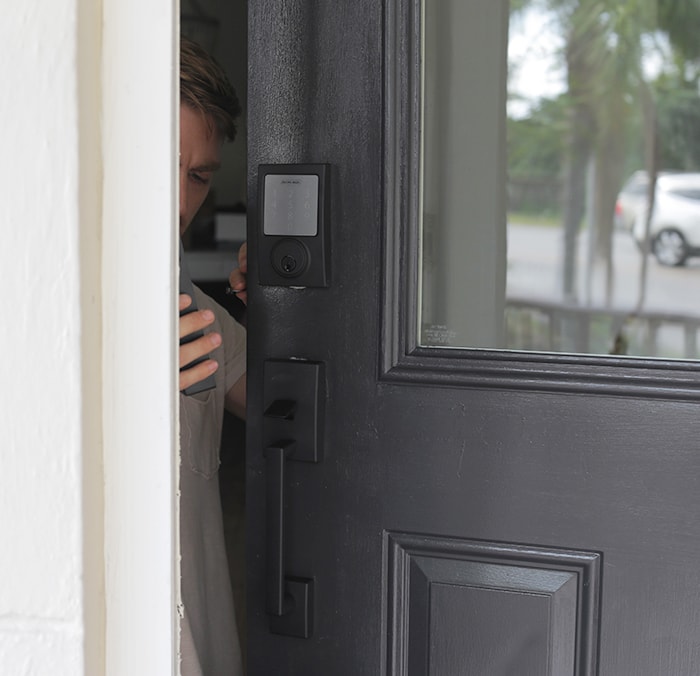
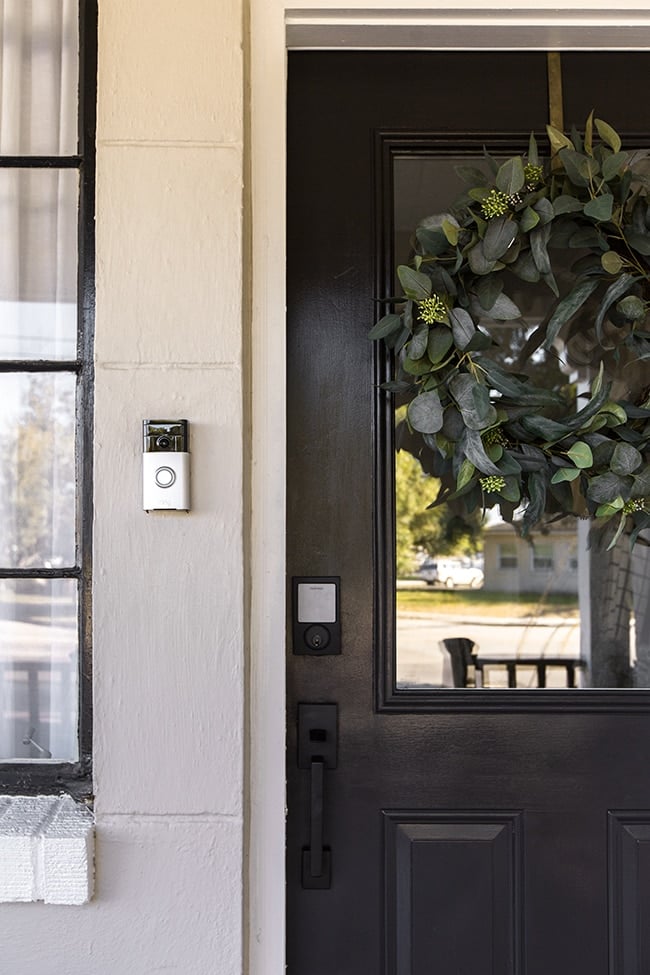
Next it was time to bring this house into the 21st century with smart technology. After reading lots of reviews, I landed on the Schlage Smart Sense deadbolt and Century handle combination.
Since this house will soon be a vacation rental, a smart lock is a must for easy guest access. The Smart Sense also runs on an app so we can get notifications, check the status and lock/unlock the doors from our phone, no matter where we are. It has already made life much easier—if for no other reason than not having to fumble through my purse to find the keys anymore! Thank you, technology.
The fun didn’t stop there, though. Our doorbell had stopped working and figured we might as well upgrade that while we were at it, so we picked up a Ring doorbell. It has video monitoring, motion sensors, two-way audio so we can communicate with our guests and everything is also on an app so we can access it anywhere from our phones.
These two additions have easily been the most useful updates we’ve done to the porch, and definitely worth the investment—even if you don’t plan on turning your home into a rental!
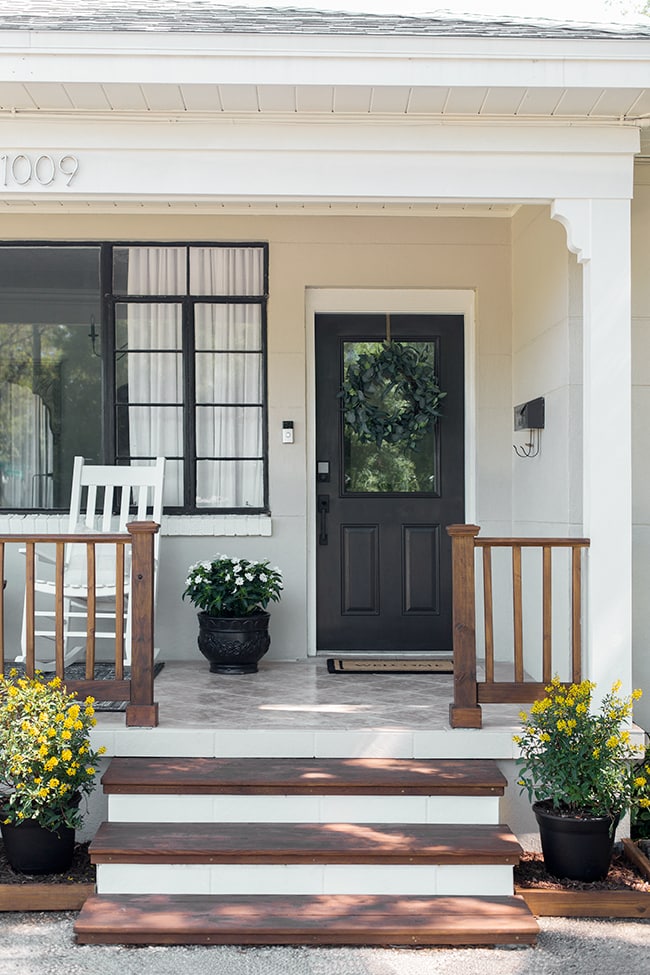
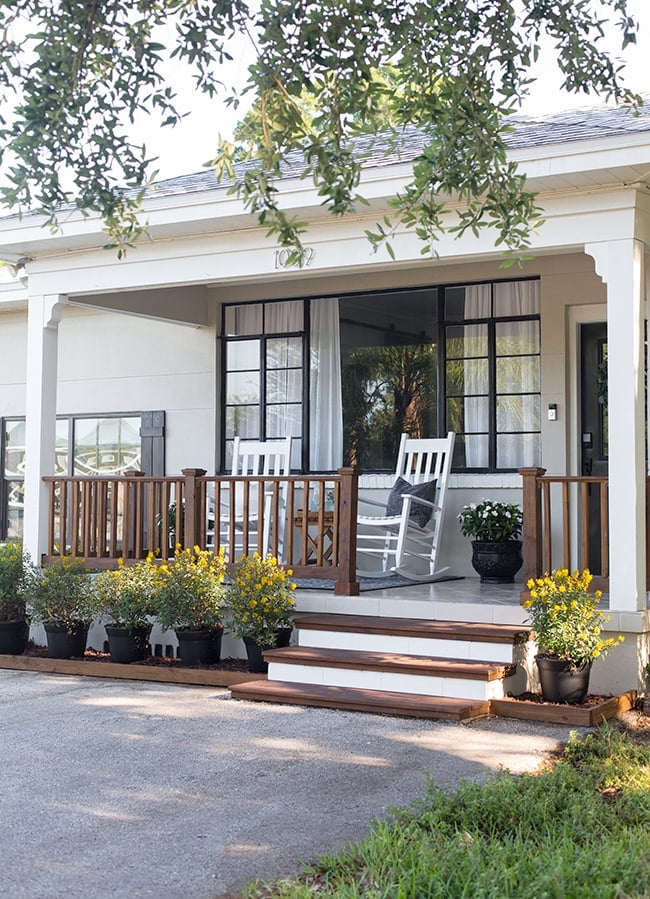
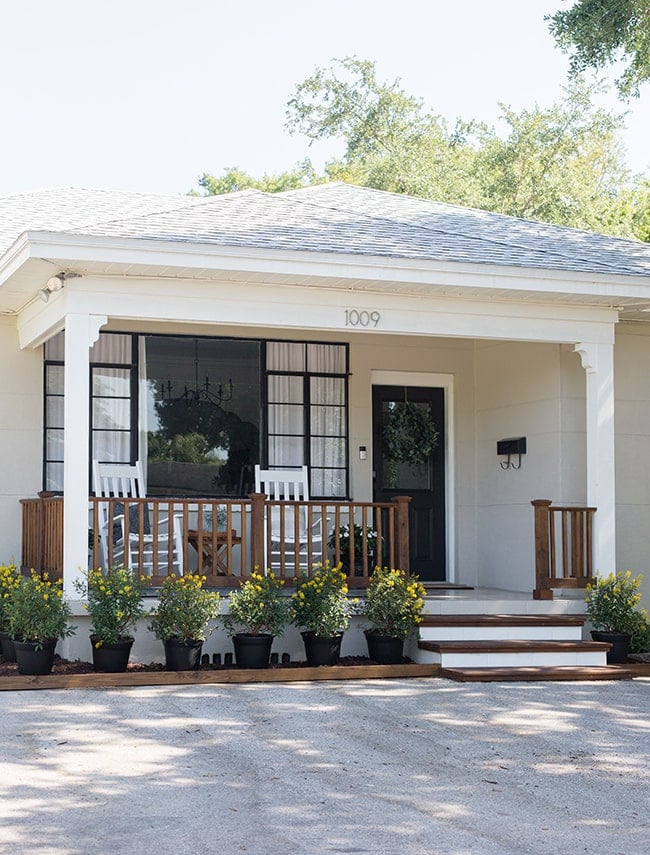
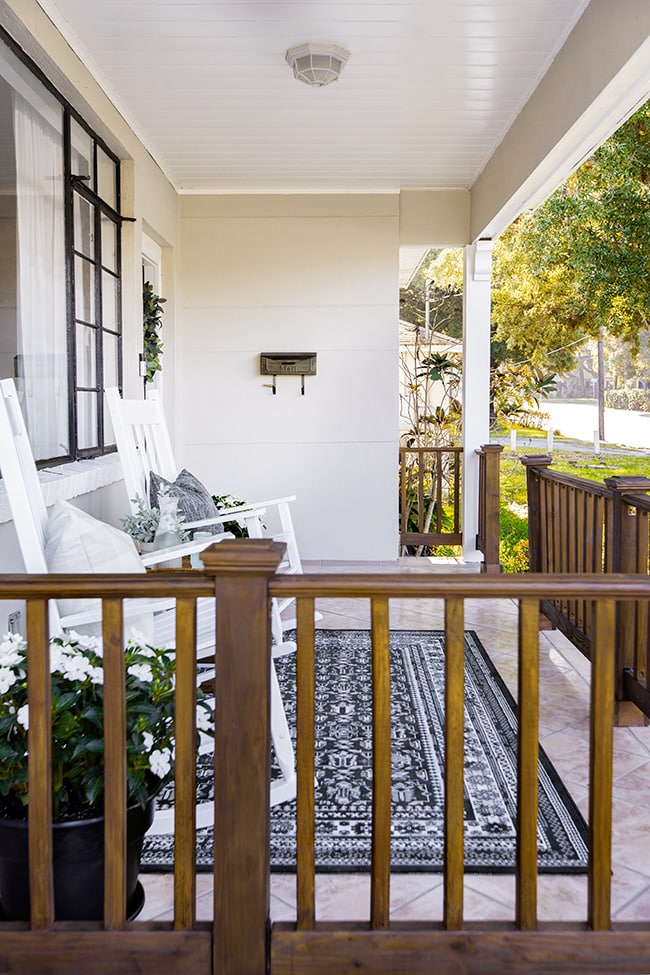
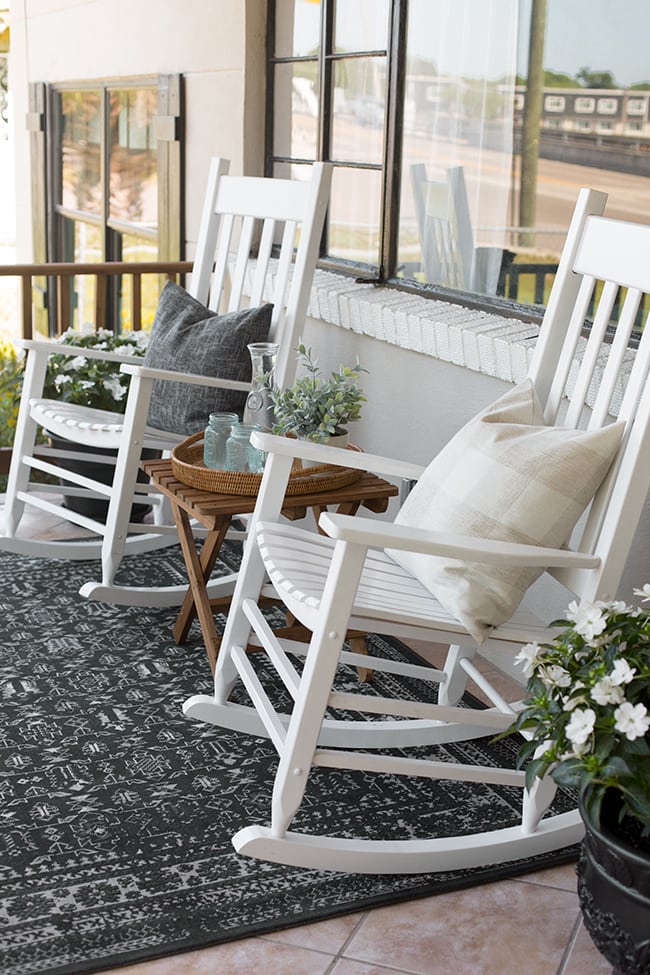
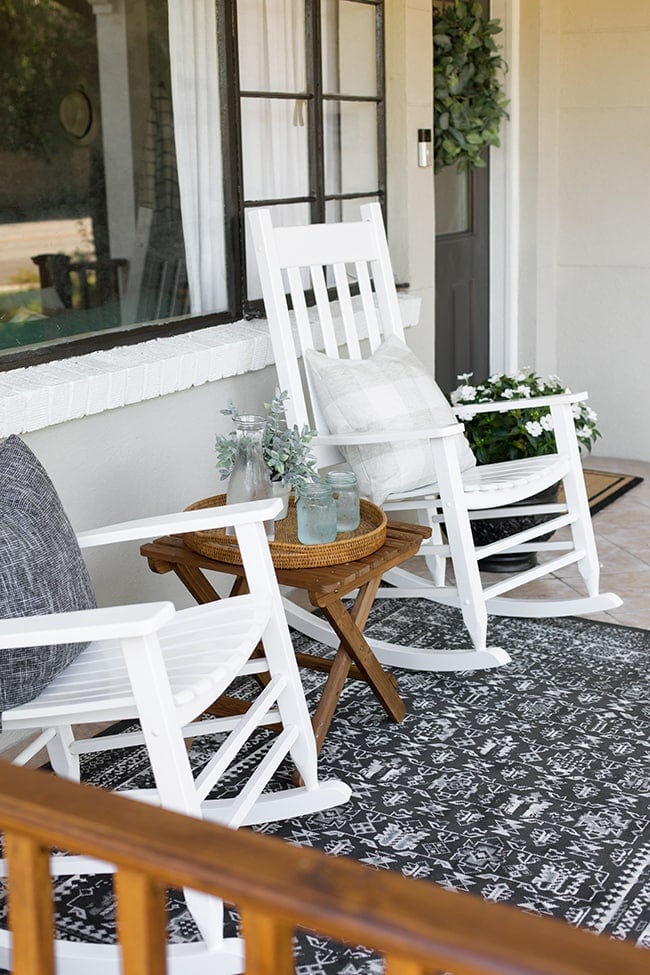
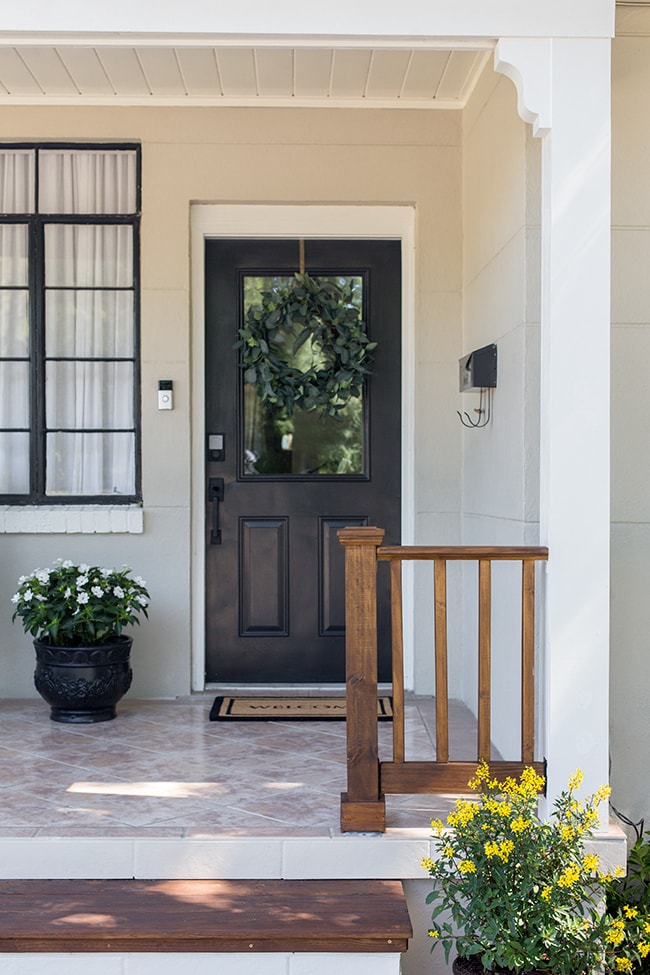
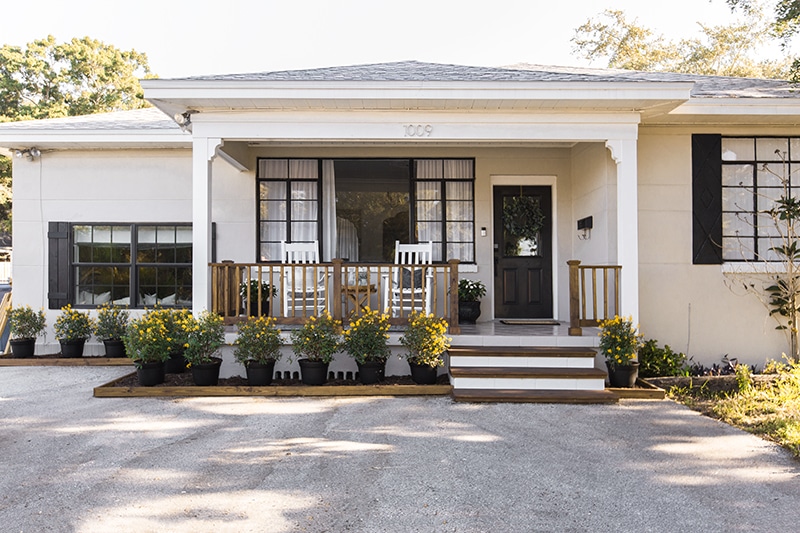
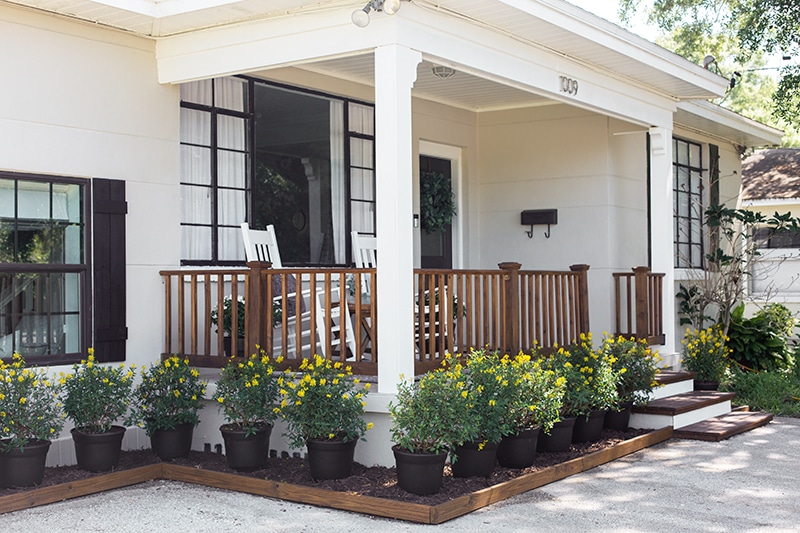
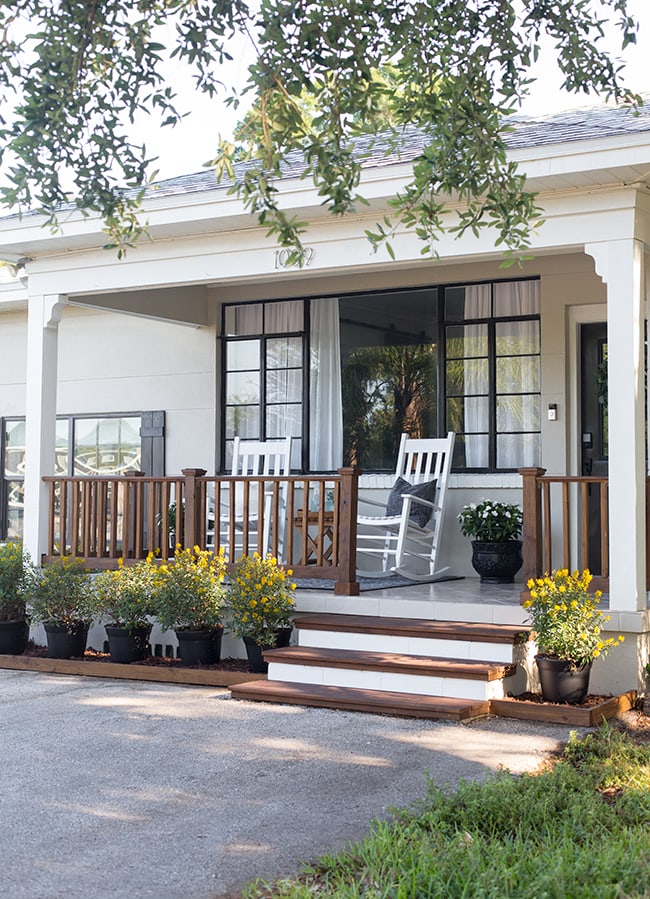
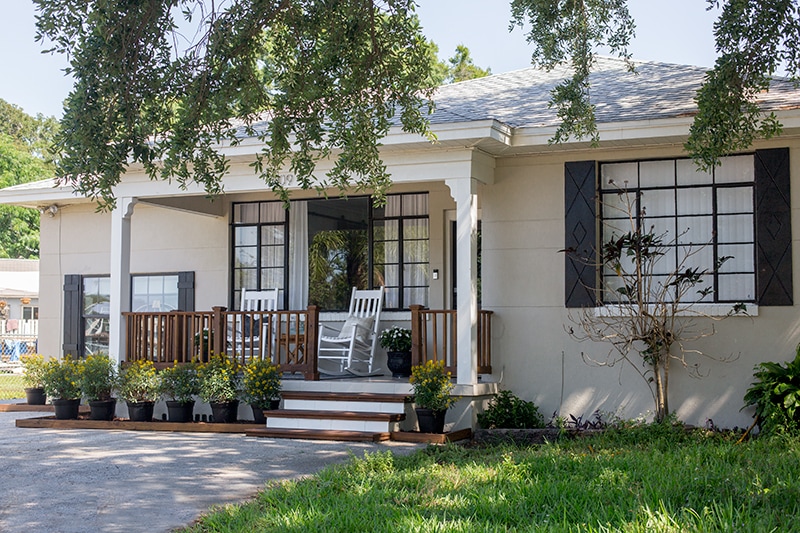
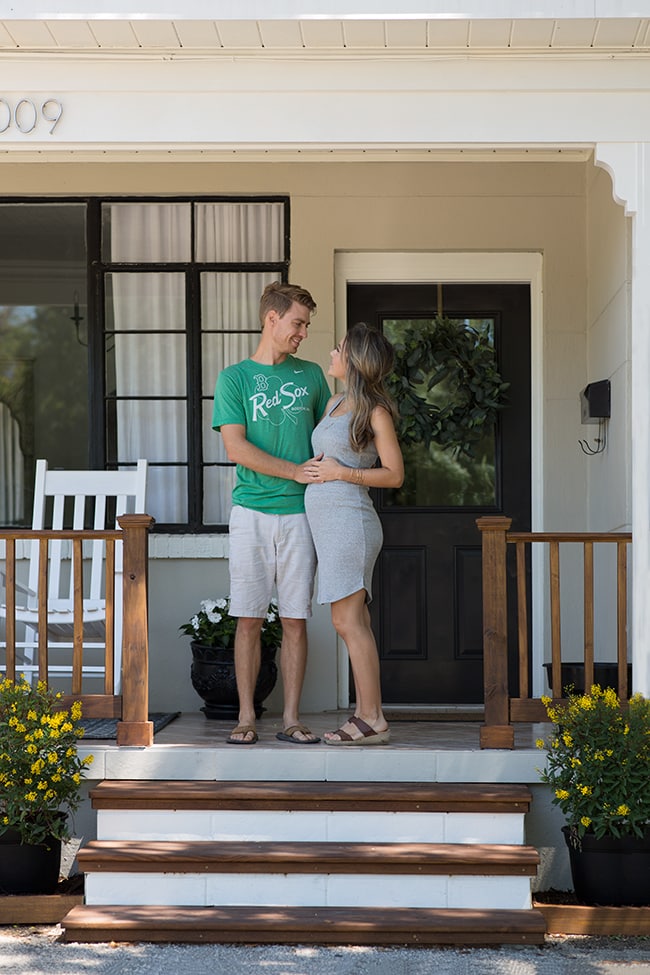
A rug, rocking chairs and a few accessories later… and our 12-week long porch makeover was complete!
I think the wood railing made the biggest difference, visually. It took the longest but was absolutely worth the effort.
Choosing a natural stained wood brings warmth to the space and balances out the black, white and beige.
And what a great idea for the potted planter bed! How much better does this look than a sea of concrete?
Greenery changes everything.
Now the porch is much more inviting, and somewhere you’d actually want to sit down for a while! To make it feel more cozy, I rolled out a patterned indoor/outdoor rug.
I also snagged two of these white rocking chairs when they were on sale…
And an inexpensive cedar wood table (which I stained to match the railings).
A $15 welcome mat was the final piece of the puzzle!
What do you think of this budget-friendly DIY transformation?
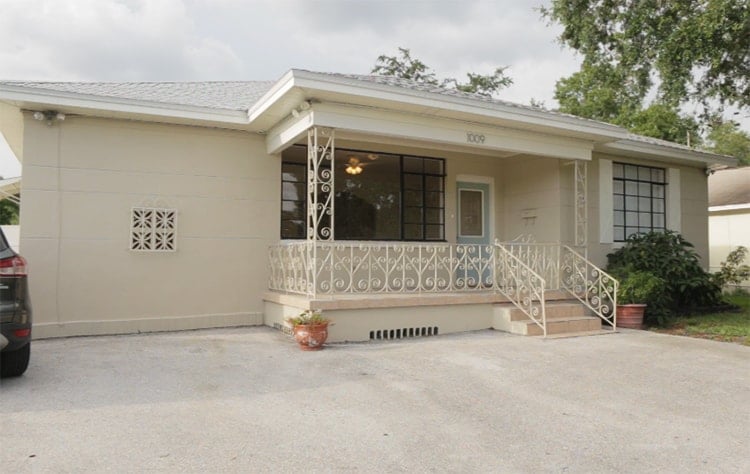
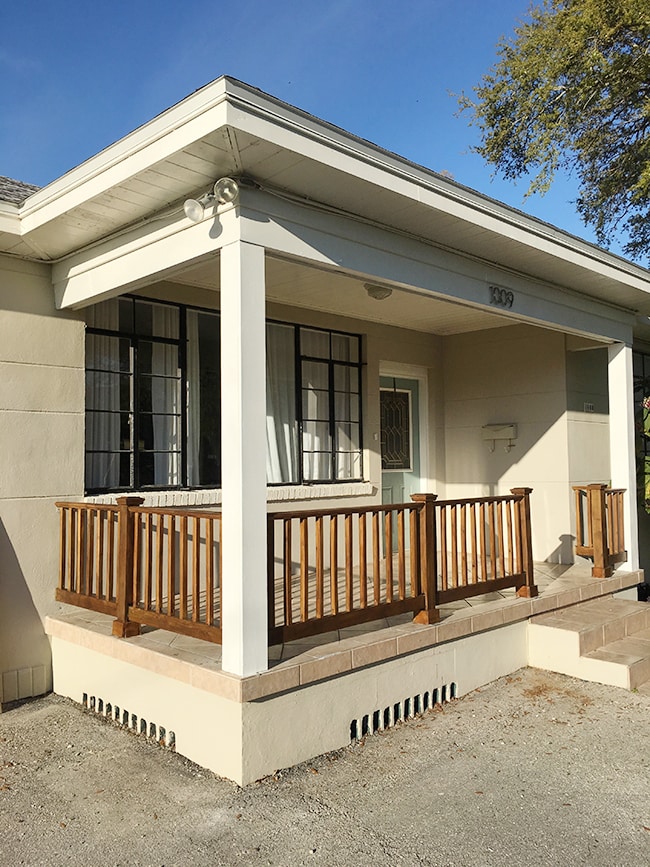
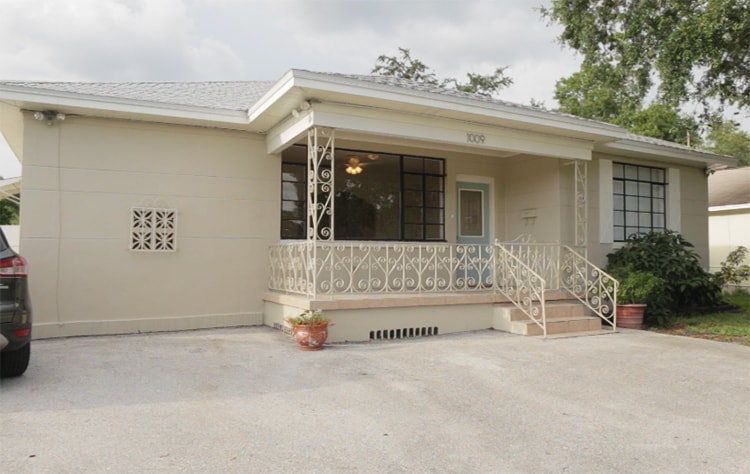
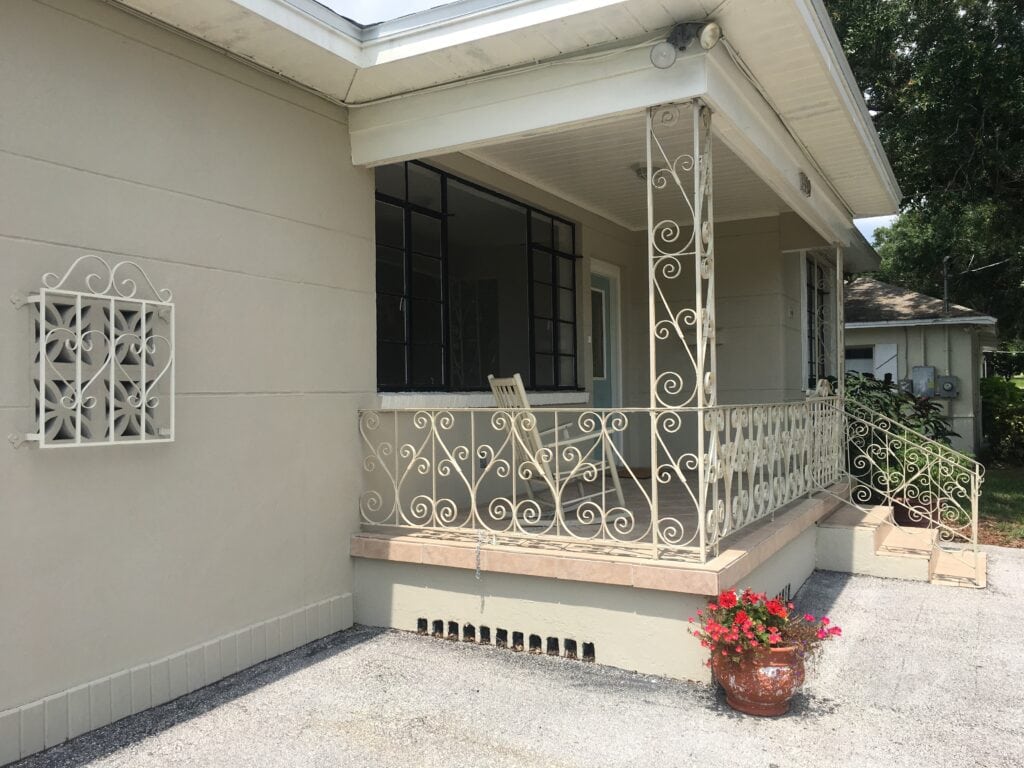
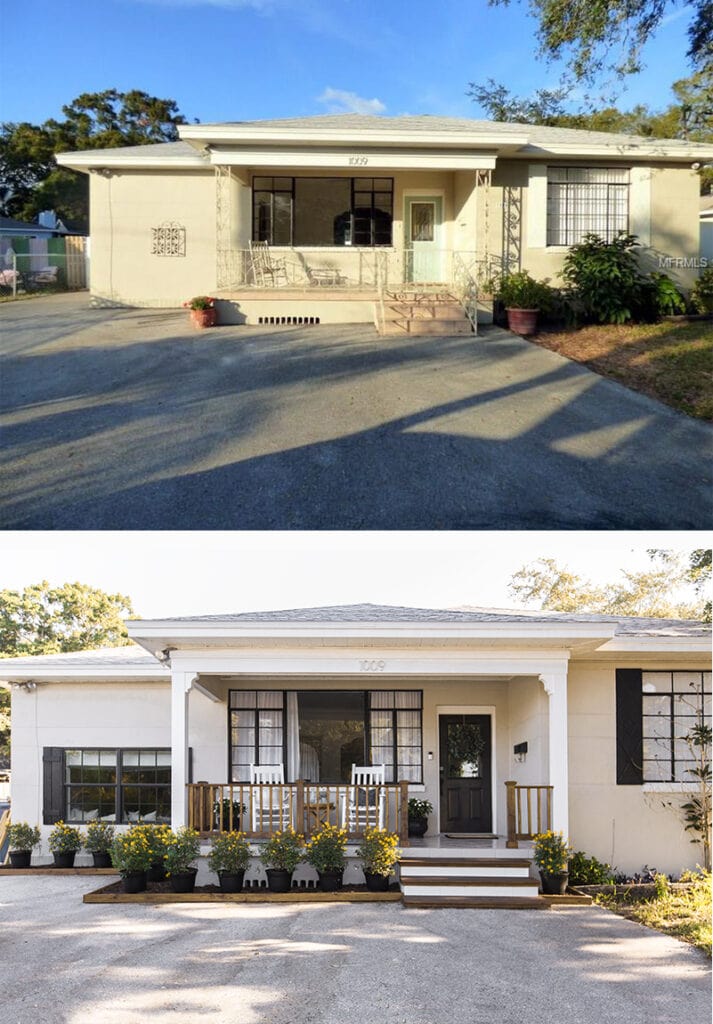
How about a few more side by side Before and Afters…
It’s no Heights House, but we’re pretty proud of what we were able to do entirely on our own with limited funds!
I hope this transformation provides some inspiration for those of you who are looking for simple/affordable ways you can update your own curb appeal this summer. Little updates over time can have a big impact!
Next up: backyard progress at the Riverside Retreat and a Master Bathroom reveal at the Heights House!






















Holly Allen says
Wow!
Kelli says
That is amazing! Now I’m inspired to get to work on my porch! Where is your wreath from? It’s beautiful.
Jenna Sue says
Thanks Kelli! It’s from Target (Magnolia) 🙂
Jamie says
Where are the pillows from?
Jenna Sue says
Amazon — you can find the links in this post! https://www.jennasuedesign.com/2018/12/the-big-pillow-post/
Rebecca says
Love it! The two of you are amazing.
Sheryl says
You have amazing vision! Beautiful transformation! Plus, you two are just so stinking adorable! I love following your blog and learning new tips! Thanks for sharing! 🙂
Jane Flynn says
This is remarkable! ! You guys are amazing!!!!!
That stenciled patio is so good!
Can’t wait to see your own house all finished, especially that nursery!