I hope you all had a wonderful Thanksgiving weekend and are feeling refreshed and ready for the holiday season! Mine was spent with some of my favorite people—Lucas and both of our families—and we enjoyed every minute of this rare and precious time that we can all be together.
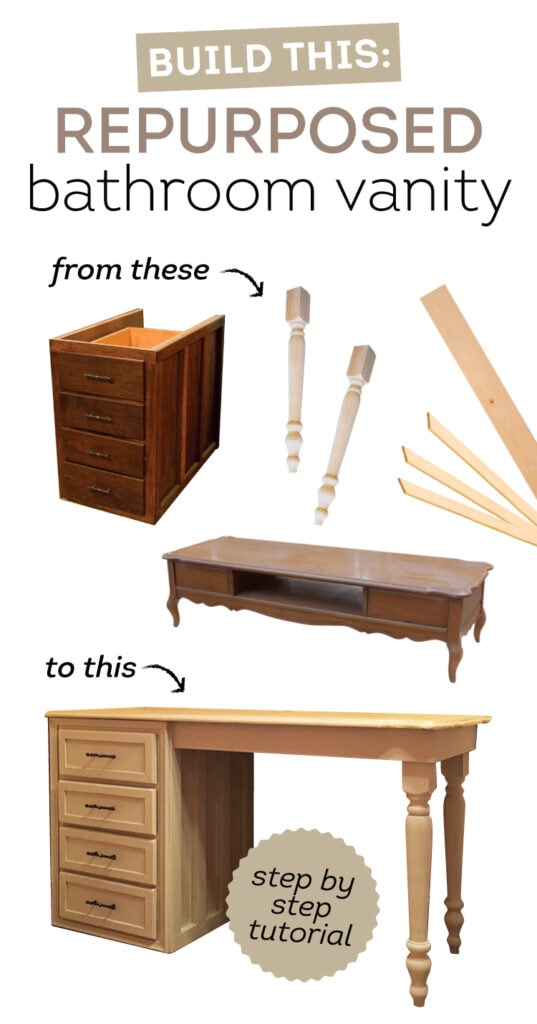
I also took advantage of the extra set of hands and came up with a group project for my dad, Lucas and I—a custom bathroom vanity:
And put together a video documenting the experience:
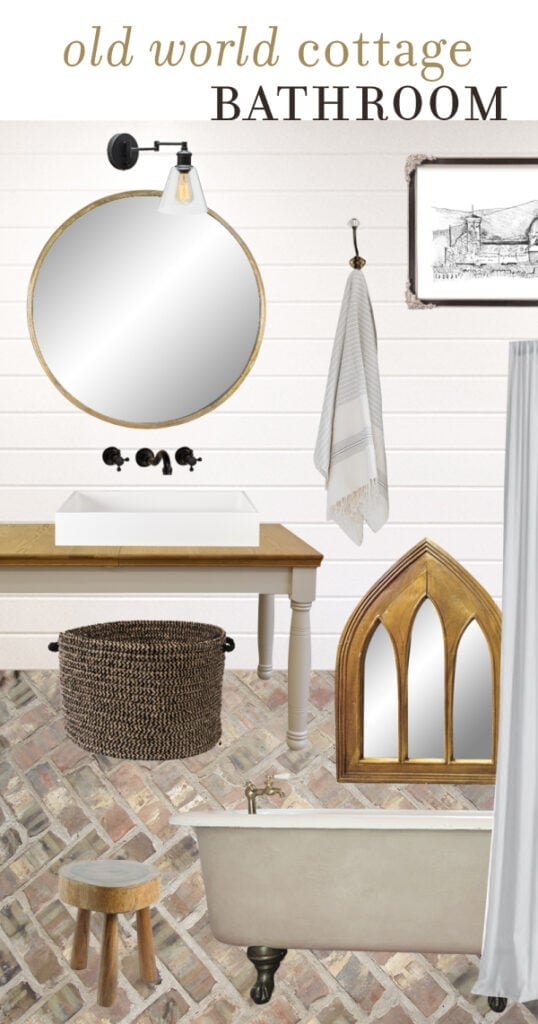
Just so we’re all on the same page, this is the vanity for the upstairs bathroom, which I revealed plans for last week:
The last brick tile was set as we first arrived to the house on Friday—can we just take a moment to stare at these beauties?

As of Monday the tile was supposed to have been grouted—I haven’t seen a photo but it will be something to look forward to when I come back on Friday!
We’re still waiting on the wall mounted faucet before the wall planks can be reinstalled and painted, but that should all be taken care of over the next few days.
Back to the vanity. Here was the original:
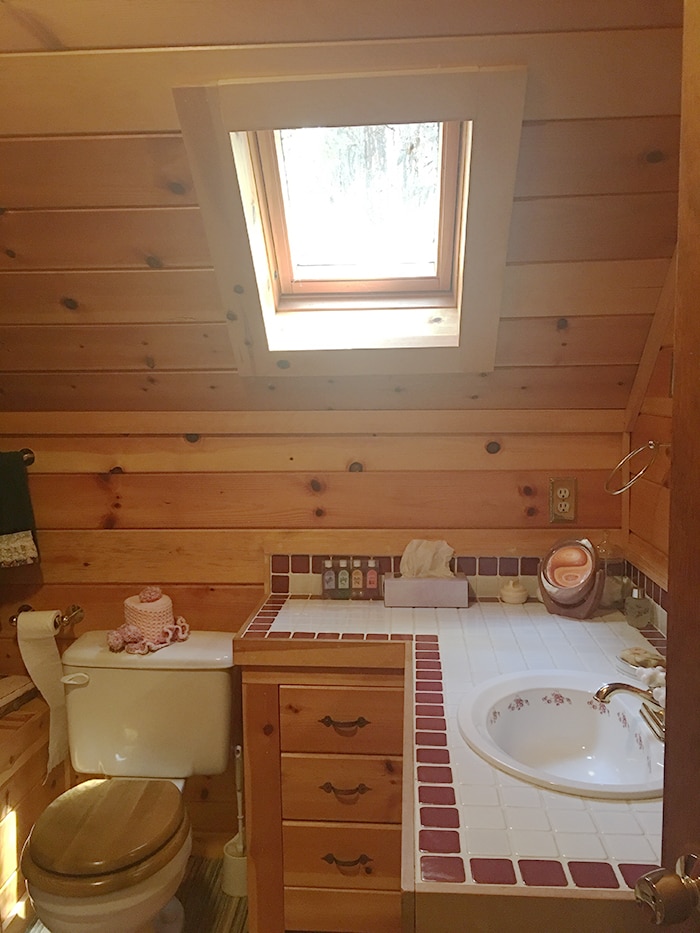
A bit cramped, so I decided to forgo the L shape to open the space up a little. I didn’t want anything too small though, so I thought it would be best to keep the same length. After no luck in my search for anything that would fit the bill, I knew that something custom built would be my best option.
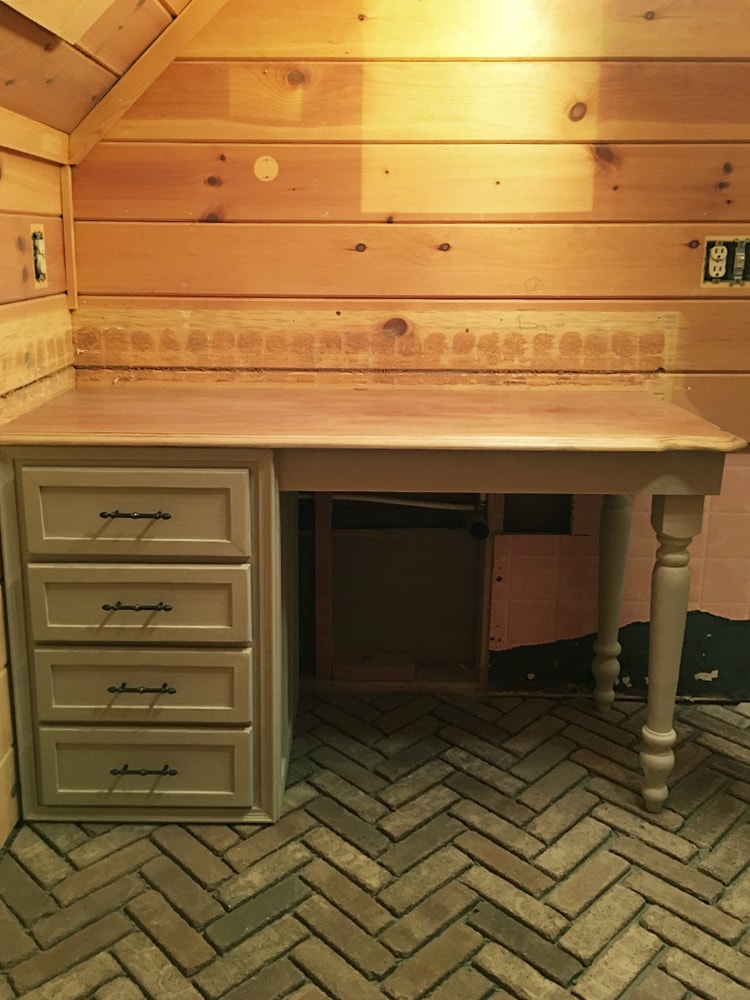
My light bulb moment was this old desk that came with the house, had been disassembled and just sitting around in the kitchen…
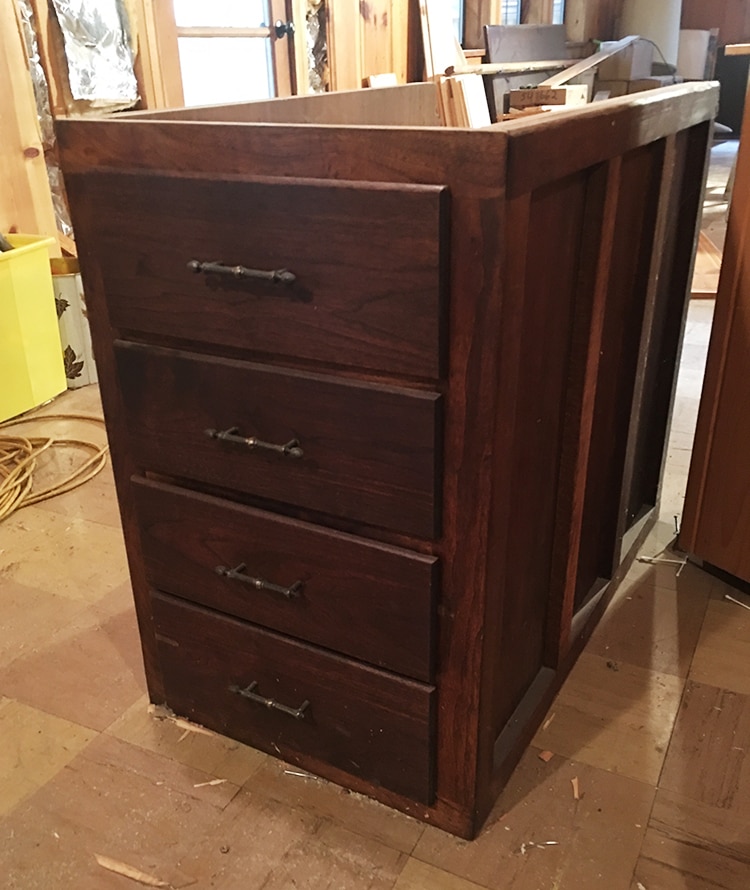
It was too deep, but nothing a little saw blade couldn’t fix. The chest of drawers would sit in the corner, then I’d place two table legs on the other end and use some reclaimed wood for the top. Inexpensive and efficient!
With a plan in place, we headed to Lowe’s to grab our supplies (and shared it on instagram, of course)
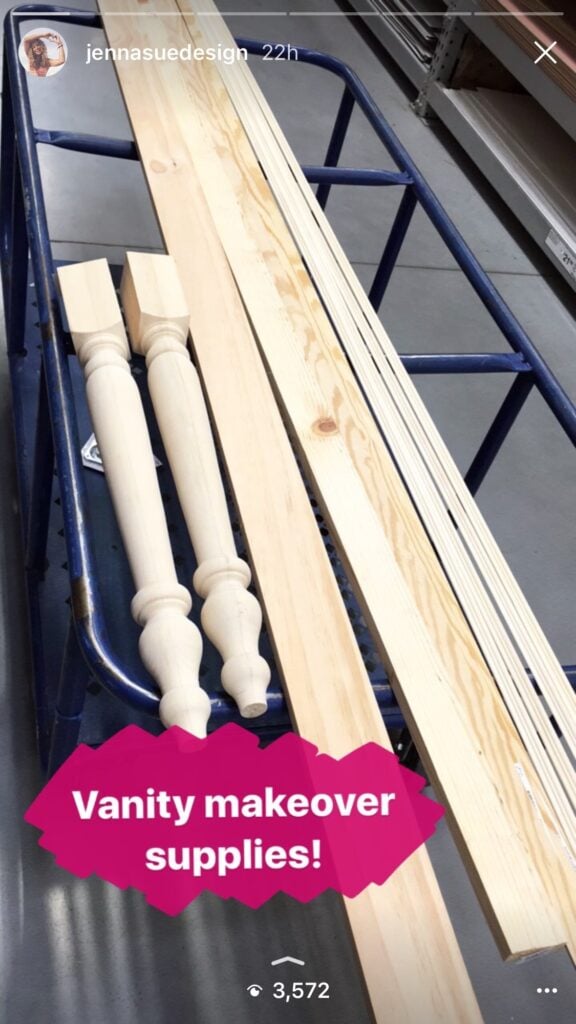
I ended up with these two table legs, top plates and hanger bolts:
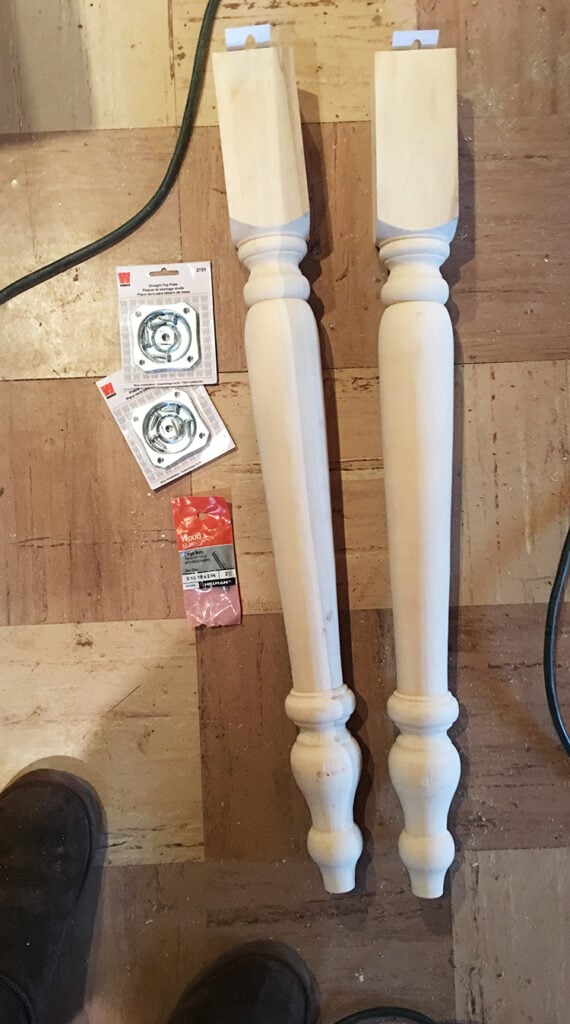
I also grabbed a 1×4″, a handful of lattice trim and small decorative molding to finish it off.
Then we were on our way to the lumber mill to pick out the perfect reclaimed wood top… until finding out they had closed early and wouldn’t open until after Thanksgiving. So much for that plan!
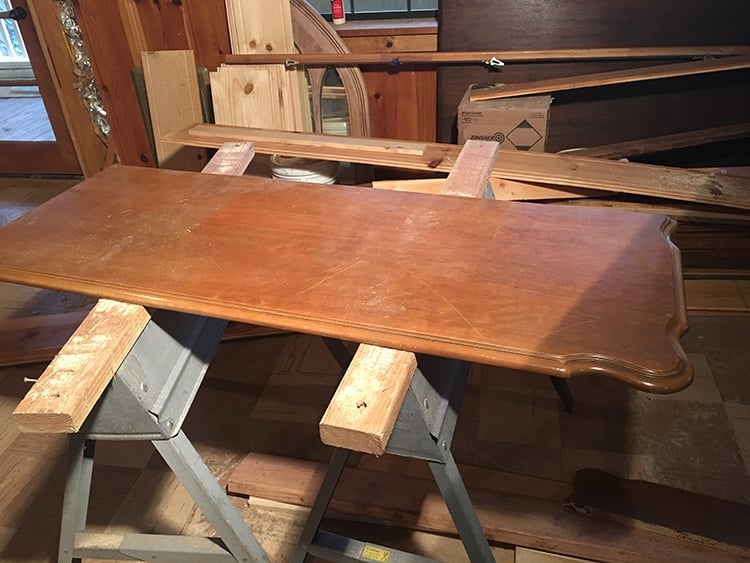
Without any other source for that type of wood, I decided to stop by the Restore as a last resort on our way to the house, knowing I had to find something and make it work. The DIY Gods were watching over me that day when I spotted this coffee table—and it was half off for Black Friday, making my total just $18:
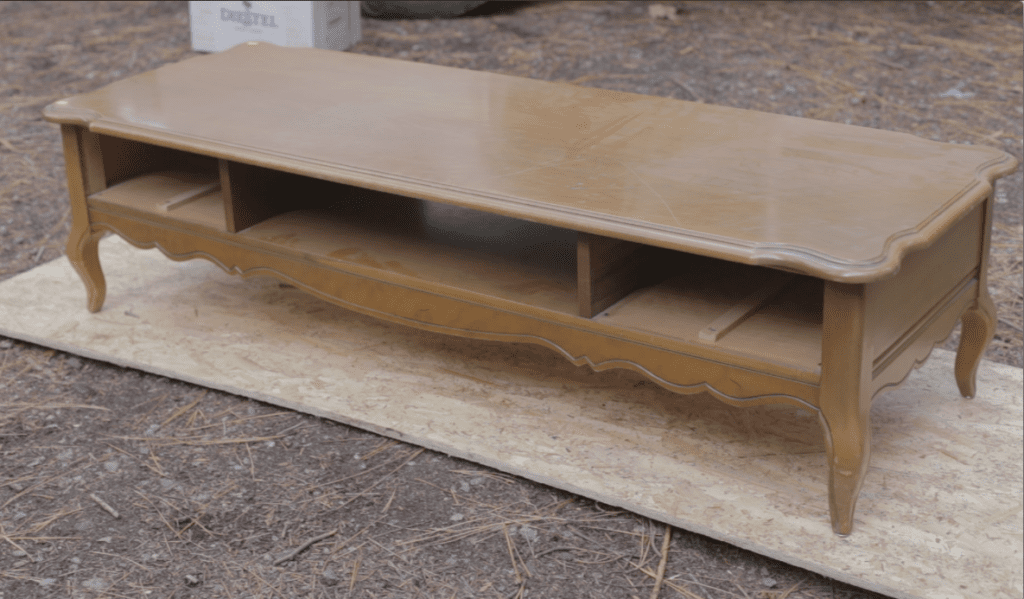
My dad recognized this table as one he had in his home growing up, so clearly it was fate 🙂 The carved top is a different style than rustic reclaimed wood boards, but I actually came to prefer this look instead. I love these happy DIY accidents.
Now that we had all our supplies, it was time to get started!
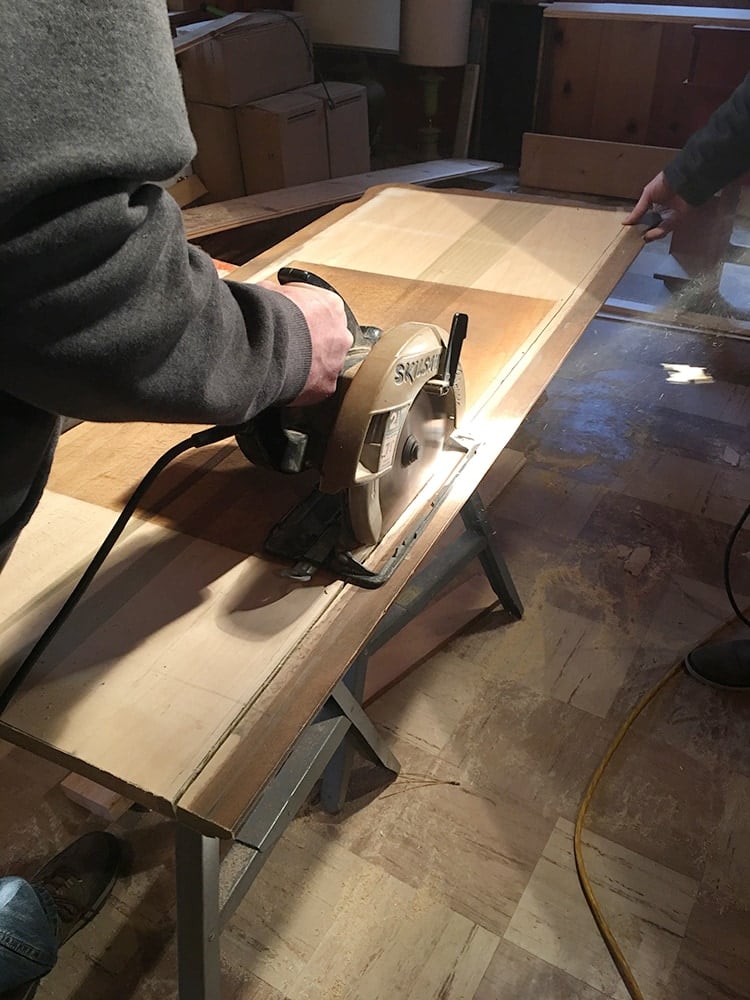
After measuring the space, I decided the vanity should be 52″w x 20″d, so we removed the top piece from the coffee table, measured and cut it with a skil saw:
Ta-da!
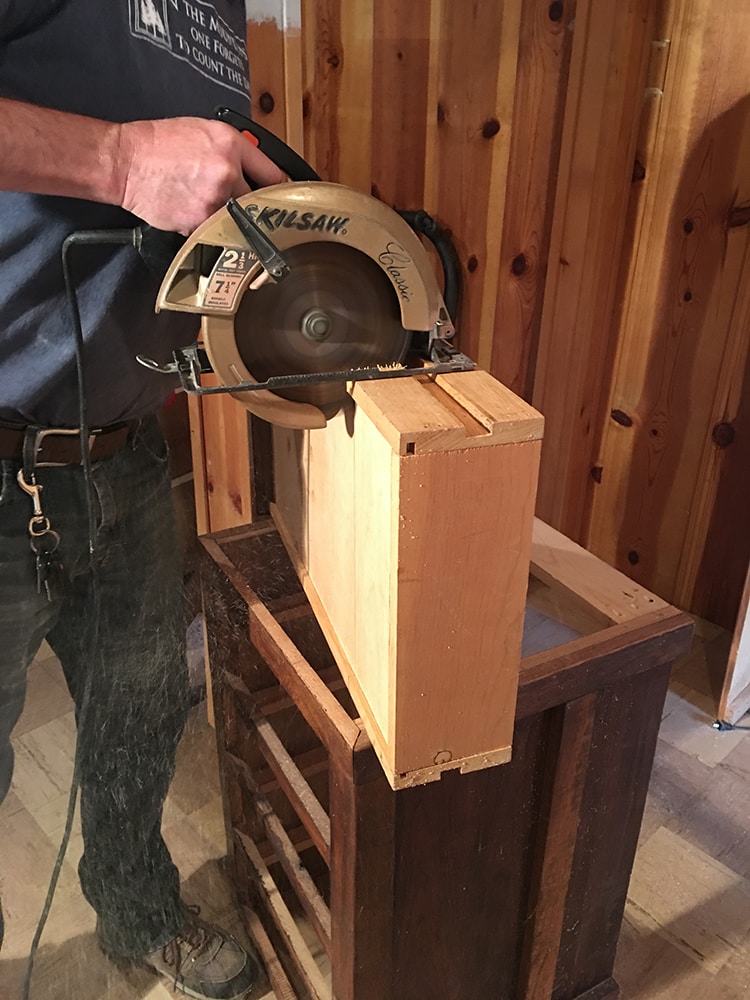
Next it was time to chop down the dresser. After removing the drawers, we had to add a brace to the top and bottom for stability:
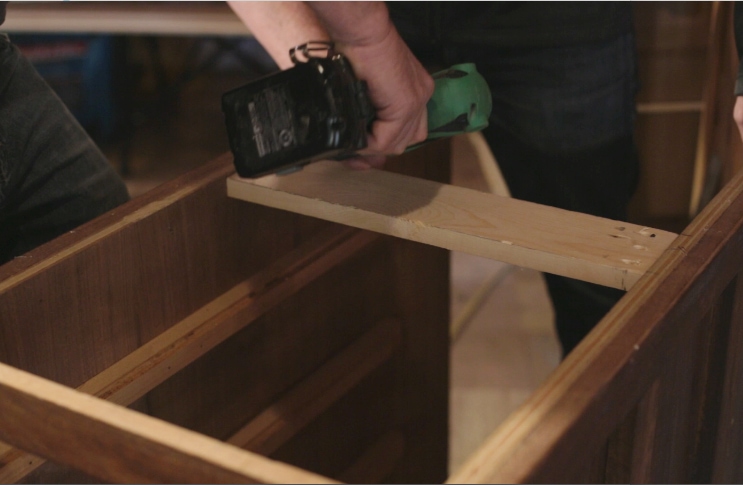
Around 13″ needed to be cut off the back, another job for the skil saw:

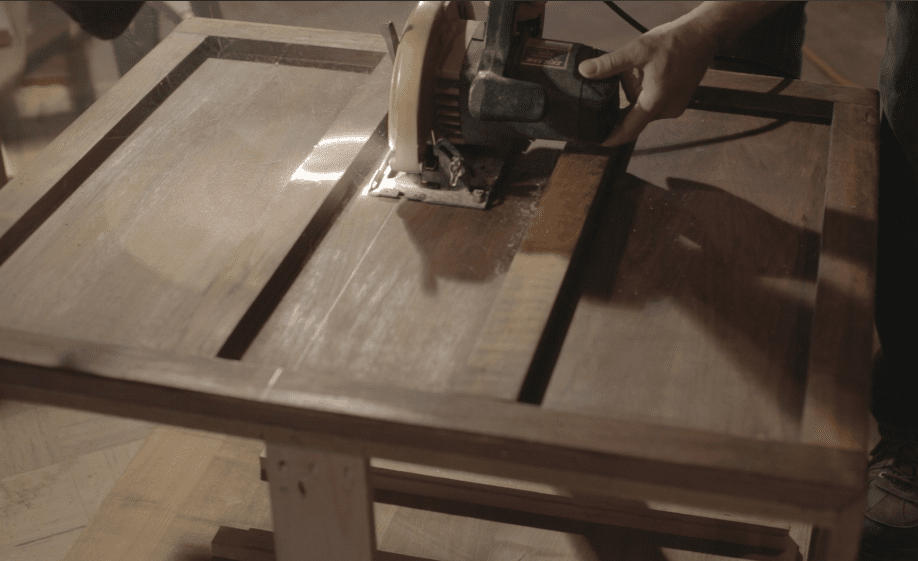
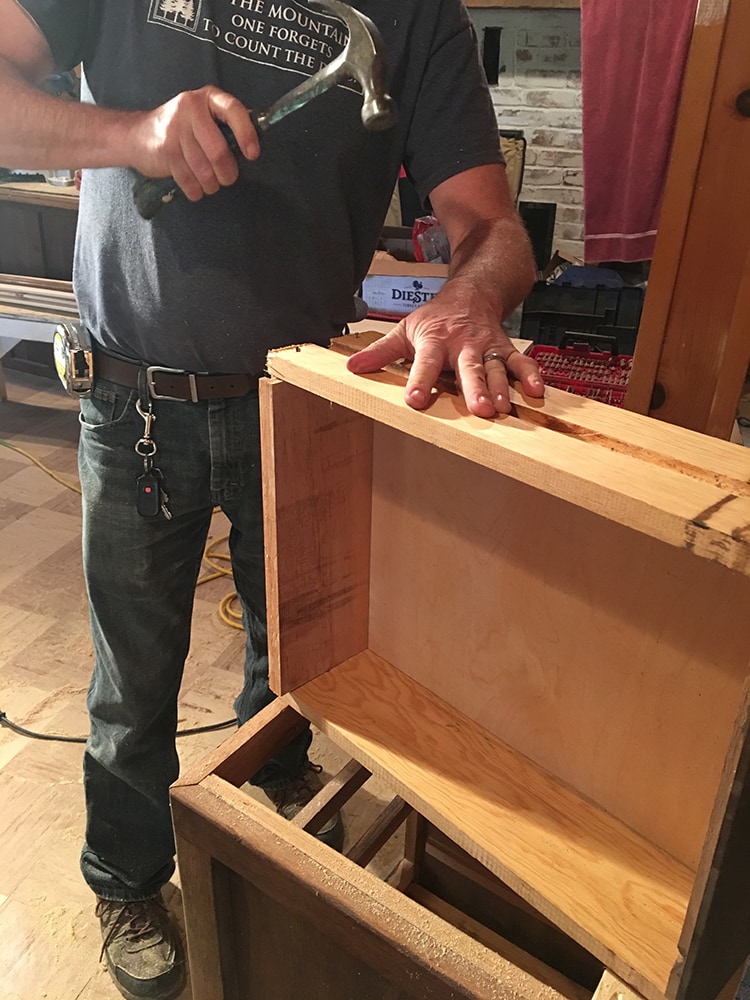
Same process for the drawers:
The back piece of each drawer was then nailed into place:
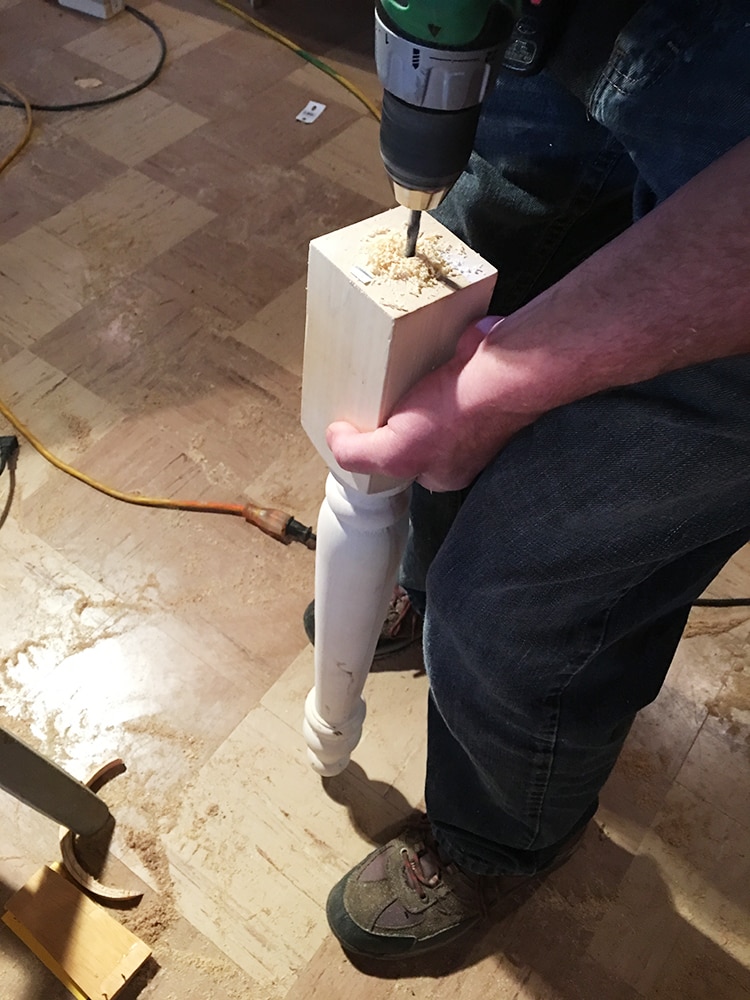
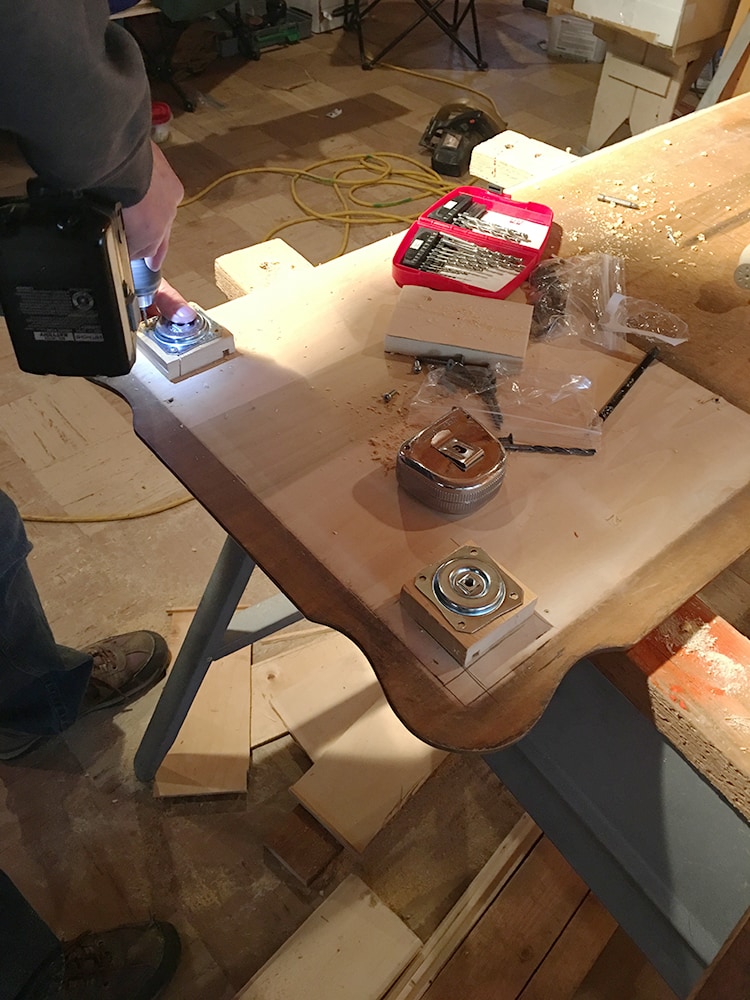
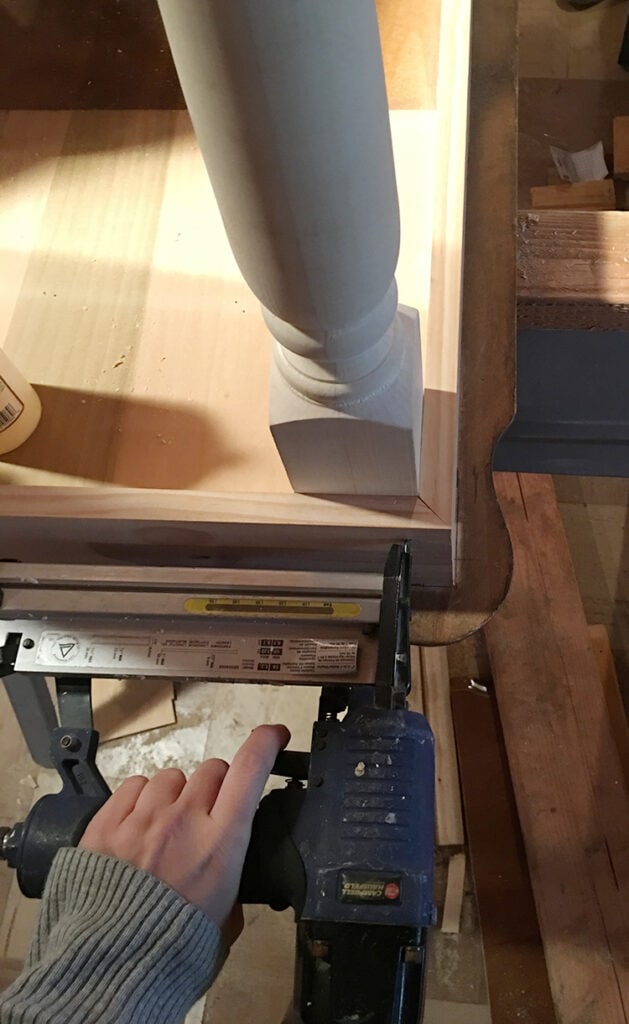
Now for the legs. The smaller ones had hanger bolts already preinstalled, but these didn’t (not exactly sure why) so my dad drilled a hole in the center of each, then threaded the bolt in with a wrench.
The legs were 29″ but the dresser is 30″, so we had to fill the gap. The top plates are 1/4″ tall, so a couple of 3/4″ scrap wood pieces below it would do the trick:
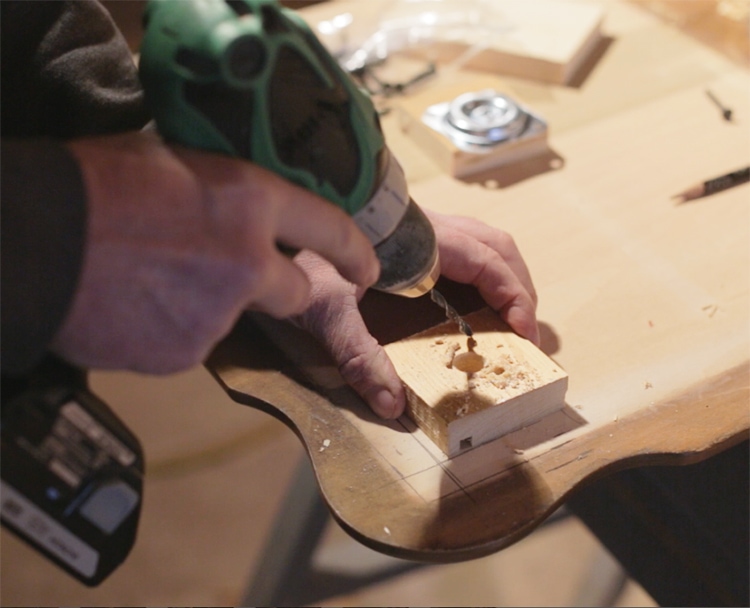
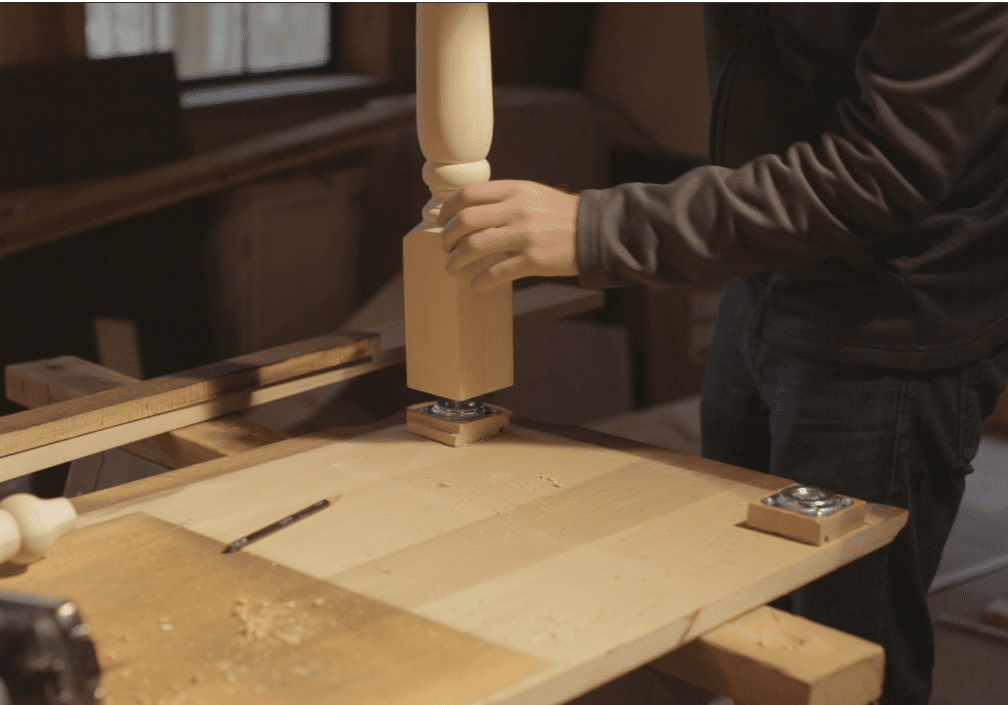
After marking our leg locations on the underside of the table, the scrap pieces of wood were screwed into place, followed by the top plates which the legs would then be threaded into:
And the legs twisted right into place:
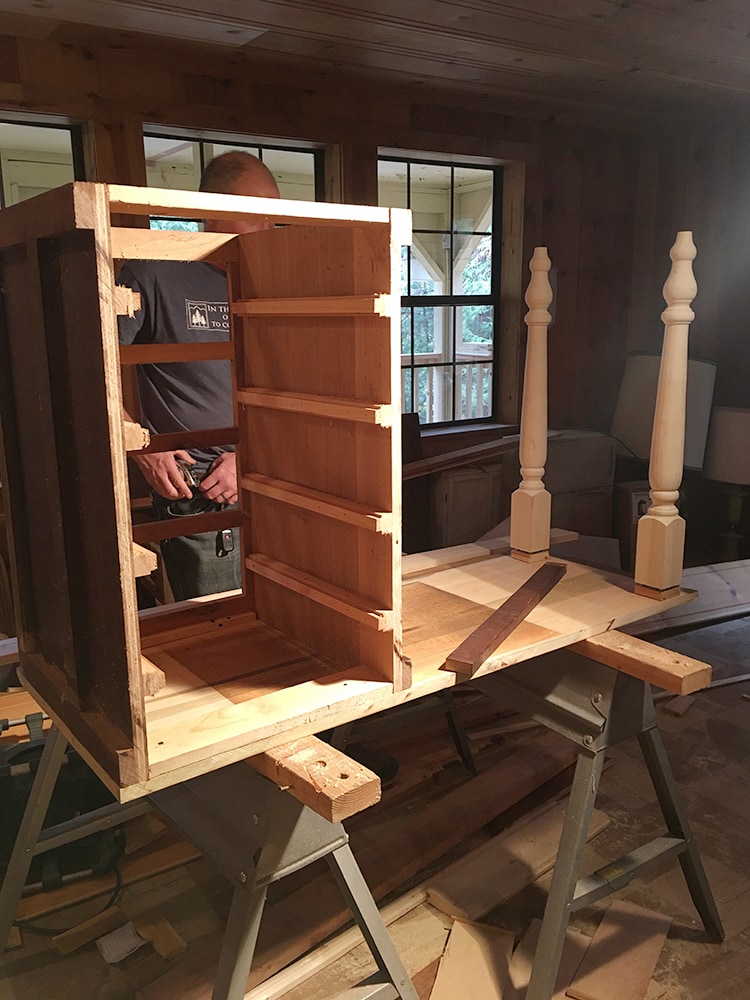
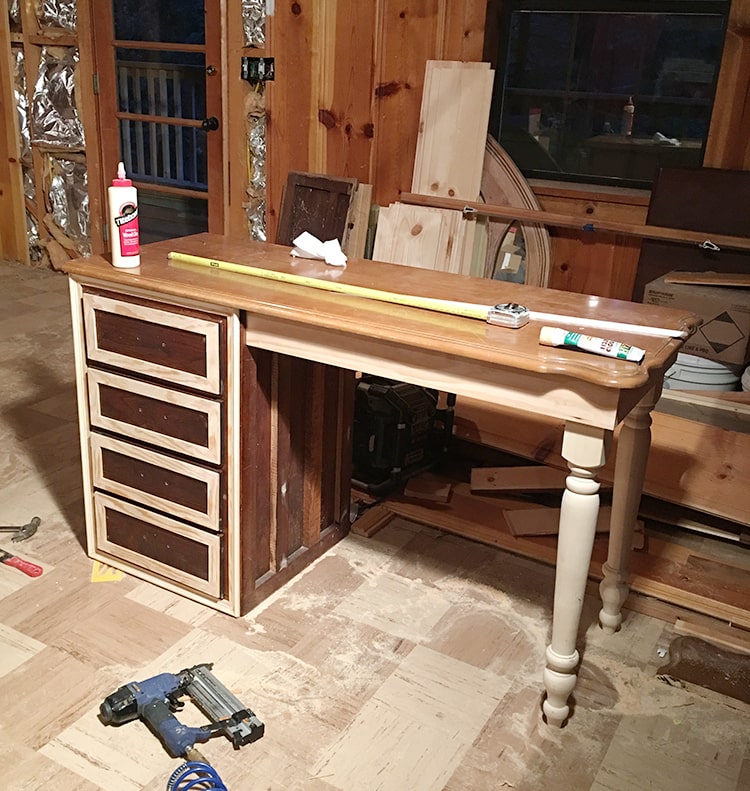
Then it was time to flip the dresser onto the other end and secure it in place:
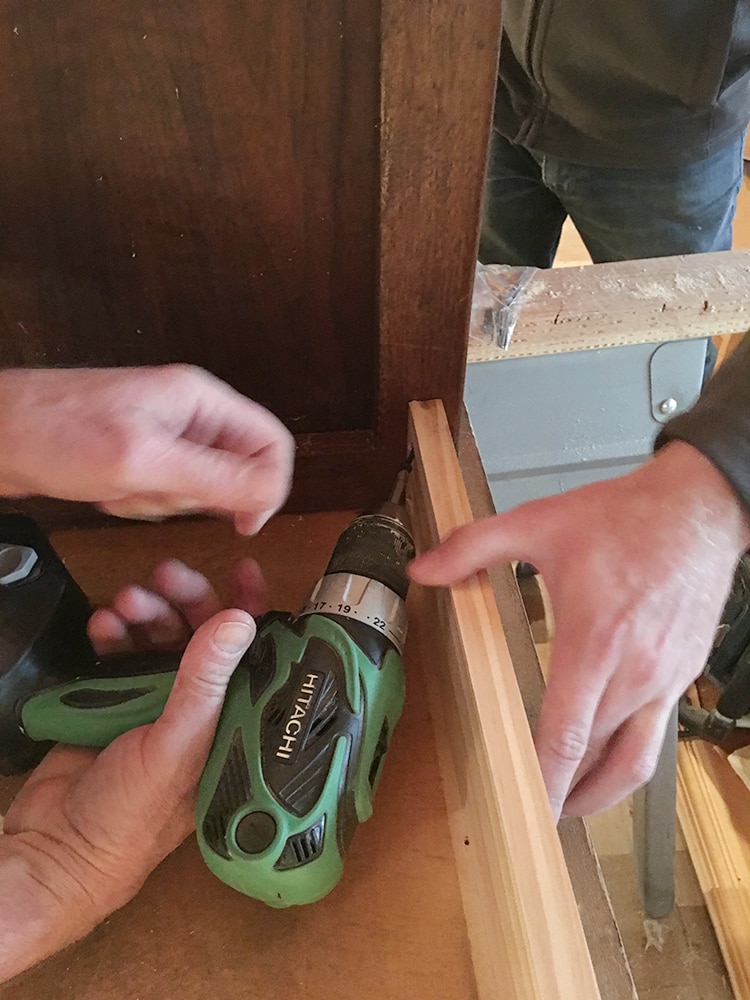
To hide the gap and connect the legs to the dresser, making the vanity look more finished, we placed the 1×4″ on the outside of the legs and mitered the edge where they met for a smooth joint:
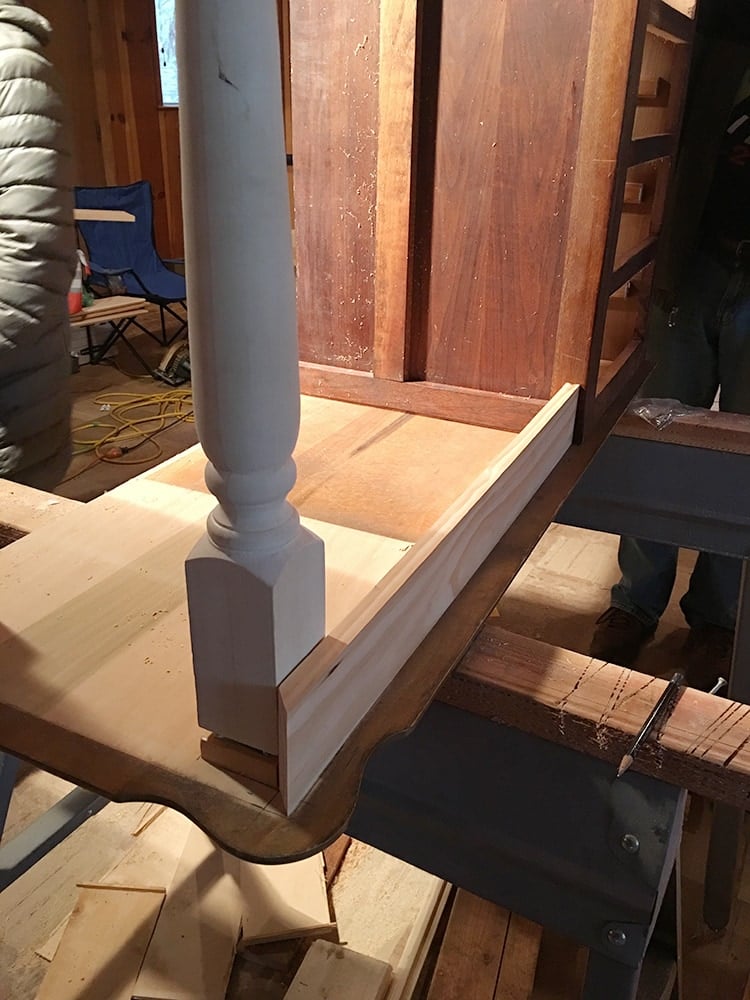
The 1×4’s were glued and attached to the legs with finishing nails:
And attached to the dresser using pocket screws:
Then it was time to flip it over and admire our hard work and ingenuity! Hey there, Frankenvanity:
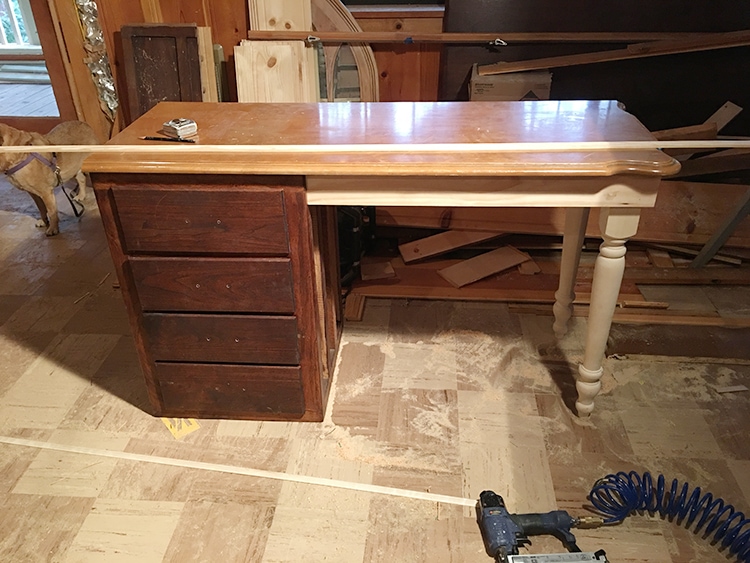
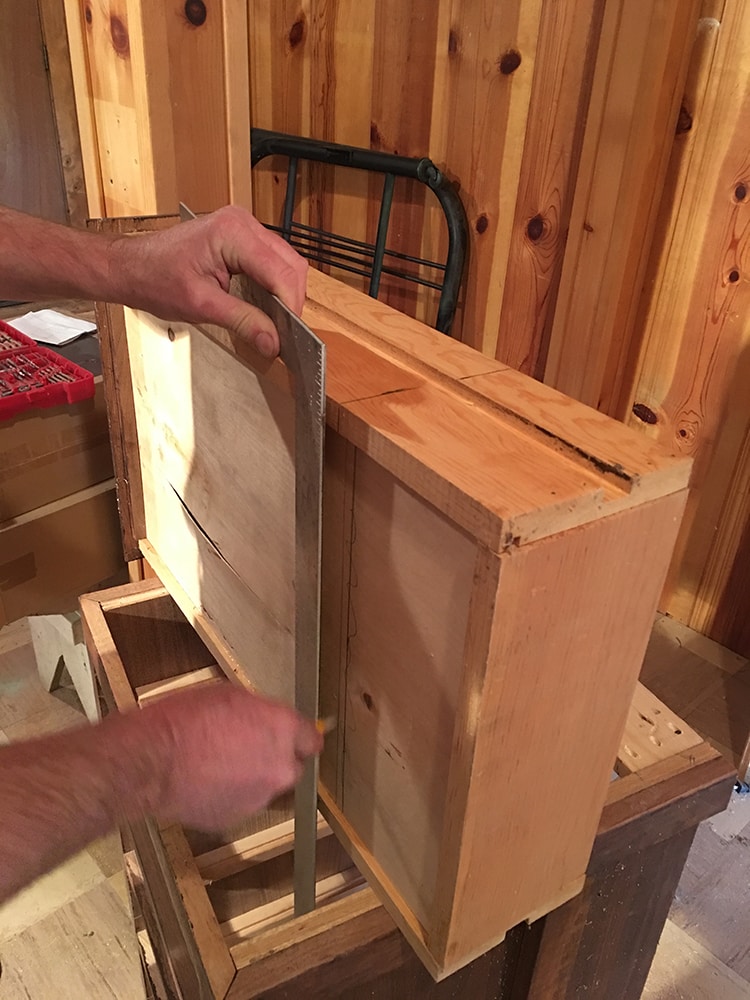
I attached two more 1×2’s to the exposed side of the dresser so it looked even:
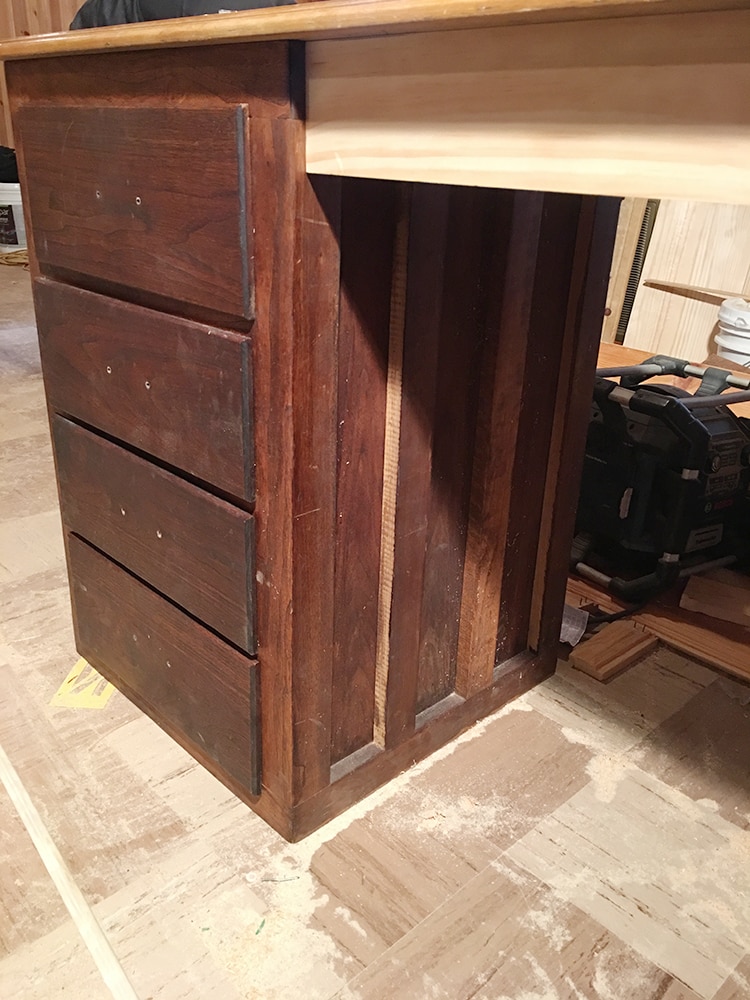
I could have left the dresser as is, but I wanted it to be a bit more polished, and trim is always my favorite way to do that.
The lattice strips were the perfect size to frame the face of the drawers:
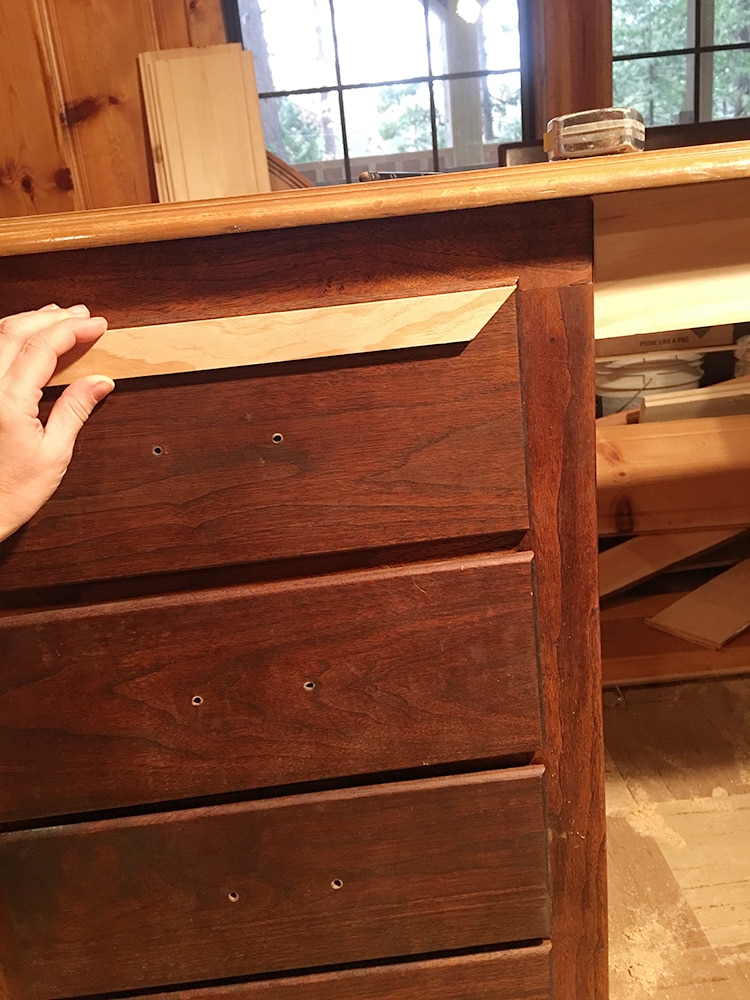
It’s as simple as measuring and cutting each piece:
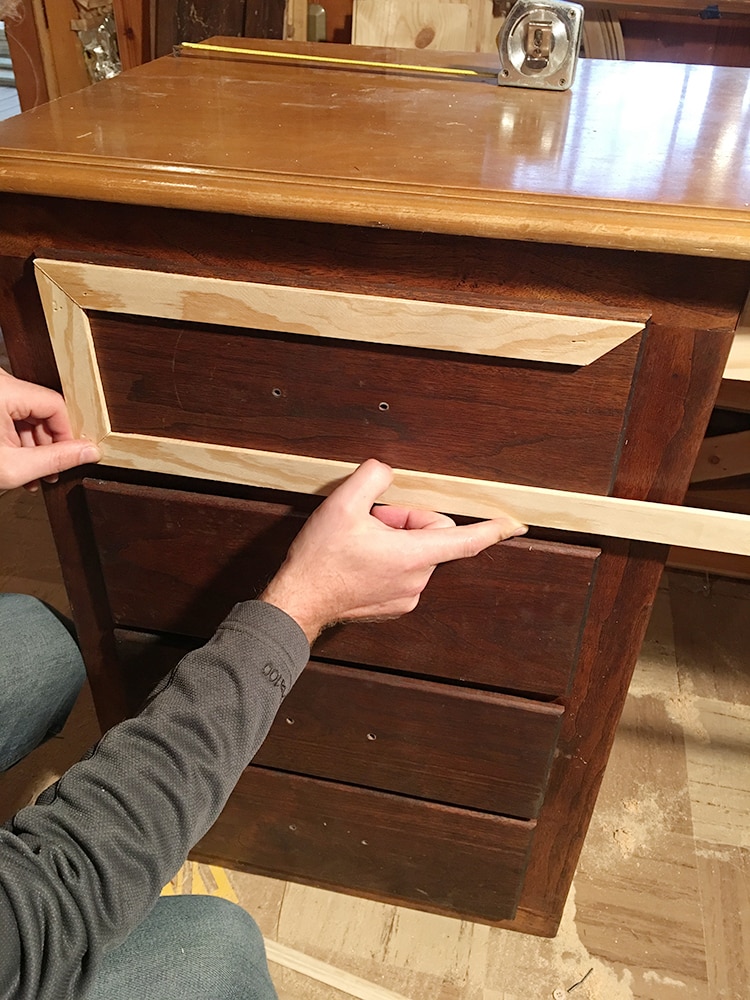
They’re attached with a bit of wood glue and a finish nail on each end.
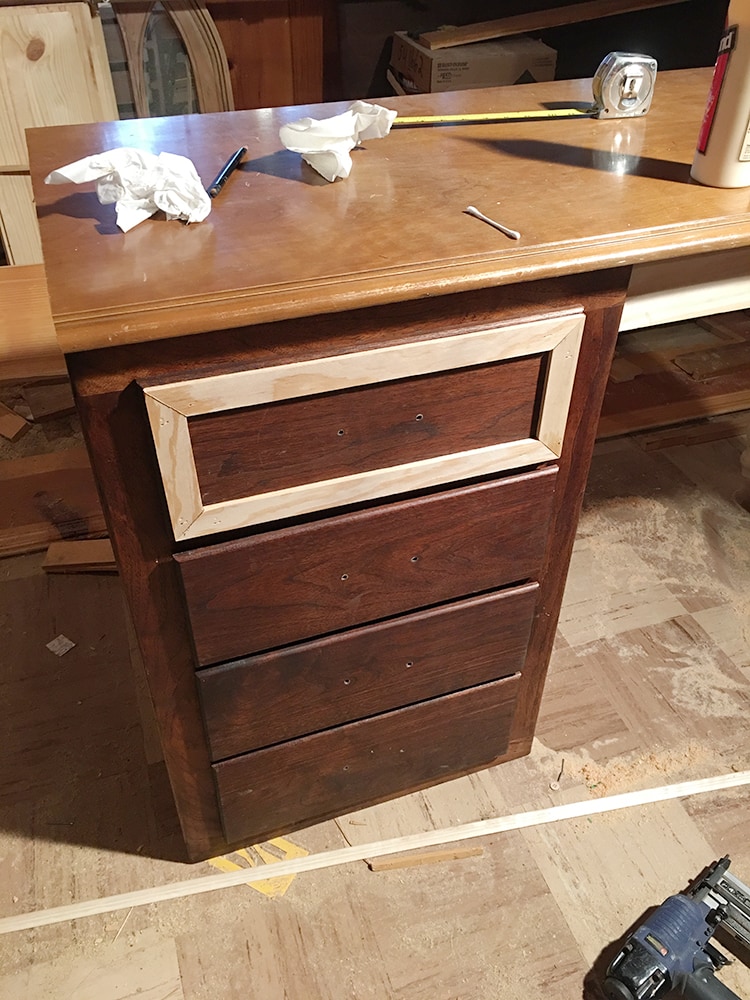
All done:
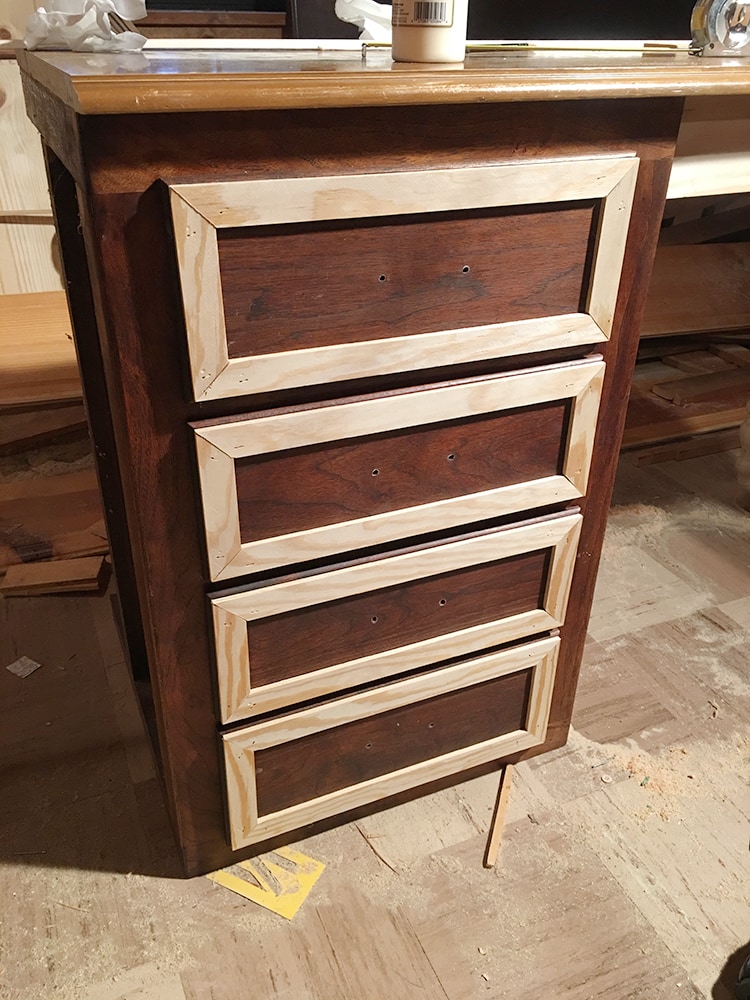
I could have stopped there, but I decided to take it one step further with trim around the outside edge too. I started with the same lattice trim:

And put Lucas on putty duty:
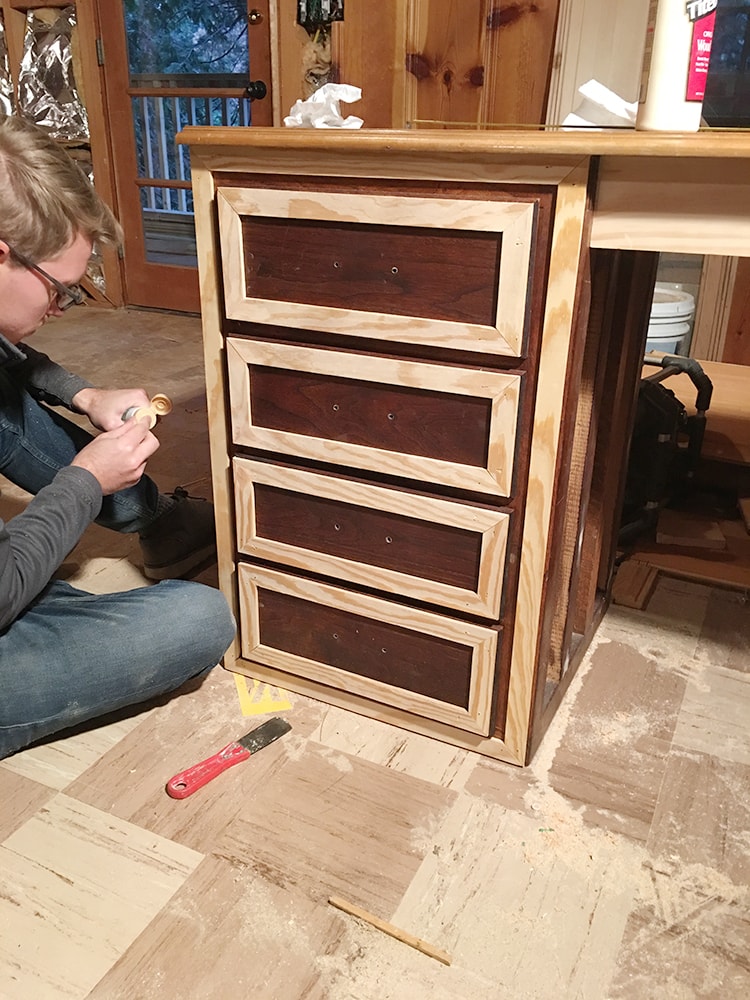
Then I added another layer of my small decorative trim on top of the lattice. Just because.

After spackling all the seams and nail holes, Day 1 was over! Whew.
The next day we returned to the house with sandpaper and paintbrushes in hand. It was time to make this thing pretty.
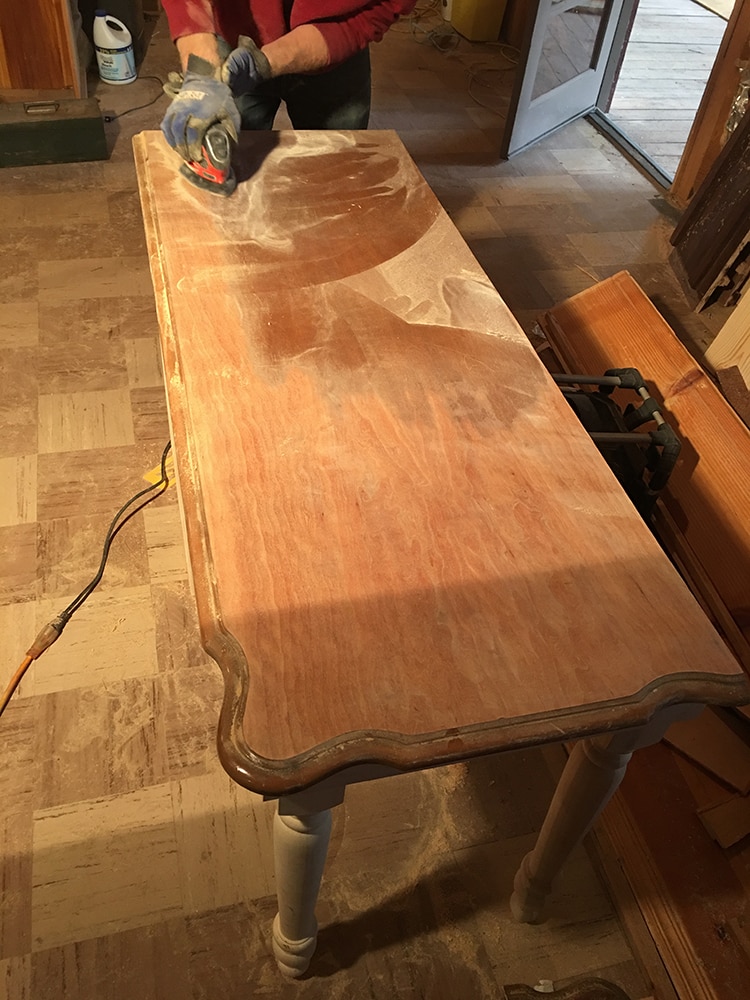
I put Lucas to work sanding the top. Ideally I wanted to have an unpainted wood vanity, but with the mix matched wood, that was never going to happen. So I decided that having a wood top and painted bottom would be the next best option. But first, the lacquer needed to be removed.
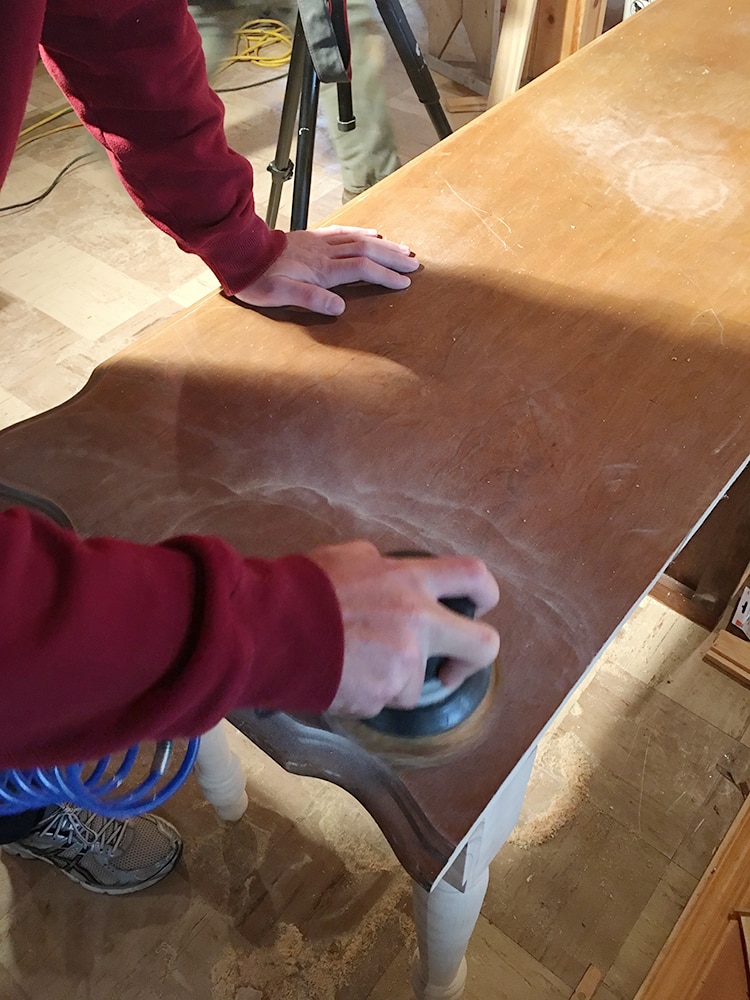
I dislike working with paint stripper so we used an electric sander instead:
There’s definitely some elbow grease and time involved (it probably took around an hour) but fortunately, Lucas didn’t mind:
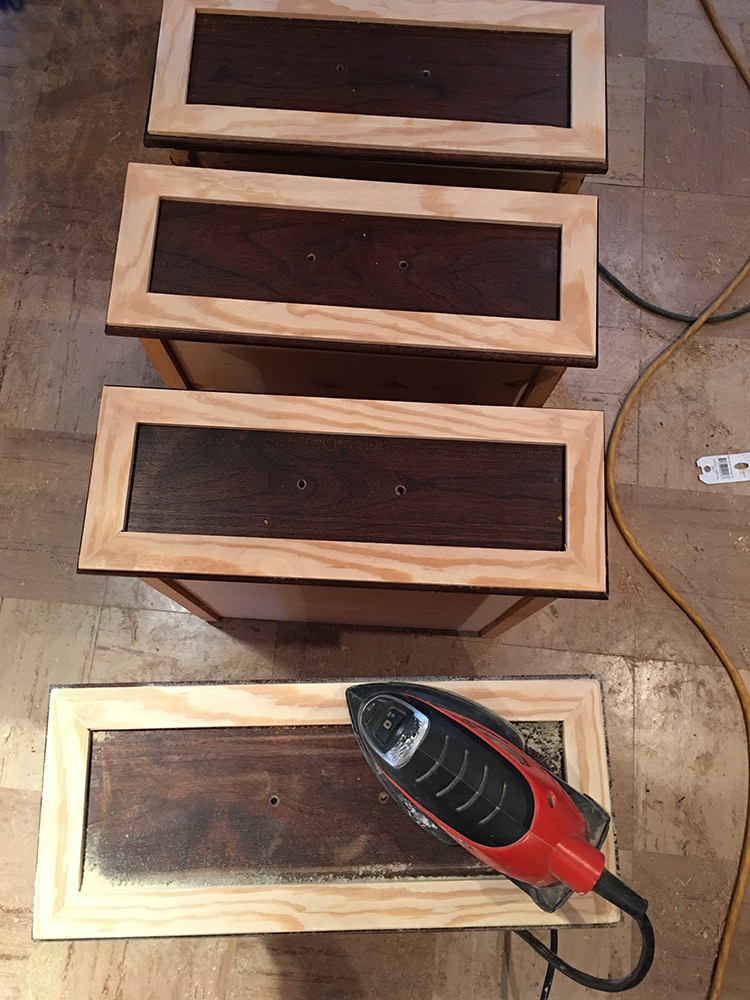
While he was focused on that, I began on the drawers, starting with sanding the wood filler and corners until everything was nice and smooth:
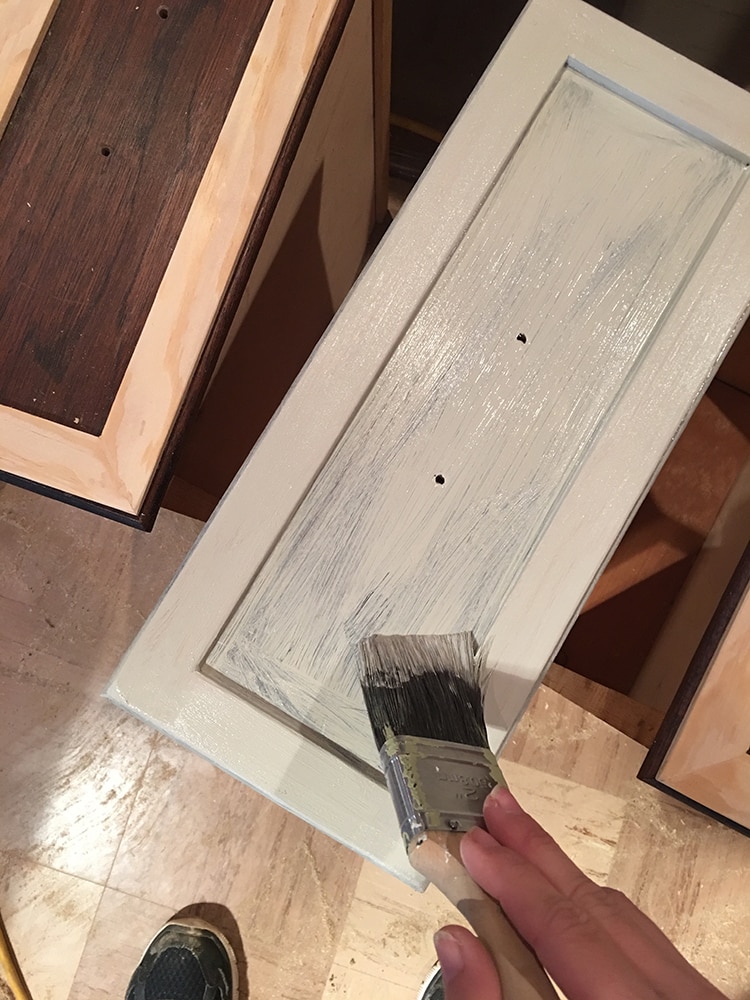
Shortly after I was ready for paint. I grabbed my can of Maison Blanche in Cobblestone—which you may remember is the same color I painted the clawfoot tub a few weeks ago:

I was actually planning to paint the vanity black, but changed my mind at the last minute. I’m slightly obsessed with this color.
It’s such a rewarding feeling, watching that first coat of paint go on and your vision come to life:
Raw wood always soaks the paint right up, while the lacquered parts take a few coats:
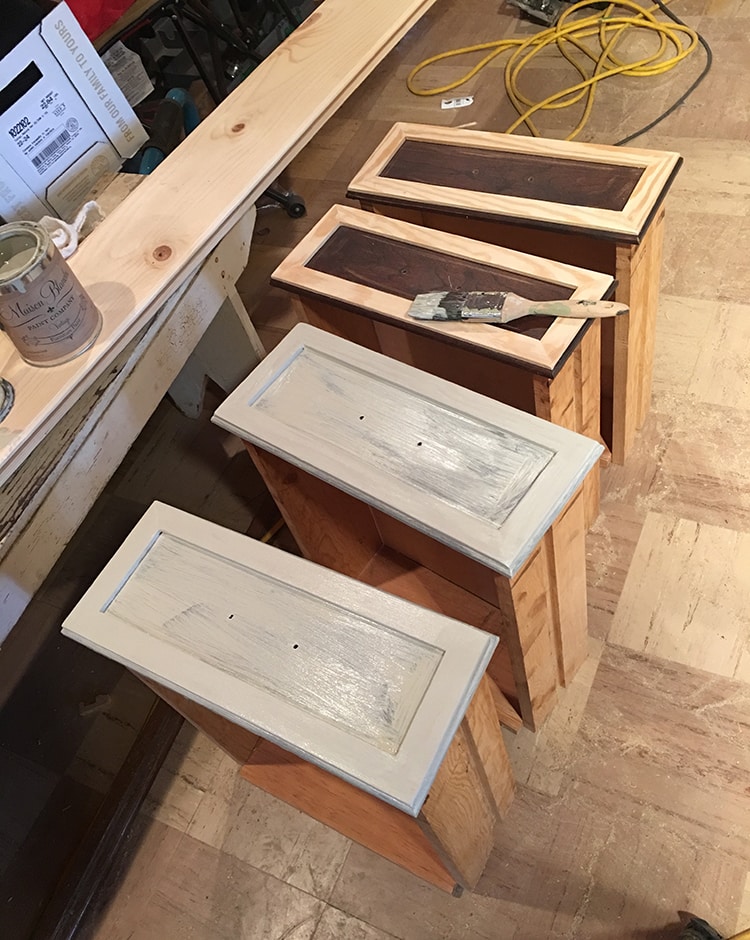
But I could paint for hours. It’s easily my favorite part of these projects.

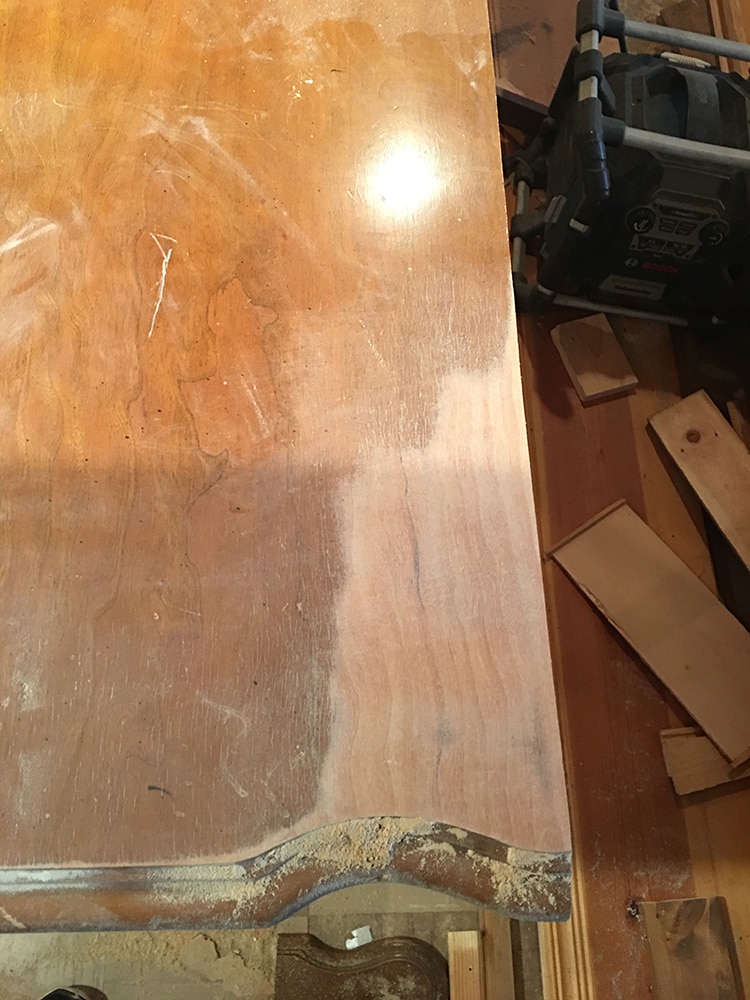
While I was in my painting zone, Lucas had finished sanding the top:

Much better, but still a bit too orange hued for my tastes. I decided to experiment and mix a bit of my Cobblestone paint with water to see if that would tone it down:

I used around a 50/50 ratio and lightly brushed it onto the wood, immediately wiping it off with a rag:
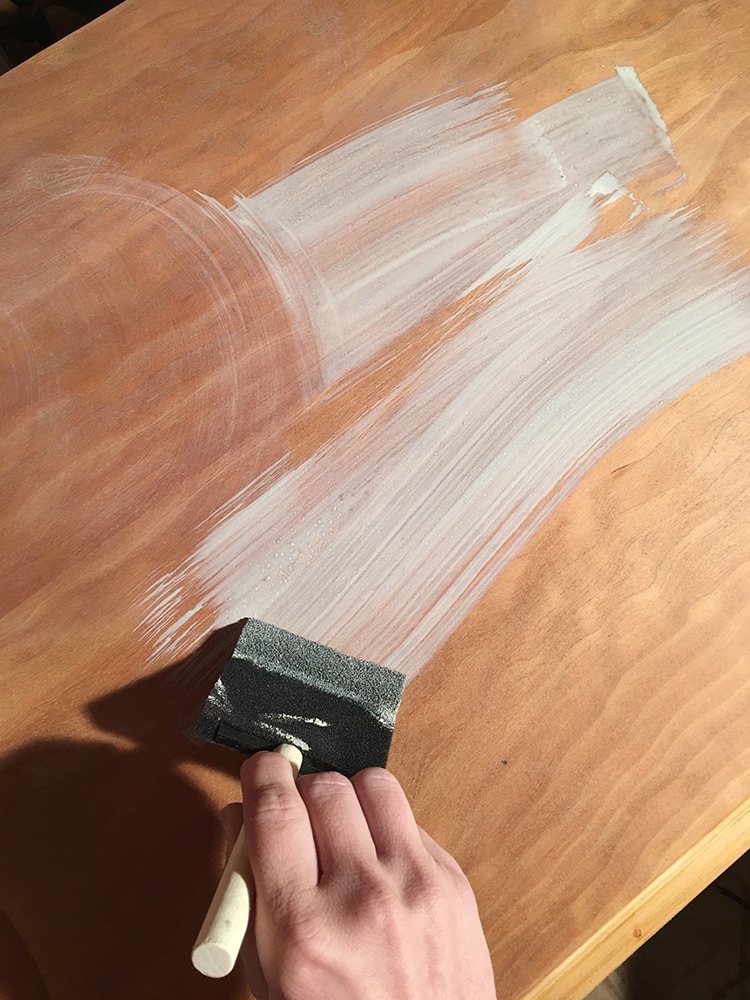
You can use as much or as little as you’d like, and multiple layers to achieve your desired results. Here it is with one light coat:
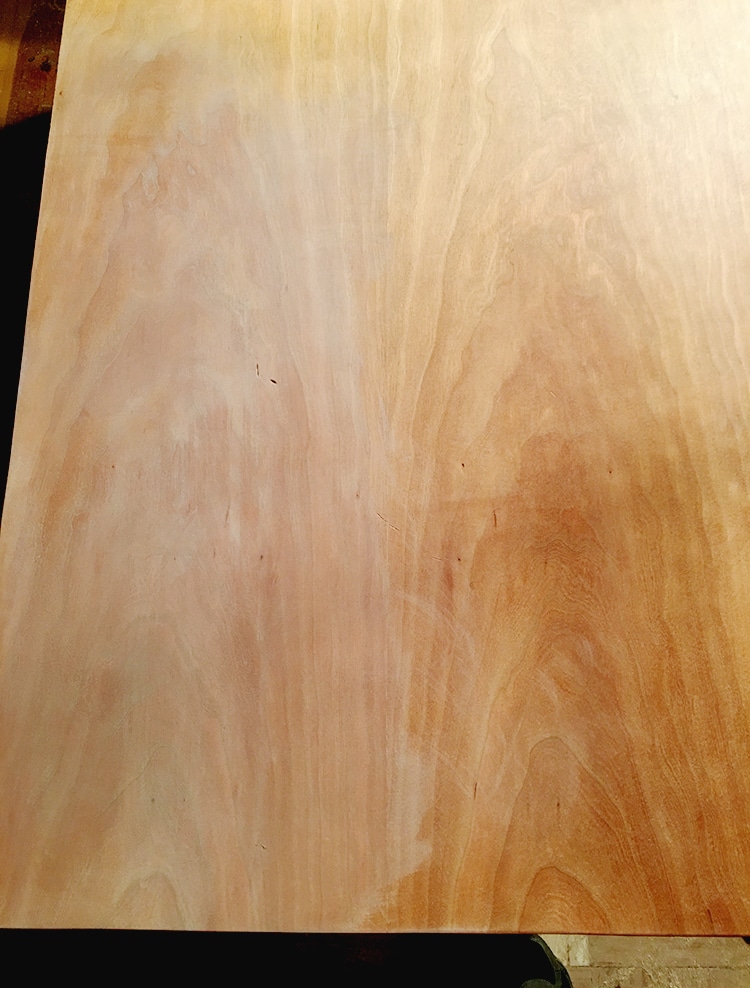
I was surprised at how much it toned down the red—that coloring is normally super difficult/impossible to get out of wood.
But I ended up with a really nice subtle weathered finish that I love.
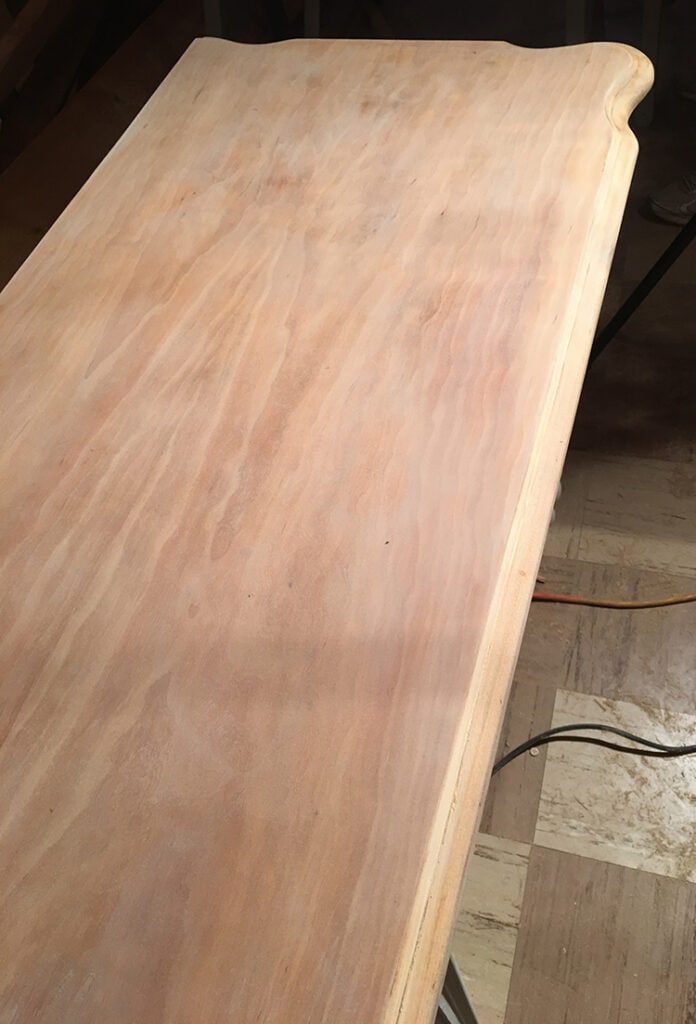
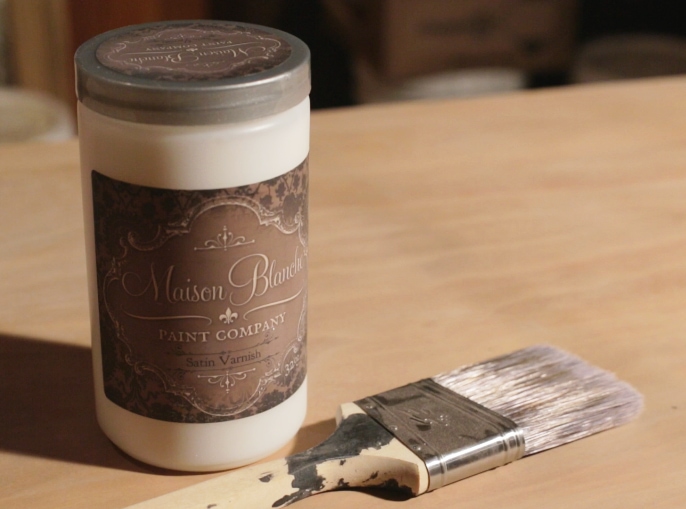
The top was sealed with Maison Blanche’s varnish in satin, which I’ve used on both of the vanities in my last house with great results. It dries invisible and creates a water repellant barrier so it can be used in wet areas.
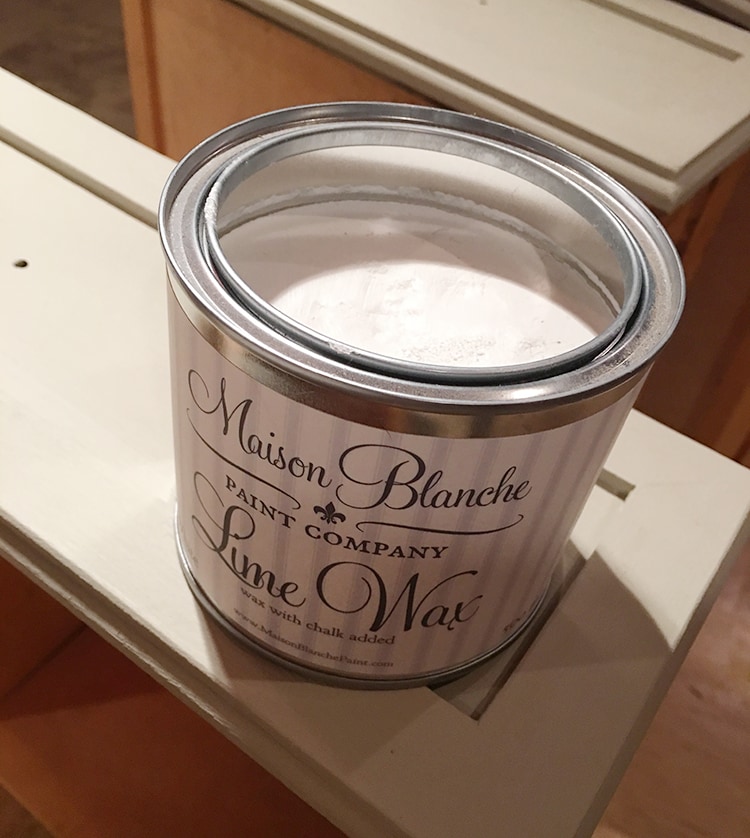
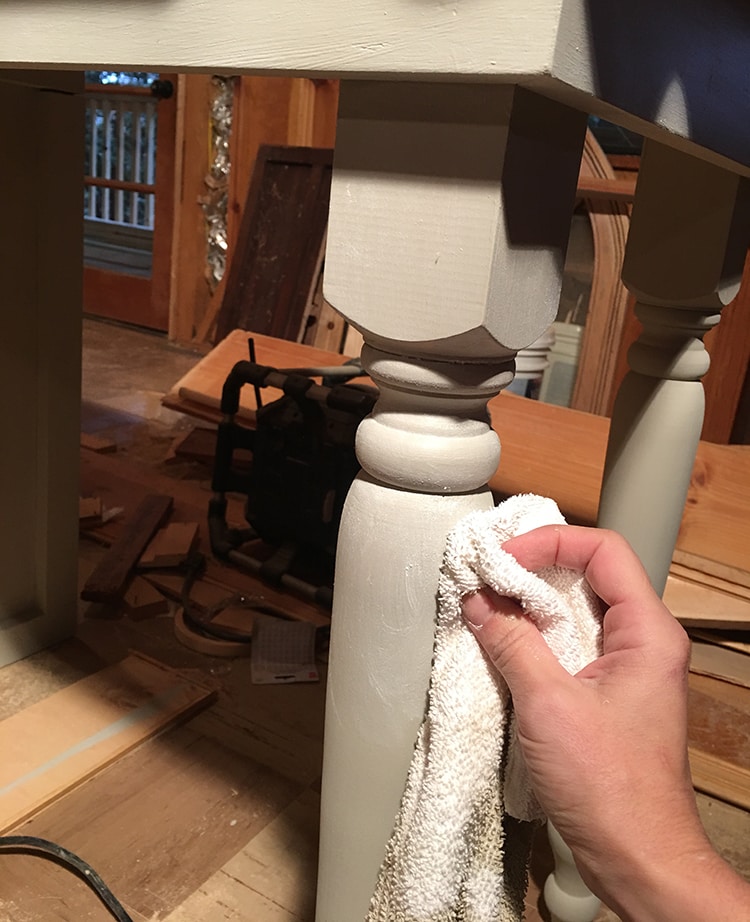
Now that the top was protected, I looked through my stash of waxes to find something for the vanity base. I had used dark brown wax on the tub and didn’t want the finishes to match exactly, so I opted for the white lime wax:
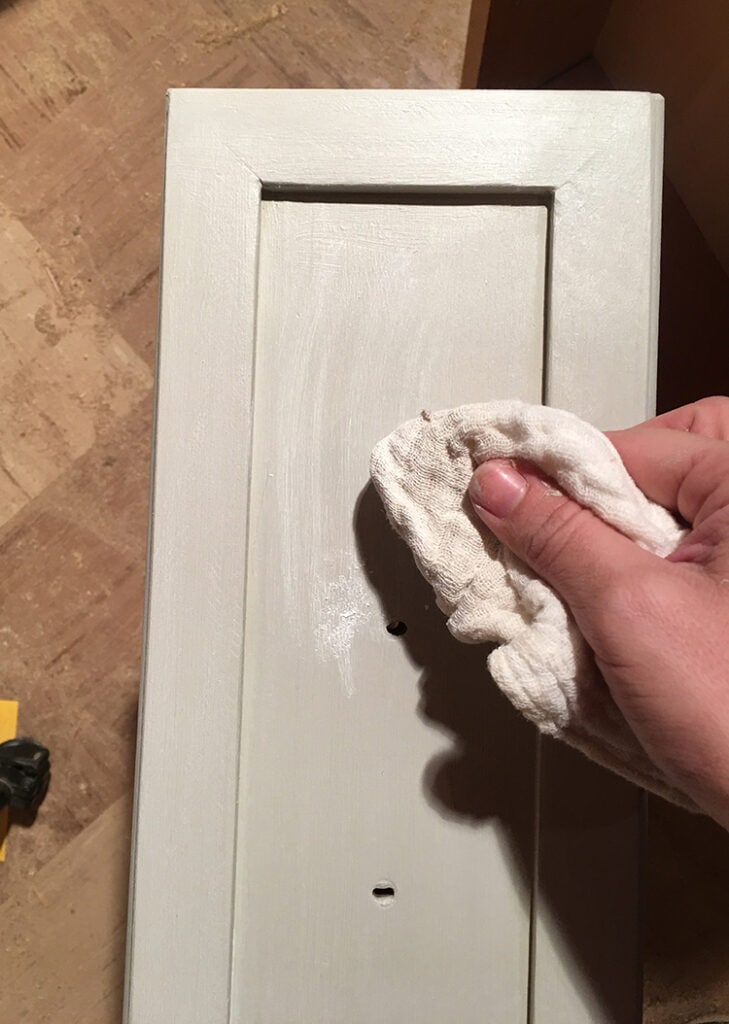
The was was buffed on with a soft cloth over the smooth areas,
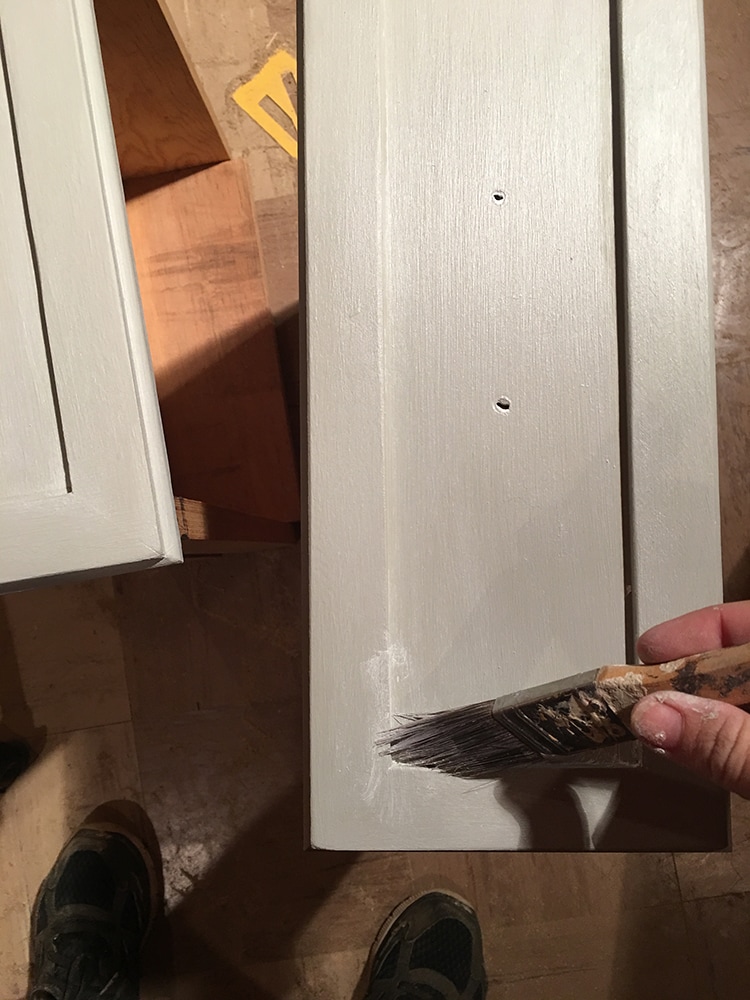
And I used a brush to get into the nooks and crevices:
You can use more or less and layer it on to control the effect. I liked being able to see the whiter coloring so I gave it a bit of a thicker application. A bit difficult to see in photos, but here’s a waxed drawer on the left compared to just paint on the right:
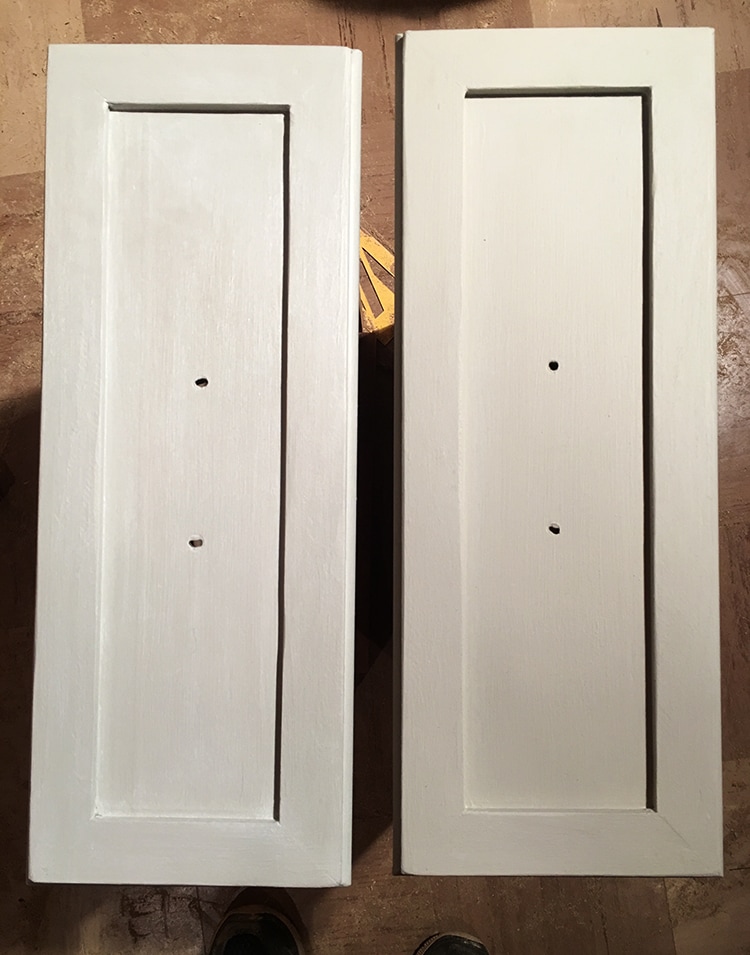
It’s more noticeable up close in person, and it’s nice to just have a hint of aged texture.
The was was applied to the rest of the paint…
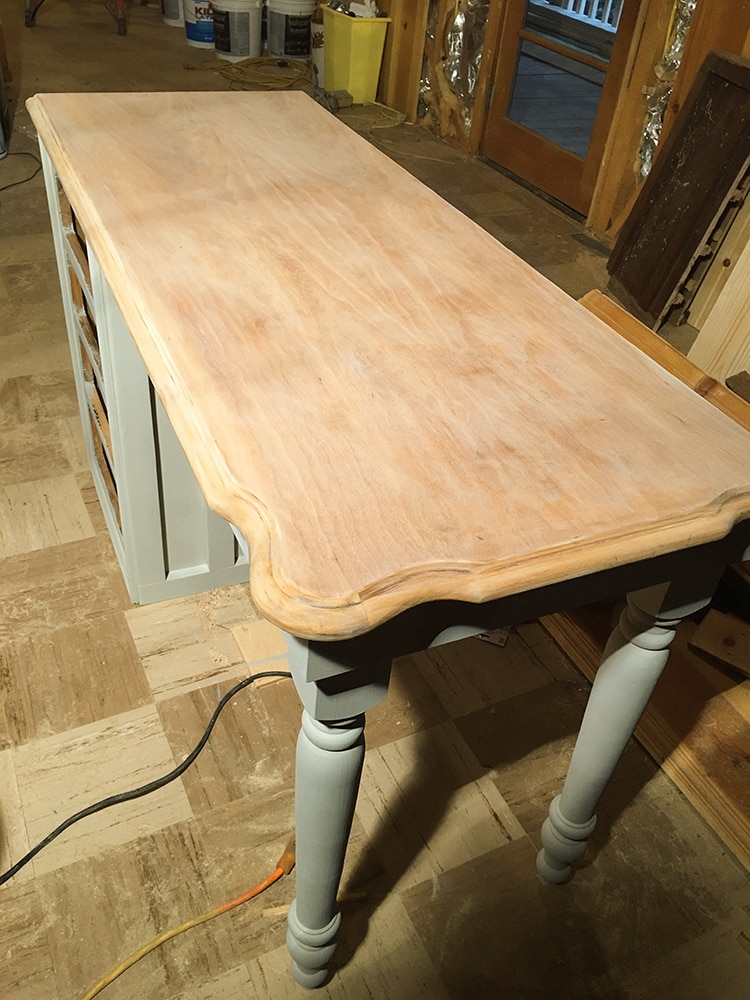
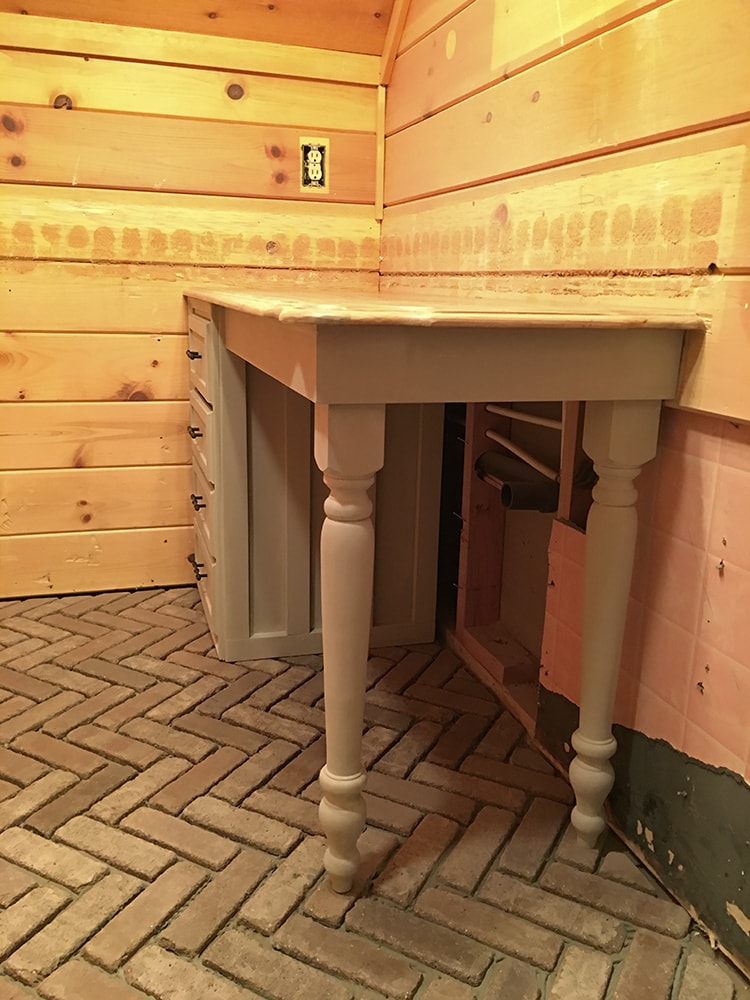
And then it was time to bring it upstairs for a test fit!
You’ll have to excuse the poor lighting/photos for this one… don’t worry, good pictures are in the future:
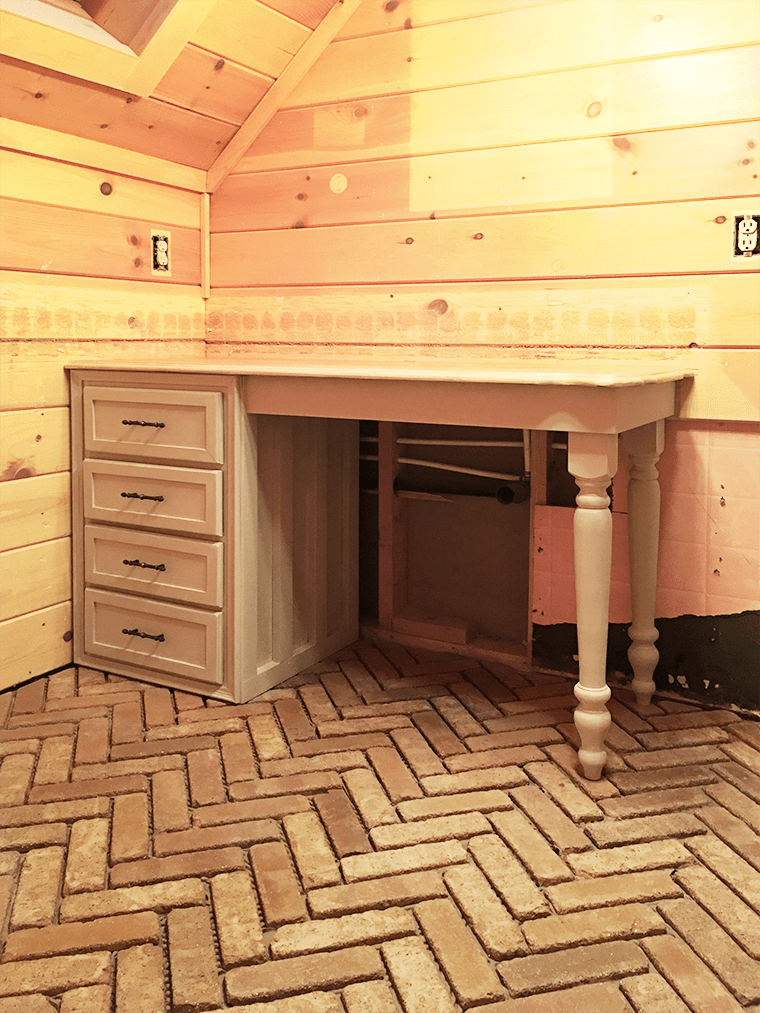
Just imagine white planked walls, grouted tile, a vessel sink and big gold mirror and all the pretty decor… sigh…
This is actually going to be the first room completed. And my favorite one, I’m predicting it now.
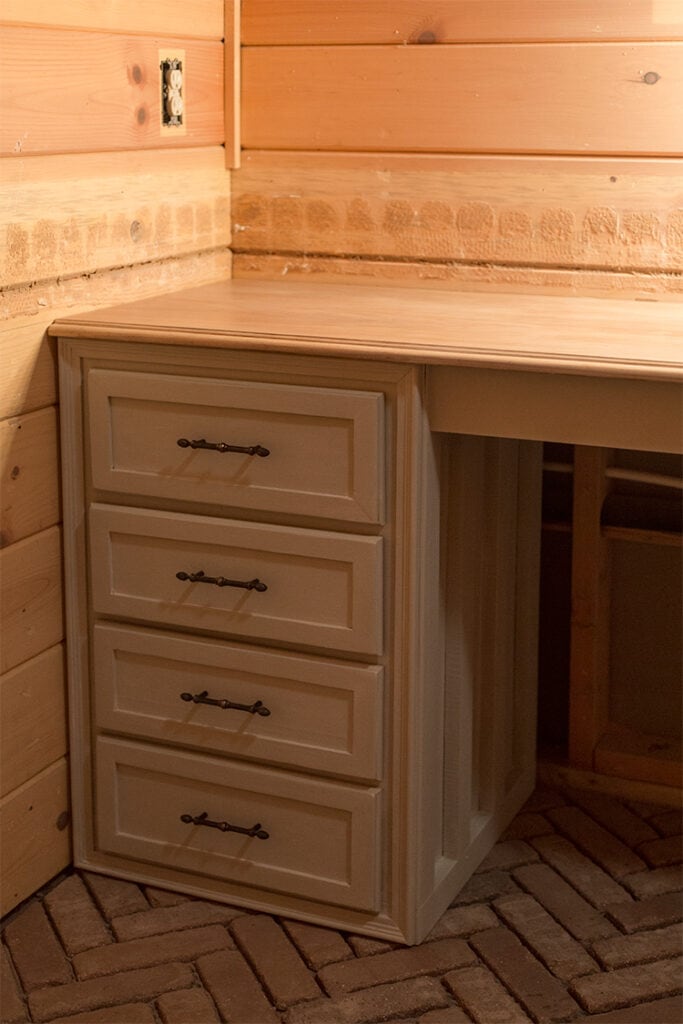
Although I haven’t decided if I’m going to swap out the handles or not. Thoughts?
While we were finishing up the vanity it started snowing at the house… the first snow of the year! And in a matter of about two hours it became this:
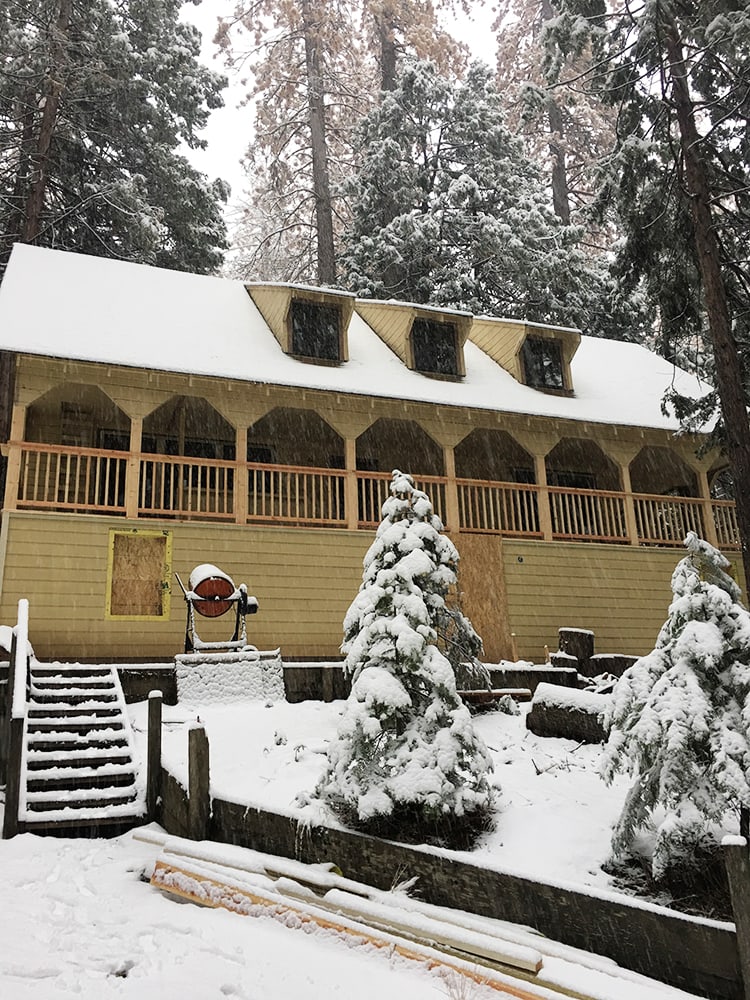
A magical ending to a wonderfully awesome Thanksgiving weekend. I’m thankful for an amazing boyfriend & dad… couldn’t do this without you, boys <3
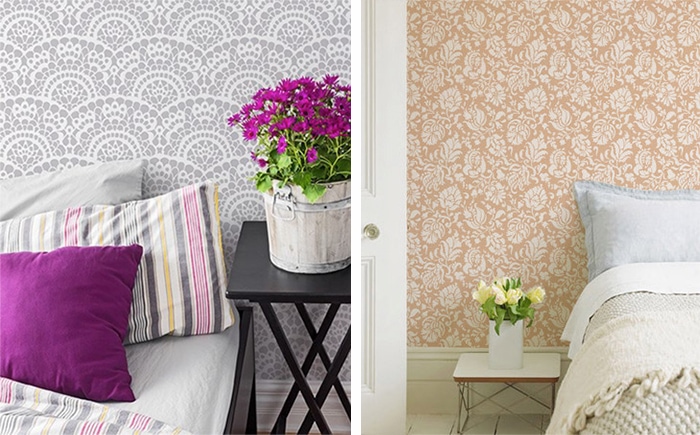
Now that I have another big project out of the way, I’m ready to focus on something a little lighter—wall stenciling, anyone?
I’ve picked these two patterns out, and have my eyes on a bedroom and a laundry room wall…
Follow my instagram and snapchat (@jennasuedesign) as I share my attempts at this process starting on Friday, and then head back here next Wednesday for another video & blog tutorial!
So much to do, so little time… hoping your December is slightly less chaotic than mine!
Disclosure: Some of the products listed were provided via sponsorship—all of which I selected and fully approve of.


Alyson Bird says
My sister and I live 7 hours apart but we always keep up with your blog and live vicariously through it. Our diy projects are always inspired by “what would Jenna Sue do?” comments. Thanks for the updates. It is going to be epic!
jennasuedesign says
Aw that made me smile, thanks for sharing Alyson! 😉
Laura says
Thanks for the post! Actually thank you for all the updates. I am thrilled at the way you are enjoying life in a relaxed fashion with such a playful relationship with Lucas!
You are fun to follow. I sure do love the bathroom floor. You just spread character!
jennasuedesign says
That is so sweet of you to say, thank you Laura!