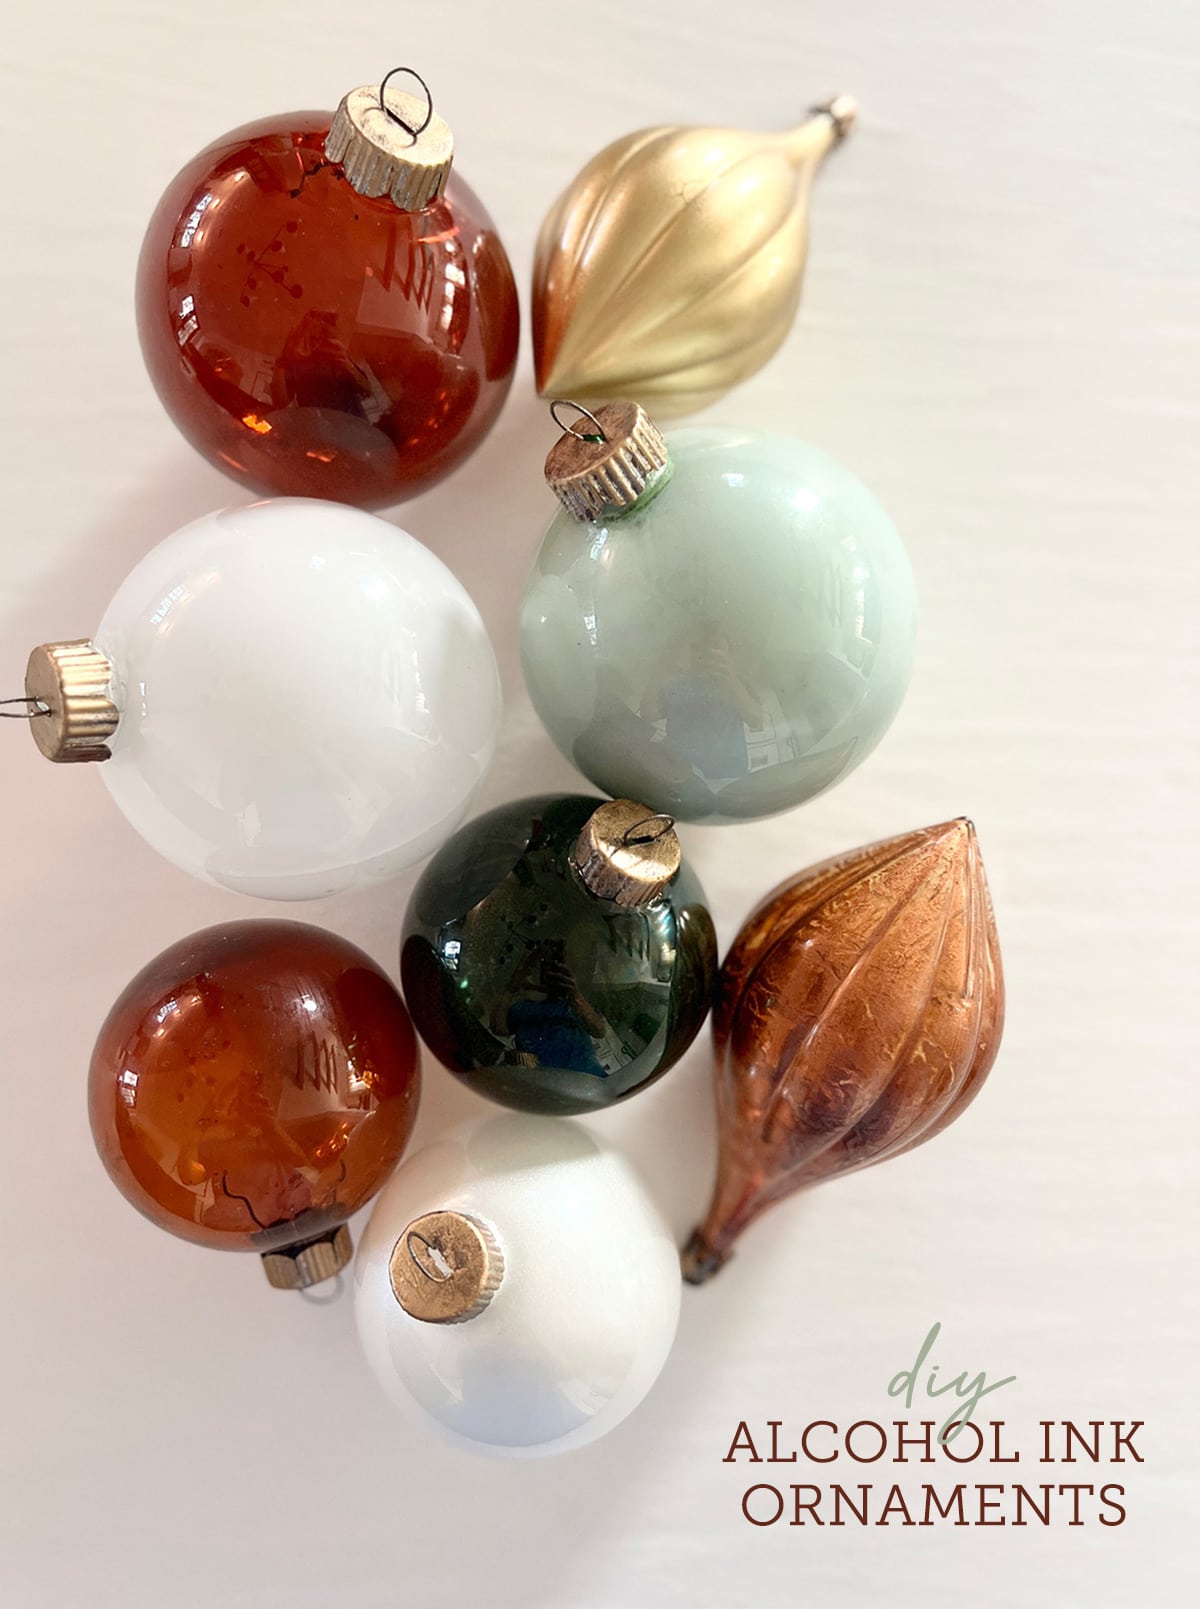
If you’re looking for a fun and easy holiday craft this year, give these DIY alcohol ink ornaments a try!
Have you heard of alcohol ink? It’s a fast drying, semi-transparent ink that can be used to dye a variety of surfaces. I’d been wanting to try it out, so I decided that DIY ornaments would be the perfect opportunity! It turned out to be a simple process requiring just a few supplies.
Jump to:
How to make Alcohol Ink Christmas Ornaments
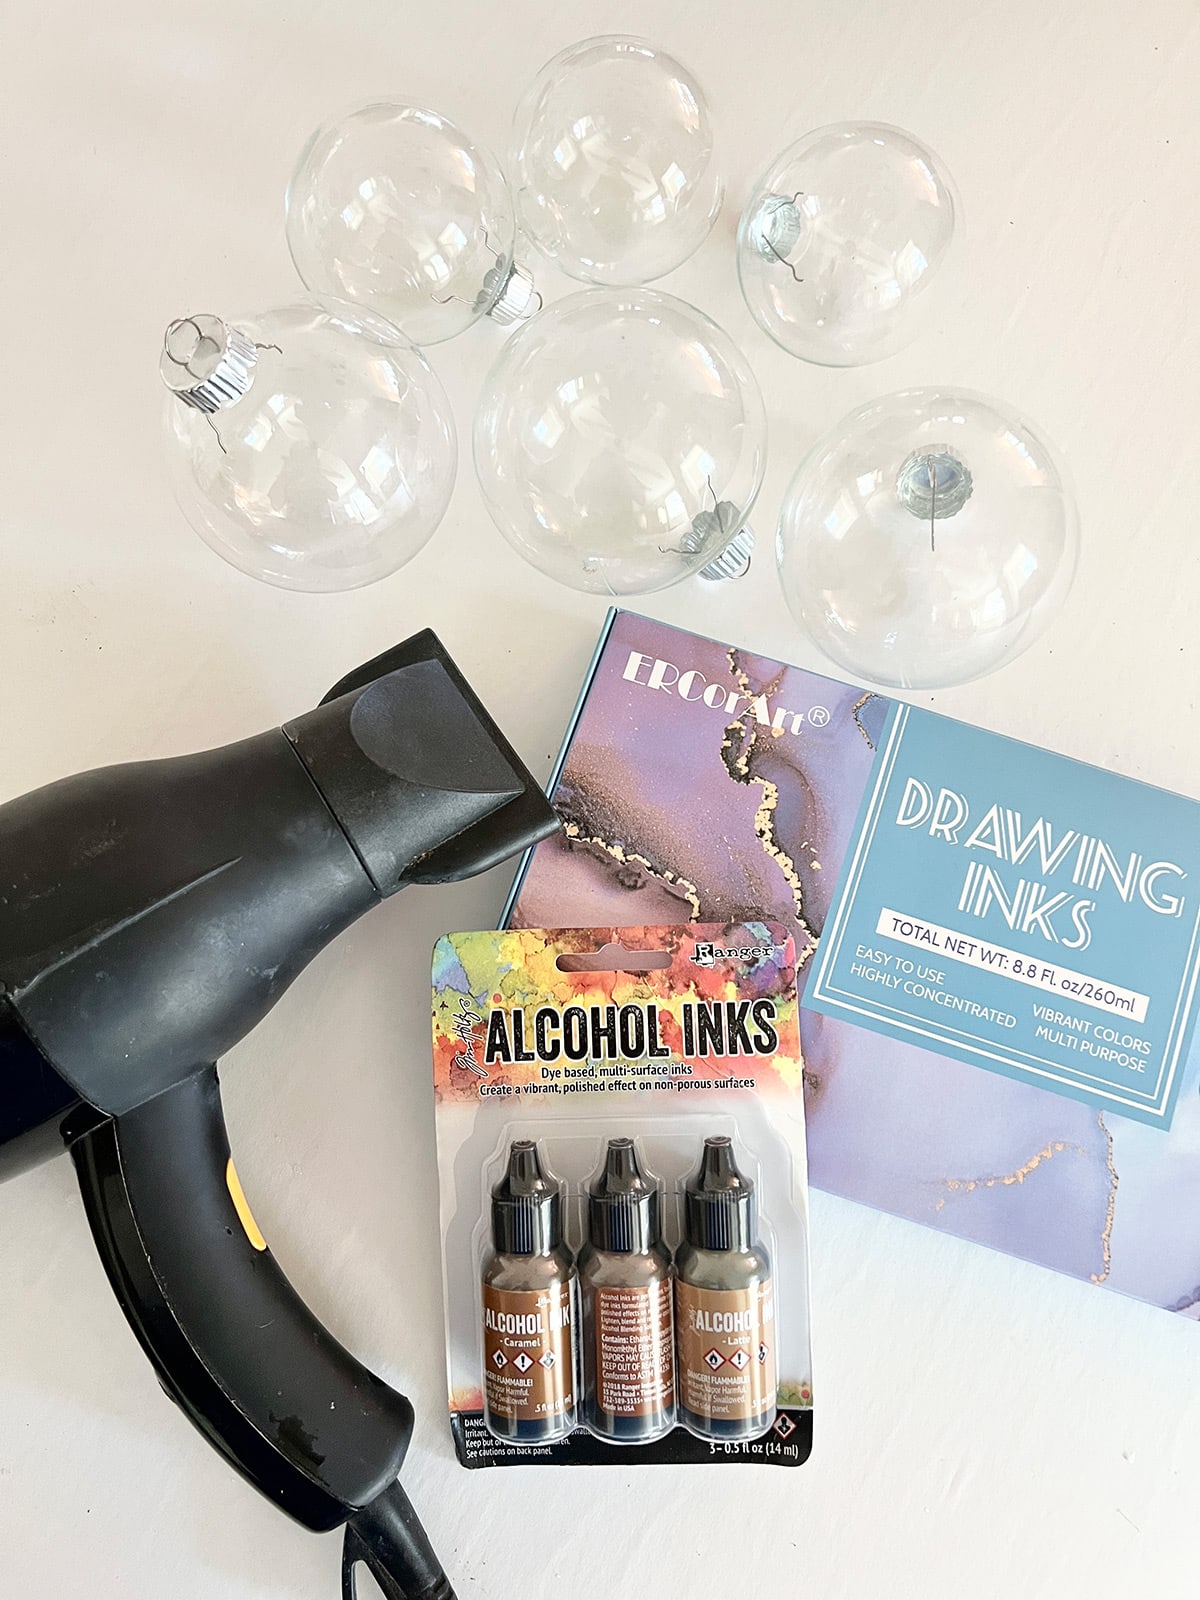
Supplies List
- Clear ornaments
- Alcohol inks (I used this set and this set)
- Hair dryer
- Optional: Rub ‘n buff and velvet ribbon
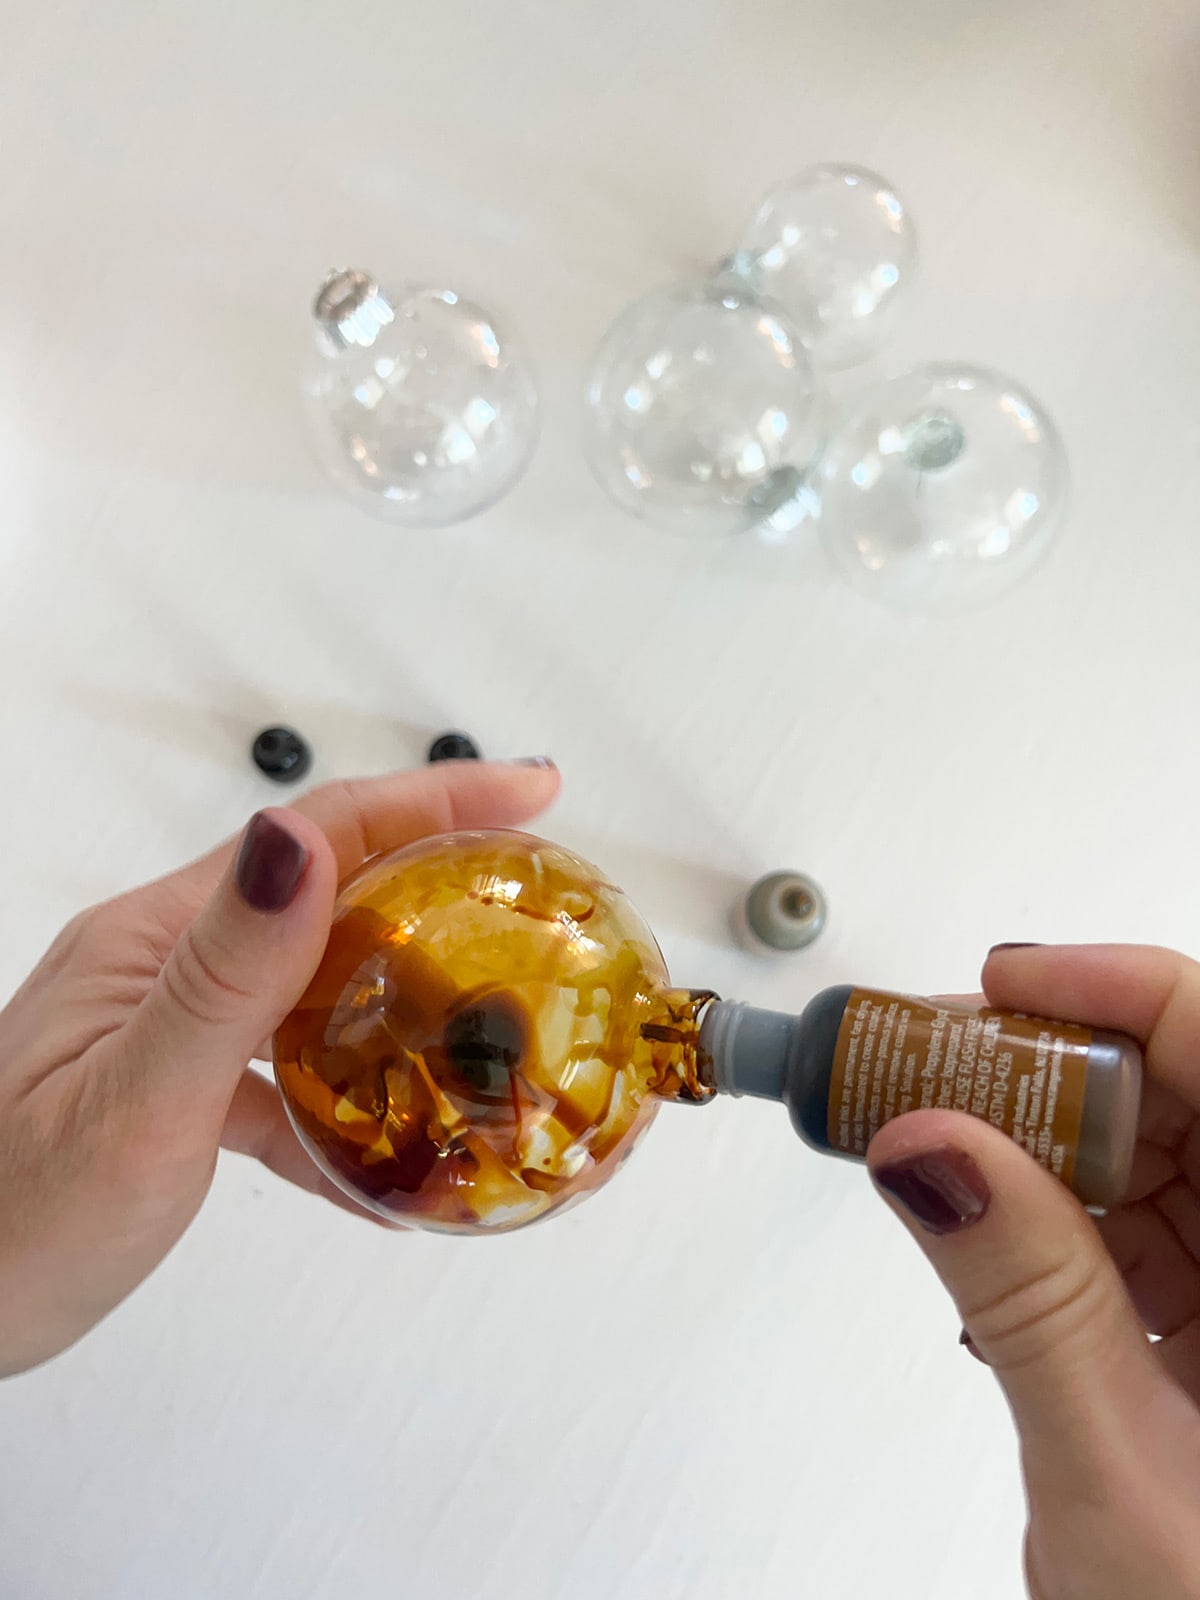
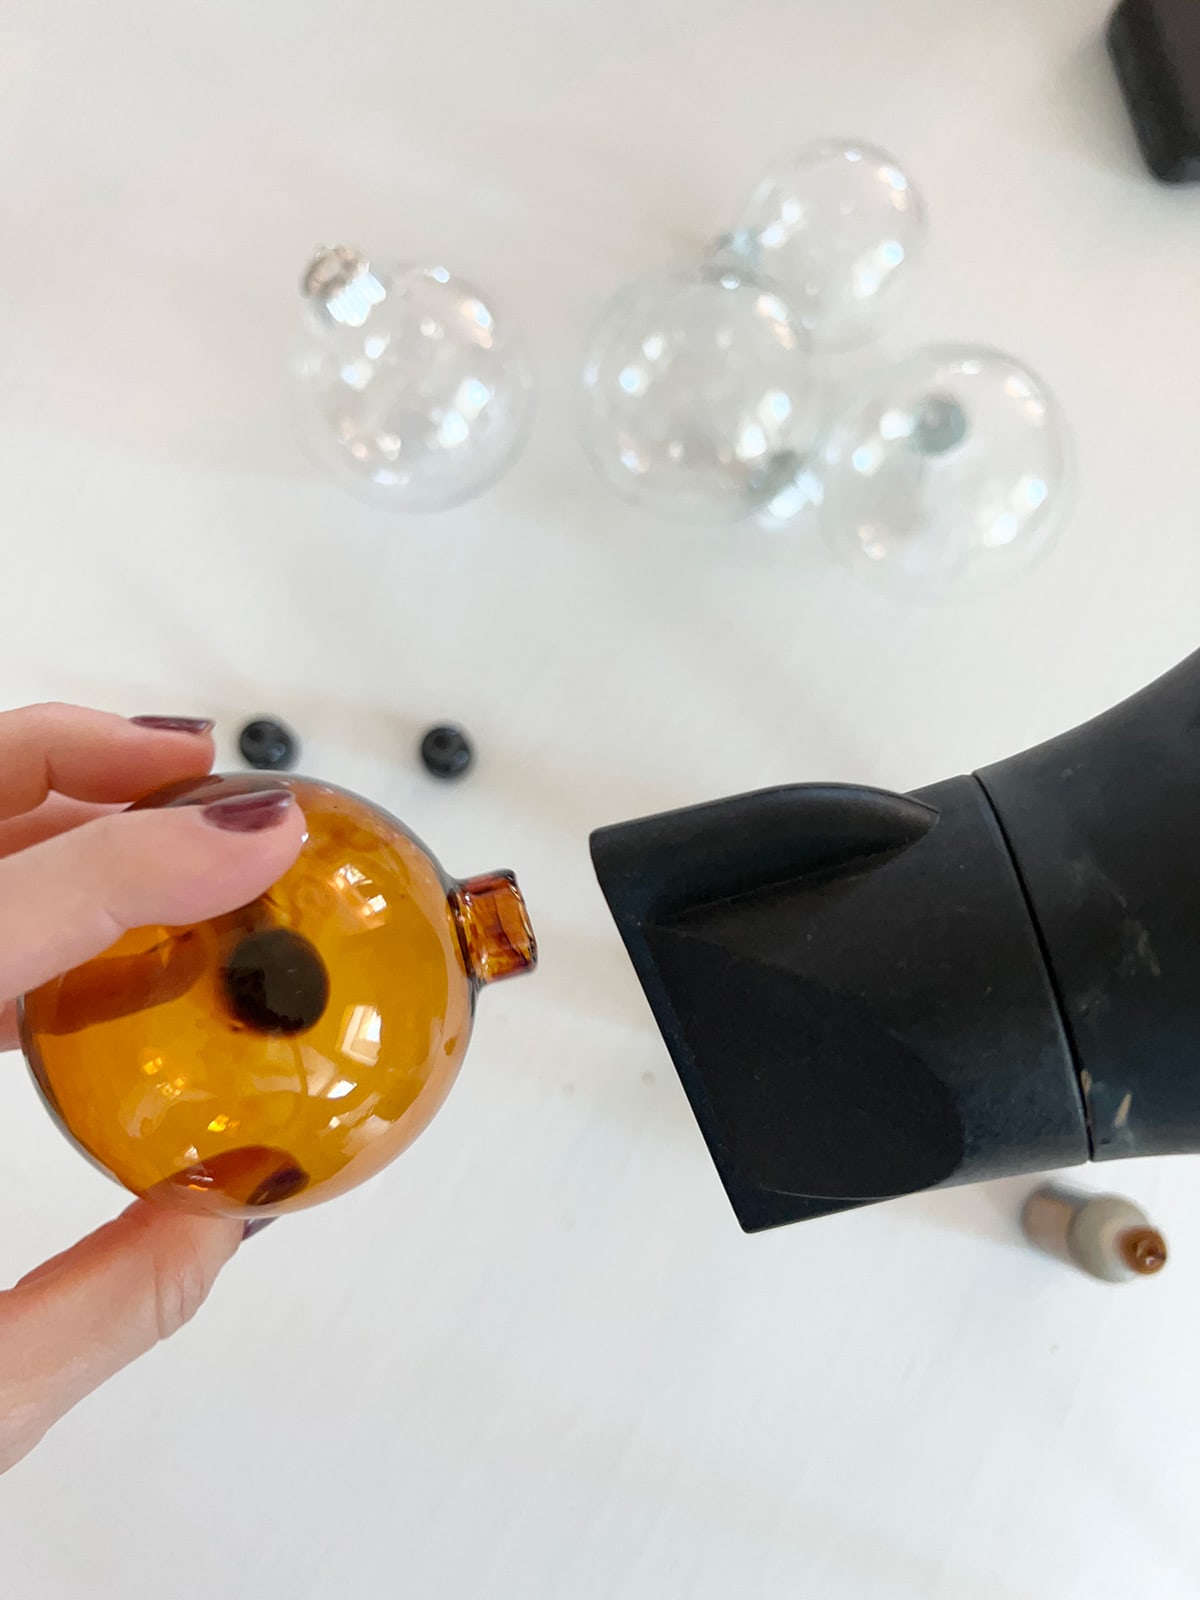
Add alcohol ink to inside of ornament
Remove the cap and squeeze to add ink. You don’t need a ton, and the ink will spread out on it’s own.

I was trying to achieve an amber glass effect, so I added a little of all three brown shades in this set.
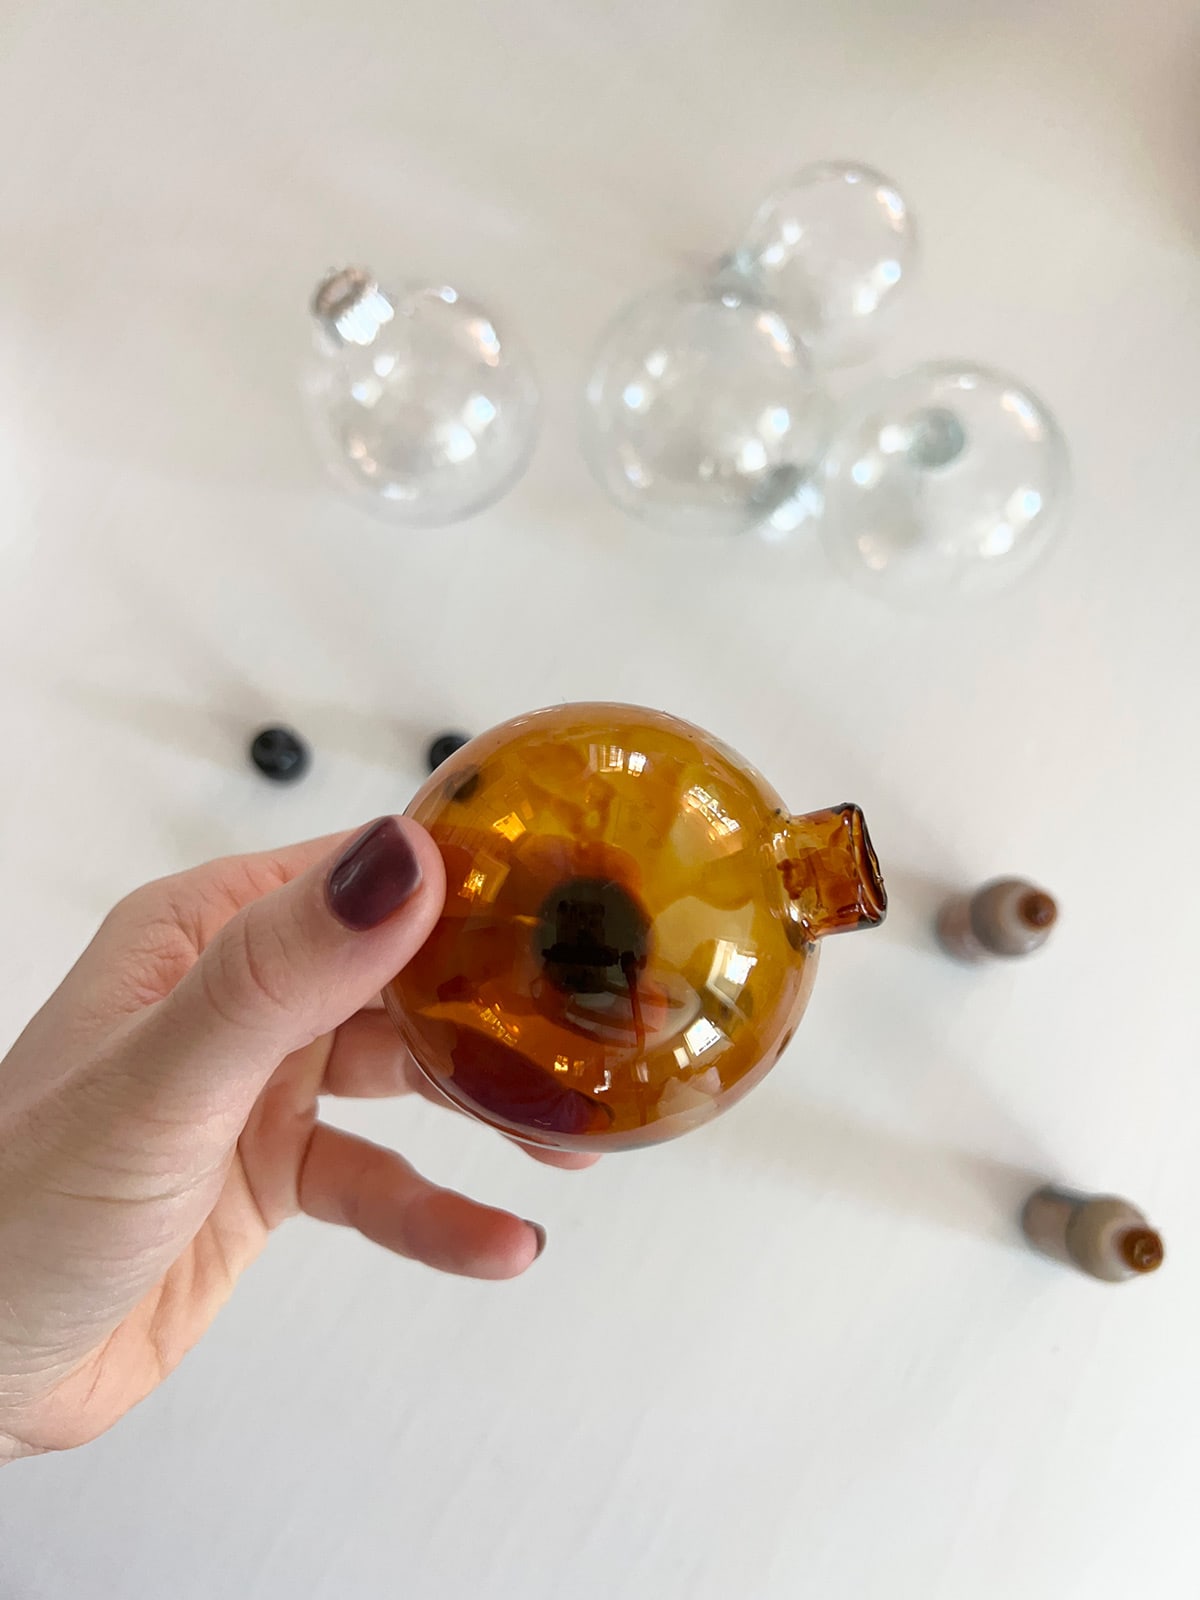
Swirl ornament to coat
The key is to continuously swirl the ornament to keep the color uniform. You’ll end up with some excess ink, and that will make the color more opaque as it coats the glass.
Use a hair dryer to set the ink
This part is critical—I tried letting it air dry at first, and that just left drip marks and lines. Turn the hairdryer on the lowest setting (heat and air), hold it up to the opening and keep turning the ornament until it’s evenly coated.
It takes several minutes to fully dry, but it’s the only way to do it if you want the color to be even!
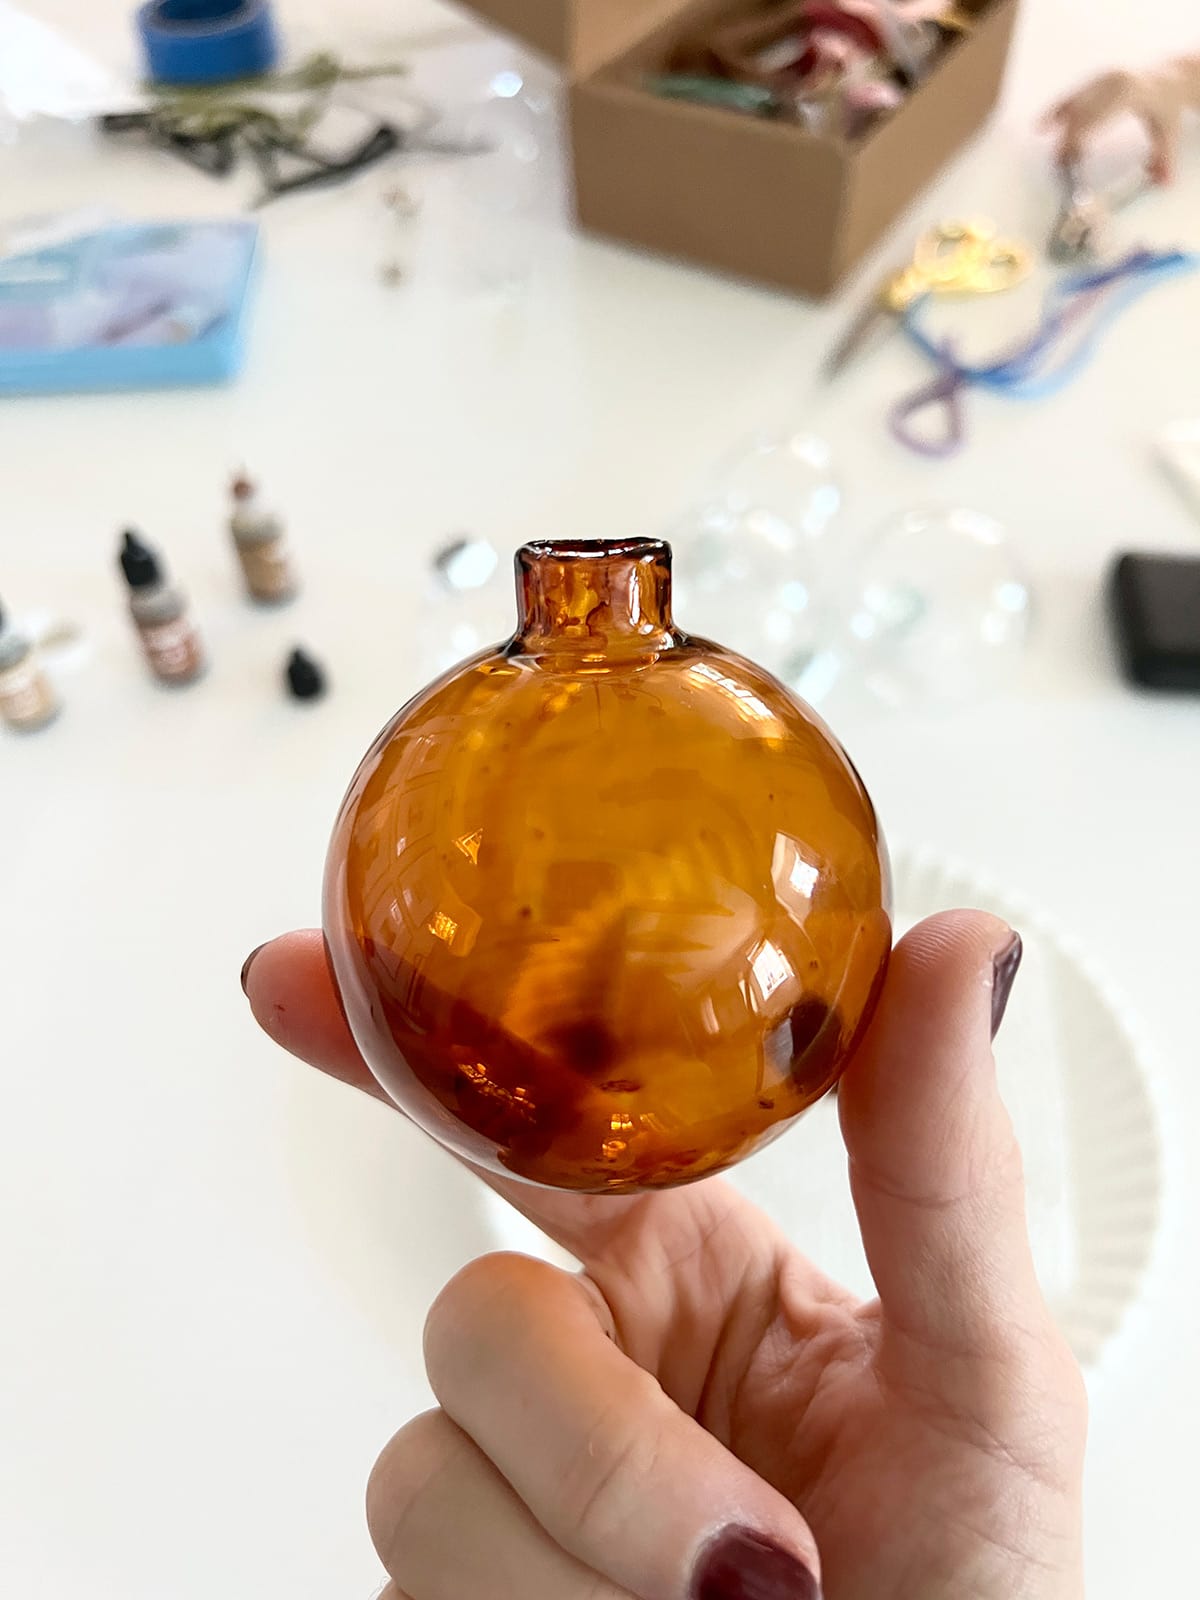
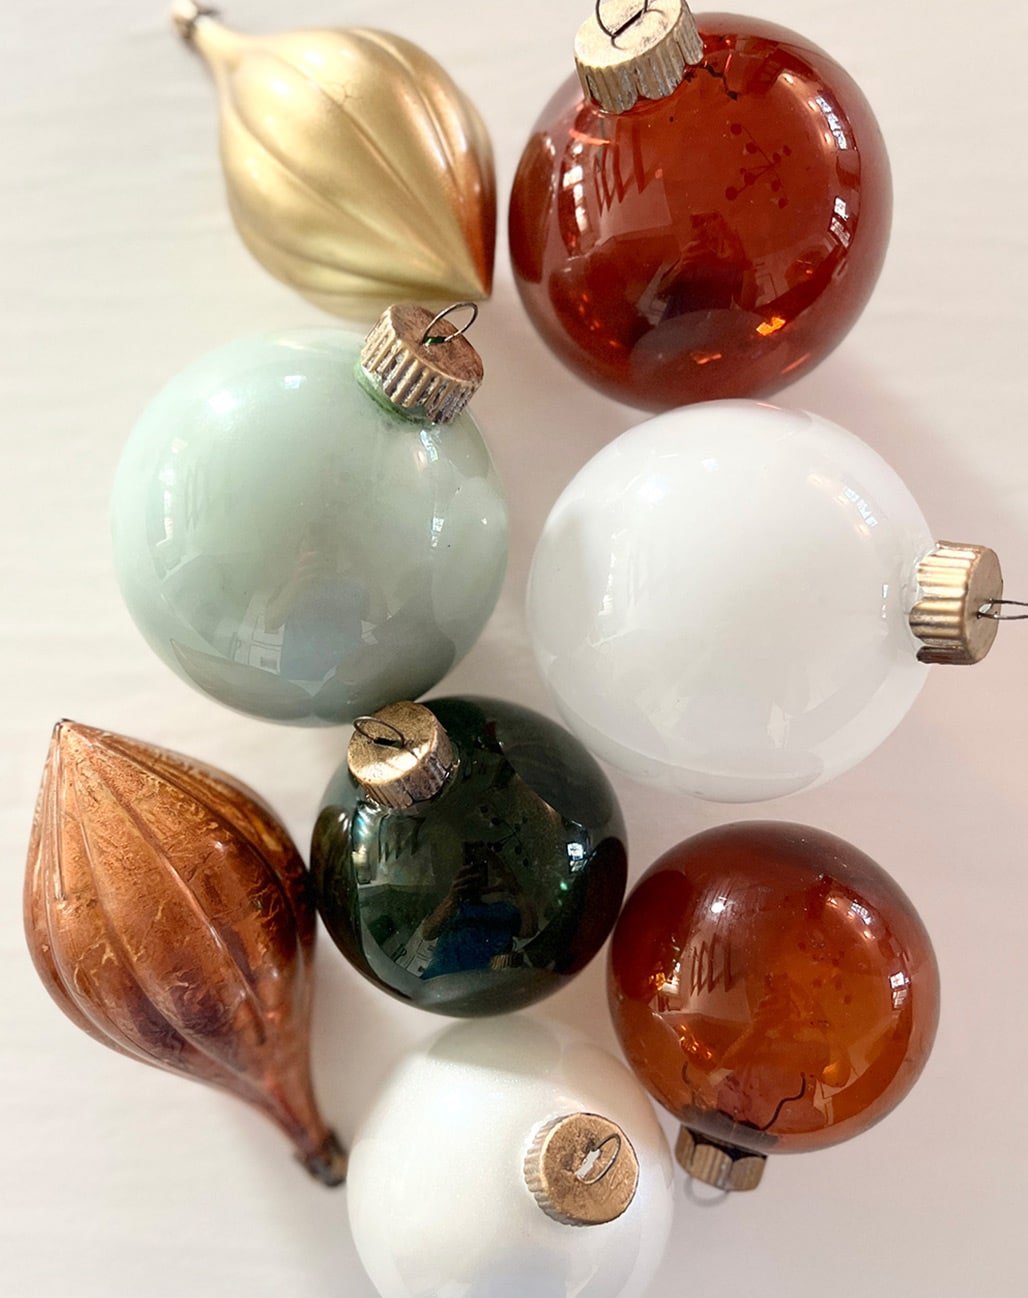
Looks just like real amber glass, right?? I experimented with a few other colors too, and love the way they turned out.
DIY Alcohol Ink Ornament Tips
Yes! A few of the ornaments I used were plastic and it worked exactly the same—except for those finial shape ornaments shown above. They appeared to be a different type of plastic, and the ink had trouble sticking. The cap opening was also tiny so they weren’t able to dry out properly. Stick with round baubles with standard openings!
You can use 91% or 99% isopropyl alcohol to dilute the ink for a more sheer color. It’s also a good idea to have this on hand to clean up any spills (like if your hair dryer shoots dark ink all over your floors—ask me how I know 🫣)
If the ink is still wet, yes! Alcohol inks are quite forgiving before they’ve dried, so if you don’t like the way it’s turning out, just keep adding ink until you’re happy with the color. You can also dry it, then add a second layer for more opaque color.
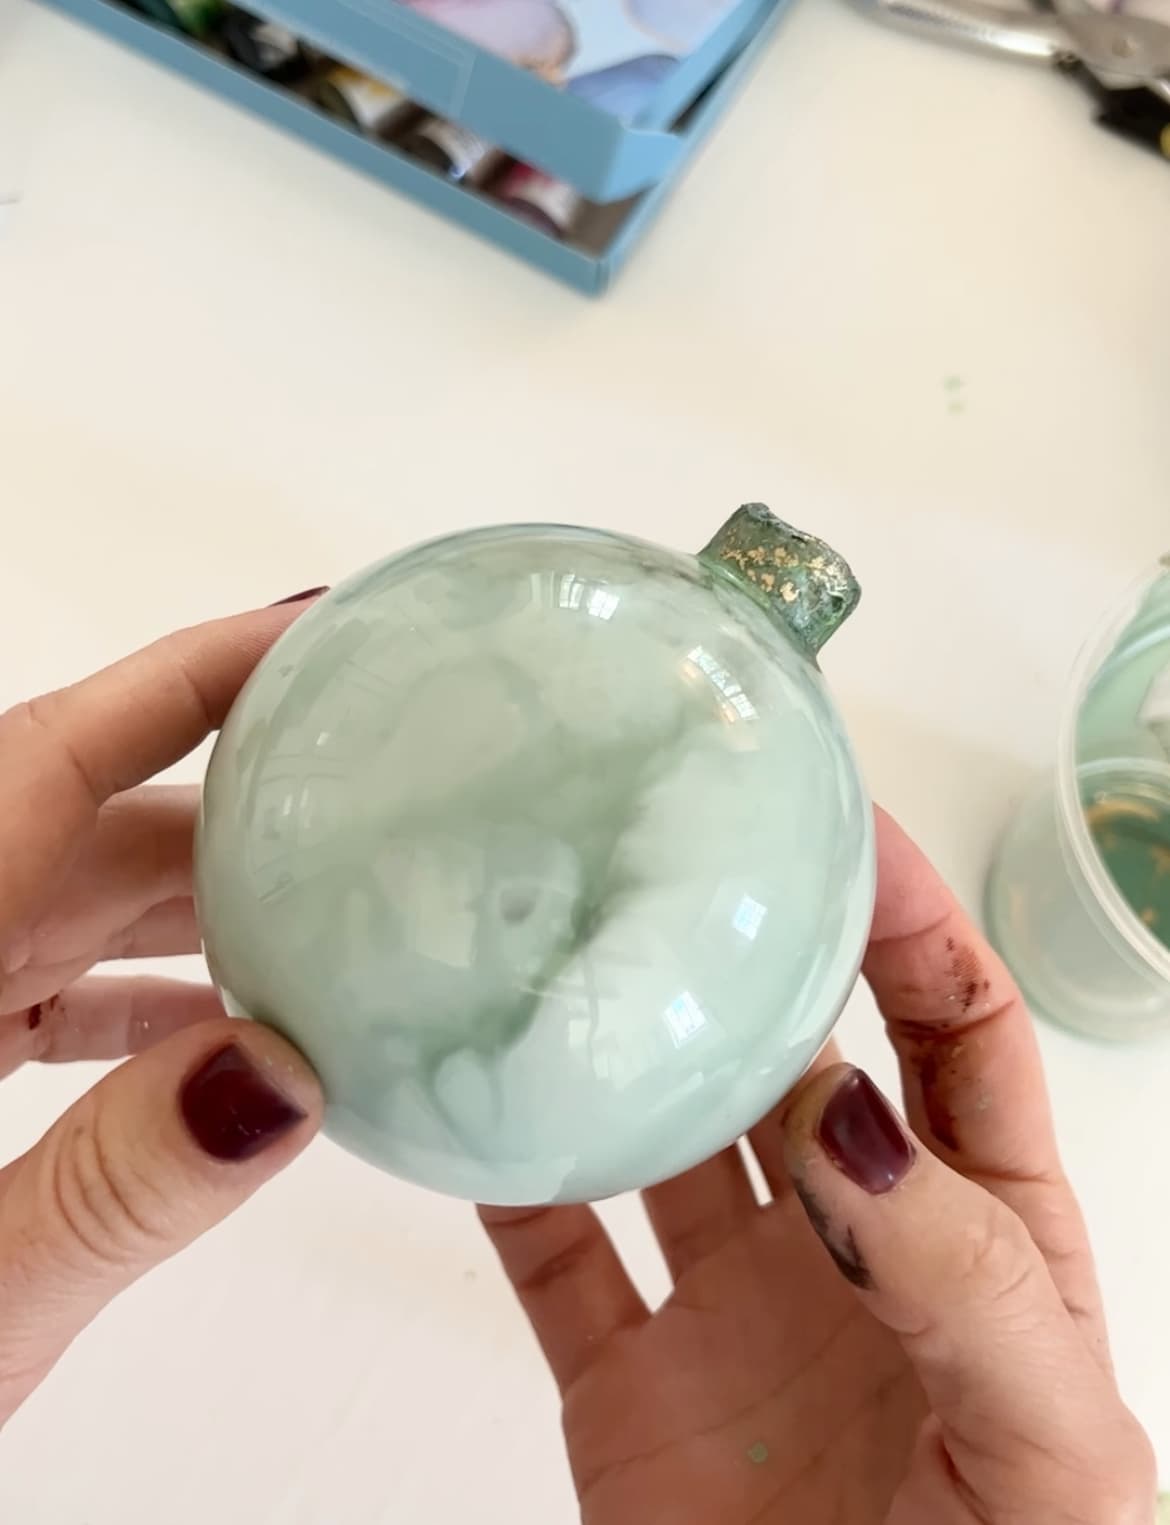
Yes—I tried using a few, and I found that they didn’t cover or blend quite as evenly. I ended up mixing metallic with regular inks to make the light green ornament shown above, and it took me several tries to get the color I wanted.
If you don’t want a uniform color, you can mix in the colors without rotating the ornament to blend them. This is actually the standard technique for alcohol inks, and it produces a really cool marbled effect–see below!
There’s really no right or wrong here—you can get creative and have fun with it!
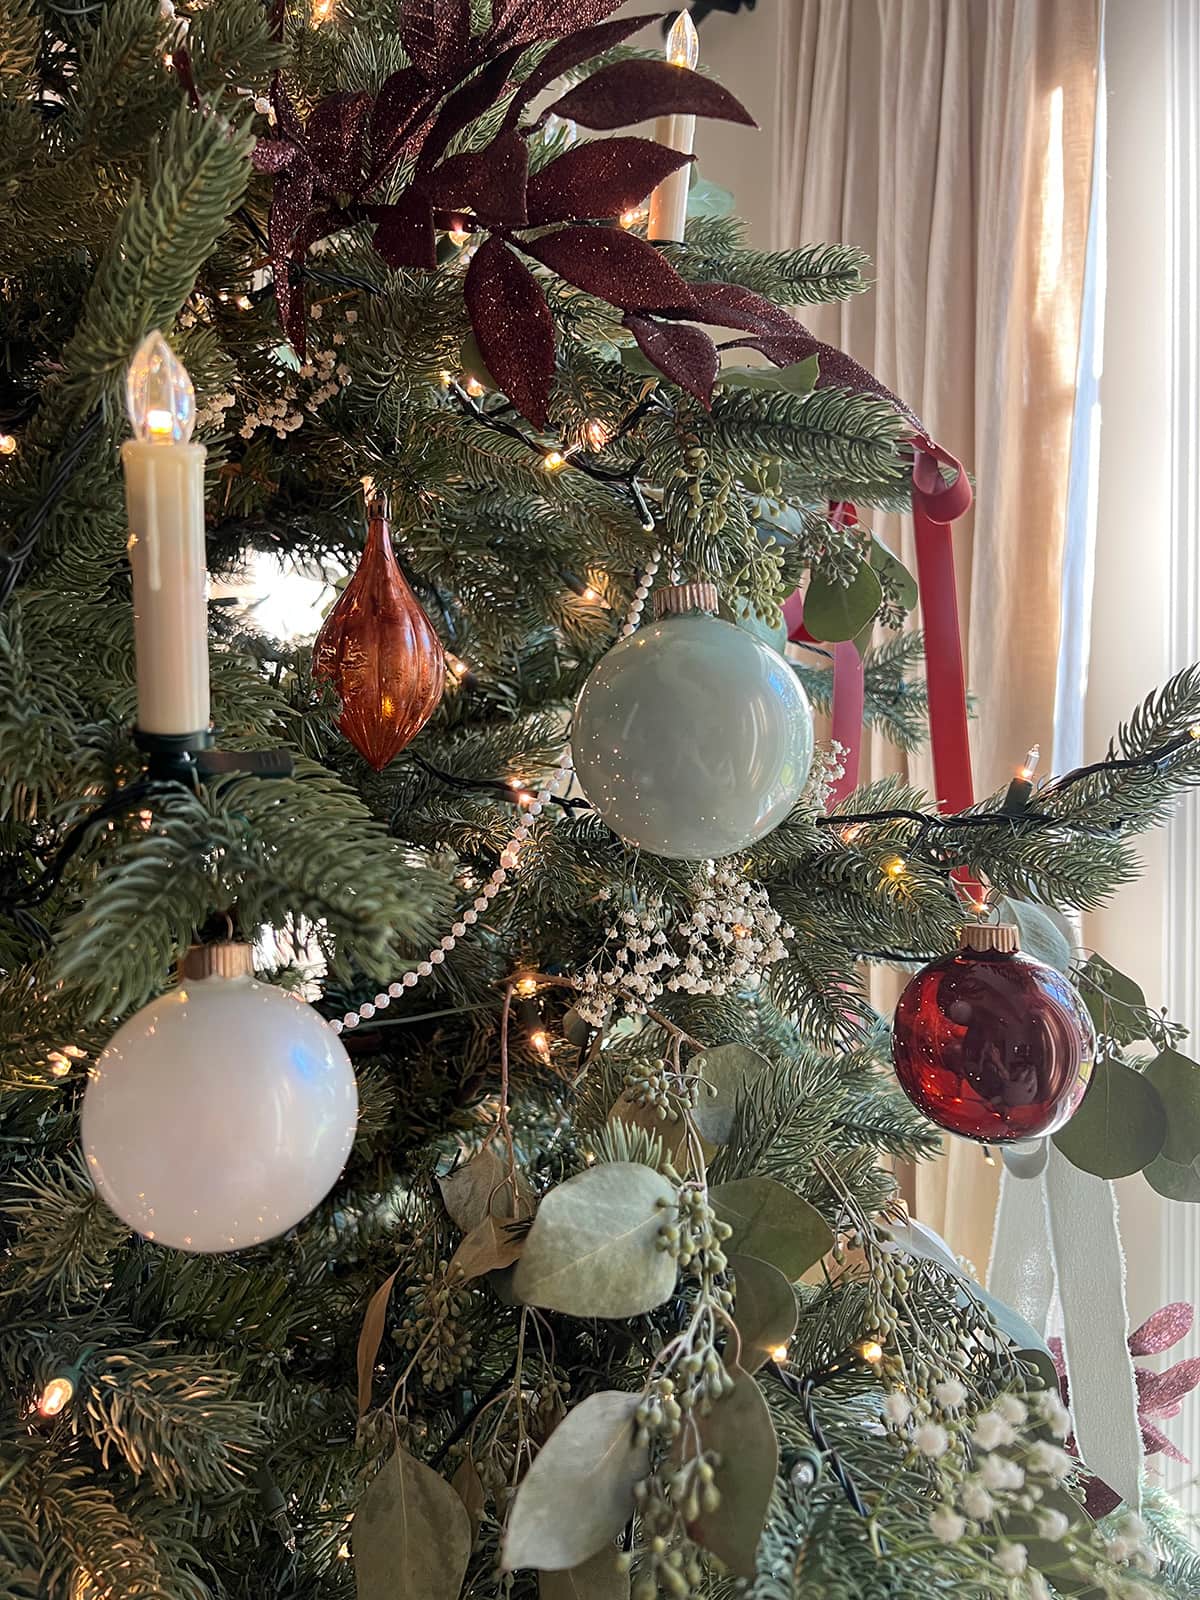
What do you think, would you try this at home? I think those amber glass ornaments would make a great gift tied with a pretty ribbon!


Kim says
Hi! I love this tutorial and successfully made red ornaments using this method! I’m interested in making some more with a marble effect but hoping you can elaborate a bit more on how to achieve this effect? Did you simply squirt the color in? When I squirt the color in it leaves runny lines (like that when swirling a wine glass).
Jenna Sue says
Hi! Yes, I just added ink and swirled. You want to dry the ink once you’re happy with the design, rather than continue to swirl like I did to blend the colors.
Lori says
Jenna, you come up with the best DIY ornaments every year, but I have to say that these are my favorites of all of them! Those amber ones look soooo expensive and elegant. Will be saving this tutorial for next year.
Jenna Sue says
hank you Lori, so glad you enjoyed the tutorial!
Suzette says
LOVE these and will definitely try my hand to make them. Can you tell me the colors you mixed to achieve the pale green one? Have been looking for ornaments that color and now I will make them!
Jenna Sue says
Thank you! It was the grass green, deeper white and silver from the kit.