I made it home safe from Seattle and it’s right back to work! I mentioned earlier that I was staying with my cousin and helping her update her living room there. It was a pretty hectic week with both of us having to work and make a few last minute shopping trips in Seattle traffic, but we were able to accomplish a good amount and set aside time for some fun outings as well (more photos to come Friday!)
The project I am most proud of (and excited to share with you guys) is this sofa table I built:
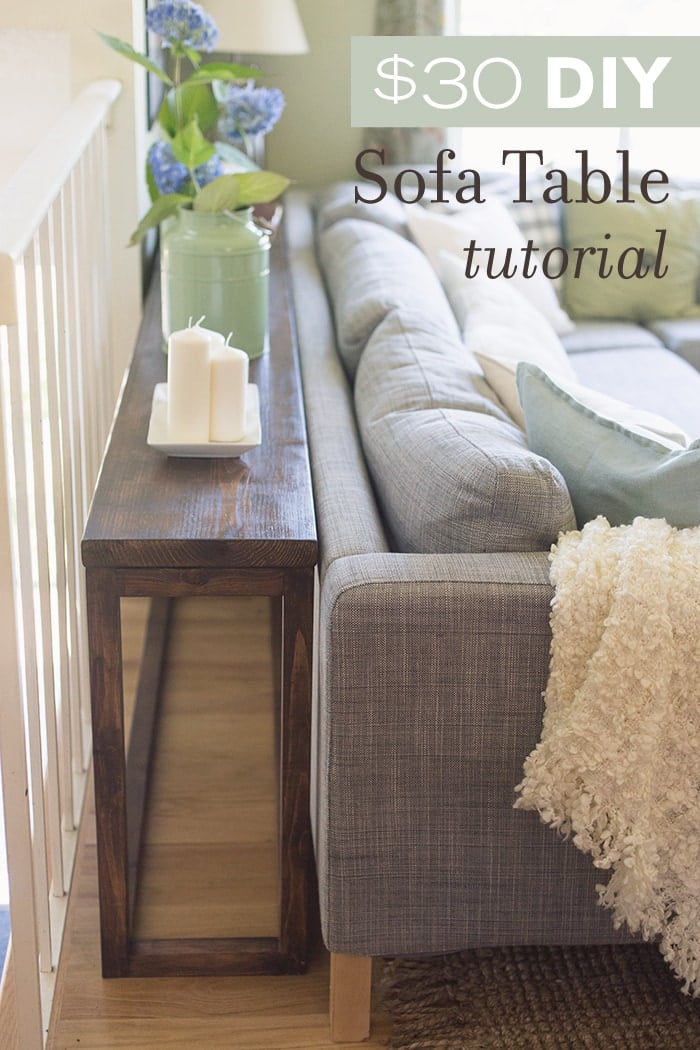
I say proud because I figured out a way to build it using only a drill & screws (and a basic saw to cut a few small pieces of wood!) That means 95% of you can do this too. By yourself. In one day, for $30 or less.
Materials
- 2x2x8′ furring strips (qty 8)
- 2x12x10‘ (qty 1)
- Screws (2.5-3″ long)
- Wood glue
- Wood stain or paint
Tools
- Drill
- Saw (miter, chop saw or miter box)
- Kreg Jig (or simple brackets)
- Sand paper (or electric sander)
My cousin had a long sofa (just over 9 feet wide) and was using an end table that was blocking part of the walkway, so I thought the perfect solution would be a long narrow table behind the sofa for more convenient storage.
I was having trouble finding a simple plan I liked online, and knew this table definitely had to be customized so I decided to come up with my own. We were also working with a budget so I wanted to do this as inexpensively as possible.
I drew a quick sketch to illustrate my idea (excuse the roughness of it):
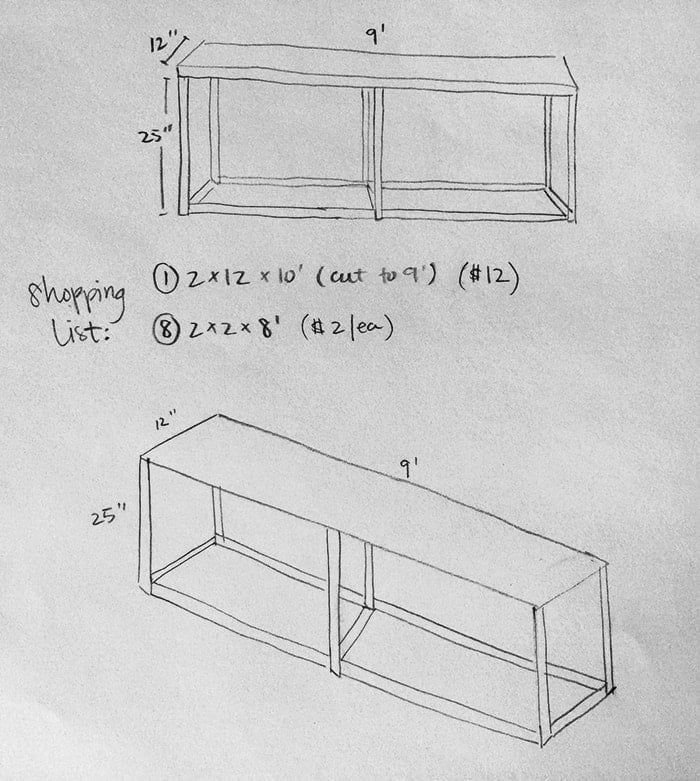
I was envisioning a very simple, modern style table constructed using 2×2’s and a 2×12″ for the top portion. The drawing isn’t super accurate as there should be 2×2’s horizontally at the top for reinforcement (below the 2×12) but you get the idea. I knew 2x2x8′ furring strips were under $2 each and the 2x12x10‘ was only around $12, making this project about as cheap as you can get for such a large table.
This can be done a lot simpler and for even less if you plan on making a shorter table by eliminating the middle piece. I put it in there for stability, but if the table was shorter than ~6 feet or so, I’d leave it out.
Here’s what we brought back from the hardware store—a 2x12x10′ and eight 2x2x8′s. Simple stuff.
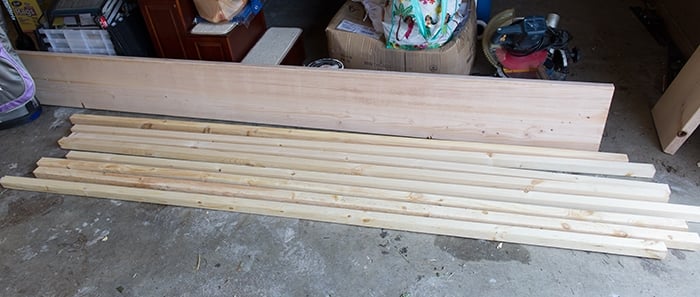
My cousin had very limited, basic tools in her garage which proved to be a challenge but fortunately we were able to borrow a neighbor’s saw to make the smaller cuts, and we had the the 2×12 cut to 9′ for us.
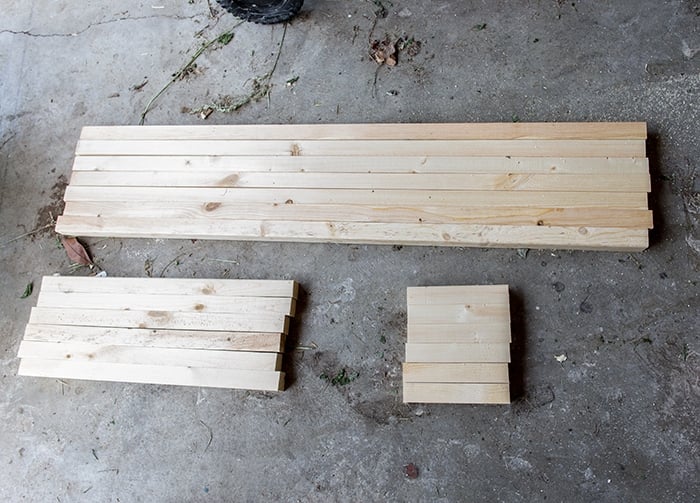
You’ll end up with three different sizes—the long horizontal pieces, the vertical legs, and the shorter pieces to connect the legs (these will be different depending on the size of your table).
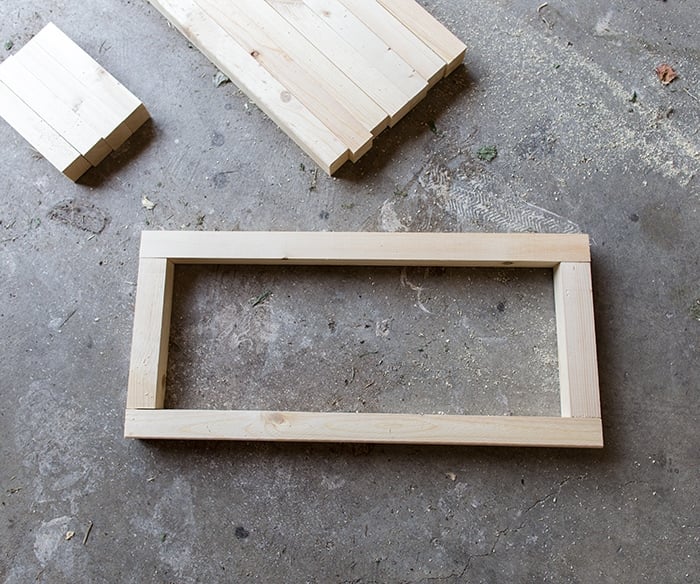
First it’s time to assemble the rectangles! I grabbed four pieces and arranged them:
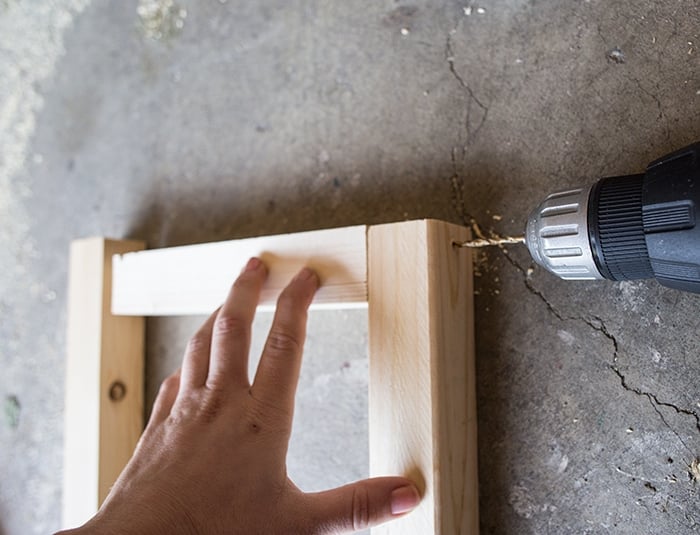
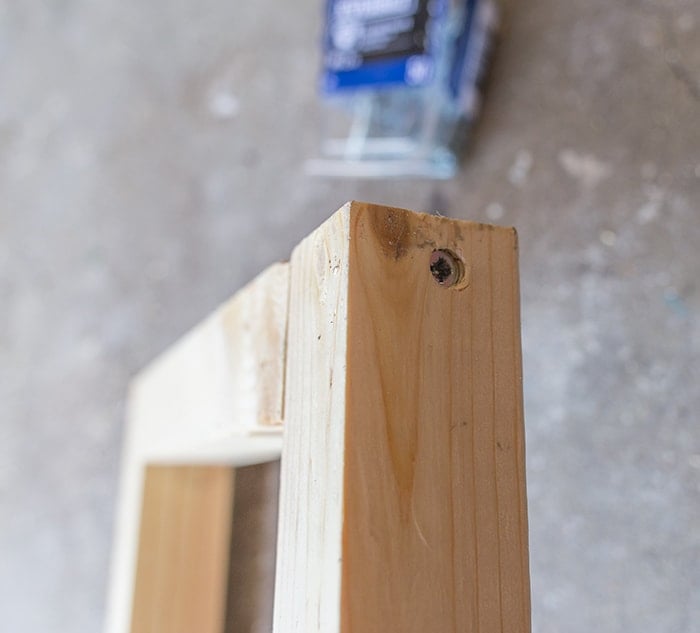
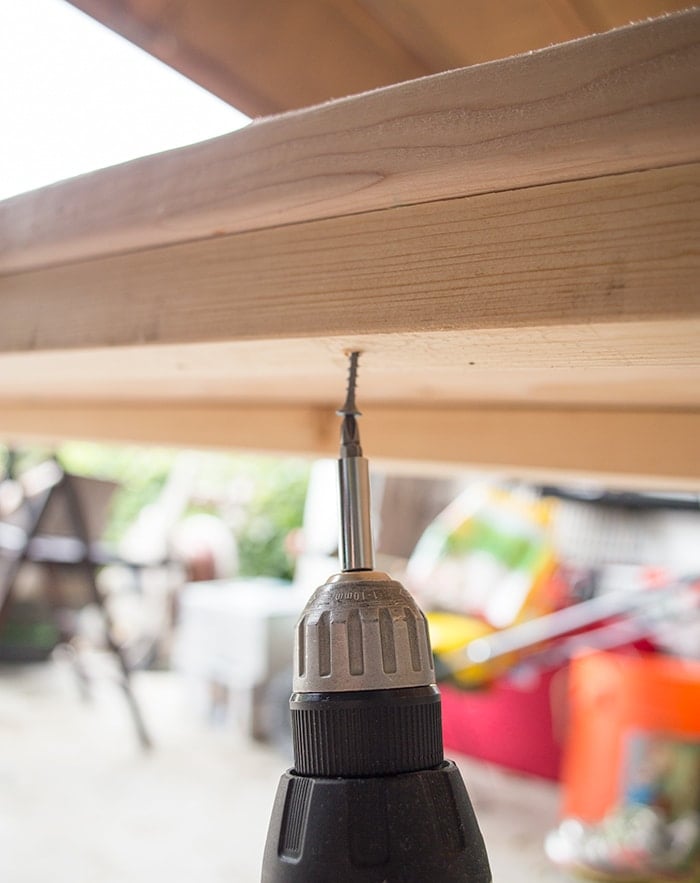
You’ll need to drill pilot holes so the wood doesn’t split—that’s a very important step especially with this type of wood that splinters easily and since the pieces are so narrow. I was able to find 3 drill bits in the garage and luckily one of them ended up working. You want it to be just a bit smaller than the width your screw.
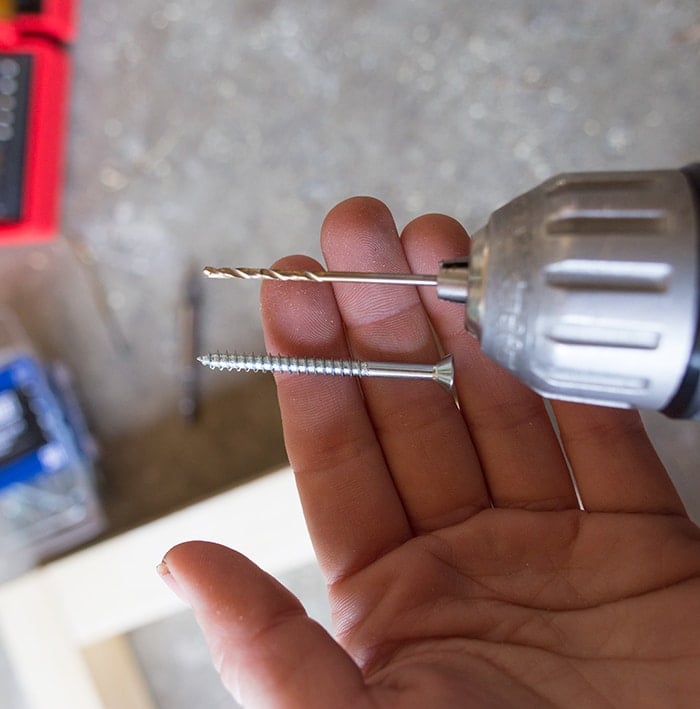
I bought 2.5″ screws for this project which worked fine but 3″ may have been even better. First I aligned my two pieces into place and drilled my pilot hole through both. I made sure to do this towards one end of the board instead of the center, since I would have to insert another screw in the same area for the horizontal pieces and there needed to be enough room for both screws to pass through without hitting each other.
Then I applied the glue onto the end of a short piece…
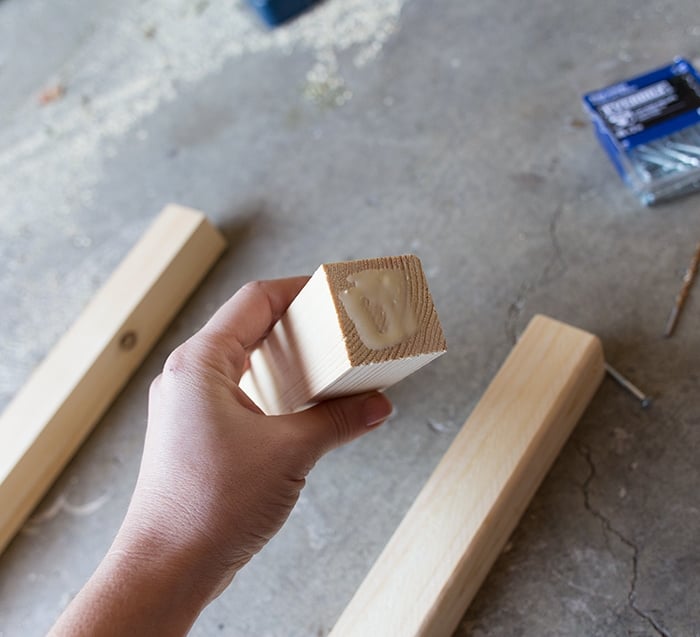
After setting it back into position, the first screw went in:
I did this on each end (3 more times) until my rectangle was built:
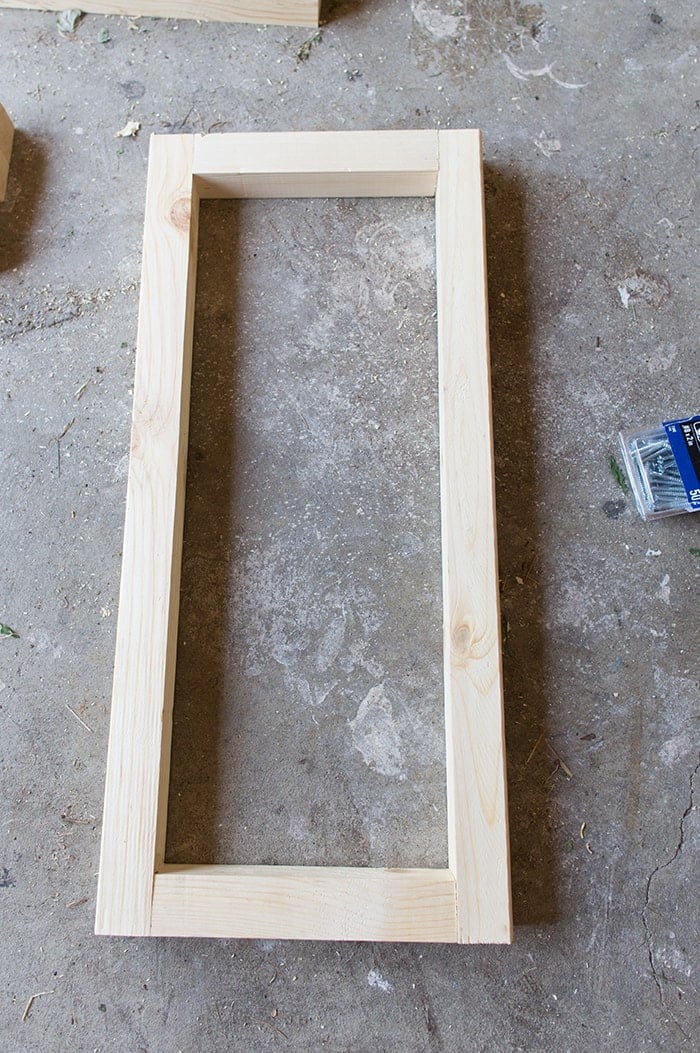
And then built the remaining two pieces. Step 1 complete!
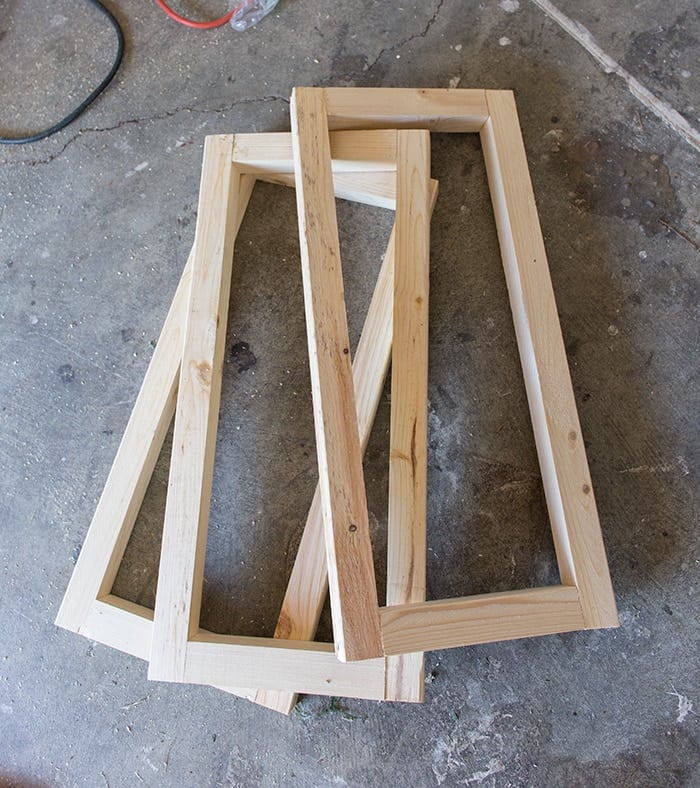
This is where it gets a little trickier when you’re working by yourself. You have to start balancing things and holding them into position while attaching them together with glue and screws. I had no clamps or flat surface to work on, and the drill I was using didn’t have a lot of power, and the drill bits didn’t fit the screw heads perfectly so there was some frustration involved. If I can do it under these conditions, you definitely can too!
The next step is to attach the long horizontal pieces. I propped up my rectangle and got the pieces into place, then repeated the attachment process with my pilot hole, wood glue and screw. It seemed to work fine…
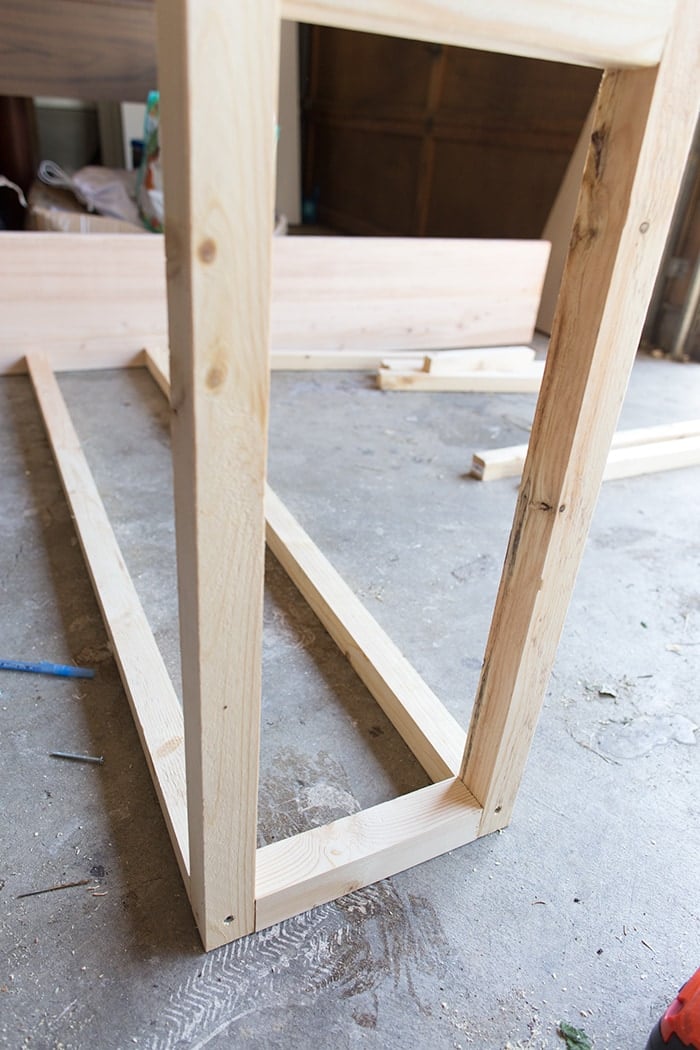
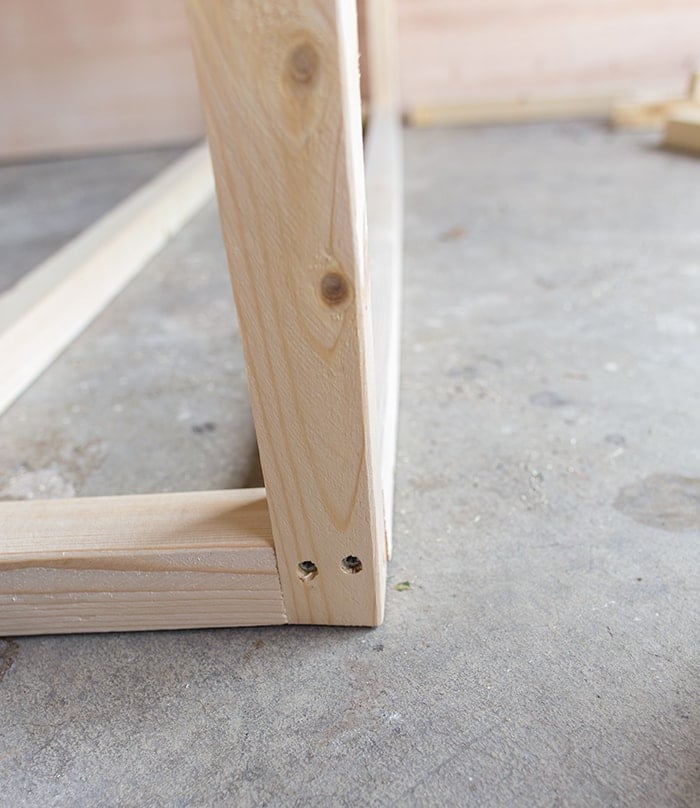
But when I lifted it up to flip it over and add the other two horizontal pieces, I found they were wobbly so I had to reinforce it with a second screw. One screw works fine for the smaller lengths of wood but just doesn’t cut it for the longer pieces. And I made sure to counter sink them so that a) they’d grab a little more of the wood and b) I could fill the holes so there weren’t any visible screws.
Two screws did the trick, and I then attached the second rectangle to the opposite end.
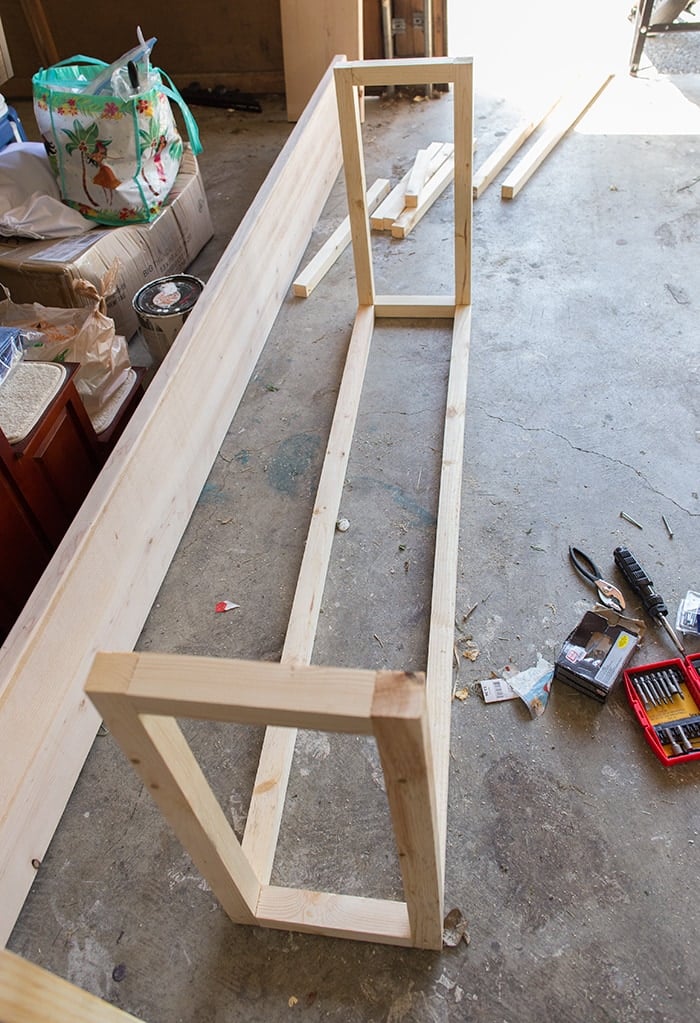
I flipped that piece over and attached the last two horizontal pieces the same way. If you were building a smaller table, this would be your last step before adding the top and it would be pretty much the easiest project ever.

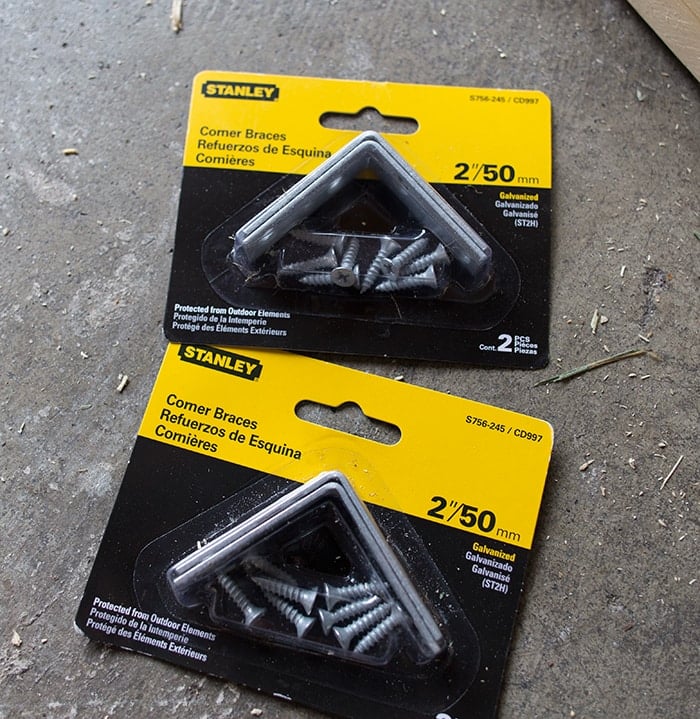
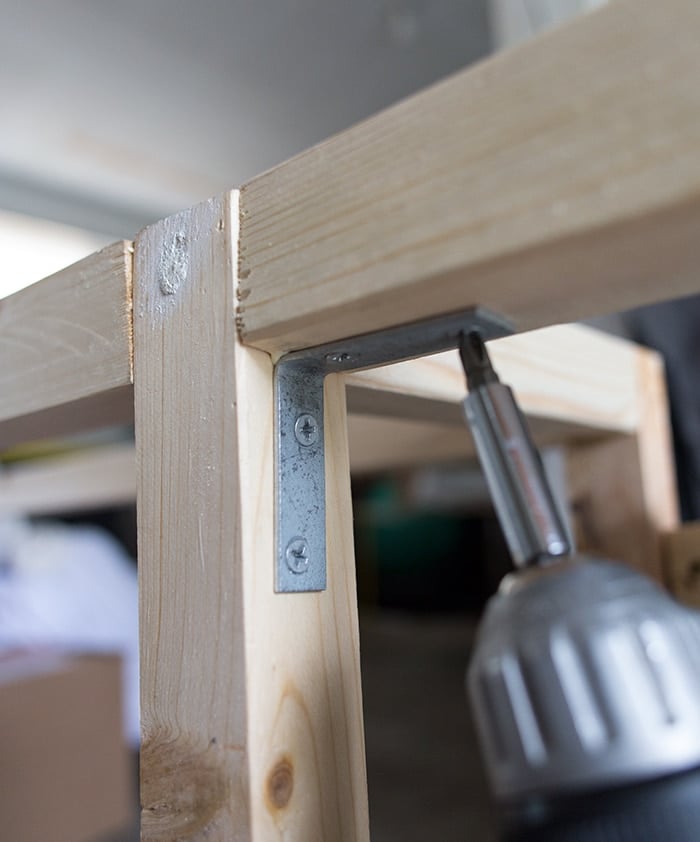
But I had the dilemma of attaching a whole other section without a Kreg Jig or anything of the sort, so I ended up buying 2″ brackets:
This part was definitely the biggest challenge of the entire project. Even with two screws holding the longer pieces together, they’re quite long so they don’t stay perfectly straight and I had to hold everything into place while keeping them elevated and drilling pilot holes, applying glue, lining up the brackets and attaching the screws.
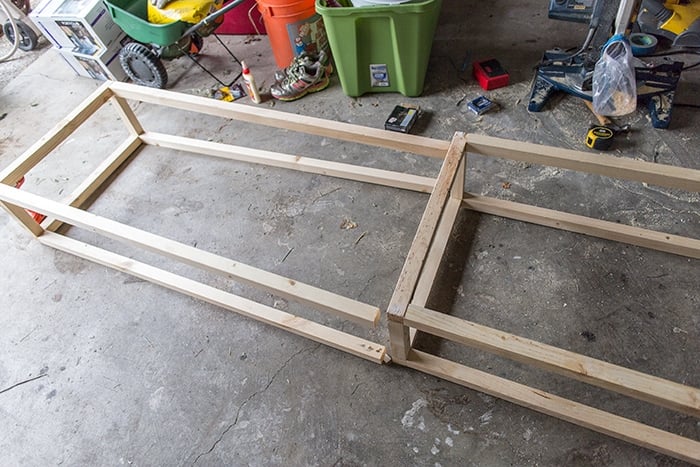
Somehow I made it all happen. Precise measurements and cutting is a crucial step, otherwise everything may not all fit together!
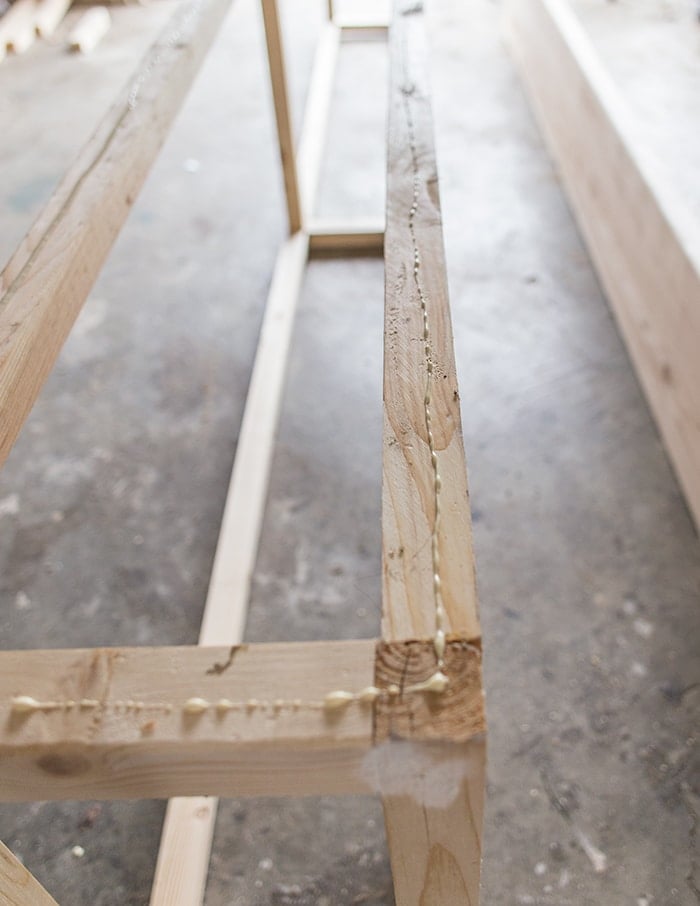
Also, these furring strips aren’t perfect, but luckily dark stain goes a looong way to hide imperfections. I didn’t even have wood filler so I used drywall mud + sawdust and you can’t tell at all with the finished product.
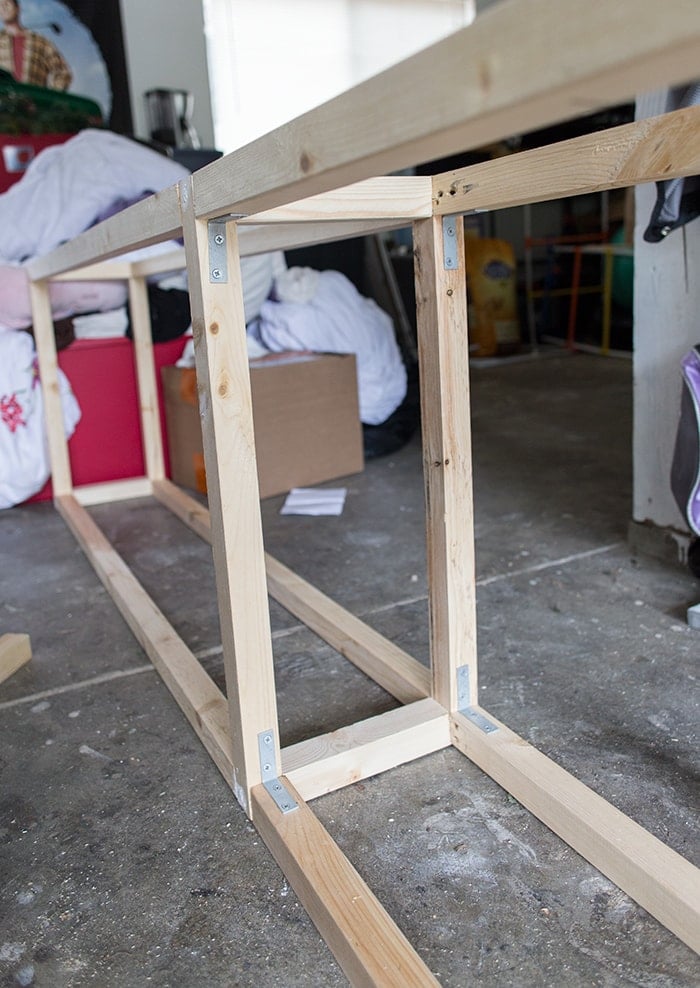
After the brackets went on and the base of the table was finished, it was a huge relief!

The next part was easy—add some wood glue to the top:
Then lift your 2×12″ into place.
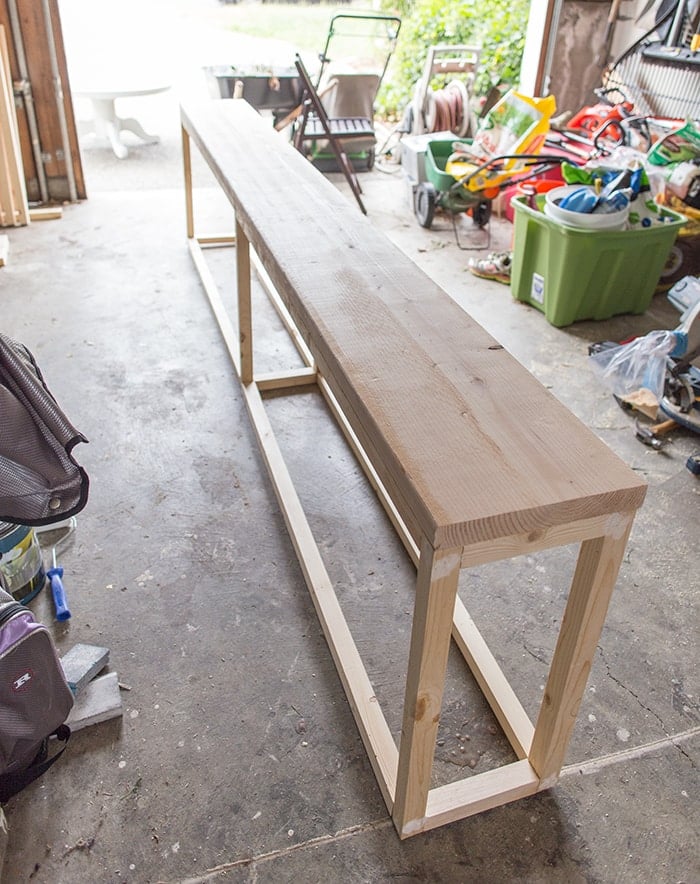
And secure it with screws from underneath. I used 8 in total.
Then it was all about the finishing touches. There was no electric sander available so I picked up some 80 grit and went over each piece by hand. Labor of love, baby.
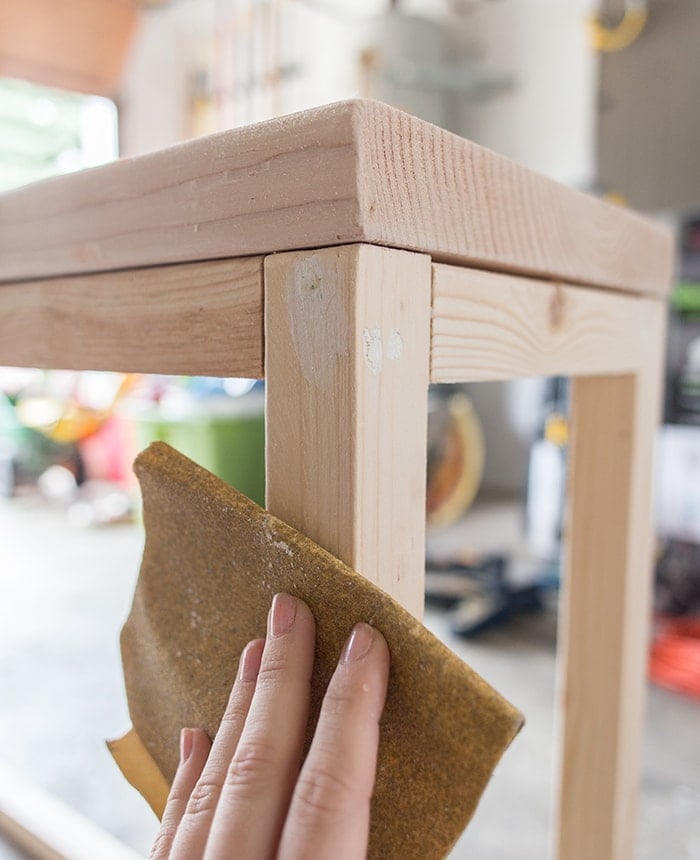
After it was all smooth and splinter-free, I applied a dark walnut stain which coordinates nicely with the warm woods in her home.
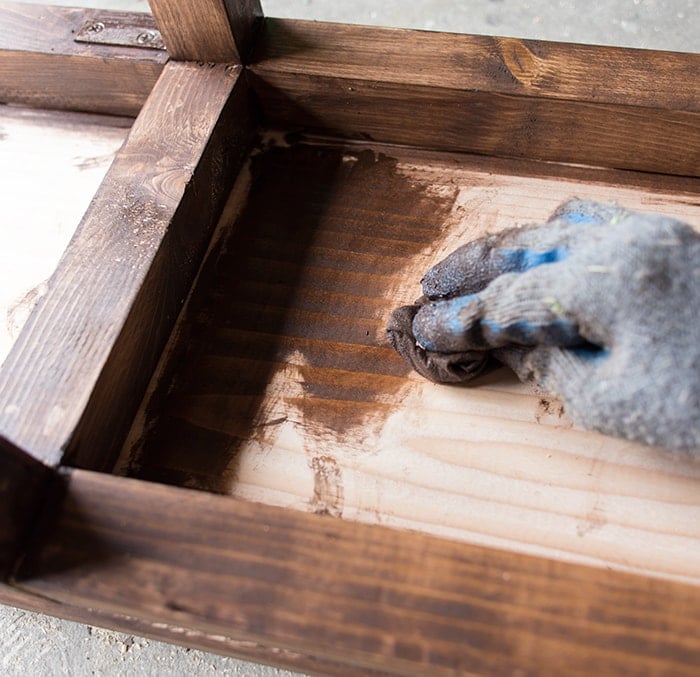
Finally, I brushed a shellac onto the top piece (for extra durability) and used a matte wax on the base since it’s easier/faster and that part doesn’t need the same level of protection as the top.
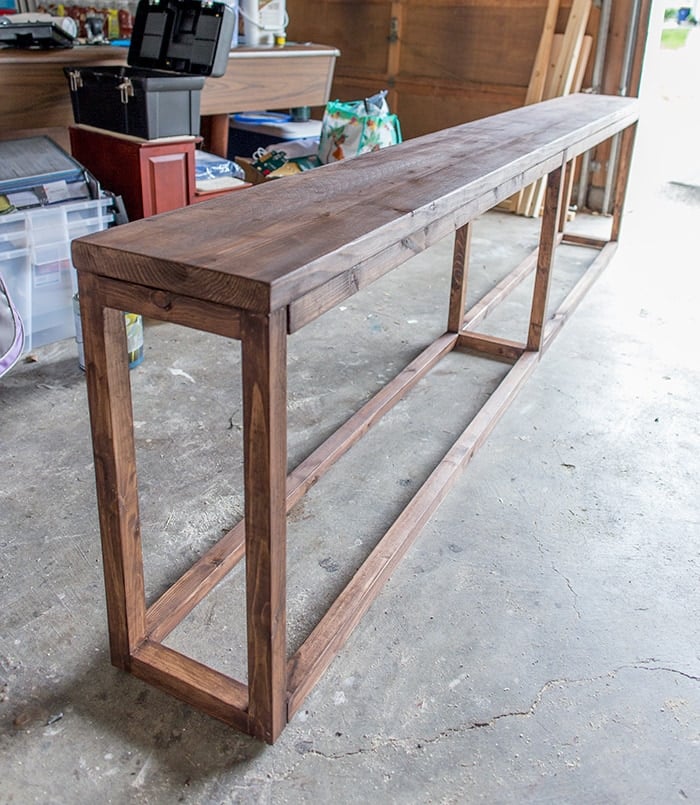
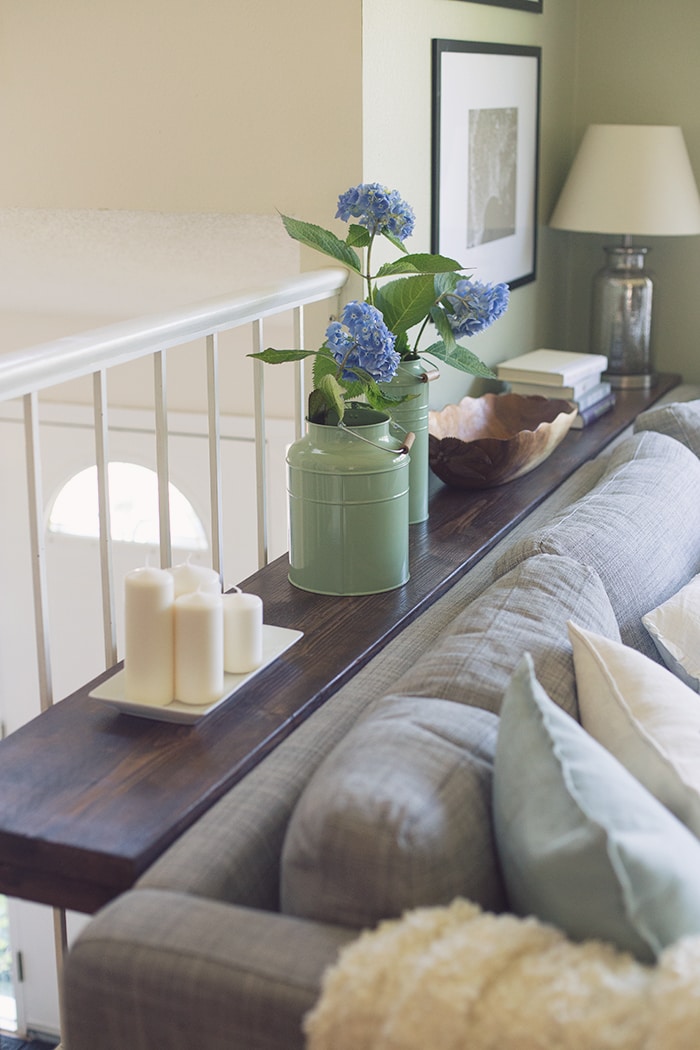
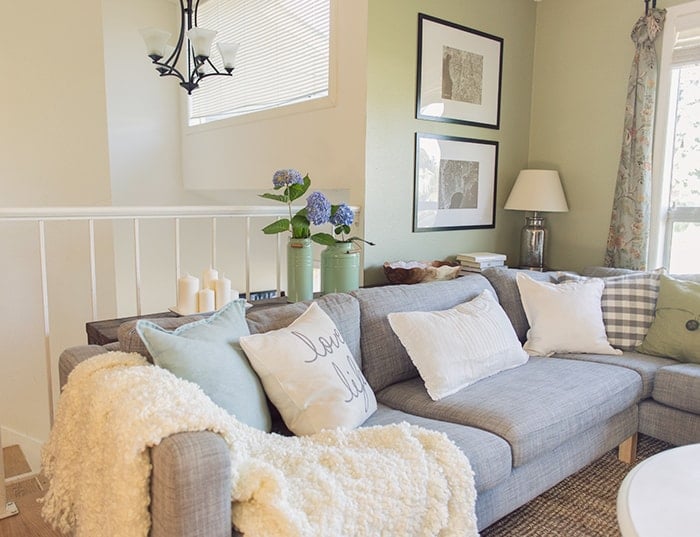
We hauled it upstairs to the living room and set it in place. And it’s perfect.
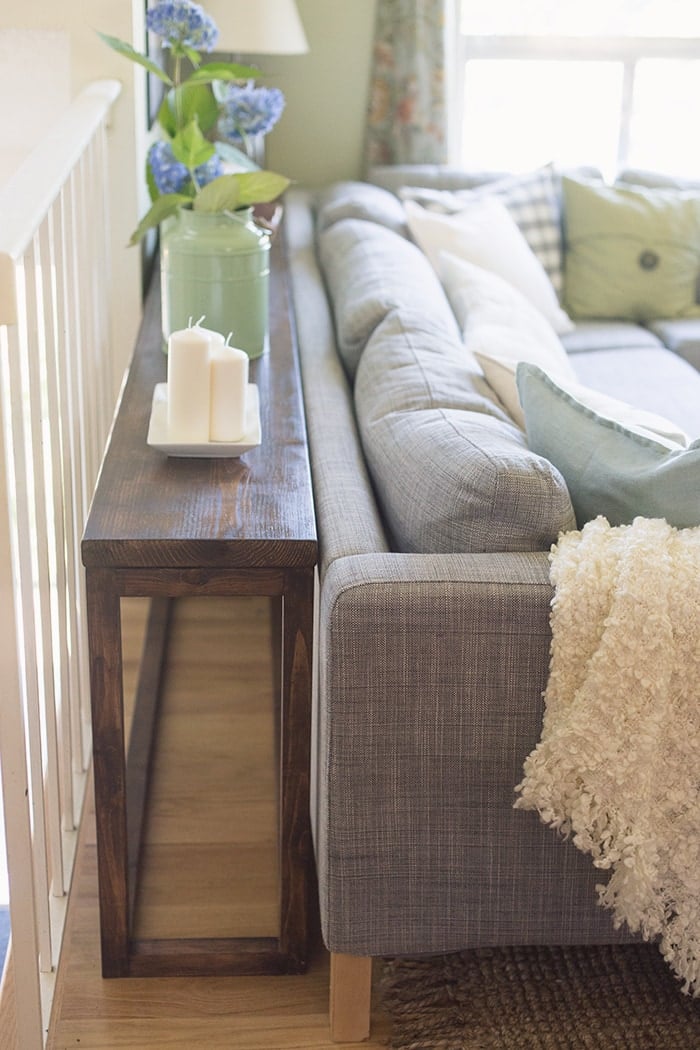
Her home is a split level so it’s one of the first things you see when you walk upstairs into the living room:
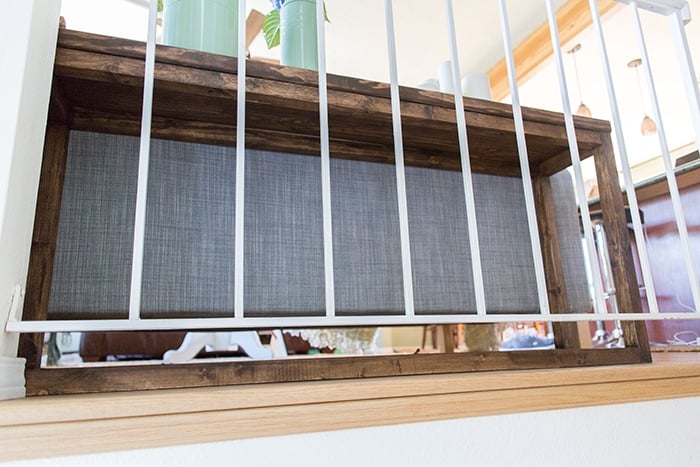
The back wall hides half of it, but it’s such a versatile piece that can be moved anywhere and travel to new homes in the future.

And they get a fun area to display pretty things.
I’m just a little bit jealous and know exactly what I’ll be making for myself the next time I need a table!
Now I’m passing on the challenge to you—if you have a way to cut wood and a drill, you can make it too!
This has to be one of my top 3 furniture builds ever and it was so rewarding to see how much my cousin loved it and how happy she is to have it in her home. And I hope this will inspire you to take action as well and try something new!
Hope you’re all enjoying the first official week of summer—make sure to keep up with everything that’s been going on over on instagram and I’ll be back Friday with more photos.
If you like this project, check out these popular beginner budget DIYs from my Project Library!
- $10 canvas floating frame
- How to realistically age wood (the easy way!)
- Easy string light planters
- Board + Batten tutorial


Mark says
Love your blog!
I had a friend show me a picture of your finished piece two weeks ago and asked me to make one for her. After many have seen my finished product, I have been getting requests to make more. Although it is built differently, it looks similar. Before I make more and potentially sell them, I wanted to make sure that there were no patents or restrictions on this particular piece.
Thanks again!
Kate Walsh says
Hi! This looks amazing. We need a table for our hallway. Do you remember what type of wood you used for the top?
Kate.
x
Ameena says
could you please give more info on staining process??!! love this project plan on making it asap 🙂
jennasuedesign says
It was the easiest part! I just used a brush and applied it to the bare wood. No wood conditioner or any prep work other than sanding. Then I brushed on the varnished after it dried.
Ameena says
Thanks ? I checked out the materials at Home Depot today will try it on the weekend… the board on top is common board or some wood kind? Also I need it to be 5 feet so I can eliminate the middle panel right??
shonee says
lovely piece of furniture! Super excited to give it a try!
-Shonee
http://www.hawthorneandmain.com
Matt says
Finished product looks great. It’s time for a kreg jig!
Alexis H says
This is so great! Would you mind telling me what your measurements for the horizontal pieces, the vertical legs, and the shorter pieces were? I have the same couch and would love to replicate this table!
jennasuedesign says
Thanks Alexis! There’s a basic drawing at the beginning of the post. The height was 25″ and depth 12″. So taking into account the 1.5″ for each leg, the shorter pieces were 9″ long, and that would make the horizontal pieces 51.75″ (108″ total length minus 4.5″ for the 3 legs, divided in half).
Christy w says
Wow!! So nice! Is there a chance you’ll be doing a guest tour on her house? From what we can see it looks lovely! I have a split level myself and would love some ideas! 🙂
Jenna Sue says
Hopefully one day! I still have some projects I want to work on if we can coordinate our schedules 🙂
Janelle says
Wow, this is incredible – especially for the price! You are a woodworking genius and I’m sure your cousin is very happy!! 🙂
Anne says
Built a 7ft one! Ran into a few issues but am now finally ready to sand and paint it. Thank you for the plans
KW says
Did you make the middle piece for support on your 7ft table?
John A says
I made a 7′ version and went with the middle piece. I might have been able to get away without it, but I felt more comfortable having it.
Teri says
Nevermind. When I reloaded the page, the pin button popped in. It was having trouble loading the first time. Weird.
Teri says
hmmm…..I am looking all over for your pin button. ??????
Great project. Perfect for my oddly sized space.
Jess says
Great Table. I will be making one this weekend. Where is the sofa from?
jennasuedesign says
Thanks Jess! It’s from Ikea 🙂 I believe it’s the Karlstad.
Nat @ This Little Yellow House says
Wow it really looks amazing! And so simple to make. I’d love to try this once we get a sofa.
Garden, Home and Party says
Wow! This is so cool I’m saving this post in case I ever need a “simple to make” table. I’m a little less intimidated seeing your step by step instructions. The table looks fabulous in your cousin’s home.
Xo,
Karen
Kelsey G says
Simple and beautiful. Totally ripping you off and building one this weekend!
Dave says
Made it, came out good but not as nice as yours.. Still wondering which stain you used (brand) got a dark walnut but it’s not the same. Maybe it will pop after the poly coat.
Daryl says
If you need a darker color apply multiple coats of stain let it dry in between coats it will darken up nicely