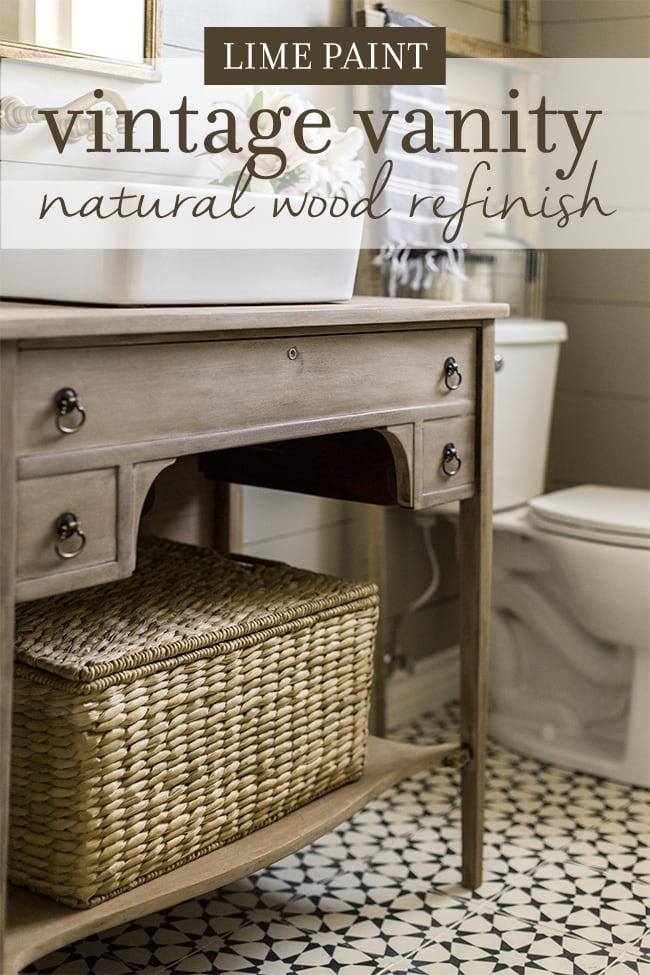
After the big guest bathroom reveal, many of you had asked about the refinishing technique I used on the vanity:
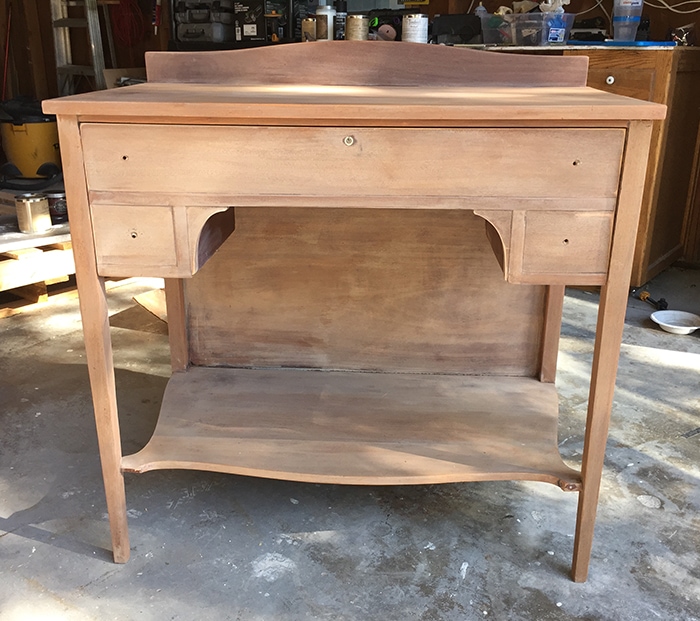
This piece actually began life as a vintage buffet—I had been stalking my local Craigslist every day for nearly a month when it finally popped up:
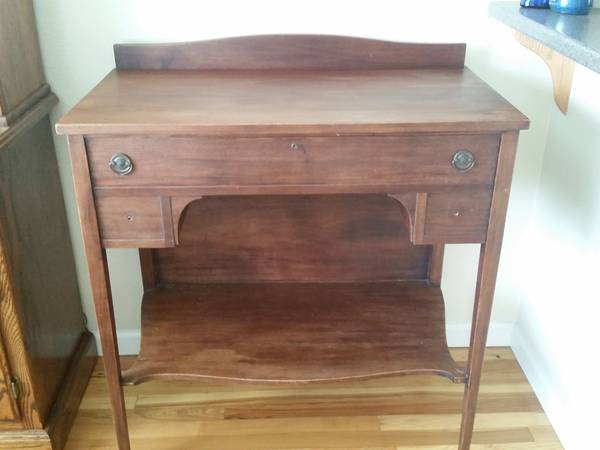
From the storage drawer to the large shelf to the antique detailing and curved piece in the back, it was perfect, and $140 later it was mine.
I’ve never really been a fan of red colored furniture so I wasn’t thrilled that this wood appeared to be inherently red once I saw the piece in person.
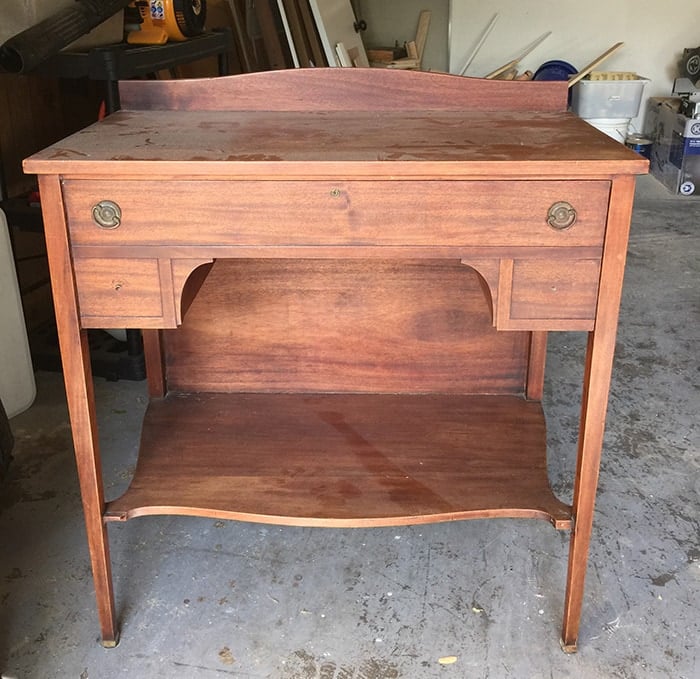
I had dealt with this type of wood before when I refinished our antique master bedroom dresser—the process was a long and frustrating journey that didn’t end exactly as I had planned, but it was a learning experience.
I decided to try something new this time. Enter, Maison Blanche paints.
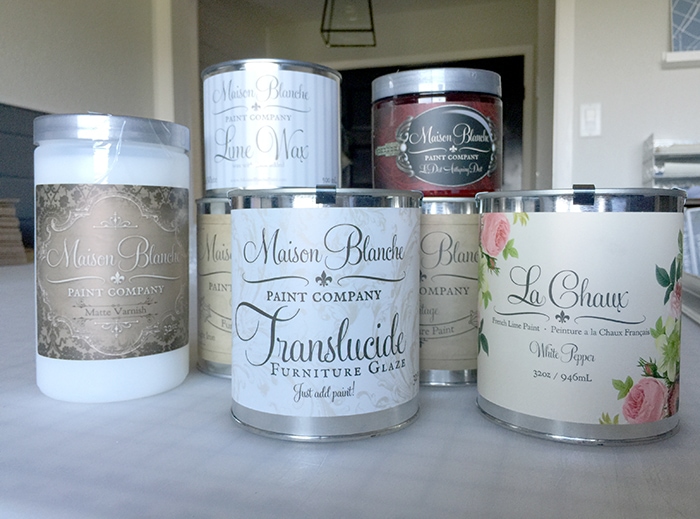
I’ve used Maison Blanche chalk paint once before (remember my friend’s aqua dresser makeover?) but this project was different. The goal was to let the wood grain show through, but in more of a natural weathered wood and less of a dated red varnish way. So they graciously sent me a variety of chalk paint, lime paint, glaze, wax and varnish just to make sure I had my bases covered.
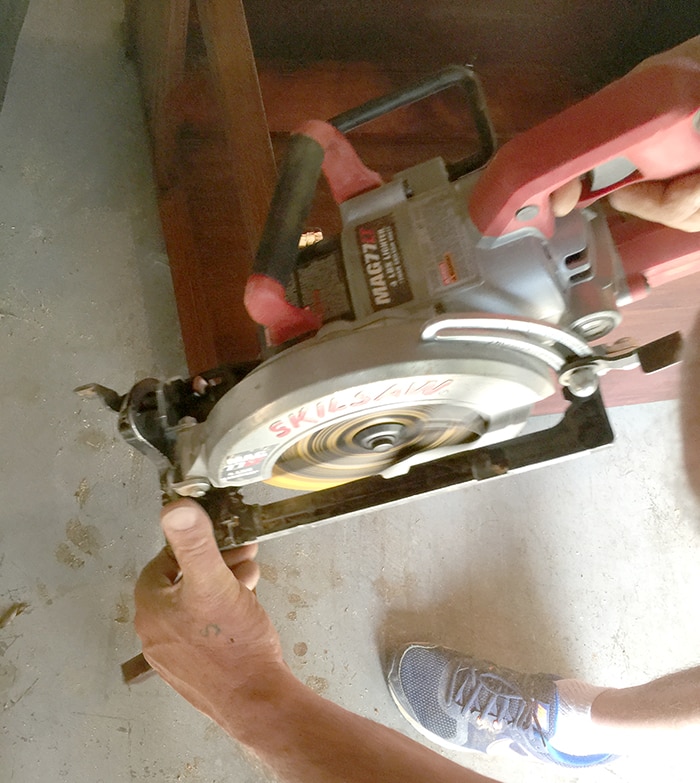
Before starting on the finish, we had to adjust the height of the vanity. It was a few inches taller than standard height (which is somewhere around the ballpark of 32″), plus I knew I’d be adding additional height with a vessel sink so we chopped the legs down with a skill saw.
If I were to simply paint the vanity (which would have been so much easier) I could have skipped the prep work and been done that afternoon, but because I had decided on this specific wood finish, I first had to sand down all the varnish. Black & Decker Mouse to the rescue…
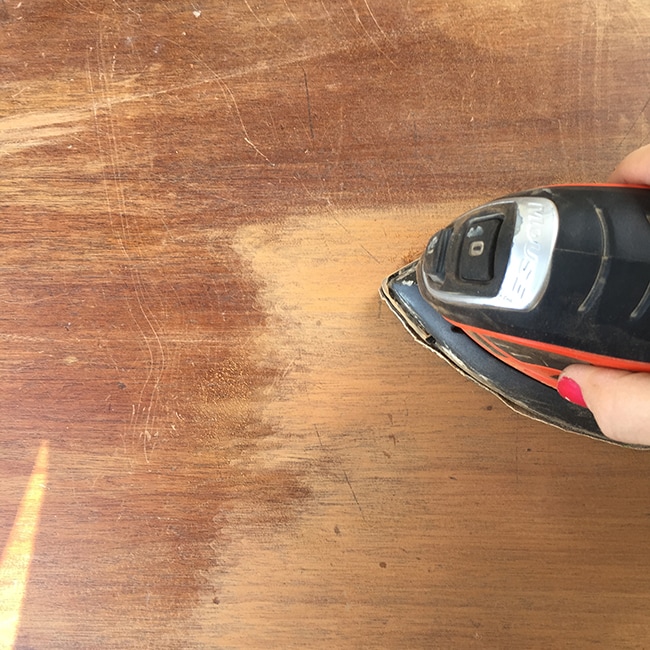
This definitely helped eliminate some of the reddish hue but it was still a warm orange tone underneath.
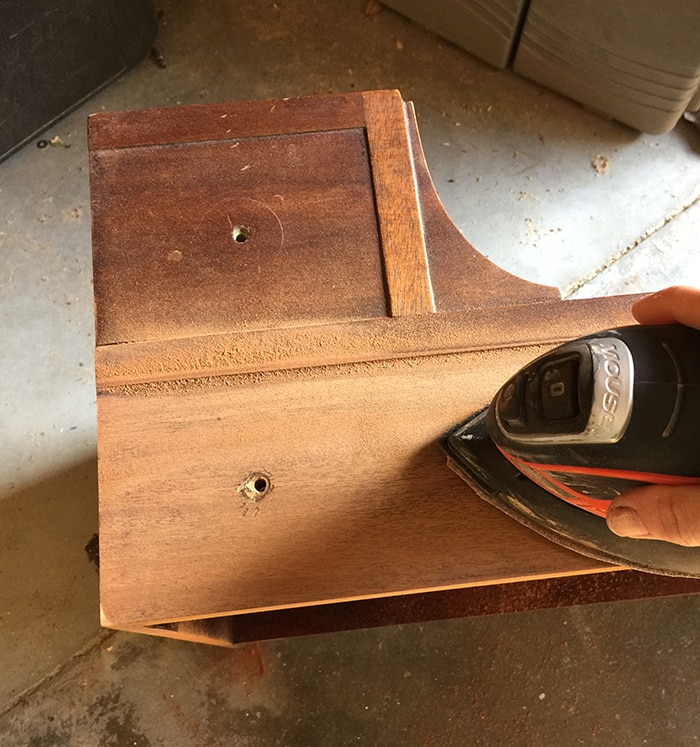
Sanding is by far my least favorite part of any refinishing project. It takes time (and patience) to pull up that pesky varnish and release the beautiful natural wood. I split the task up into several days over a week so it wasn’t as daunting. Finally, a blank slate:
It was looking much better already but I knew (from experience) that as soon as I added any sort of moisture or sealer it would want to go right back to that reddish hue, so I thought that perhaps adding a soft white/gray wash may neutralize it.
The lime paint (in white pepper) looked promising, so I started by diluting a bit of that in water…
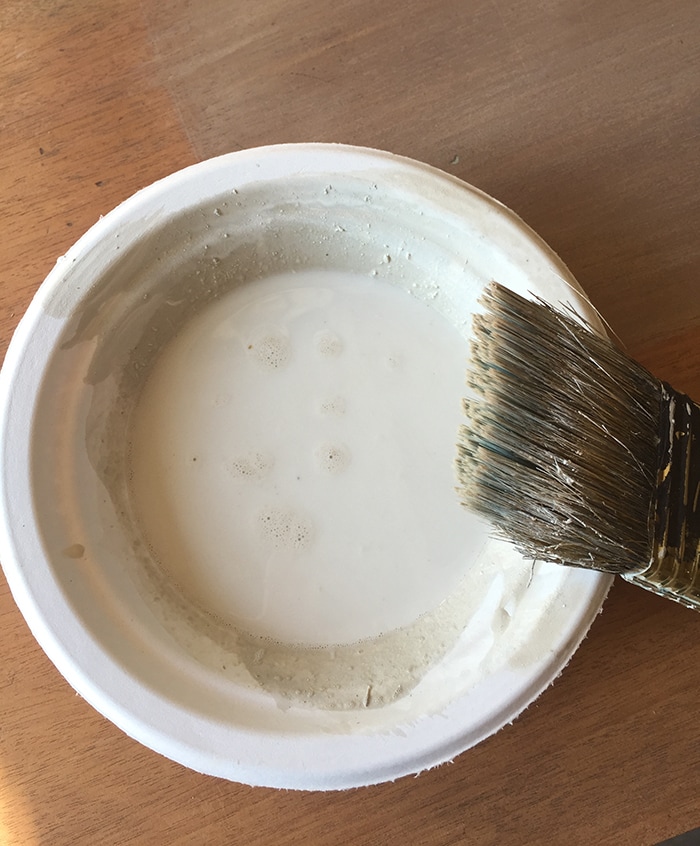
Then lightly brushed it on an inconspicuous area of the wood. The wet mixture immediately turned it red again as I had feared… but then it dried, and it was like magic:
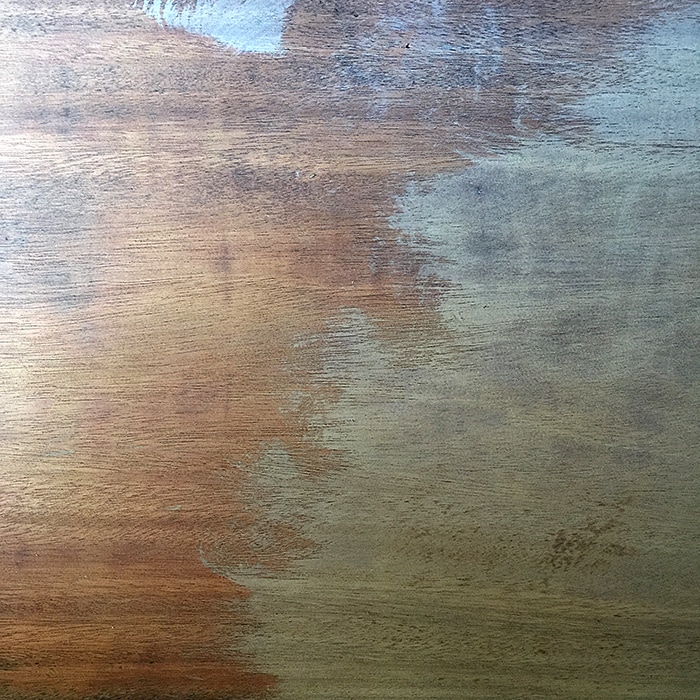
You can see the original wood on the left and the lime finish on the right. It didn’t appear painted on, rather, like it had changed the genetic makeup of the wood itself to a naturally aged species. Completely different than any standard latex paint I’d ever used.
Here you can see it in process… this was taken right after I had brushed it on before it dried. The lighter finish on the right edge had already dried after being brushed on just a couple minutes prior.
Then the process became fun. I mixed and brushed and watched in awe as the wood transformed before my eyes. Since this piece was made up of different kinds of wood, some parts took reacted with the mixture better than others, but the red was completely gone.
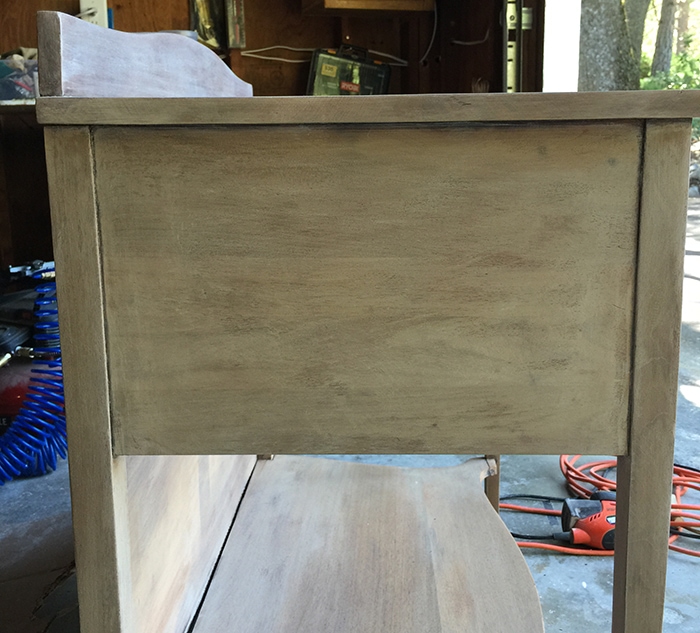
I could have added more paint to the mix and ended up with a true white washed look, but I really wanted more of a medium toned wood for this room so I left it at one light coat.
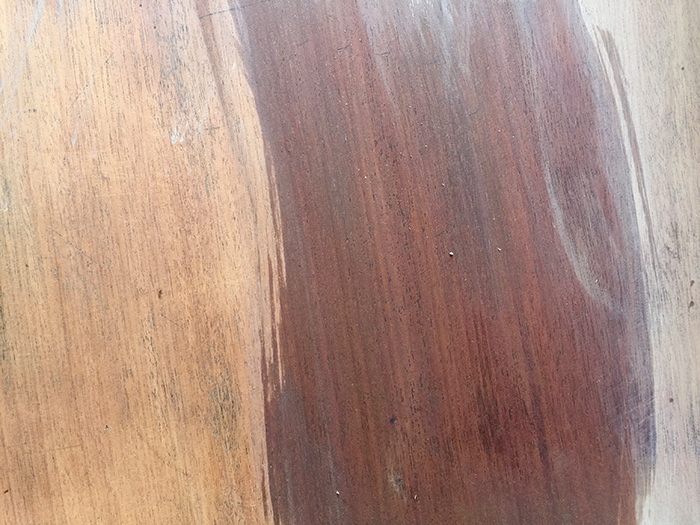
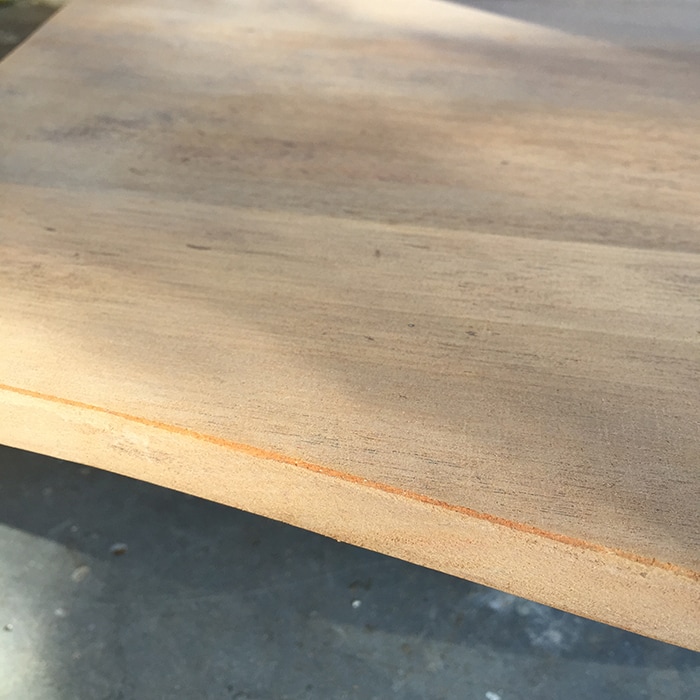
Just for fun, I lightly sanded down some of the edges to see what would happen, and it ended up revealing the original warmer wood underneath:
Then came the moment of truth—the protective coat. I prefer to use wax and I would have with this piece, however since it’s used in a wet area it needs to be waterproof and varnish was the only option. I used Maison Blanche’s clear varnish (in matte, not satin):
I wish I could tell you that it left my perfectly weathered wood coloring untouched, but unfortunately it did pull out some of the original warm/red tones. However, it was still a huge improvement over the original finish so I let go of my type-A perfectionism.
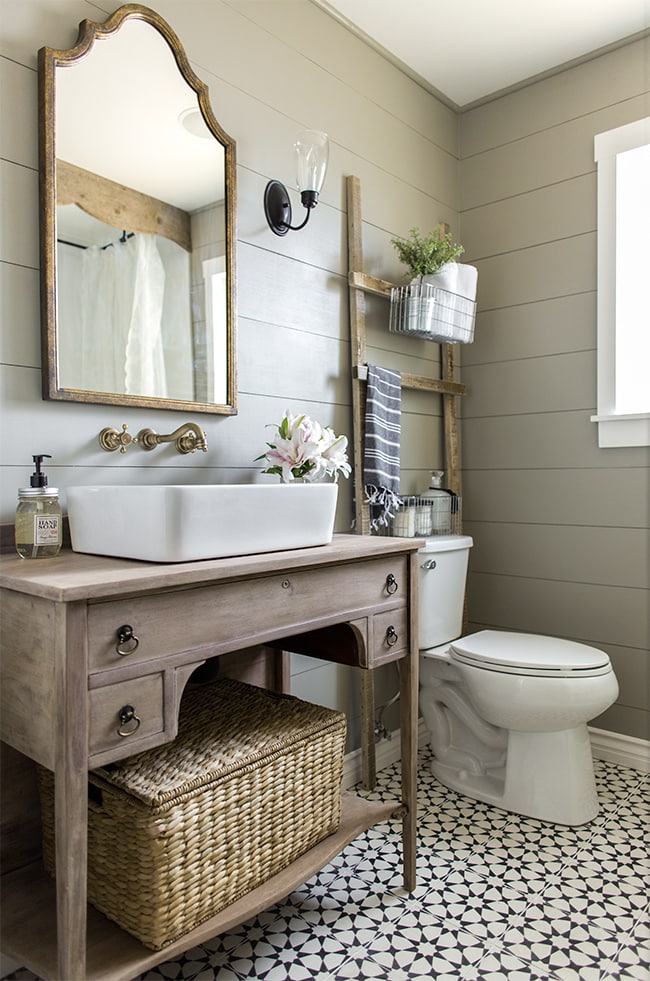
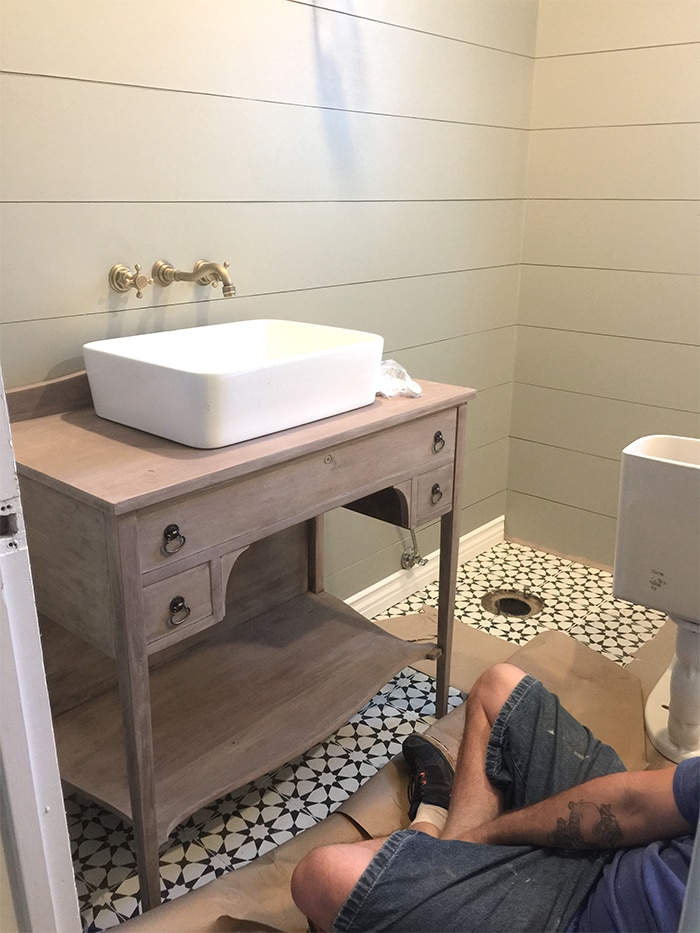
Here it is being installed, after 3 coats of varnish:
For the installation, our plumber drilled a hole at the top in the center for the drain and cut a rounded shape out of the drawer to allow room for the plumbing. I didn’t bother sanding the inside so you can see how the original finish looks in comparison to the lime paint wash:
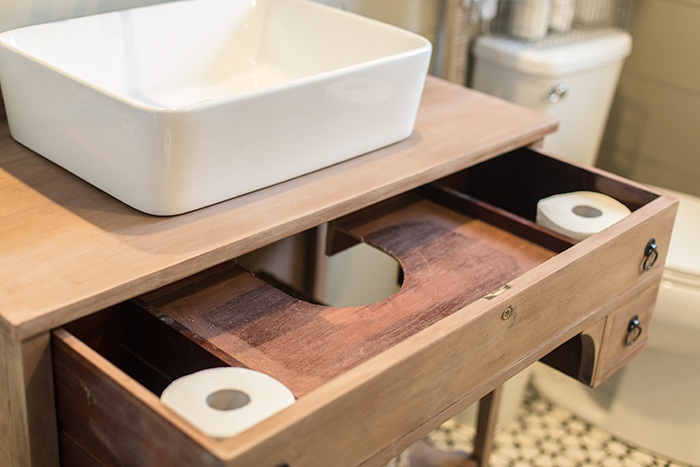
I didn’t want the plumbing to be noticeable, so I had him make it as low profile as possible and I’m so happy he was able to pull it off so well. We used regular black plastic to save money and I painted it using black matte chalk paint. You can’t even tell it’s there unless you kneel down.
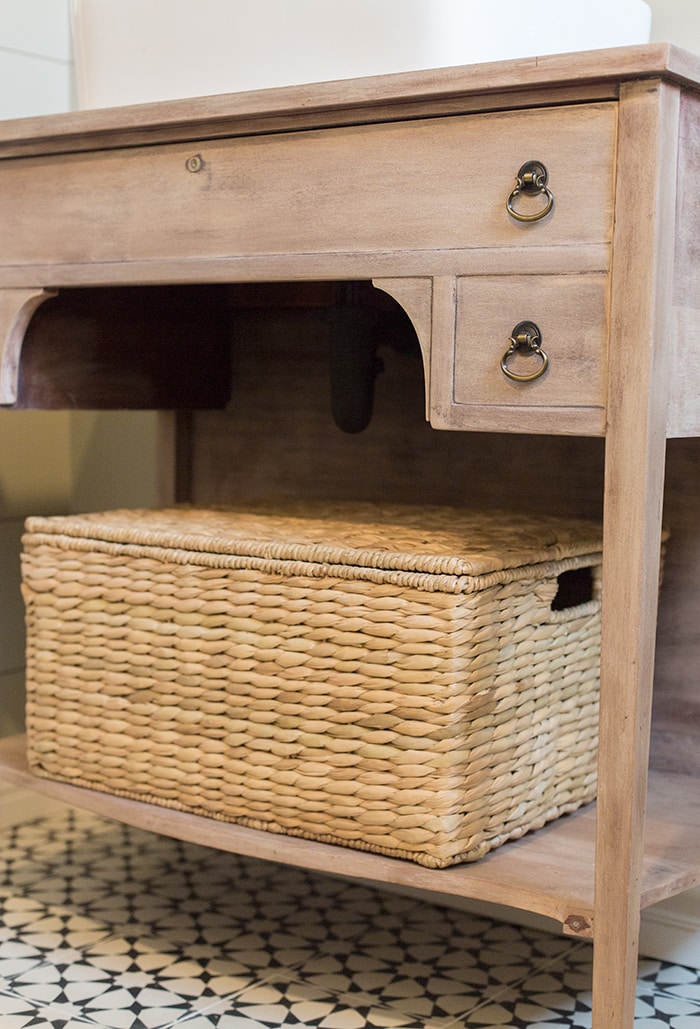
I purchased the drawer rings for $4/ea from my go-to hardware source: Ebay. The subtle brass finish plays nicely with the other gold metals in the space. (PS—you can find a source list for everything in the room in the original reveal post).
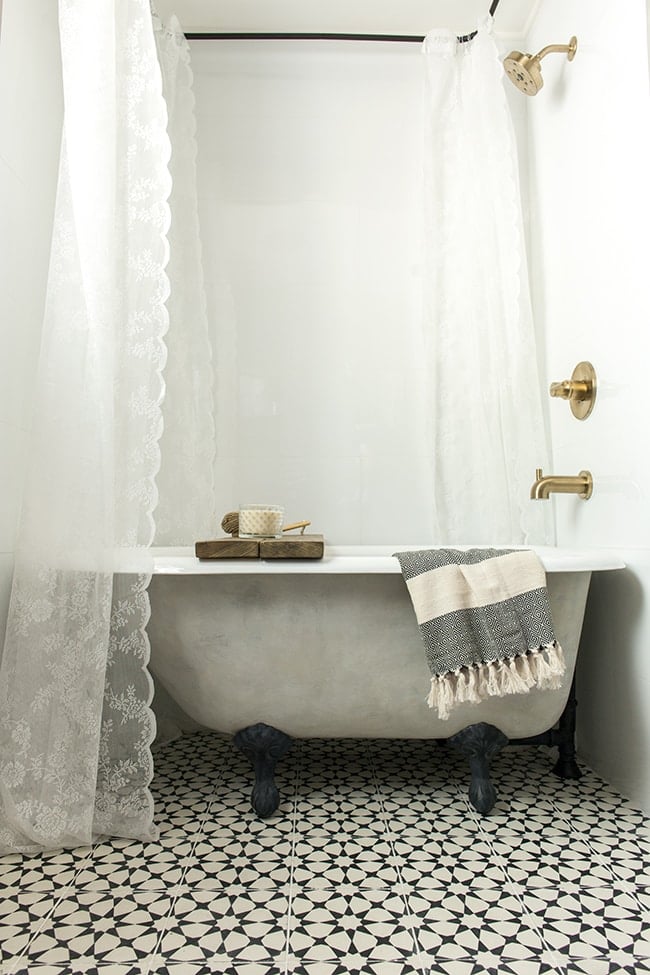
All in all, this is definitely one of my favorite pieces in the room (maybe my second favorite behind the clawfoot) and I loved having the opportunity to try out a new type of painting technique. Lime paint is a lot of fun to work with and played a big part in transforming this tub as well…
That tutorial is coming up next month!
Have you worked with lime paint before, and if so, what were the results? I’ve been looking around the house trying to find another piece to makeover just to work with it again. It’s pretty fascinating how many different ways you can use it!
A few of my blogger friends also experimented with some Maison Blanche paint recently—head on over to their blogs to see what they did!
Shayna at the Wood Grain Cottage
Liz at Liz Marie Blog
Allison at The Golden Sycamore
And with that, I’m packing my bags right now en route to Seattle for the next 7 days. I have my first in-person client (ahem, cousin) room makeover project we hope to finish while I’m there and I can’t wait to share the details on that soon. The pressure is on!


Ashley Sanderson says
It looks amazing! Can I ask what grout color you used? I’m guessing white, but wanted to make sure! Possibly the brand and name? Thanks!
jennasuedesign says
Thank you! Just plain white, don’t remember the brand but it’s all the same 🙂
Leah says
Love your bathroom remodel! I’m redoing my daughter’s bathroom and am going to use yours for inspiration. What wood did you use for the walls? I didn’t see that mentioned in the blog – sorry if I missed it. Thanks!
jennasuedesign says
Plywood! Search my blog for ‘Shiplap’ for a video tutorial 🙂
Meg says
Did you end up just using that white pepper lime paint & the finish for this piece, or was there another color or paint you mixed in? Just making sure! 🙂
jennasuedesign says
Just the lime paint as far as I can remember!
Amy Ballock says
I love this bathroom so much that I am literally stealing a lot of you ideas ! I wanted to know about how much you watered down the lime paint… I am guessing quite a bit because I have tried little amounts and it seems to cover more opaque than I want it to… the dresser I have is also red oak and I’m looking for a finish like yours… Do you think I should go heavy on the water, so that when I brush it on it’s almost clear with a tiny hint of the white pepper? Thanks!
jennasuedesign says
You really just have to experiment and it all depends on the wood! Start light and then keep layering it on until you achieve your desired look 🙂
Sarah Neal says
Hi Jenna
Beautiful, I love it!! This is our inspiration for our new house build master bathroom What are the dimensions of the vanity?
Thank you!
jennasuedesign says
Thank you! It’s 19d 35w 33h”.
Keira St. Claire says
Love the bathroom! Where did you get the mirror? <3
jennasuedesign says
Thanks! Wayfair but it’s no longer in production unfortunately.
Wendy Adams says
Hi there! what is the actual height of your table from floor to top of vanity(without the sink). I have an old table made of barnwood I need cut down but want to make sure I cut the right amount.
jennasuedesign says
33″ 🙂
Brittany says
so I love love love the vanity color. I haven’t used lime paint before I like how the color came out a weathered/distressed look. I want to capture the same color and attempt to use it on my pre existing vanity. How much water did you add? Is there something else you would recommend to achieve the same weathered look?
jennasuedesign says
There really is no formula, I just winged it! You can test out on a hidden piece of wood and use a little at a time. Try starting with more water and adding a bit of paint at a time until achieving your desired look.
Maggy says
Hi Jenna – I left a message on your other post regarding the name of your mirror and who makes it. Also, approx dimensions would be helpful. Thanks much.
Brooke says
Hey Jenna!
I’m on the hunt for a dresser to re-finish a lot like both this and your dresser in your master suite. Is there a certain type of wood to make sure to hunt for to get that beautiful bare look? I am eyeing a couple of cherry stained dressers on craigslist but I’d hate to spend hours and then find out it will never sand down to that great rustic tone.
jennasuedesign says
I’ve found a lot of the older pieces are that cherry/red wood which is really difficult if not impossible to get rid of entirely, so I’d look for something that is closer to the color you want already. Lime paint helps a lot too though. Good luck!
teresa brown says
What an incredible job! Thank you so much for sharing your work of art and giving such detailed instructions.
Myriam says
I LOVE YOUR bathroom and am in the process of recreating it!! Where can I find lime paint in Canada??? Help!! Thank u for the inspiration 🙂