This post is part of a paid collaboration with Lowe’s Home Improvement. All opinions are my own.
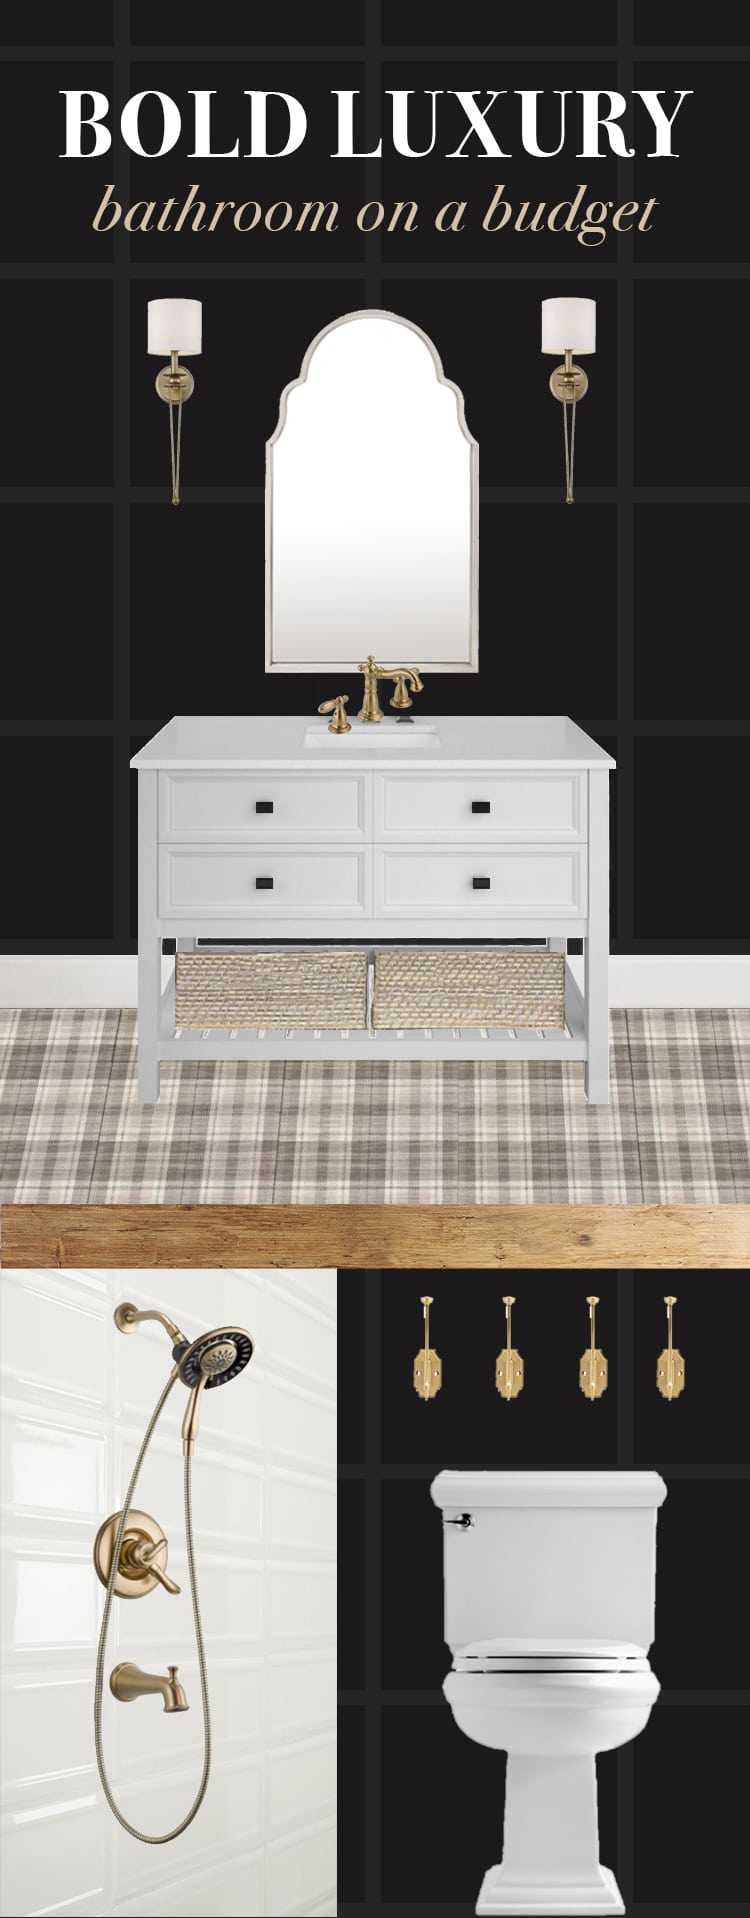
We did it! In less than six weeks, we’ve transformed an under-construction shell of a room into the bold, luxurious guest bathroom of my dreams. The very first room at the Heights House is complete! Watch to see the transformation:
In case you missed anything, make sure to get caught up from the beginning:
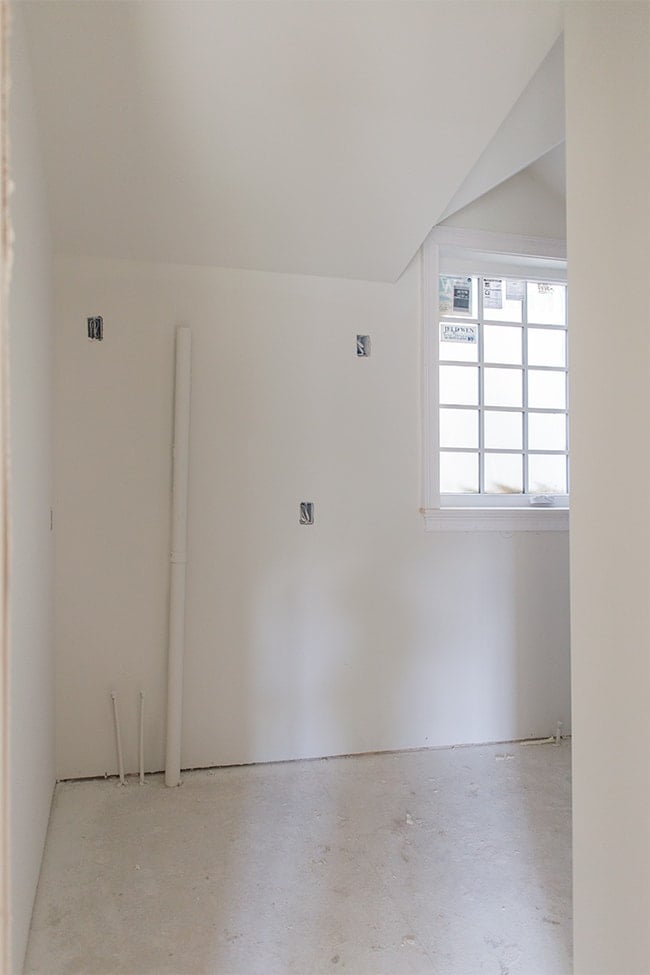
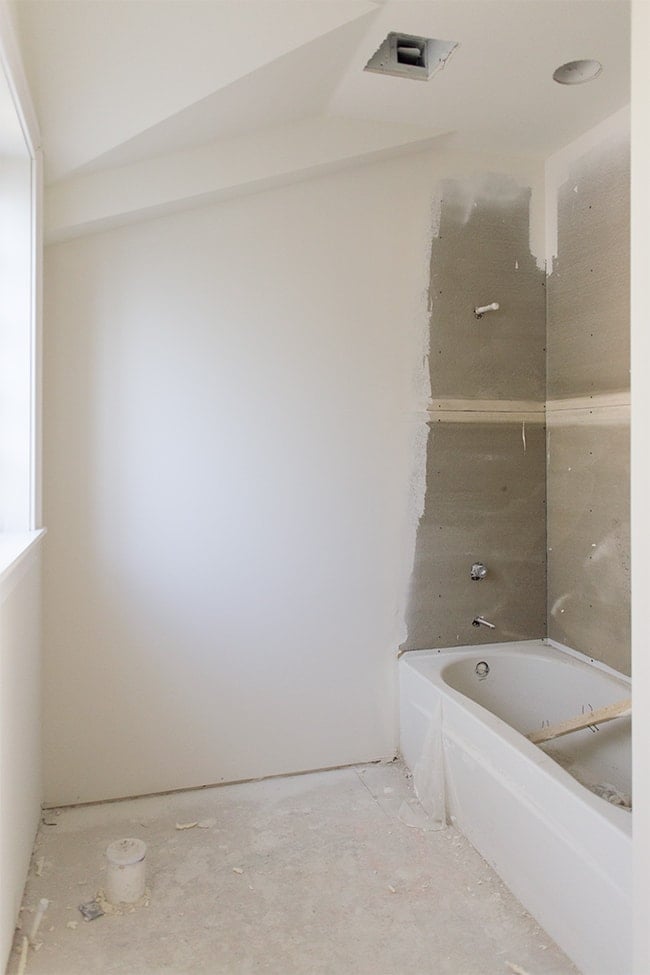
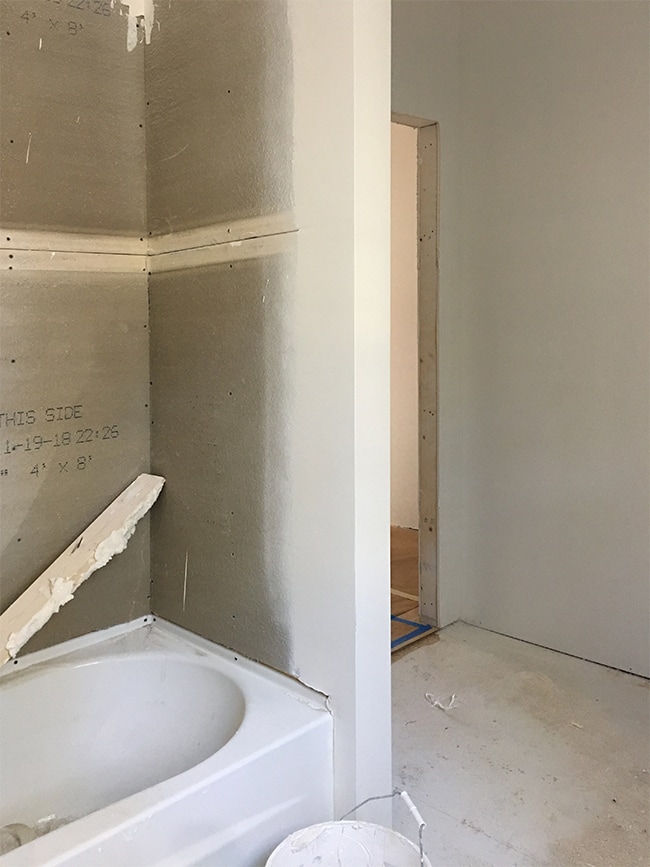
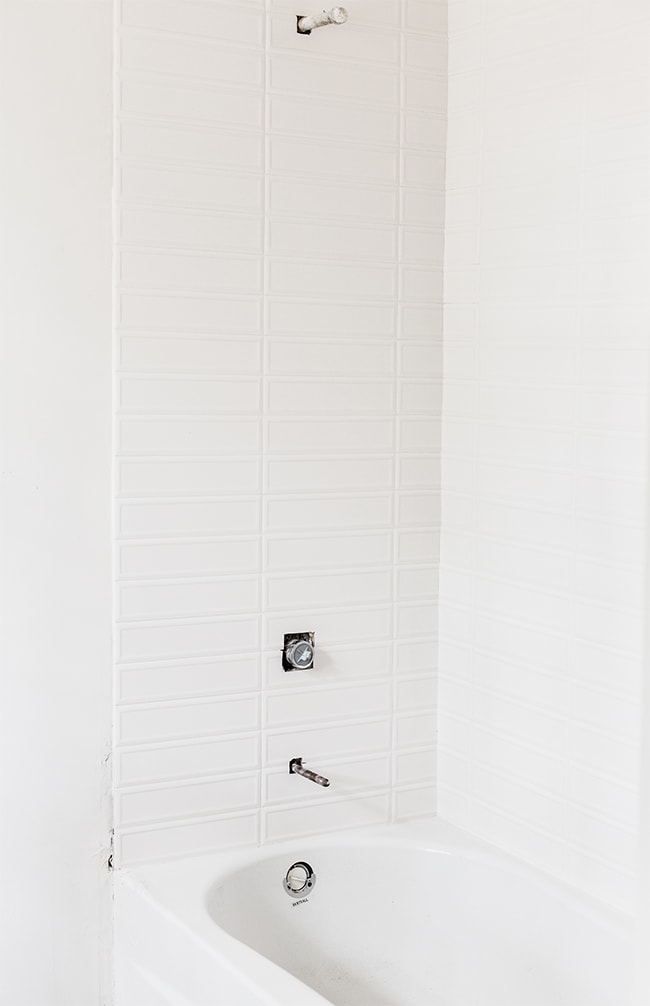
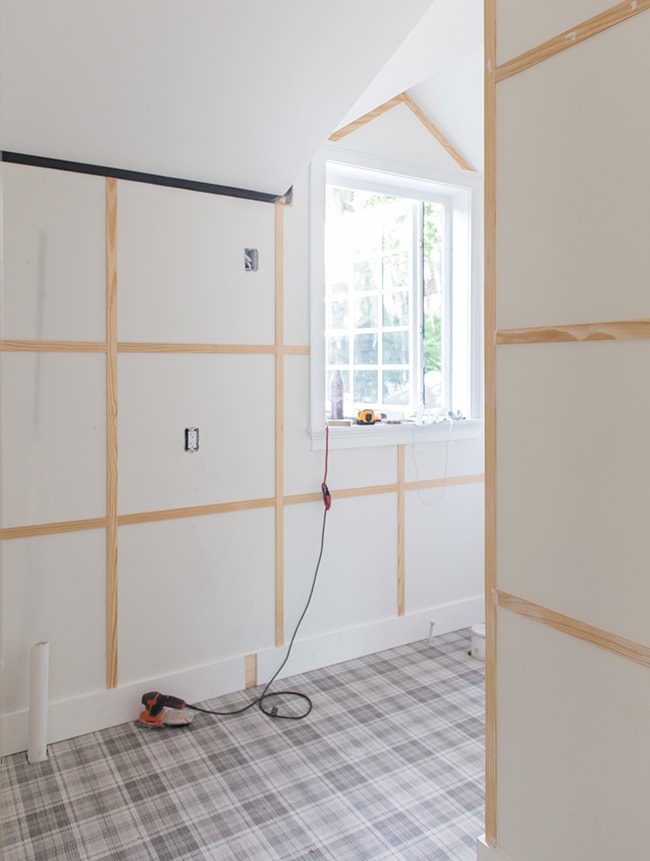
While I planned the design out back in February, work didn’t actually begin until three weeks ago, so we’ve been busy in here almost every day! This is how it looked last month:
I had my work cut out for this space—aiming for a rich and luxurious design, but also affordable and easily accessible for others to recreate.
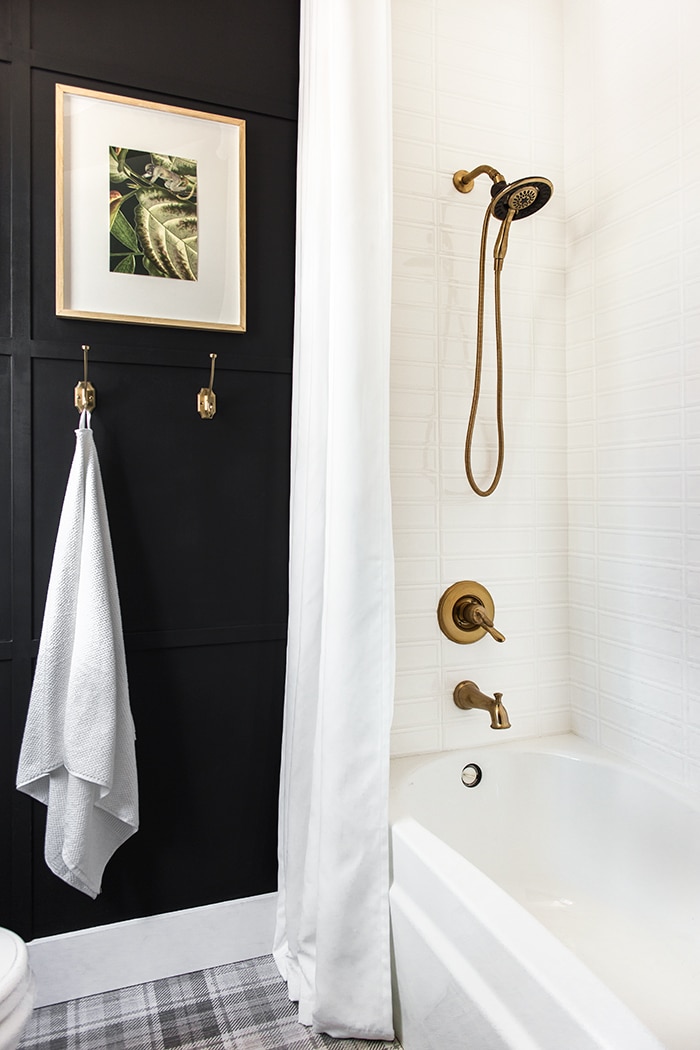
Shower tile was the first task on the to-do list, and I shared our Lowe’s shopping trip mission to find the perfect budget-friendly tile.
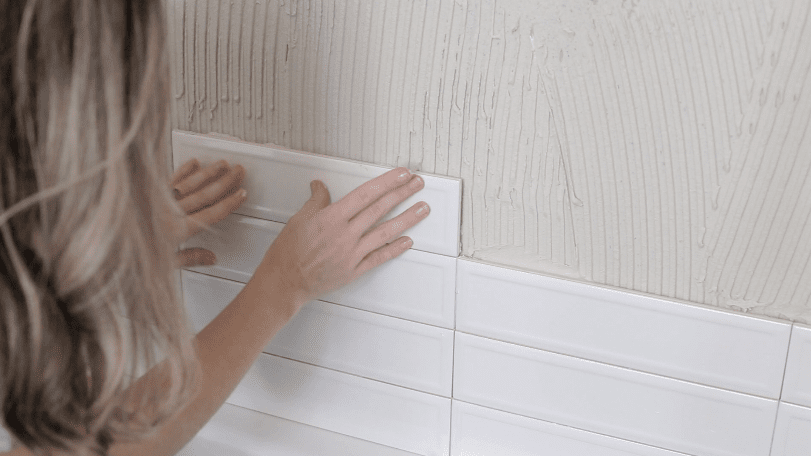
This unique American Olean subway tile was the clear winner, at just $1 a piece (FYI, the tile is on sale right now for only 78 cents each!)
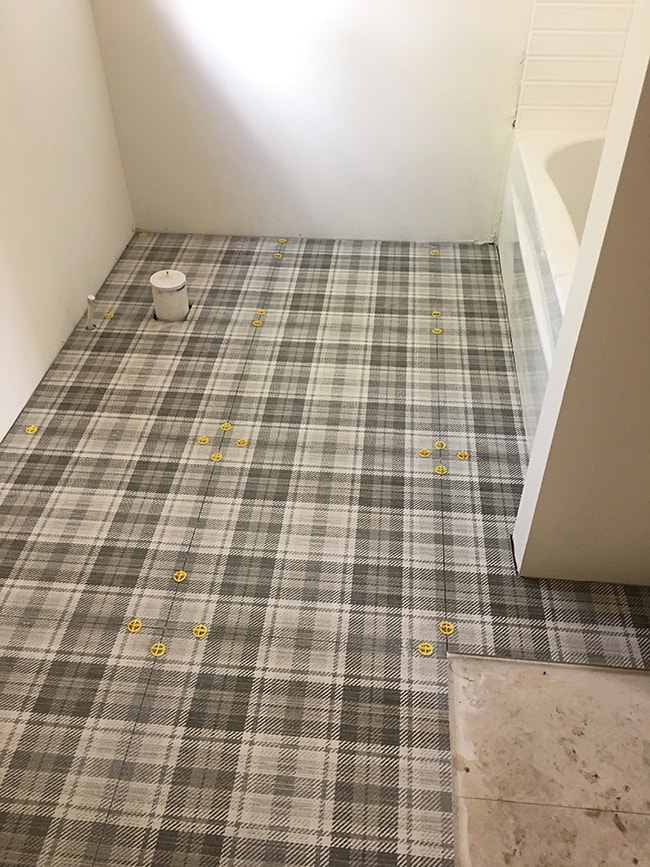
Next came the floor tile install…
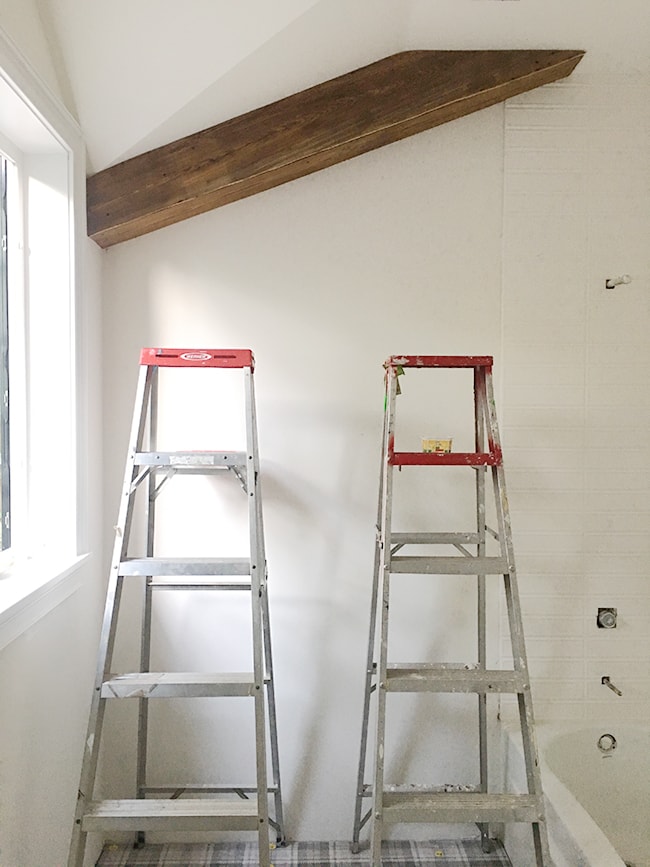
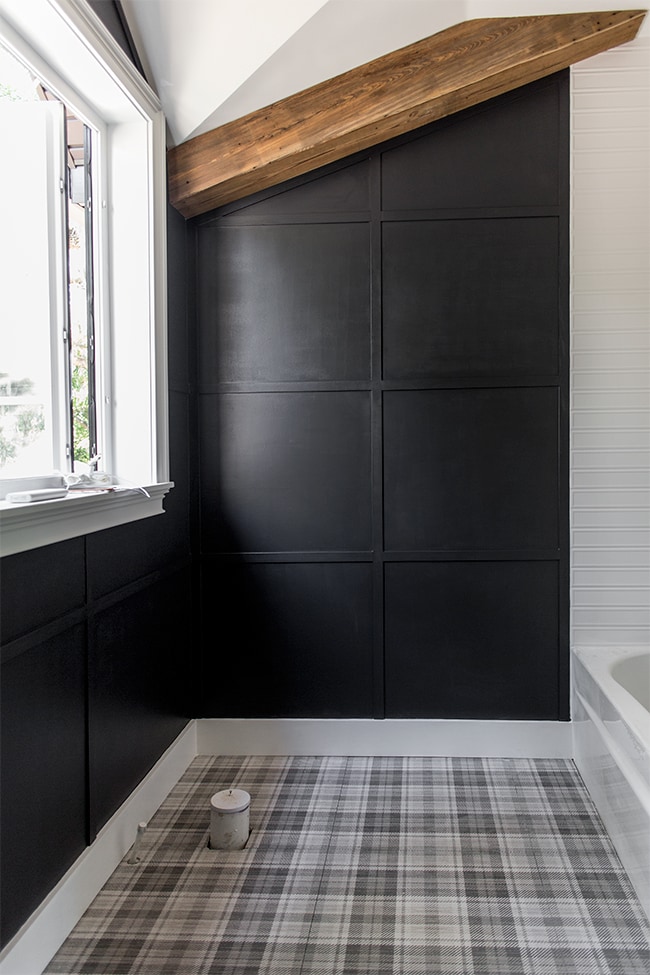
Followed by a DIY wood beam using local reclaimed wood…
And then a few days of non-stop DIY wall molding…
And then a little black magic…
The last week was spent completing the install and adding the finishing touches, and that brings us to today! Ladies and gents, here is our Bold Luxury Bathroom on a Budget:
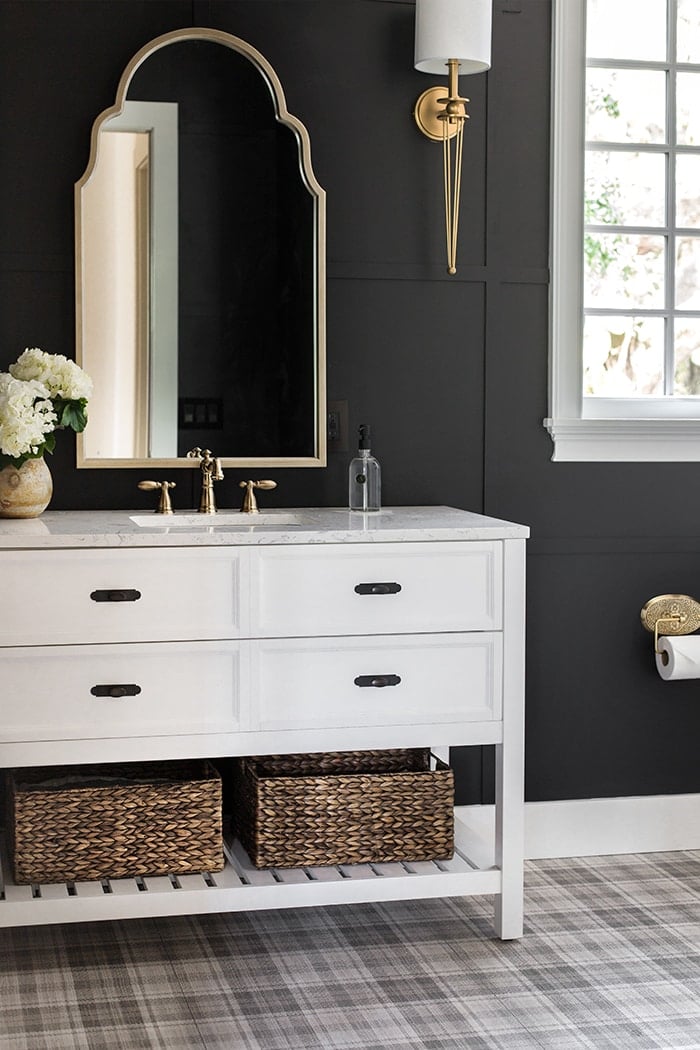
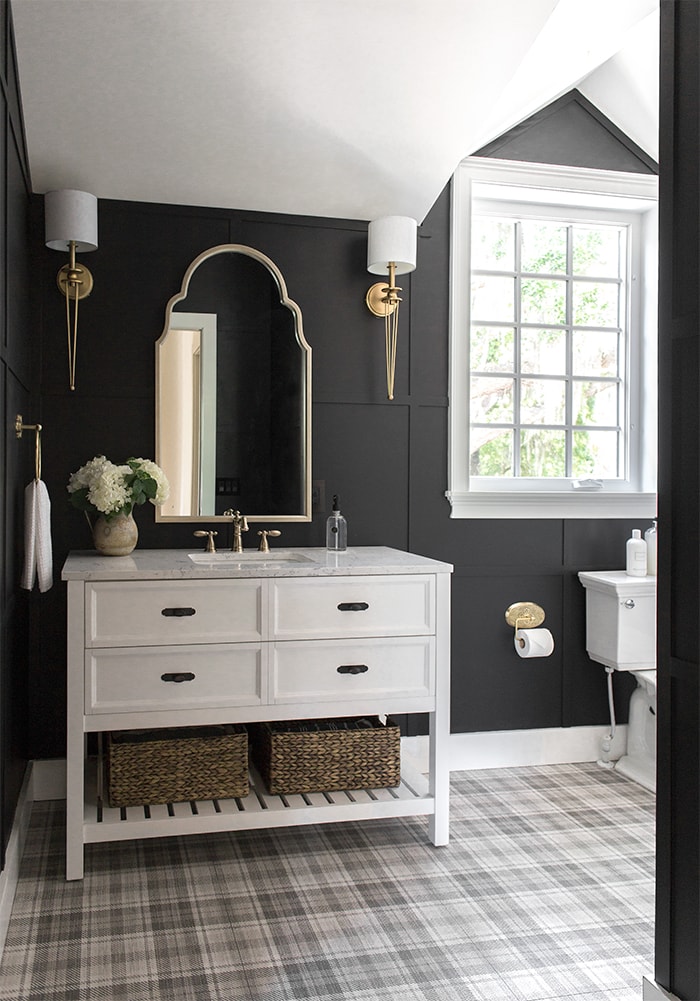
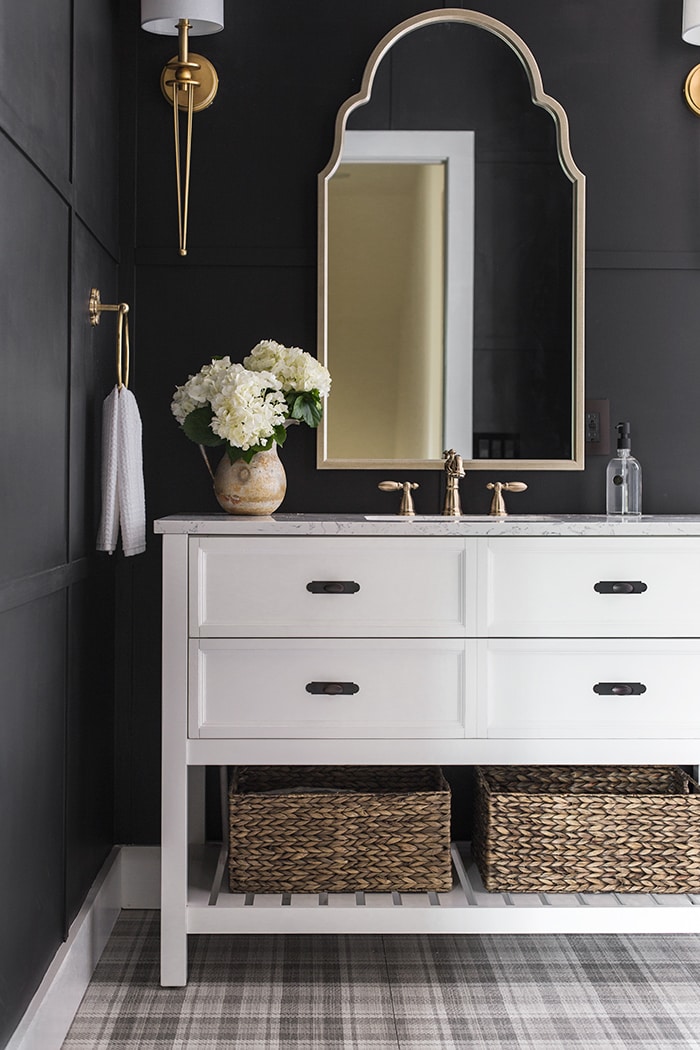
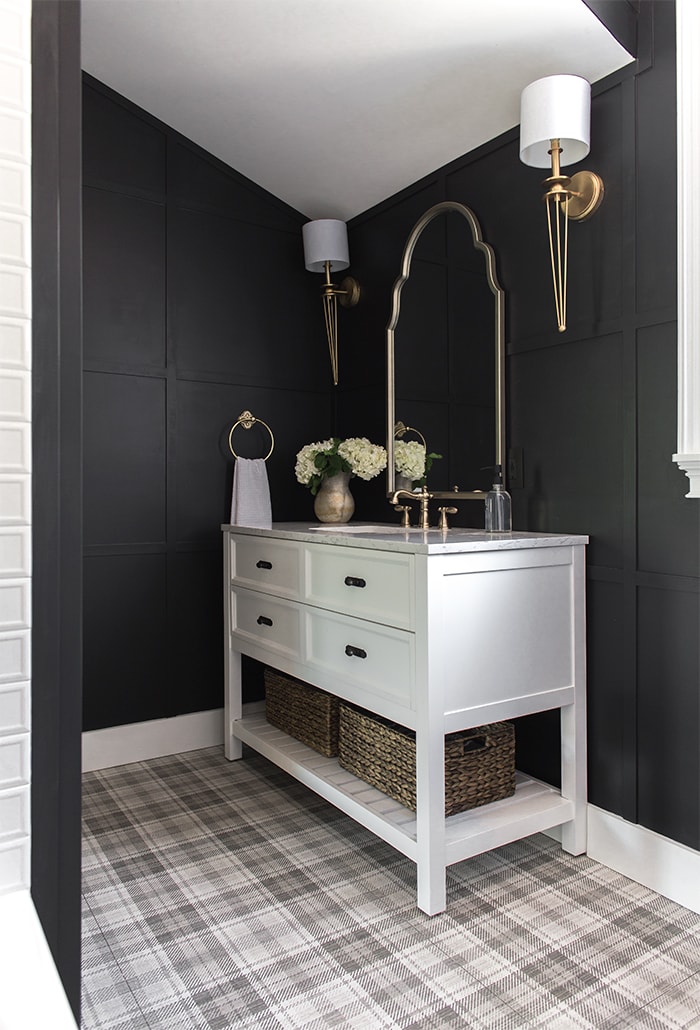
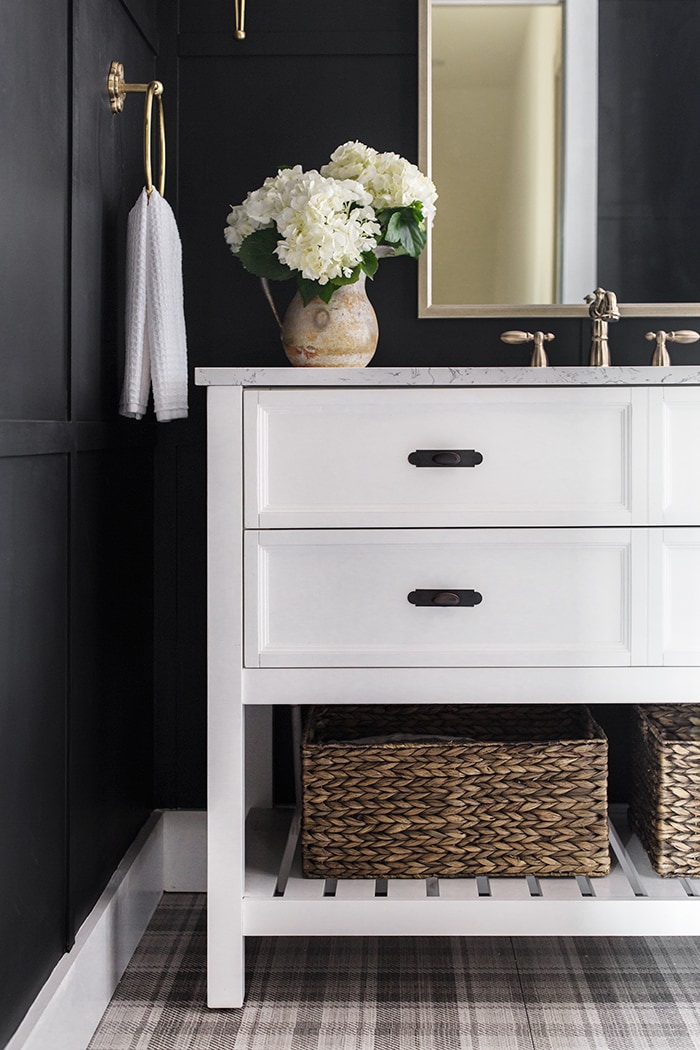
Someone pointed out that the drawers on the vanity match the look of the subway tile… I’ll pretend like I planned that on purpose 😉
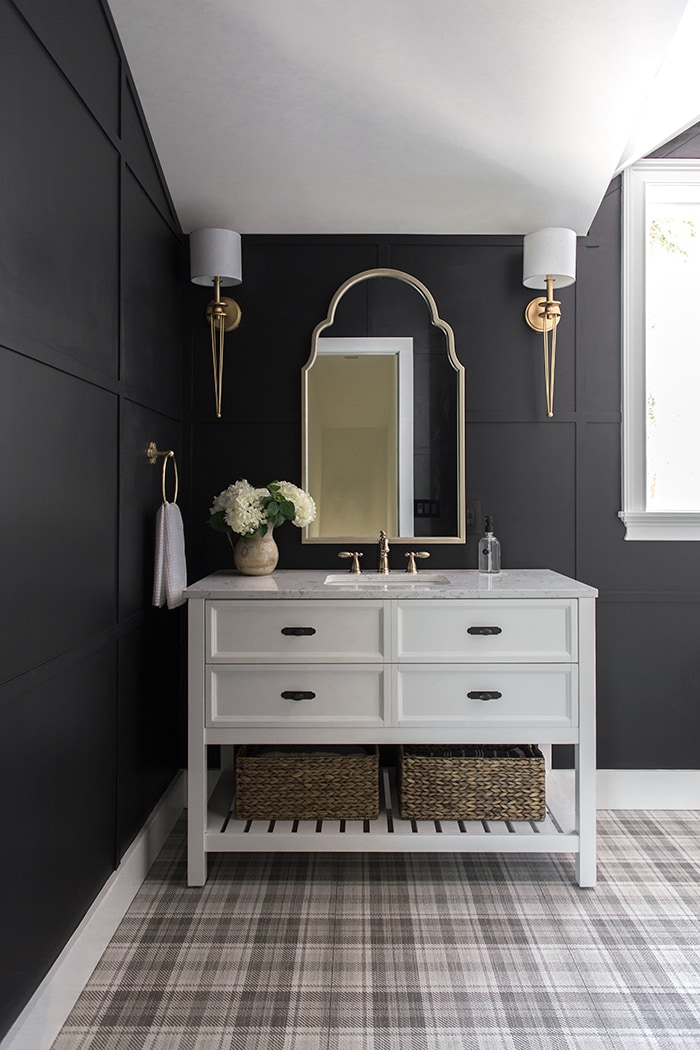
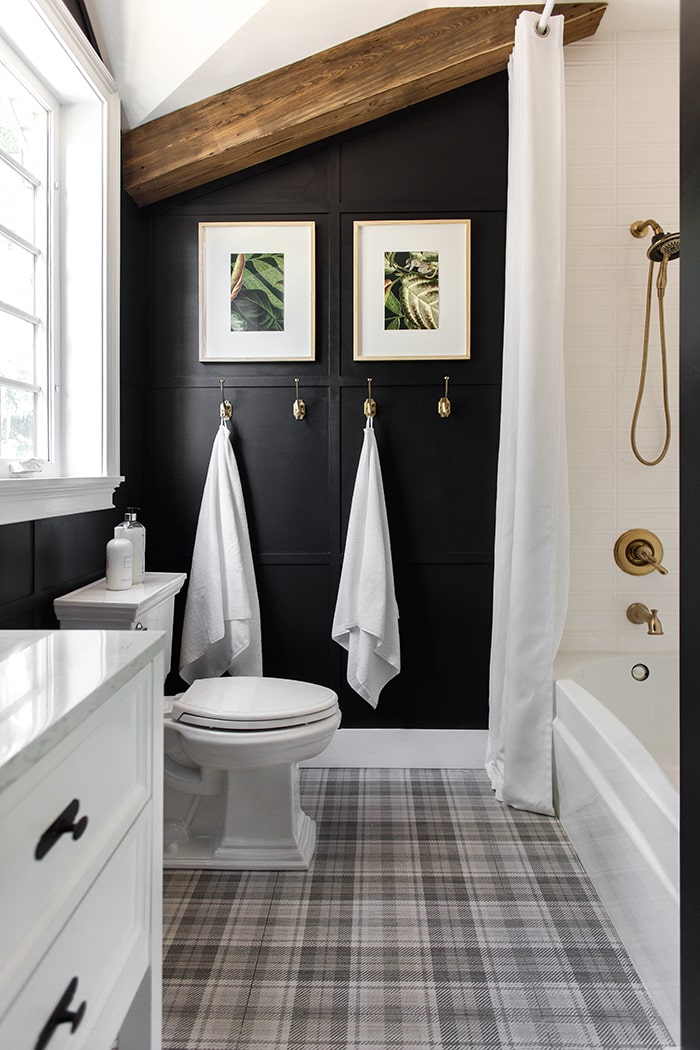
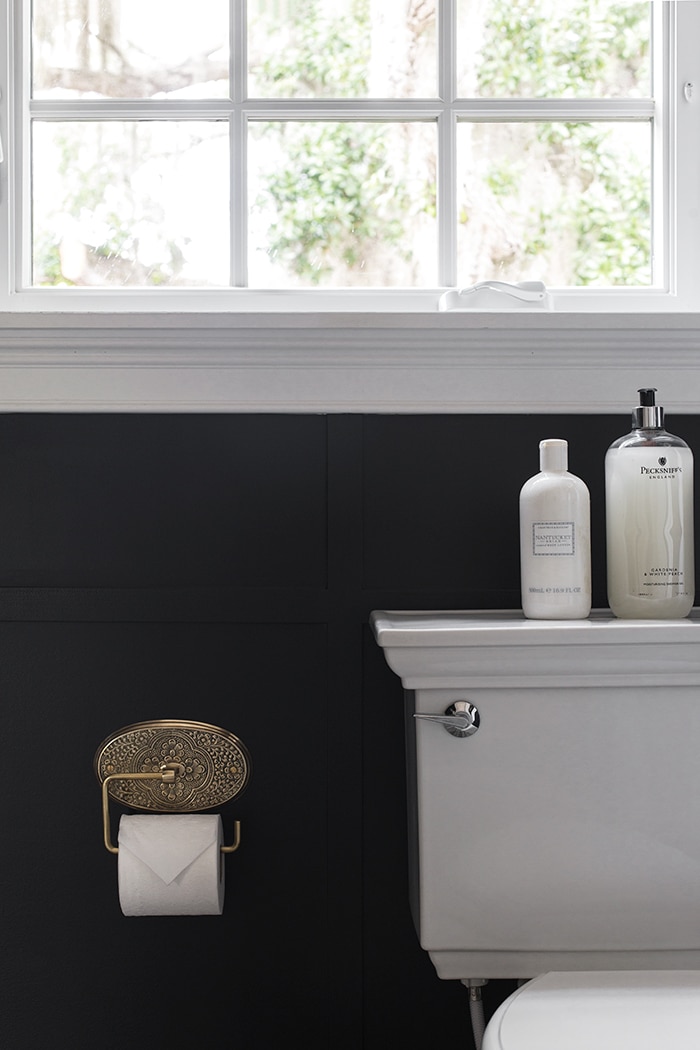
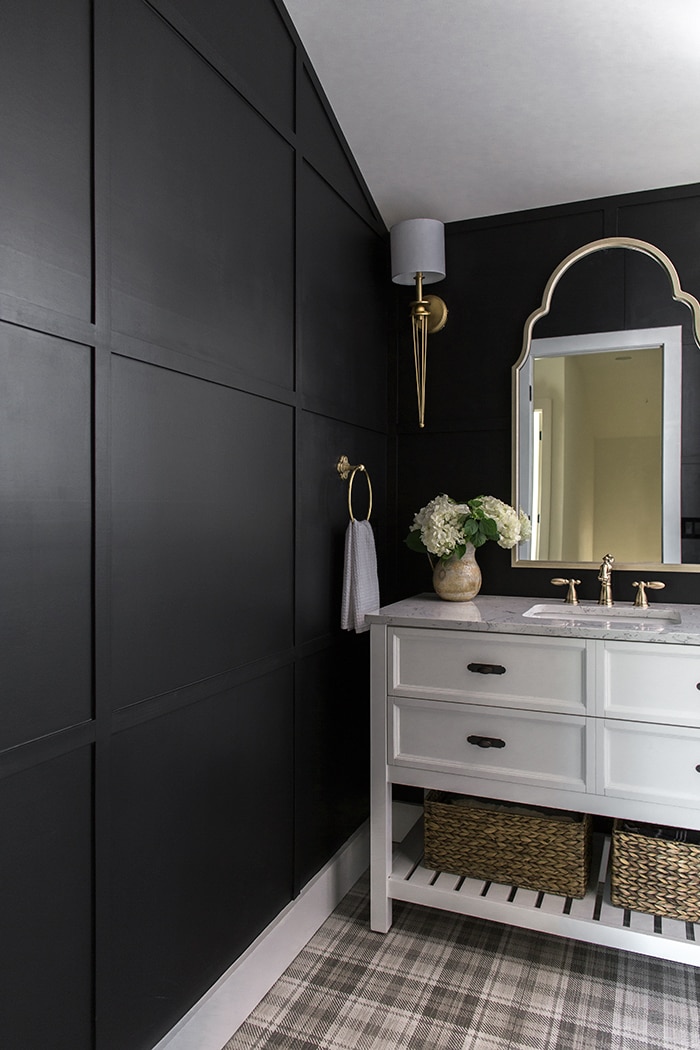
There’s plenty of light and white accents to make this space feel cozy rather than cave-like (the walls are painted in the richest Valspar black, Cracked Pepper).
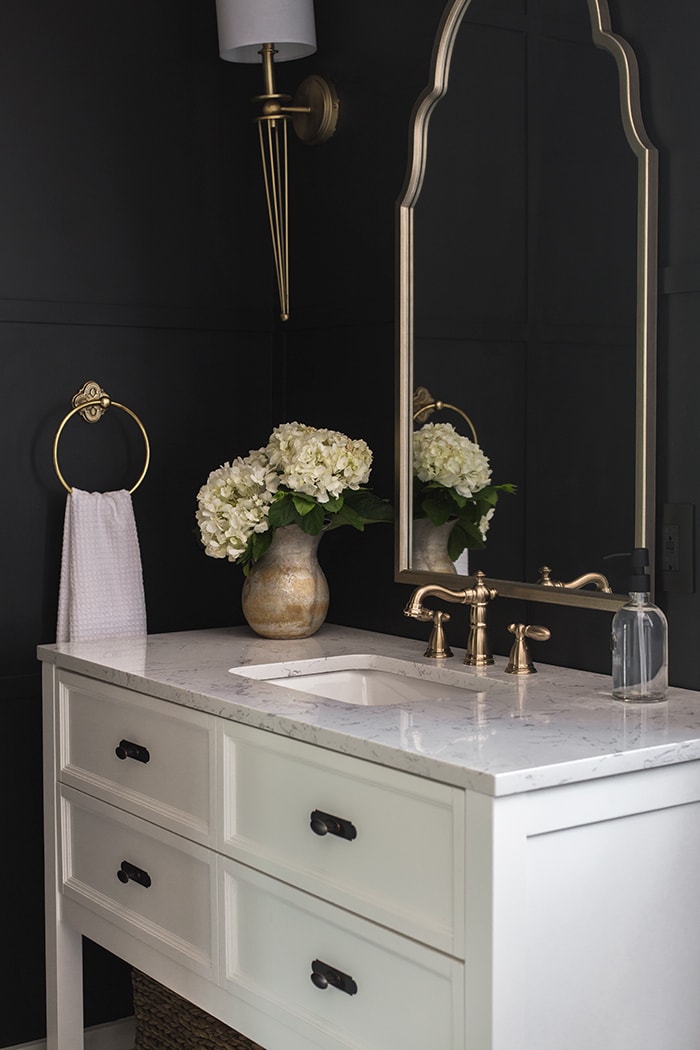
And a healthy dose of champagne gold and wood tones to warm it up.
I’m loving this whole vanity area situation.
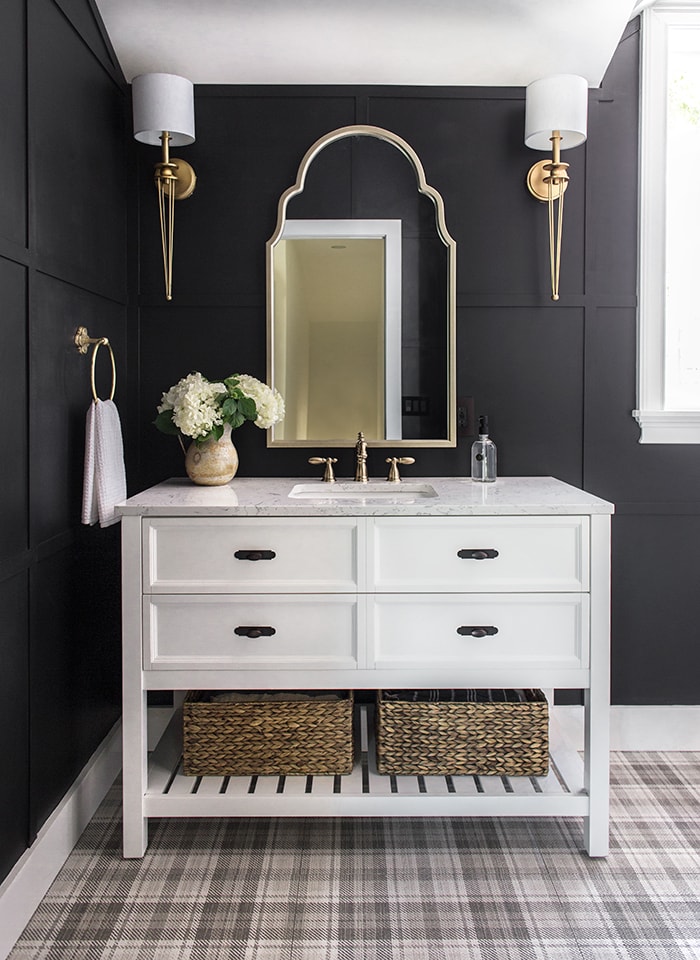
This gorgeous arched mirror is only $75(!) and was such an easy choice to stay on budget.
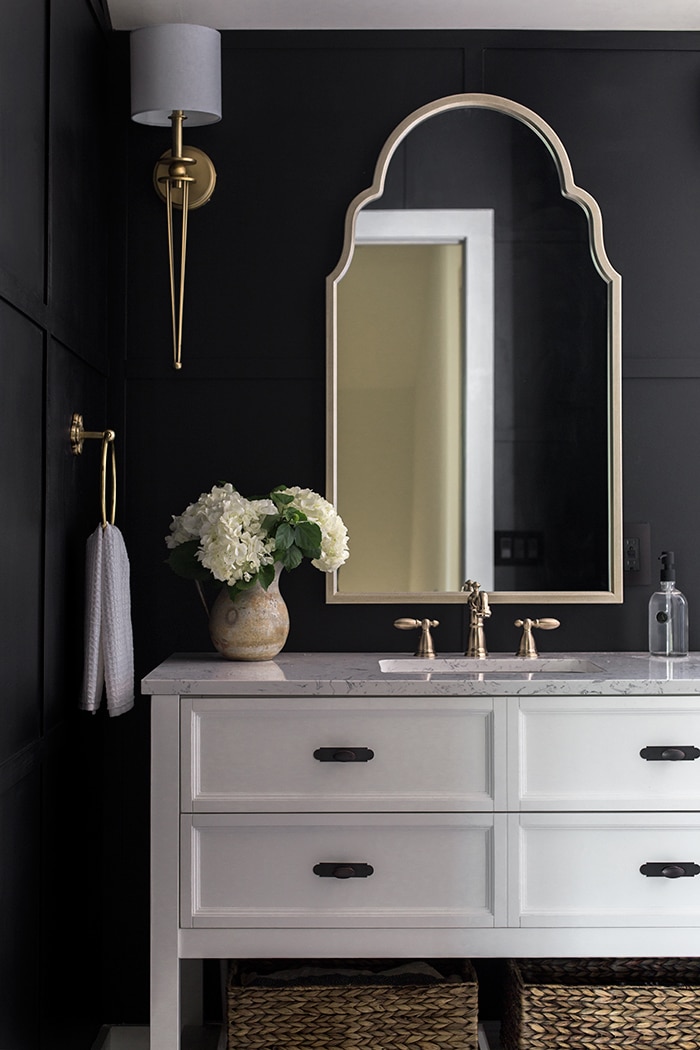
The sconces were also something I couldn’t resist and an unexpected touch for a bathroom.
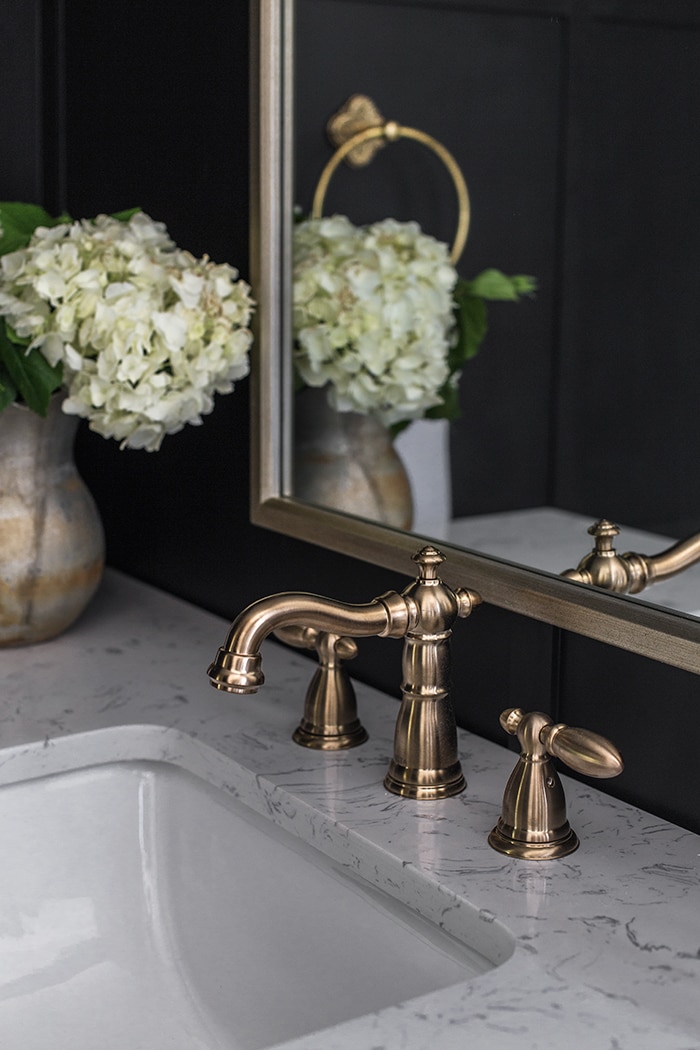
I fell in love with the vintage look of the Delta Victorian champagne bronze faucet which was a bit of a splurge for me (the price has dropped quite a bit since I bought it) but with functional pieces like this, quality is often worth paying for.
I love finding ways to customize furniture, and bathroom vanities are no exception. I swapped out the factory chrome handles for Amerock backplates and oval knobs, which go a long way in giving it a more high end look.
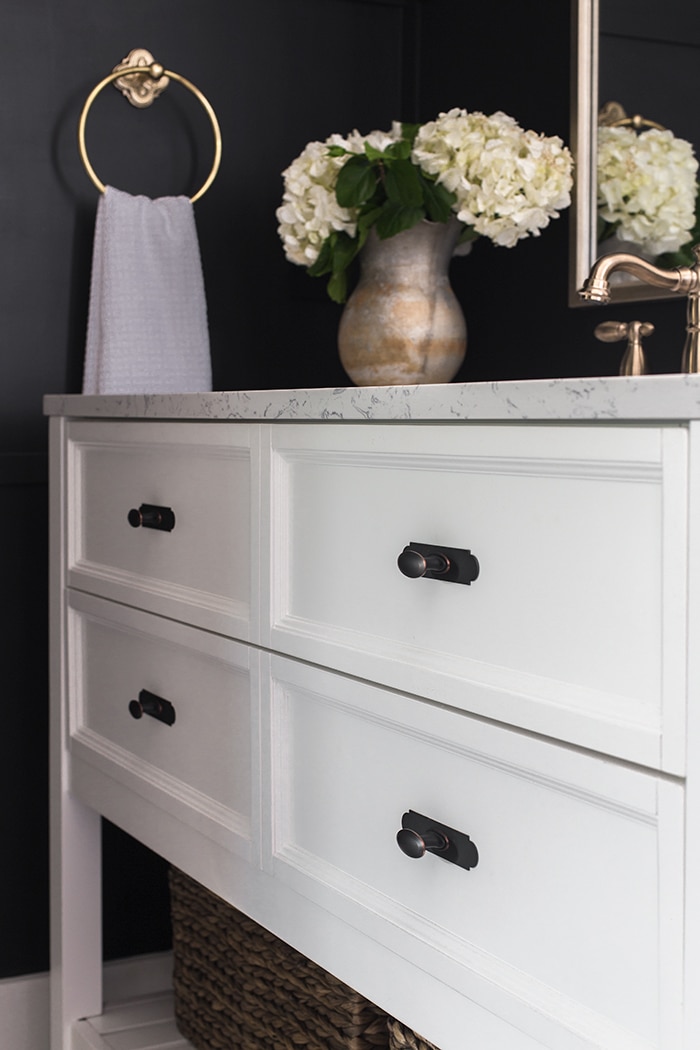
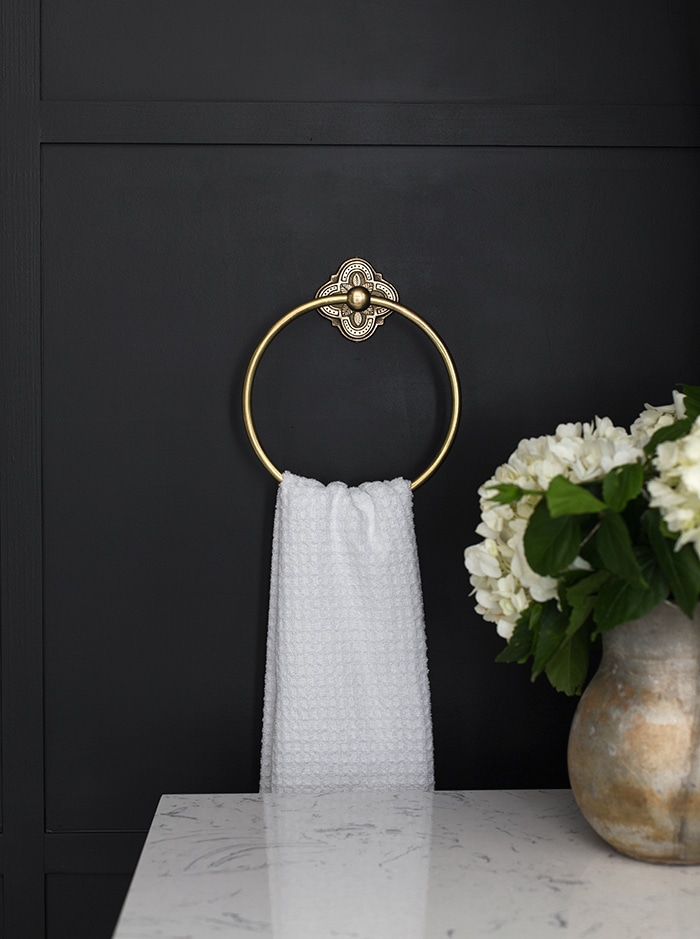
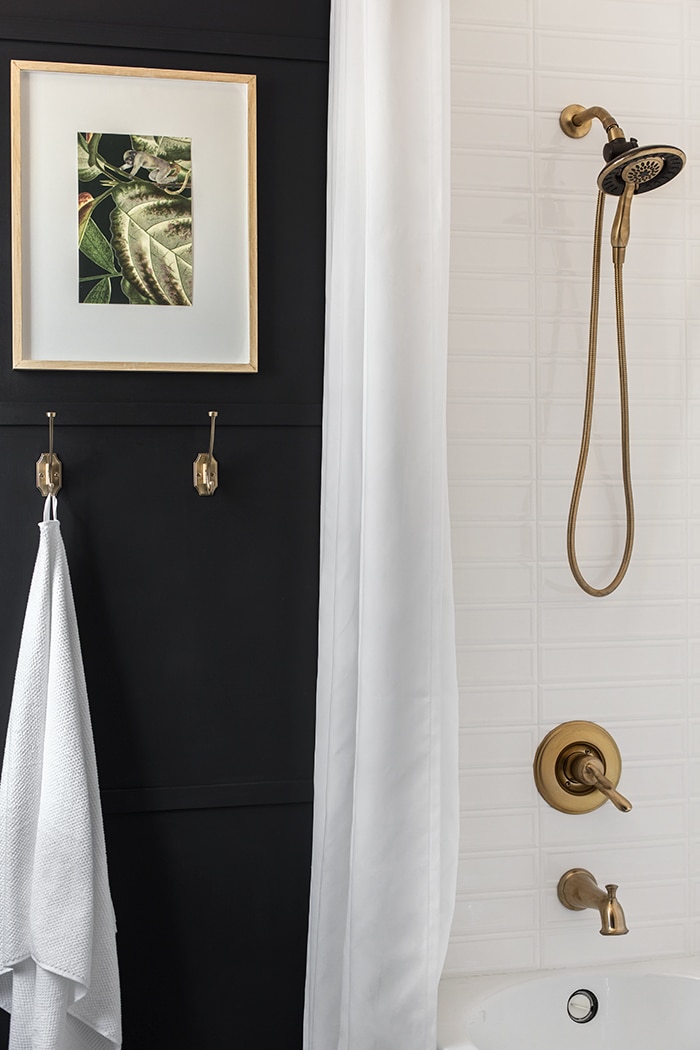
Every room needs a fun little detail or two, and this Anthro towel ring fit the bill.
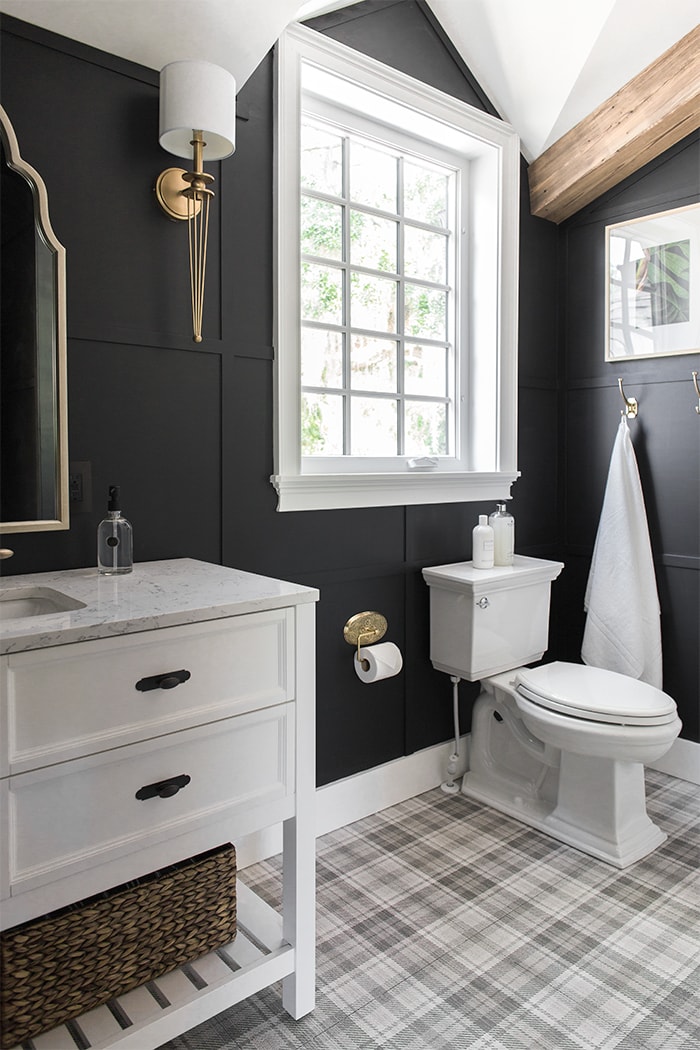
I can’t get over the look of this textured plaid tile. Or the fact that so many of you thought it was carpet 😉
I also can’t decide which view of the bathroom I like more…
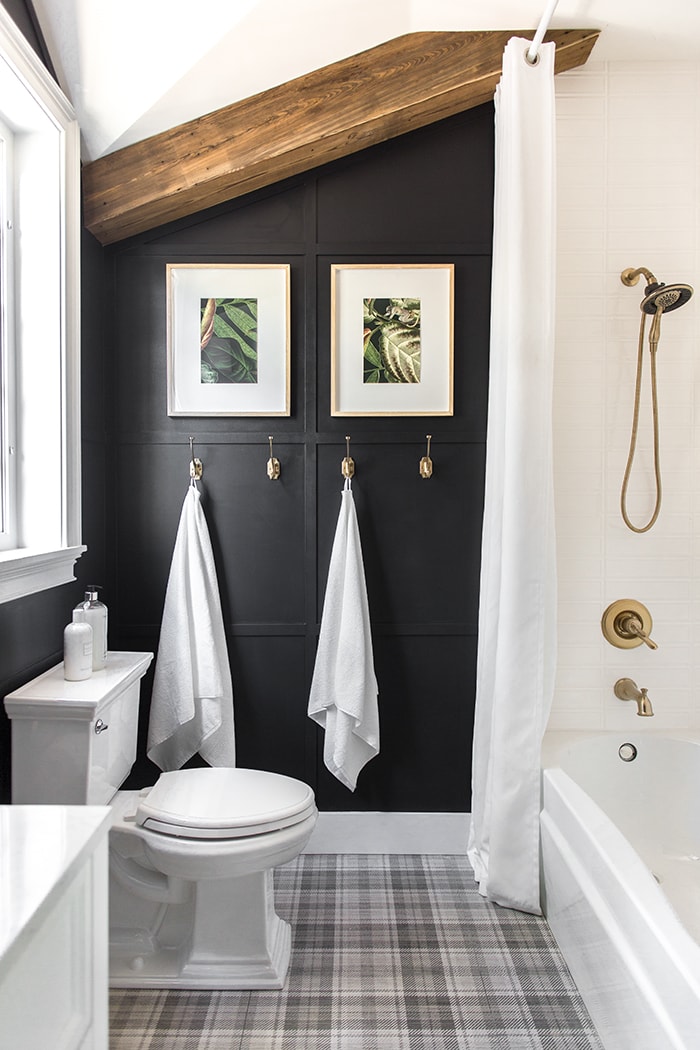
I used $13 Ikea Hovsta frames, made my own “mats” with white posterboard from CVS, and cut up a free wallpaper sample from Rebel Walls for the art.
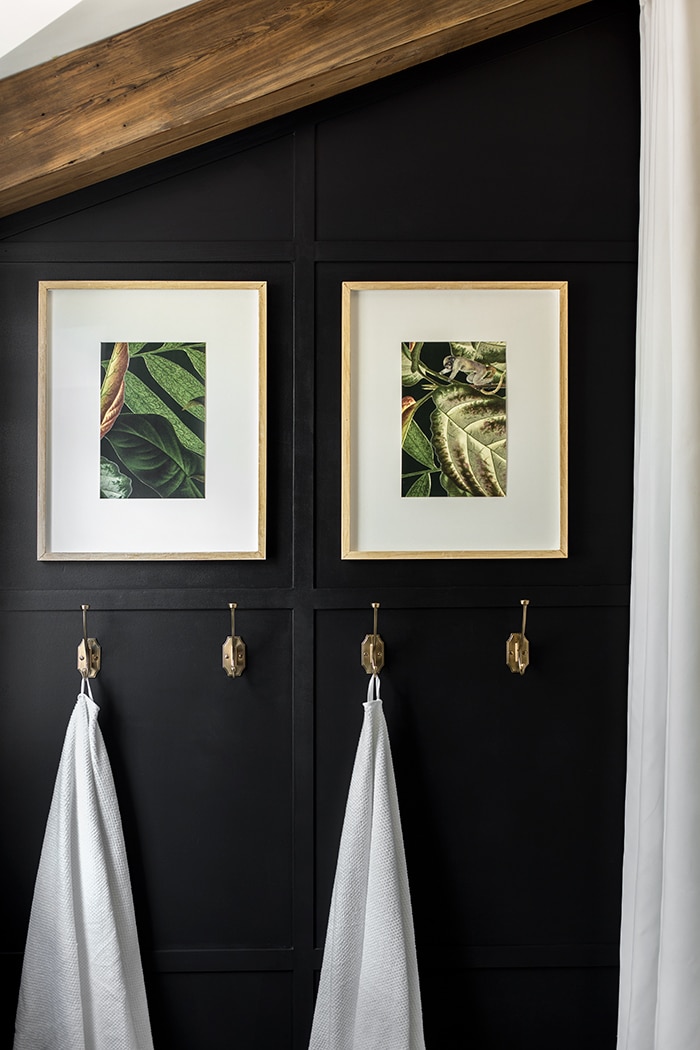
And of course, another appearance from my all time favorite $6 champagne gold hooks.

The shower faucet/tub combo is also Delta champagne bronze to match the sink faucet, and it’s surprisingly super affordable (the price has dropped even more since I purchased!) The hand sprayer option should really come in handy for baby bath time.
Is it weird to be in love with a toilet? Because this is my first true toilet love—it’s just so handsome. I ended up buying two more for the other bathrooms.
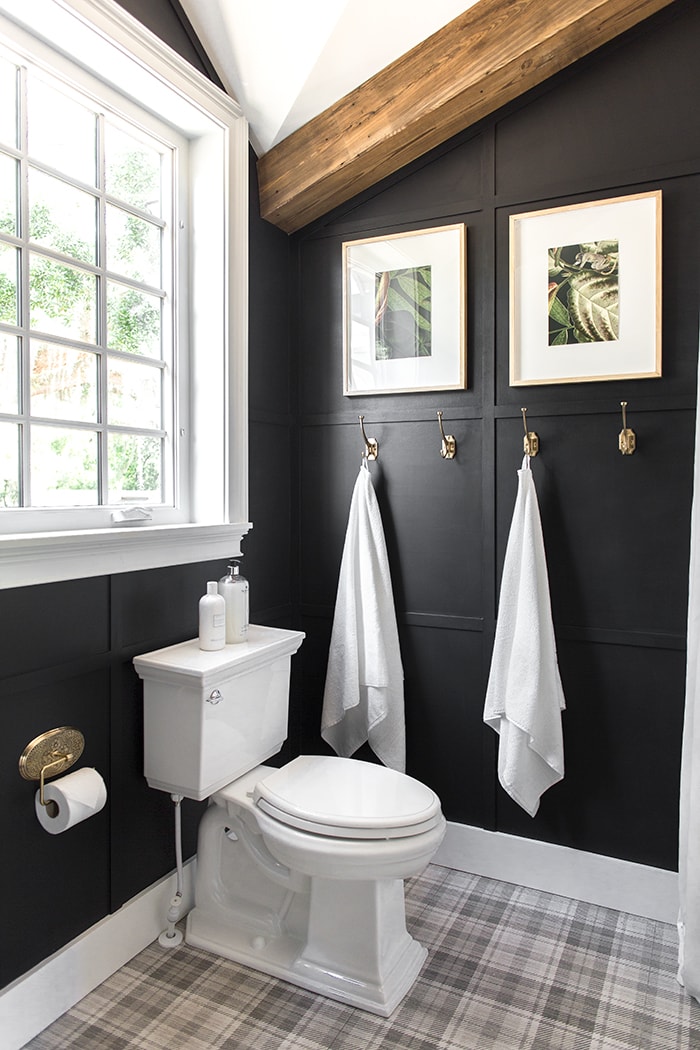
Why settle for a boring toilet paper holder when you can have this work of art? Another Anthro find.
One more small but important detail—thank goodness for black outlets! Do you see it hiding to the right of the mirror?
There’s another one on the wall next to the hand towel, but you’d never know because it blends in so seamlessly. I used these GFCIs and black wall plates. If you look closely in the mirror, you can see the reflection of the black light switches too. Can’t forget these small but important details!
Alright friends, time to wrap up our tour. Make sure to watch the reveal video as well if you haven’t, so you can feel like you’re actually there in real life (or at least the closest you can get until we’re all walking around with virtual reality goggles!)
I hope this bathroom is proof that high-end design is definitely do-able with a little DIY, and on a budget!
Sources
Valspar Signature eggshell in Cracked Pepper
Delta Linden shower/tub faucet
Amerock cabinet backplates & knobs
Brass wall sconces (discontinued)
Anthropologie toilet paper holder
16×20″ picture frames (stained with dark wax)
Art: wallpaper sample from Rebel Walls
The final total for everything (not including installs, which is built into our new construction cost) came in at right around $3500, which I think is pretty amazing starting from primed drywall and subfloor to what we have now! Especially since there were a couple splurges like the Delta faucet and Kohler toilet. I really couldn’t be happier with the way this space turned out. What do you think of the renovation, and are you surprised at the cost? Let me know in the comments (or over on Instagram!)
Oh, and for you sleuths out there who noticed a couple unfinished parts, yes we still need to grout and get a drain/overflow cap for the tub. So this room is technically only 95% done… but that’s close enough for me at this point 😉

One room down in the Heights House—and a ton more to go! We’re just getting started over here, and this week we’ll be focusing on the master bathroom (along with continuing my weeks-long stenciling saga at the Riverside Retreat). Have you been following all the progress in my IG stories? There’s so much going on, I can’t keep it all straight! Catch you there,


Lori says
Love it and thank you for all of the info.!
Vanessa says
It’s lovely Jenna and Lucas, well done!
Shelly Smith says
Annnnd…she does it again. I wouldn’t have picked these things out for myself in a million years on their own, but when you do it, it’s magical. You are truly gifted Jenna. Thank you for sharing your ideas.
Mary in VA says
This is stunning! Thanks to Marty for referring us over here.
Jess Hartman says
Love it!!!! You are always a source of inspiration. Do you mind sharing grout type (sanded/non-sanded)/color you would use for the “subway” tile in the shower as well as the floor tile? Thank you so much for your recommendations.
Jenna Sue says
Thanks Jess! We used Maipei in Avalanche (unsanded) in the shower. The floors haven’t been grouted yet 🙂
Jess Hartman says
Love it!!!! You are always a source of inspiration. Do you mind sharing grout type/color you would use for the “subway” tile in the shower and floor tile? Thank you so much for your recommendations.
Indulgence says
Love it. I’m thinking of using a similar panelled wall but with bolder (wider) strips in a dining room.
Linda Grubbs says
Nailed it! So beautiful. Love the dramatic look that still looks cozy. Excellent value for your money! (That floor! ?) Good job guys!!
Katherine Allen says
Such a beautiful bathroom. I notice the vanity does not have the backsplash attached as shown on the Home Depot website. Is it an optional choice to have it attached or did you have to do something special to remove it?
Jenna Sue says
The backsplash came with the vanity (a separate piece) but I opted not to use it — I prefer the cleaner look without!
Heather says
This is truly inspirational! I’m loving this mix of textures that bring such a richness to the design. I’m finally getting to remodel my own house (husband and I are home renovators and our house is always last on the list) and I plan to do a black and white bath as well. Thank you for sharing your carefully curated choices. Fantastic work!!
Denise says
Bold & Beautiful! Love it so much simply cannot wait to see the other rooms in your gorgeous new home. And the baby’s room!
Karen Bunch says
You guys do magical work. You pull off such beautiful spaces that look like they would have cost thousands and thousands. It’s truly an inspiration!
Thank you,
Karen
Monica says
It’s absolutely stunning Jenna! I love it!
Andrea Nisbet says
Looks amazing. Loving the black walls with the white and gold fixtures.
Well done to both of you.
Marynn says
It looks SO good!!! Great job and I can’t wait to see what’s up next!