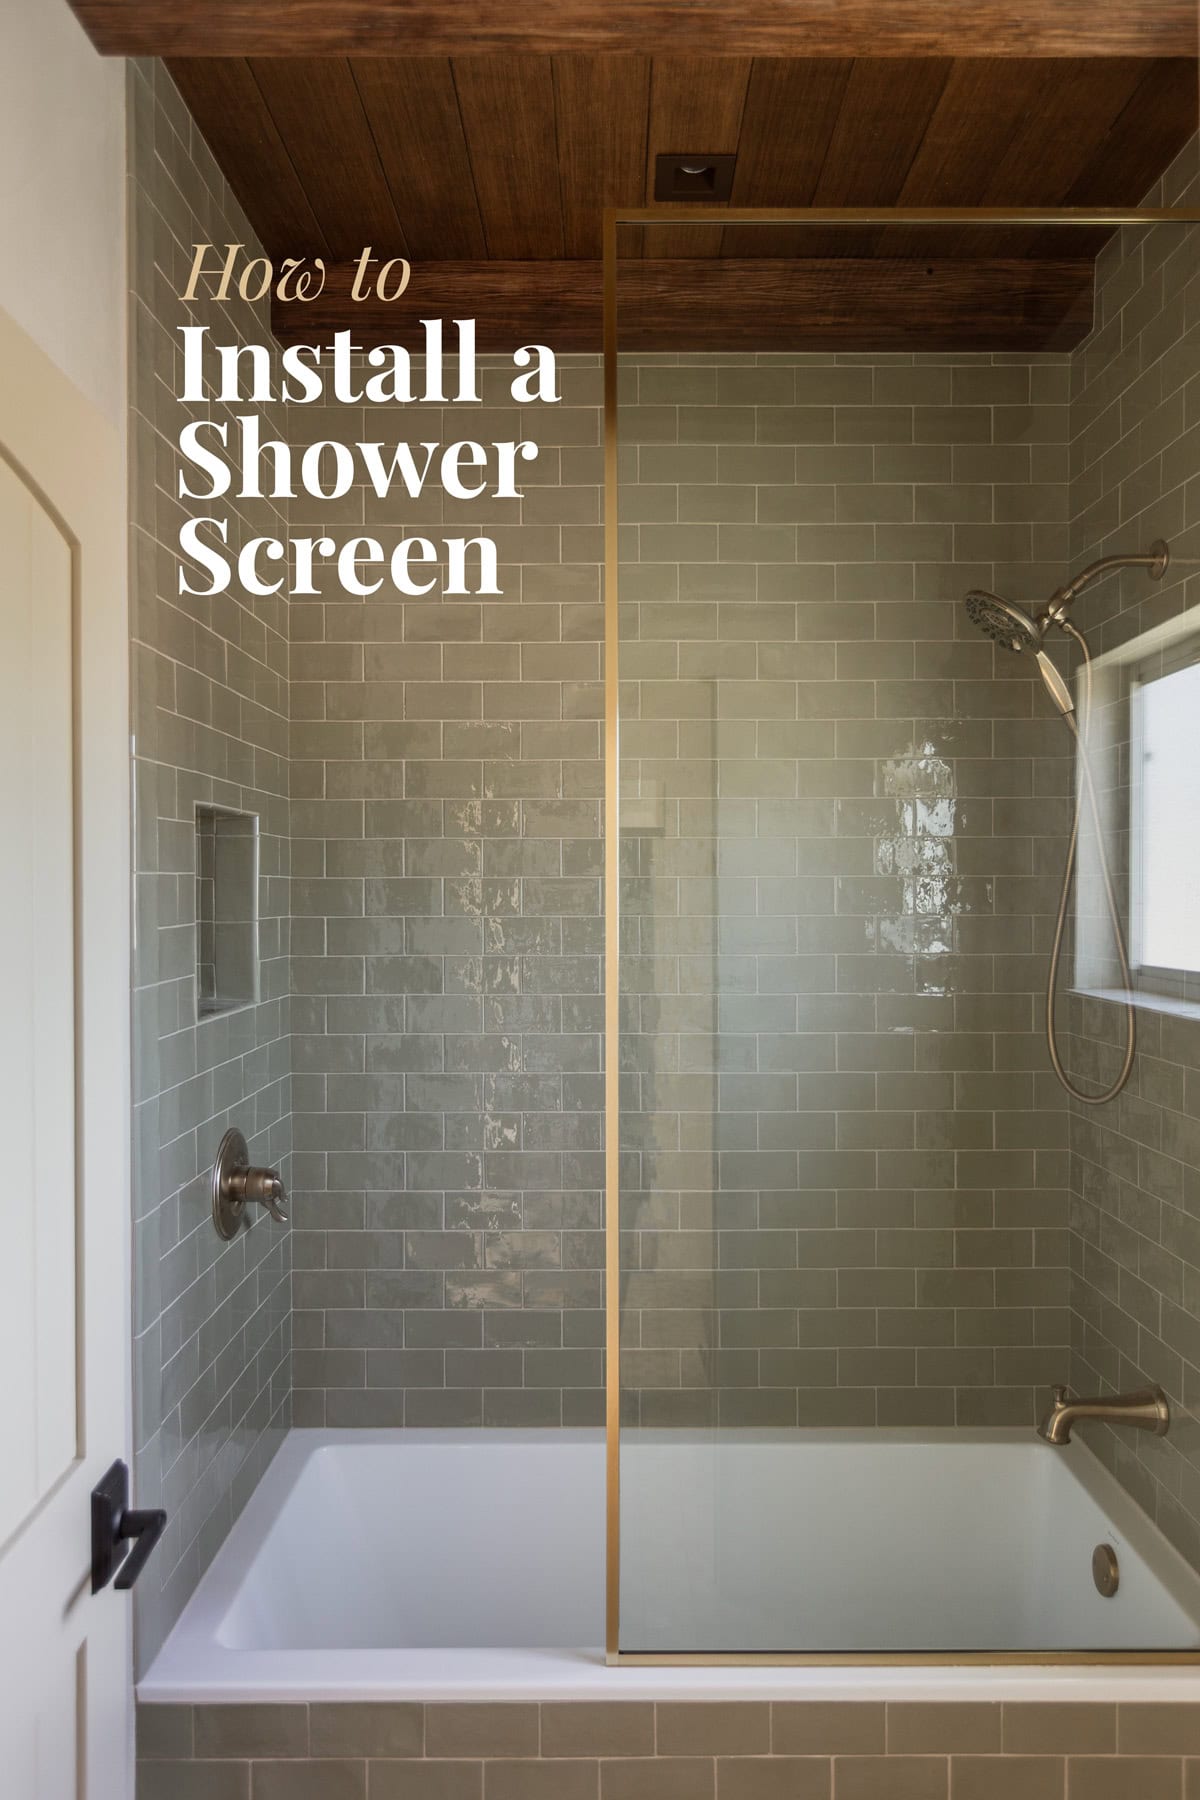
If you’re ready to trade your shower curtain for a cleaner, low maintenance and permanent solution without hiring a contractor—a shower screen is the way to go. Here’s why I chose one for our jack & jill bathroom, and how you can install it in less than an hour.
Why choose a shower screen?
In the past I’ve opted for shower curtains because they’re quick, easy and affordable. However, we’ve learned that they aren’t ideal for rentals. They spill water, trap dirt and mildew, and constantly need to be washed or replaced.
There’s another DIY solution that won’t break the bank: a shower screen. They look cleaner, keep the water inside and all they need is a quick wipe-down. Plus, they make the whole bathroom feel more open and polished. It’s one of those upgrades that will save us time and headaches in the long run.
Also, I’m using a shower screen instead of a bathtub screen because it’s taller. Just like an extra-long shower curtain makes a bathroom feel taller, a taller glass panel has the same effect.
How to install a shower screen
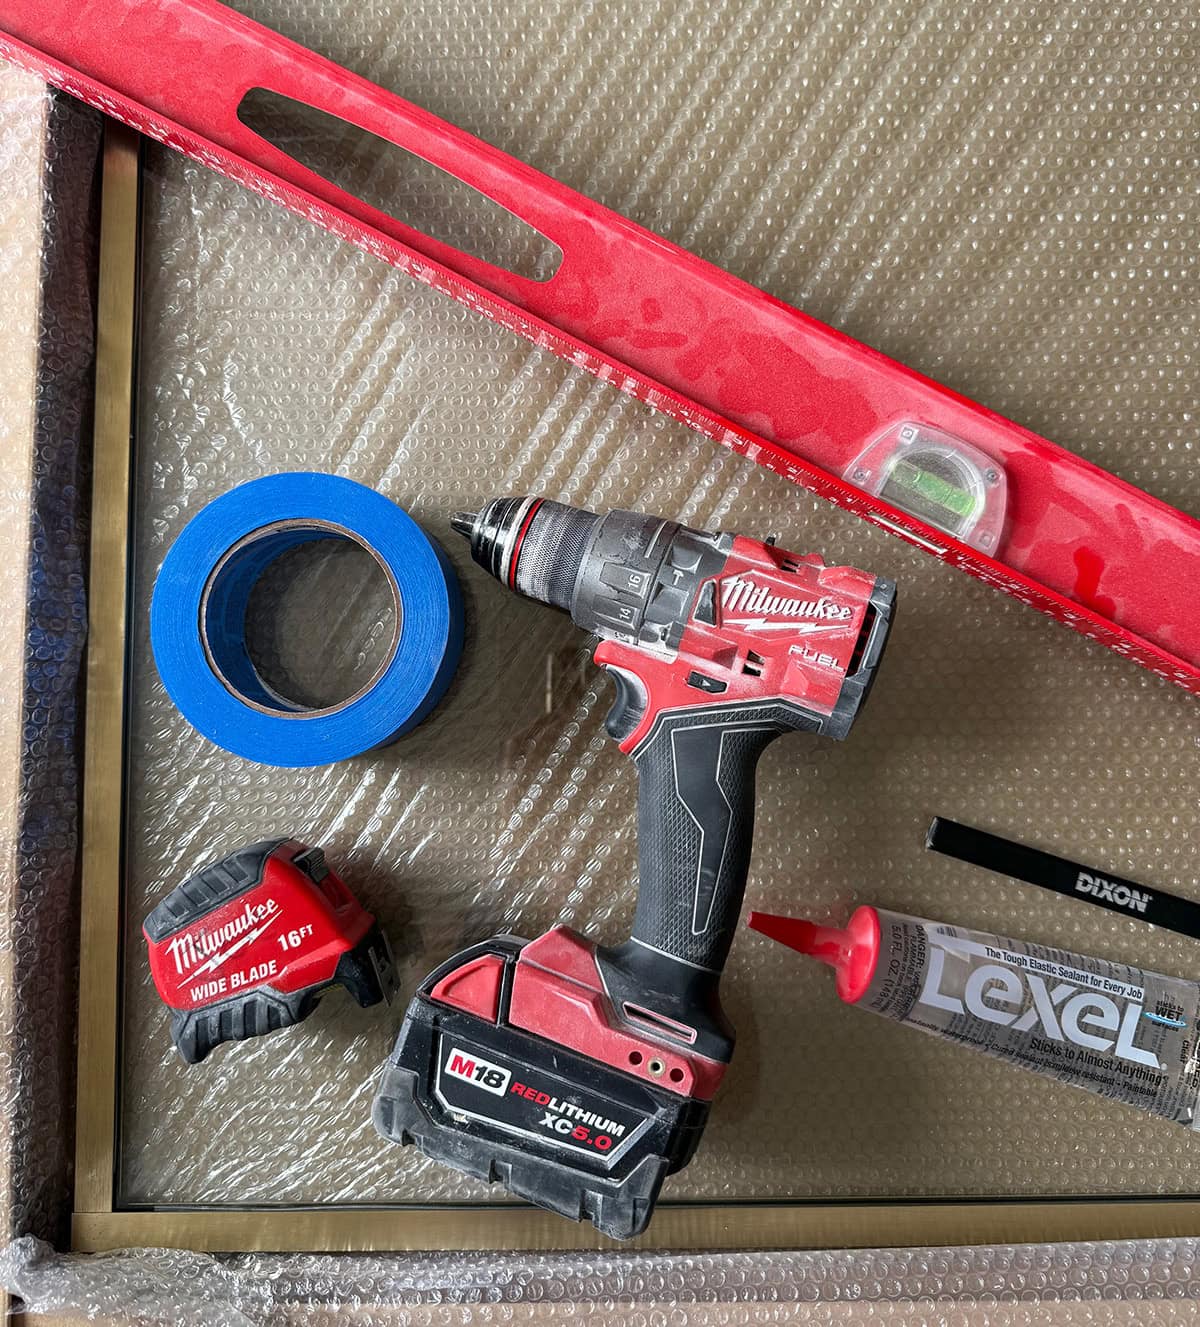
Grab a friend to help, and follow these instructions for a smooth install:
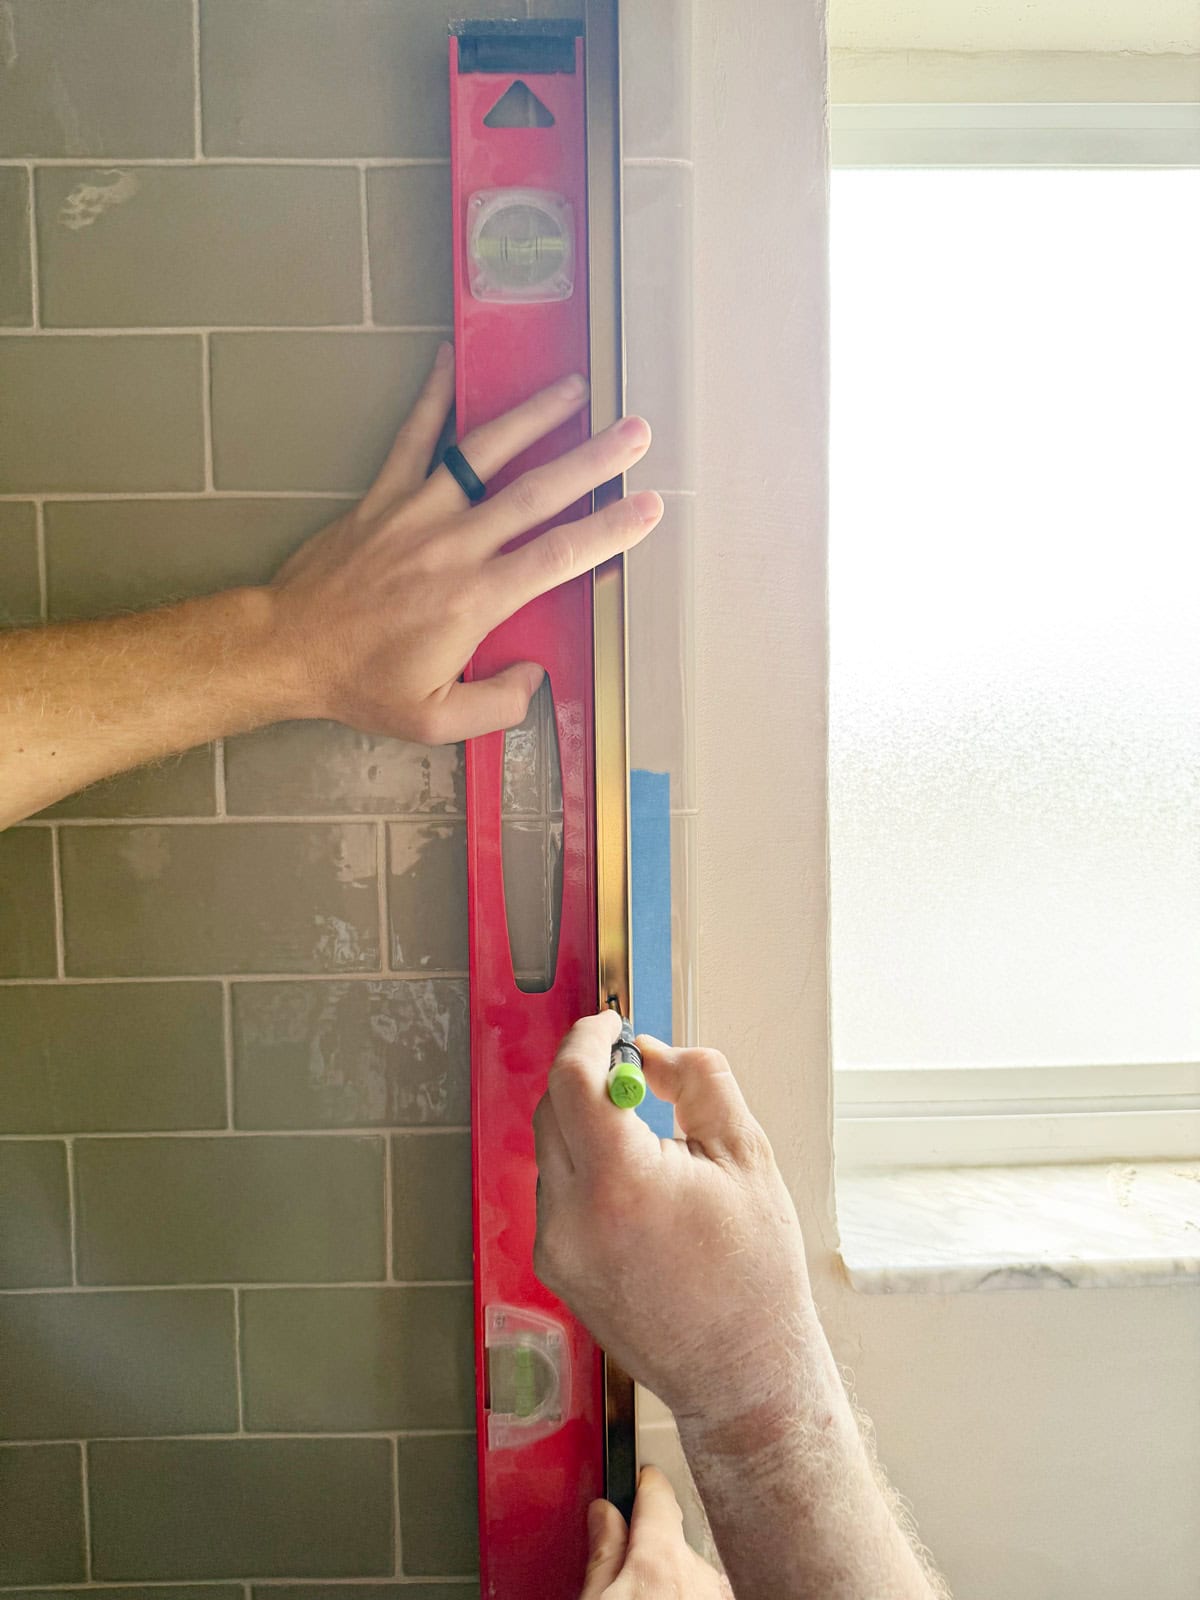
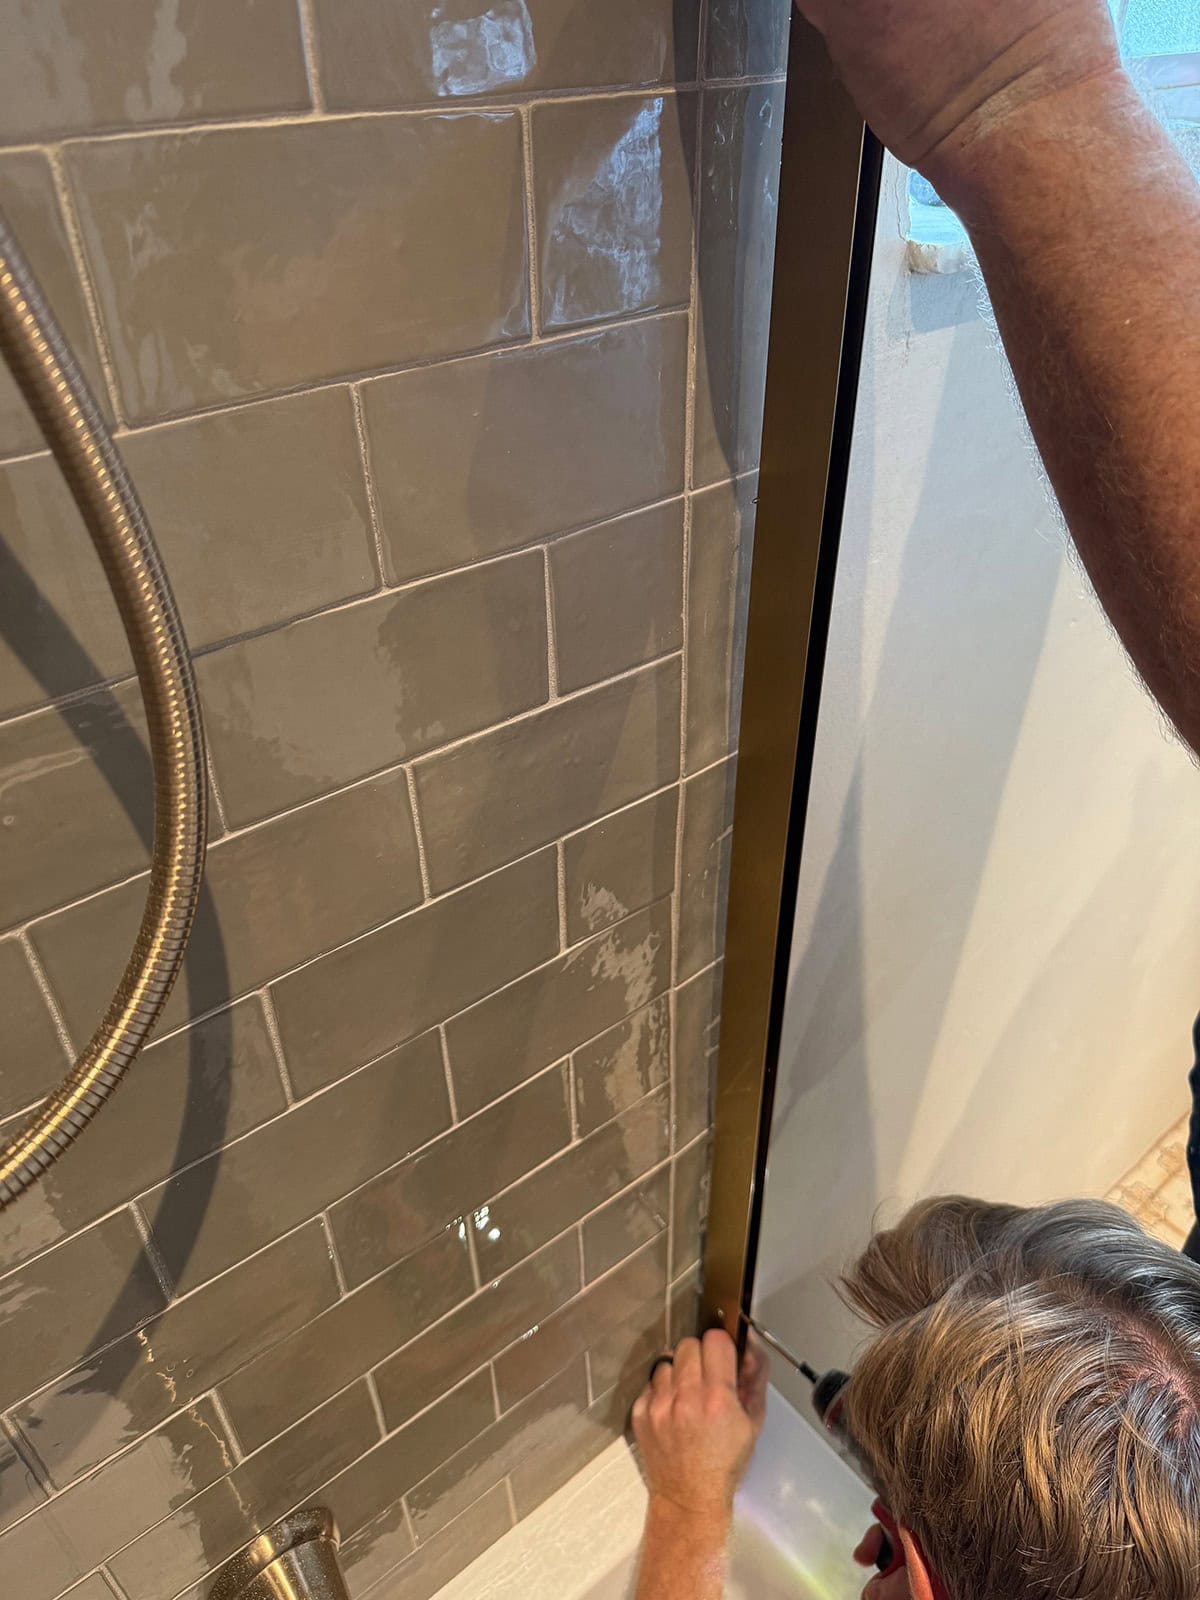
Mark hole locations
Determine exactly where you want the screen installed. We centered ours over the tub and placed painter’s tape down before marking.
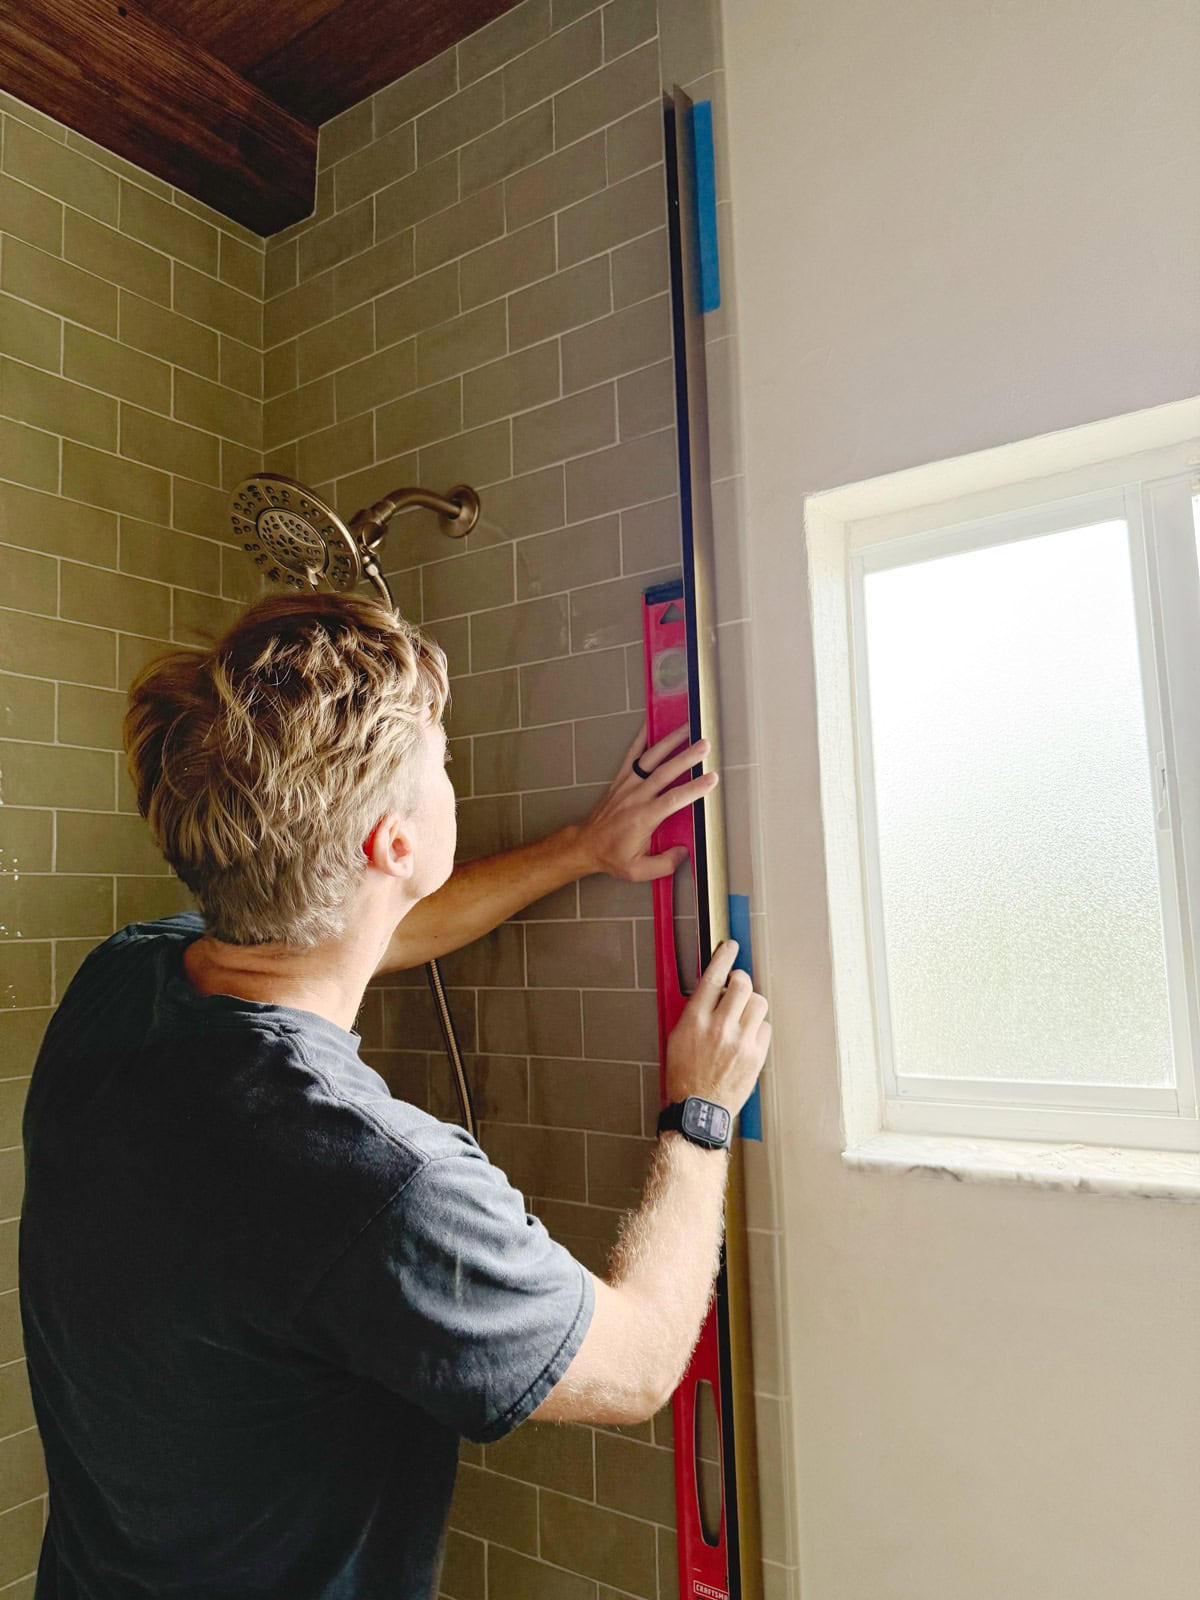
Hold the metal channel in position against a level, and mark the pilot hole locations (our channel had three).
Drill pilot holes
Using a carbide or diamond bit (depending on your tile) drill holes at each mark. Our diamond bit easily cut through the ceramic tile, but you may need to add water to keep it from overheating on harder tile.
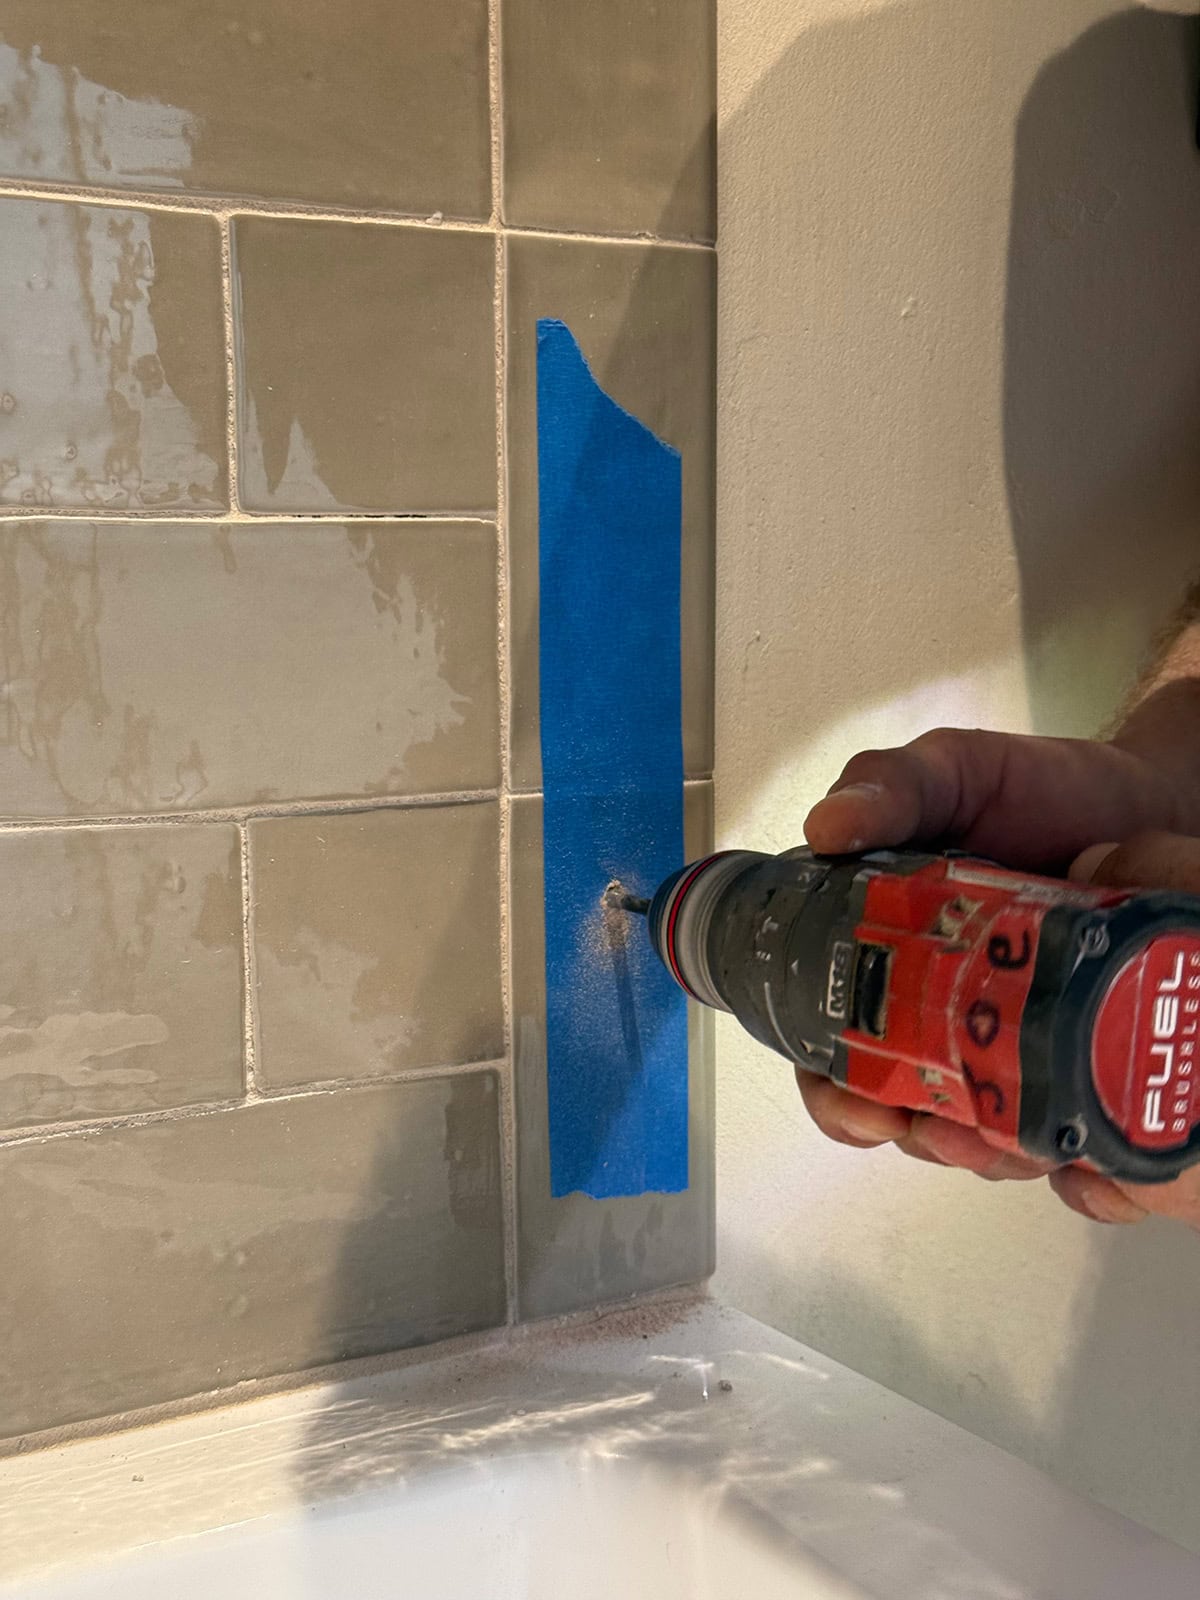
Insert the plastic anchors that come with the screws, and cut any excess off to ensure it’s flush with the tile.
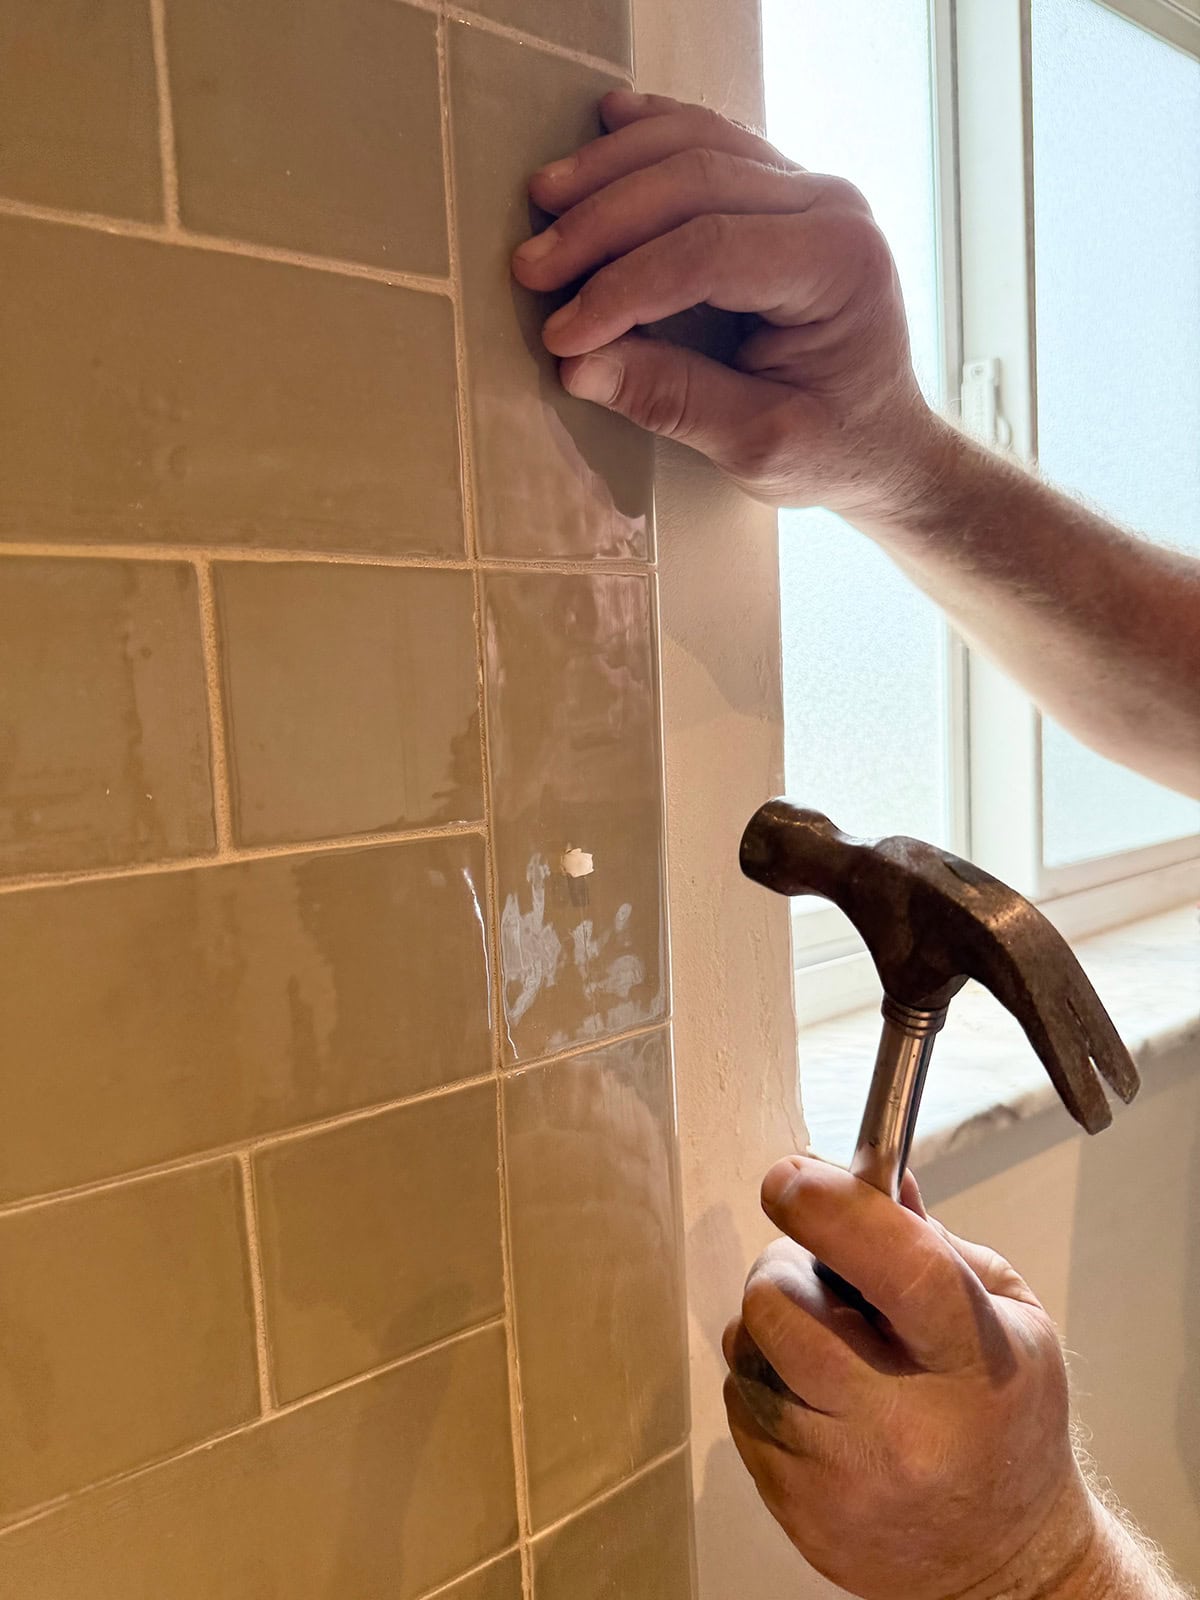
Install channel
Before setting the channel in place, run a bead of clear silicone along the back to seal it. We also added some inside the anchors for extra protection.
Insert the provided screws into each anchor.
Secure glass panel
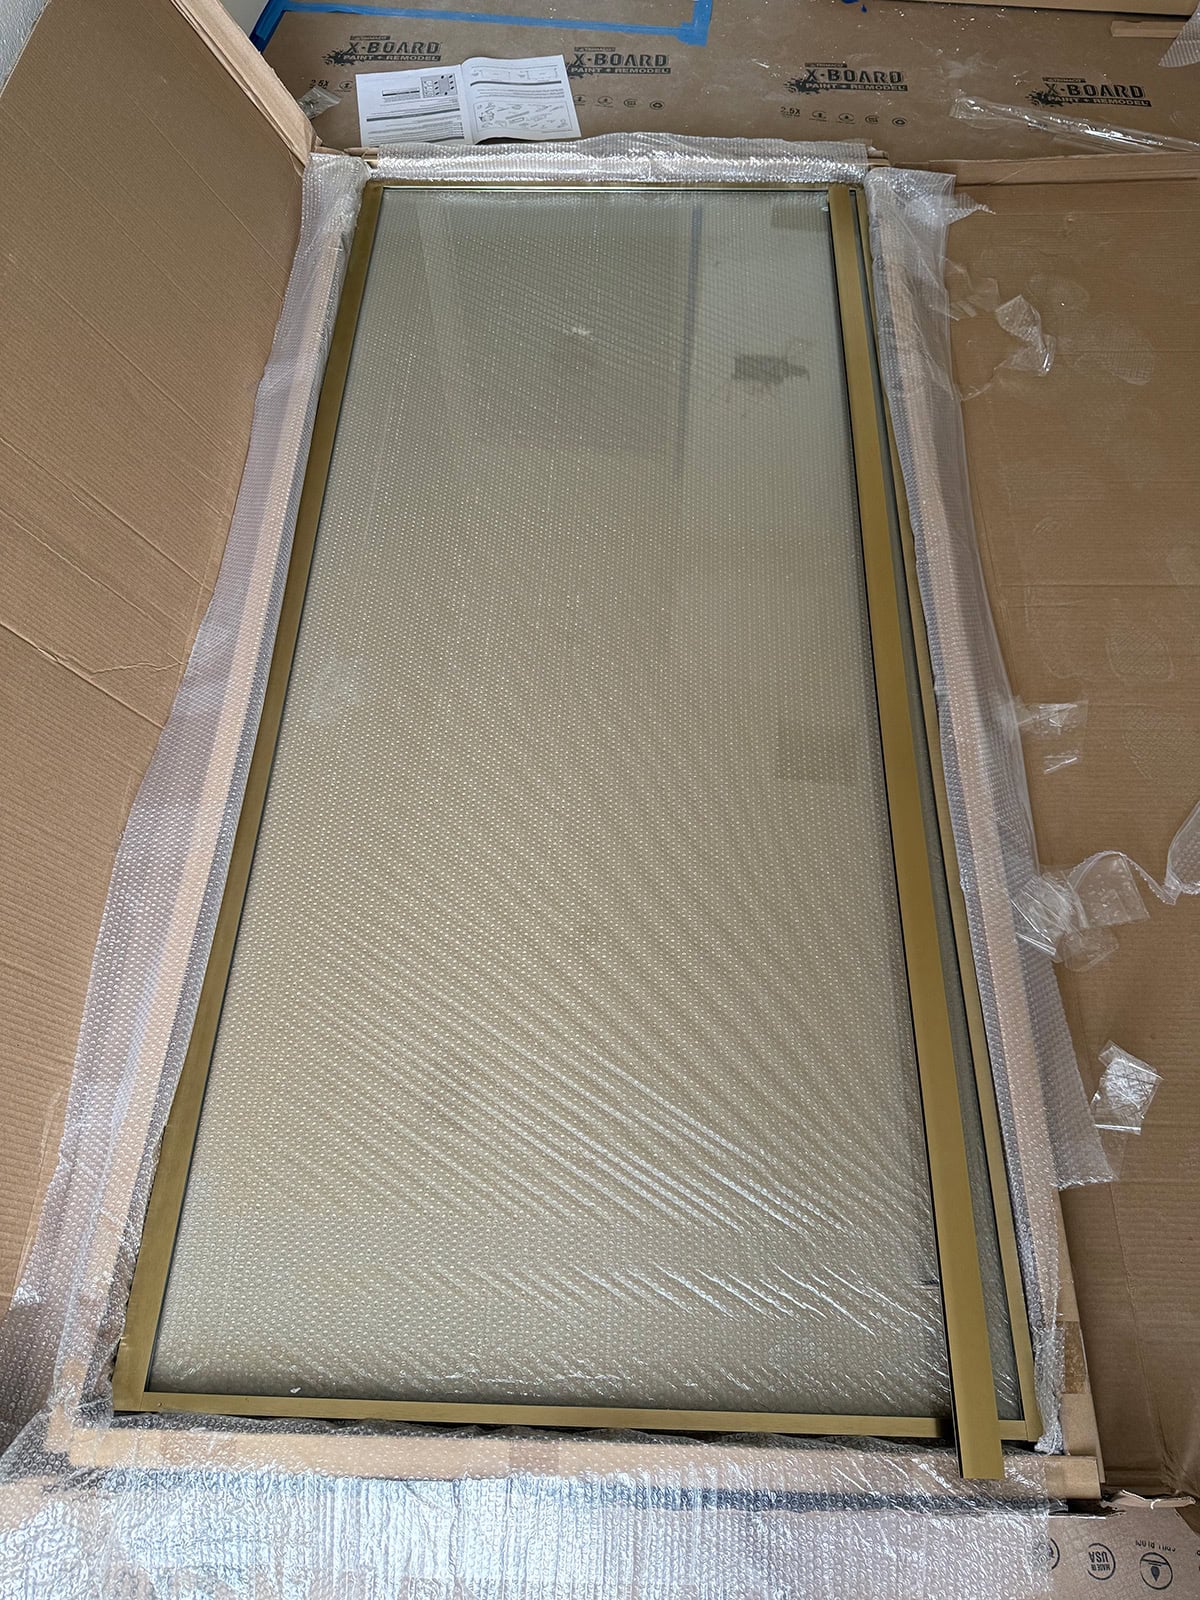
With the channel in place, lift and slide the glass panel into position. Ours was a snug fit, so it took a little shimmying and prying.
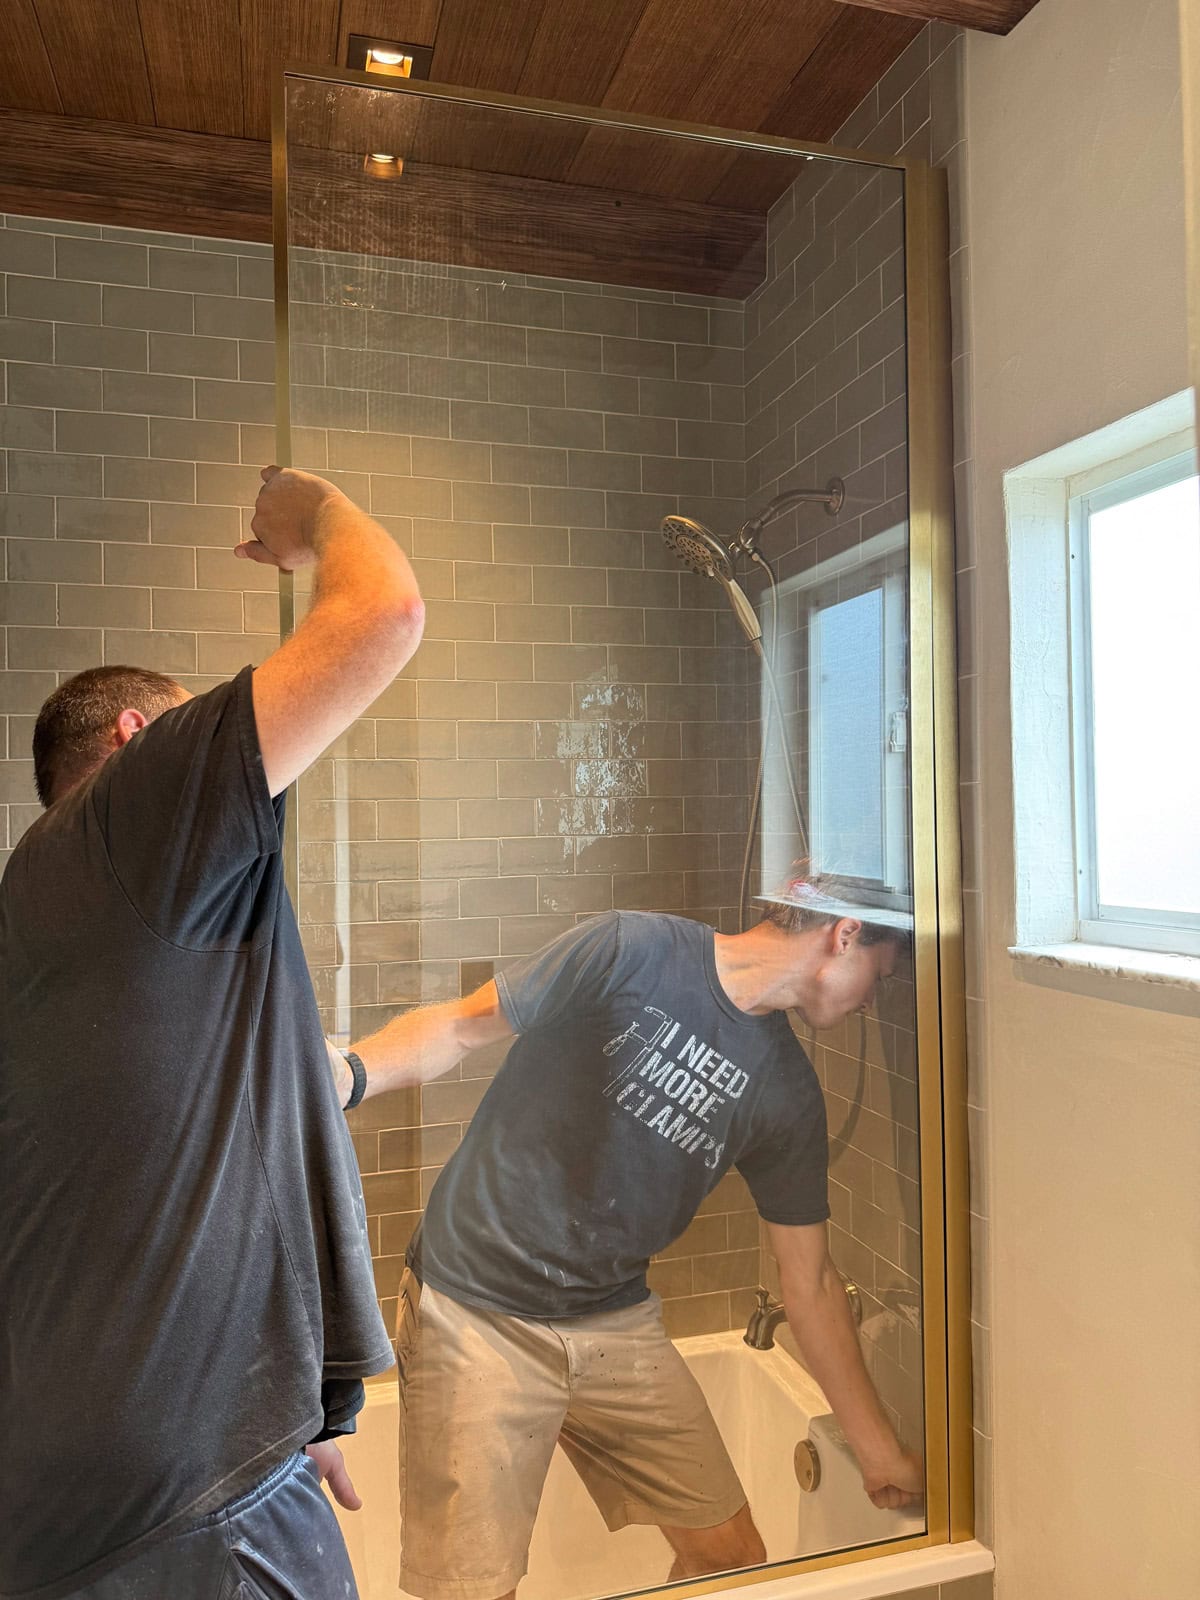
Once fully seated, drill pilot holes and insert the screws into the metal on the inside to secure both pieces together.
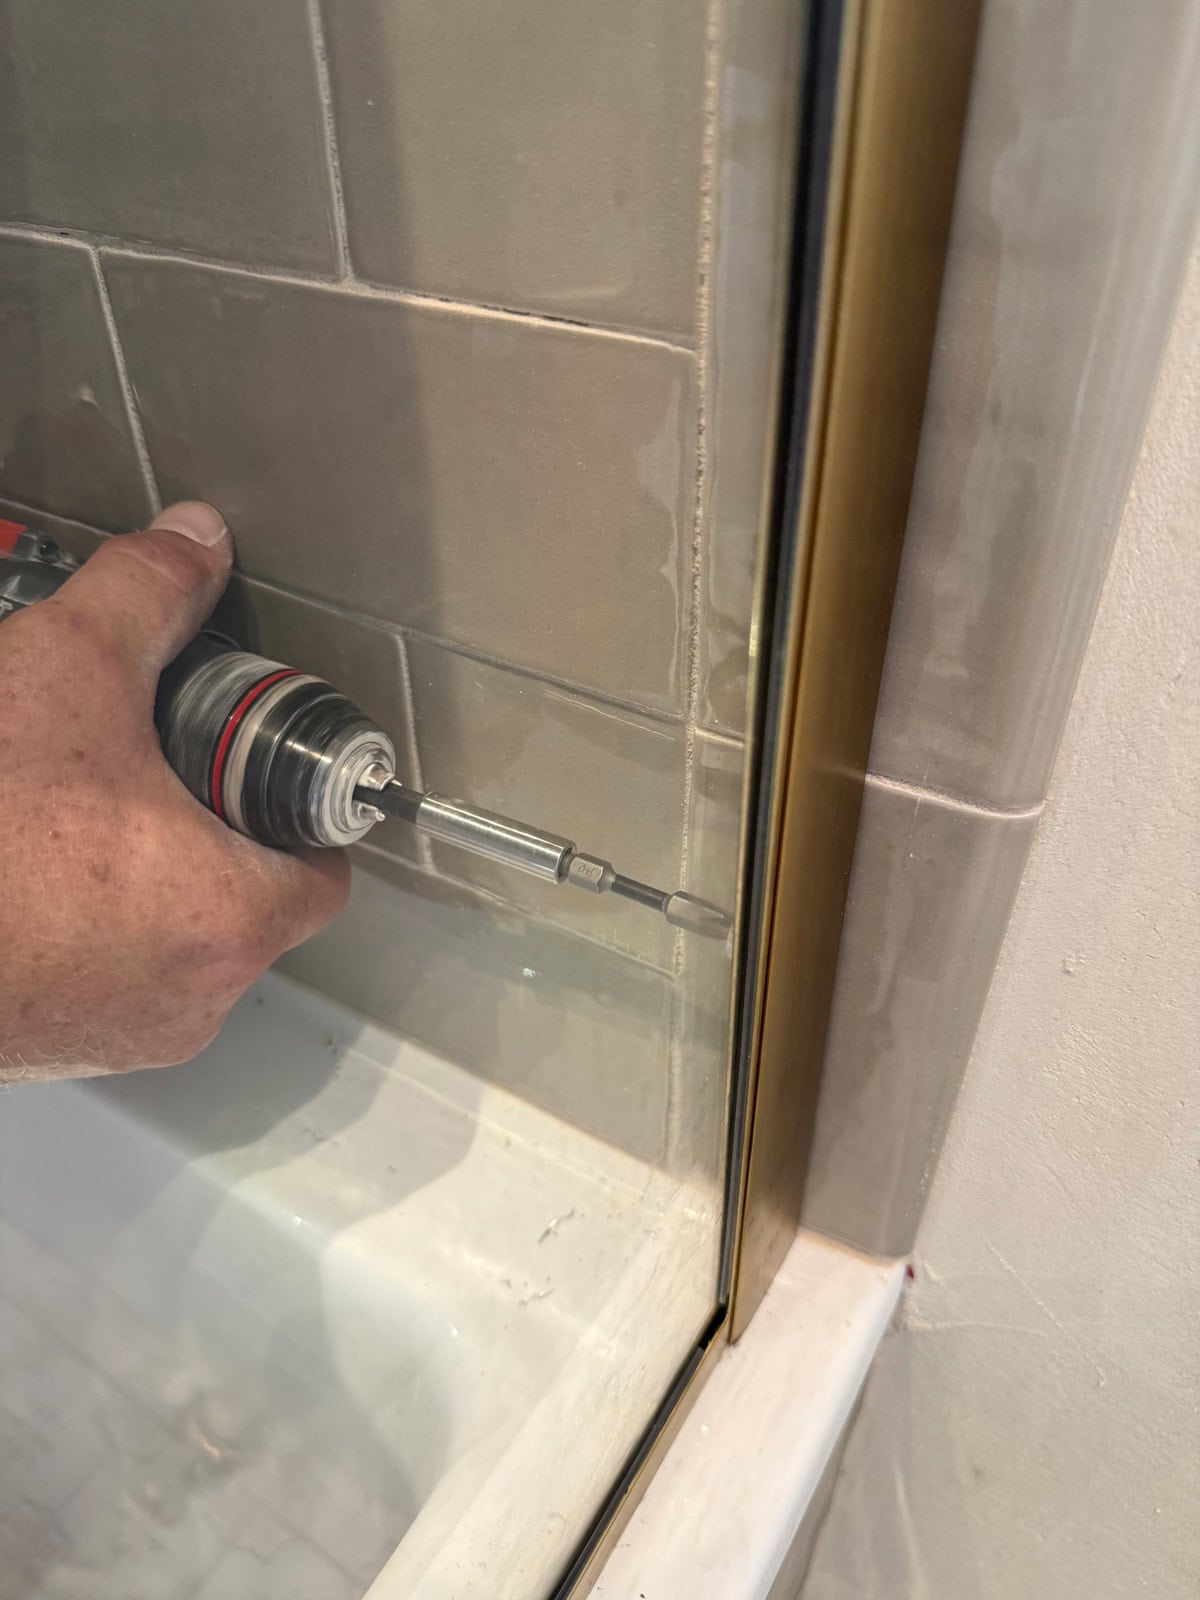
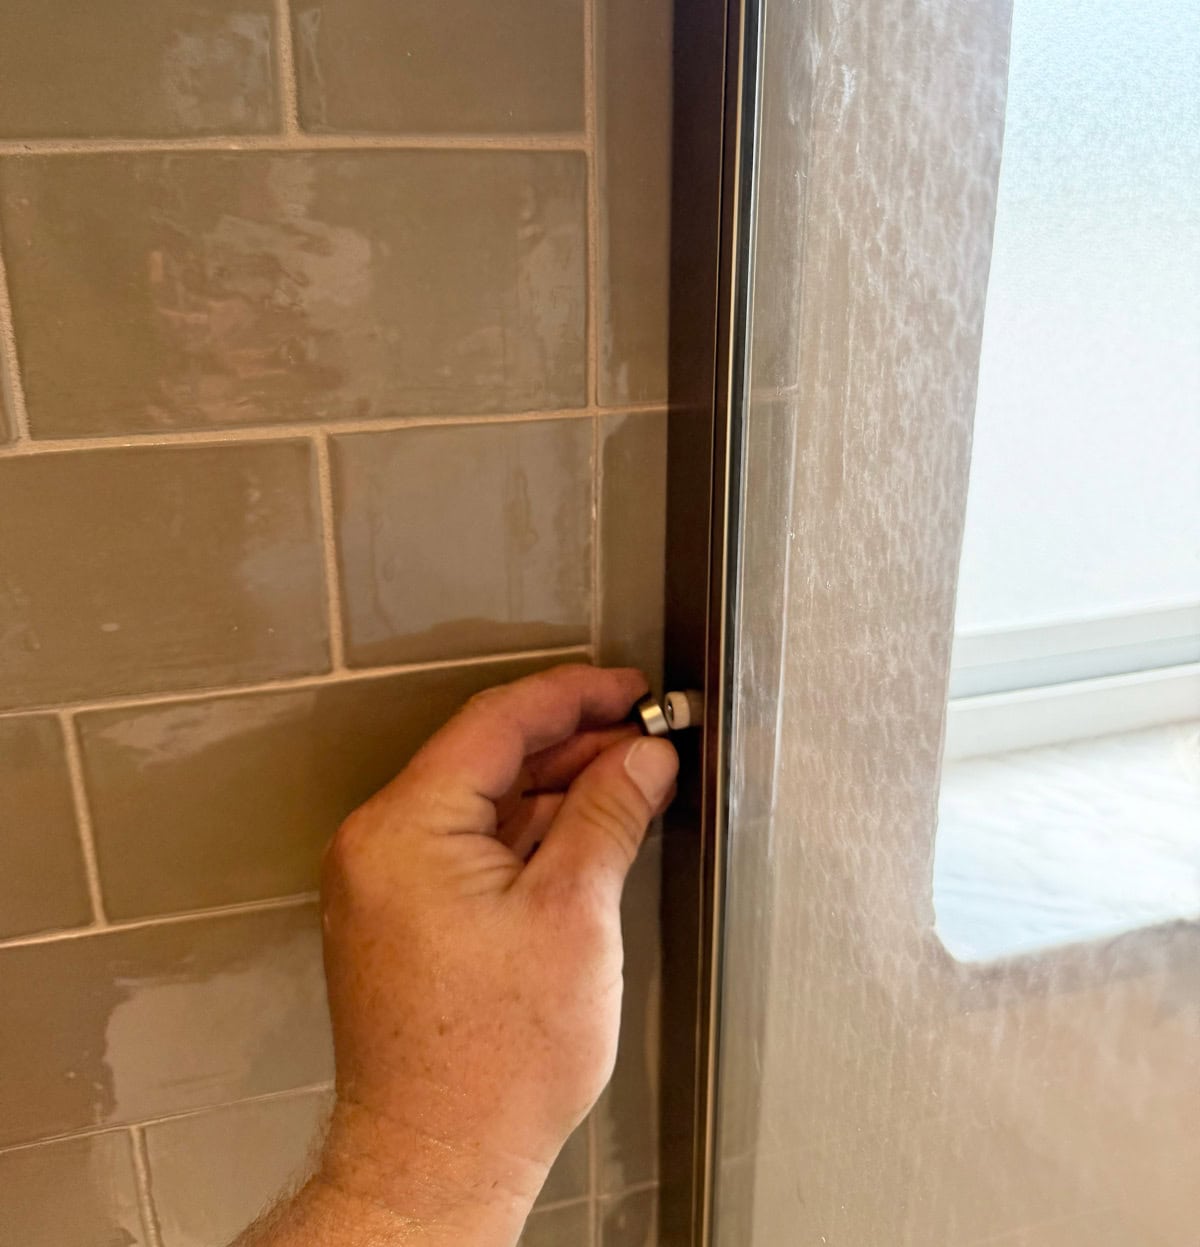
Cover the screws with the provided matching caps.
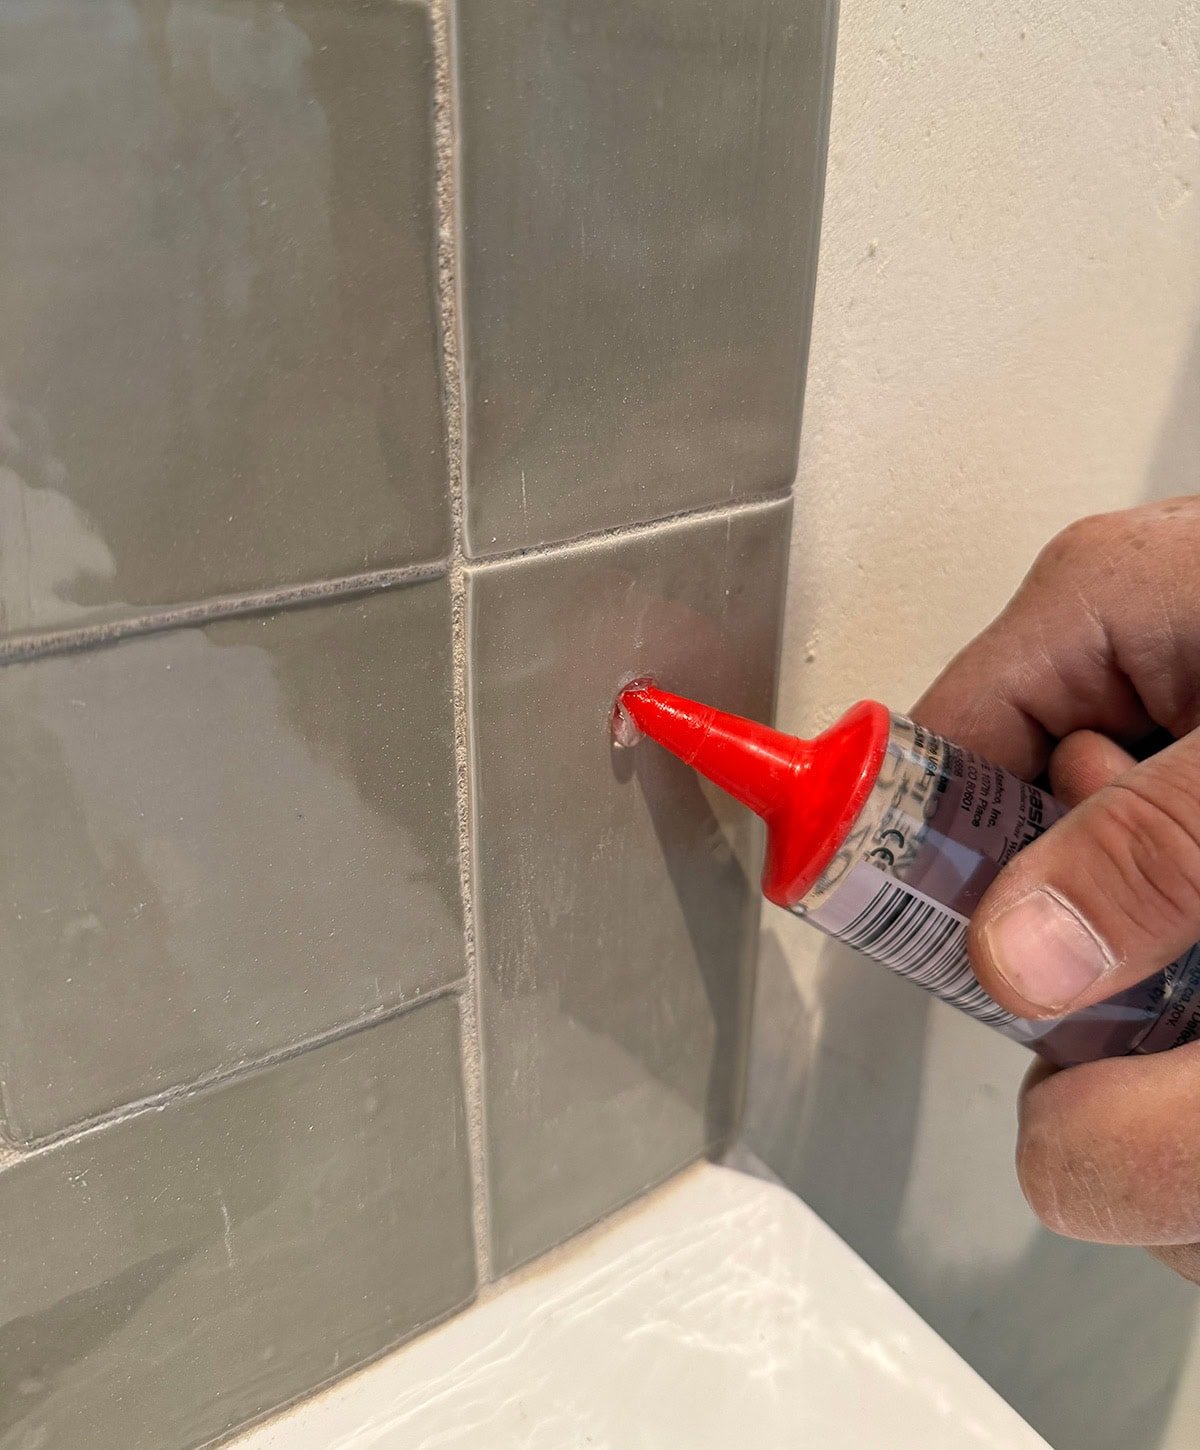
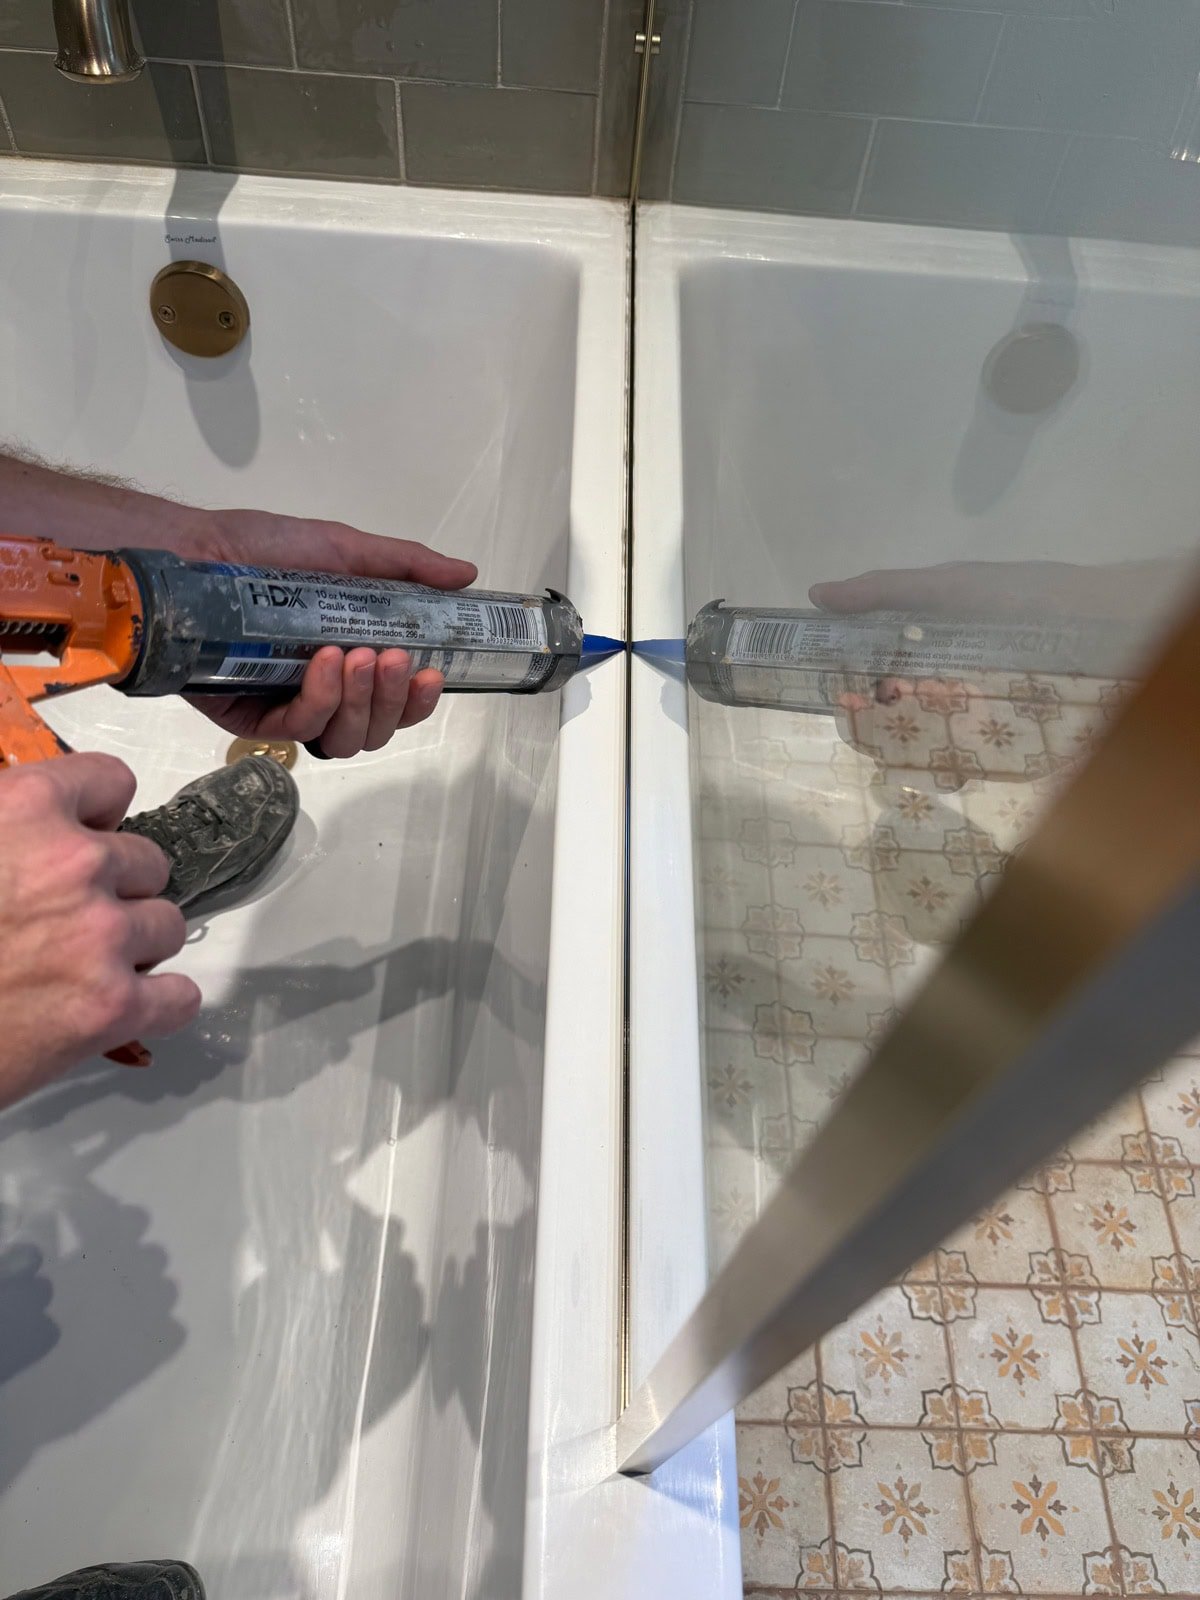
Seal with silicone
Run a thin line of clear silicone along both edges where the screen meets the tub, as well as along the wall to create a watertight seal.
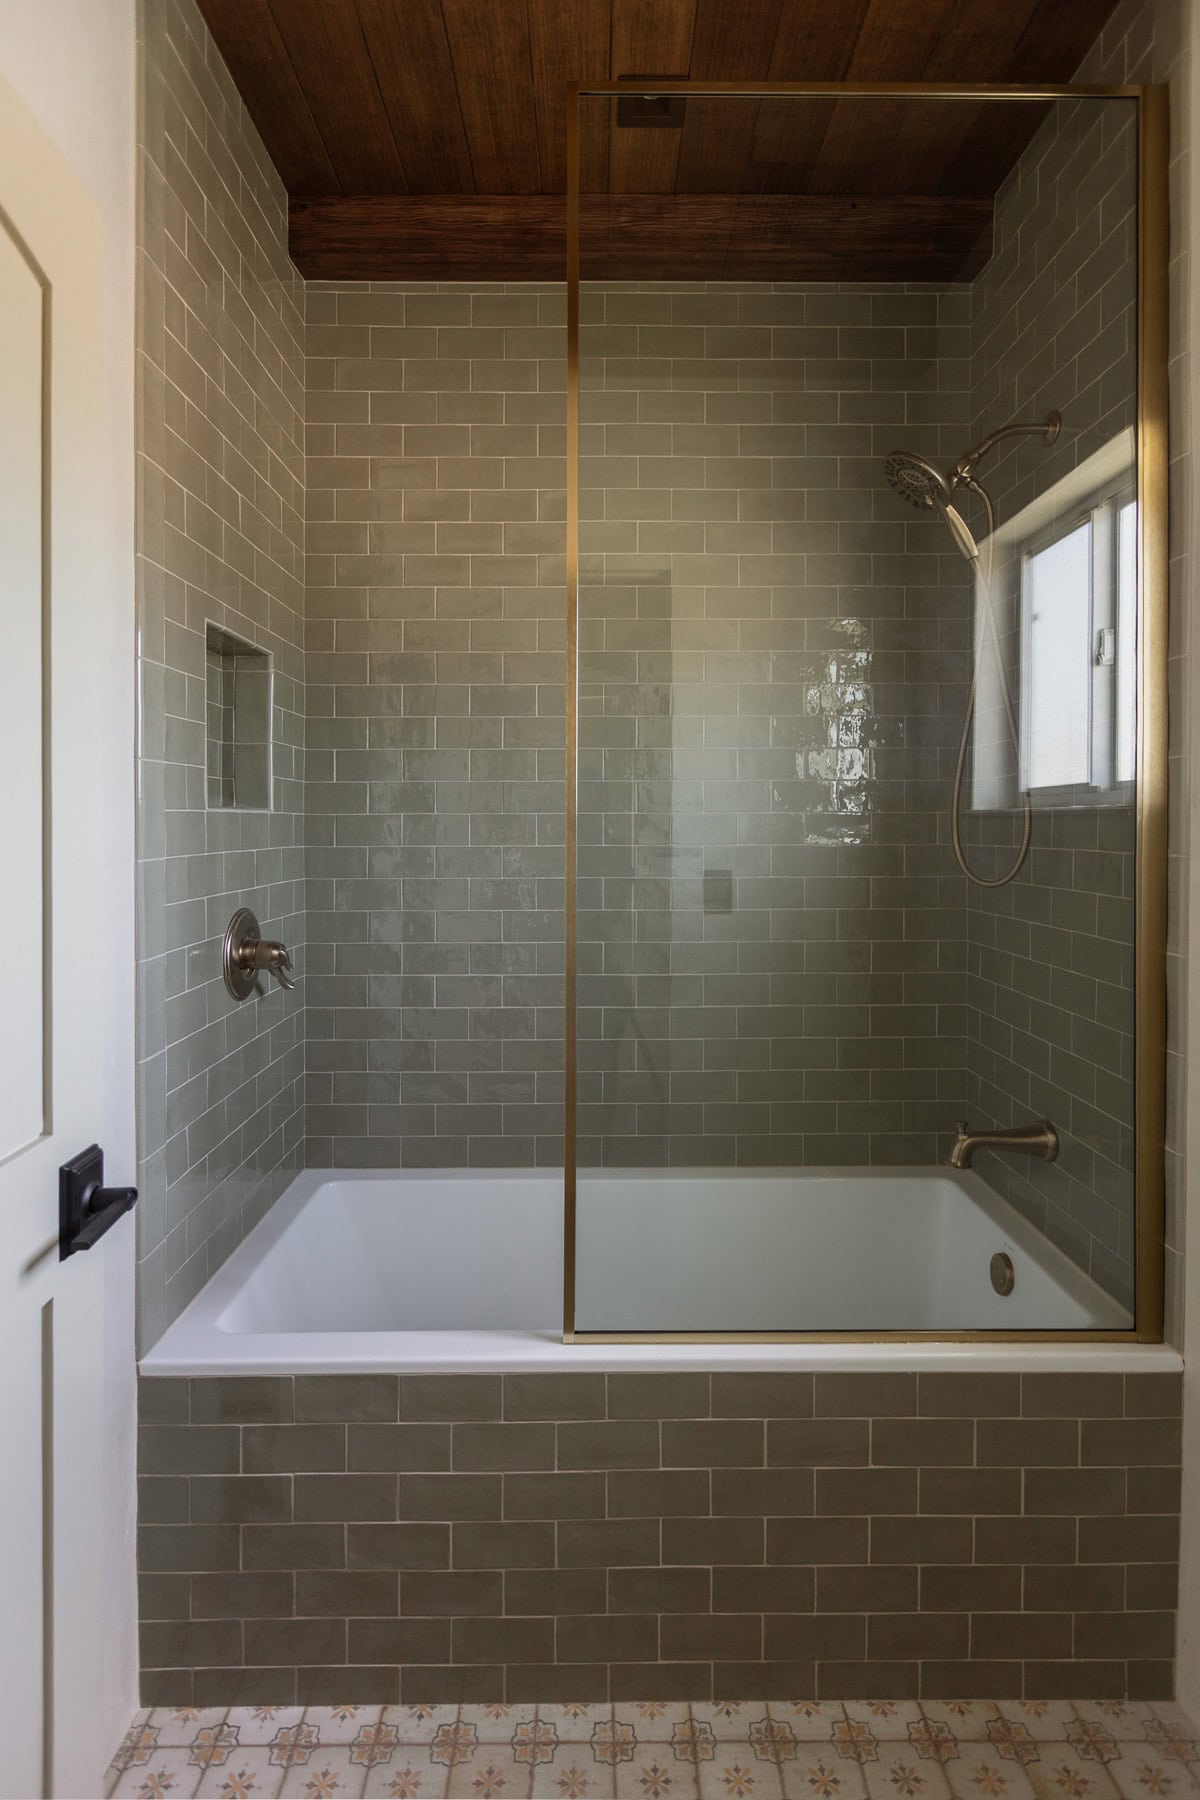
Here’s the final result!

I wasn’t sure how the brass would look in person and was prepared to use rub ’n buff on it, but I was pleasantly surprised—the product photos don’t do it justice! It’s a nice, muted brushed brass that coordinates very well with the champagne bronze faucet.
Shop Shower Screens
Options for framed shower screens in a gold/brass color seem to be fairly limited, but here are the best I found if you’re shopping around:

Have you ever used a shower screen? After seeing these results, I’m not sure if I can ever go back to shower curtains again!


Ami says
Is the exact screen you used in the links you shared, and if not, can you share it?
Jenna Sue says
Yes, same screen linked in the post! It went out of stock but now it’s back: https://bit.ly/3Vu9ntU
Karla Toye says
Would love a link to the drop in tub. Thanks
Jenna Sue says
Here you go! https://bit.ly/47765ns
Kerry says
I don’t know anyone who has a tub and shower combo where the shower head is opposite from where the handle is.
Where would you recommend placing the shower screen for a standard tub and shower combo, where the fixtures are all together on the same side? Would you place the screen at the end where the fixtures are or would you place them on the opposite end?
Jenna Sue says
I wouldn’t recommend doing this unless you also relocate the valve. We did this as part of a bathroom remodel so it wasn’t a big deal to move the plumbing. We always make the shower valve easily accessible in every bathroom!
Jen C says
Very nice and clean looking. Great solution instead of a shower curtain. Thank you for the tutorial. Love the finishes and tile.
Jenna Sue says
Appreciate it, Jen!
Molly says
It looks gorgeous, much better than a curtain, I agree. However, it’s an awkward nook now that’s very difficult to clean. It needs just one not so fussy renter to leave the inside full of lime and grime after a short period of time. A shower curtain can be removed and washed easily and you would have access to the complete bathtub and all while standing outside the tub (telescopic bathroom cleaner!). In addition, how would you fill a bucket with water here or use the shower head for cleaning something? In rentals the bathtub or shower often is the only place where you can do that. Though not as nice as your setup, I prefer to have at least two shower curtains for easy change.
Jenna Sue says
Unfortunately our cleaners don’t launder the shower curtain so it falls on us. I don’t see how this would be more difficult to clean than any other shower glass enclosure. I’d say it’s actually easier without moving parts. And wiping it down is certainly quicker/easier than laundering. Also, the faucet has a detachable wand. For our situation, this is the best solution all around.
Elise W says
Stunning! How does the shower screen handle water spray?
Jenna Sue says
We sealed it on all sides with silicone so it’s water tight. It’s no different than any other shower glass!
Cheyanne says
How much splash happens when/after a shower?
Jenna Sue says
I haven’t personally tested this shower but the screen is the widest I could find (3′) so it should contain most of the water without any issue!