Let’s get to it, shall we?
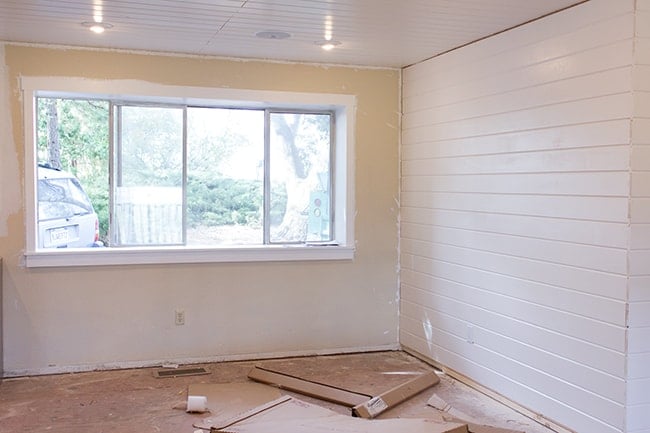
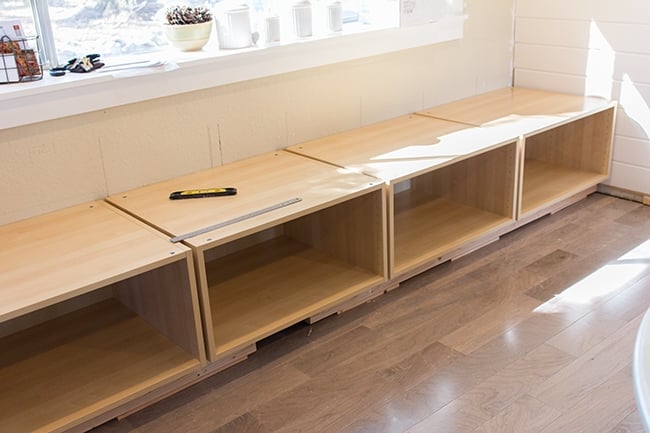
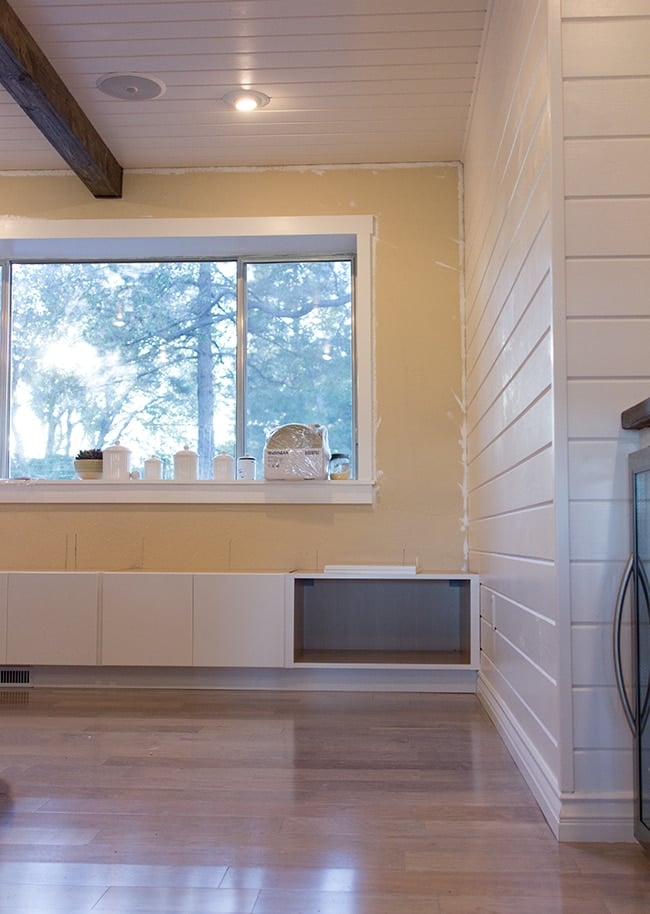
We started with this empty space under the dining area window, which I thought would be perfect for a nice cozy bench…
To make it serve a dual purpose by adding storage, I decided to go with these Akurum refrigerator cabinets:
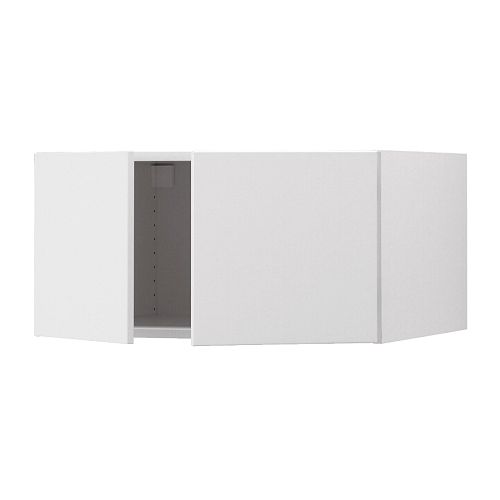
Because they are standard cabinet depth (24″), they would also line up with our existing cabinets on the left to look like one long built-in wall.
I chose the same Applad white doors to match our new bar cabinets and keep them nice and clean looking without distracting from the rest of the room (and yes, I forgot to select “white” instead of “birch effect” for these cabinet boxes too, argh!)
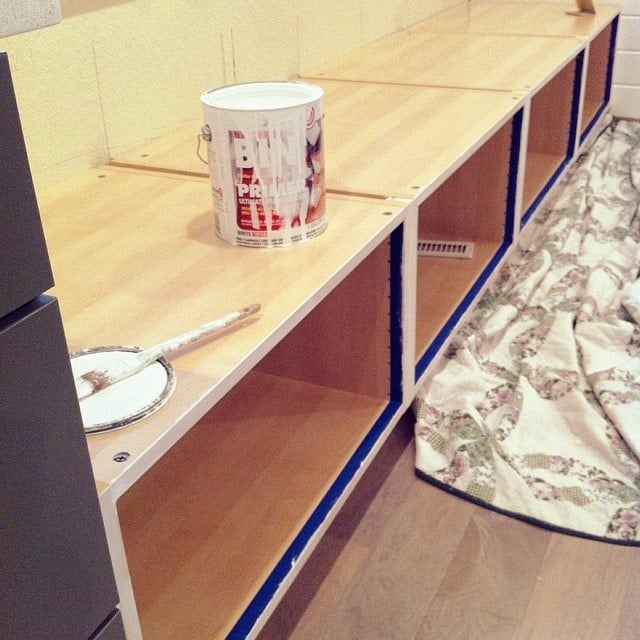
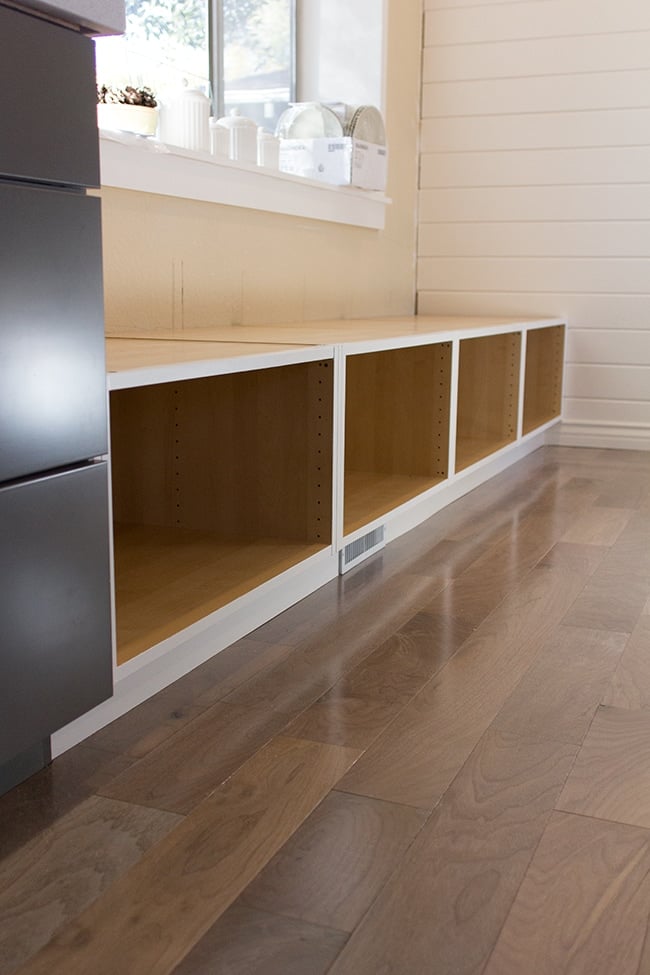
I had 123″ of empty space to work with, so I went with four 30″ wide cabinets which only left 3″ of space to fill.
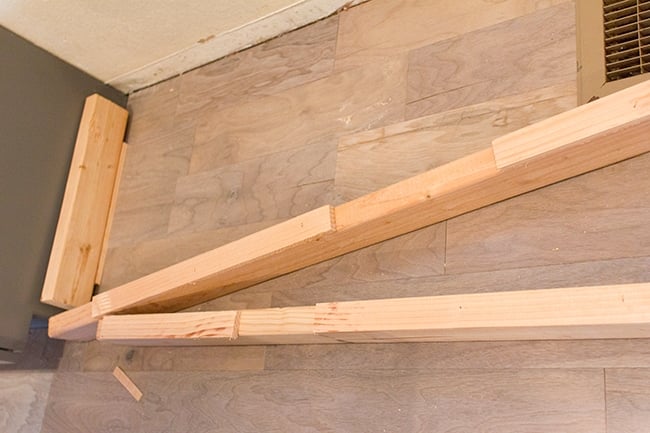
But first, we had to build the base. It was basically the same process we used to build our bar cabinets, except there was one small issue…
The 2×4’s weren’t tall enough to match up with the existing cabinet. Standard toe kick height is 4″, but 2×4 boards are just barely over 3.5″. With the bar it didn’t matter because it didn’t have to line up with another cabinet, but we had to elevate these 2×4’s somehow…
So we ripped down some boards to make shims.
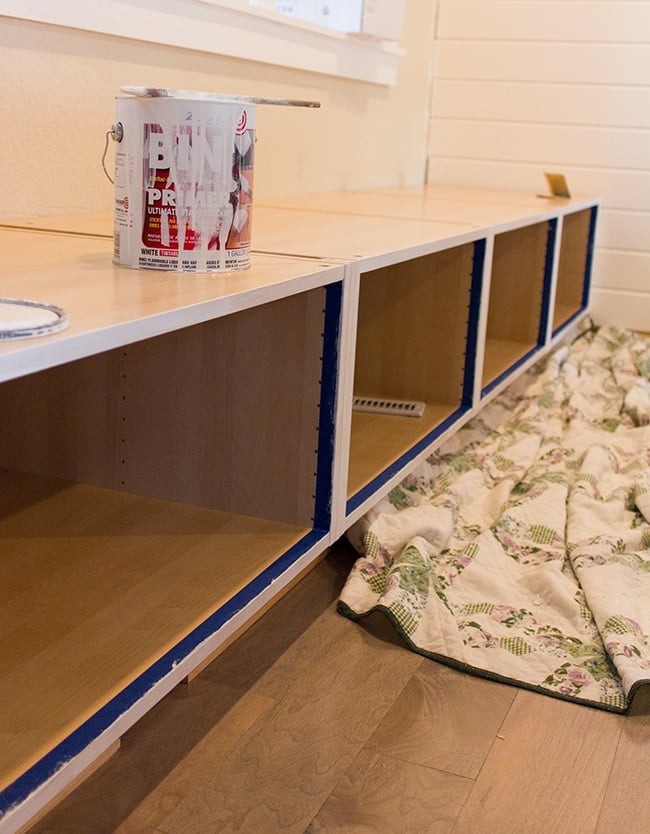
Then we assembled the base upside down so we could screw the front 2×4 into the cross pieces first. We decided to place a cross piece wherever two cabinets would meet up for extra support.
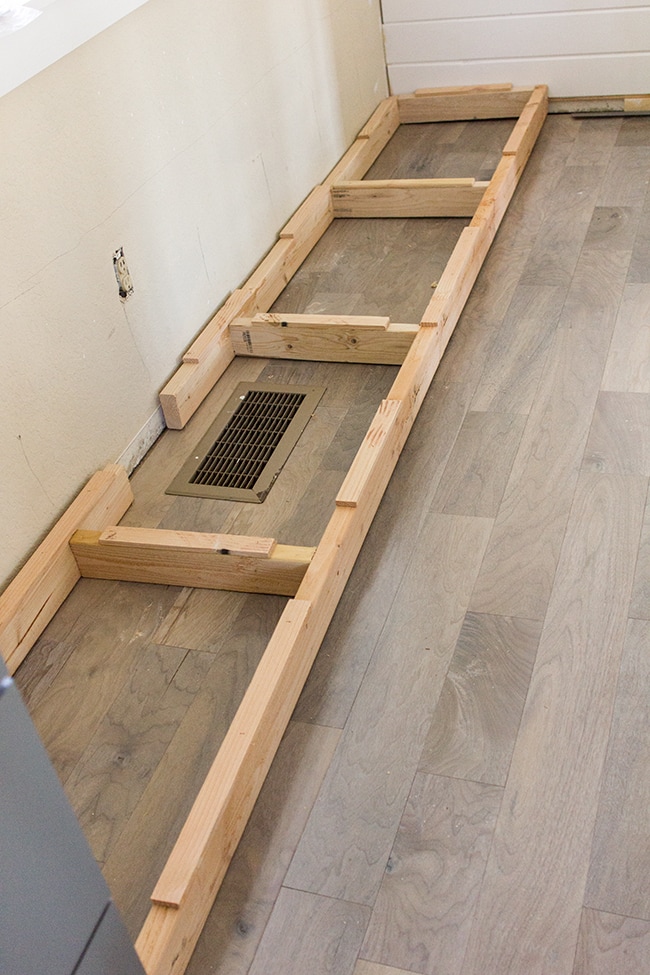
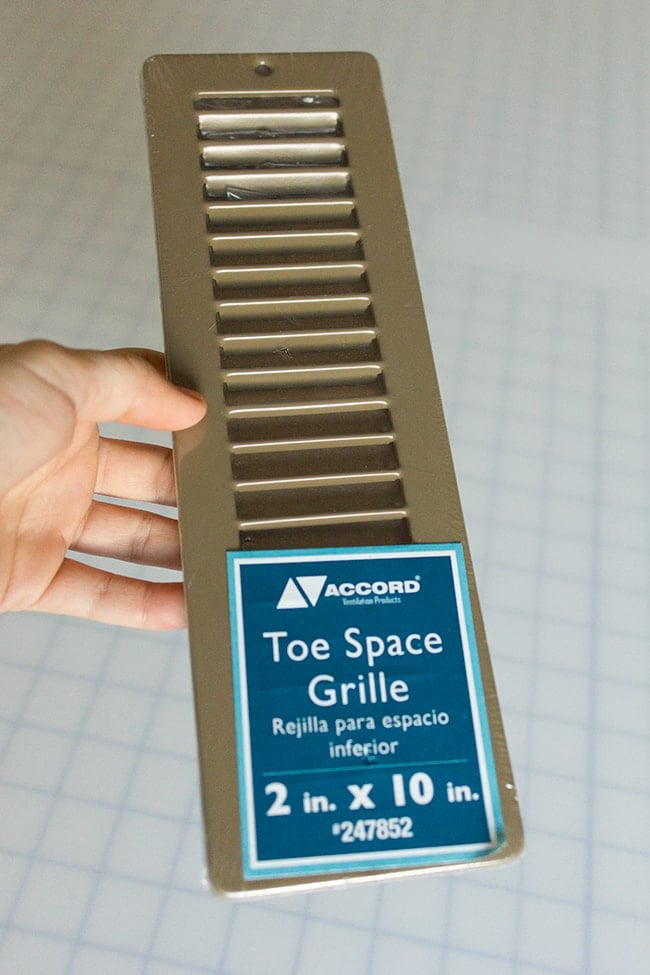
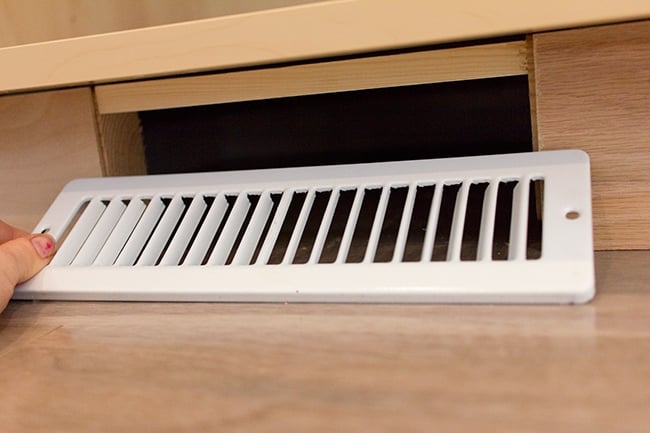
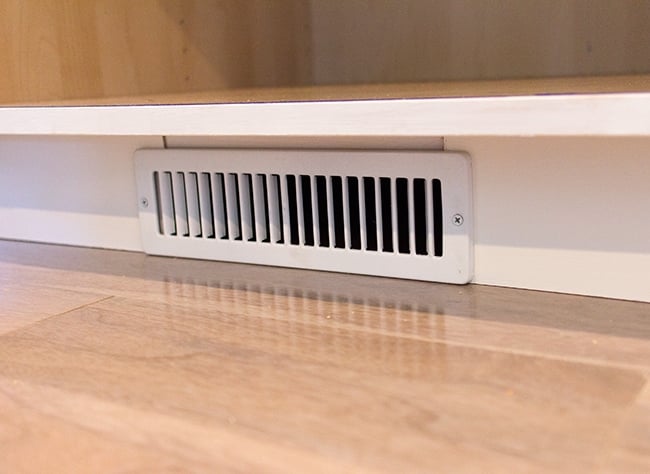
You’ll also notice a chunk of board missing out of the back. Since we were covering over a vent, we needed a way to reroute the airflow. I picked up this narrow grille at Lowe’s (designed for toe kicks) and gave it a few coats of white spray paint:
After the first 2×4 was secured to the cross pieces, we flipped everything over to its final position and attached the front 2×4 so it was all one piece:
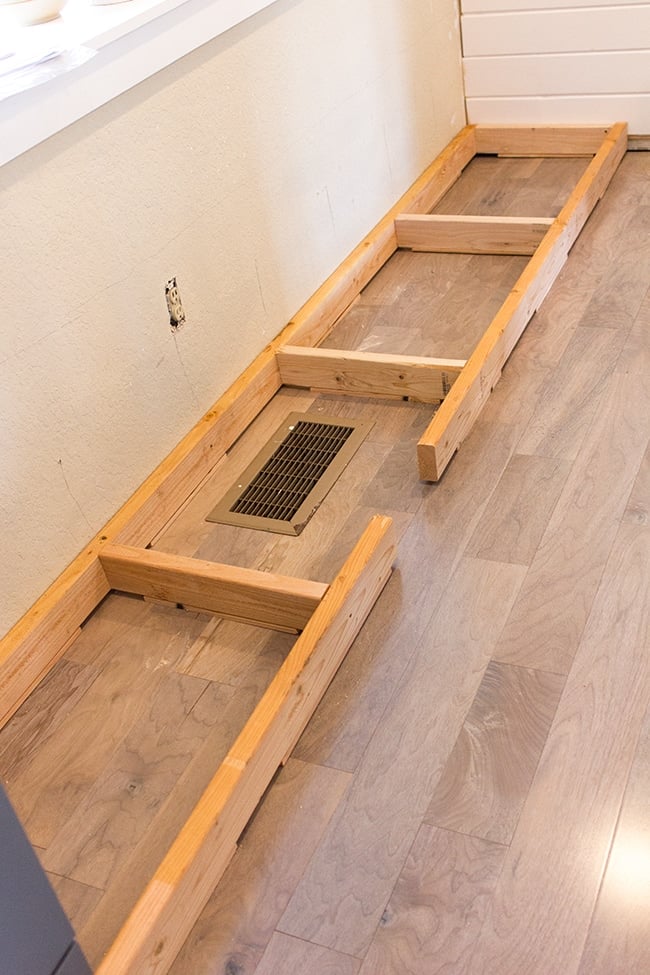
Then we secured the back 2×4 into the studs so it wouldn’t go anywhere.
To seal off the vent chamber so air wouldn’t leak out, we placed some trim pieces along the bottom and caulked it in really well. We also had to cut a hole in the back for the outlet:

Then it was time to get the cabinets in!
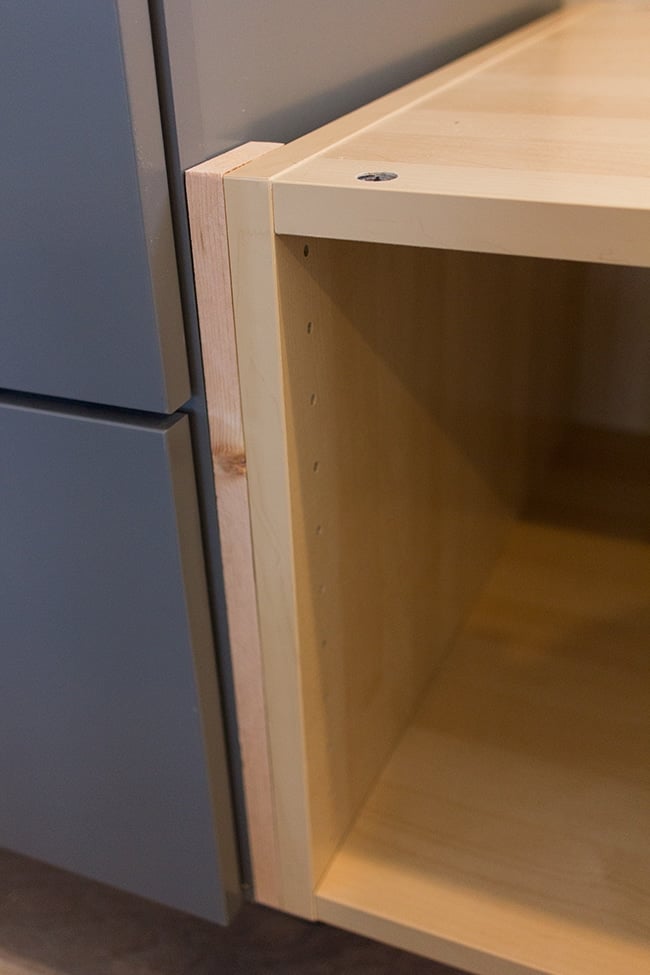
I had 3″ of extra space to work with, so I decided to divide it evenly between them (including the far left and right sides) which meant I had to make 0.6″ spacers. I used some scrap pieces of wood we had in the garage and ripped them down to size, then cut them to the height of the cabinet (15.25″):
Perfect!
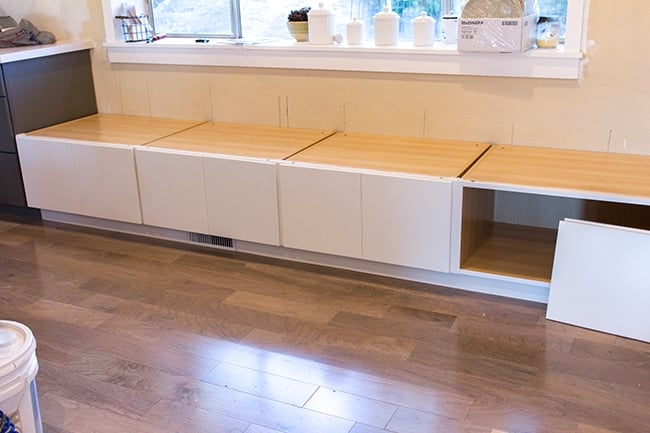
Once they were in, we screwed through the sides of the cabinets (both left and right) and caulked them in:
Then we put a few screws through the cabinets to attach it to the 2×4″ against the back wall. This bench was solid.
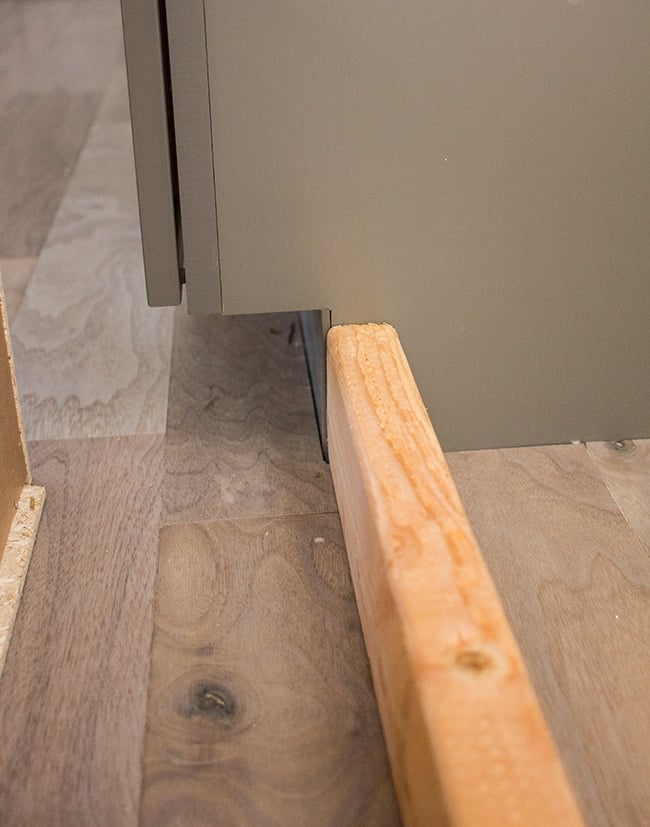
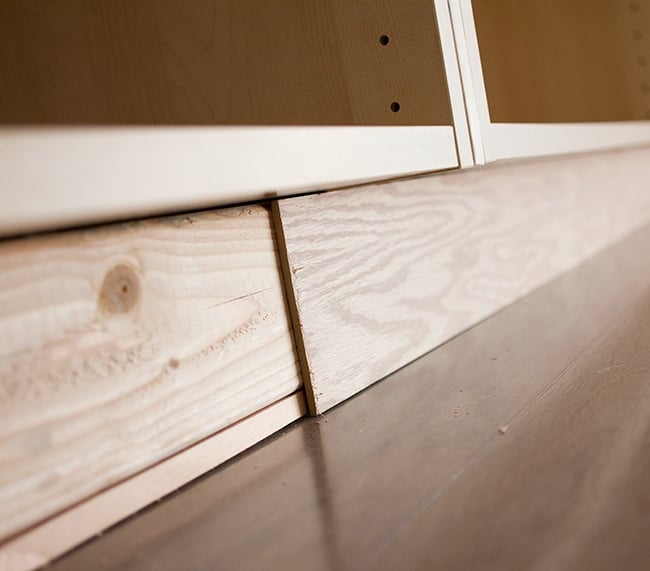
The toe kick piece we bought fit like a glove, no ripping down needed!
The vent grille was a little shorter than the toe kick, so we slid a small piece in at the top so there wasn’t a hole (It doesn’t look very pretty, but it won’t be seen):
Once everything was in, it was time to prep and paint!
For the cabinets I used the same Zinsser shellac based primer (red can) that I used for the pantry and bar cabinets:
The only part that would be visible from the outside was the face frame, and I wanted a nice clean edge on the inside so I taped it off.
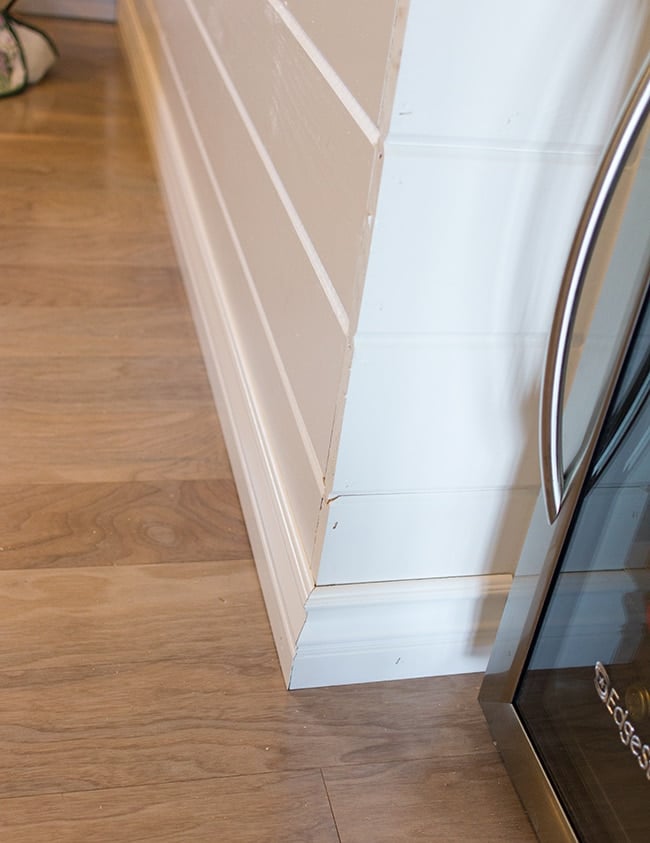
While working on that, I painted the toe kick and the rest of the trim that we’ve been dying to put in (tip: ALWAYS paint your toe kick/baseboard/crown molding before installing so you don’t have to tape it off later!)
Yay for baseboard:
We used a 90° corner piece over the planks and quarter round where the plank wall met the ceiling:
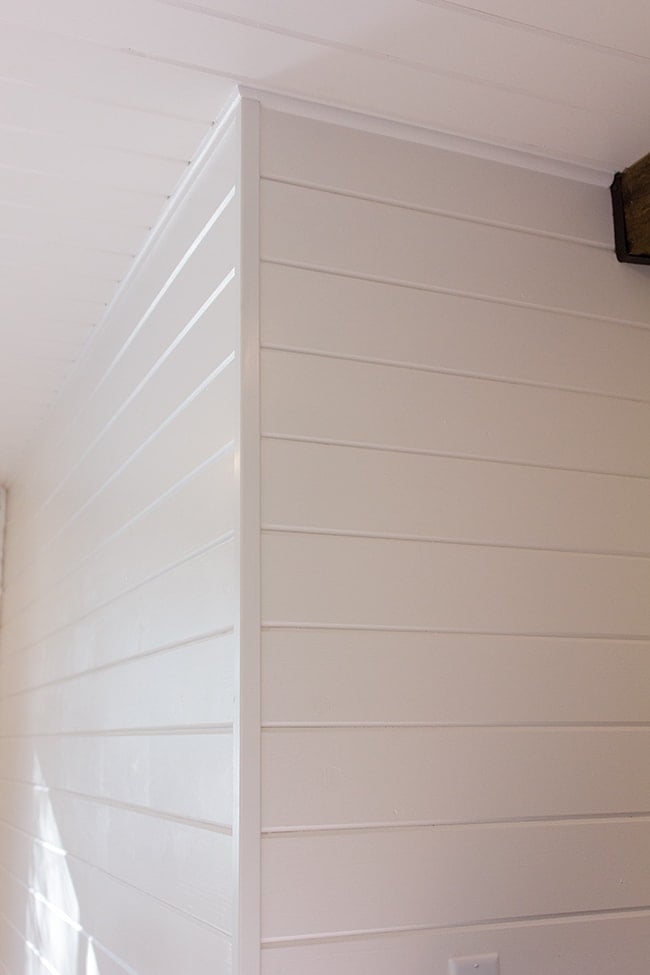
Ahhh… so much better.
The toe kick worked out nicely too:
All that’s left was the doors…
We finished the first three cabinets and realized we had a problem.
Apparently, someone in this house *coughBradcough* must have accidentally thrown away a box with half of our hinges in it. After a frantic search came up with nothing, I had to buy 8 more packages (16 hinges total, we still need to build another bench seat) for $60 from Ikea.com. I was just relieved we were even able to order them online and get them shipped. They won’t be here for a week, so sadly this project will take a little longer to finish…
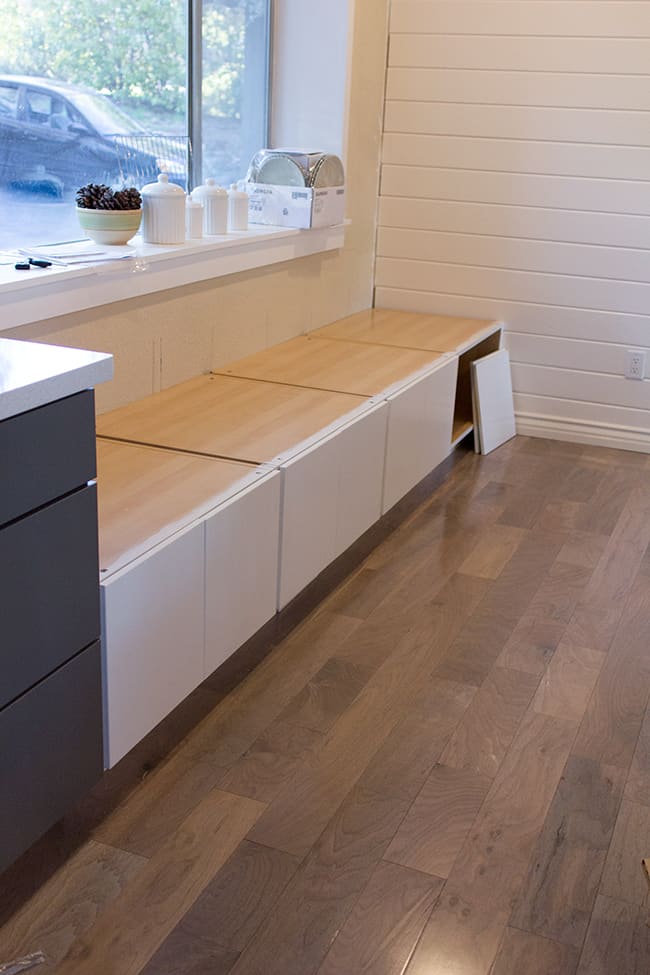
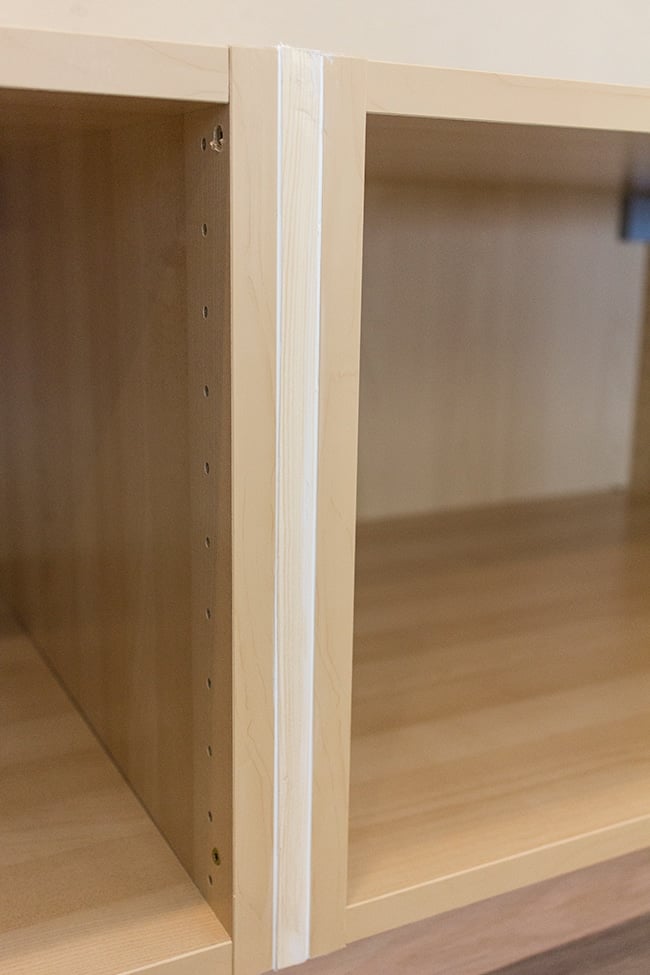
In addition to that setback, I can’t decide how I feel about the gaps in between the cabinets. I didn’t even really think about it when I was lining the spacers up with the cabinet base instead of the doors. Might have to move them forward.
What do you think?
As for adding hardware or not, I’m undecided. I’m leaning towards keeping it really simple, so it looks more just like one long panel instead of drawing attention to the fact that it’s cabinets by adding knobs. That was the original plan at least—we’ll see how it looks after we get the last doors on. And I ordered the foam so hopefully next week I can get started on the cushions.
One more update—we bought our backsplash!
After much debate (which I’ll cover in a future post) we went with this white subway tile from Lowe’s:


Melissa Sabra says
Love the progress so far – everything looks great!
My husband & I actually just finished installing our 3″ x 6″ subway tile backsplash a couple of weeks ago. A couple of things we learned in the process:
-do a dry fit of the tile first to make sure you're not left with any super tiny slivers of tile at the ends/corners
-use matching silicone caulk instead of grout where the tile meets the countertop & cabinets
Here's the post: https://duoventures.blogspot.com/2014/03/kitchen-makeover-subway-tile-backsplash.html
I hope that helps – so excited to read your next post! Good luck!
Mel 🙂
Karen Fletcher says
Cover your beautiful counters completely with plastic. The contractors didn't do that in our kitchen and the grout that landed on the counter top (recycled glass) left pok marks that could not be repaired. Ask Lowes what type of saw would be best for the tile you selected. A tile cutter may leave you very frustrated. We installed ceramic tile in the bathroom and we were pulling our hair out using a tile cutter. The wet saw was much better. Good luck! Looks fantastic!!
Jenna Sue says
Yeah that isn't so bad—one of our quotes was more than triple that so we would gladly pay $600 if that was an option!
Ashley says
I've loved seeing everything you've done to your new house! Can't wait to see how the tile looks too! I've used the standard 3×6 subway tile and I've used tile with a mesh backing, but never the combo. I'm interested to see how you like the mesh backing…I didn't love it, but I was using a natural stone mosaic tile and the spacing wasn't uniform so there was lots of cutting. I'd bet the subway tile is different, though. Keep it up!
Heidi says
I wish I could offer advice on installing the backsplash, but once we started to price out our time and rental costs that $600 to install our backsplash didn't look so bad! But you can do it! Can't wait to see the next update.
https://jax-and-jewels.blogspot.com
Julie says
Our first tiling foray was our tub surround, using mesh-backed “tile” (it was actually river rock). It wasn't hard, and we did floor to ceiling on 3 walls as novices. Granted, we didn't need to cut around outlets, and we could pull rocks off and replace them with smaller ones if the spacing required it, but I think you'll be fine.
Anonymous says
Love the finishing touches on the plank wall – looks awesome! I've done a few backsplashes, make sure your wall is close to perfectly level or you'll have deeper grout lines in spots which ends up being super noticeable. We used drywall compound to make it more level before starting. For cutting depends on tile size, we have both the wet saw for bigger ones and the paper cutter sliding type one for small tiles. You'll be fine! We tackled tiling before we tried lots of other projects. Good luck! Can't wait to see the finished tour!
Sarah
Jenna Sue says
Yeah, I might just cut more spacers and add them on so we don't have to realign the cabinets to each other all over again. I'll wait until the last doors go up before I decide!
Jenna Sue says
Forgot about those, thanks! Pinning now.
Yancey says
I love seeing how your plans are all coming together! It is looking amazing! I love the bench seat but I would totally move the spacers flush with the doors. So long as it doesn't compromise the function of the doors opening, it would look much more seamless. I like your idea of leaving the hardware off, perhaps those little push open things that IKEA make could help open them.
Inês Figueiredo says
Found this one:
https://www.bowerpowerblog.com/2012/12/a-backsplash-bash/
And this one:
https://www.younghouselove.com/2012/01/backsplash-bid-ness/
Jenna Sue says
I've heard of Bondera before—I'll look into it more, thanks Erin!
Erin says
We installed a mesh-backed tile backsplash using Bondera Peel and Stick backing- OMG, it made it so much easier!!! You literally stick the Bondera on the wall, peel off a layer, stick on the tile, position and push hard. Once it's all on you grout over it. We also used a tile cutter that was a lifesaver, it's like a paper cutter, no wet saw necessary. This was our time doing anything with tile as those two products made it a breeze! Good luck!
Jenna Sue says
Thanks Jenn, that's definitely something to consider!
Jenn(ifer) says
Hi Jenna.
It looks great. I like the spacers as they are.
If you consider hardware, maybe something inset is a good idea so people don't snatch their clothes / legs on it when they sit on the bench (It works well for my bench seat here: https://heim-elich.blogspot.de/2014/02/dyi-flur-teppich-fur-700.html https://heim-elich.blogspot.de/2011/12/schuhe-im-stehen-anziehen.html – and there are so many options…)
Good luck, love seeing your progress!!!
Greetings from Germany
Jenn(ifer)