Before we get into today’s post, we have a long overdue vlog update! Watch below to see what we’ve been up to since moving into the Heights House:
And now for the details on our first completed nursery project…
Last weekend I shared live updates in my Instagram stories of our progress, and my DM was flooded with hundreds of messages, so I figured I’d break down the details for you in a separate post.
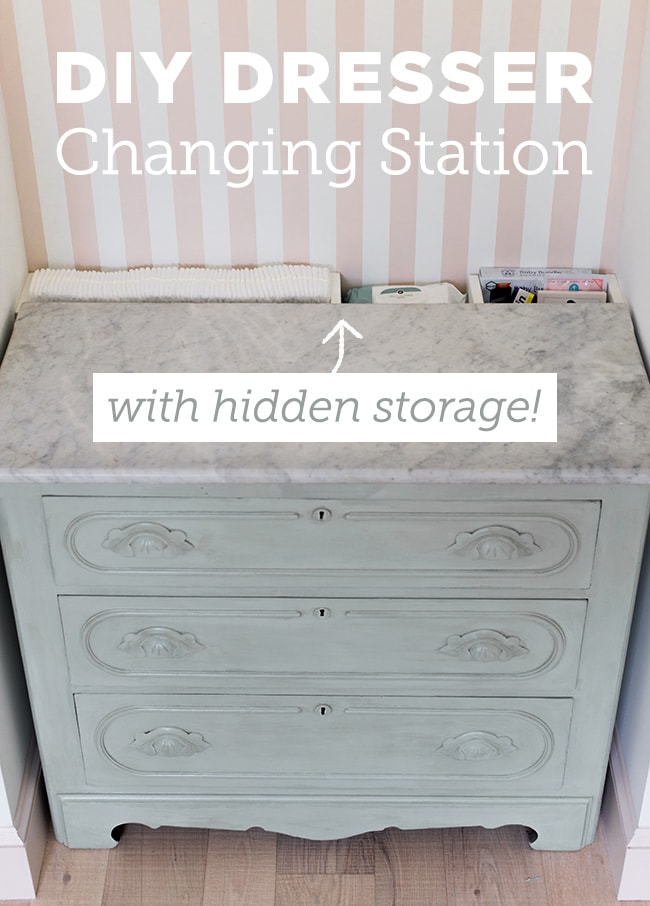
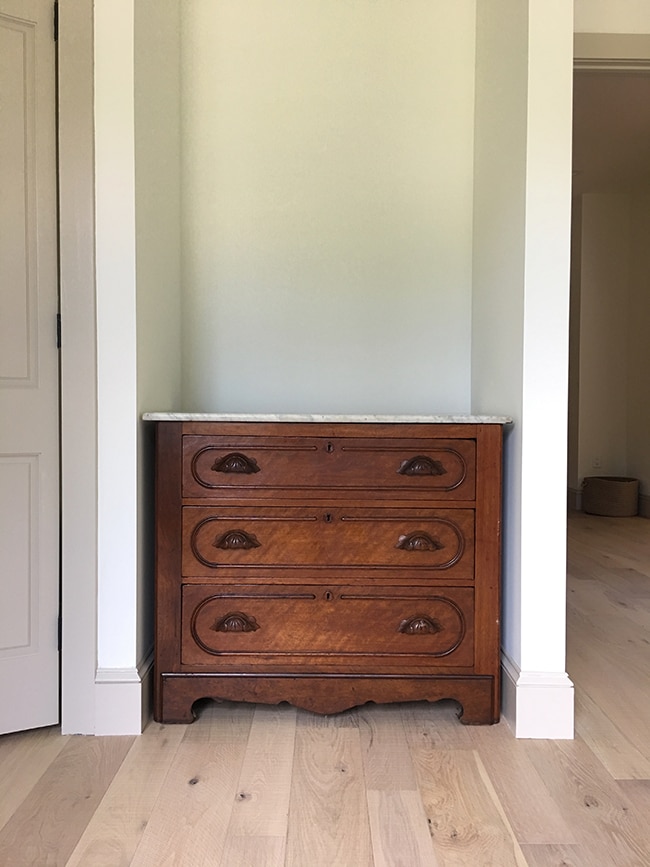
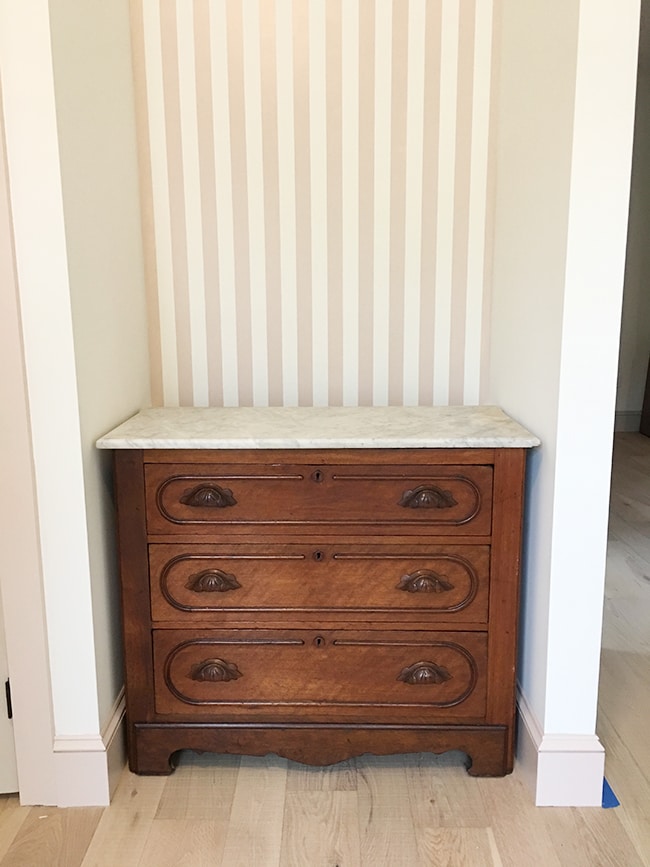
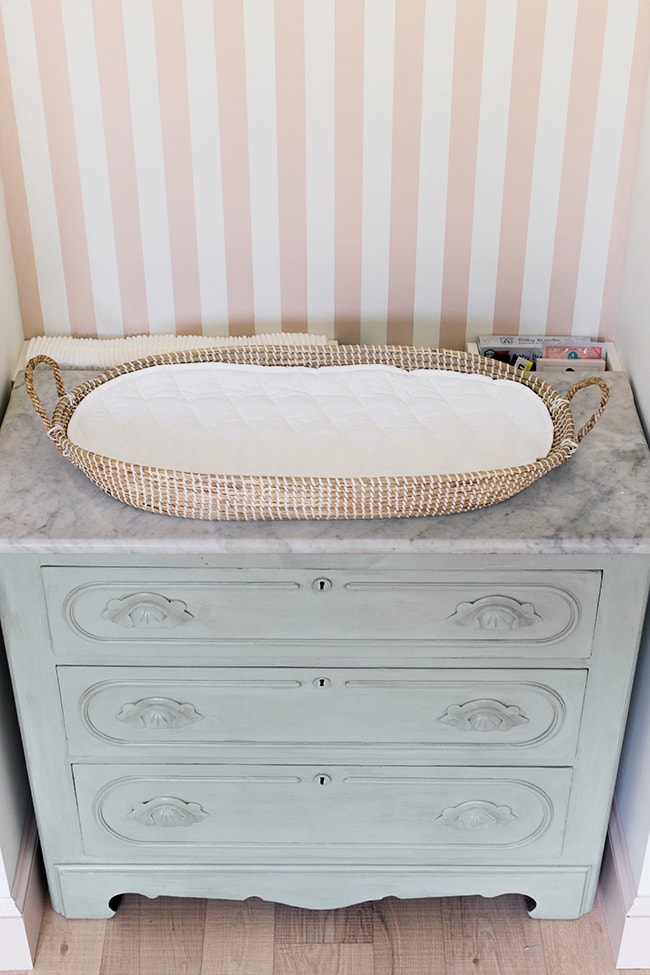
We had this nook built with the intention of using it as a changing station for baby, and last month I found the perfect vintage dresser:
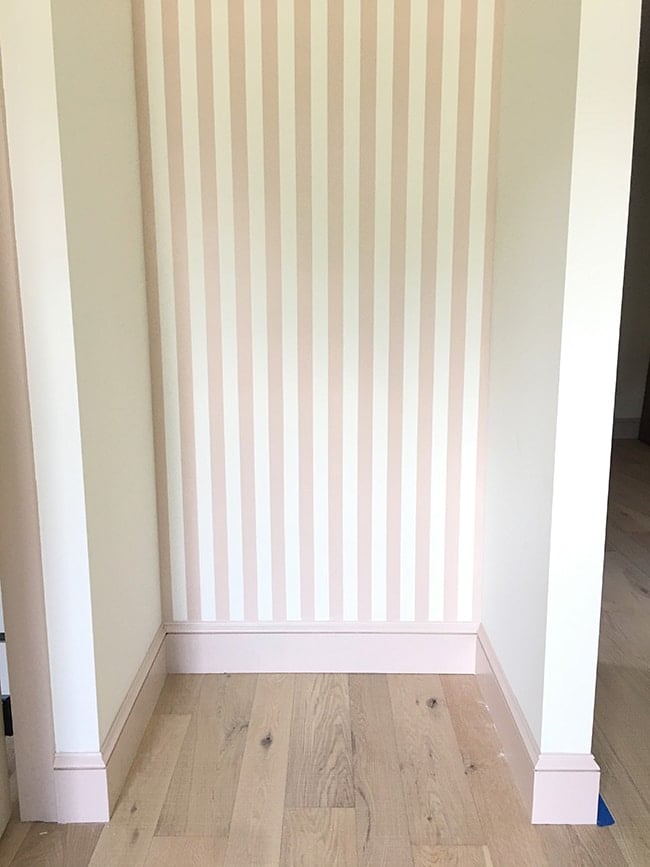
A couple weekends ago we painted the trim and stripes (using SW Malted Milk)—I’ll share the simple method we used to get clean stripes in the next post this week:
Although the dresser was a perfect fit, it didn’t offer a ton of surface area and I didn’t want to build shelves above it to put everything on display, or have to open the drawer to grab something every time. Somehow we came up with the idea to move the dresser forward and build a hidden cubby behind it—lightbulb moment!
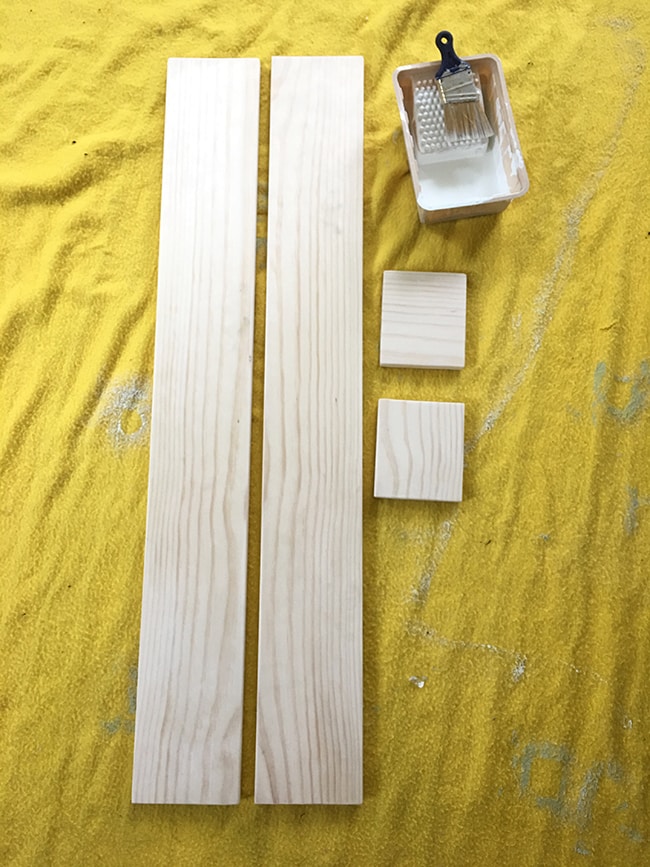
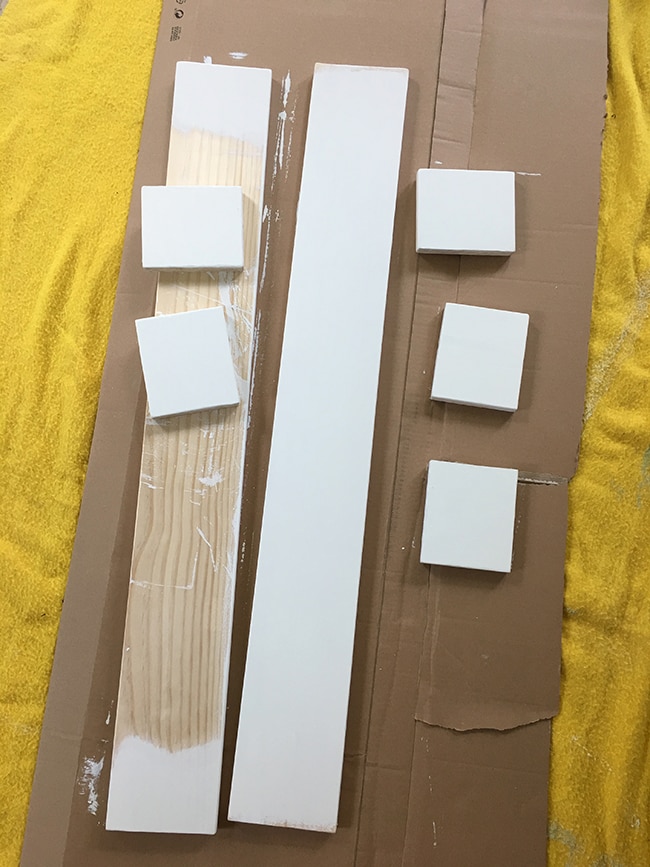
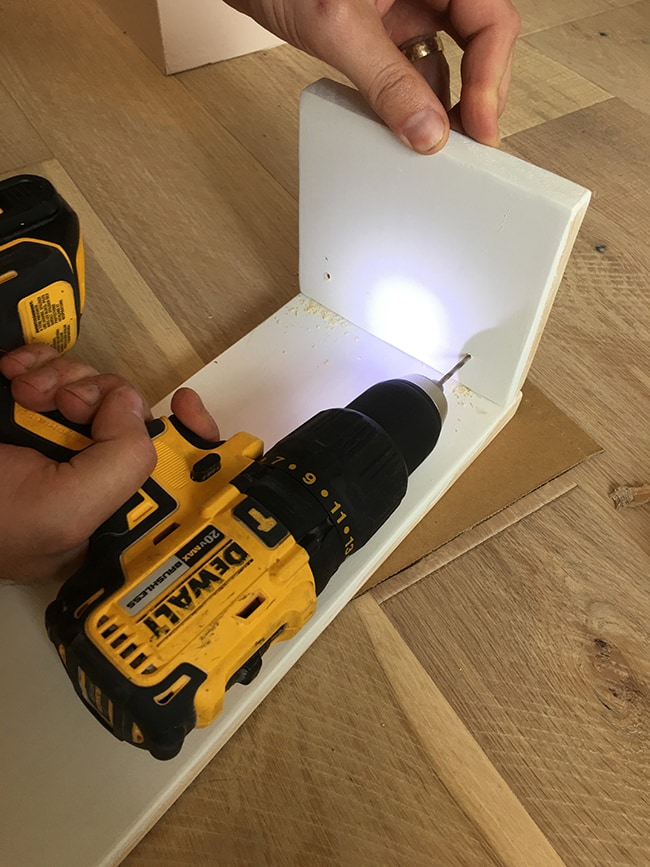
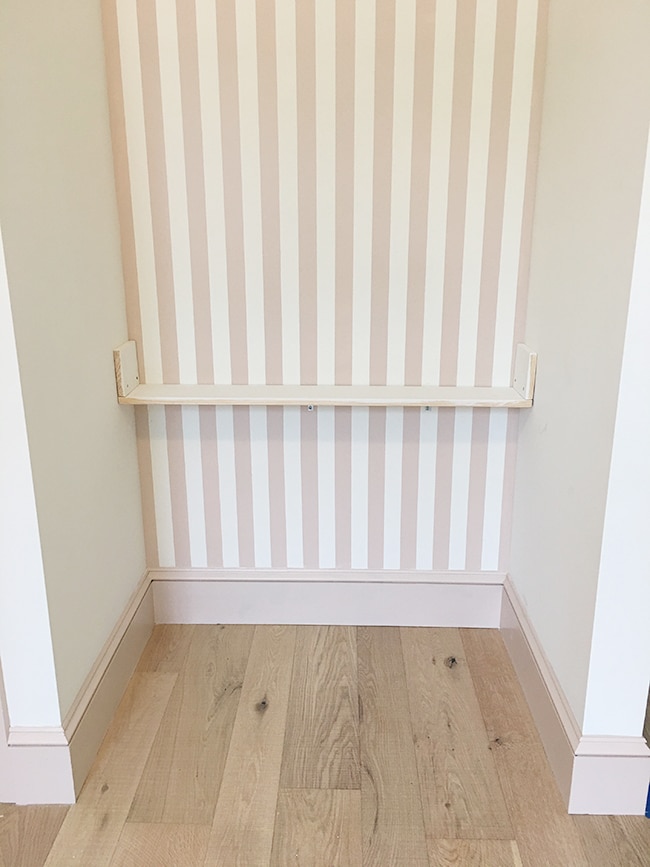
Our materials list was simple—a 1x6x8′ pine board from Lowe’s and a couple brackets. We measured the width of our nook and cut two long boards for the bottom and side, and two short pieces for the ends.
The plan was to assemble them together like this, with the open end against the wall:

Since the top and sides would be visible, I went ahead and painted those areas (using the wall color, SW Alabaster). We also cut a few extra blocks to make dividers:
After the paint had dried, it was time for assembly. First we needed to attach the bottom to the sides. Holding the two pieces in place at 90º, we predrilled two holes:
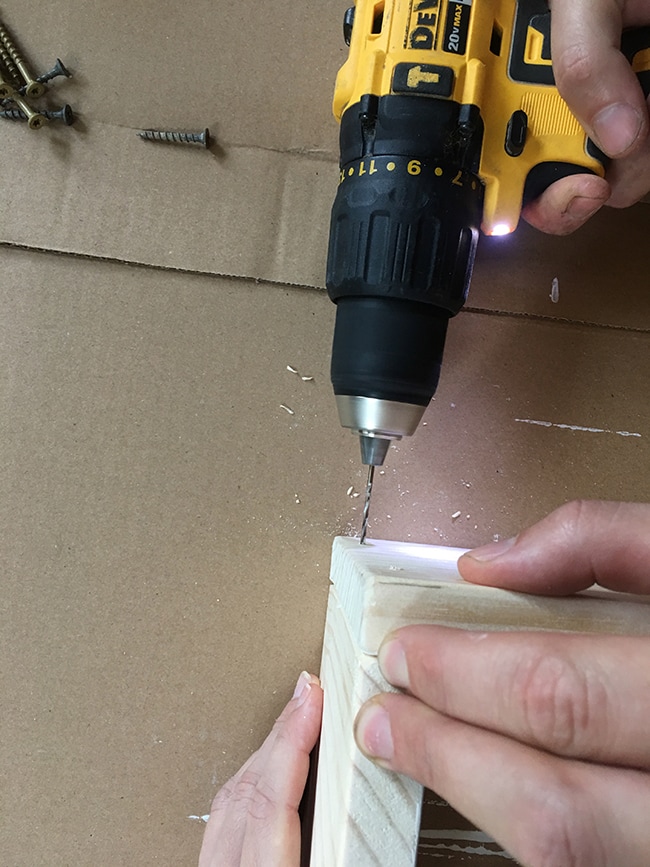
Then inserted our screws:

Ta-da!
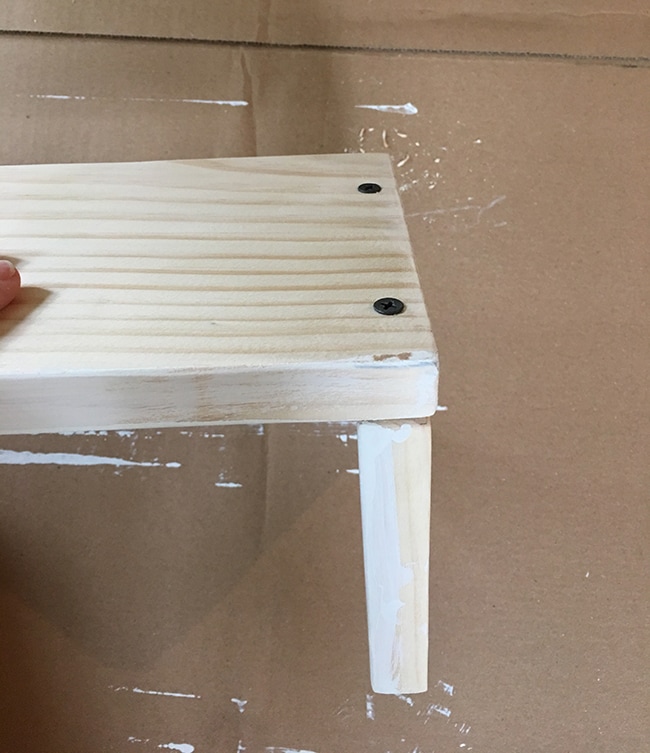
Repeat on the other side, and we were ready to roll:
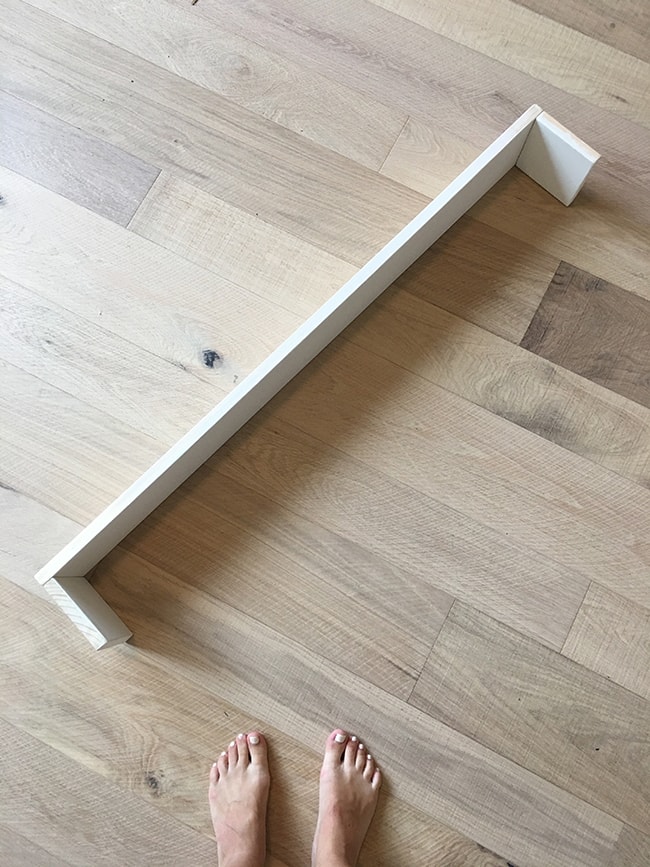
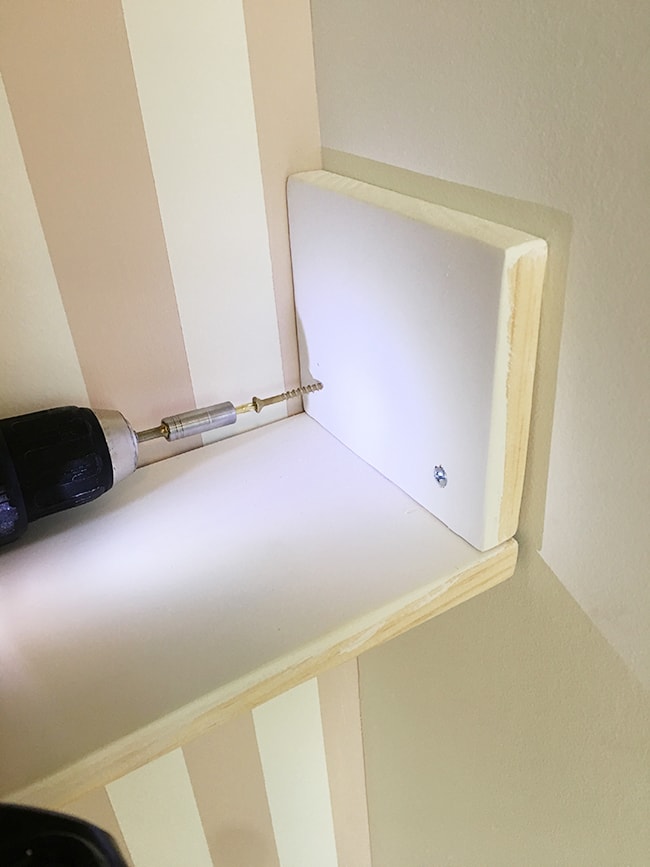
Before getting it into place, we predrilled two more holes for the screws that would attach to the wall.
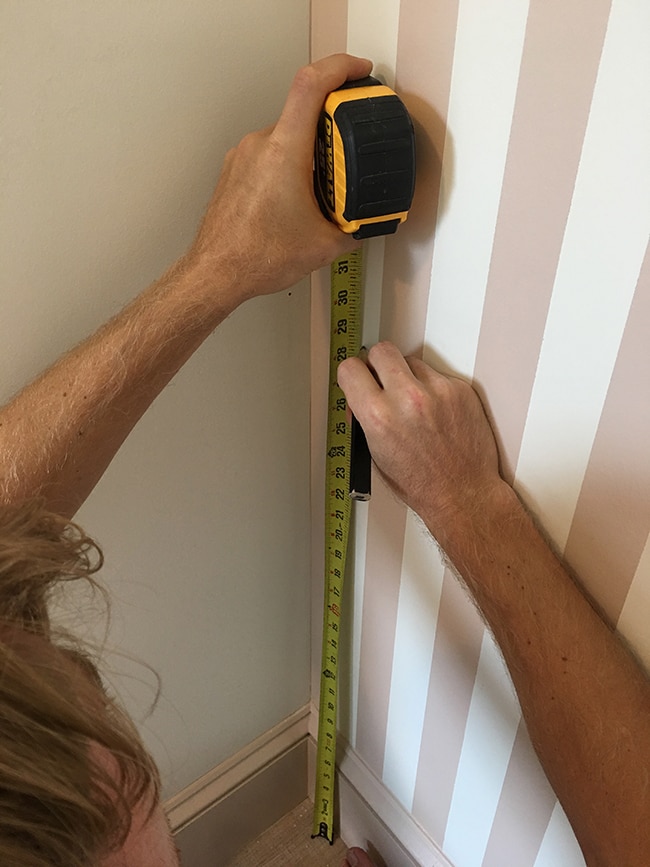
After measuring the dresser to determine our desired wall height, we marked our measurement along the wall…
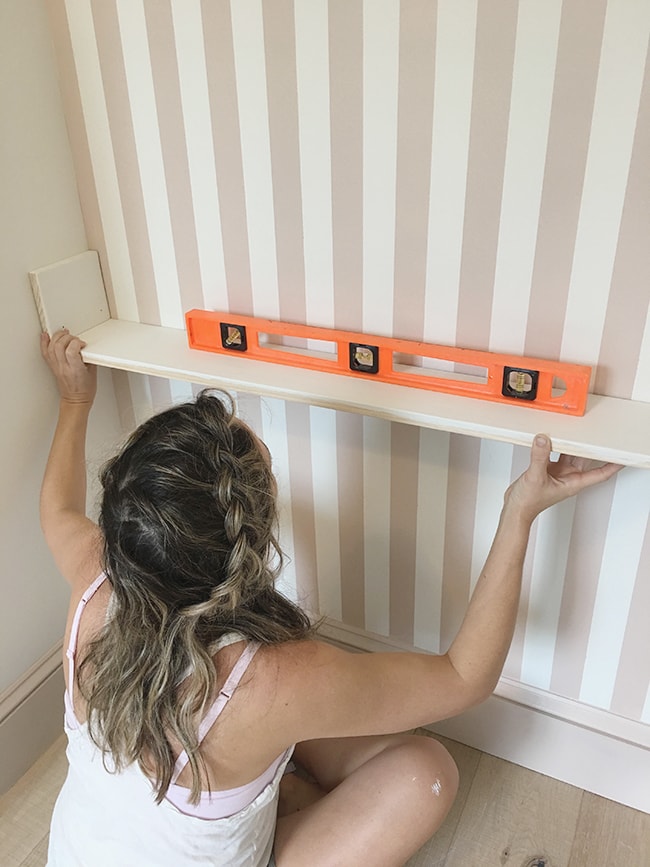
Then held the shelf up along those marks, checking for level.
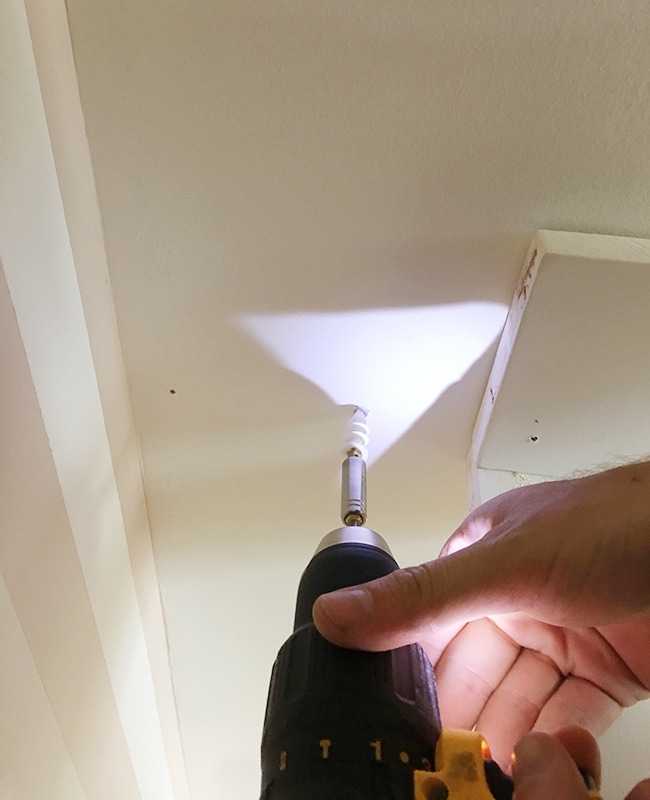
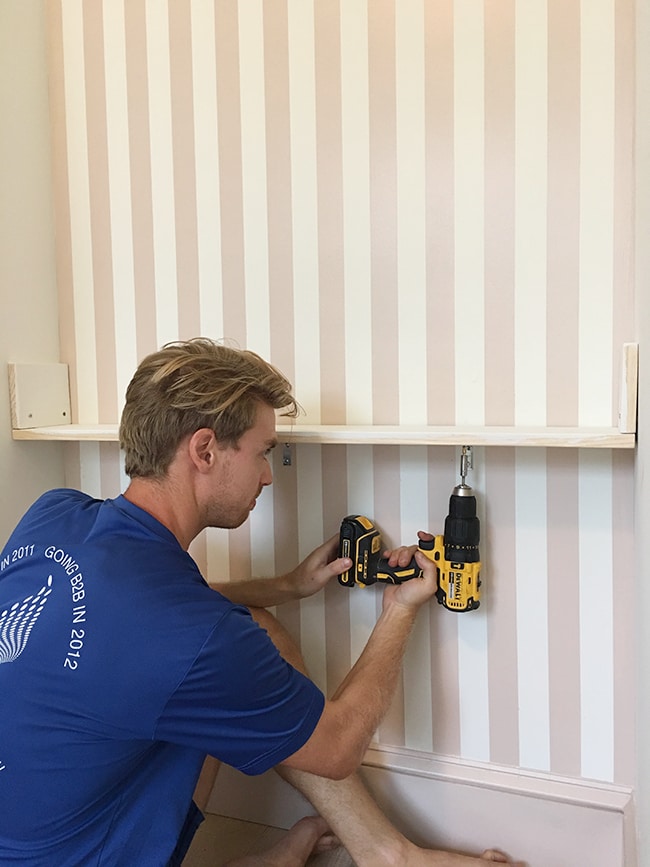
Once in place, we drilled through the last four holes we made to mark the locations on the wall and removed the shelf. The screws closest to the wall would end up in a stud, but we needed to use drywall anchors for the other two (btw, never using anything other than these self drilling anchors again!)
Once the drywall anchors were in, we lined our shelf back up and inserted the screws (one into the anchor, one into the stud).
For extra support, we decided to use a couple of these metal brackets along the bottom:
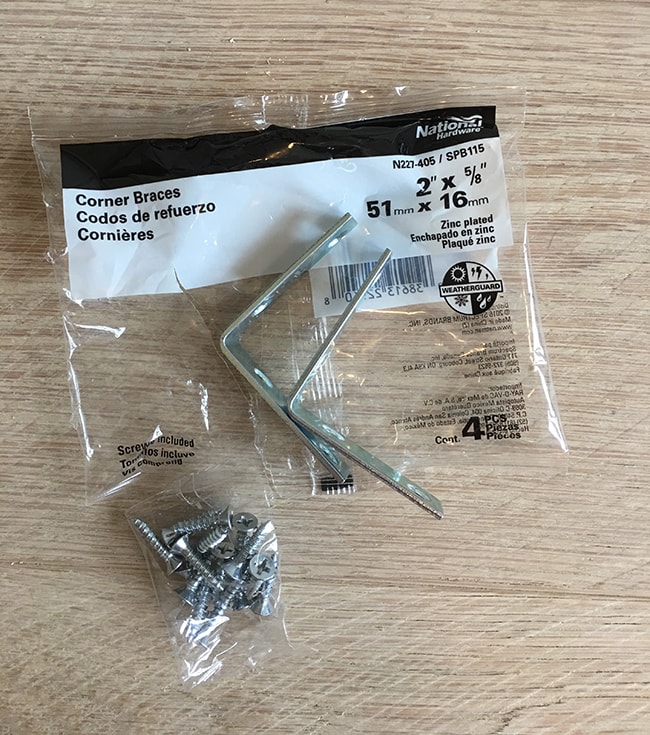
First step, find and mark the stud locations:
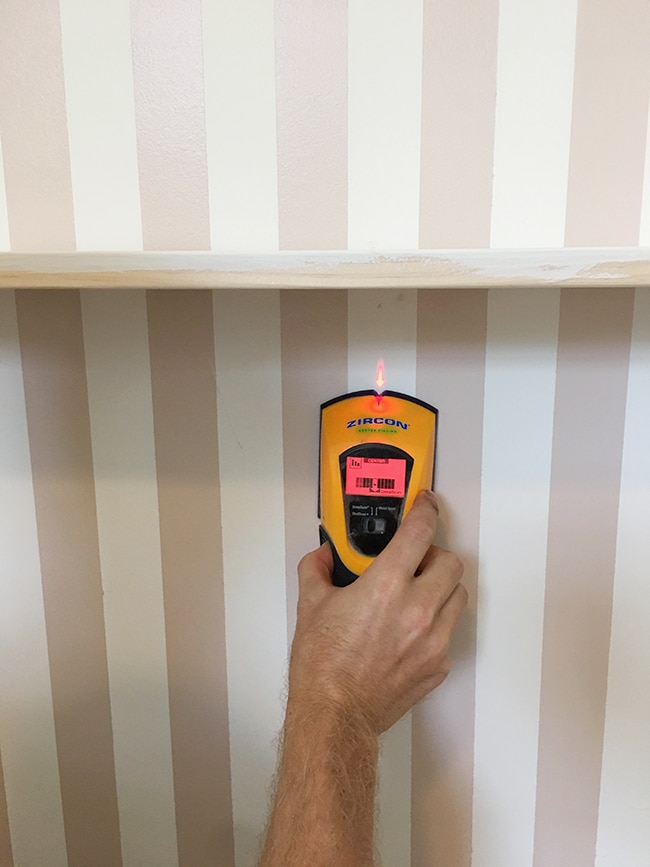
Then attach the braces into the wall and shelf (for the wall we used longer screws than what was provided in order to reach the studs):
And we’re in!
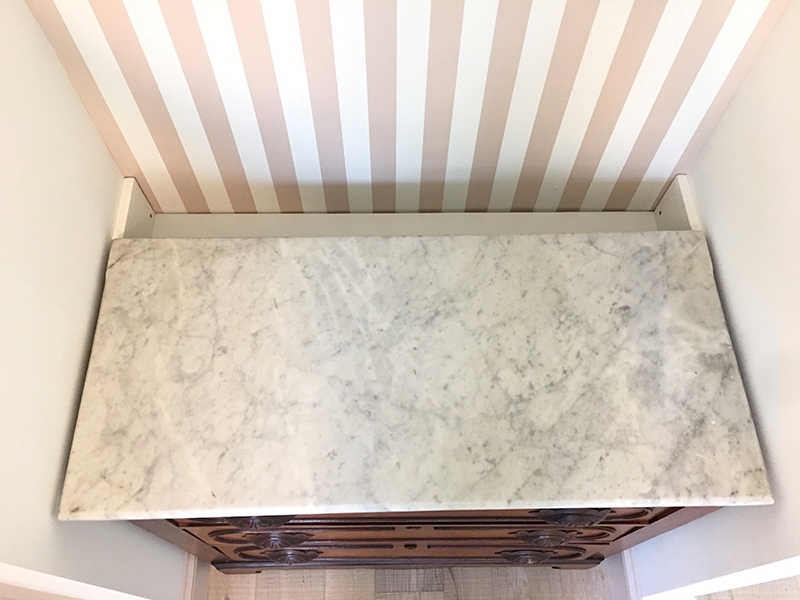
At this point we decided there was no need for an additional piece of wood in the back, since the back of the dresser would serve the same purpose. Here it is in place… you’d never know something was behind it!
Until you peek around back…
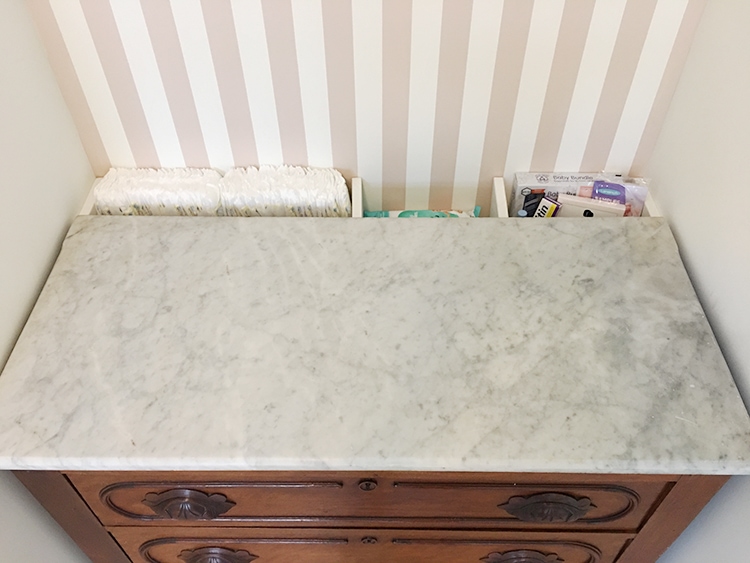
Obviously I couldn’t wait a single minute before organizing it. We have yet to buy most of our changing supplies so this isn’t the finished setup (do we need anything other than diapers, wipes, rash cream and lotion?)
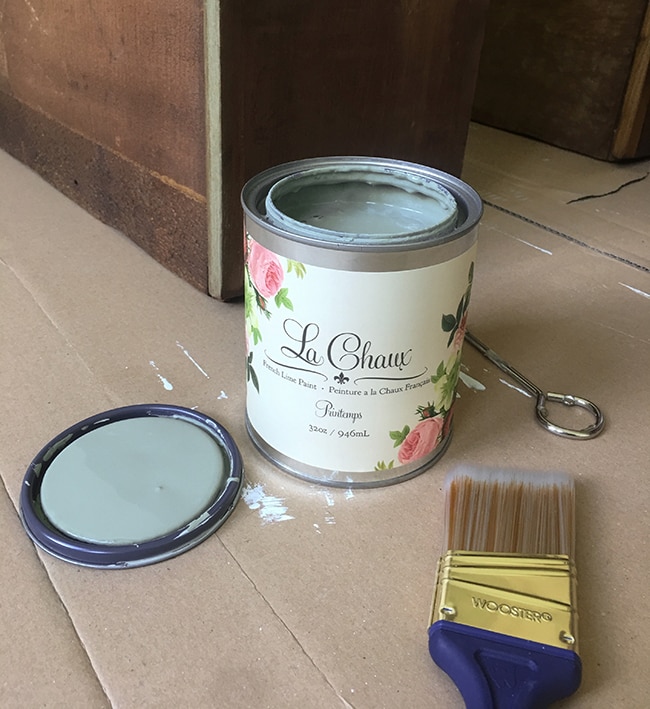
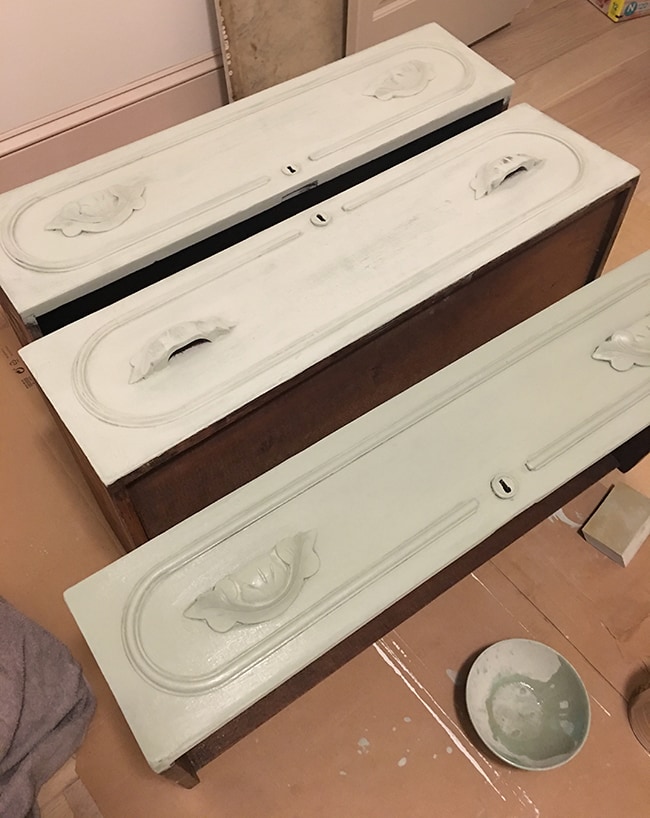
The next day it was time for a dresser makeover! I decided on Maison Blanche’s french lime paint, in the color Printemps (which is a pale sagey green):
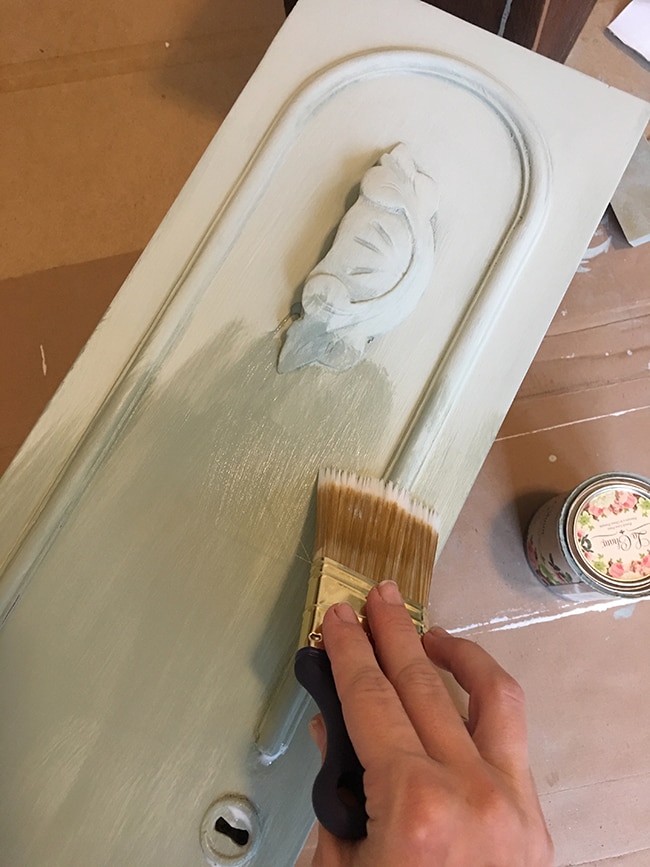
I also made sure to use a brand new brush (my favorite $5 brush) and applied the first coat:
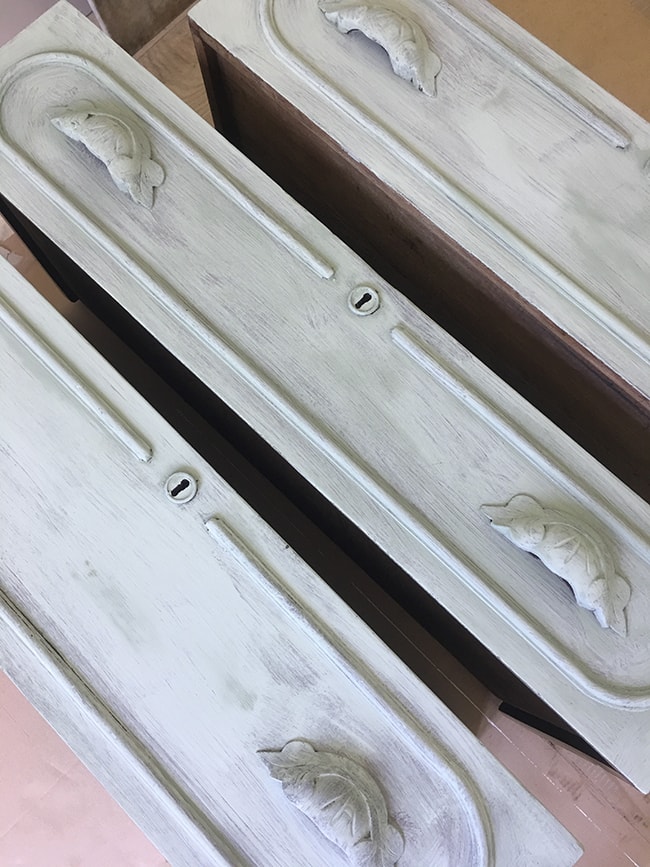
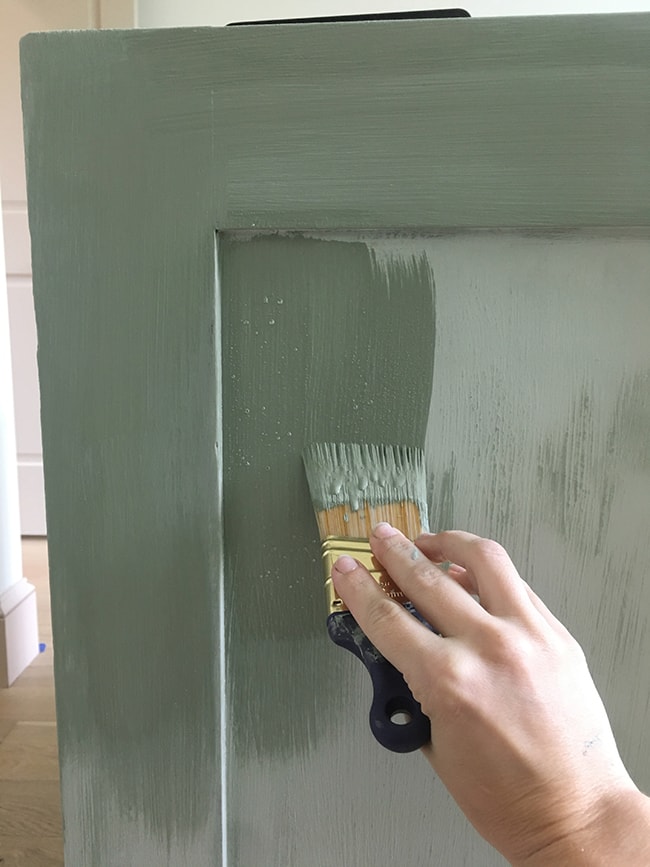
This paint is not like regular latex paint at all—it’s has a powdery finish that you layer on and end up with visible texture and depth for an aged look. It can get really thick, and I found that it’s best to water it down for a smoother finish.
I applied 3-4 coats, lightly sanding with a 320 grit block in between.
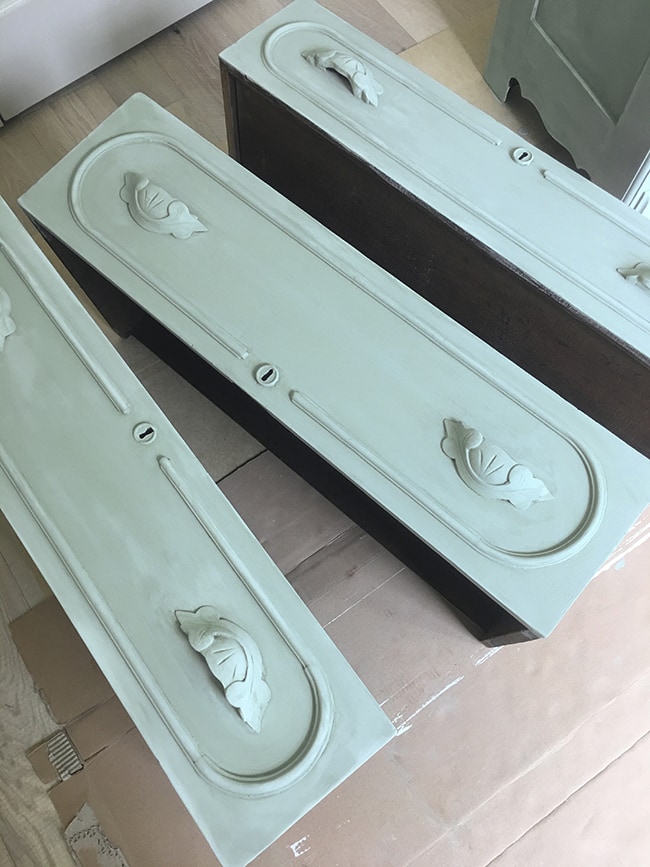
You can see how much lighter it gets when it dries (the bottom drawer is still wet in the photo below):
Finally, I sealed the dresser with three coats of Minwax polycrylic in matte:
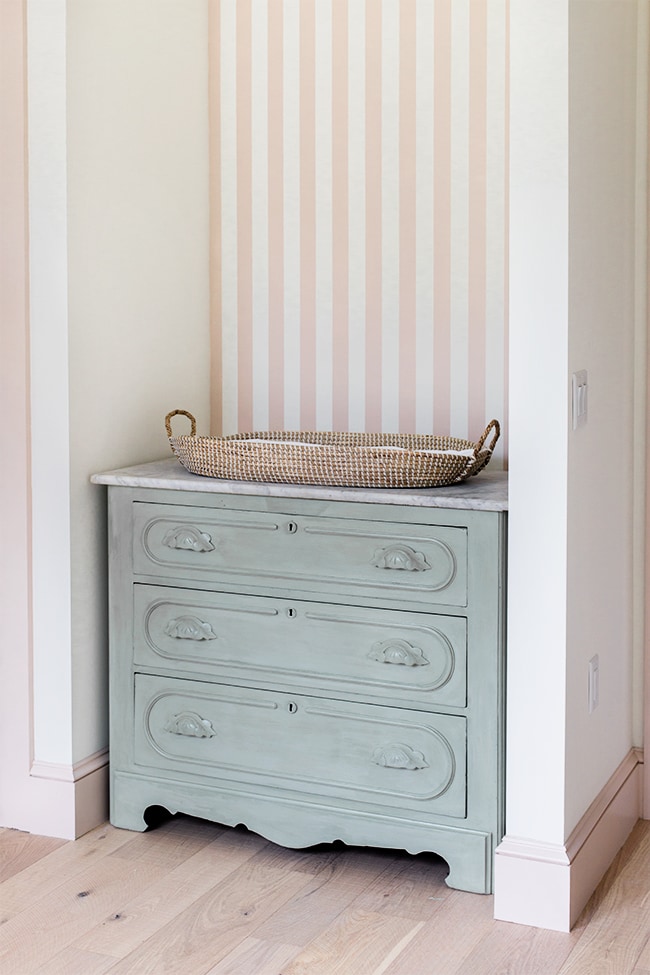
It’s hard to capture the true color in photos, but it’s so soft and delicate, and I think it will be gorgeous with the forest mural…
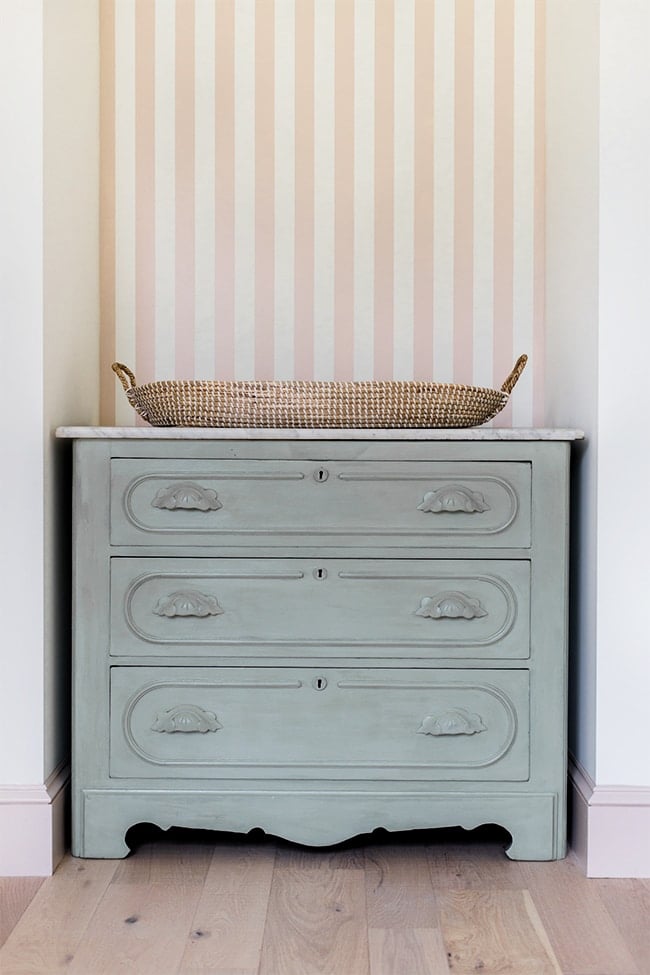
And I love the way it looks next to the natural texture of the seagrass changing basket.
One more time for the overhead view…

I’m tempted to put our cat in the basket for a practice diaper change 😉 Daydreaming is fun…
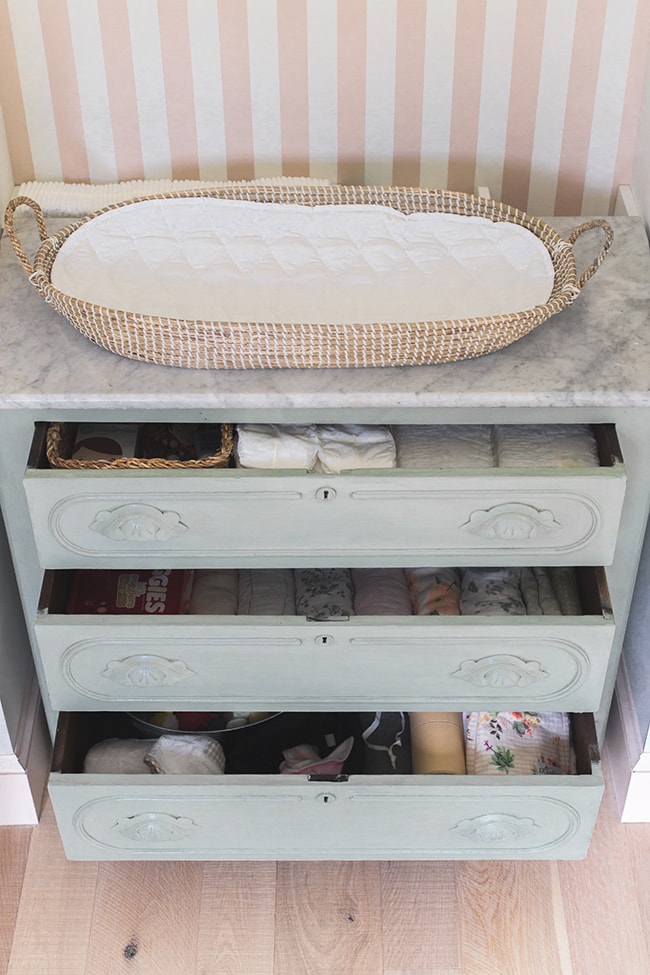
I also didn’t waste any time organizing these drawers! The nursery is now 95% organized (even though the room is only 10% complete…)
Next up I’m spilling all the details on her closet makeover. My nesting has been in serious overdrive lately (making up for lost time) and nothing makes me happier than staring at all her little clothes and accessories neatly stored away. Can’t wait to share that with you in a couple days—stay tuned for more nursery fun my friends!


Linda says
Did you prime or sand the dresser before painting it? The nook looks great! Hope you can relax and enjoy it all soon!
Jenna Sue says
Nope, no sanding or priming required with this paint! My favorite thing about it <3
Linda Fitzgerald says
?
Amy J says
I would add hand sanitizer to the changing table. It’s easier than trying to wash them all the time while holding a babe. Also, I would consider a back up to the basket. She will grow out of it pretty quickly and as others mentioned they pee/poo all over the place in the beginning. Good luck! It’s the best job in the world to be a mommy!
Jenna Sue says
Ah that’s smart! Hoping this basket will work out for us but if not, Amazon prime is just a click away 😉
Terri says
Jenna, I love following along as you and Lucas create the nursery that will be perfect for the three of you! Thank you for taking time to share the beautiful details.
Jenna Sue says
Thank you Terri, so glad you are enjoying the progress so far!
Shanon says
My husband works in insurance and I’m pretty sure you can file a claim with the driver of the vehicles auto insurance to have the damage to your property repaired. With all you have going on you might as well get the person responsible to pay for repairing the damages. Good luck!
Jenna Sue says
Thanks Shanon! We have the police report # so now we just have to figure out how to get in touch with the driver. Hopefully they’re ok!
Dallas says
Cotton wool and a little container for water. You don’t want to be using wipes on that beautiful peachy new born bum! Calendula cream for nappy rash and any skin problems. A stack of cheap white hand towels which are great for mopping up all ends ?. And finally a huge dose of good luck!! X
Jenna Sue says
Noted, thanks so much Dallas!
Sandie says
So pretty and charming! What an amazing journey you are beginning ?
Jenna Sue says
Thank you my friend! <3
Kathleen Bell says
Love it! Was thinking about a while in babies grab for everything while waiting for a change, but because that is lower than the dresser its a perfect way to avoid a bunch of diapers flying across the room. lol
Jenna Sue says
That’s the hope! Or we’ll just have to train her to be perfectly well behaved LOL
Leslie says
That’s gorgeous. Do you have any tips to freshen up the smell of older pieces. It has that distinctive scent when you open the drawers.
Jenna Sue says
I’ve heard of trying vinegar and/or bleach to get rid of moth balls (tried it in an old chest and didn’t work for me) but fortunately this dresser came smell-free! I just wiped the drawers down with kitchen cleaner spray beforehand.
Chris K says
I have the same issue with an old dresser. The only thing that worked for me was to coat the inside of the drawers with multiple layers of polyurethane.
Jenna…I love how the dresser came out! I need to use that paint on my next project!
Susan D Berkelbach says
Love this hidden storage! You do not want to be trying to open a drawer while keeping a wiggly baby on a changing table! Also be sure that nothing you have at the table is too precious or not wipe-able! Especially when they are little the poop can go everywhere, at any moment! I’m so happy for you two! I have been following your story for years now! Congrats on baby and awesome hubs! : )
Jenna Sue says
Thank you so much, Susan! <3
Dani says
This is beautiful. I hope you never have the issue that I and all of my friends have had with unexpected poop explosions as soon as you open the diaper. The newborn phase is the worst for this. I fear that sea grass basket may not be as cleanable as a wipeable pad or Peanut changer.
Jenna Sue says
Fingers crossed! There’s always pressure washing ?
Laura says
Your pressure washing reply here made me laugh. It sure shows you have the tools to rejuvenate anything!!!
Erika says
While precious, the basket wont hold a growing baby past the changing table stage. When that happens, what will you put in it’s place to still serve its purpose of “changing station”?
Jenna Sue says
Then it will just be a dresser 🙂
Kimberly says
Hi Jenna! Love how creative you are. I was wondering if you’ve ever thought of using Flor tiles–especially in your rental….I would love to see your take on them.
Jenna Sue says
Hi Kimberly! I looked into those briefly when they first came out years ago, but never found a use for them. We have laminate floors at the Riverside Retreat and I love the durability and look of them!
Lorraine says
Don’t forget a soft nightlight that gives enough visibility to change a diaper, and a mobile to keep her hands and attention out of the way, when she gets older a toy or two helps as well
Jenna Sue says
Planning to have all of the above! 😉
Amanda says
I keep chux pads for really yucky diaper changes (order on Amazon). With blowouts, your pretty changing pad can get super dirty, so I put one down and then can just toss it when I’m finished. I also use them for public changing tables. A lot of people use the one that comes with their diaper bags for that, but I’m pretty sure those changing stations are the germiest things ever and I’m not putting that reusable changing pad back in my bag after it’s been sitting on the changing station. So easy and much cleaner. I’m an environmentalist, but I put my foot down on spreading germs. Love your hidden storage!
Jenna Sue says
Thanks for the tip, I’ll have to look into those! I bought washable/reusable foam liners to put on top of the changing pad so hopefully those will do the trick 🙂
Amanda says
Yep, I have those too. For lesser messes, those are great. But there are likely to be some that are super-yuck. Or maybe it’s just my babies! ? Also time for all the laundry becomes a problem at times. You may have better luck though.
Tara R. says
Beautiful work!! I love the entire house and can’t wait for you to be able to relax & soak in the newborn days with your precious one. Handy changing station items: nail clippers, a high contrast item (black & white art or book) to hold her gaze.
Oitems for the newborn days are disposable changing pad liners for blowouts- so you aren’t scrubbing and washing your fabric pad daily. They’re also great for diaper bags, and I cut them in half sometimes b/c they’re large! https://www.amazon.com/Munchkin-Hammer-Disposable-Changing-Count/dp/B002KCMSPQ
Also, these baggies for smelly diapers after she starts foods, the early days aren’t too stinky in my experience. They’re also great to open up wide before you start changing her to throw your dirty wipes in quickly when you’re trying to contain the mess.
https://www.amazon.com/Munchkin-Hammer-Diaper-Refills-Count/dp/B009F98SSS/ref=sr_1_4?keywords=diaper+baggie&qid=1562684329&s=baby-products&sr=1-4
Good luck with the rest of your pregnancy- it’s a wonderful time! Thank you for letting us follow along!
Jenna Sue says
Thanks for the recs, Tara! I did buy washable foam liners I’ll be using on top of the changing pad, knowing I’ll go through those often! Good to know on the diaper bags — do you use this instead of a diaper pail or in addition to?
Tara R. says
in addition to the pail
Erika says
Diaper pails no matter how pricey and fancy it is will still leave some aroma in the room even after just one opening of the can. I used it maybe all of two weeks if that with my first
born and realized nothing beats the good old fashion way of just sealing up a soaked, pooped in a baggie (recycled clear veggie grocery bags) then tossing it straight outside to the trash bin. Live n’ Learn as they say!
Jenna Sue says
Good to know — maybe we’ll hold off on buying a pail and see how it goes!
Angie says
I just used the bags that were made for the diaper pail. The diaper pail lasted about 2days b4 I realized i did t like having all that poo in baby boys room. Its just as easy to throw in the main trash.
Jenna Sue says
Hmmm interesting… we haven’t bought a diaper pail yet but there is no good place to put one, the one drawback about this nook! I figured I’d just keep it out in the open but now I’m wondering if we should just use those bags instead. Thanks for sharing your experience!
Deborah Gustafson says
The hidden storage is absolute genius. The nursery is going to be so dreamy and sweet!
Jenna Sue says
Thank you Deborah, so glad you like it! <3