Today I’m sharing Part 2 of our nursery organization—the closet! Make sure to check out Part 1 with our hidden storage changing table first in case you missed it.
Here’s how the closet and nook looked when we moved in…
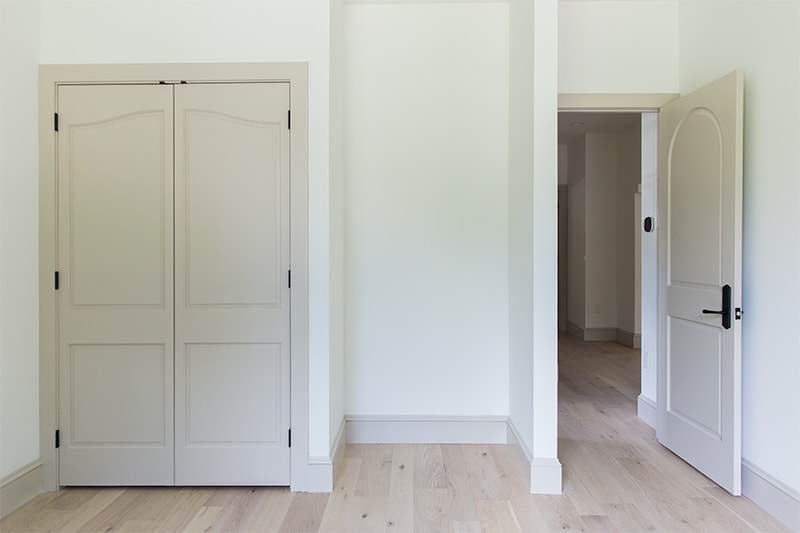
This wall was originally an 8′ closet in the build plans, but we opted to divide it into a 4′ enclosed closet plus an open nook for a dresser/changing station (one of our better ideas, I must say).
Closet makeovers are high on my list of top DIY projects because they’re small and manageable, and you can have more fun and experiment with the design since it can be hidden behind doors. Plus, organizing sparks all the joy for me so this is right up my alley (and obviously I’ve been dying to start nesting after 7.5 months of carrying this baby!)
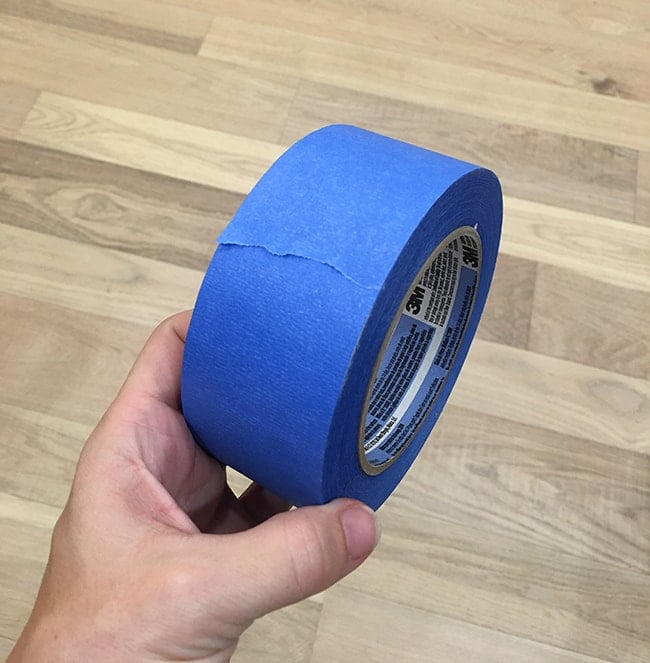
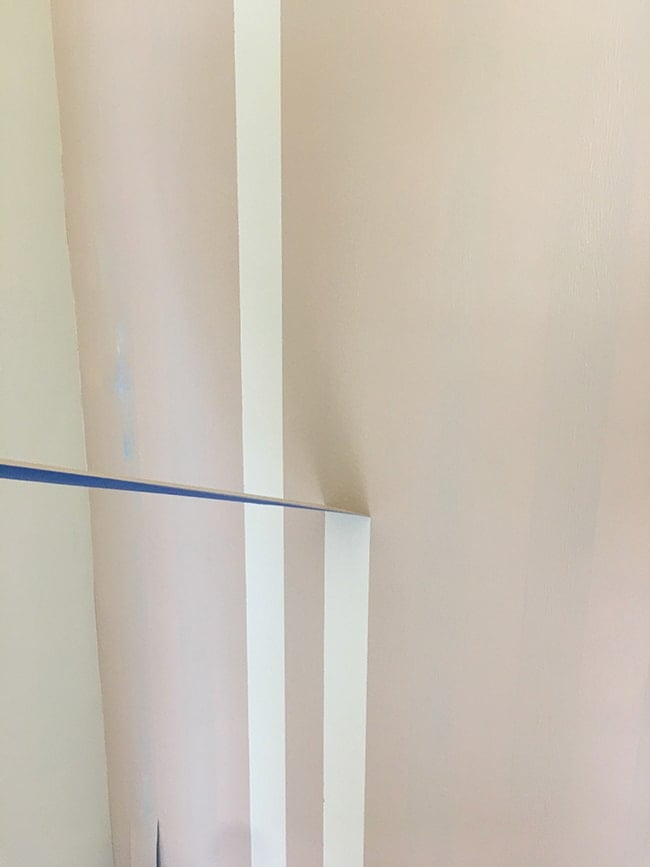
For this project, I went with painted stripes instead of wallpaper (we were all wallpapered out after our recent closet makeover, plus we’ll be hanging a wall mural on the adjacent wall) so I picked up a roll of the widest painter’s tape I could find (1.88″).
There’s a few different ways you could approach the spacing, and we decided to keep it simple and make the stripes even. Instead of marking up the wall, we ripped off small pieces of tape and carefully lined them up along the edge of the wall vertically every couple feet, acting as spacers. Starting from top to bottom, we secured the first piece of tape, making sure it was aligned with our tape spacers. Then we moved the spacers to the right side of the tape and repeated the process.
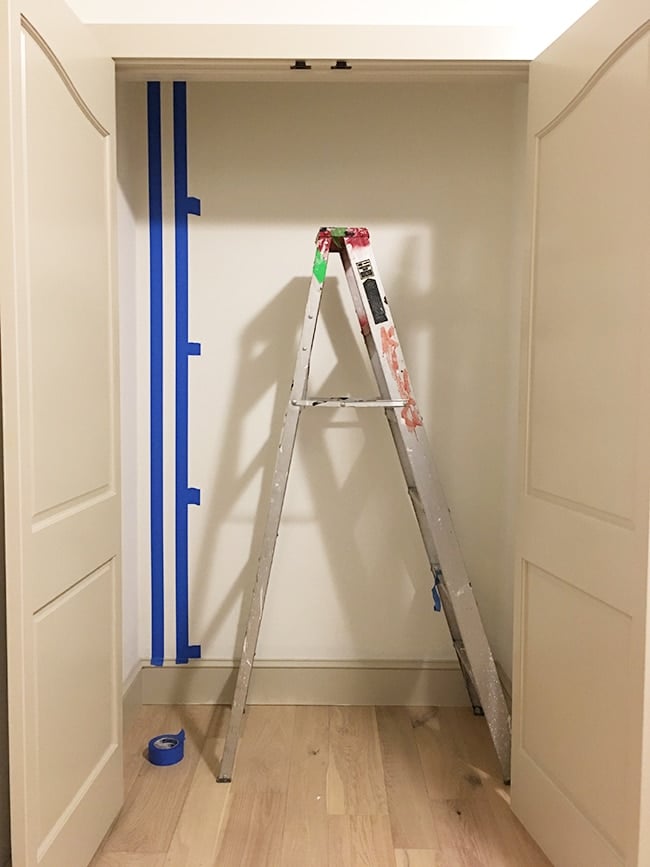
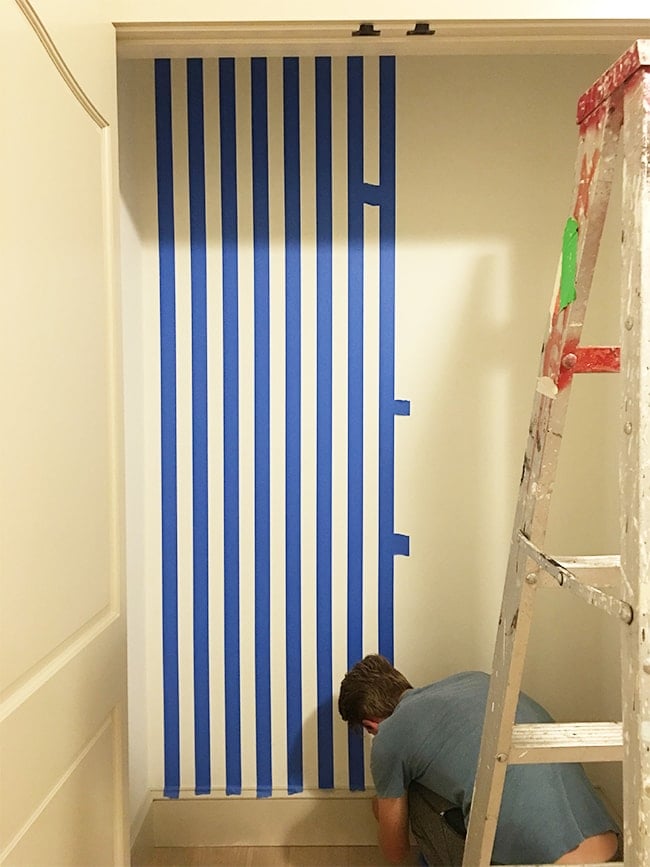
Lucas stood on the ladder and handled the top section, while I took over on the bottom half. It took us about an hour in total.
We did the same for the nook wall.

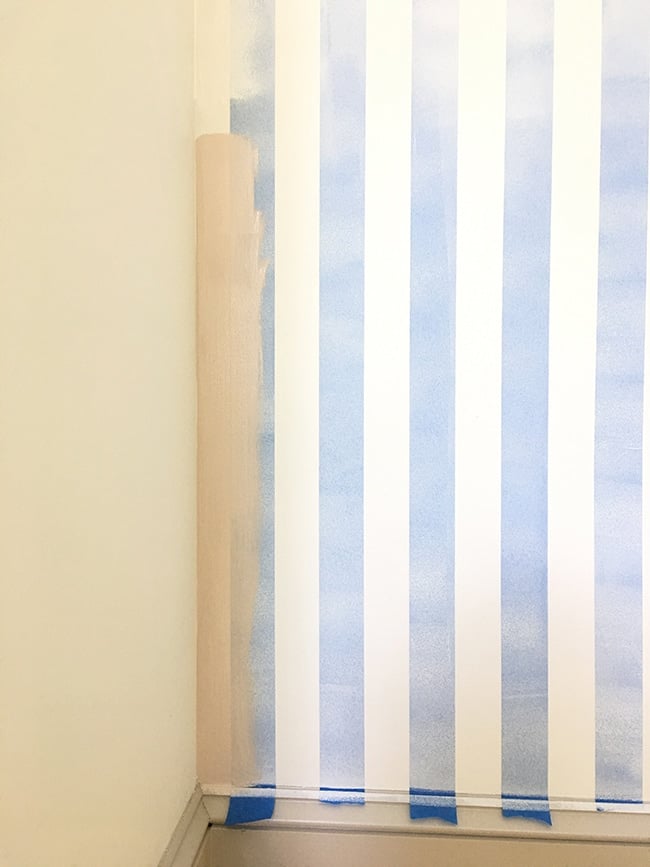
Now here’s the important step—instead of simply painting the wall and calling it a day, you’ll want to first paint the wall with the existing wall color (the color underneath your tape) to avoid bleed through. This will ensure the wall color bleeds through under any loose areas of the tape first, blocking the second color. I used SW Alabaster (flat), one coat should suffice.

After the wall color has dried, go ahead and paint your stripes. I chose a gorgeous pale putty pink (SW Malted Milk) in satin.
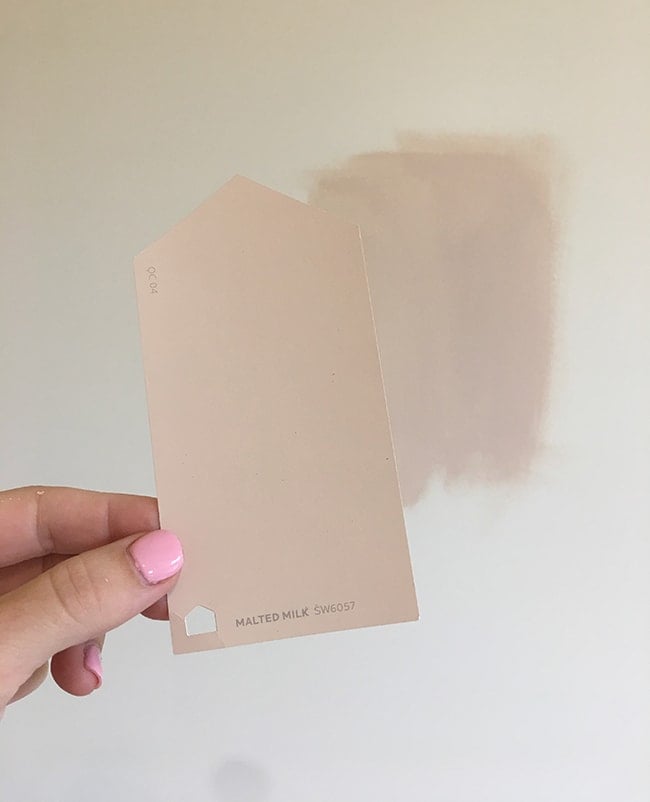
Seriously can’t get enough of this color.
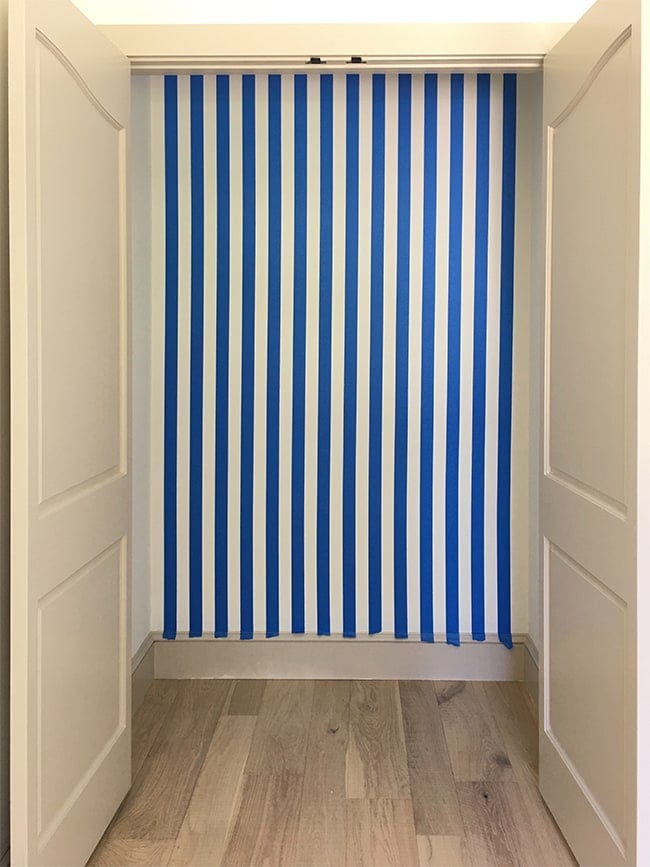
I applied two coats for full coverage with a smooth foam roller and waited around 20-30 minutes, until it had just dried, before removing the tape. Moment of truth!
This is the fun part…
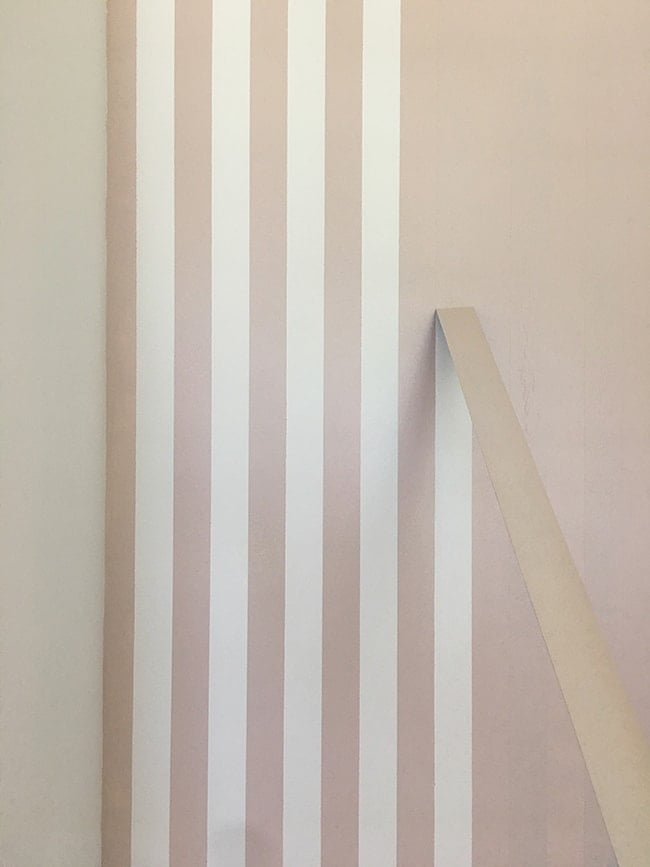
Look at those stripes! You can see a bit of the pink closet wall before we had removed the tape there.
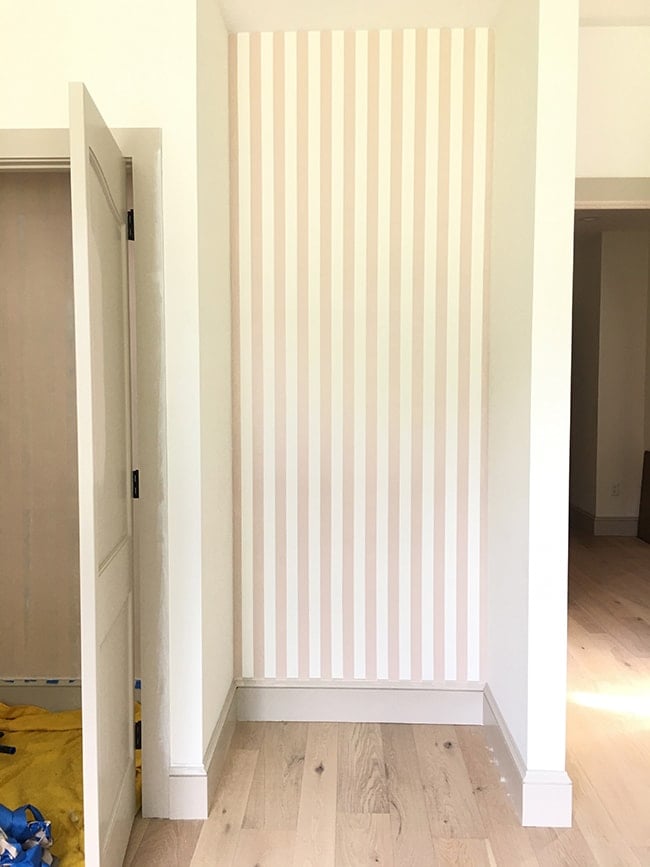
And here’s how the closet turned out. The house painters didn’t do a perfect job priming/painting this area and the tape ripped off some of the drywall, so we had to do some touchups, but no big deal. I also painted all of the trim and doors Malted Milk (the existing color was SW Accessible Beige, if you were wondering).
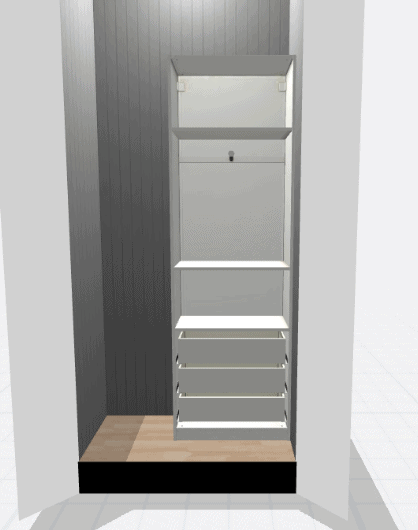
Now for the closet part! After lots of research trying to figure out the best/most budget-friendly and easily customizable closet system, I settled on the IKEA Pax wardrobe. I’ve used the Pax in the past, both as a kitchen pantry and bedroom built-ins, so I was familiar with the process and ease of assembly/customization. After using Ikea’s online planner to design the perfect setup, we happily made the drive there with our shopping list in hand.
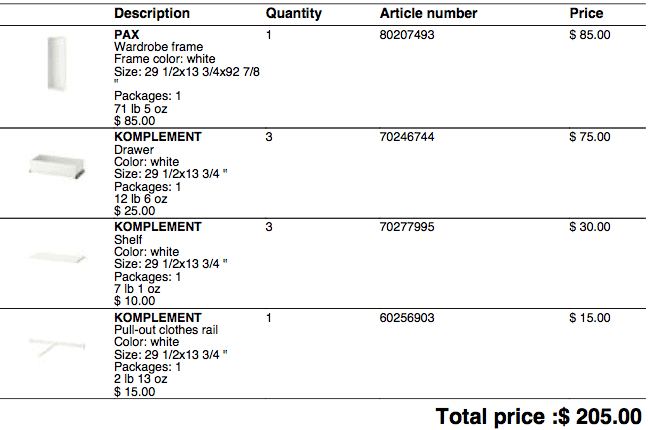
A few days later when we went to put it all together, I realized our closet was 7/8″ too narrow for the standard 24″ deep wardrobe—ugh! At least I can blame the oversight on pregnancy brain (I’ll miss having that excuse in a couple months) so back to Ikea we went, this time coming home with the 14″ deep frame. Here’s what we bought:
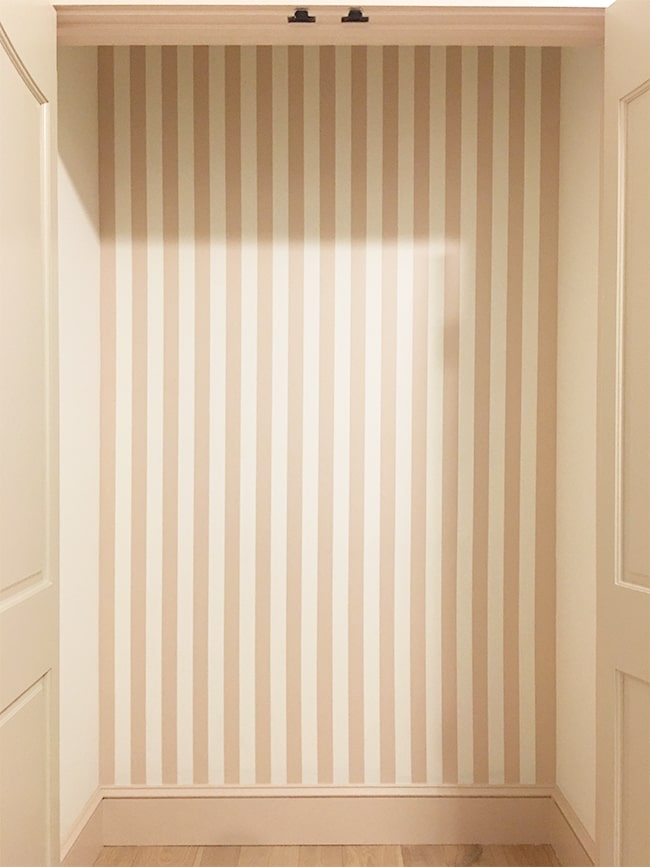
We assembled the frame as planned, opting to skip the back piece to allow the stripes to show through.
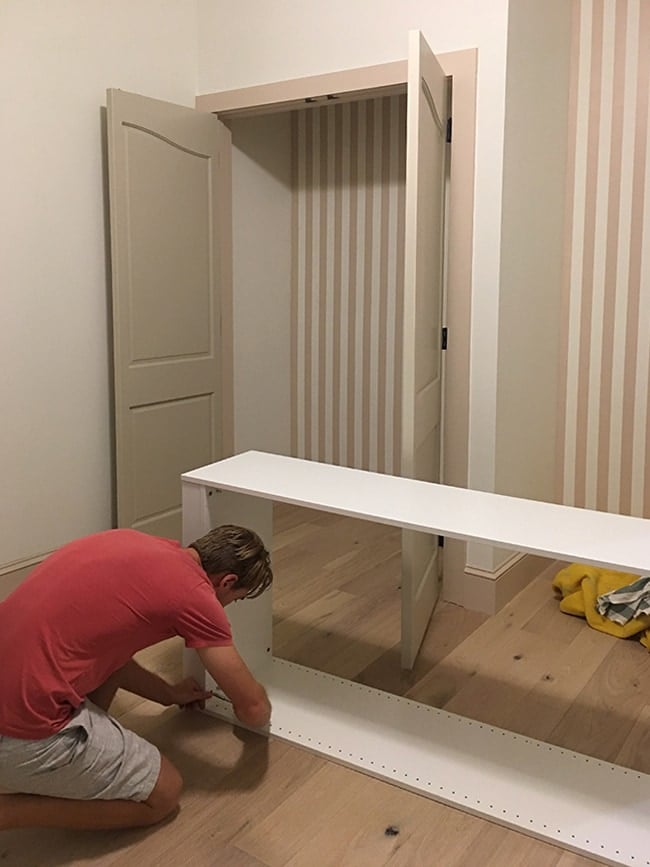
And there she is!
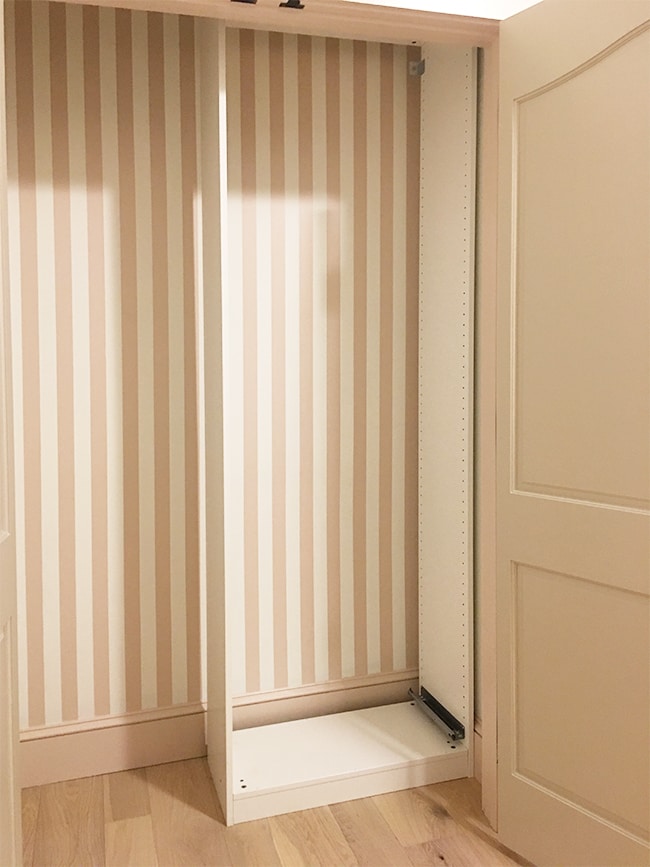
There was just one slight issue—the baseboards prevented the frame from being flush up against the walls (those pesky baseboards are always causing trouble!) Fortunately, we were able to use our Dremel multi-max to easily cut them away.
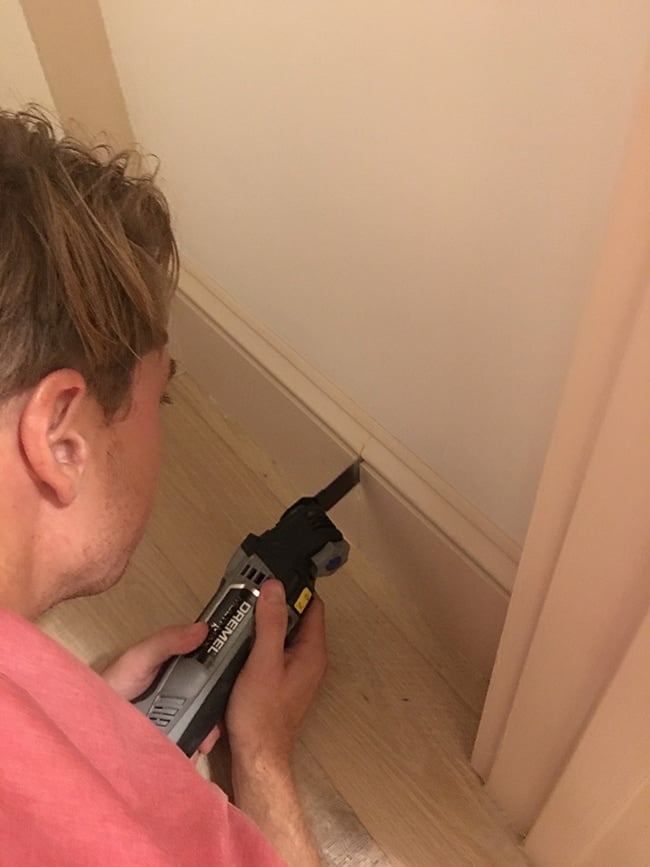
We just got this tool a couple months ago, and I’m not sure how I ever lived without it (we’ve used it for so many things around the house already!)
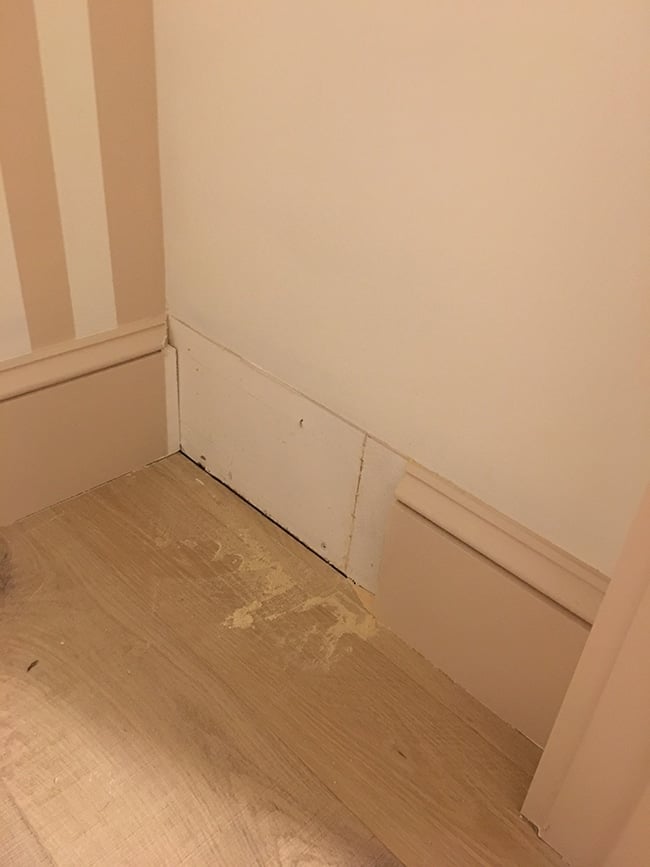
Once both sides were cut, the frame was able to slide nicely into place.
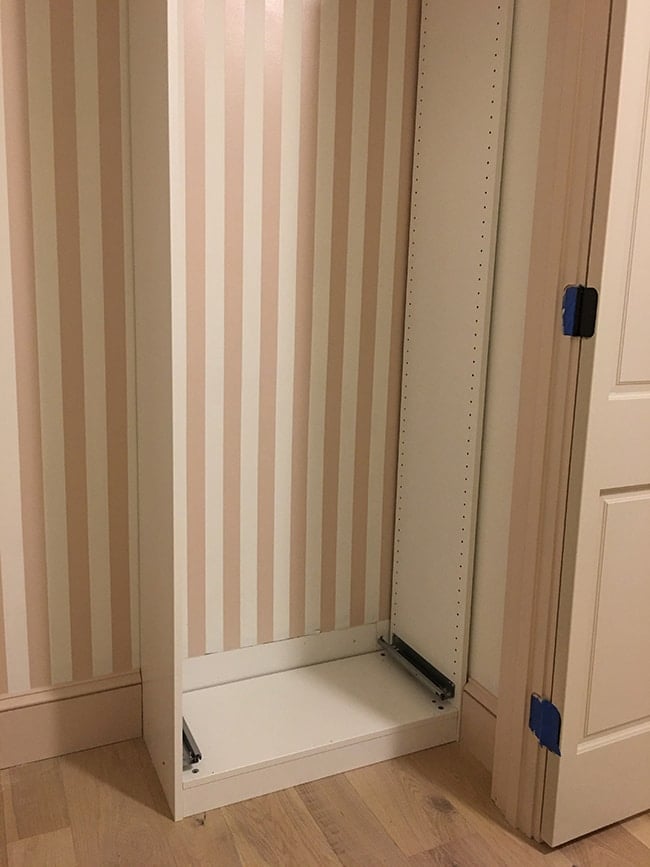
Our frame was secured to the wall and ready for drawers and shelves…

The closet depth ended up working out perfectly in the end, as the fully extended drawers cleared the door trim by about 1/4″—whew!
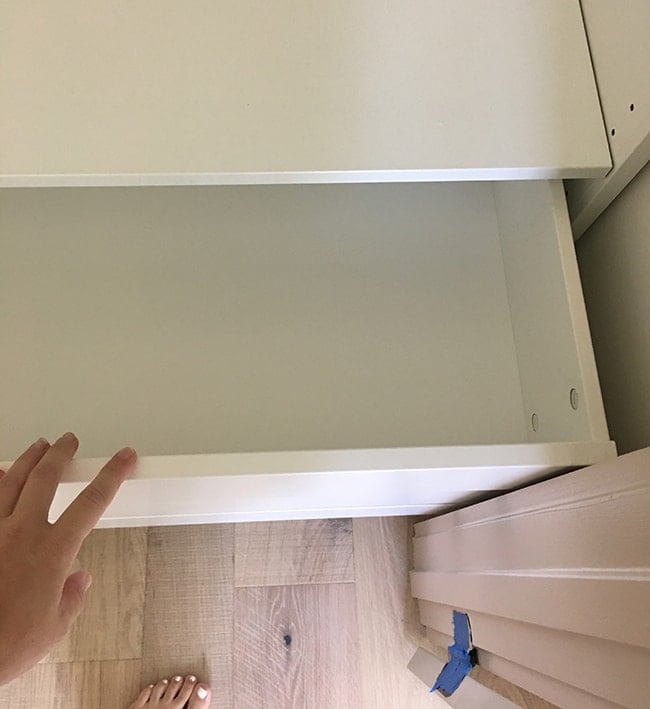
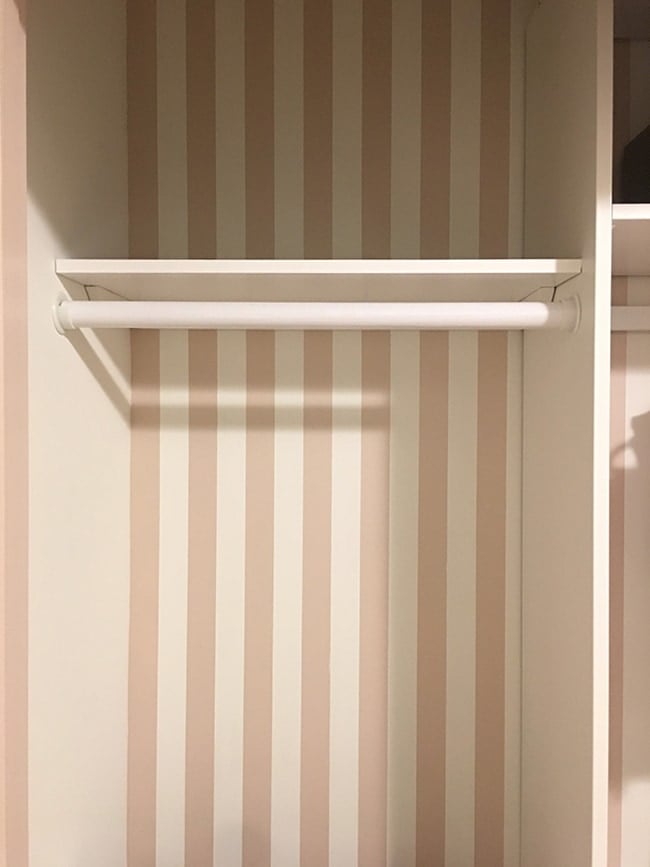
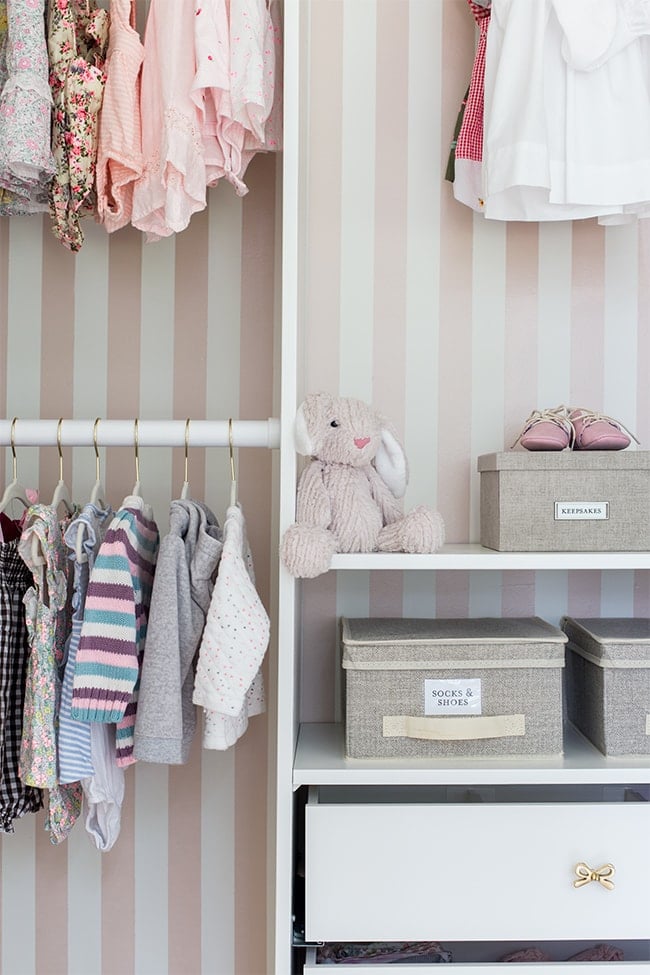
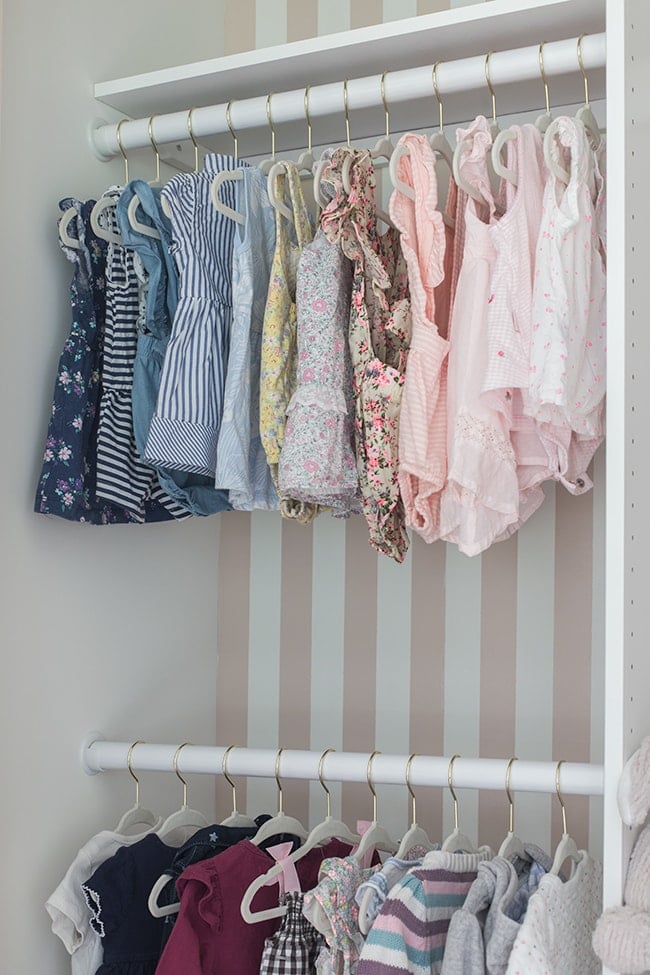
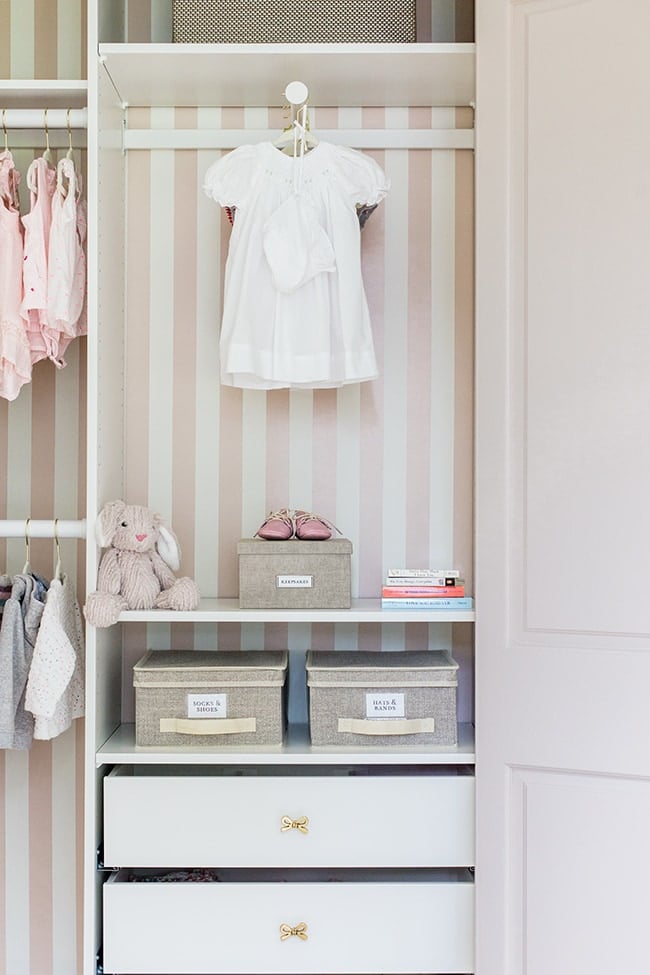
I also added a few shelves and a pull-out clothes rod.
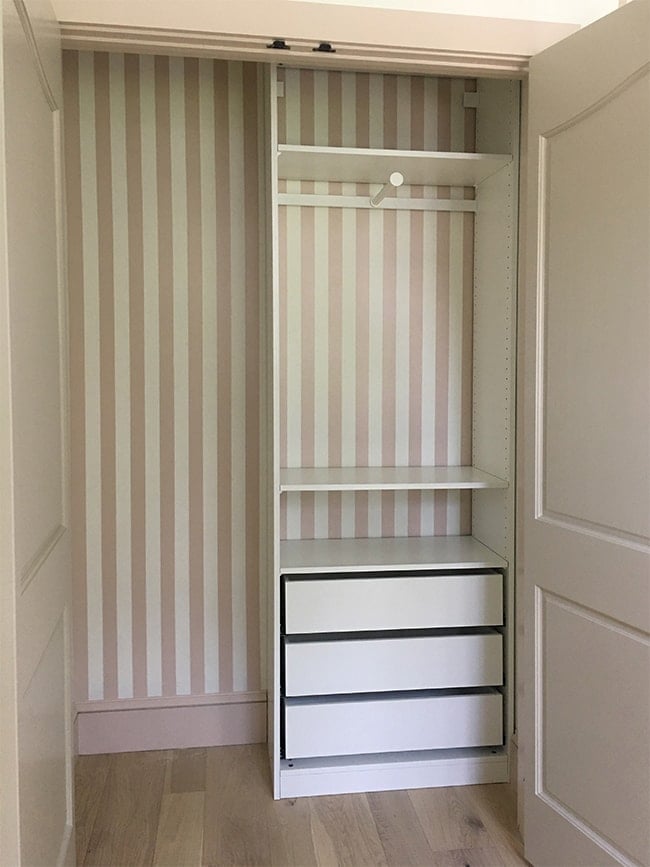
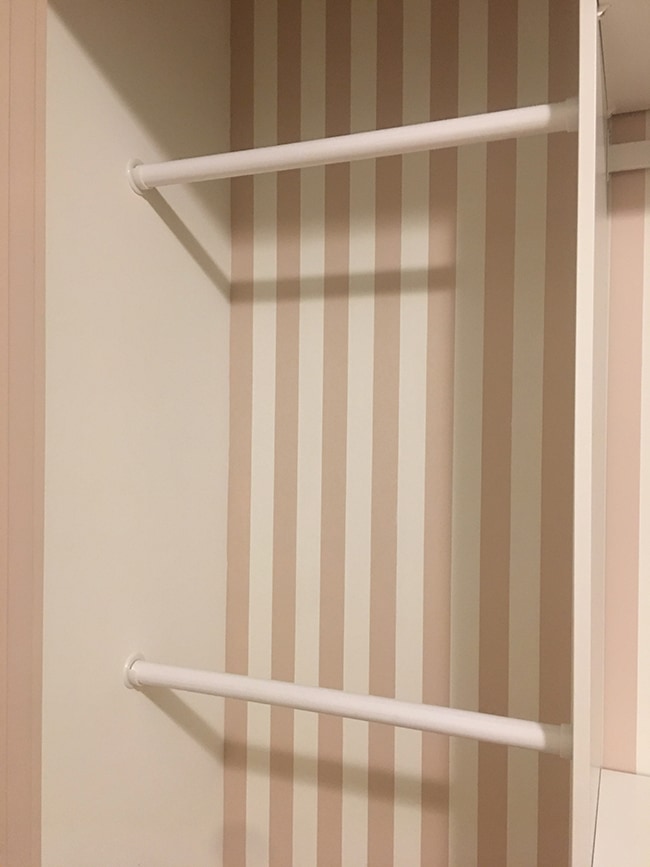
That was it for the Pax system, but we still had around 25″ of empty space on the left side. I decided that two more clothes rods would be the best use of space, so I picked up a $13 72″ rod from Lowe’s and inexpensive low profile flanges from Amazon. The flanges were secured to the drywall (with anchors):
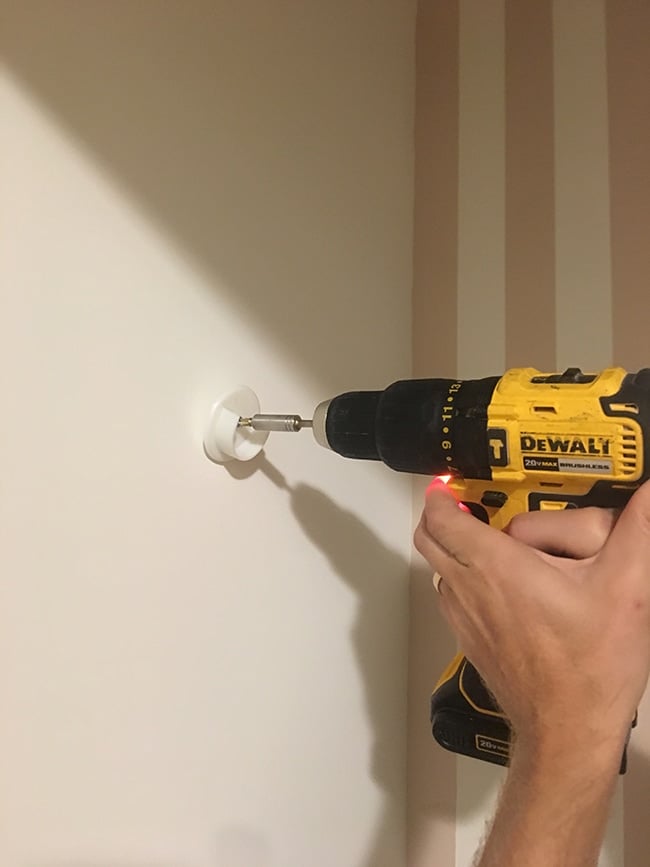
Then into the wardrobe frame with short screws, and the wood rod was easily cut down to size:
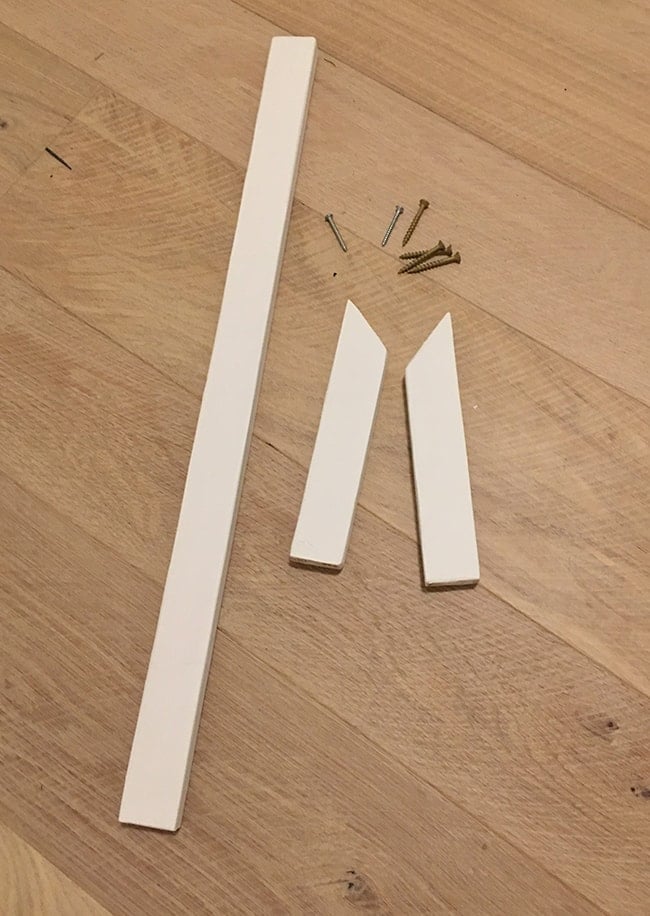
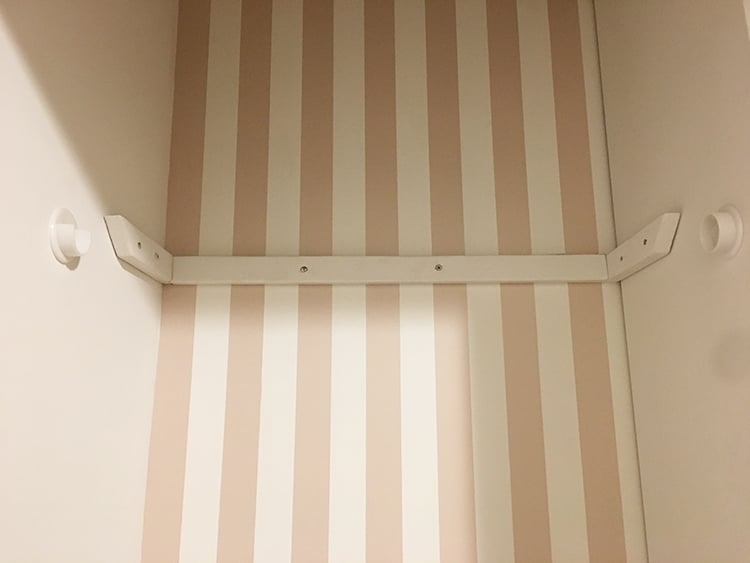
We also picked up a 12×48″ laminate shelf for the top (it matches the Ikea shelves quite nicely and costs only $9) and a 1×2″, which we cut down into 3 pieces and painted to make our own brace:
The shelf was cut down to size, and we marked a line along the wall after holding it level in place:

The 1×2’s were secured along this wall with anchors and screws, checking each piece to confirm level:
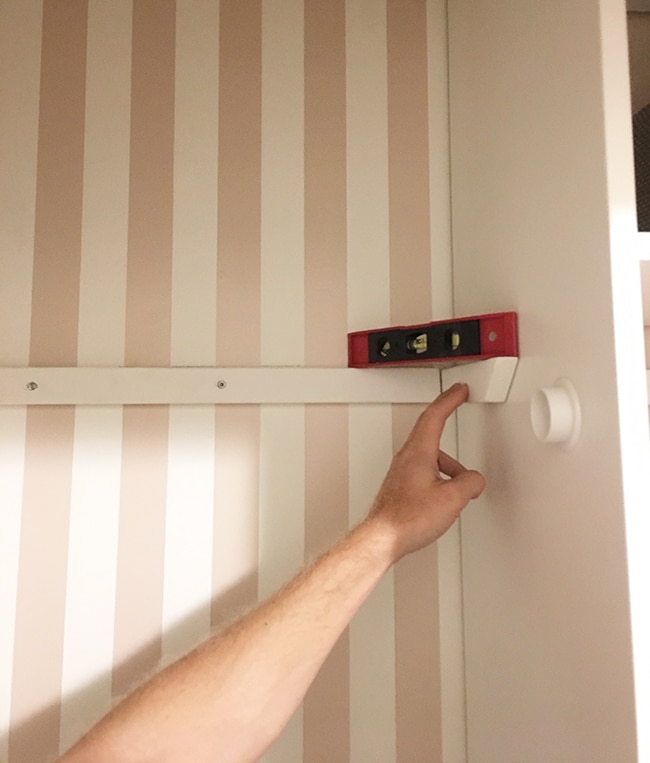
We lined it up so that it would be mostly hidden behind the rod:
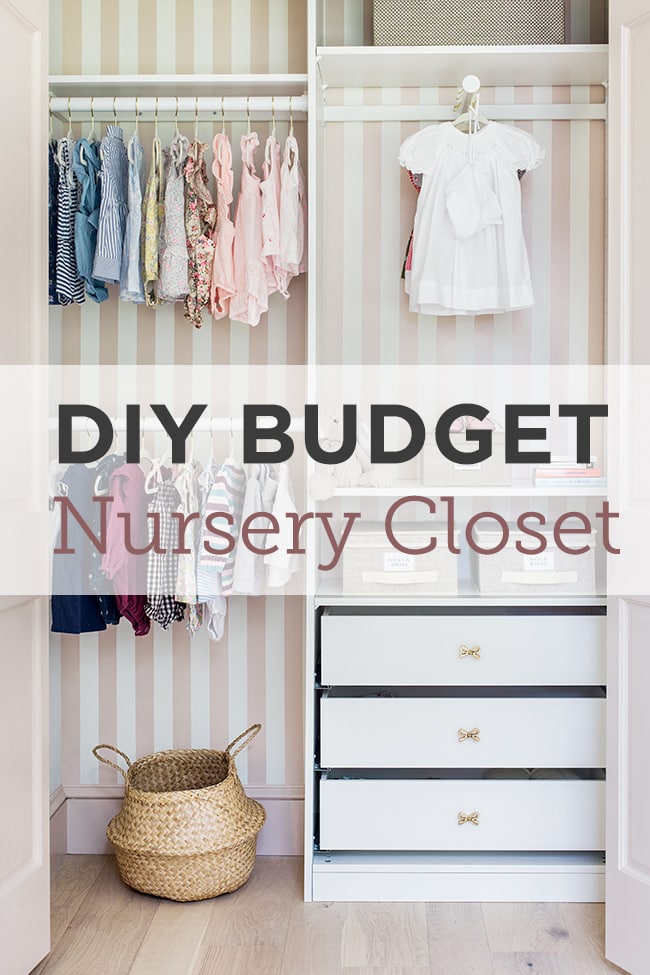
And this closet is DONE! Not bad for under $250 right?
Oh my heart…
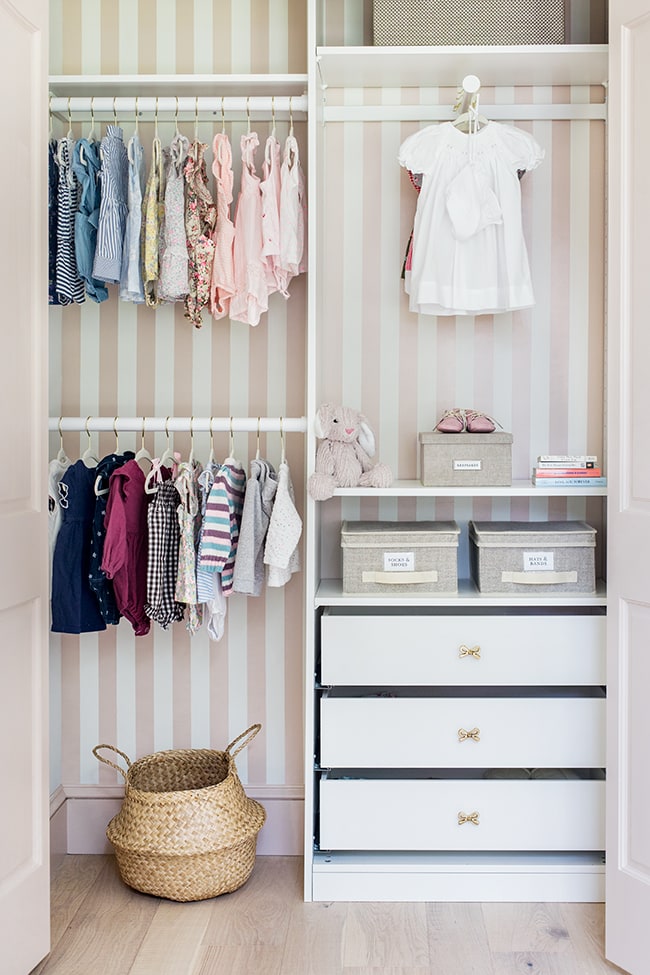
Organizing this little space has been the highlight of my pregnancy (nesting mamas, you can relate!)
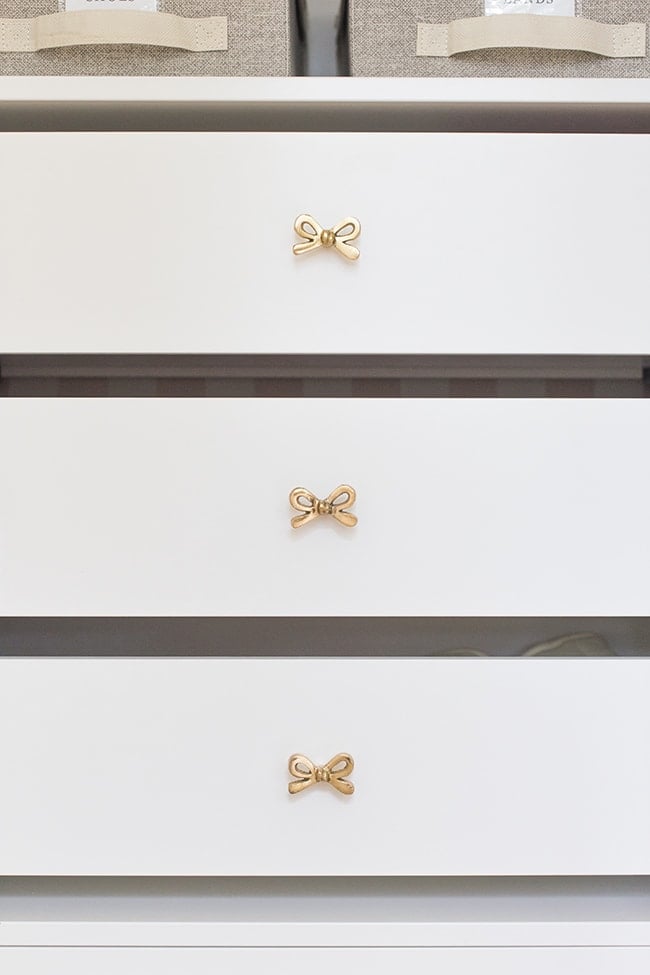
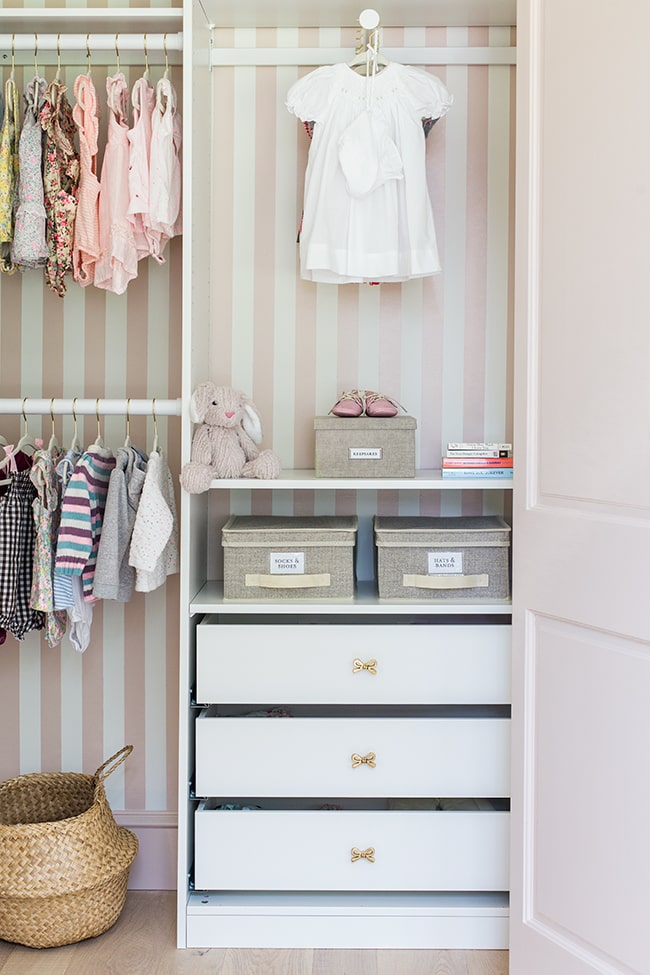
I mean really, does it get any cuter than these bows?!
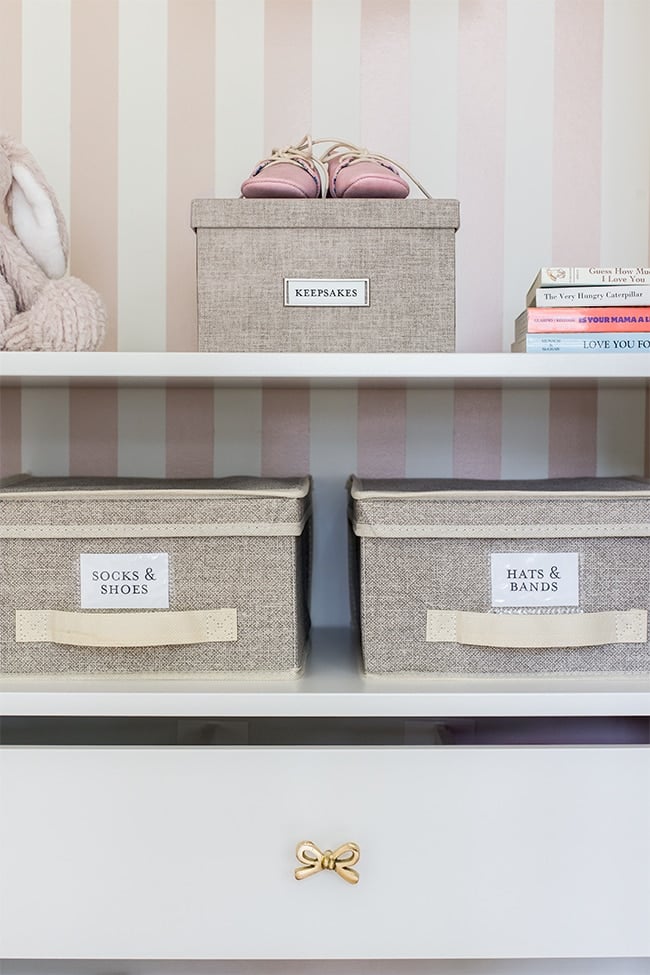
I picked up this canvas keepsake box at a recent trip to the Container Store, and found these fabric storage bins for less than $7/ea on Wayfair (it pays to shop around!)
The great thing about this wardrobe is that I can easily swap out drawers/shelves/clothes rods within the Pax system as her storage needs change.
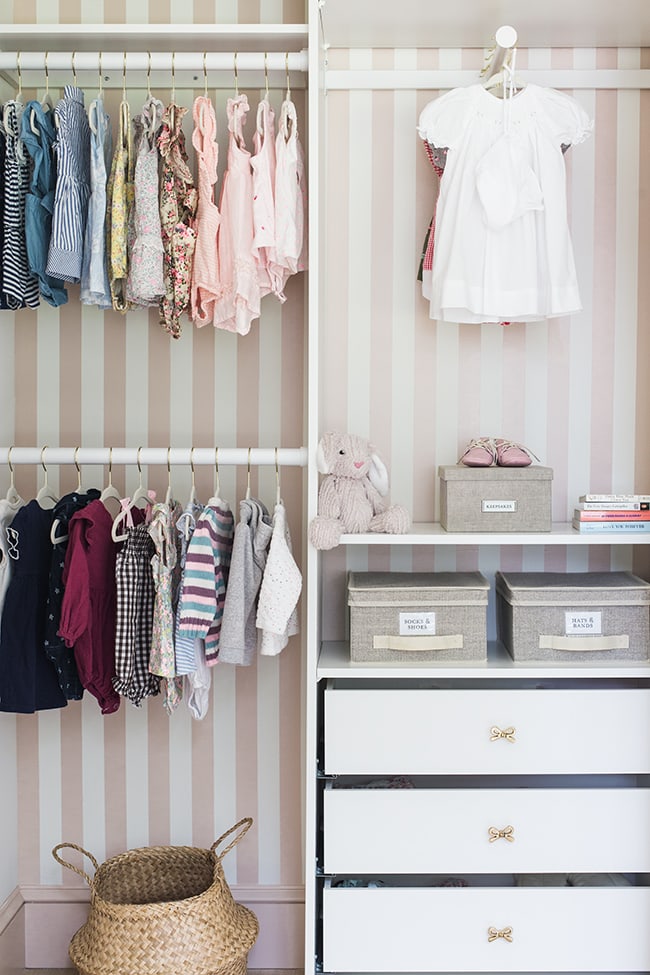
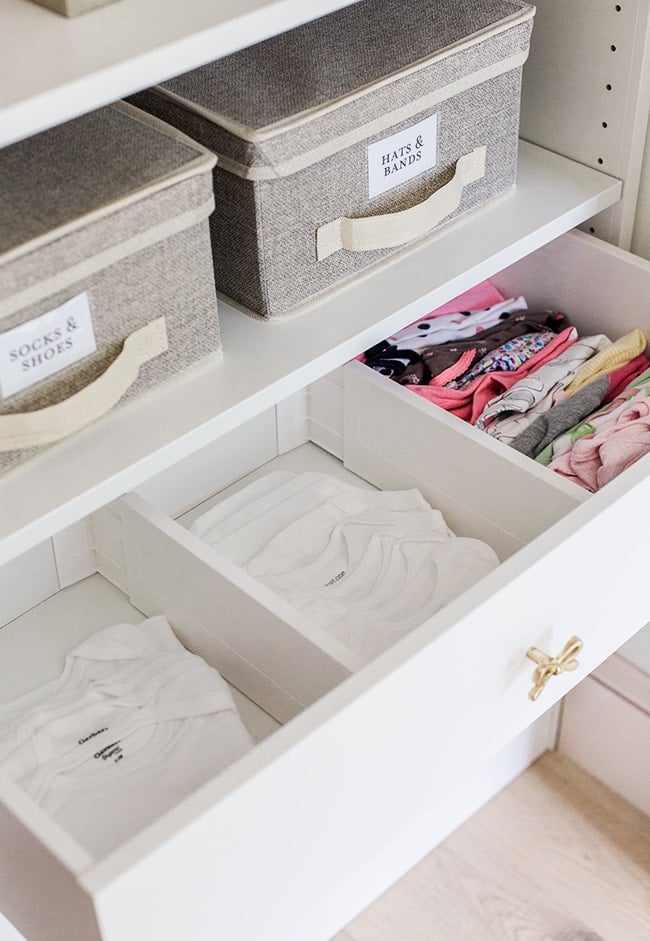
Three drawers are plenty for now though—enough to hold onesies (top drawer), bottoms (second drawer) and pajamas (third drawer).
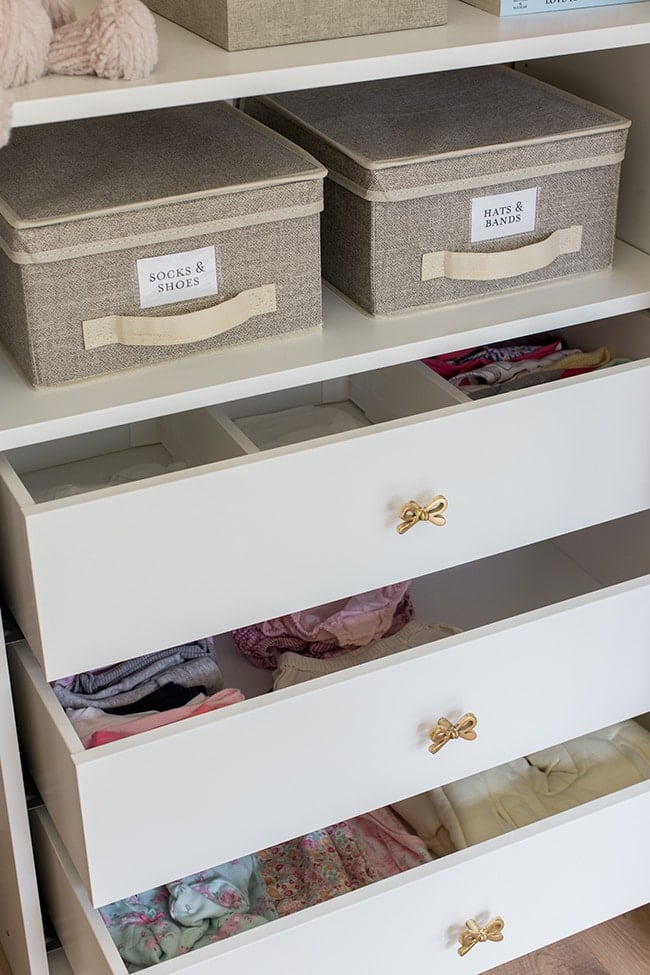
I picked up these expandable drawer dividers at The Container Store to help keep things organized.
The sweet gold + ivory velvet hangers are another one of my favorite budget finds at just 38 cents each (they also have rose gold, which I almost bought instead)
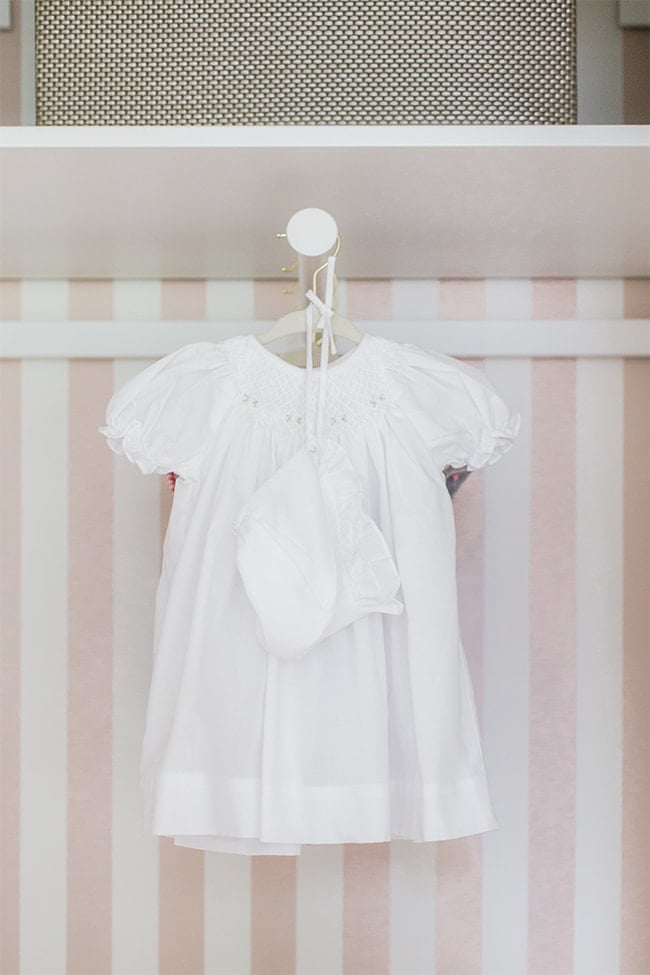
I just can’t with her little coming home outfit. Six more weeks and I’ll be dressing her in it…
The woven storage bin on the top shelf was another Container Store find at 30% off (under $12!) and it’s still on sale. I’m using it to store her next size up clothes.
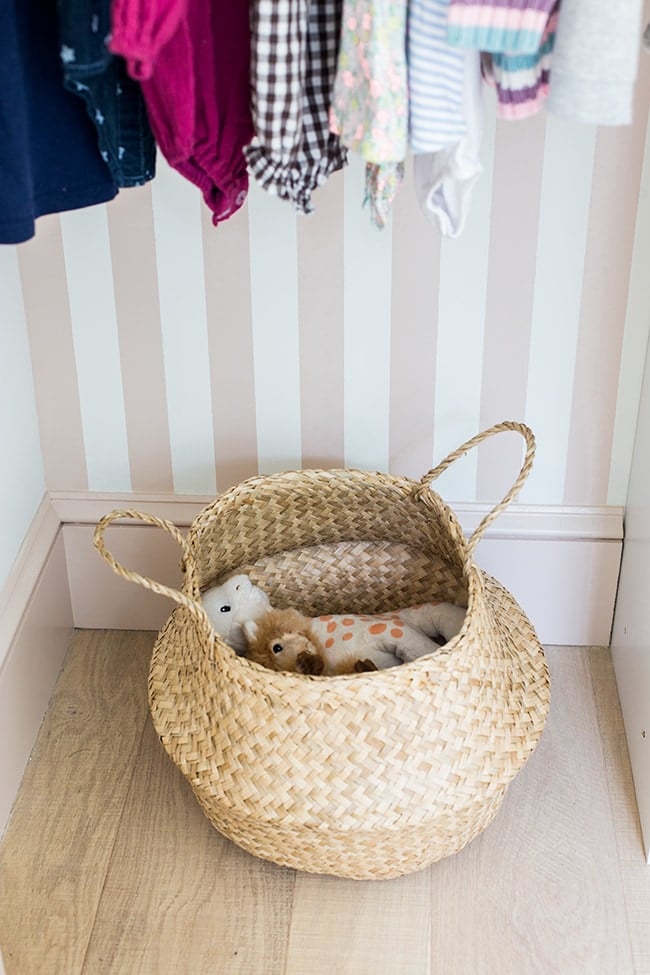
I found this $10 seagrass basket on Amazon and have a second larger one on the way (they’ll be used for toys and laundry).
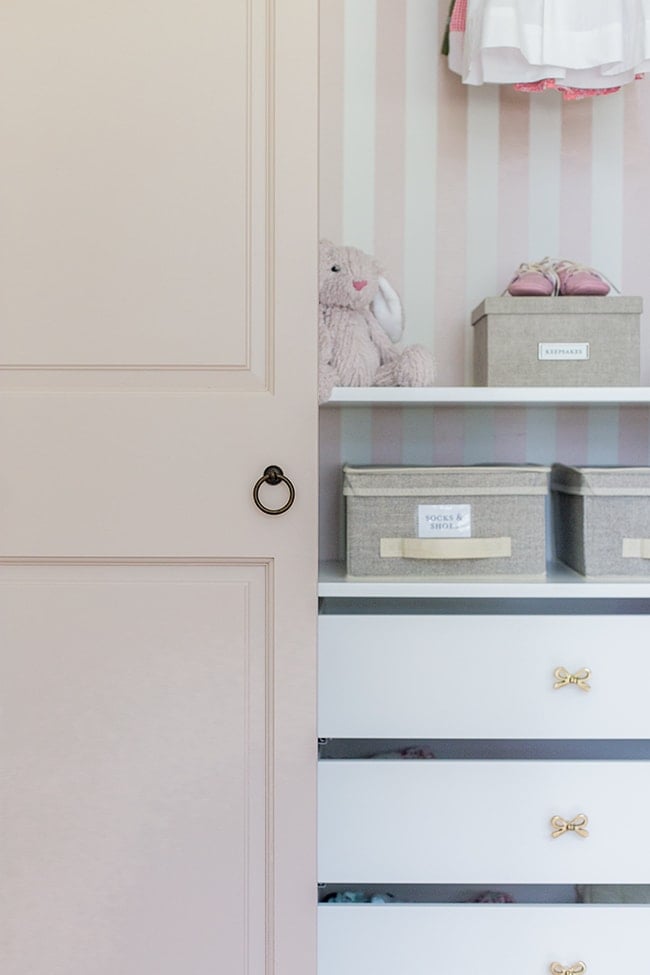
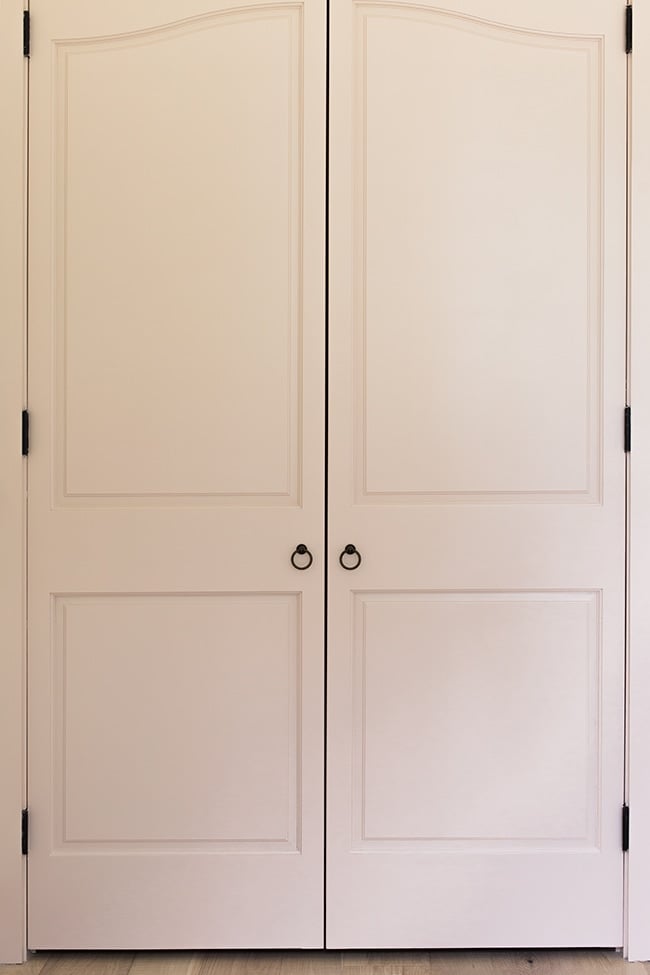
The ring door pulls arrived just in time to snap these photos yesterday evening. They’re the same $3 pulls from Lowe’s I used for our last closet makeover—so versatile and you can’t beat the price!
In love with this whole door situation, and I’m really glad we went custom on these with the French chateau style.
Never has a closet made me so happy (and that’s saying a lot if you understand my love for closets!)
We’re just getting started in the nursery, so hold onto your booties! More pink and bows and baby girl goodness coming your way soon…


Montee Wellman says
Sweet!
Shauna says
Just adorable.
Kathleen says
So precious!! And yes Mommy brain is a real thing ?
Nadine says
This is so nice. Love the stripes and that shade of pink is perfect.
Becky says
Another UNBELIEVABLE job! There’s nothing you can’t do! All your dreams coming true better than you probably dreamed! You are one capable mama and one lucky little girl!
Jenna Sue says
<3 <3
Ashley says
Good news: that closet is gorg. Bad news: that pregnancy brain just gets replaced by mommy brain.
Jenna Sue says
Haha, so I’ve heard! 😉
Brenda says
This is what I was going to say! Mama brain is almost worse 🙂 But you do become used to it or just have lists of things all over the place!
Jenna Sue says
Haha, I already do! Oh boy ?
JV says
Love all your projects, but this one is extra sweet!
I love the “going home” outfit and have a suggestion I wish I had thought of…maybe have a back-up “special” outfit as well! With our second baby (a boy), we got him all dressed in his special going home outfit only to have him have a massive diaper explosion a few minutes later with leakage everywhere (which is likely to happen with those newborn babes) and we had to give him a quick bath and change him completely. So much for the special outfit. 🙂 It was not the end of the world and we were thrilled he was here and was healthy and wonderful so it was all good, but if you are hoping for those special “keepsake” photos, just remember it doesn’t always go to plan and a backup might be a good idea! Wishing you the best of luck in the upcoming exciting weeks!
Jenna Sue says
Thank you so much! And I definitely plan to bring a few outfits for baby to the hospital — gotta stay prepared!
Arli says
So sweet! Your excellent taste continues…
Jenna Sue says
<3
Leslie says
Love this !! Precious
Terri says
Every detail is perfection, Jenna Sue!