It’s Room Reveal Day! Crazy to think that I haven’t had one of these in seven months… how time flies.
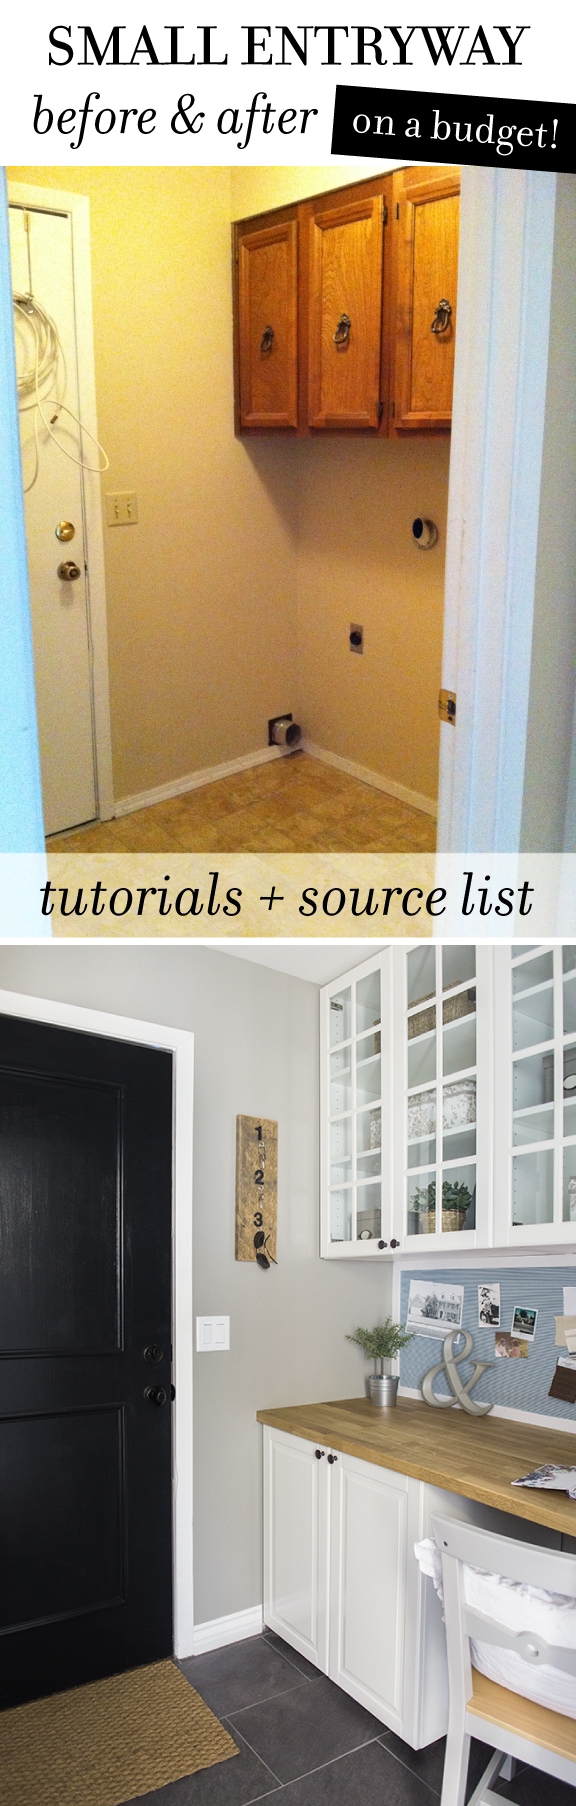
This is one of those areas that became something from nothing. Once an ignored, barely functional pass through space that just needed a bit of planning and a small budget. Today it has been transformed into a functional entryway with plenty of storage—a feature that’s impossible not to notice as you walk by.
Phase 1: That 70’s laundry room

I don’t think it even qualified as a room, but rather an empty wall between two doors for laundry machines. It sucked.
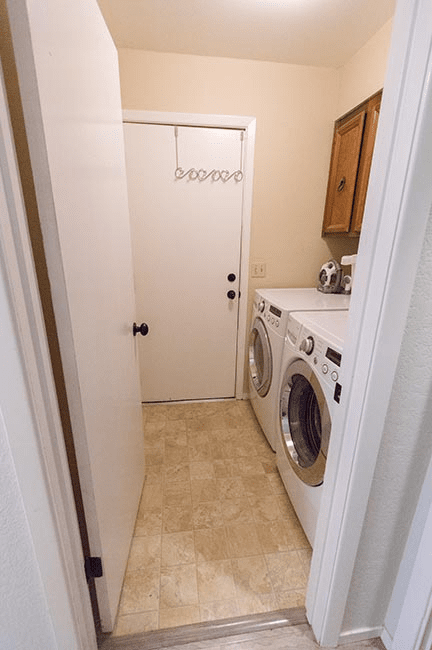
In fact, it was so cramped that we built a fancy new laundry room downstairs and this space became an oversight—a junk storage closet.
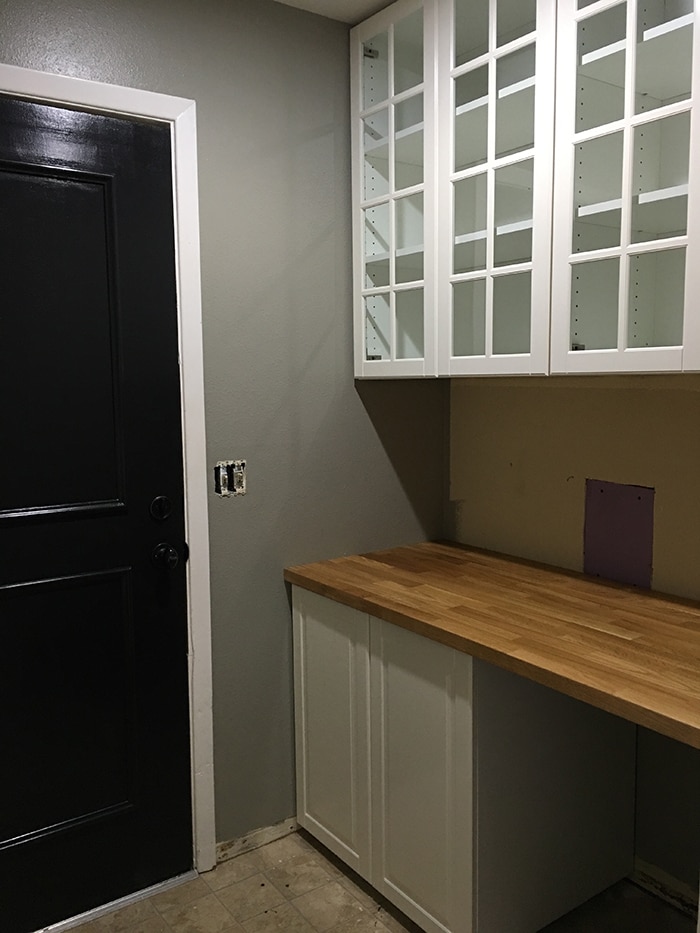
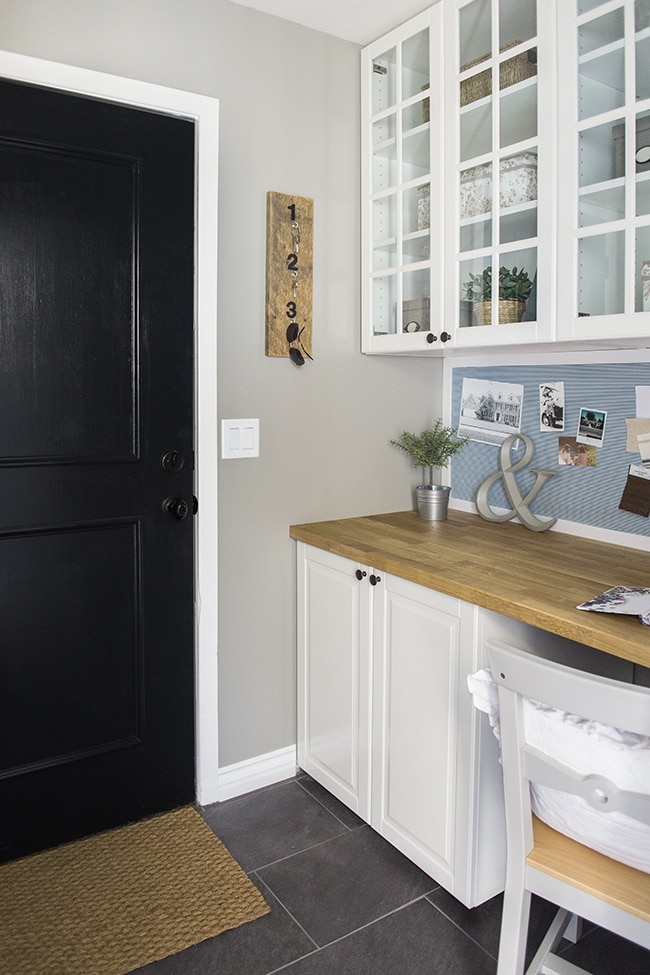
Something had to be done in there before putting the house on the market, so I thought about what the best use of space would be without spending a fortune. The back door leads to the garage which I enter the house from 99% of the time, so I figured a drop zone would be a nice addition, and extra cabinet storage never hurts. The future homeowners may not have a need for a full on studio/office the way I currently have it set up, so I also decided to build a desk nook as a secondary workspace option.
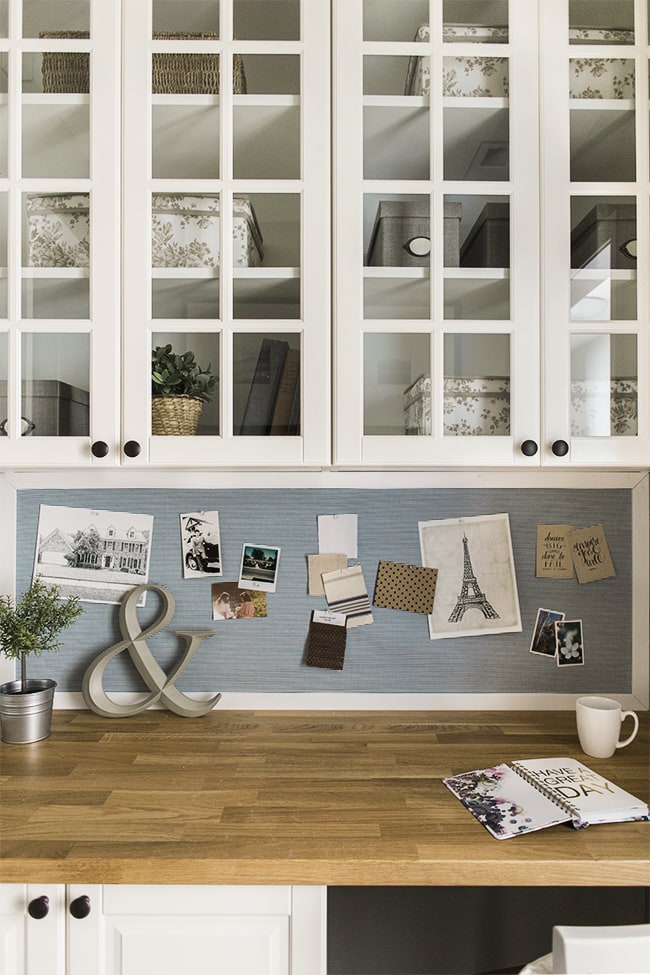
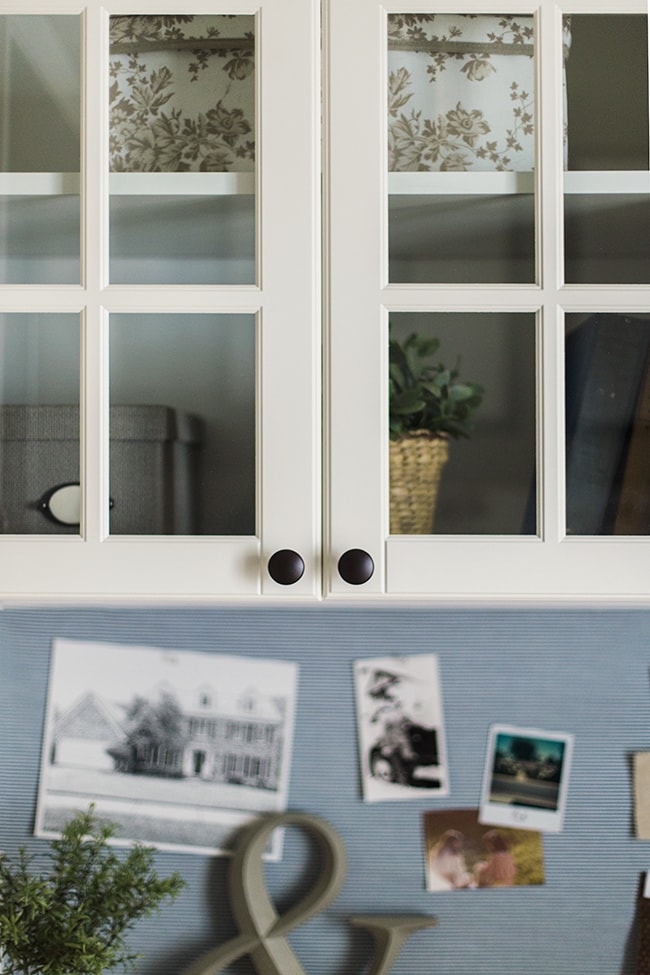
After removing the door to the hallway and retrimming the opening, the garage door was updated with DIY trim and painted with Valspar’s Dark Kettle Black. The walls got a couple coats of Gray Silt, while an Ikea trip resulted in perfectly sized Sektion cabinets and a butcher block to serve as a desktop.
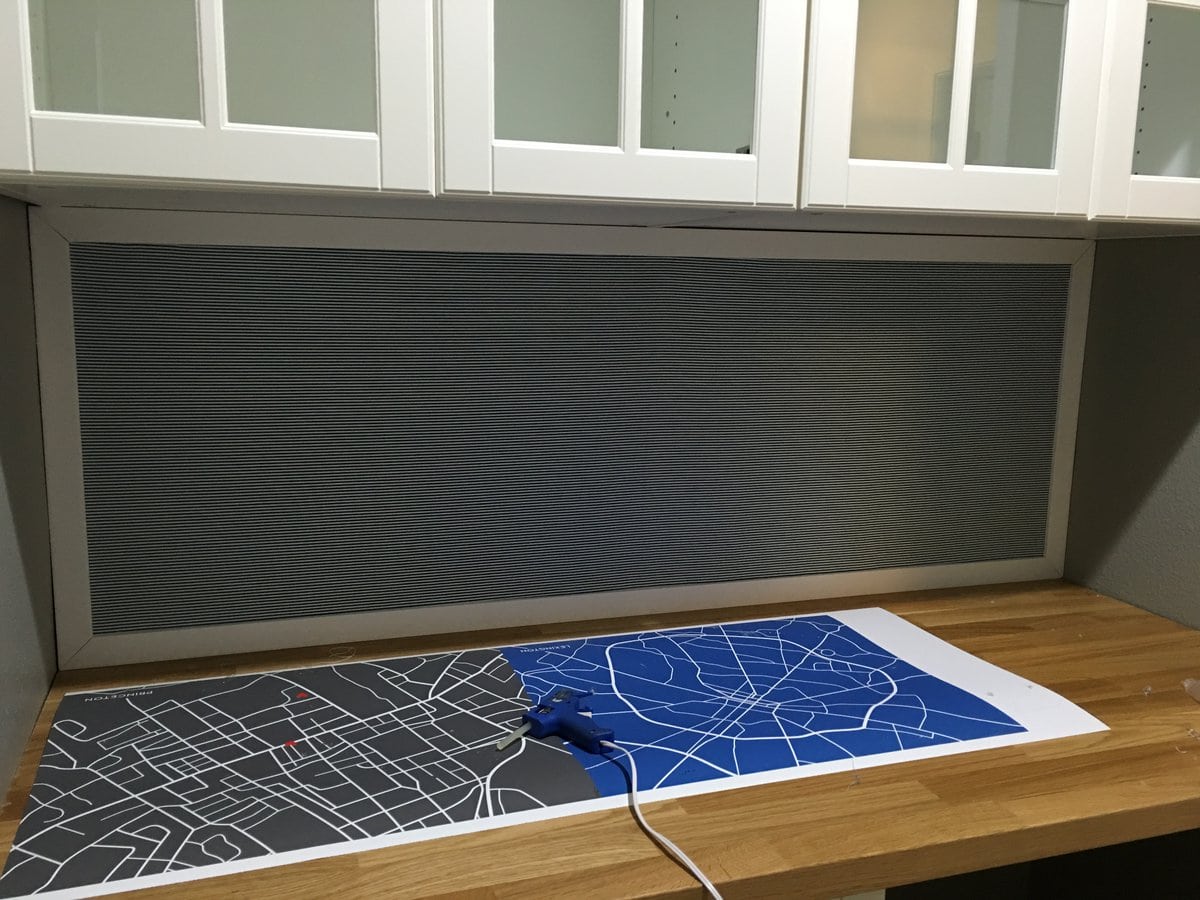
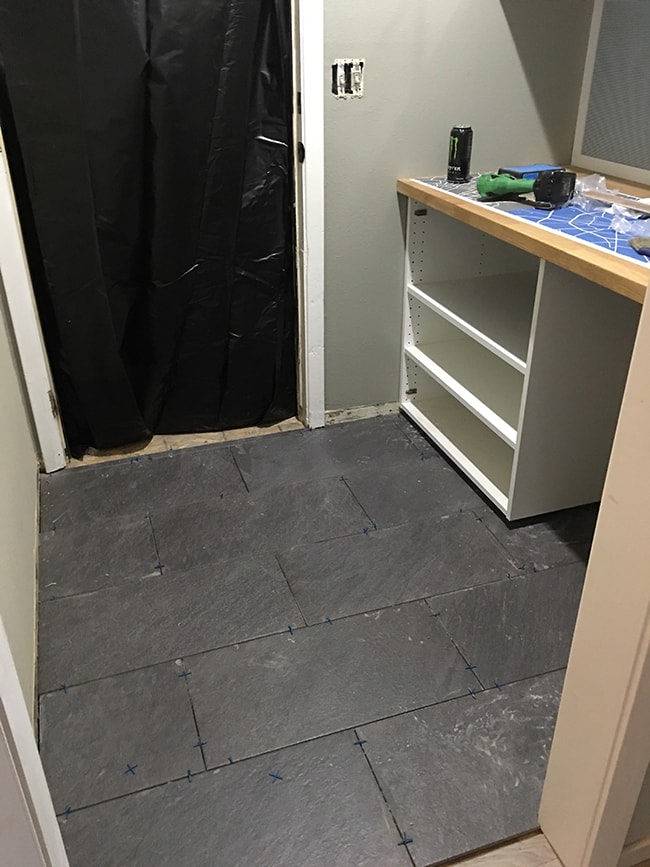
A DIY fabric wrapped cork board was installed for the backsplash while the floor was tiled in charcoal porcelain:
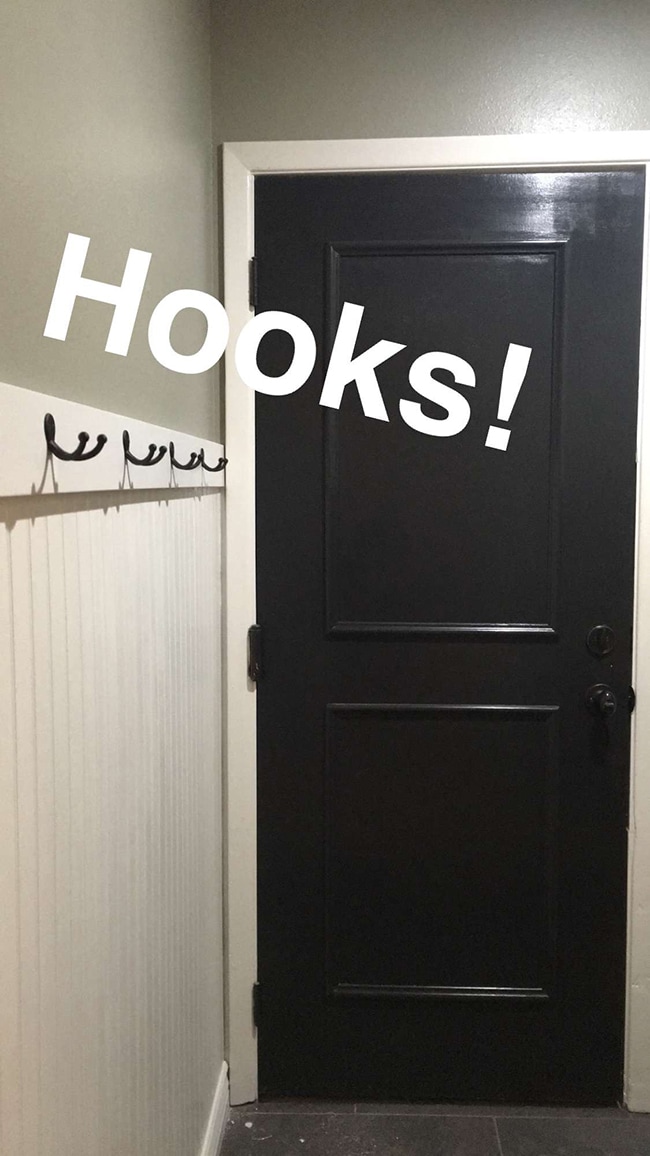
Last week I added a beadboard wall, new baseboard trim and coat hooks for extra storage…
And the past few days have been spent on the finishing touches & staging—always the best part!
Without further delay… here’s the final result of the past four weeks:
Doesn’t even look like the same space, right?!
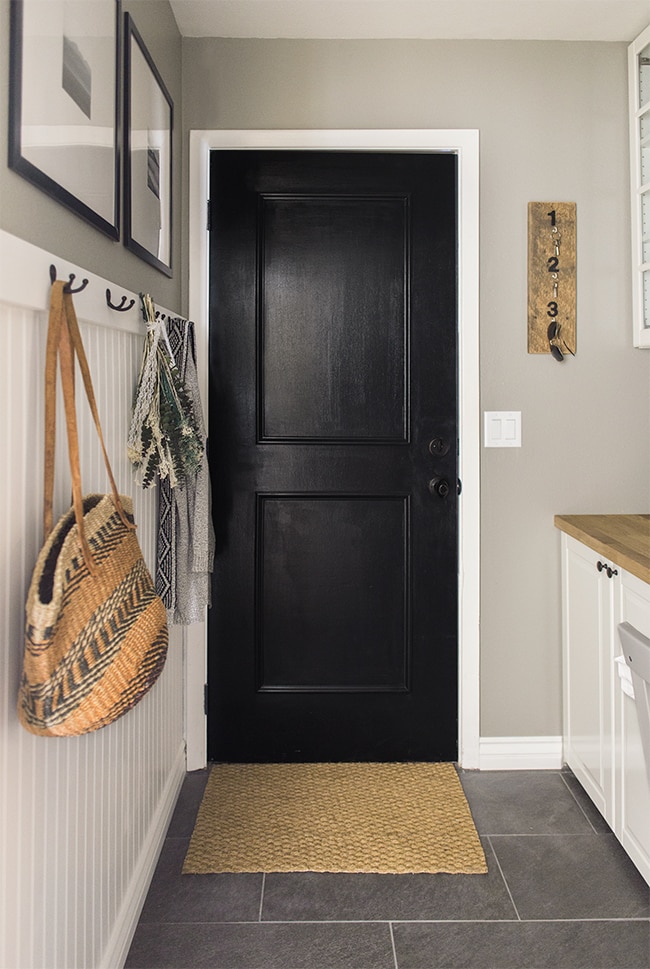
Nothing like a black door to add a touch of sophistication.
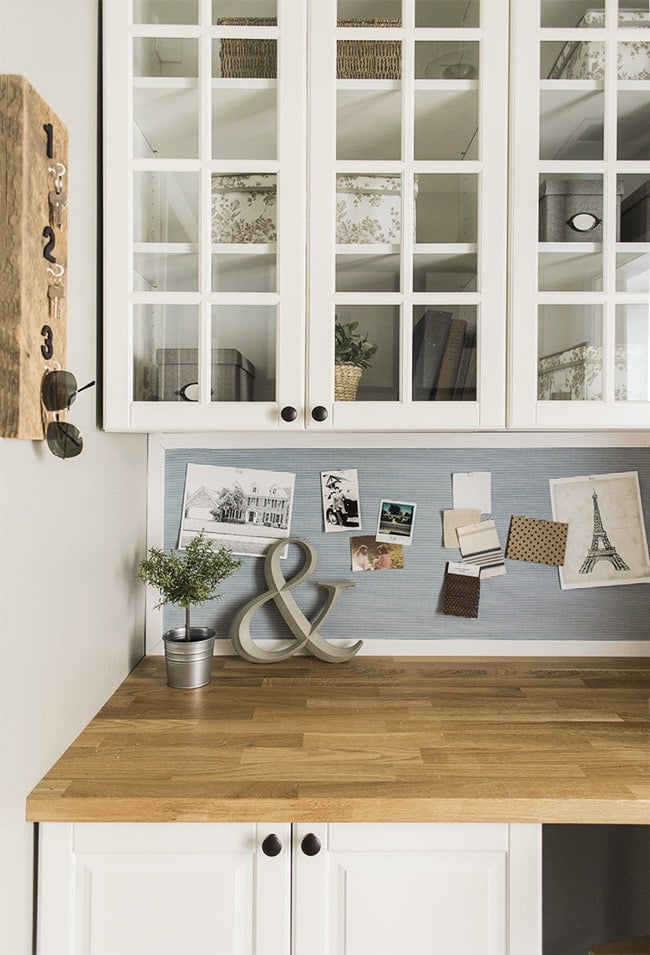
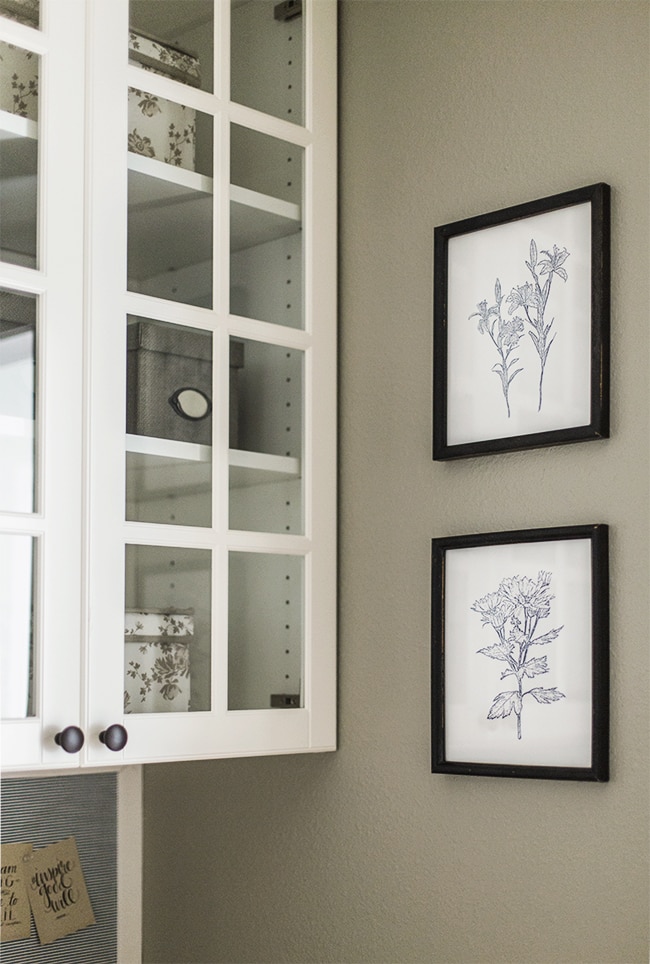
These glass paneled doors were my third choice (the first two styles were sold out) but it was one of those happy mistakes, because they definitely look more high end and make the room appear larger. And the shelves were fun to decorate!
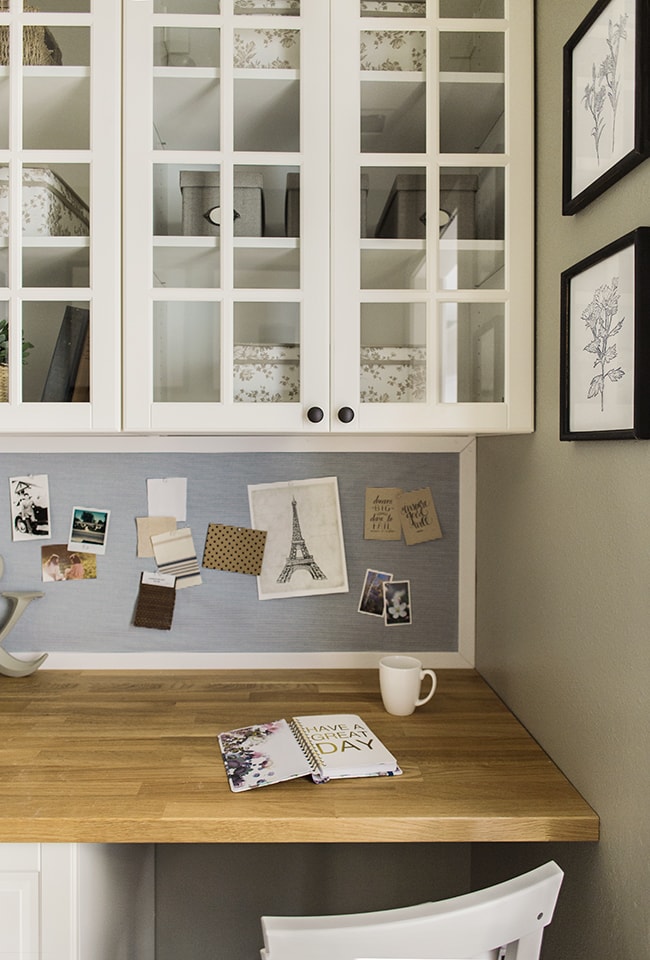

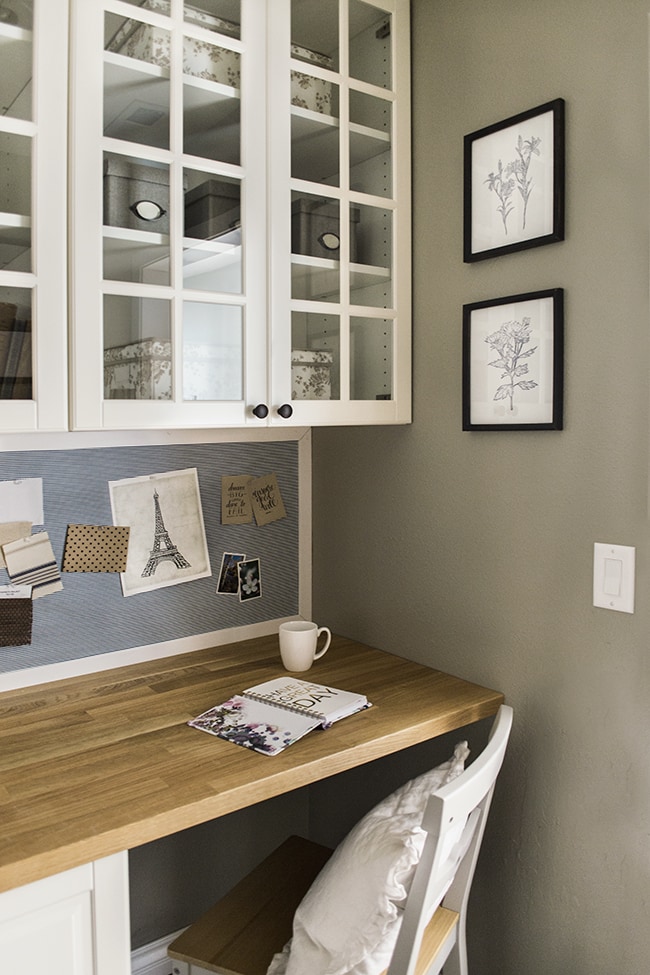
I picked up these 8×10″ frames for 50 cents each at the flea market last week, spray painted them black and popped a couple of my botanical prints in.
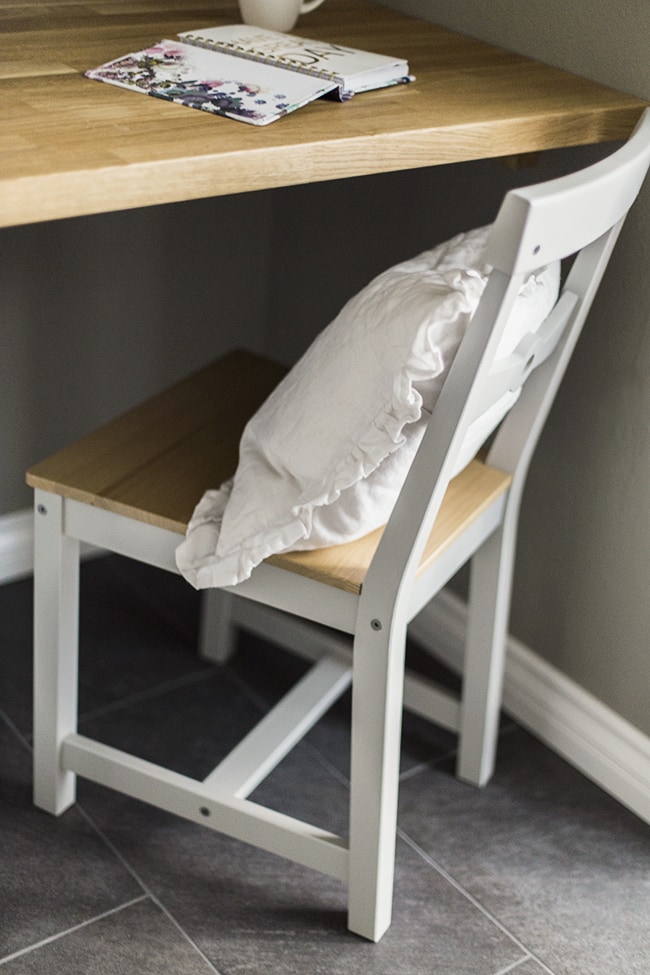
Love this chair.
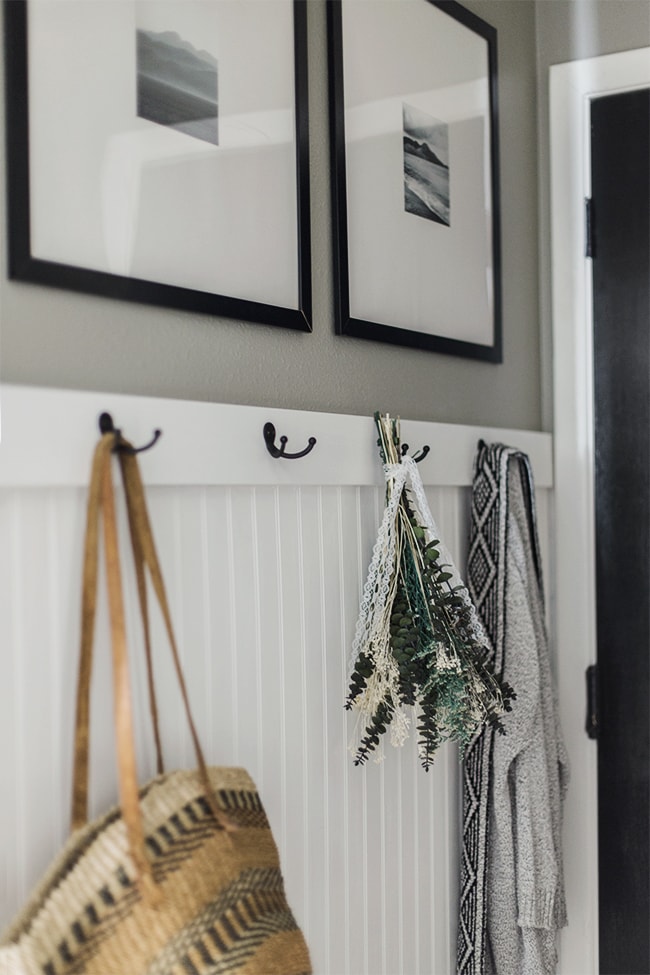
These are old Nyttja frames with instagram pics from Ikea (no longer available it seems, boo!) that I pulled from storage:
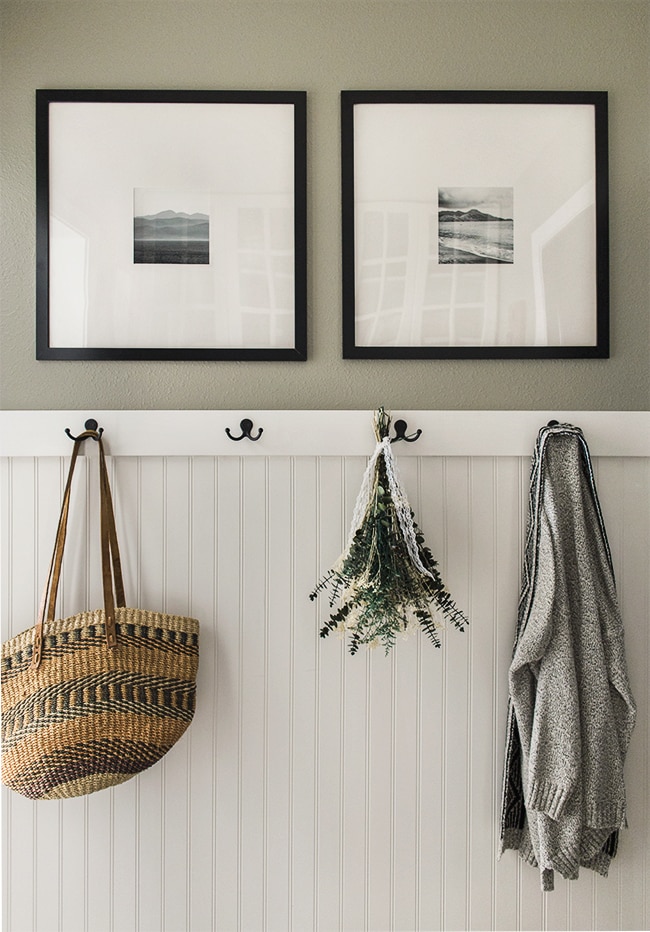
The hooks are my go-to $1.75 cheapies from Lowe’s.
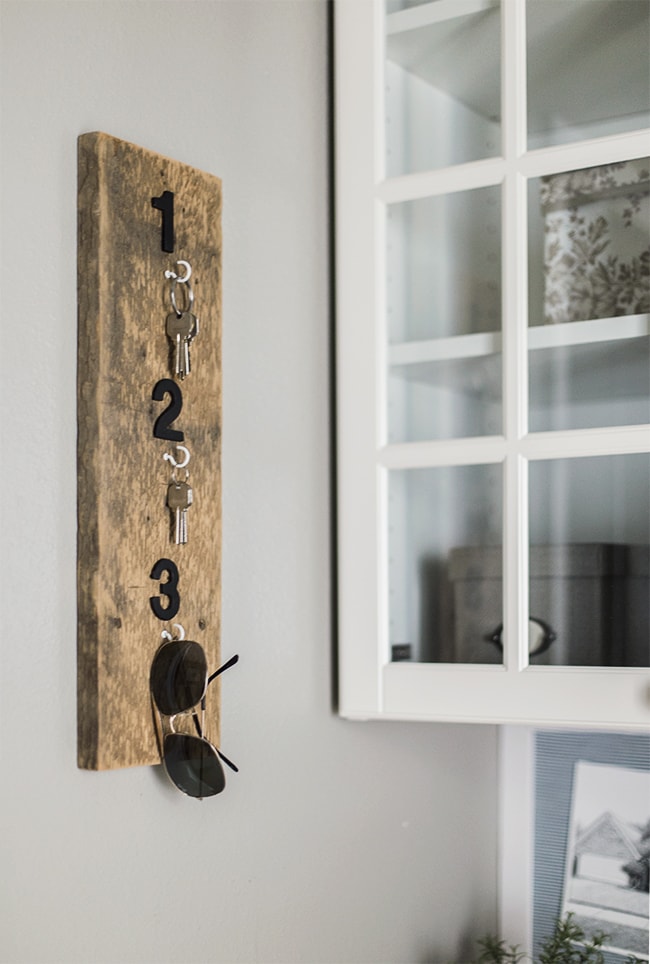
At the last minute I decided a key hanger was necessary but I didn’t want to change out of my pajamas to drive to Lowe’s, so I dug around the garage and found a scrap of old wood, some metal numbers and hooks and made this in a few minutes:
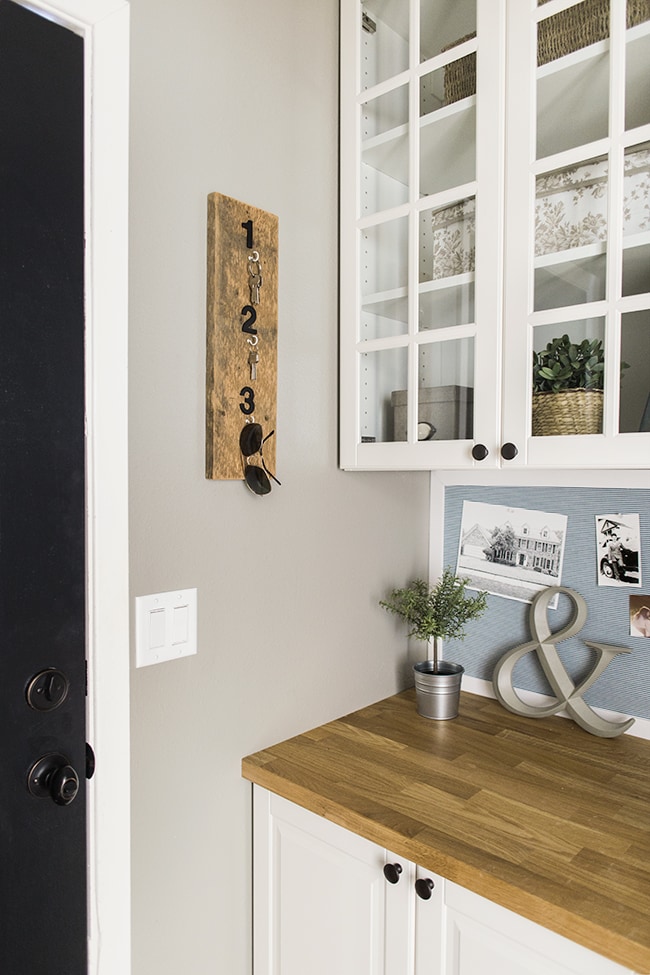
I bought these brass numbers on Ebay last year for a project but ended up not using them, so after spray painting them black and screwing the board onto the wall, I used hot glue to adhere the numbers to the wood (which is a 6″ lumber yard find that I cut to 20″ tall and sanded). Then I twisted the hooks in by hand and voila… free & functional decor:
One room down… just a few more to go!
Now for the budget breakdown and source list. Luckily I kept track of everything this time around.
Cabinets: IKEA Sektion Bodybn off-white, upper & lower
Cabinet knobs: Ebay
Butcher block: IKEA Karlby
Chair: IKEA Gamleby
Floor tile: Lowe’s
Wall hooks: Lowe’s
Wall Paint: Valspar Gray Silt
Door Paint: Valspar Dark Kettle Black
Picture frames: Ikea Nyttja, flea market
Pillow: H&M
Cabinet & Desk boxes/decor: Ikea, Hobby Lobby, Target
Budget breakdown:
IKEA: $1005
Beadboard, baseboard & trim: $90
Floor tile: $90
New switches/outlets: $30
Labor: $555
Fortunately I had the paint and decorations on hand already!
Total: $1770
So worth it, right? Especially considering I’ll easily see triple, if not quadruple my return when the house sells. It feels great to finally cross something off the list! Now my attention turns back to the master bathroom, along with figuring out a plan to stage the guest room and downstairs.
What do you think of the space? For those of you stuck on what to do with a small space, hopefully this provides some inspiration on ways to make the most out of it!
See you back here next week for the next vlog, and in the meantime feel free to reach out on instagram, snapchat (@ jennasuedesign), facebook & Youtube, or follow my ongoing inspiration on Pinterest. Hope your weekend is warm and relaxing!


Rachel Woytek says
I love this and am considering doing this to my own 70s laundry room. I’ve never hung beadboard before. Any tips for newbies? Also what size trim did you put the n the top of the beadboard (where your hooks are) and does it sit just right on top of the beadboard with caulking to fill in the space of did you nail it over top of the top edge of the beadboard? Thank you!
jennasuedesign says
It’s pretty straightforward but I’d use a helper for your first time! The trim is just a 1×4″ board but you can use anything. It sits right on top and the seam is caulked.
Rachel Woytek says
Thank you! Also the black door. Is it an exterior door leading to your garage? If so, does that black paint work for exterior doors and did you paint one side or both? Thanks again!
karen says
I meant grout color (not brand or anything – ha- you were probably like what?!) but no way, it’s dark grey! I thought it was white or silver…Mine is going in a powder room – would you say dark grey as well? Thank you!!!
karen says
oops- I think I left a comment in the wrong spot earlier! Jenna wondering if you could tell me the grout you used? I got your tile…Also I bought the Lowes barn light fixture you used in your laundry room…but I want it black…would you suggest spray painting it? I drool over your home…thanks for your help!
jennasuedesign says
Thanks Karen! My tile guy bought the grout so not entirely sure, but it’s dark gray and I had him match as closely to the tile as possible. And yes, spray the fixture!
Karen says
You are so talented!!! Omg. I’m following along and using the same tile- but need help on the grout- did you use straight up white? Or is that grey? Help! Thank you 😉
Ivory says
Wow, what a job, what a mighty mighty beautiful job you did. I love it.
Veronica says
I love the look of this little room! I’m curious to hear your process when decidiyhow to use a space. Why crate a tiny drop zone/office rather than a more traditional mudroom (bench and hooks or locker style cabinets) in the space?
jennasuedesign says
Hi Veronica, I thought a desk/work space would be more useful and practicdal for potential future homeowners than a mudroom. There’s already a coat closet in the main front entrance I live in a mild/dry climate without a lot of need for a traditional mudroom. With the coat hook wall, you get the best of both worlds 🙂
Ginger says
It’s incredible that you can make such a small space so beautiful and functional! I have been looking for some neutral floral fabric boxes for my office just like the ones you used in the cabinets, do you remember where you got those?
jennasuedesign says
Thanks Ginger! They’re from Ikea.
Ginger says
Darn, there is no Ikea by me and they are not online. Guess I”ll continue to be on the lookout. Thanks for the inspiration anyways!
Leah says
This laundry room is the exact set-up of mine – basically a cramped pass-through as you enter from the garage…I think I need to add some trim to my door (and maybe paint it black) as well!! Thanks for the inspiration + motivation!!!
Happy weekend!: ) P.S. Can’t wait to see the bathroom…
Gail says
Just happy to see a beautiful styled room. Again you nailed it.
Julia @ Hooked on Houses says
Wow, I love the new space you created! You are so talented. I have a feeling people will be lining up to buy this house when you’re finished with it! 🙂
jennasuedesign says
Thanks Julia! Fingers crossed 😉
Natalie S. says
Just ?. That is all.
Rebecca says
What an amazing transformation; love it!
Denise says
So excited to see this room, it is gorgeous like WOW! And so functional. The cabinet cost seems high, do find that you save considerable by selecting IKEA?
jennasuedesign says
Thanks Denise! The glass doors were a bit higher than the ones I originally wanted, but yes they are still a cheaper than somewhere like Lowe’s. Sometimes Lowe’s will run a sale but you have to buy a larger volume to take advantage of that (like we did with our kitchen cabinets). More importantly, you can buy the cabinets on the spot vs waiting weeks from Lowe’s.
Kristen says
What a great use of space! I really love the glass cabinet doors and think they keep the smaller space feeling airy.
Karen says
I actually like the shelves as they are. It looks intentional and like the doors have a double mullion. Kind of craftsman. Anyway, love the room as always. Can I ask how you can estimate how much to spend on a room for ROI. Is there some kind of formula for figuring this out? Thanks for so much inspiration.
jennasuedesign says
Yeah I’m leaving them as is because the shelves are more functional spaced evenly 🙂 I didn’t set a budget for this and never use any formulas, just a design plan using inexpensive solutions and materials knowing that I would more than recoup my costs that way. Hope this helps!