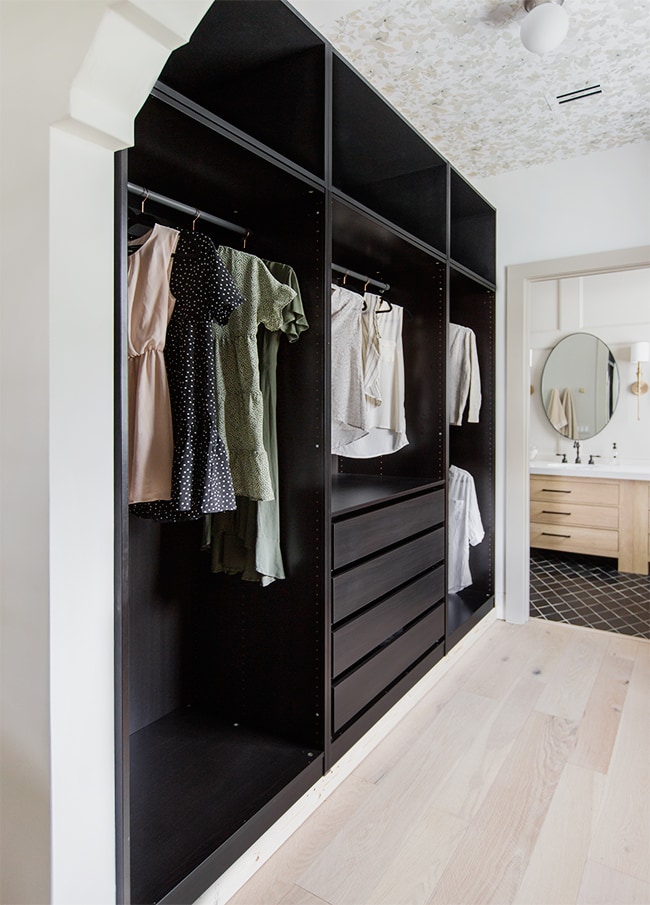
Back with another update from our big Closet Makeover! Last month during Phase 1, we finished installing our Pax wardrobes and custom cabinet boxes:
Those upper cabinet boxes gave us a run for our money, but I knew Phase 2 would be the ultimate challenge: dry fitting.
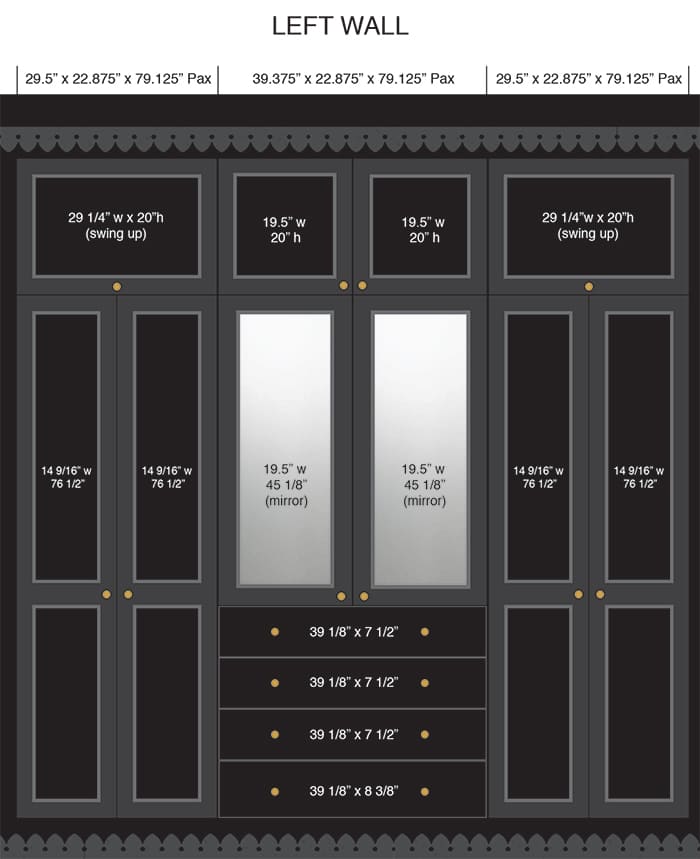
In the Design Plans post, I shared that we were working with The Cabinet Face on custom doors, drawer fronts and panels for our Ikea Pax closet system. Our shipment arrived a few weeks ago and we couldn’t wait to get started!
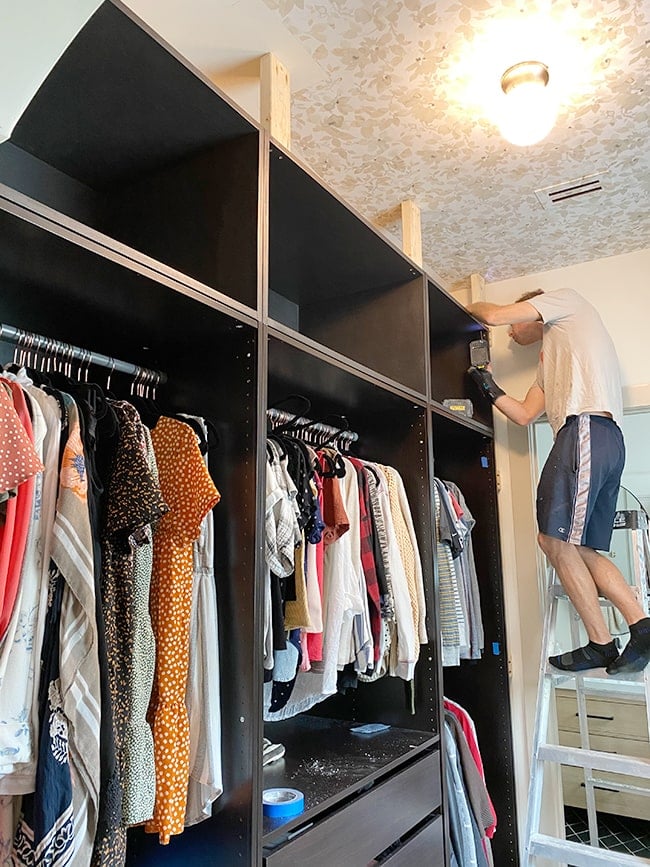
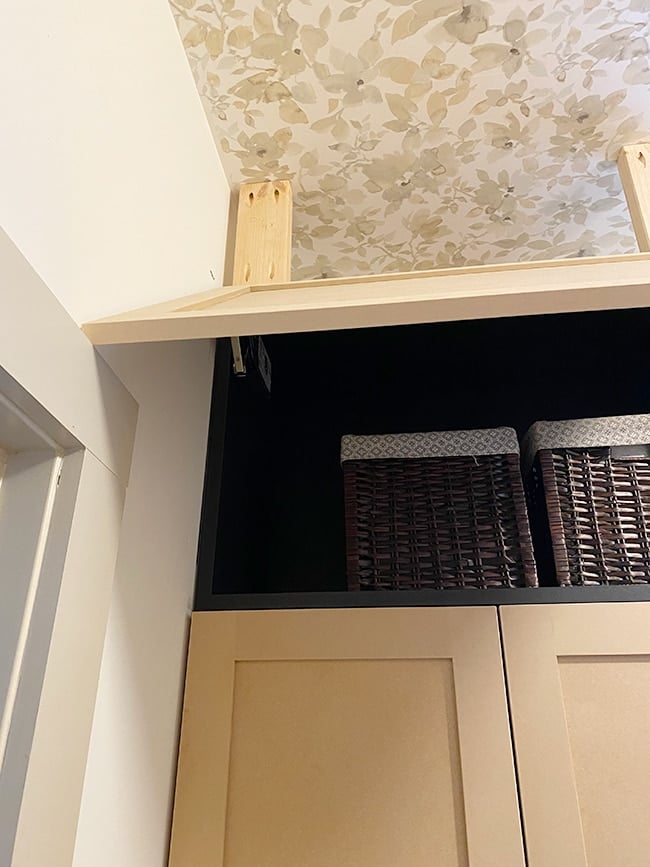
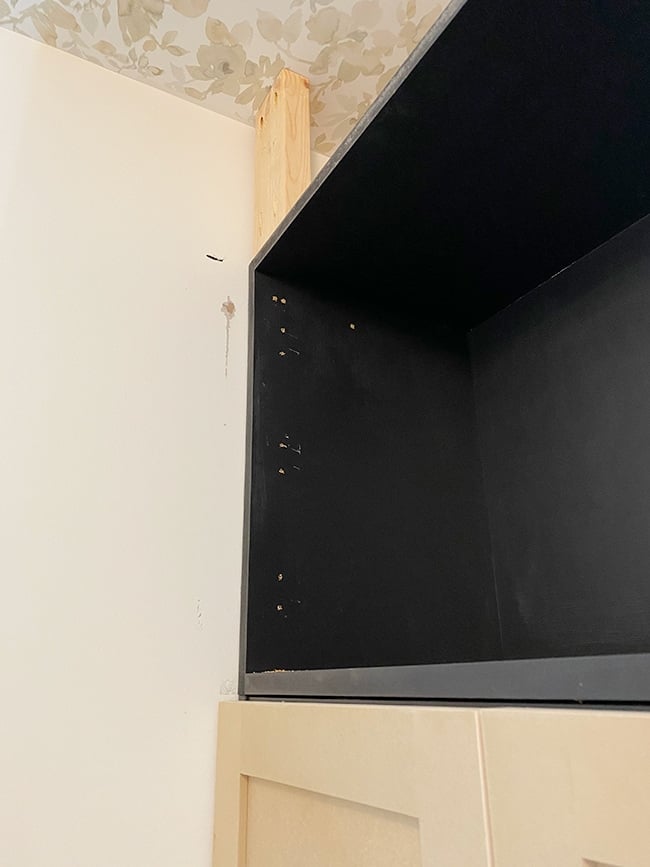
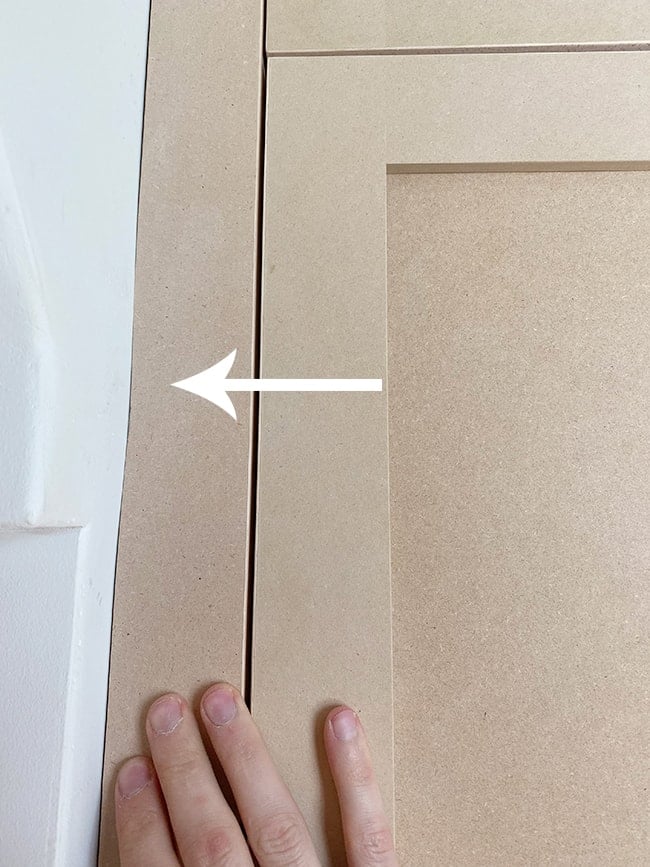
Before we could start dry fitting, we had to add blocking for the filler panels. This step is pretty simple and straightforward. It requires cutting a 2×4 to create “blocks” that sit in the gap between the cabinet and the wall—this is what the filler pieces get attached to. We decided to add four blocks on each side (locations indicated by the arrows):
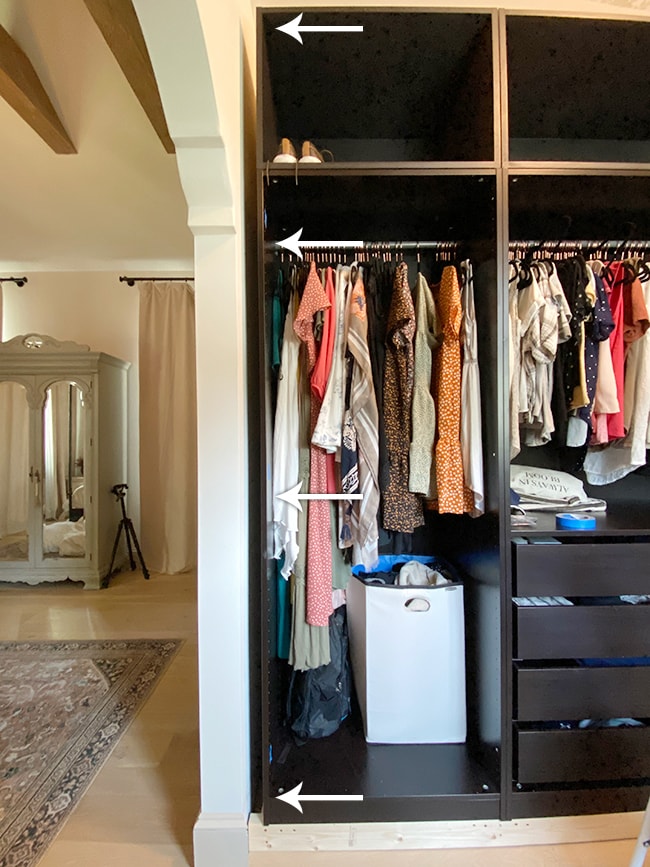
The placement really doesn’t matter, you just have to make sure to avoid the door hinge locations. Our gap wasn’t even all the way up (it varied between 2 1/8″ – 2 3/8″) so we had to measure/cut each block individually. We also drilled a couple pocket holes with our Kreg Jig to attach it to the wall.
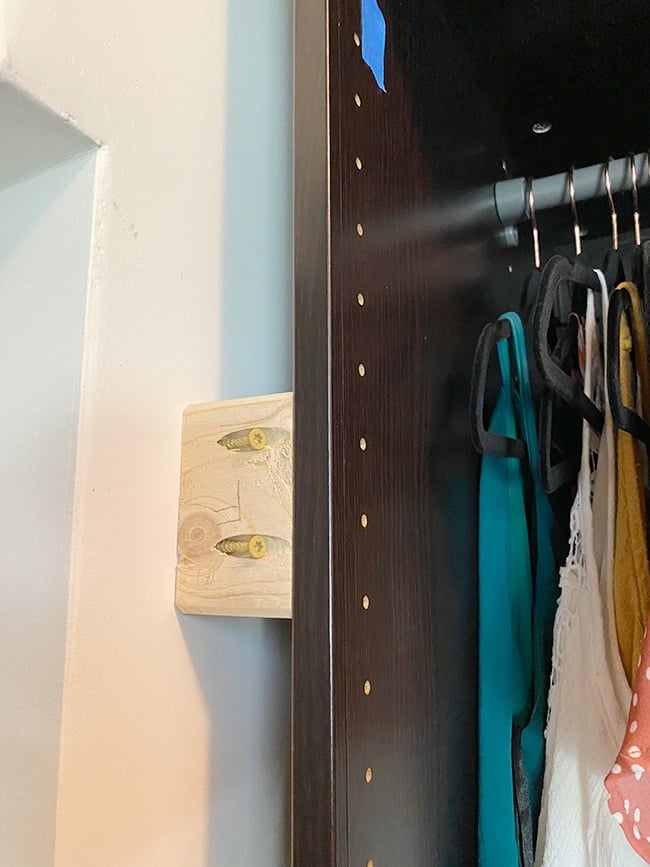
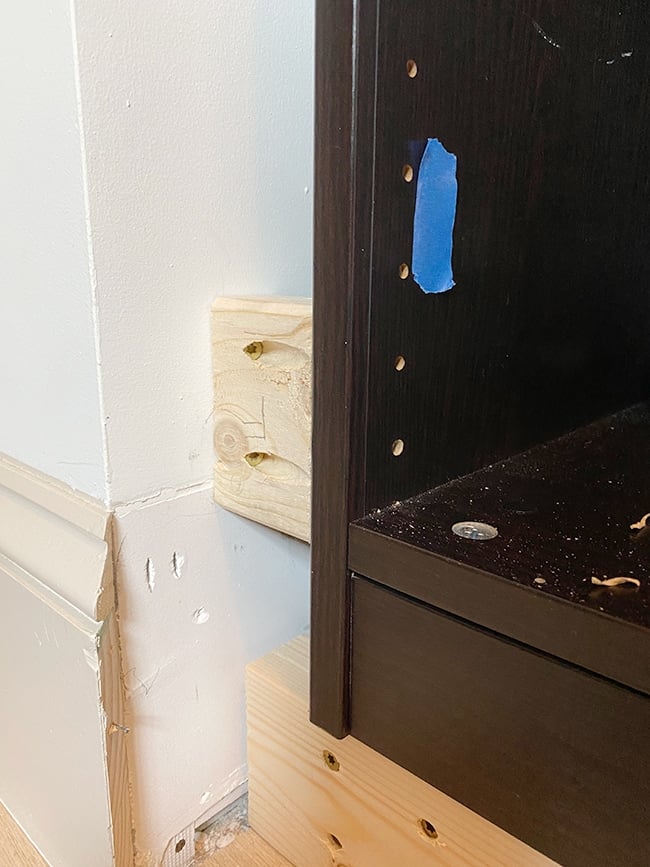
The blocks were attached to the wall with two screws through the pocket holes, and two smaller screws into the cabinet holes (which we can hide later with black plugs).
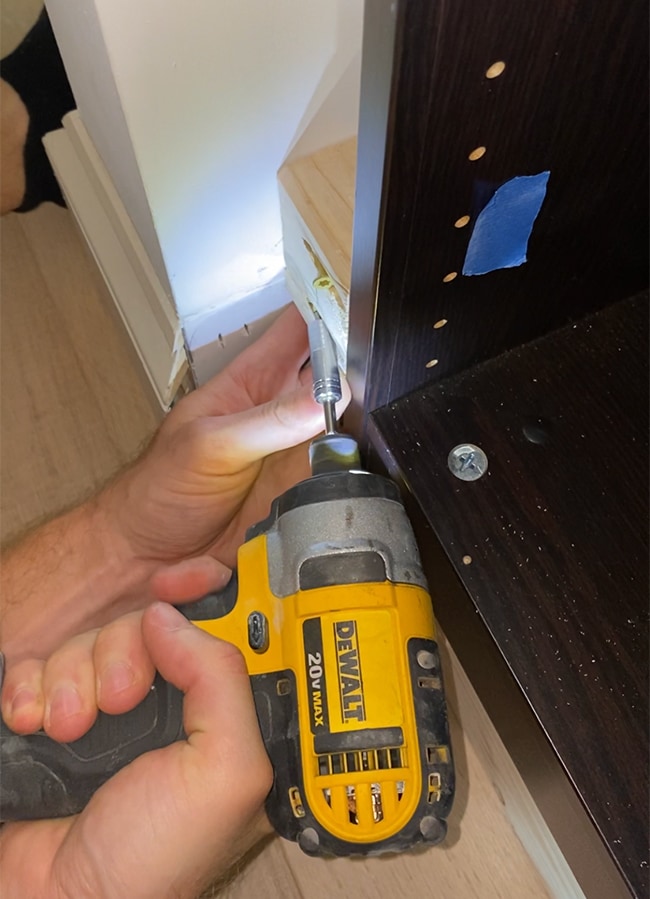
It doesn’t need to hit studs—between the four screws, it’s not going anywhere! The important thing is to make sure it’s perfectly flush with the edge of the cabinet.
Left side done!
The same process was repeated on the right side and along the top of the cabinets as well.
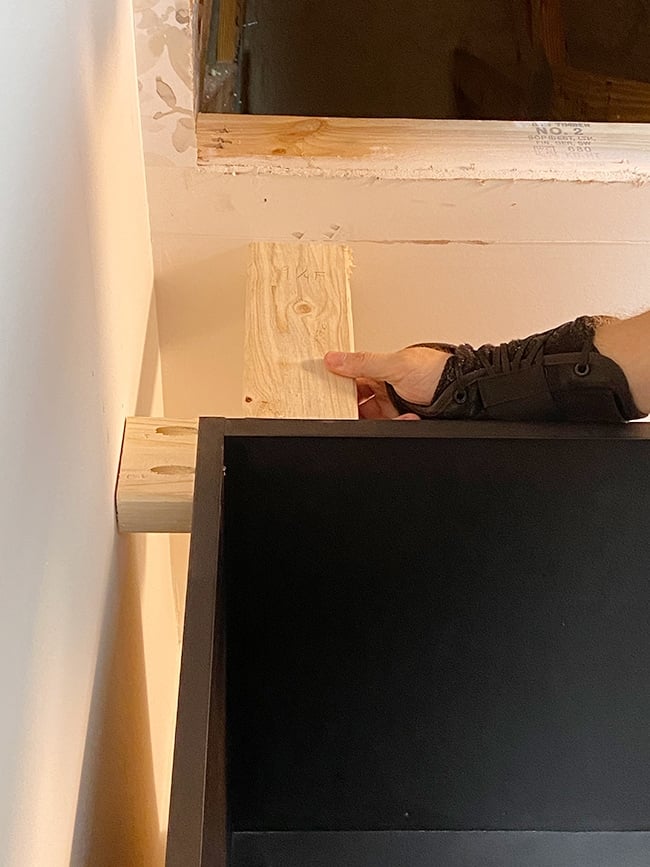
Lucas decided to screw the ceiling blocks from underneath, but using pocket holes would have been a better option here to save the step of patching/sanding/repainting.
I kindly brought this to his attention by the time I realized what was going on (ha!) and pocket holes were used on the two right cabinets.
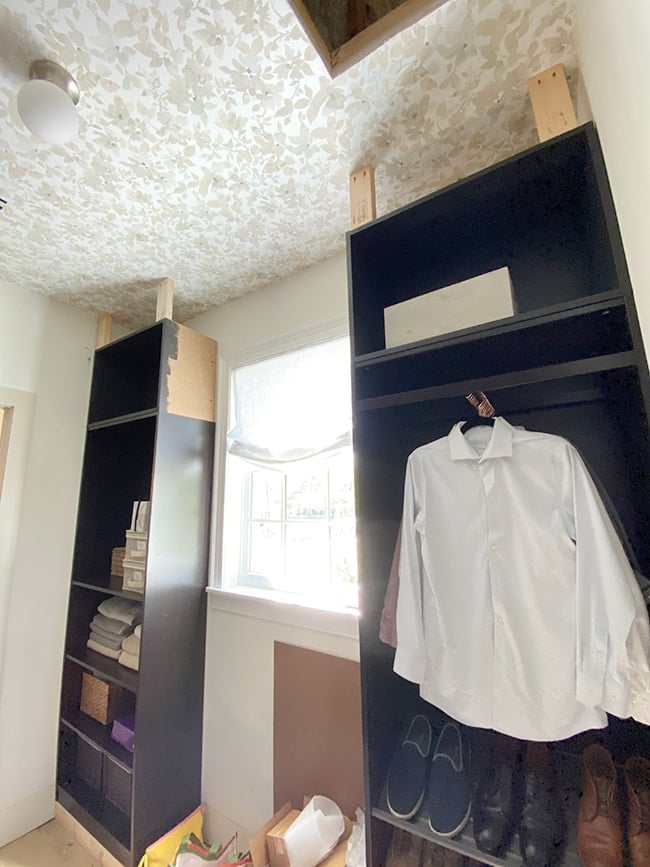
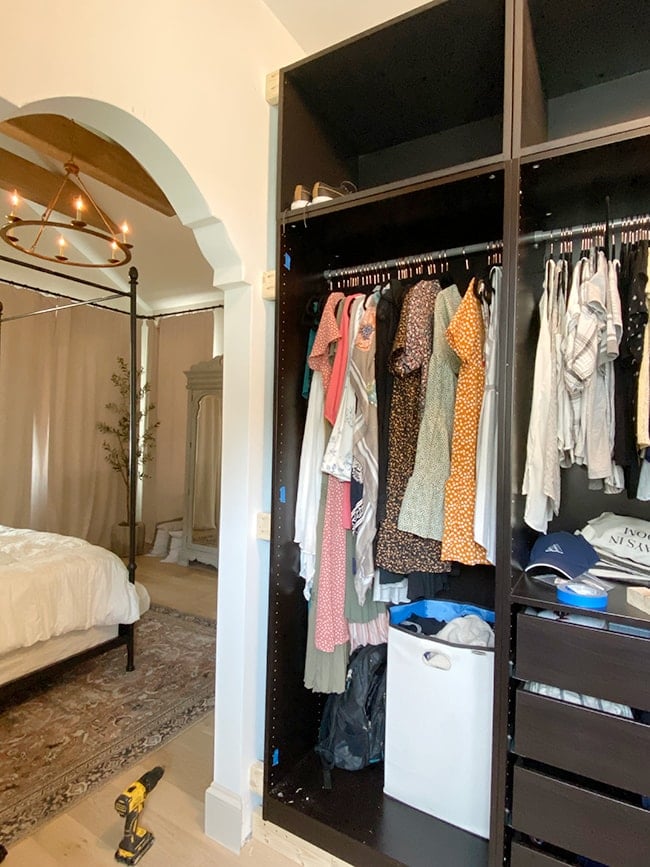
Since the cabinets on the right side were up against the wall, we only needed ceiling blocking there. That’s it for the blocking!
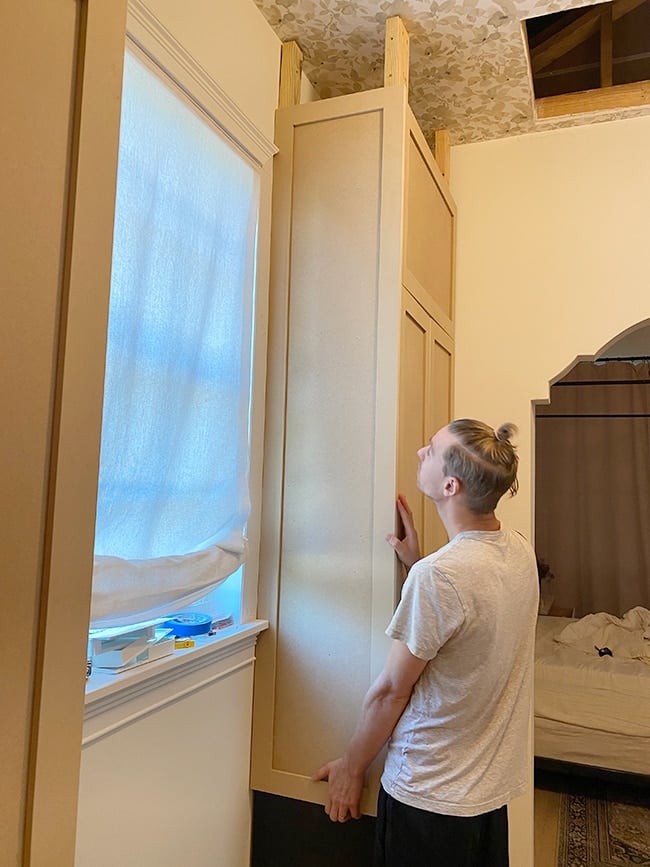
Then came the moment of truth: time to test fit these doors… my heart was racing.

All was well until we hung the doors on the left side and realized they were almost 1/4″ too low. After an emergency call to The Cabinet Face, we learned there was some confusion on the hinge hole placement and we’d have to drill new holes into the cabinet boxes. Fortunately, they offered a great solution that we never would have thought of and a really useful woodworking trick that will come in handy later!
When you have to drill a new hole that’s too close to the original hole, you can use a wood dowel rod (or dowel pins) to fill it in.
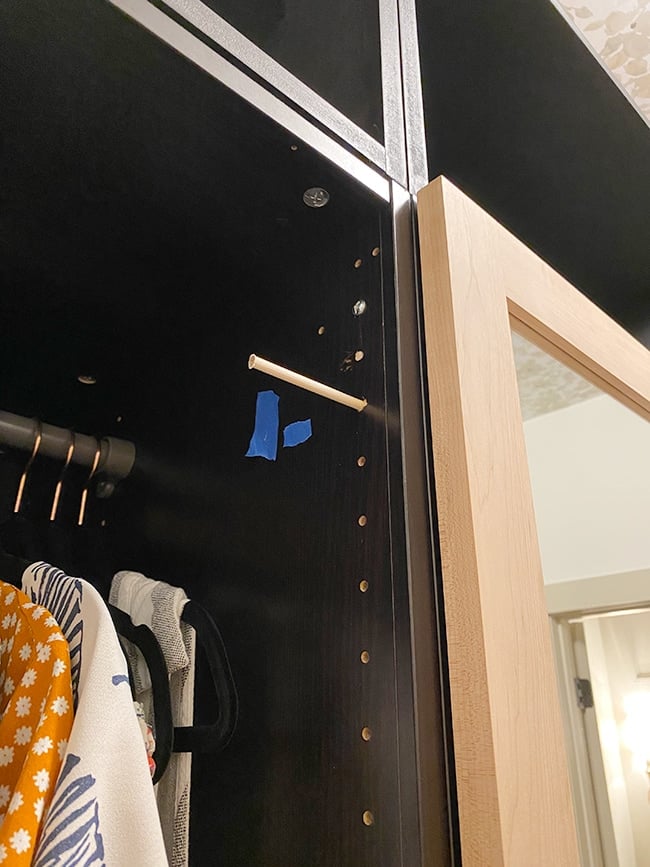
We picked up a dowel at the hardware store that matched the size of the cabinet holes (5mm), pushed it inside the original holes and used a sharp blade to cut it down. This allowed us to drill new holes directly above the old ones without the drill bit wandering down and/or creating one large hole.
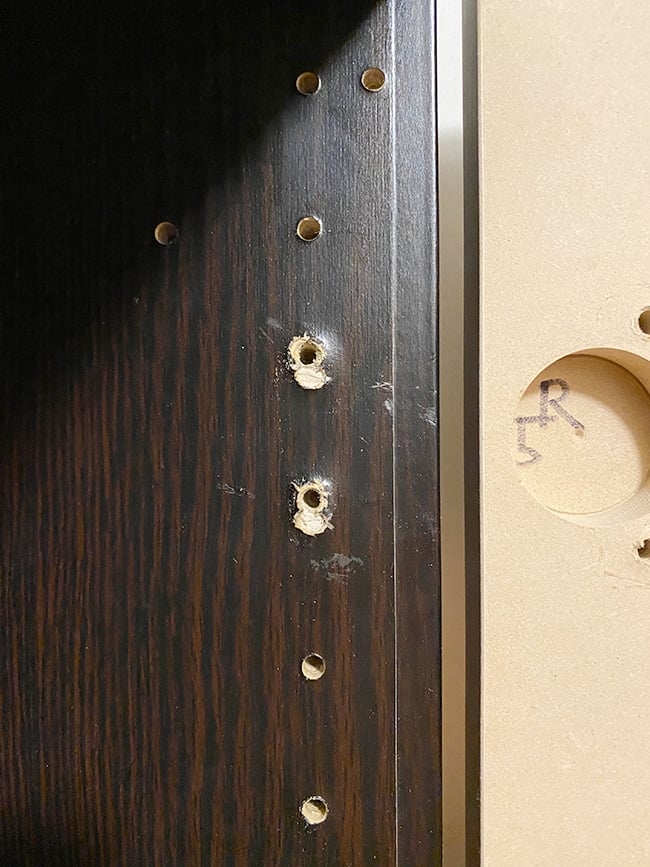
It worked like a charm, whew!
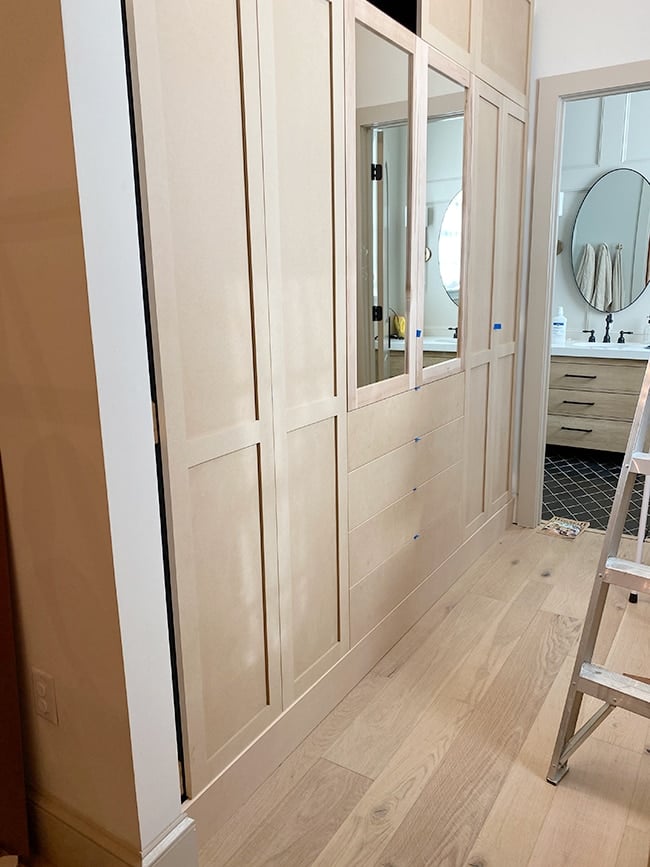
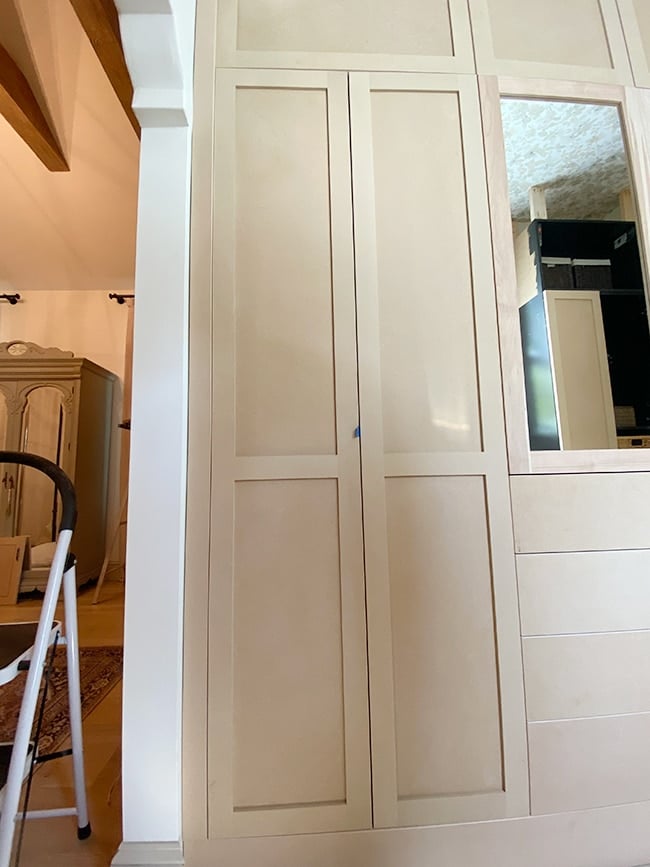
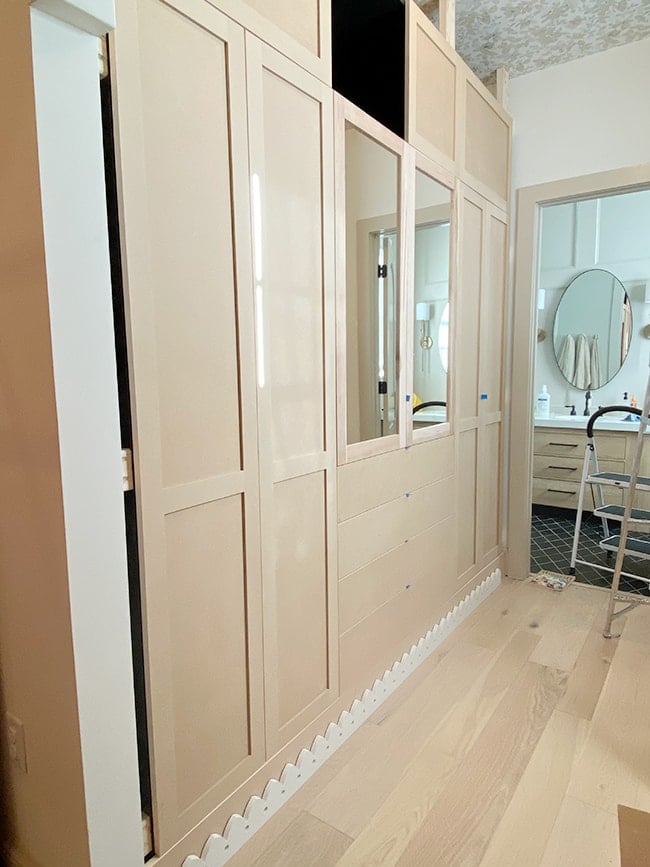
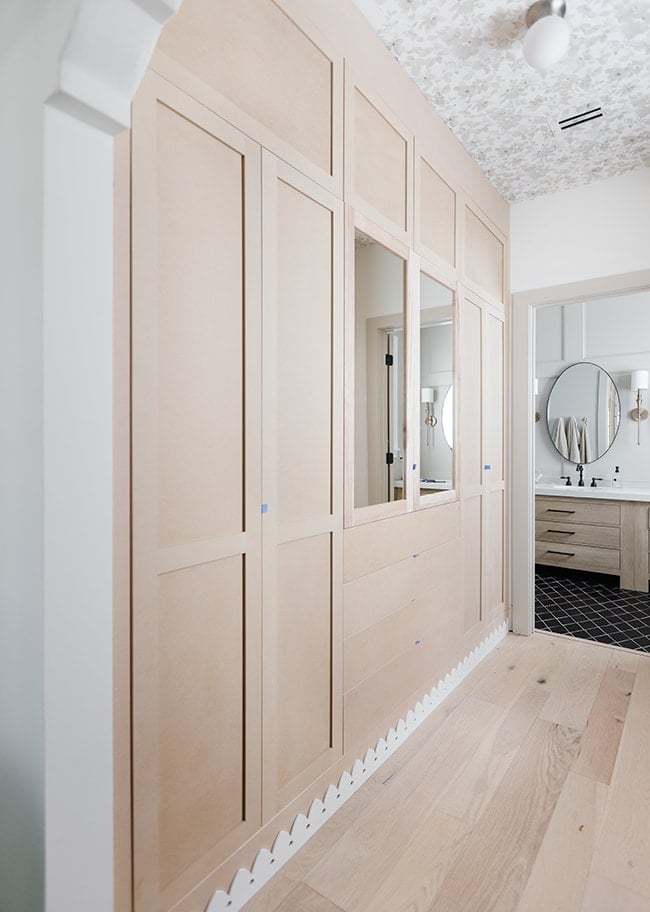
With that issue resolved, we marched right along installing the doors. I had mirror inserts added by a local glass shop on the center doors, and I’m so glad I went this route. It breaks up the wall of cabinets and reflects light from the window on the opposite wall, making the narrow hallway feel much more open.
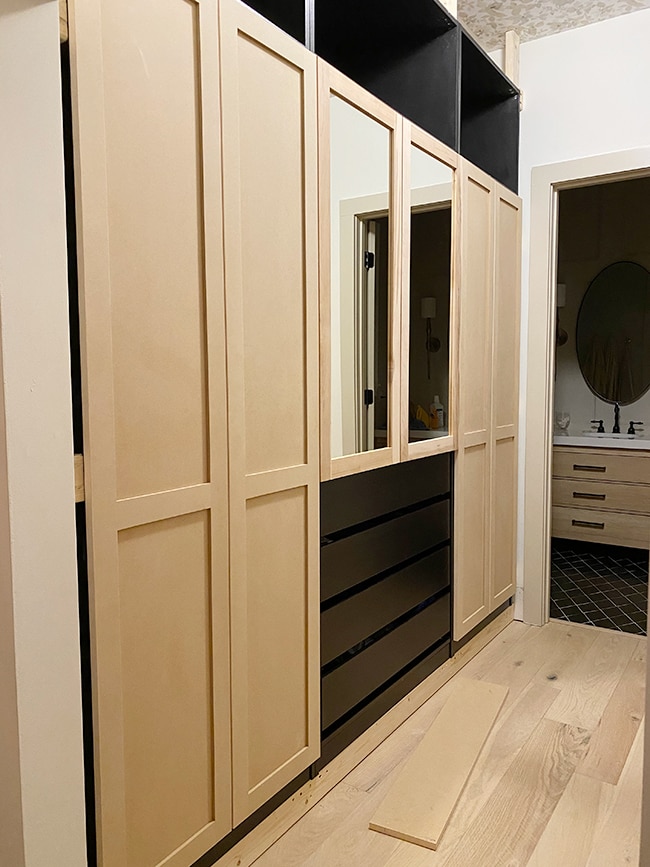
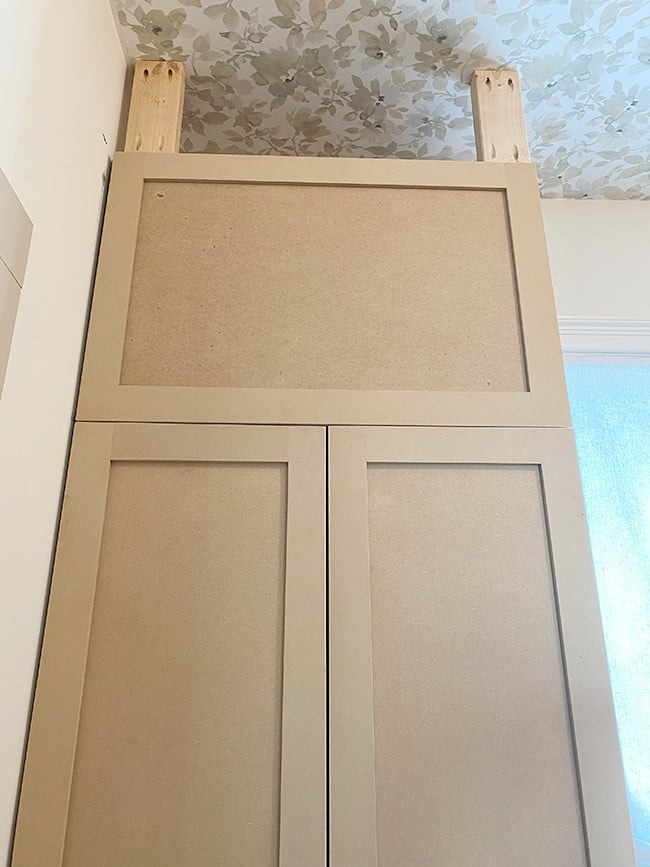
I was definitely nervous when it came time to install the upper doors on our DIY cabinets. This was the final test to see how square and straight our cabinets were!
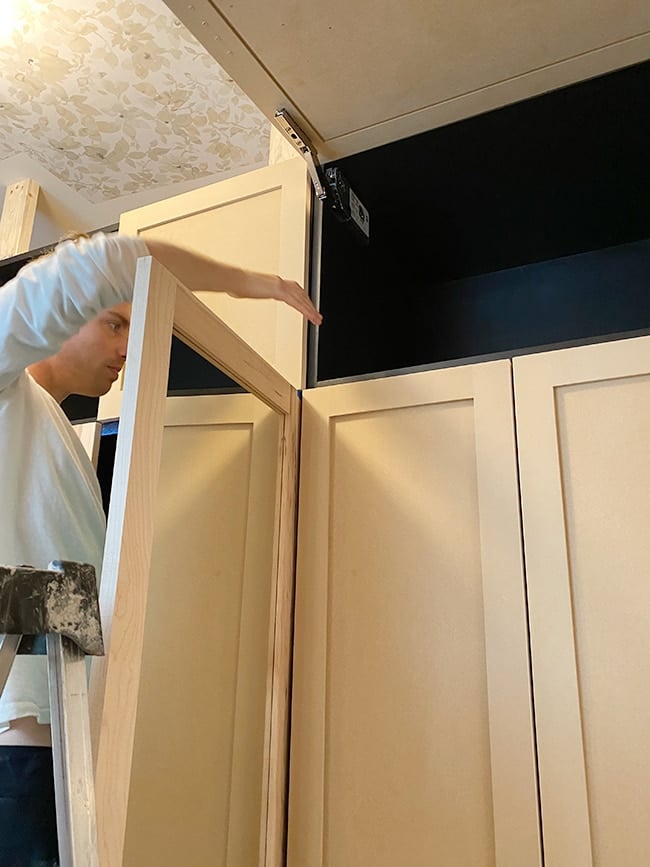
We quickly found another problem—the upper door on the right cabinet (right side) was hitting the wall when opened.
If you recall from the plans, we weren’t able to add a spacer along the wall since the cabinet was already up against the window on the left side. We didn’t consider the fact that our wall might not be perfectly level, but this was a pretty simple fix—shave 1/8″ off the right side of the cabinet.
But over on the left side, it was a much bigger issue and one that was a complete oversight on our part…
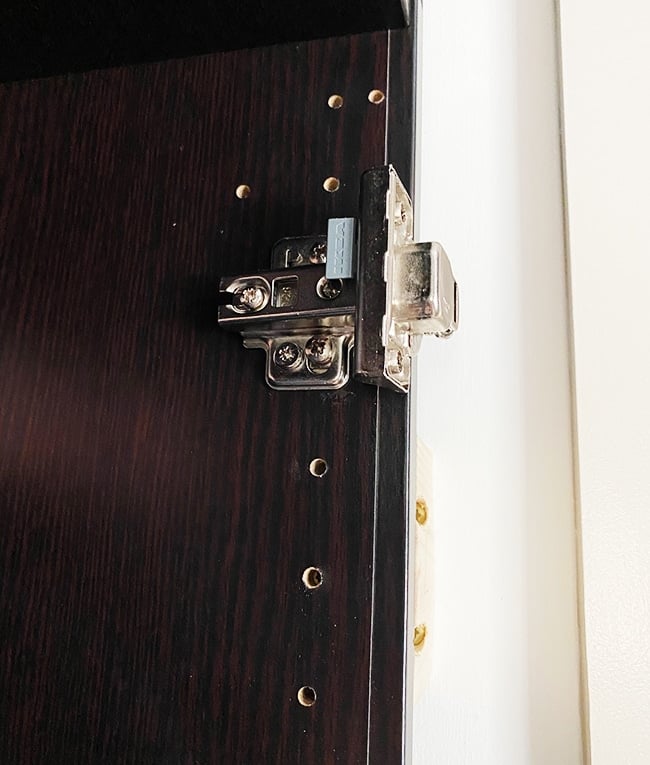
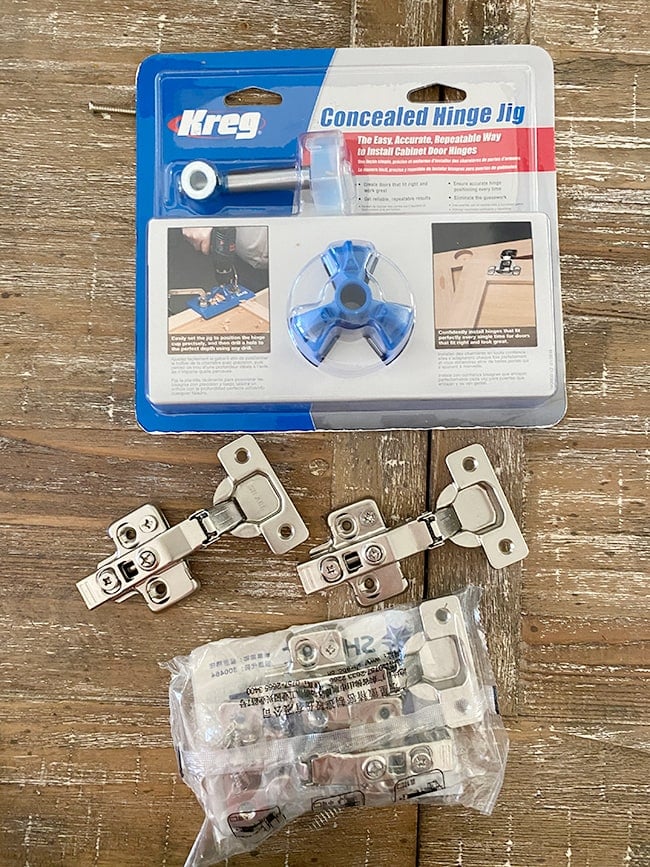
Completely forgot about that door trim. Doh! Luckily Instagram came to the rescue here, as many of you suggested using left-mounted hinges so the door swings open instead of lifts up. We were slightly concerned about the hinges being able to hold the weight of the door (it’s pretty large/heavy) but figured we’d give it a shot.
We Amazon Prime’d two sets of inexpensive European hinges and a Kreg concealed hinge jig set to make our lives easier.
The hinges didn’t come with any instructions so we just eyeballed the door placement. The jig was easy enough to figure out.
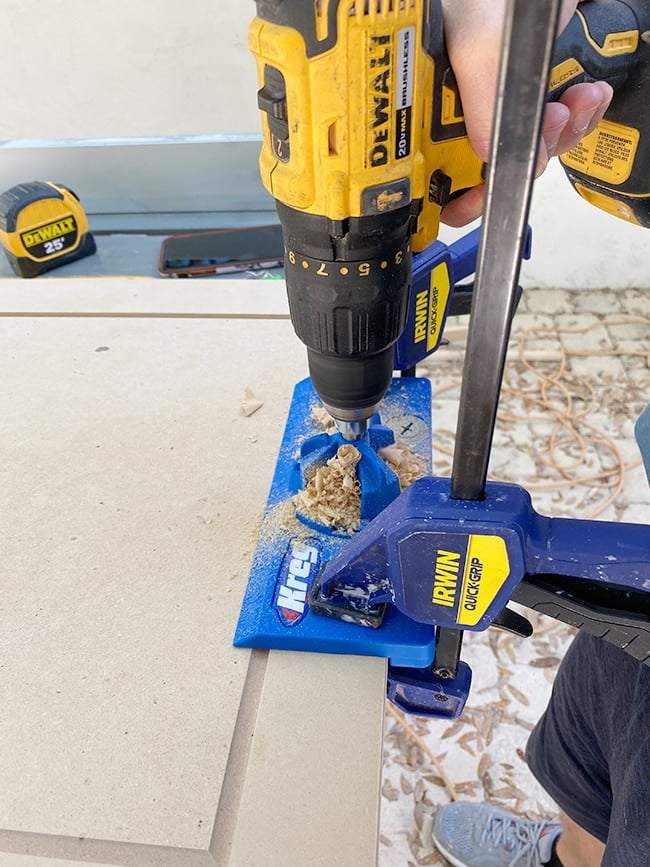
We drilled for three hinges to help support the weight of the door.
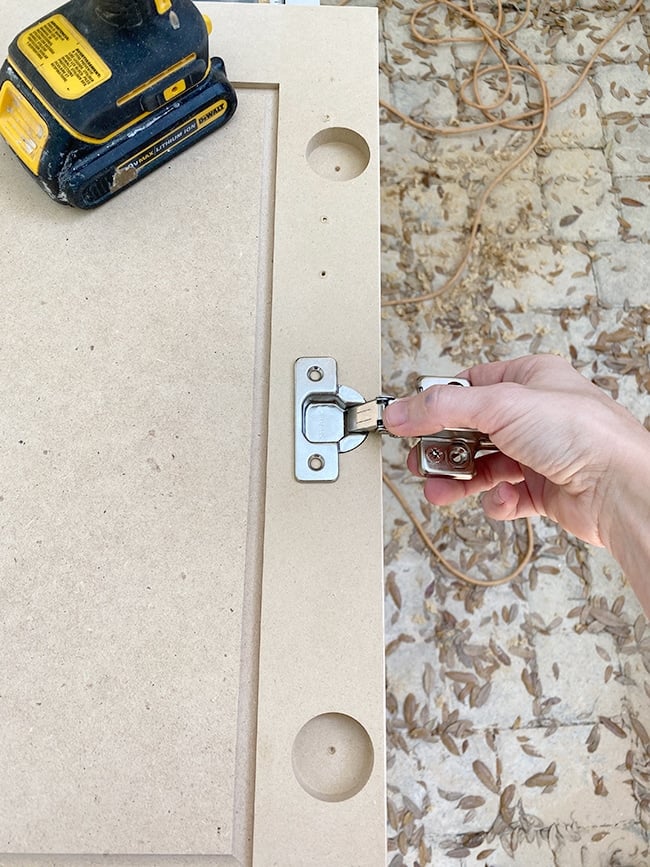
Lucas held the door carefully in place while I marked the screw locations on the cabinet box.
We drilled pilot holes and attached the hinges with the provided screws.

After a couple minor adjustments, it WORKED!!!
What a relief.
With those issues resolved, I’m thrilled to report that everything is now 95% close to perfect, which is all I could honestly ask for. We’re using Ikea Utrusta hinges for the other upper cabinet boxes (designed for their kitchen cabinets) so we had to drill all of our own holes, but it was pretty simple to figure out and the soft close hinges work smoothly.
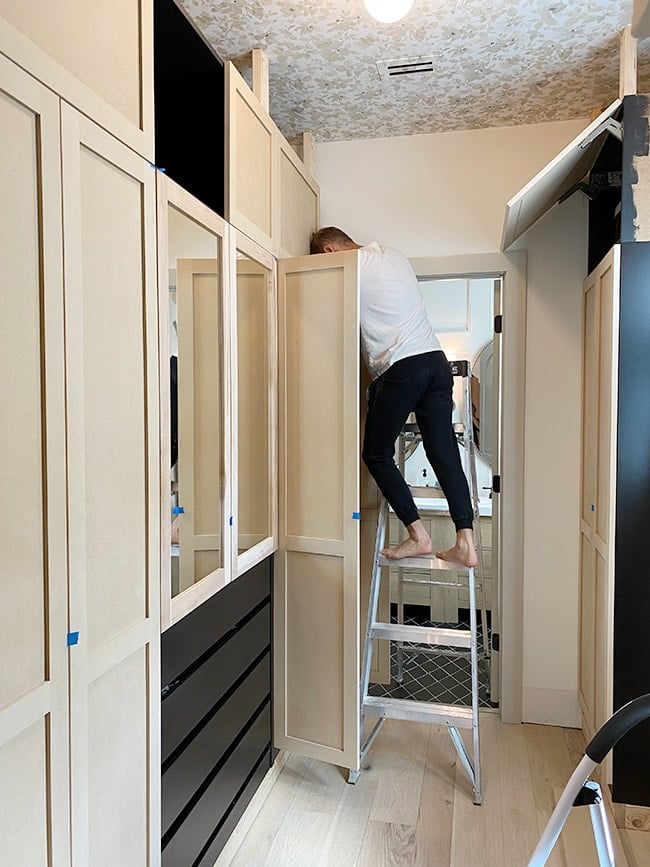
Installing and adjusting the doors is by far the most tedious part of this project though, especially when you have so many doors you have to line up perfectly. It’s not just left and right, but back and forward too. When you make one small adjustment, you have to adjust everything else around it. It takes a lotttt of patience with a project this size!
Let’s talk about these drawer fronts. This is one of my favorite design features of this plan, but it was also a custom modification that required precise measurements. We started with the top drawer, using a scrap of 1/8″ hardboard as a spacer and clamping the drawer front in place.
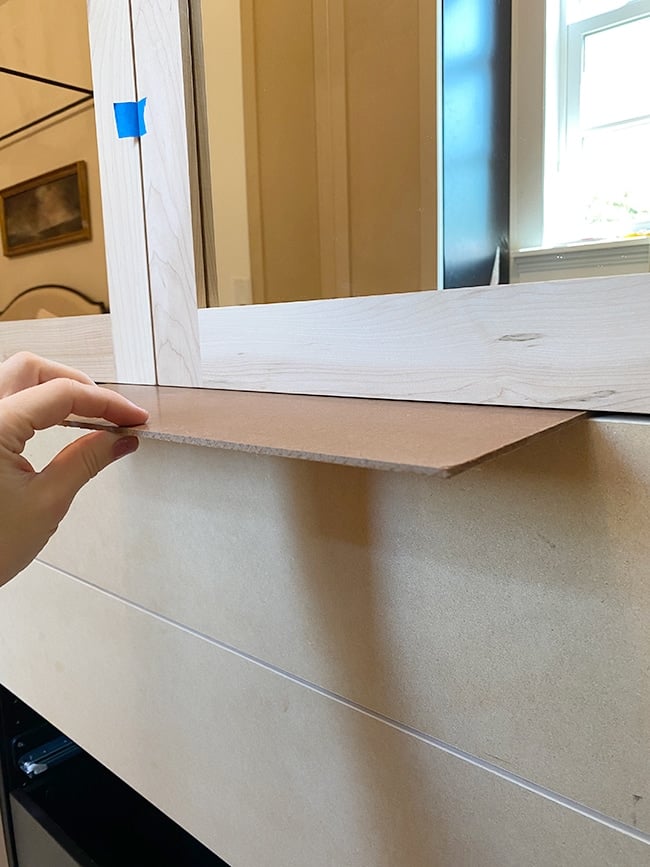
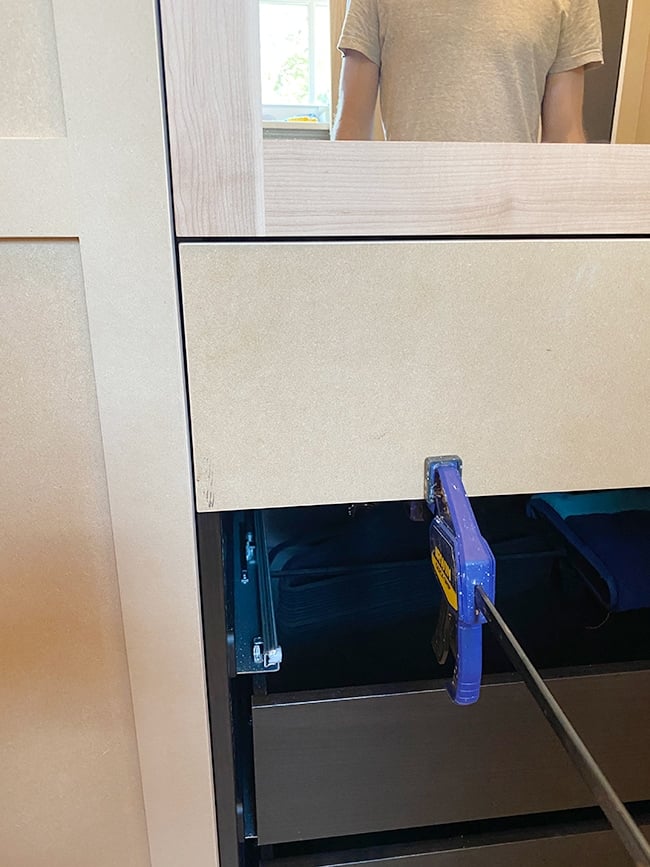
Once the spacing looked good, we drilled three pilot holes into the drawer front from the inside of the drawer, and attached both pieces with 1 1/4″ screws.
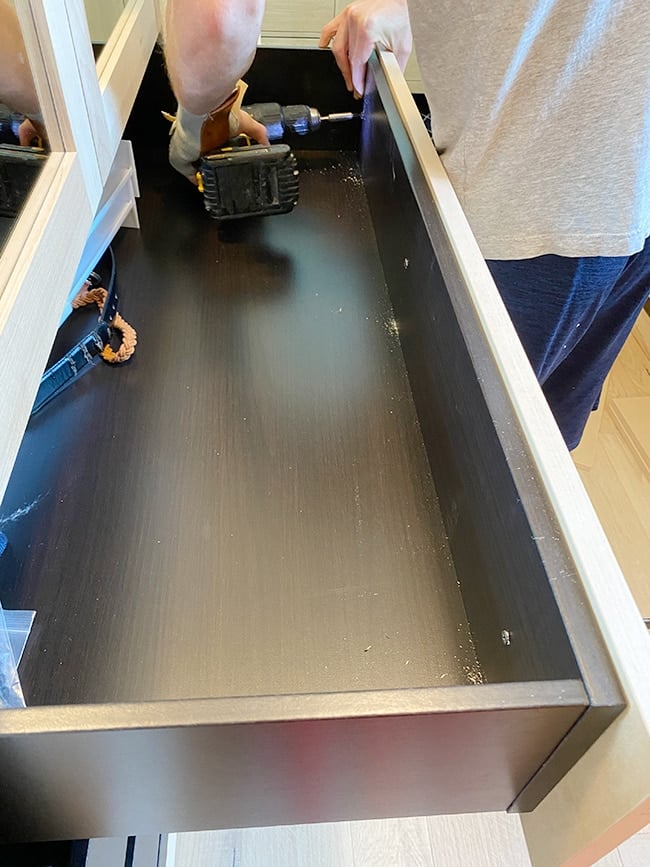
Then we worked our way down each drawer.
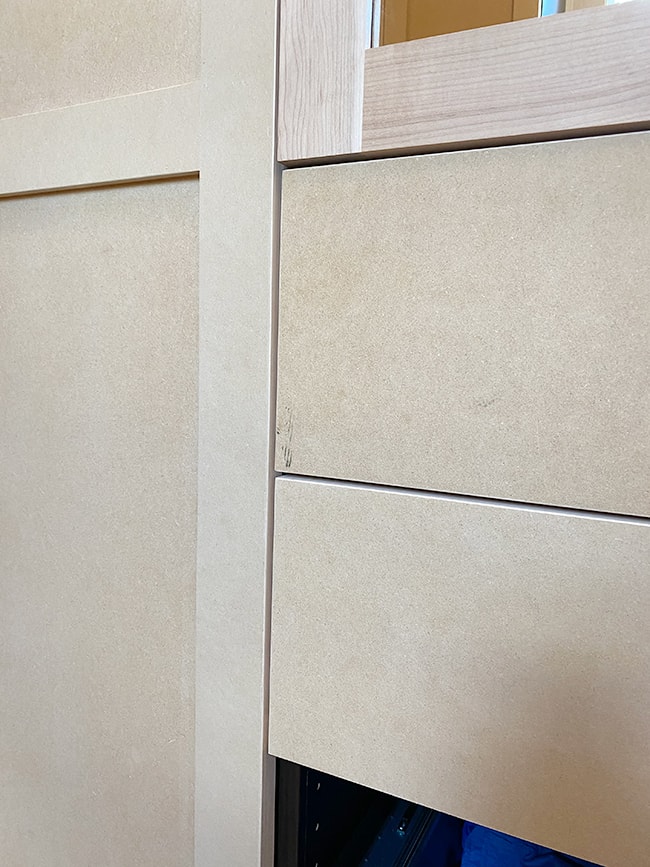
Somewhere along the line our spacing was slightly off, and we ended up having to rip down 1/16″ off the bottom drawer so it lined up flush with the cabinet doors on either side—no biggie!
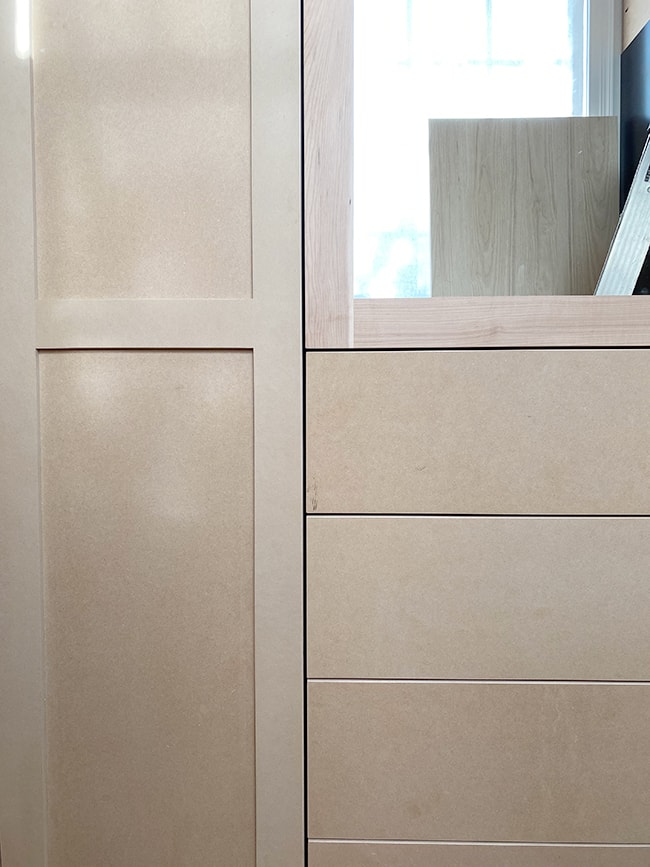
I somehow missed a photo of all the dry fit doors before moving onto the filler panels, but what an exciting feeling when we got the last one on! The vision was really starting to take shape.
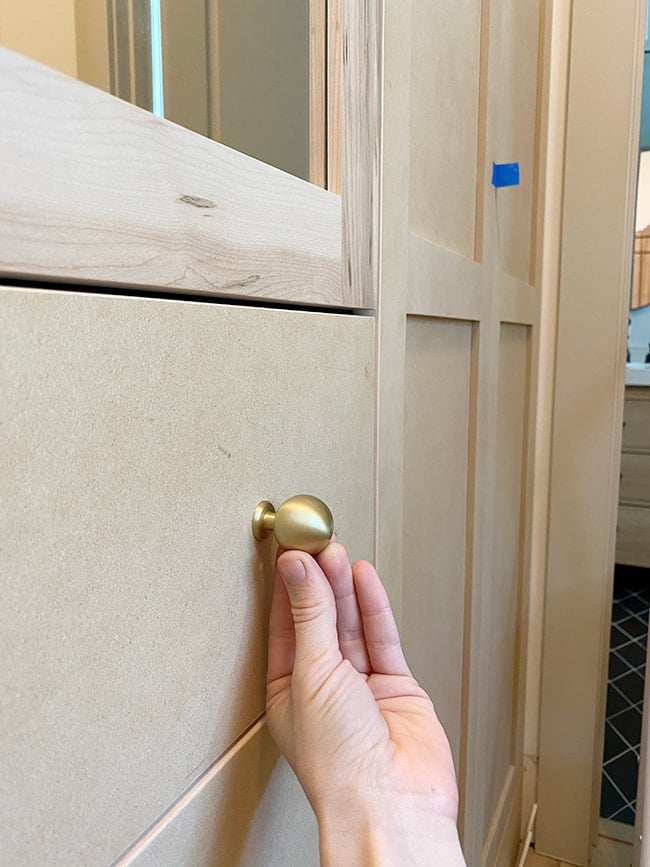
The hardware also arrived! I found these dupes for the popular Rejuvenation ball knobs on Amazon for less than 1/3rd the price. They’re solid brass, heavy and nice color/quality. Excited to see them installed!
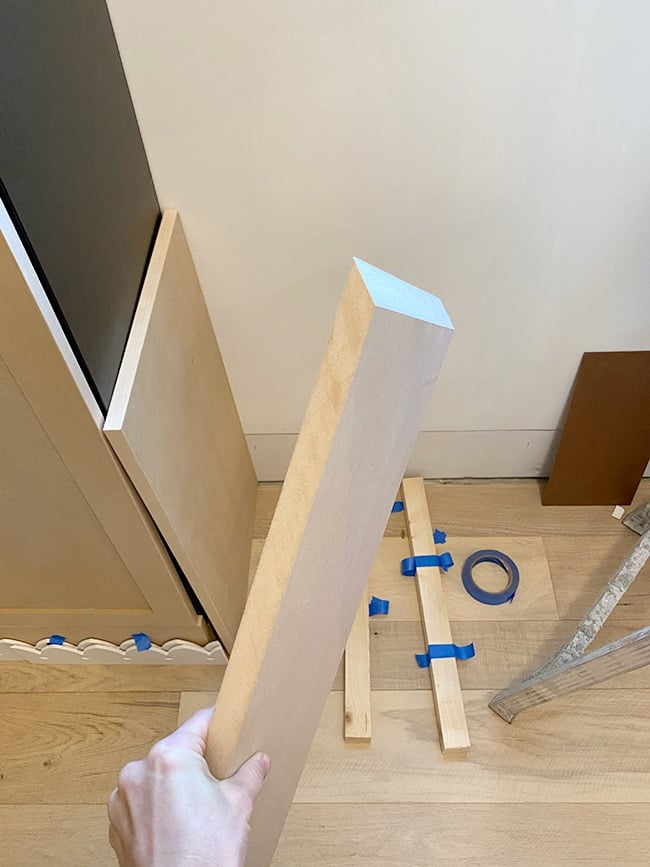
The Cabinet Face provided us with matching MDF boards to use for each filler piece and panel. Starting at the bottom, we measured the gap between the floor and bottom of the cabinets and subtracted 1/8″ for the gap. Our gap was slightly taller on one side, so we just ripped the board down to the narrower measurement and will shim the other side when we install so there is a consistent 1/8″ gap all the way across.
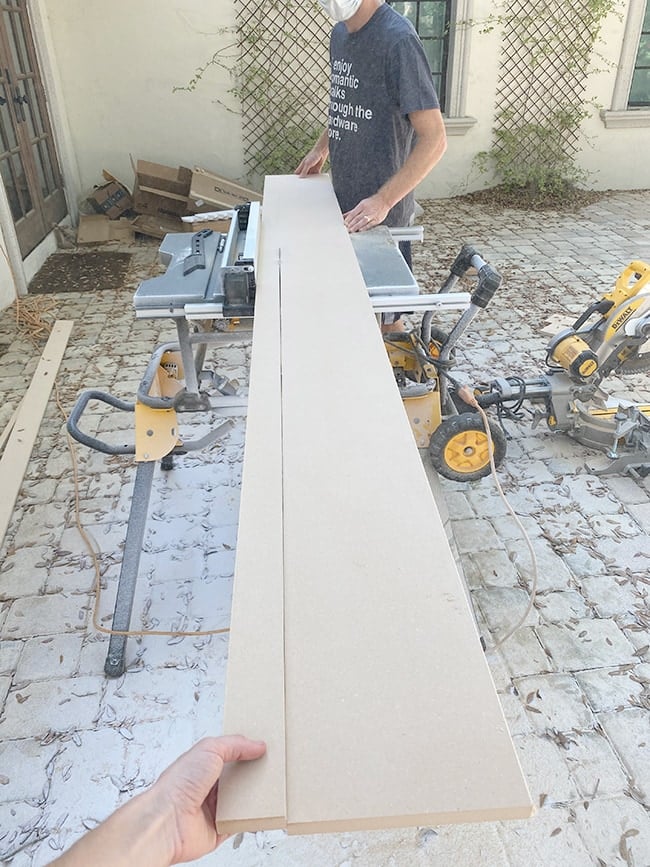
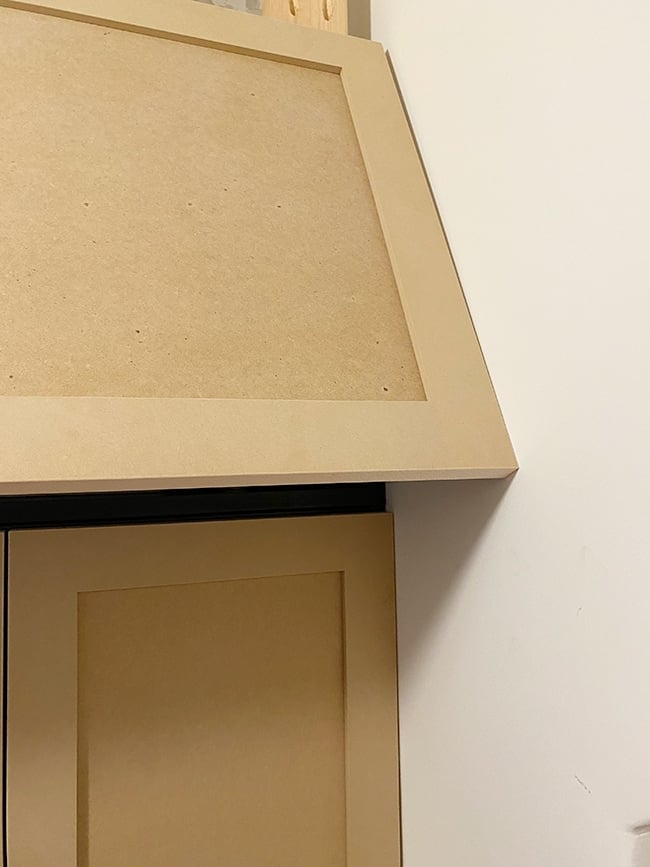
Along the top of the cabinets, we didn’t have to be as precise since there would be crown molding covering any gap along the ceiling. We ripped this one down about 3/4″ smaller than the exact height (but made sure it fit snug against the wall left to right).
On the left and right side of the cabinets, we wanted this piece to fit snug along the wall as well, with a 1/8″ gap between the door. Because our wall wasn’t perfectly even, we ‘scribed’ the piece by hand, marking the small section where the wall bowed out a bit and sanding the area down to fit around the curve.
This is the same technique we used to fit the trim our playroom cabinets—though that project was a lot more involved! Fortunately, we only had to scribe this one area as the rest of the walls were pretty straight.
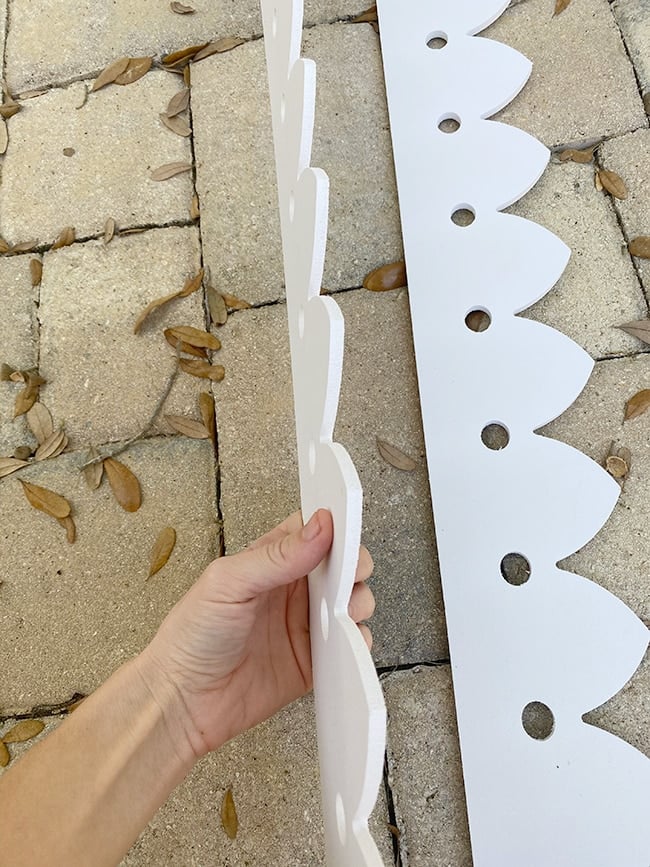
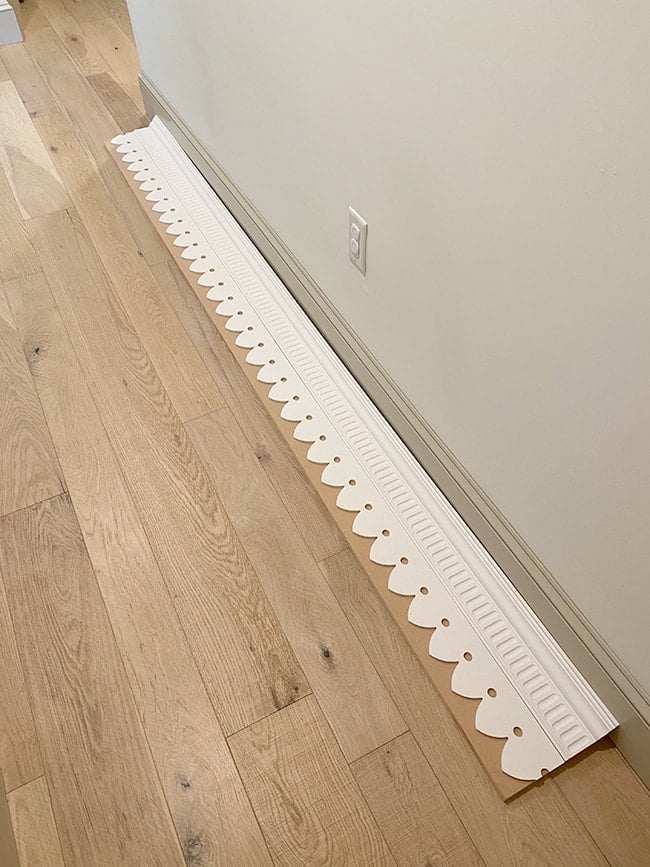
Now things start to get real fun! Remember the running trim I ordered from Ekena Millwork for the top and bottom of the cabinets?
It looked great but it was too thick for my liking, so we ripped it in half, down to 1/4″.
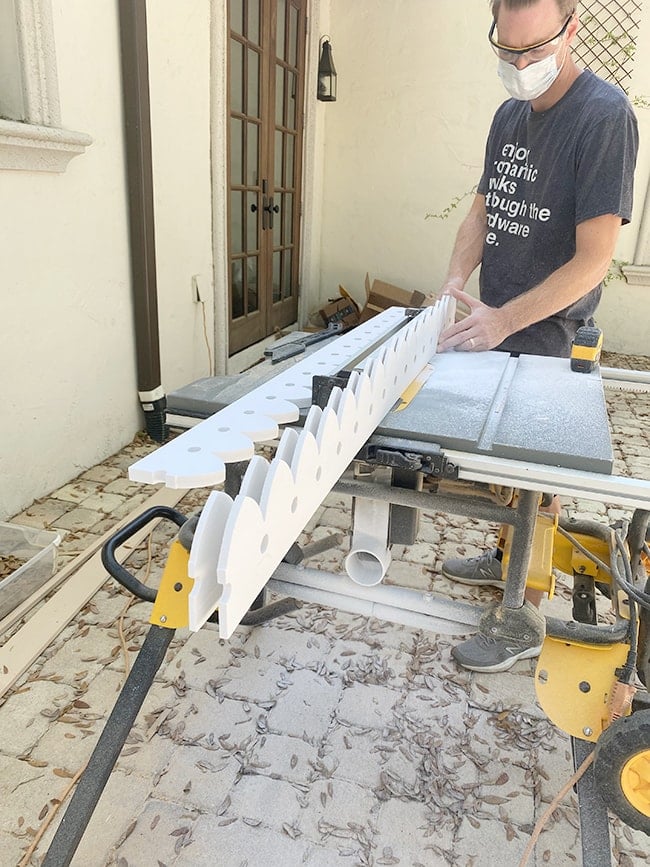
Much better! And as a bonus, we ended up with twice the amount of trim.

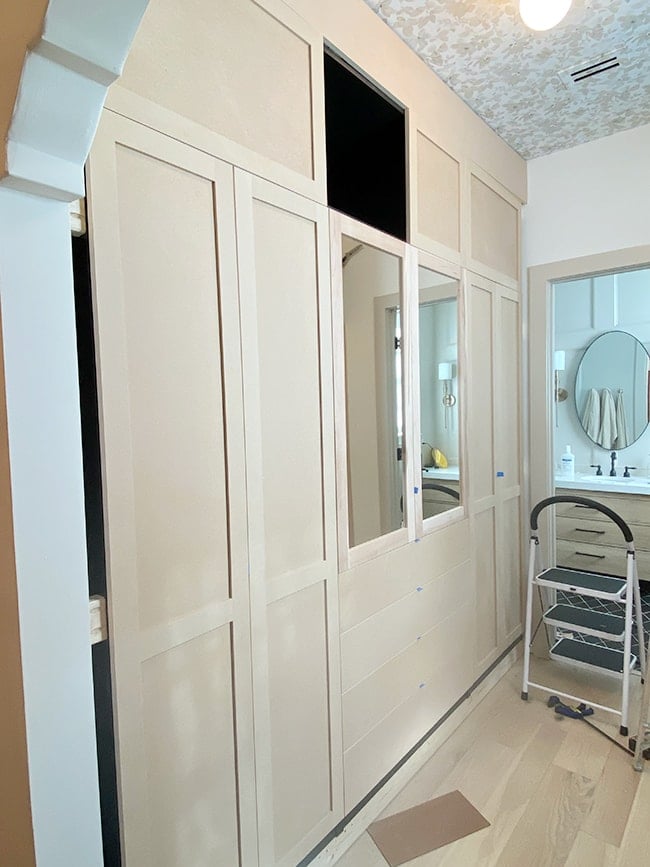
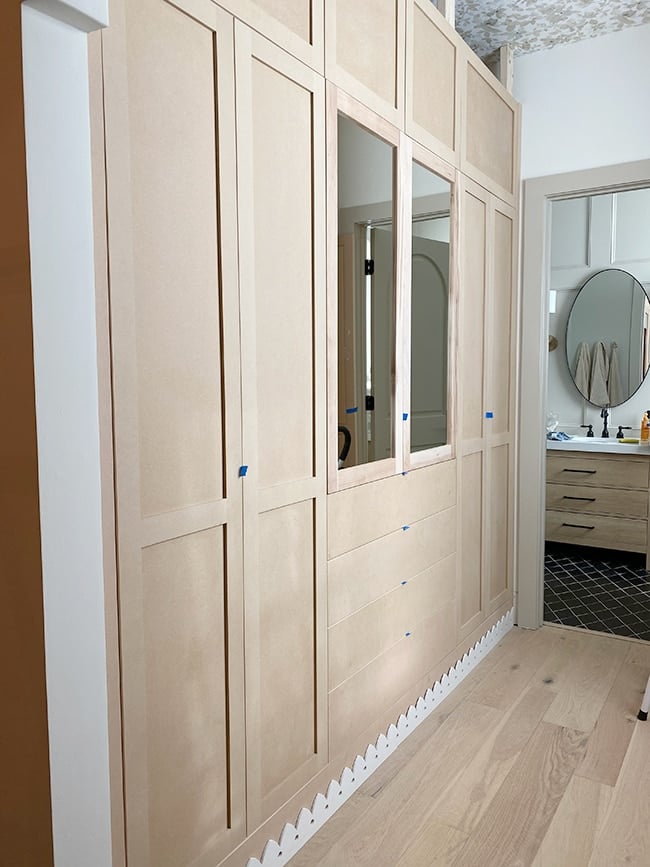
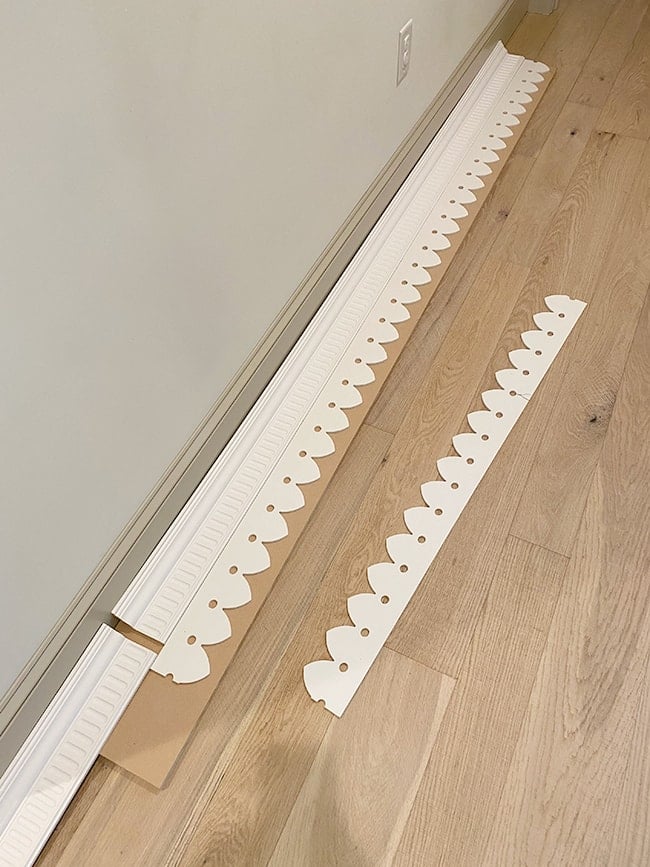
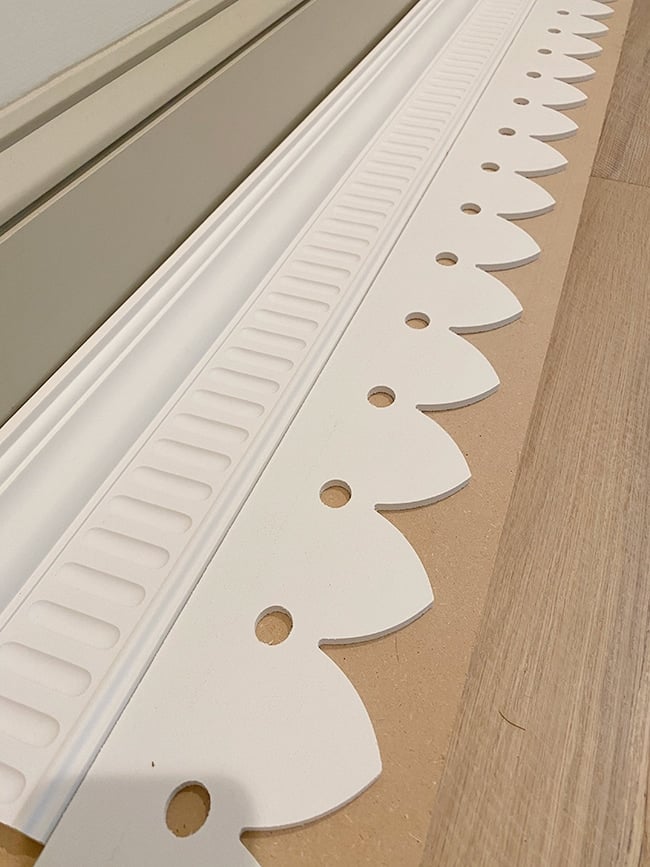
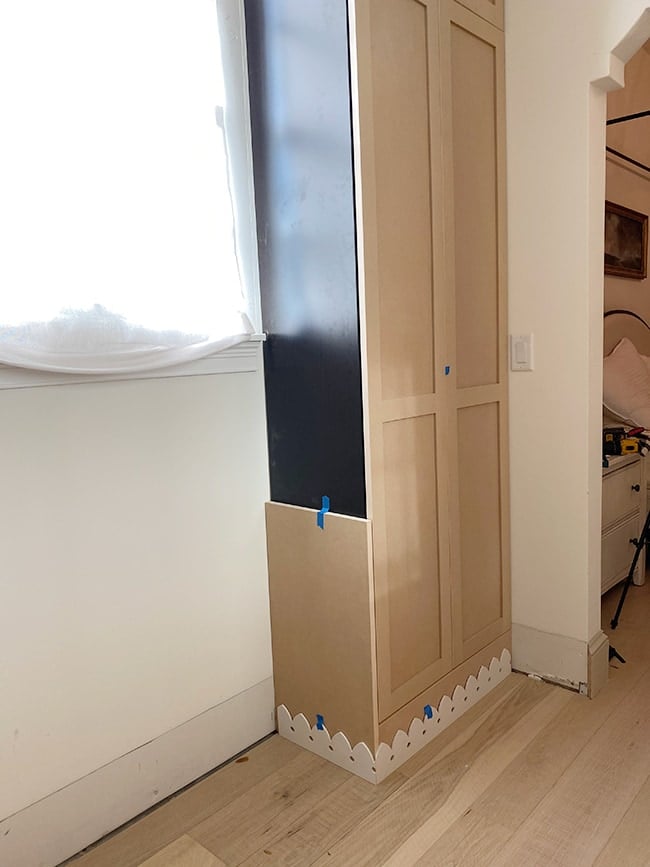
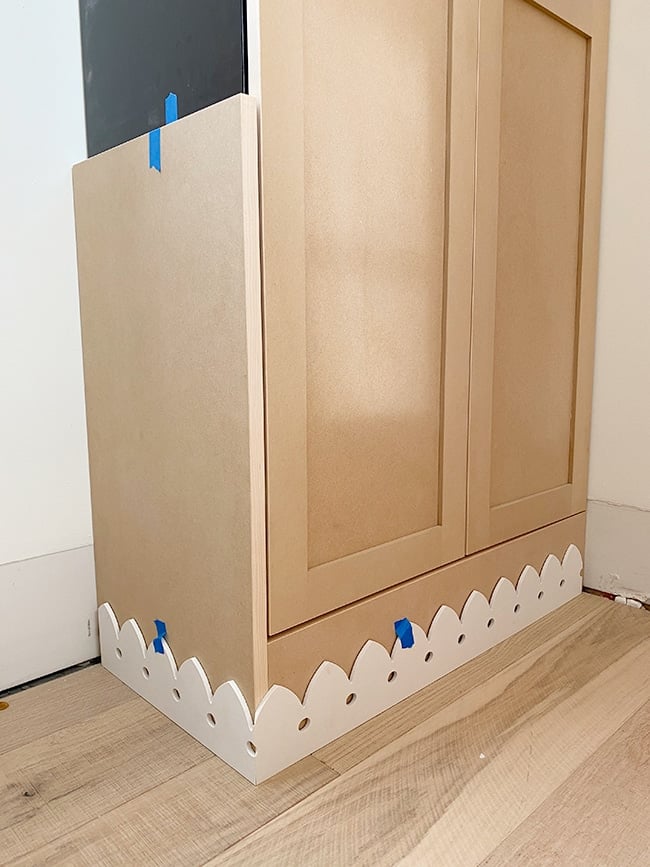
I had to tape some of these pieces down to keep it in place for the photo, but here it is coming together!
Above the cabinets, I’m using a three-piece molding treatment with the MDF filler as our base, crown molding, and the running trim below that. We couldn’t test fit this in place, so we measured/cut everything on the floor.
The closet is a little over 8′ wide so we ended up having to use two pieces for both the crown and running trim.
Can you picture it all painted black? I sure can!
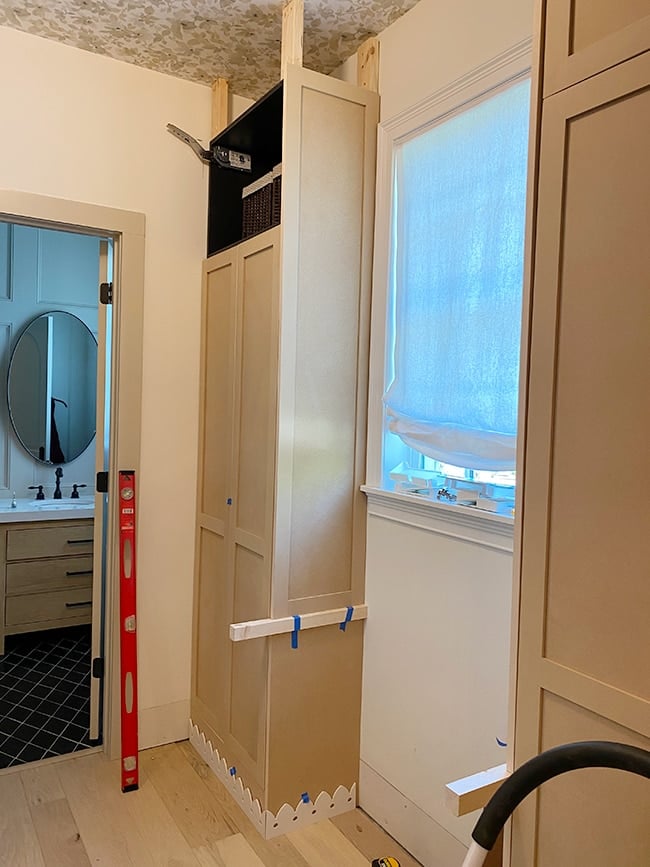
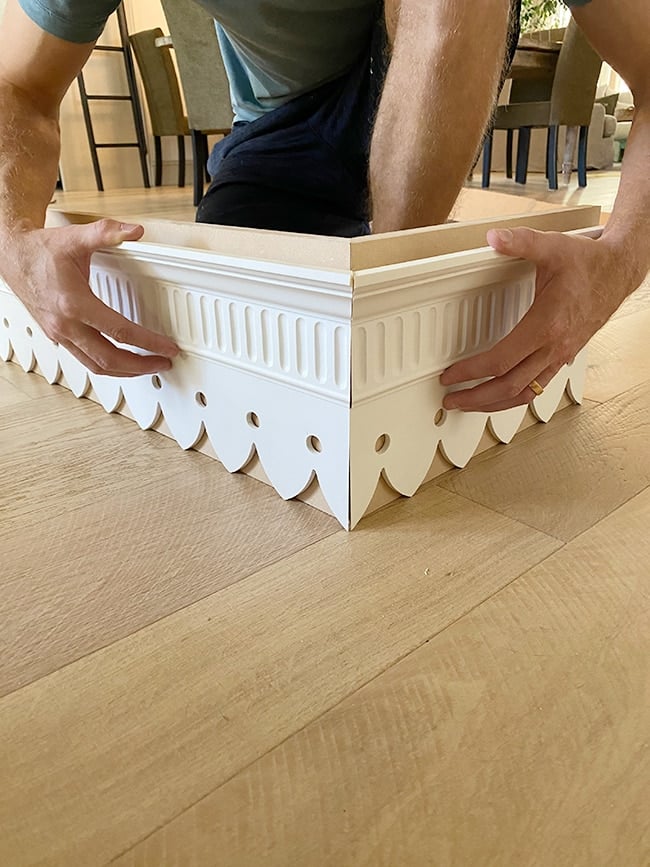
The right side of the closet is more involved. We’re planning to build a custom vanity desk here, so I had two panels made to go above and below the desk.
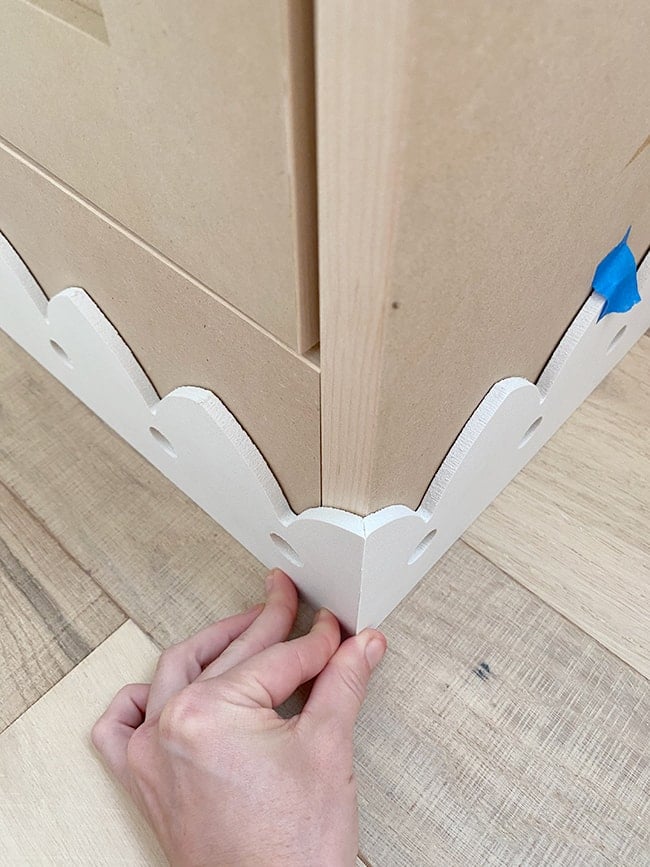
We also had to wrap the crown and running trim around the cabinet, mitering the edges.
Because the cabinets are so close to the window, we used a dremel to cut back the window sill so our panel could slide in.
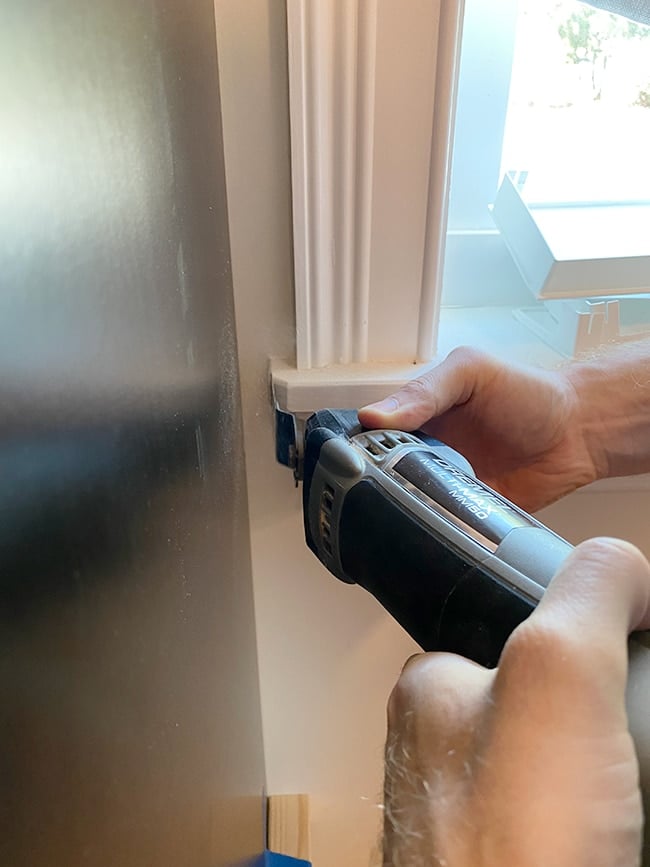
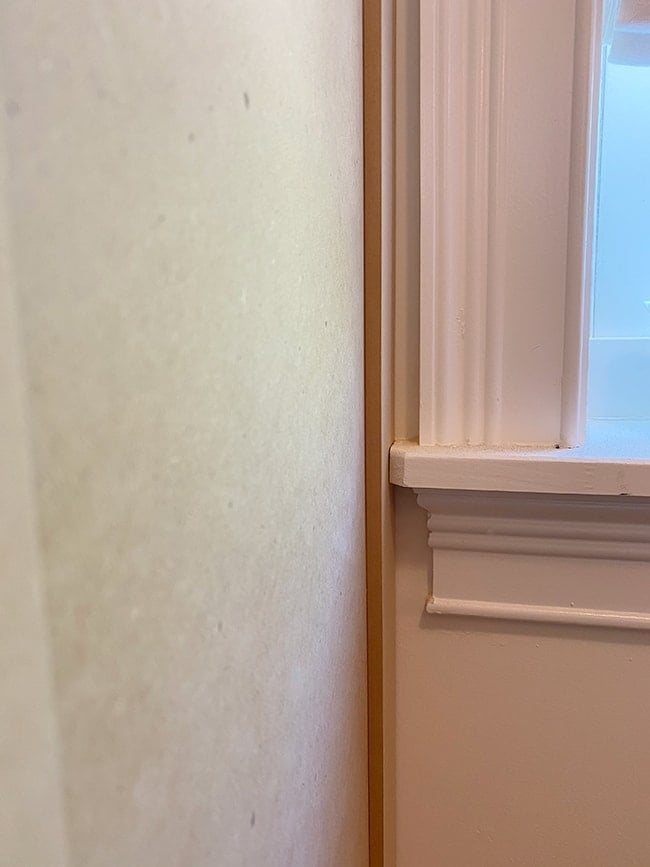
The right cabinet is even closer to the window (the window isn’t perfectly centered in the room) so we had to remove the entire side of the trim to rip it down.
I had The Cabinet Face make the upper panels in a shaker style to match the rest of the doors, and the lower panels slab since those had to be cut down on site after all of the door adjustments were made. The top panel had to line up with the top door, and we used a spacer ripped to the size of our vanity top to determine the height needed for the lower panel.
All three pieces of molding at the top had to be mitered as well.
Once again we had to test fit the crown and running trim on the floor (these pieces will be raised up against the ceiling, not level with the bottom of the MDF as shown below):
And with that, the test fitting was DONE!
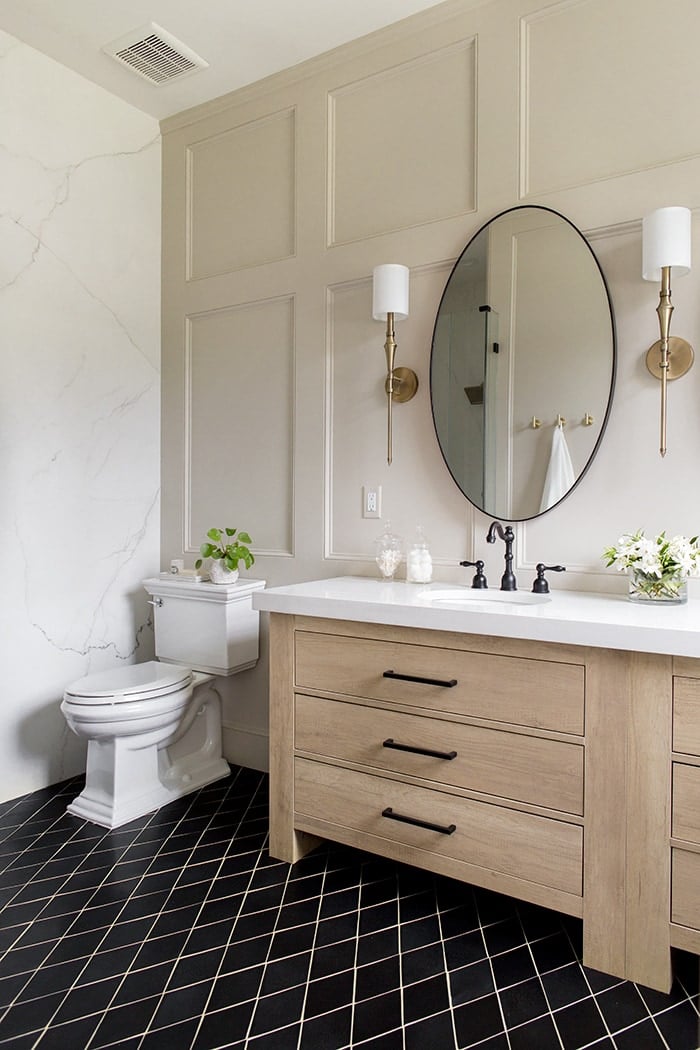
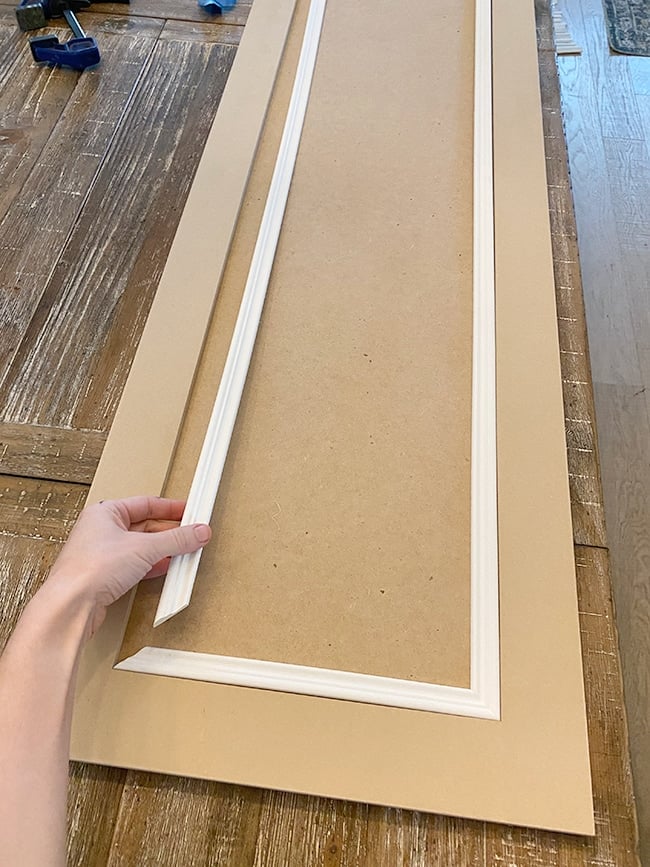
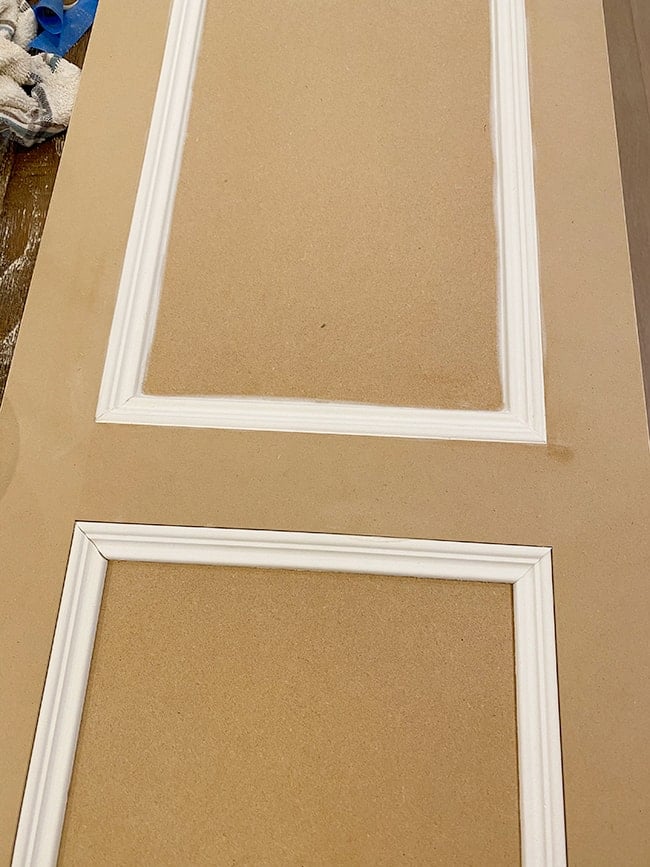
As lovely as this closet would have looked if we’d just painted everything and called it a day—you know I like to take things a step further. Last time we fluted our shaker cabinet doors, and this time I opted to line the inside of the stiles with trim to give it that recessed panel molding look—the same treatment we used in the adjacent bathroom and playroom walls:
This is a small added detail that completely elevates the look and makes all the difference. Totally worth the extra step!

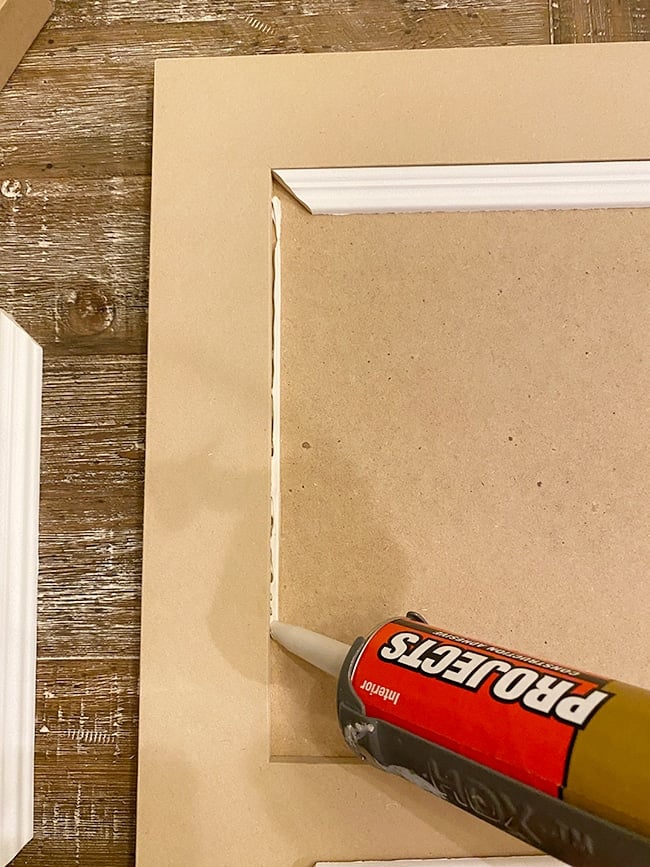
I won’t go into extreme detail on this (you can get a thorough tutorial here) but I used a very thin, low profile chair rail molding and mitered the corners.
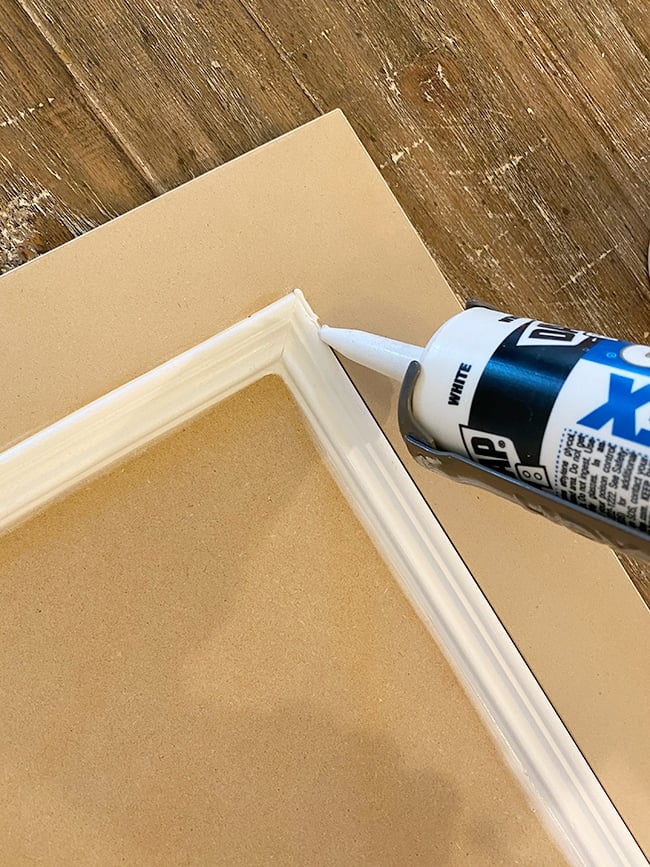
This molding is made of lightweight urethane and attaches with glue, no nails needed (I used liquid nails).
Since it is so lightweight, I had to make sure the trim was held in place against the doors with no chance of shifting, so I used every heavy object I could find in my house to hold them down while the glue was drying.
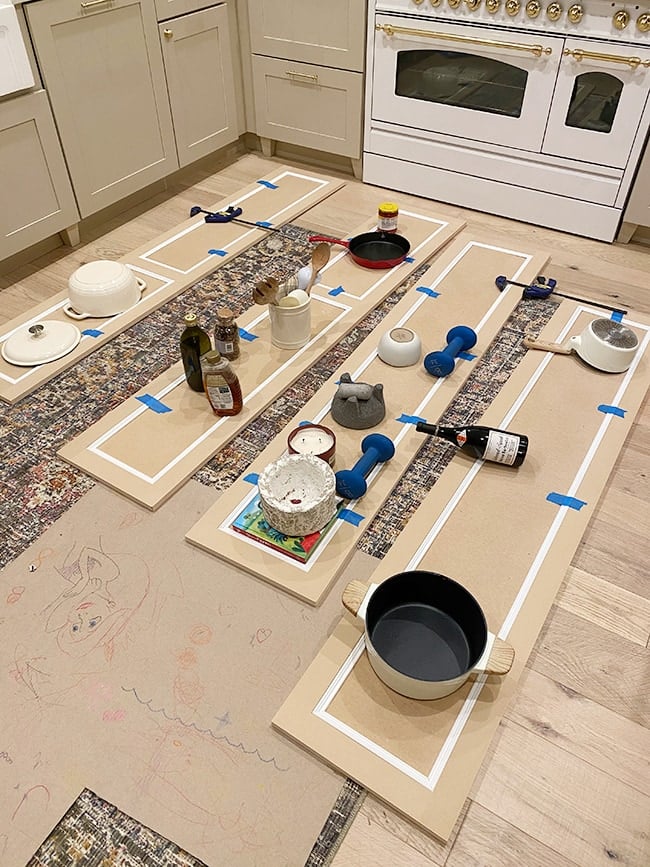
Our floors were covered in doors for a couple days and once the glue was dry, it was time for my least favorite part of any project: caulk.
Every part of DIY gets easier over time except for caulk. Anyone else feel this way? Unfortunately it cannot be skipped, as it would be terribly noticeable once painted. You can see caulked vs uncaulked below.
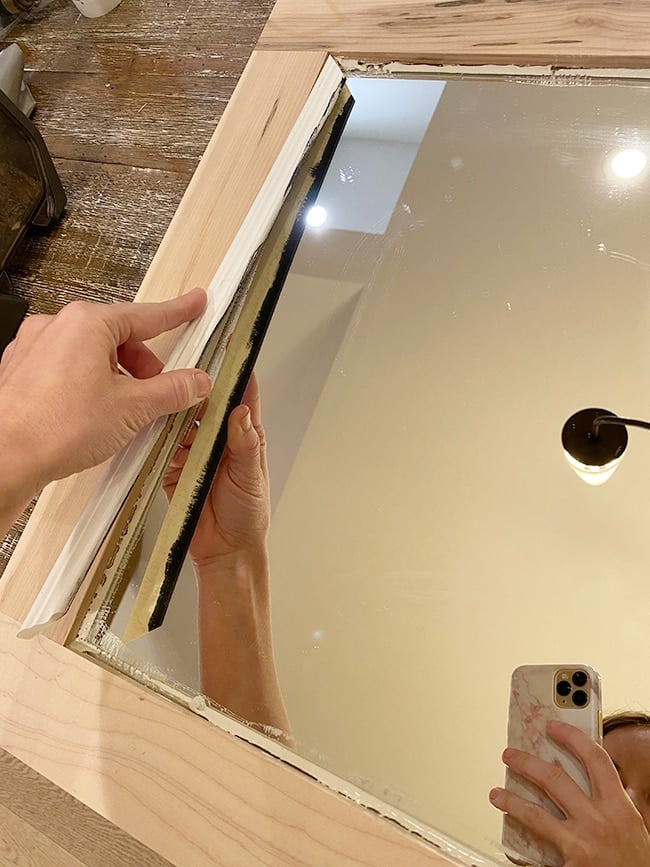
After the caulking marathon was over, I noticed an issue with the molding on the mirrored doors. Apparently, the mirror reflects the back of the trim (which is an off-white color) and the only way around this is to paint the back of the trim—oops! You can see our test piece here with the unpainted part on top and painted below:
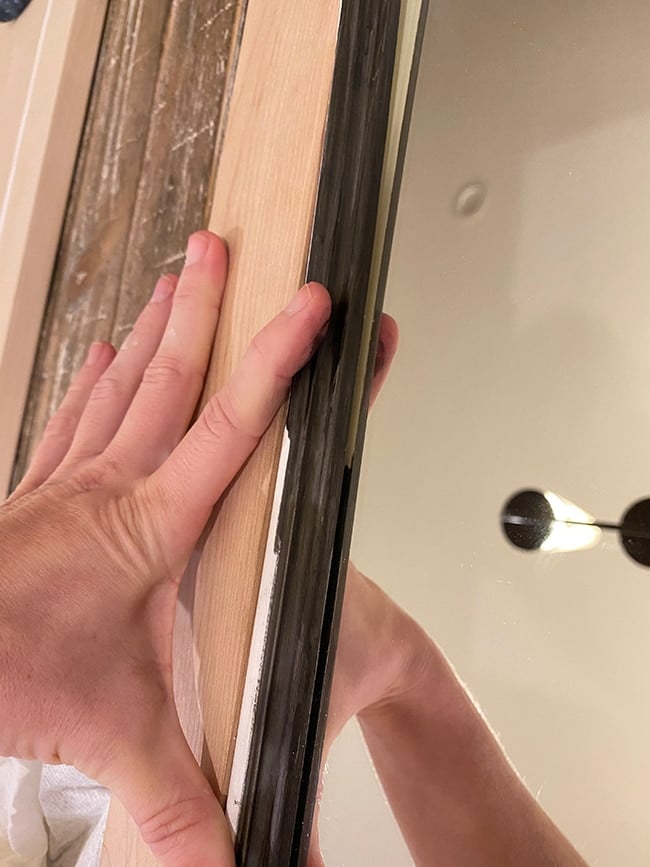
That meant we had to carefully remove the molding from the mirrored doors and redo them. Thankfully, I had only applied glue on the back edge of the molding and they all came off in one piece.
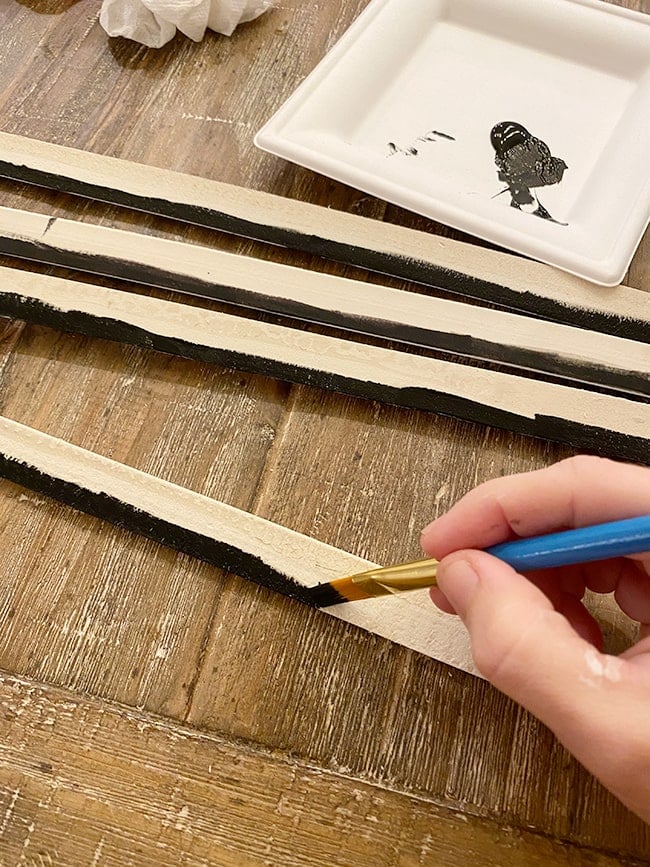
It didn’t take too long to paint the edges, and re-glue them back in place.
And that brings us to the next big phase: painting! We spent last weekend prepping, priming and painting each door and trim (54 pieces, to be exact) and they are curing as I type. I plan to share a detailed video tutorial and blog writeup on our painting process, now that we’ve done this a few times and learned some tricks.

This will be the last blog update before the big closet reveal! If all goes well, I plan on revealing the completed space in two weeks, followed by a separate painting tutorial afterwards. But as usual, I’ll be sharing all the updates in real time over in my Instagram stories if you don’t want to miss anything. Happy Spring!


Joanna says
This has been really fun to follow along with. I found your blog a few months ago and am just loving it. A lot of the home reno/project bloggers I’ve enjoyed reading over the last 10ish years are mostly doing sponsored posts and turned themselves into lifestyle bloggers, and I miss the projects (and honestly don’t need another recommendation of what eye cream I should buy, lol). I can tell you’re really into it and excited to share your projects and your house. I’m always happy when you pop up in my reader 🙂 Can’t wait to see the final reveal!
KristenEff says
I 100% second this. I don’t care what you wore on vacation. I’m here for the sawdust. 🙂 Thanks for keepin it real.
Jenna Sue says
Thank you Joanna, I’m glad you’re still here! I’ll keep sharing DIY projects as long as I’m doing them (and enjoying them ;))
Ivory says
I love love love this closet, inside and out, but not so much of the running trim. Please don’t you are anyone hate me for saying this. EVERYTHING looks high end, except the running trim. Other than that, as for me, I 100% love this fabulous step by step tutorial closet. I would love owning one in our bedroom
Pam says
Once again…. Superb!! You and Lucas are aaaaamazing… I wish you could come do my home… When are you coming back to Seattle to see your Cousin I believe it is.. Ha Ha…. Is Lucas’s hands doing OK? I saw a brace on in some of the pictures.. One more thing I have to say.. Not only are you and Lucas extremely talented and DIY experts… I also want to thank you for sharing your detailed step by step’s.. AND then you reply to all of us when we comment.. Your simply amazing.. You should be sooo proud of yourself.. Esme is one lucky little lady to have you and Lucas as her parents.. One of these days I’m going to rent the Riverside retreat!! Hugs from Washington…
Jenna Sue says
Aww you are too kind Pam, thank you for your sweet words! Lucas’ hand is improving slowly but surely (until the next round of stucco at least). We are hoping to visit Seattle in September–we’re long overdue for a trip back West!
Julie says
I’ve already spent hours following along on the build ins, knowing that you have spend 1000000x the hours in just making them. I totally feel for you in those frustrating moments, and kuddos for you guys for having the patience. I think I would have quit and just read my favorite design blogs instead. I can’t wait to see them finished, and get that WOW moment. Luckily for you, you get to use them for a long long time!
Jenna Sue says
Haha! Unfortunately we don’t really have the option of quitting, but that’s probably a good thing 😉 So glad you are enjoying this renovation!
Tiffany says
Hey Jenna what brand/color was the black paint you used on these? Thanks!
P.s. you’re my favorite account to follow on IG! You’re SO talented and I just love your style! ❤️
Jenna Sue says
Thank you so much Tiffany! The color is Onyx by BM 🙂
Juanita Louie says
This was so exciting to watch. You are masters!! I love how you had the doors on the floor with pots and pans. I used the same technique when I made mine ; )
I can’t wait to see more and get the deets on the painting.
Jenna Sue says
Haha, whatever gets the job done right?! Excited for the reveal of this project!!
Taylor Hill says
I have enjoyed following this so much! I really love your attention to detail and taking things up a notch. I love that part of design, AND ya’ll work together so well. Also- BIG thank you for the discovery of the Rejuvenation dupe knobs. Can’t wait to see the finished product in a few weeks!
Jenna Sue says
Thank you so much Taylor, I’m really glad you’re enjoying this project! These knobs are such a great find and I’m excited to see them in action. Almost to the finish line!!