For our first big project in the work + play room, we created an accent wall with recessed panel wainscoting, and today I’m here to walk you through every step—including all my best tips and mistakes to avoid (you can watch the whole process in video form here in my Instagram stories in case you missed any of it!)
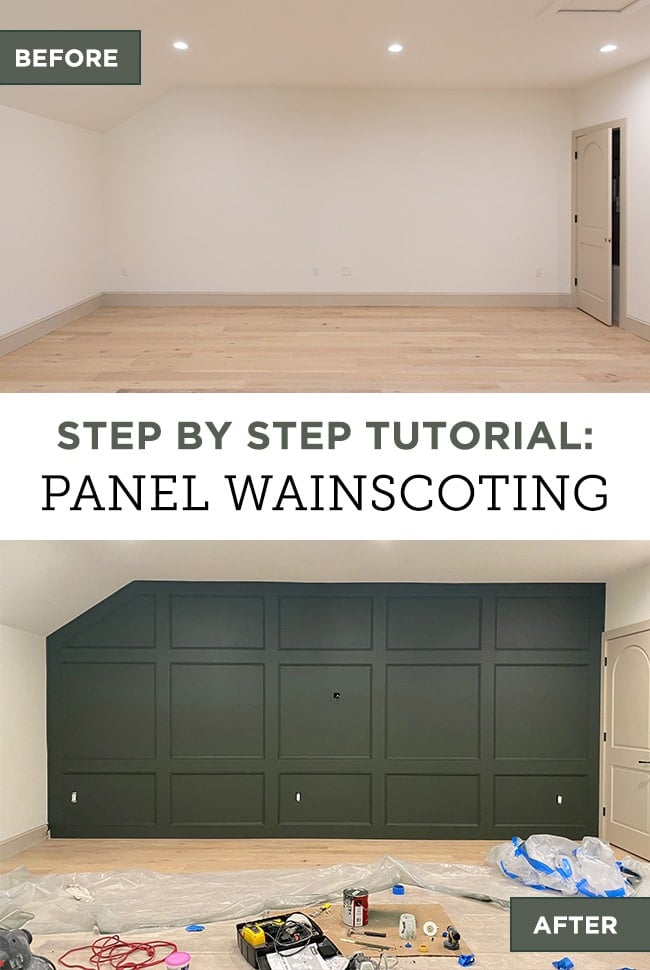
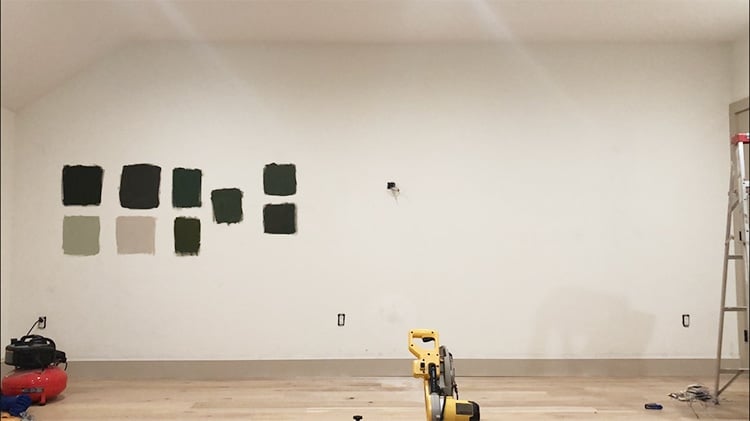
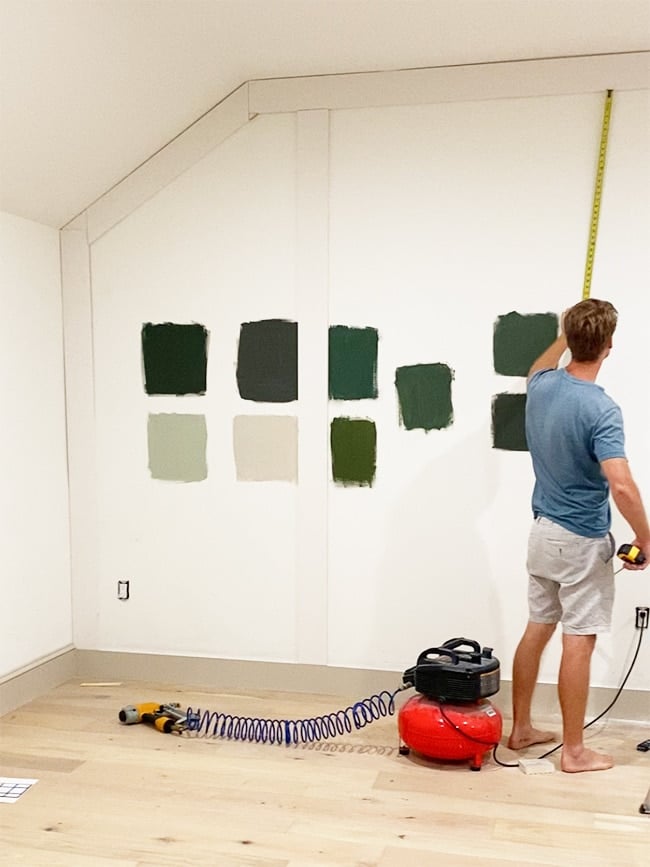
If you recall back in the design plans post, we’ll be mounting a TV in the center of this wall between two sconces. We had to relocate the electrical box near the floor and patch the hole before starting. Here’s how it looked just a week ago:
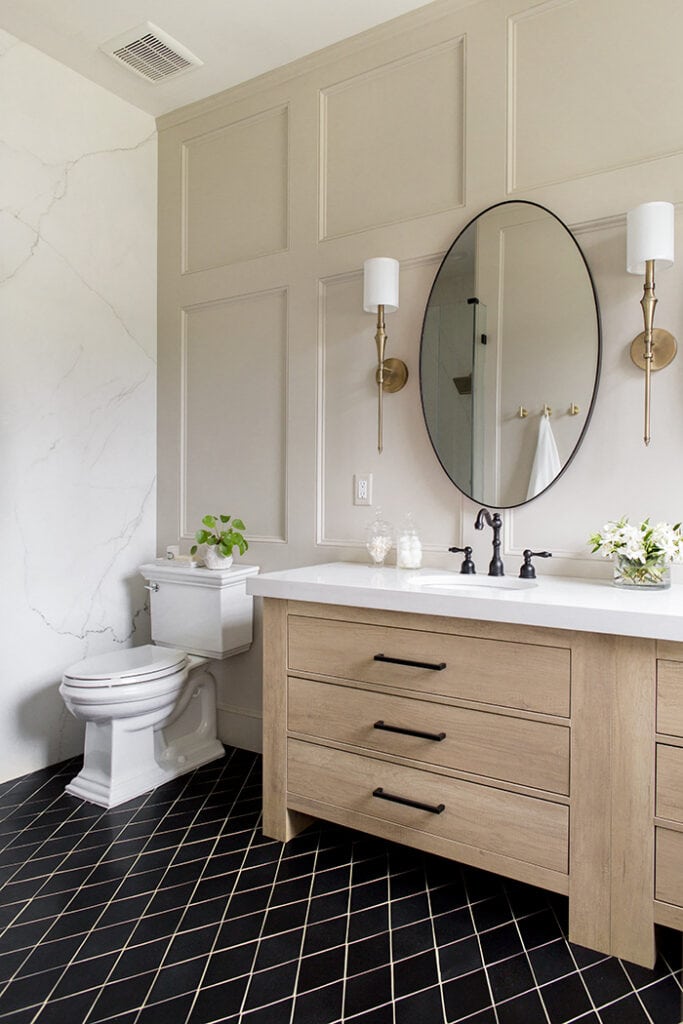
I decided on a recessed panel molding treatment because it’s simple yet sophisticated, won’t compete with the adjacent mural wall, and relatively inexpensive. You may recognize that this is the same molding treatment we used in our master bathroom last year (check out this quick tutorial):
Since this wasn’t our first rodeo, things definitely went a bit quicker with less headaches this time. Even still, this two-piece molding installation comes with more challenges and a larger time commitment than other wall molding techniques. If you’re looking for something easier, check out my beginner tutorials for board and batten, lattice molding, easy shiplap, decorative panel molding, shaker panel, and tongue and groove.
Note: this technique is best if you have smooth walls. If yours are textured, you can cover them with hardboard panels, skim coat, or just leave them as is if you don’t mind the texture. I’d also stick with eggshell paint which will minimize the appearance of texture.
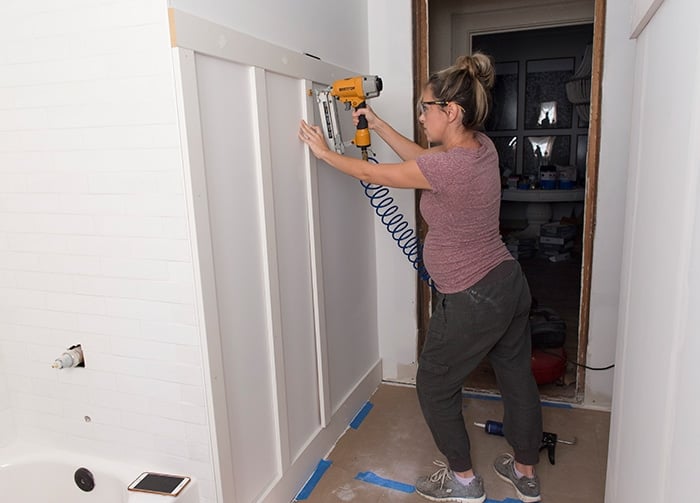
With that said, you can still take this project on as a complete beginner with a lot of patience and by following these tips. Just remember, all great things take time and effort!
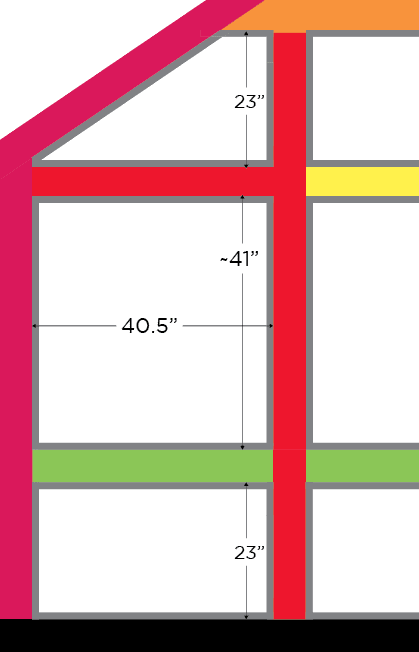
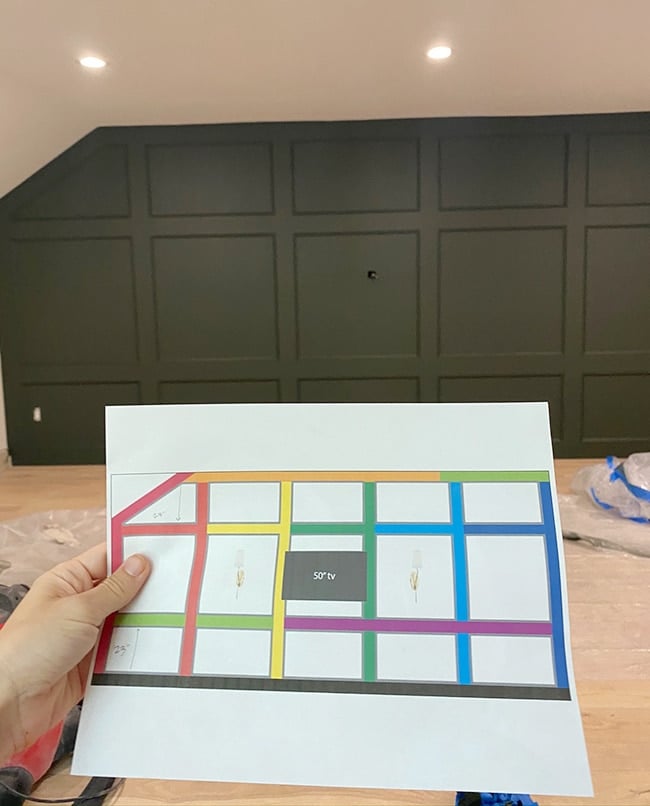
Before getting started, measure your wall and lay out your plan. I always do this in Illustrator but a pencil and paper works just as well! I decided on the same layout as our master bathroom, splitting it into three rows with an approximate 1/4, 1/2, 1/4 ratio. You could divide the rows evenly instead, but I think this arrangement is more sophisticated:
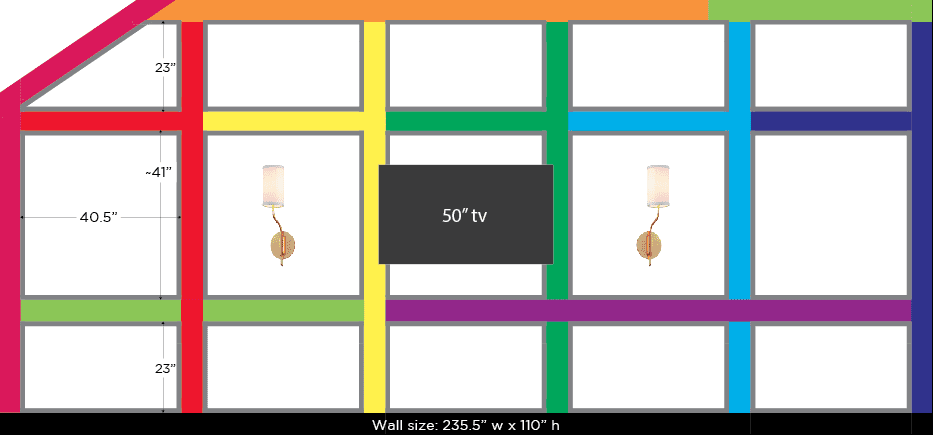
The different colors each represent one 1x6x12′ board—this is how I was able to calculate how many I needed (I’m a visual learner!). This mockup is to scale and accurate except for the sconces, those aren’t the exact ones I chose but they’re similar. This is a two-part molding technique and the gray lines in the center of each box represent the base cap molding.
Now that we have our plan, here’s what we’ll need for this project:
Jump to:
Materials
- 1x6x12′ MDF boards (we needed 8 pcs)
- 8′ base cap molding (we needed 27 pcs)
- Paintable Caulk (we used 3 tubes)
- Wood filler/putty and a putty knife
- Paint (we used SW Ripe Olive)
Tools
- Electric sander (a Mouse works great)
- Miter saw OR a miter box
- Nail gun and 2″ nails
- Level or laser level
- Hammer and nail setter
- Tape measure
- Paint brush & roller or paint sprayer
- Optional but very helpful: Miter shears, laser measure
Our existing base molding is made up of two pieces: a 1×6 and base cap molding on top. We decided to leave the 1×6 in place to save on materials cost, so we just had to remove the old base molding first.
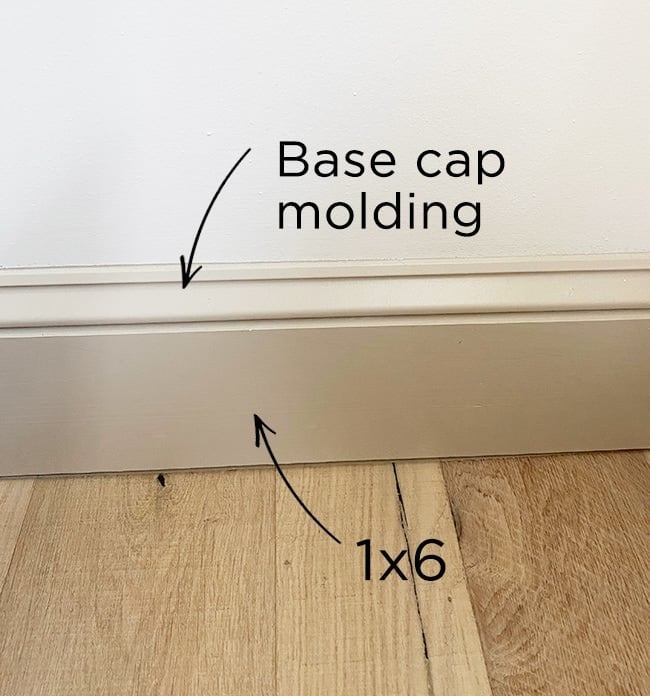
Then it was off to the races!
Step 1: Cut and attach the perimeter boards
Starting in the far left corner, we measured for and cut the first vertical 1×6. Since our wall is angled, this isn’t super straight forward, and we didn’t really think it through before cutting the first piece (this is what happens when you try to rush through it!)
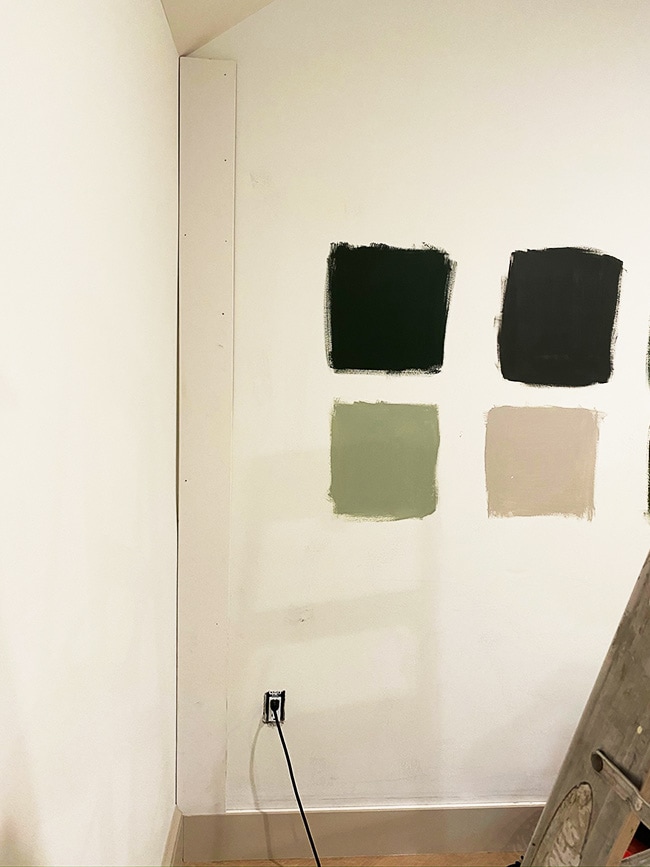
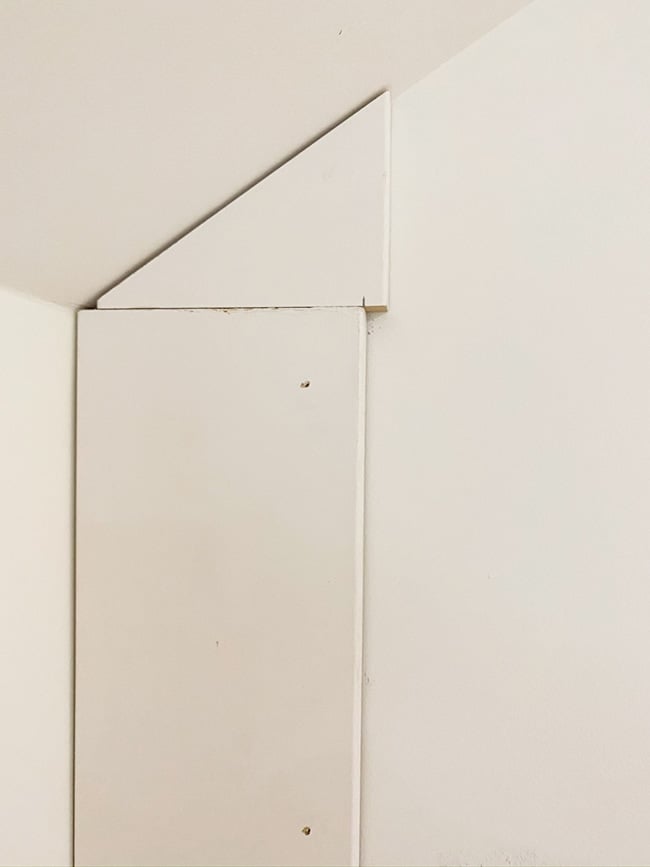
If we left it this way, we would have had to do a funky L-shaped cut for the piece above it, so instead we cut down a little triangle to fit (we should have just angled the top cut to avoid this! Fortunately, putty and caulk hide all sins):
To figure out the cut for the next 1×6, we locked our angle finder in place along the wall, then traced it onto our board:
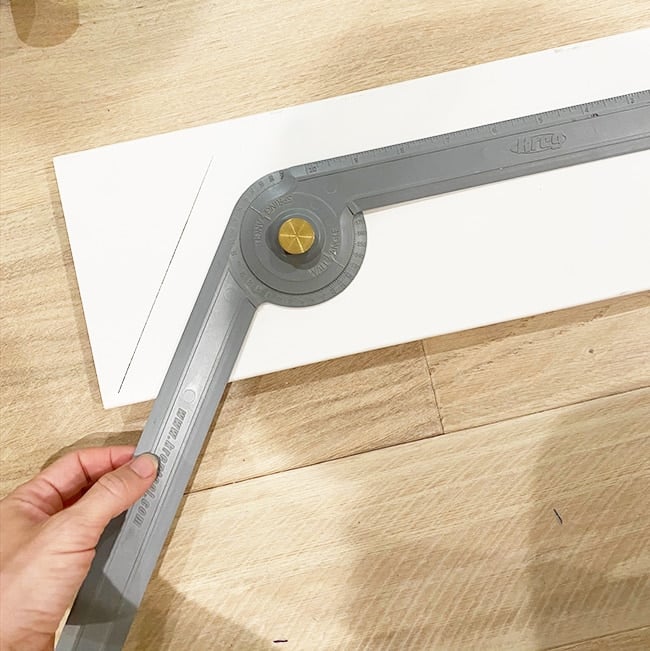
On the other end of that board, we wanted a straight cut, so we held the angle finder level along the edge where the cut would be:
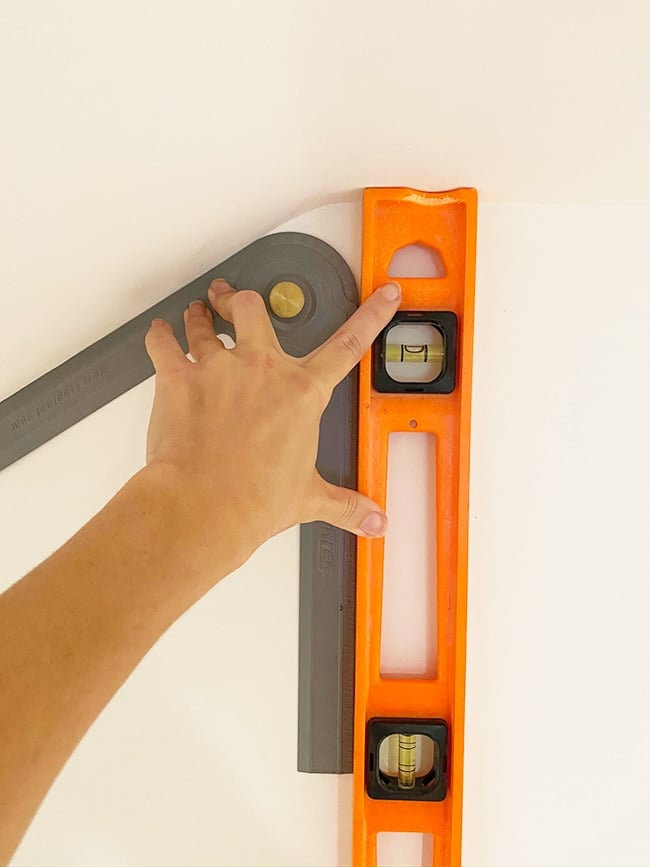
Just like so…
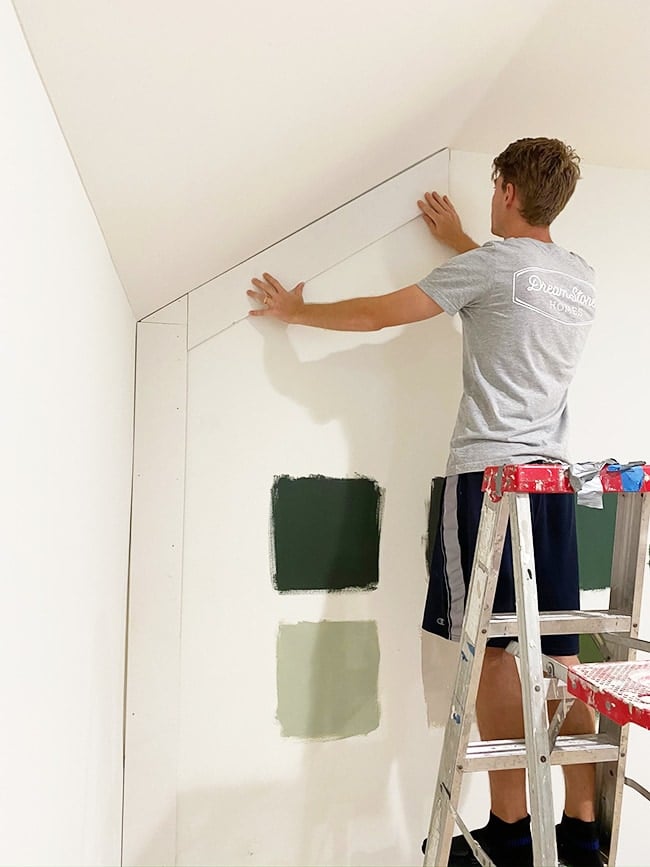
After holding up the next board, we realized there was another gap (doh!) and had to cut another little triangle to fill it. A professional would have angled the end cuts on both boards to avoid this, but meh, it turned out just fine in the end:
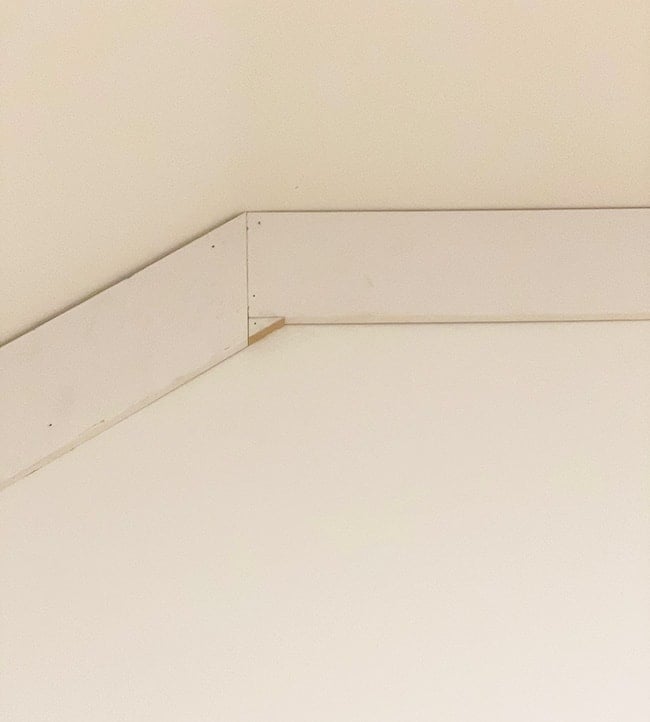
Thankfully, that was the end of angles for our 1×6’s, and we were able to finish the ceiling edge in no time. One tool that has been extremely helpful/life changing over the past year is our laser measure.
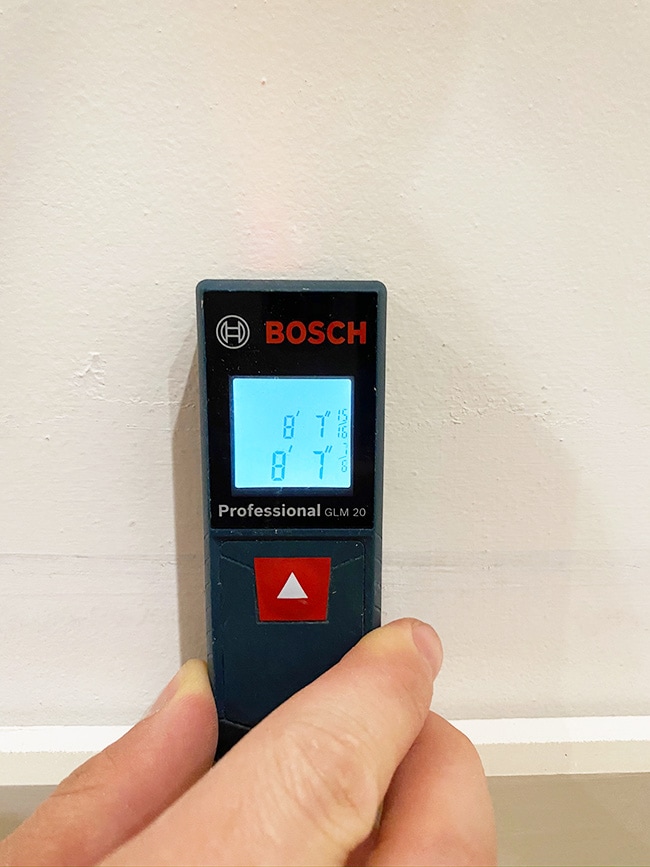
Instead of trying to hold a tape measure perfectly flat and squinting to guess the line, you simply point the laser to the surface you’re trying to measure and press a button. It’s accurate down to the 1/16th! We double checked it against our tape measure several times to be safe and it was dead on every time.
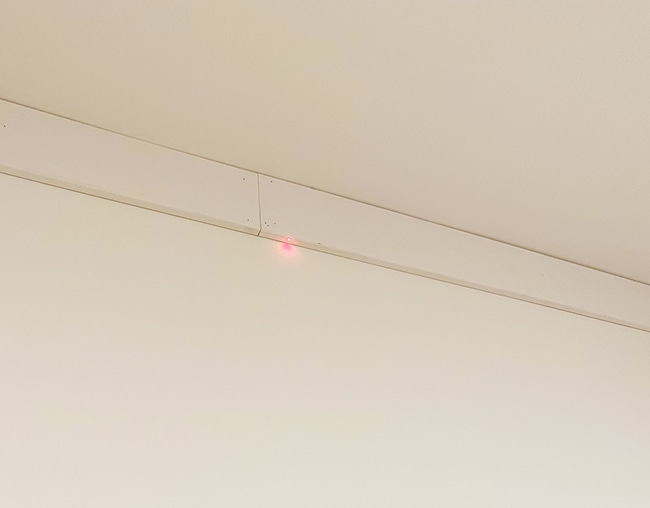
This is especially helpful for larger distances where you’d normally need two people to measure. It saves so much time and guesswork!
On the far right side of the wall, we had to rip down the board with our table saw and finished the cut off with our Dremel to accommodate the door trim.
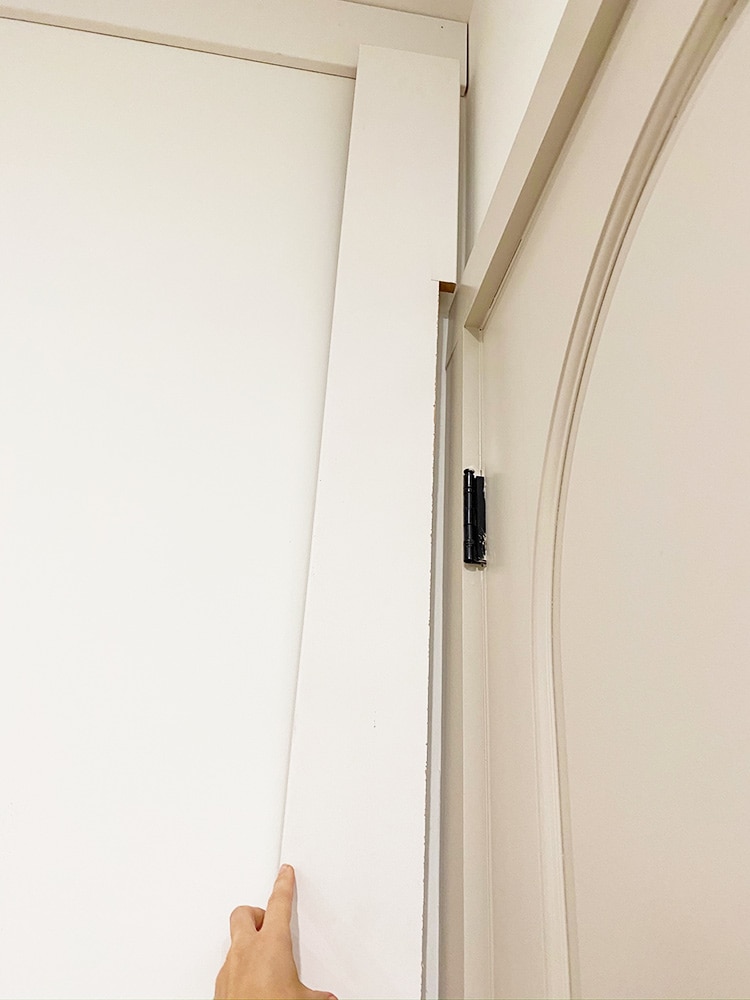
Once the outline of the wall is in place, it’s time for the quick and easy part…
Step 2: Cut and attach the vertical boards
Starting on one end, measure and mark the horizontal gap you laid out in your plans. Here’s how to calculate this:
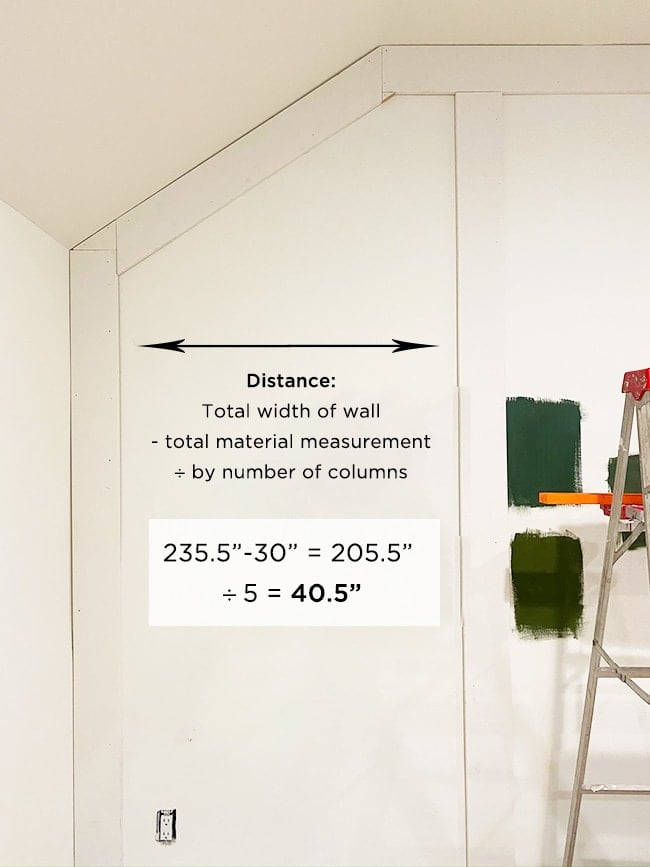
Our total wall width is 235.5″, the total width of the materials is 30 (6 boards times 5.5″), and we have 5 columns in our design, so each gap will be 40.5″ wide. You can measure across from any point of the vertical board and mark the wall. Measure the vertical distance at this point and cut your board. Then line it up on your mark and use a level to ensure it’s straight up and down (sorry about the poor screen shot quality on some of these!)
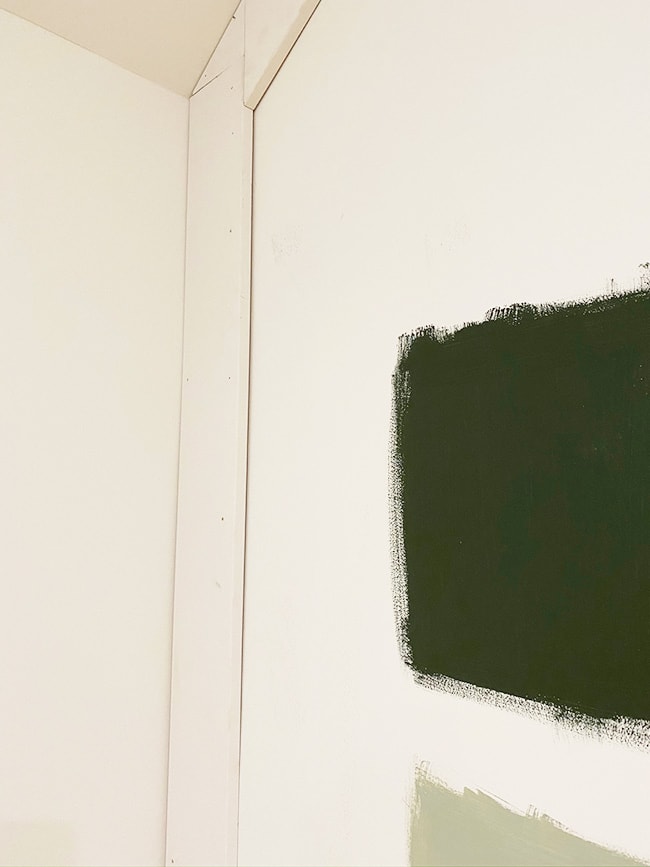
Rinse and repeat for the other vertical boards. Note: these likely aren’t hitting studs and you may encounter some issues if your walls aren’t perfectly straight (which they almost never are!) Even with a new construction home, we have our fair share of uneven walls that create these gaps…
To be extra secure, we applied liquid nails to the back of our boards before nailing them in, but this probably isn’t the best idea if you ever plan on removing the wall treatment at some point because it will damage your drywall. We have zero plans to change this wall in our lifetime and wanted to make sure these boards wouldn’t shift over time, so liquid nails works for us.
We also used nails every 2-3′ and alternated sides of the board:
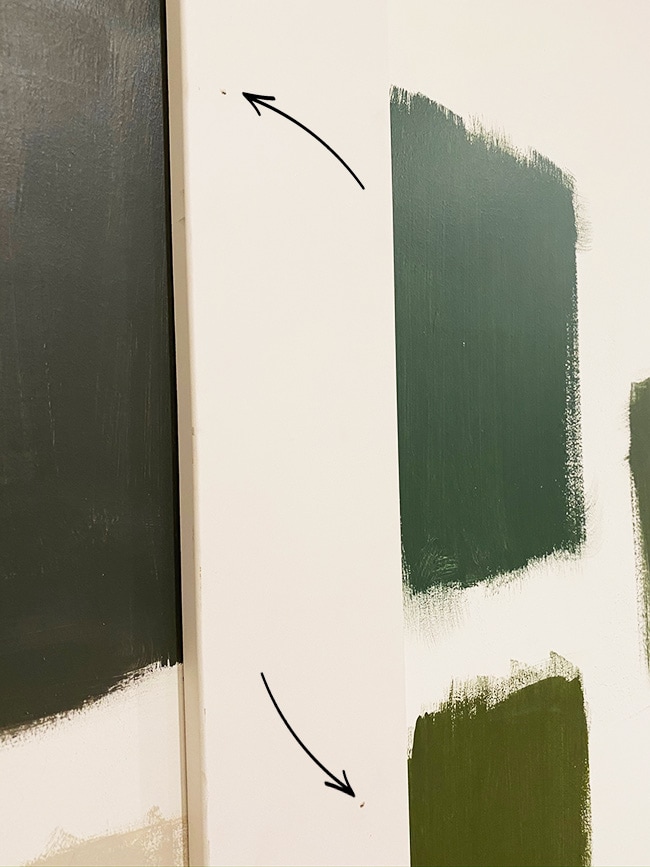
If a board won’t sit flat against the wall, you may need to add several nails in one area to try and force it down. The vertical boards should go up pretty quickly, and then it’s onto the next step…
Step 3: Cut and attach the horizontal boards
Measure and mark the wall for the vertical gap specified in your plans. We decided to use a 23″ gap on the top and bottom rows, which made our center row gap around 41″ (this will vary slightly if your wall height isn’t consistent on both ends, and it won’t be noticeable!) We didn’t measure anything from the center, just 23″ from the top and bottom 1×6’s.
Here’s where you may start to run into issues if your walls aren’t completely flat. The most important detail of this whole operation is making sure there are no visible seams where the 1×6’s meet, meaning they have to be level with each other. If your walls are uneven, this is what happens:
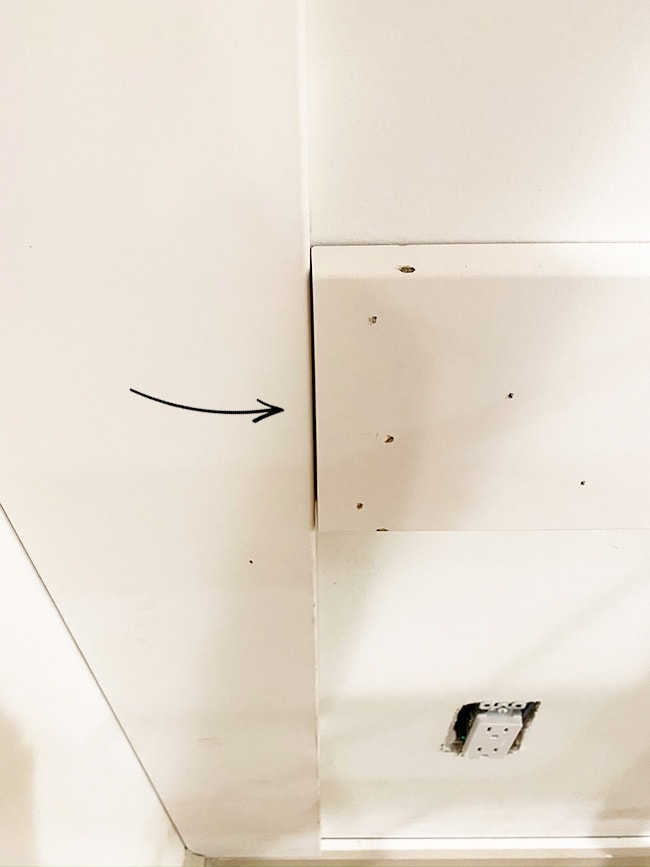
The wall sticks out farther on the right, and since there’s no stud behind the drywall, we can only force the board down so much. The horizontal piece stuck out a good 1/8″ past the vertical piece, which is a huge no-no. If you encounter this problem, there’s two ways to fix it. #1, and the preferred method: shims!
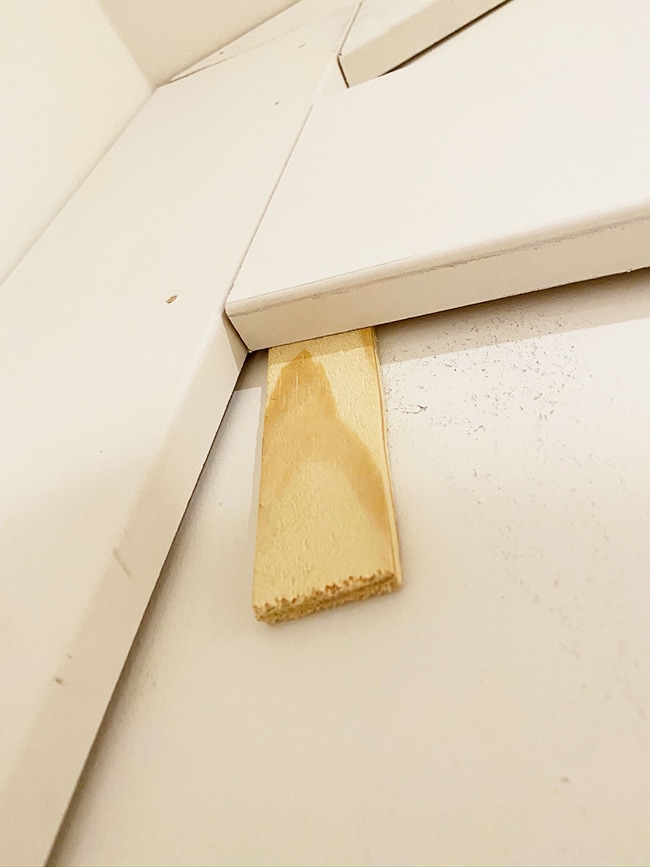
Use shims to make the gap even so both boards are at the same level (if you don’t have any shims on hand, you can get creative and use anything—it just needs to keep the board from moving!) Once the boards are lined up, nail it in place.
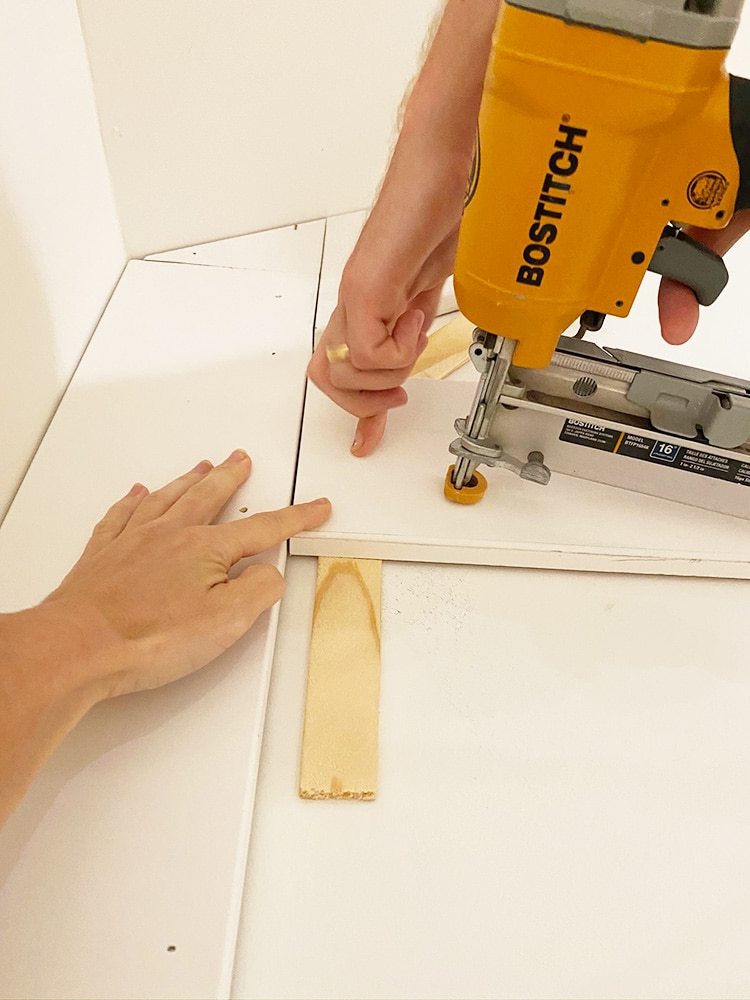
You can then score and break the shim off, we also added liquid nails in the gap to make sure it wouldn’t move.
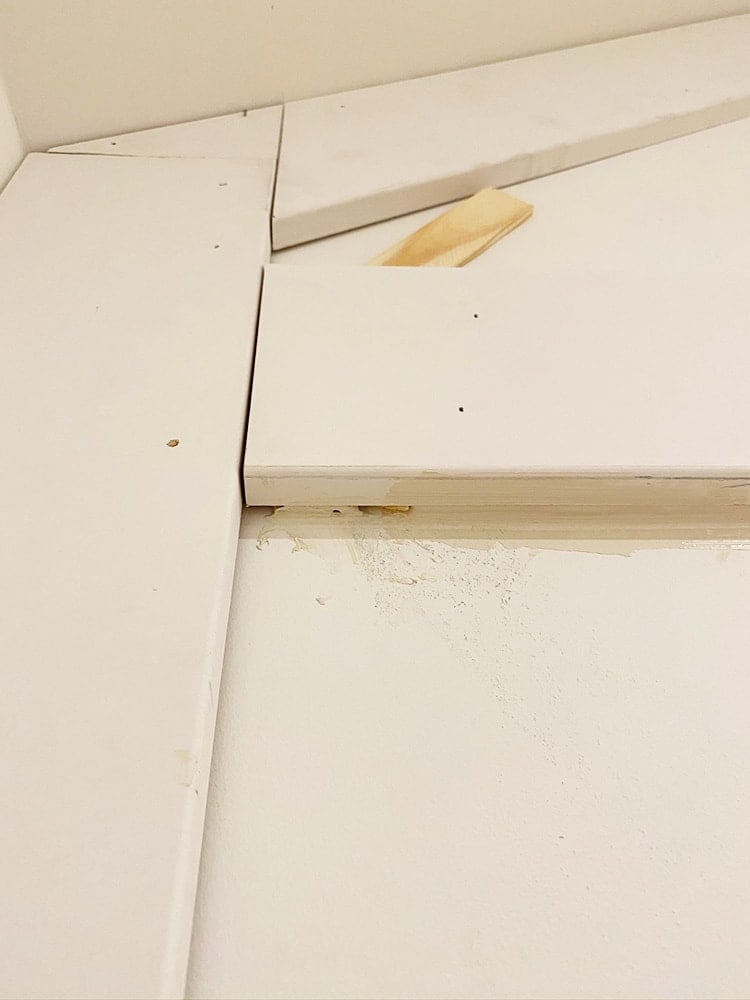
Sometimes you have to use a putty knife or shim to loosen a board you already nailed up to bring it away from the wall so it matches up. You won’t be able to do this if you used liquid nails and let it dry overnight (guilty), so it’s best to put up all the 1×6’s in one go.
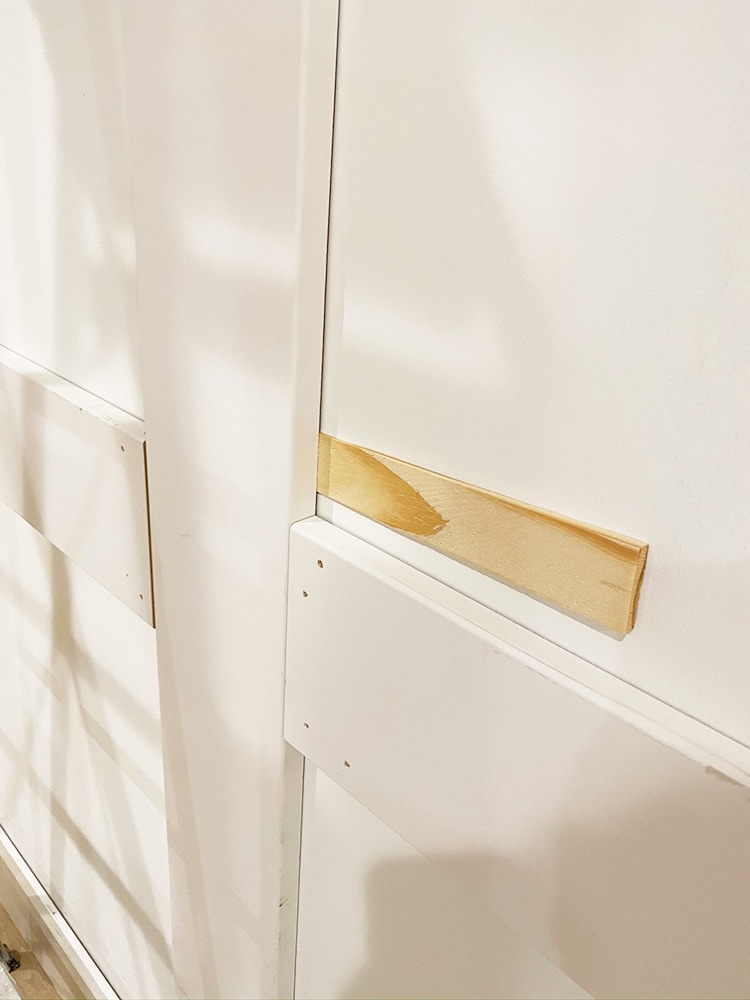
Attaching the horizontal pieces is the same process as the verticals—measure, mark, cut, level, nail up (using shims when needed). As long as you make sure each seam is flush, you’ll be golden!
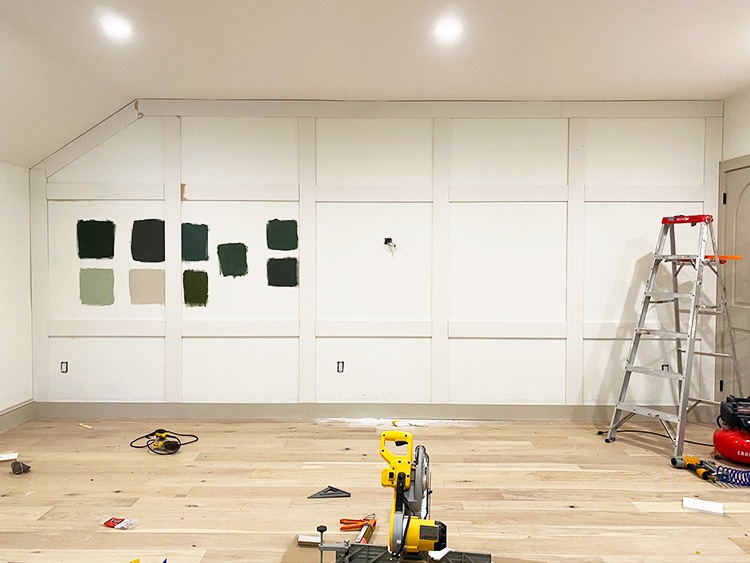
Step 4: Miter cut and attach the base molding
Now we get to the part that really elevates the look of this molding. You can use any small detail molding that has two flat sides. I chose this PVC base cap because it has a nice profile, it’s flexible/easy to install, and it’s inexpensive!

Installation is straightforward—45º cuts on both ends for each piece, you just have to pay attention to the direction your miter saw is facing! It’s easy to go on autopilot and cut the wrong way.
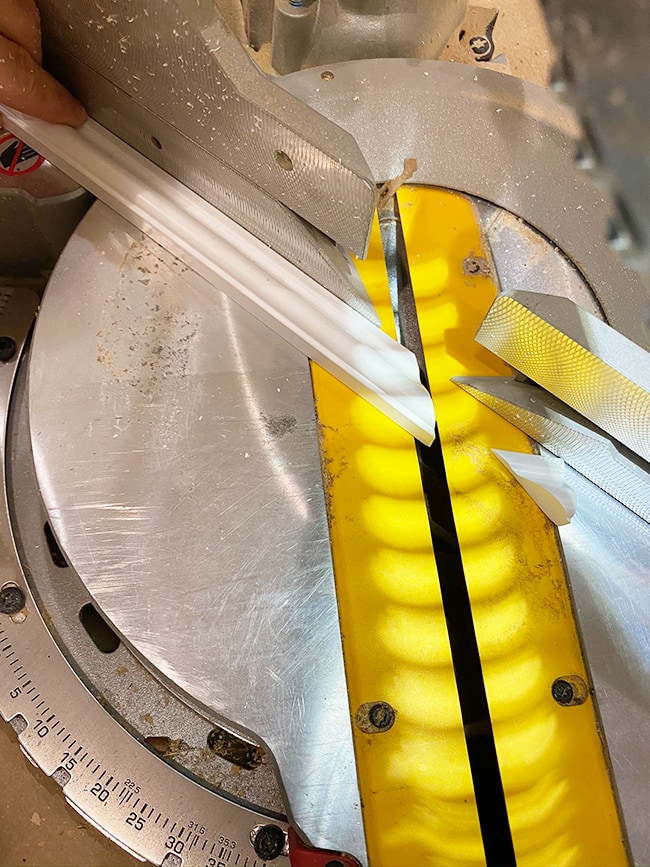
We used a bead of liquid nails on these too. Again, just personal preference.
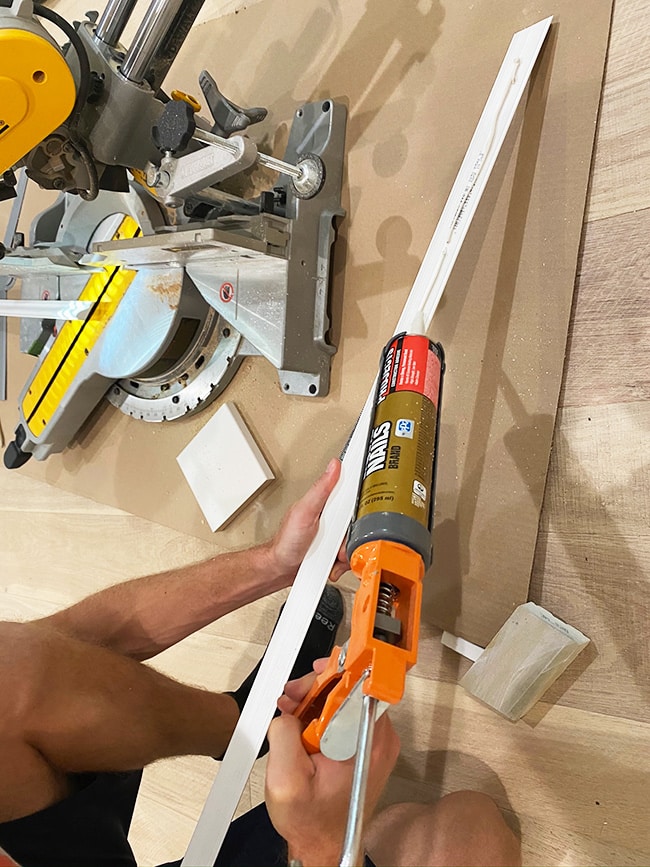
You’ll need to use a tape measure on these since you can’t get a laser measure to sit flat against the trim. Oh, and always measure before cutting each piece! Don’t assume that any two measurements are the same just because you’re working with squares. There will always be slight variations.

This molding is so light and easy to work with, it doesn’t need much to stay in place. Two nails on the short pieces and three on the long side.
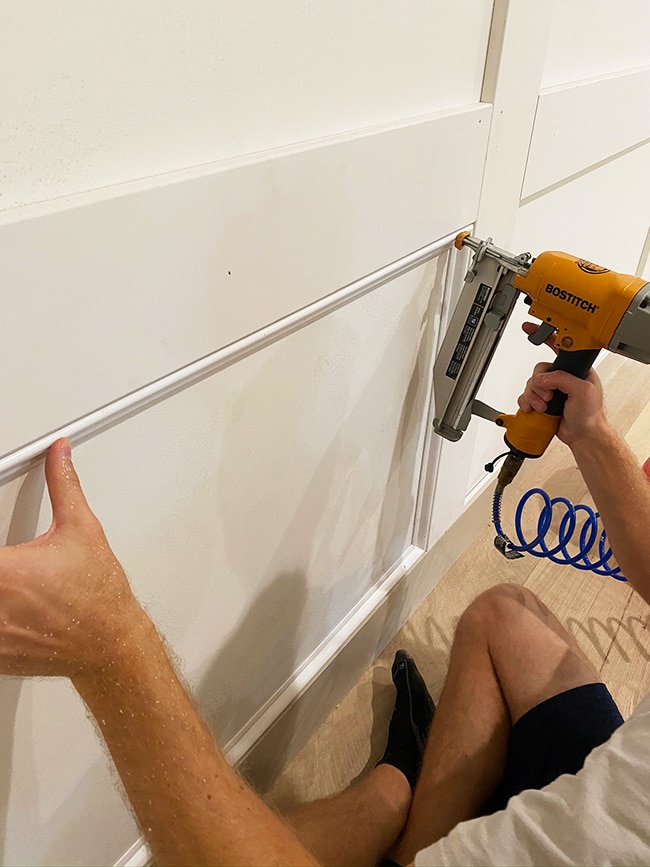
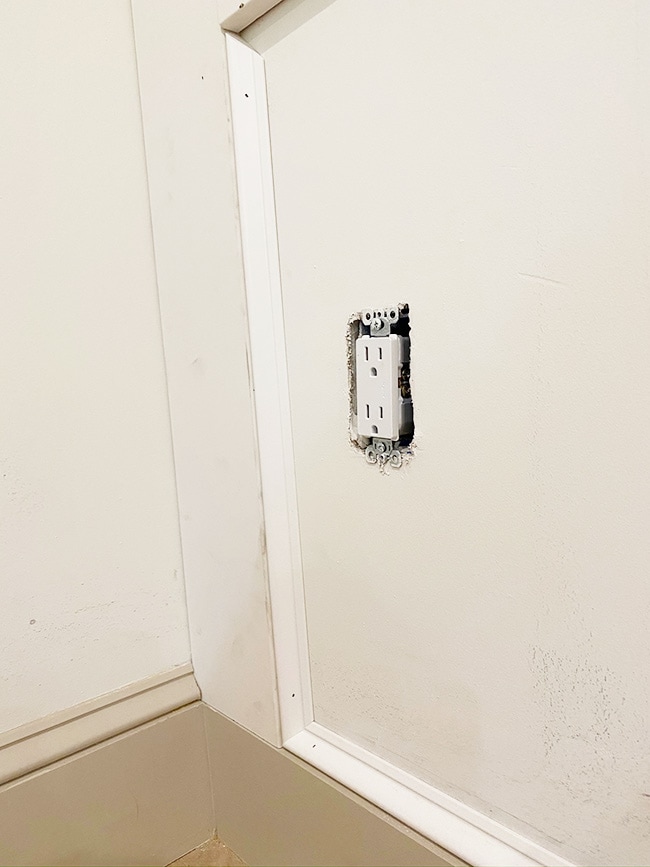
Tip: nail onto the flattest part, which will make it easier to putty/sand over later.
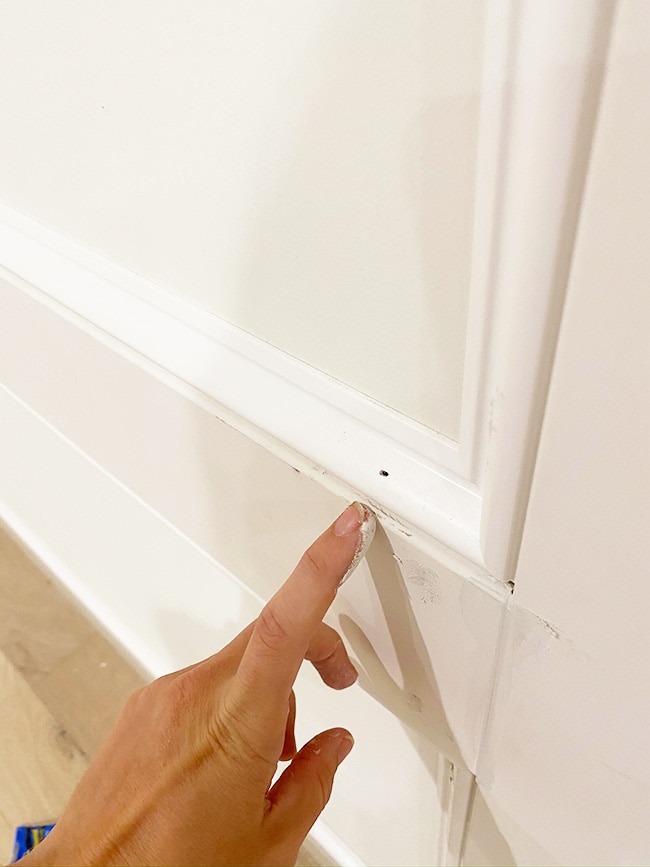
Here’s another tip from a reader that would have saved us a lot of time… miter shears! This is a handheld tool that will easily cut through softer materials like PVC. You set them to the angle you need, line it up on your mark and snip! So much easier than dealing with the saw every time…
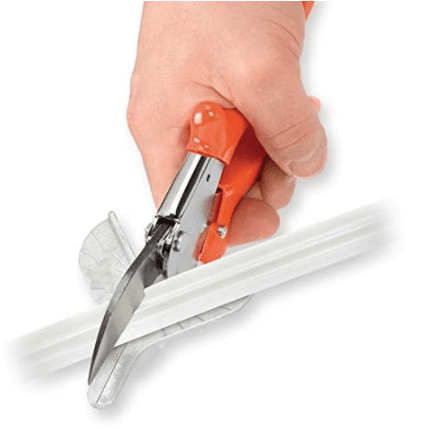
I didn’t find out about these until after the fact but I am 100% getting these for next time!
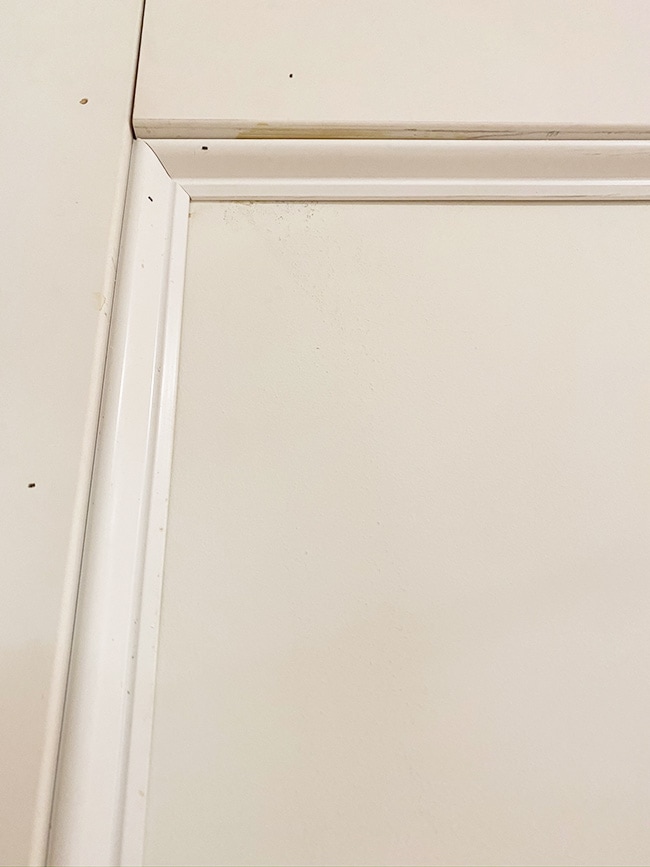
As long as your 1×6’s are level, 45º cuts should fit together perfectly (but it’s okay if they don’t, putty and caulk will hide the gaps!) Here’s how one completed box looks:
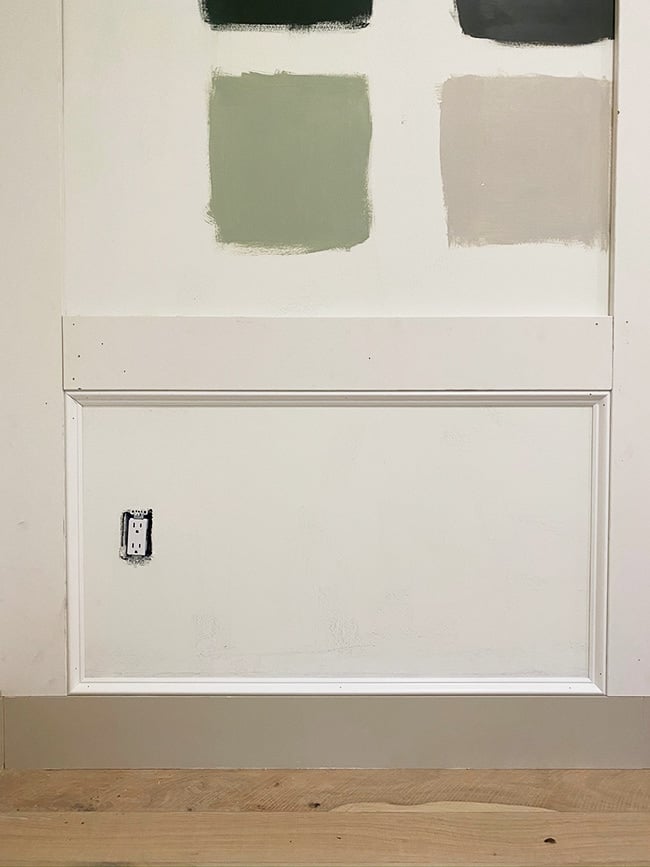
But what if your walls have angles? Have no fear, I’ve got you covered! After dealing with this predicament enough times, we’ve finally figured out the formula. Ready for a quick geometry lesson?
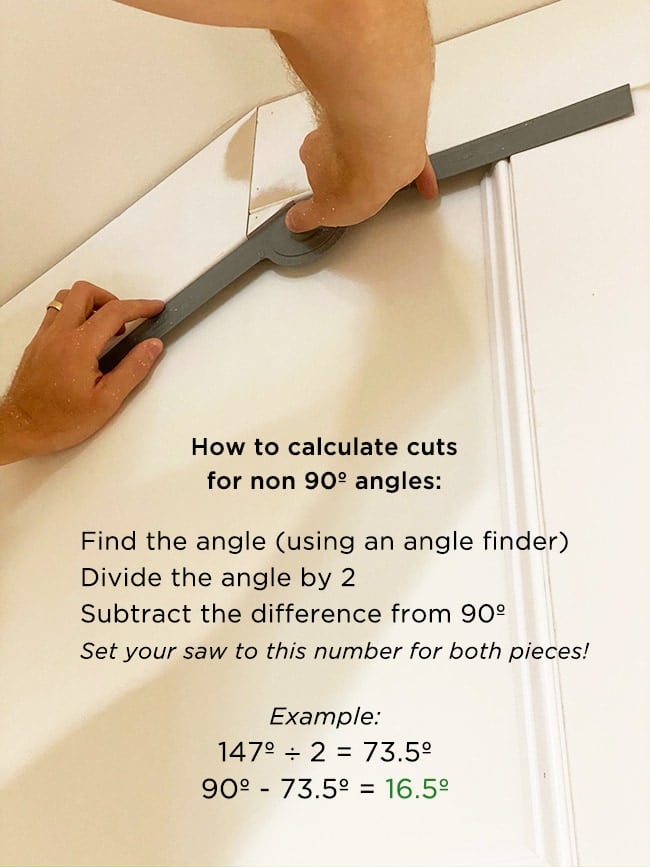
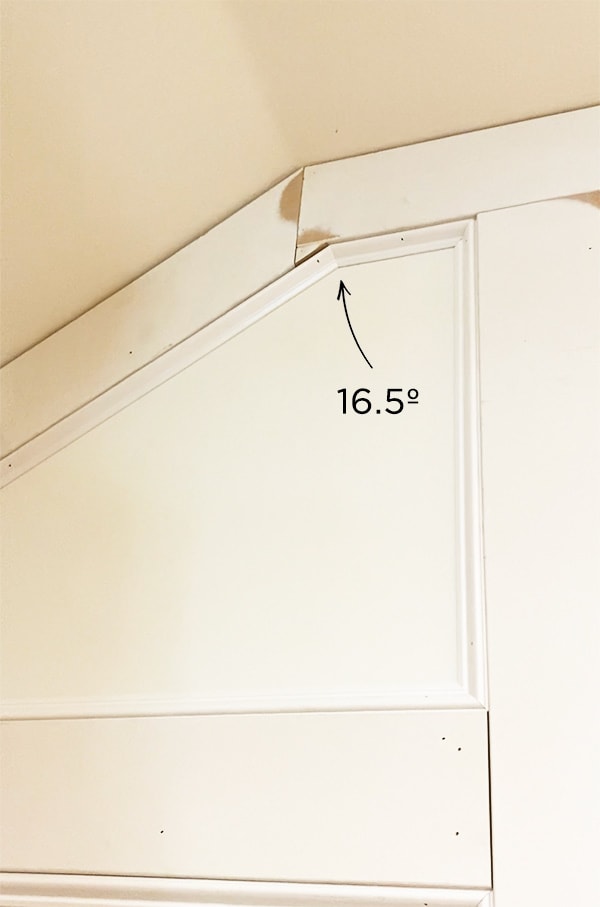
Math is not my forté and I know this may seem confusing, but I promise it’s simple! You just need an angle finder to find the angle, divide that number by two, and subtract the difference from 90. Then set your miter saw (or miter shears) to that angle for both pieces. It works!
Even without tricky angles, this step takes the longest (our wall required 61 individual pieces of base cap, that’s 122 cuts!) but it would go a lot faster with miter shears.
The base molding will cover all of the gaps around the 1×6’s, but if you have gaps along the wall or ceiling, you may want to add trim to hide those. Ours was pretty uneven, so we picked up a few pieces of inexpensive quarter round molding.
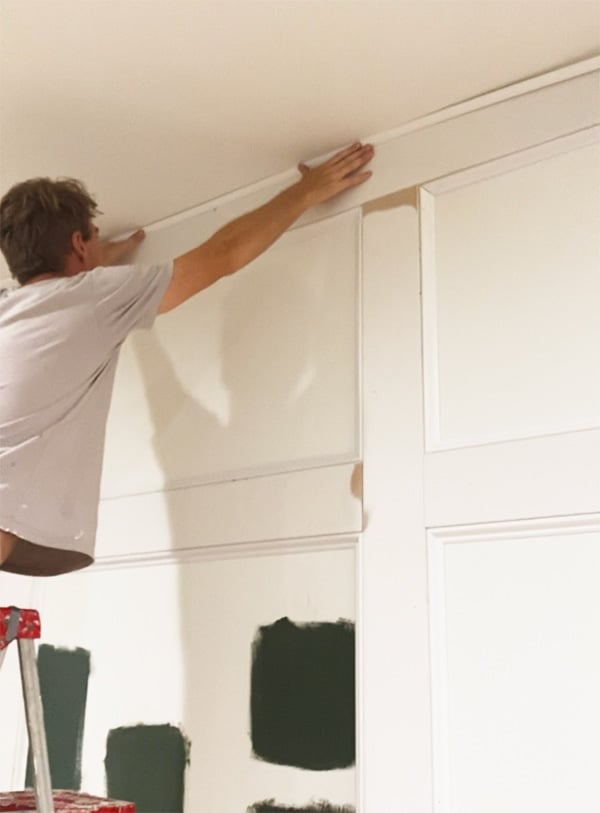
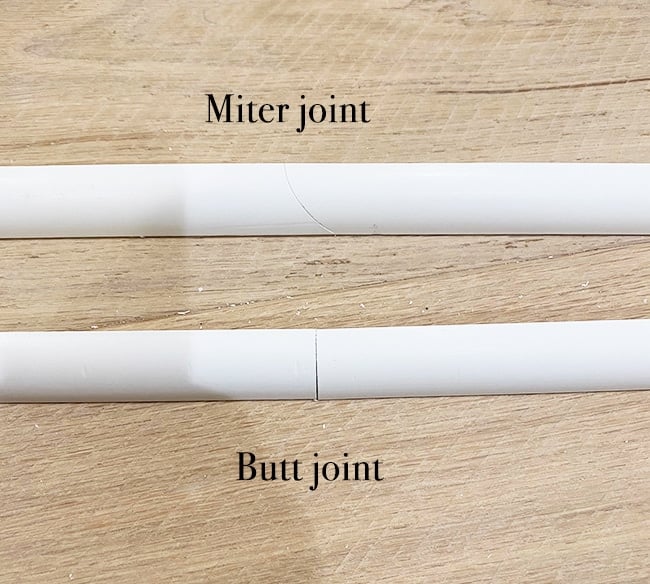
These are really easy to nail up and the PVC is flexible enough to curve to the shape of your wall. When joining two pieces of trim side by side (this goes for any type of trim) it’s better to miter your cut (this can be anything up to a 45º angle) which gives a cleaner seam and helps keep it secure on the wall.
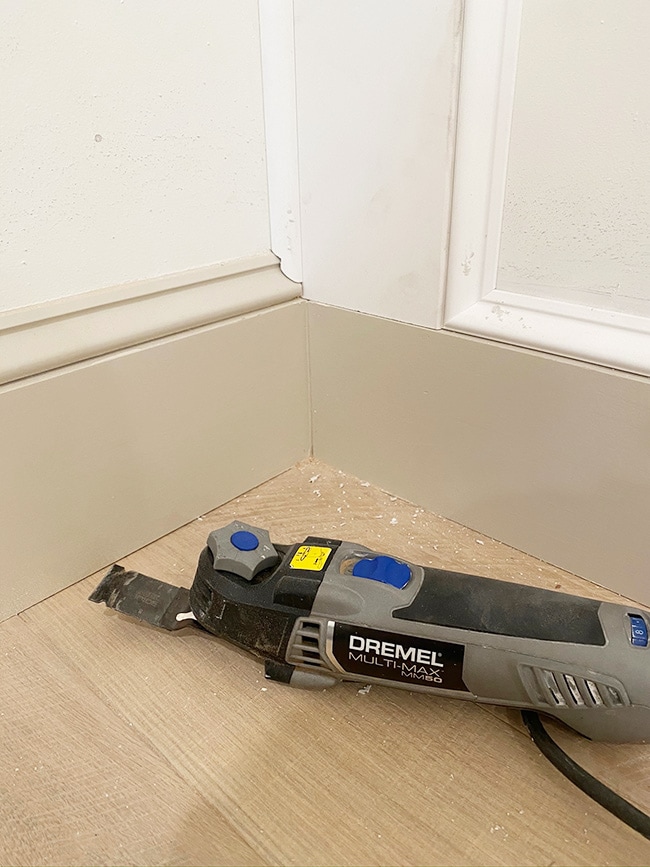
In the bottom corner where the trim met the baseboard on the left wall, Lucas used our Dremel multi-max to notch out a groove for a cleaner look (the gap would later be filled with caulk). This tool has become one of our favorites and most used!
The angled cuts were calculated with the same formula shown earlier, and all the quarter round was up in no time!
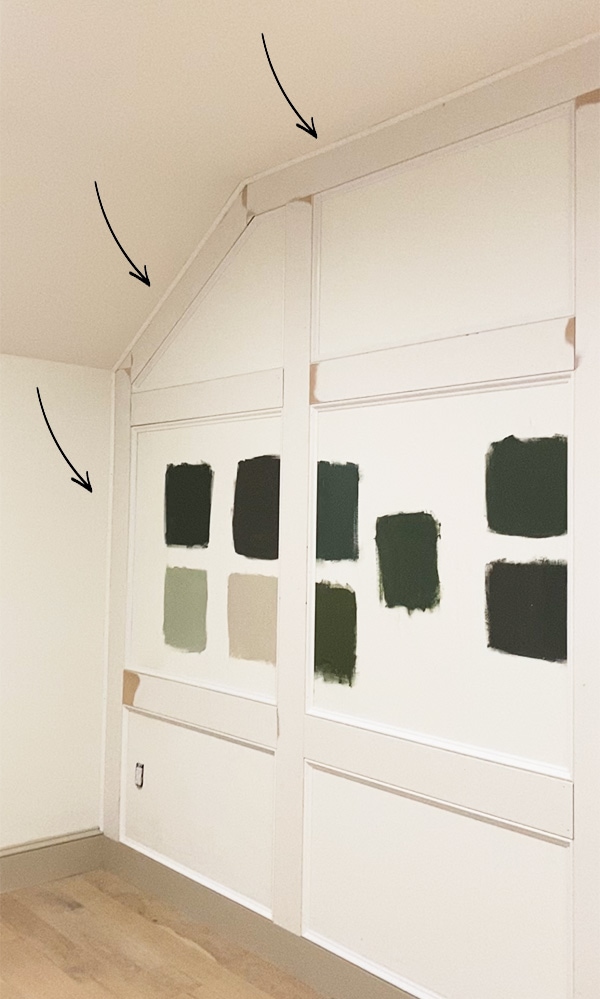
Step 5: Sand down any uneven 1×6 seams
Here is your time to shine, Type A perfectionists. This is a critical step that will set the amateurs apart from the pros. Hopefully you did a good job getting all the 1×6’s flat and even with your shims, but sometimes it’s not quite perfect. Remember that issue we had with the 1/8″ difference earlier?
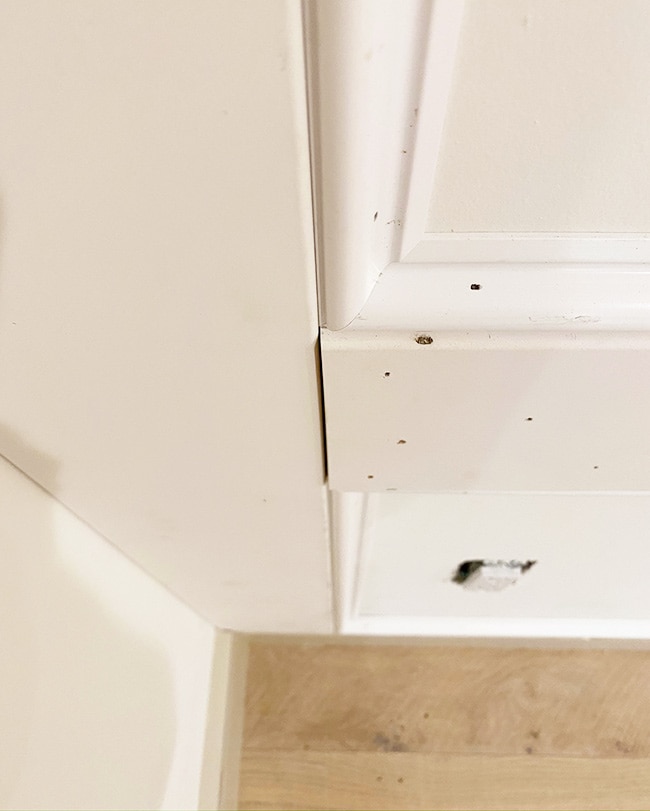
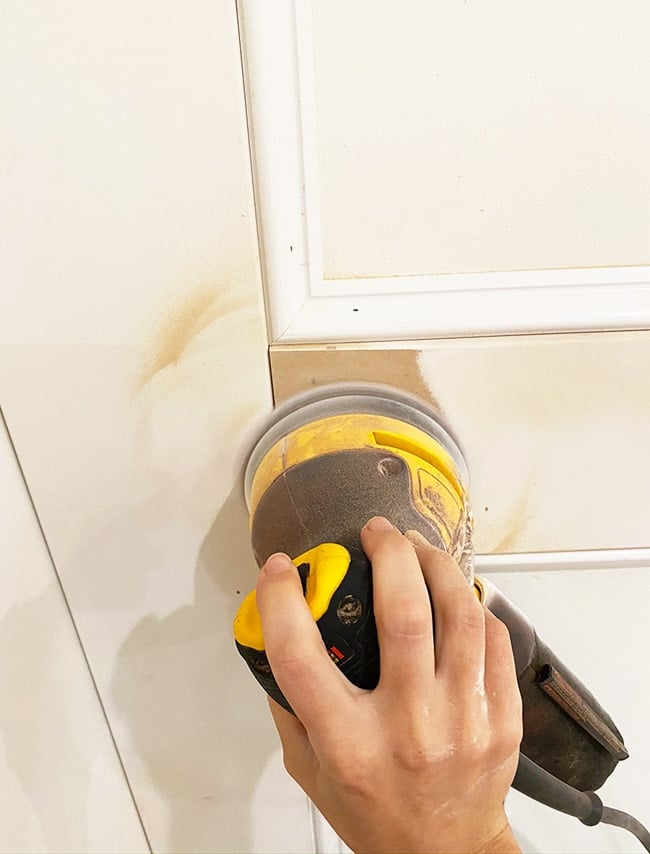
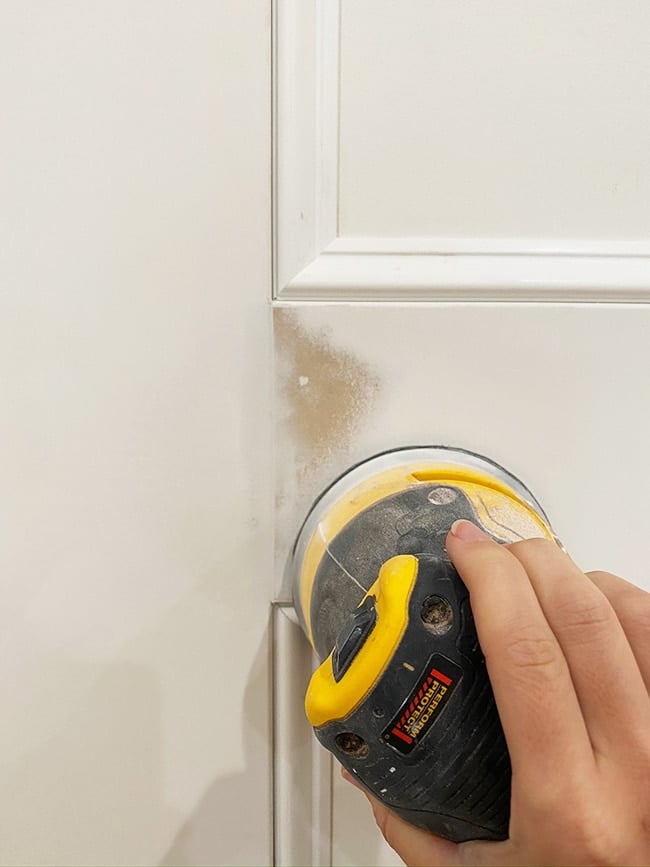
The only way to get these level now is with an electric sander. I used our orbital sander with 220 grit paper, but a mouse will do the same and it’s easier to handle.
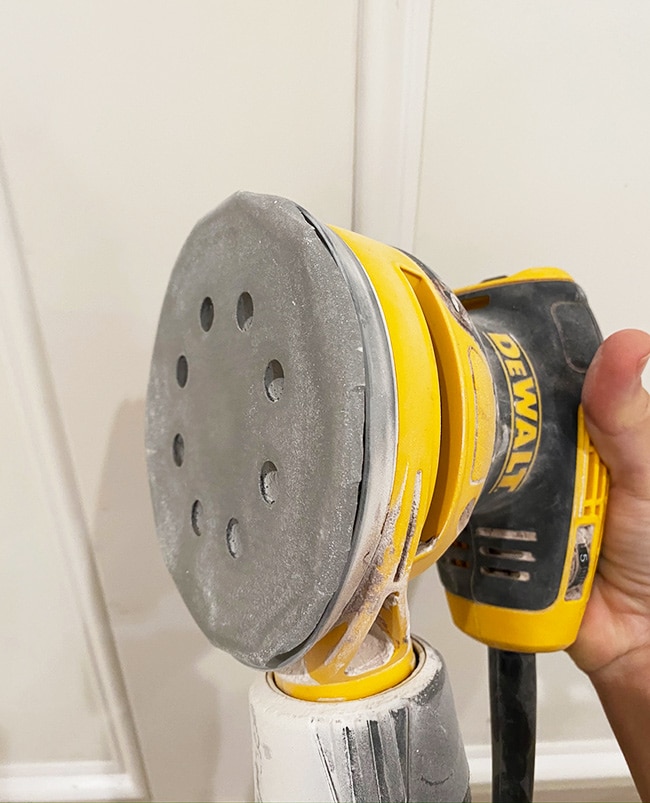
It doesn’t take long—maybe 1-2 minutes—to smooth it out. You want to taper it as much as possible so it’s a nice, even transition:
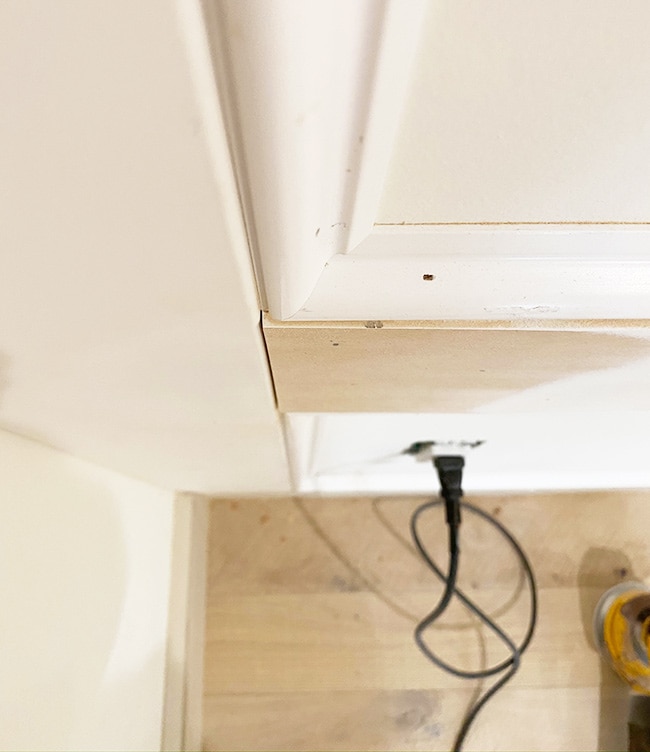
Like magic! Even if the seams look even by eye, always run your hand across it to check. I actually just run the sander across every seam regardless, and if one board is slightly higher than the other, the sander will expose the MDF underneath:
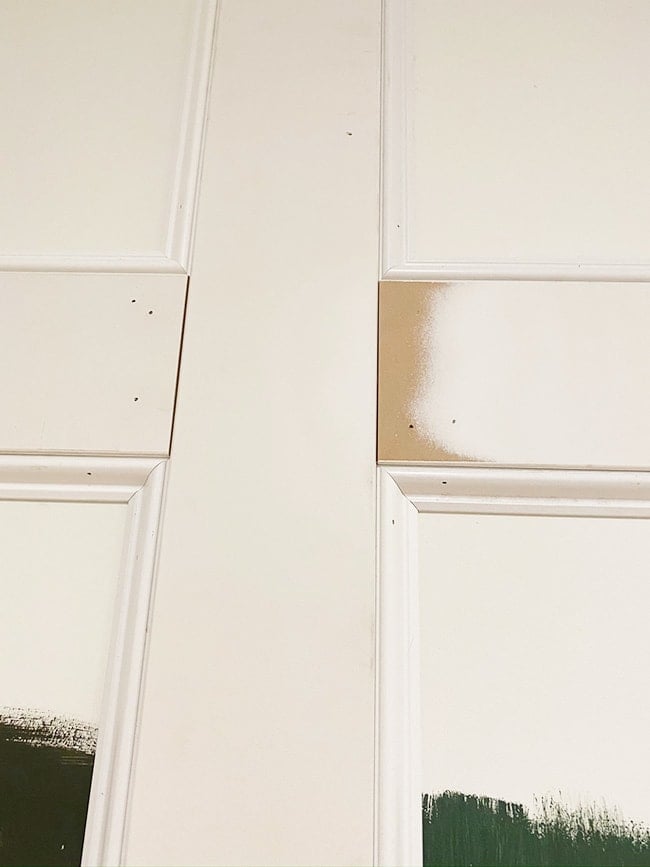
Once you get down to the bare MDF, the texture is slightly rougher which will be noticeable after painting. Make sure to finish with 320 grit paper (or higher) to smooth the surface so it matches the primed boards.
Step 6: Fill seams and nail holes with putty
Once all the seams are even, it’s time to move onto putty. While drywall mud is easier (and more fun) to work with, you’ll want to use a wood filler for this part. Wood filler is denser (it hardens like real wood) and will form a solid bond to the MDF. Drywall mud/joint compound will crack and flake off over time. We had these two wood fillers on hand, and I ended up using the plastic wood since it was already open:

If I had to do it over again, I wouldn’t use plastic wood. It’s great for small repairs and filling nail holes, but it dries too fast to work with larger areas.
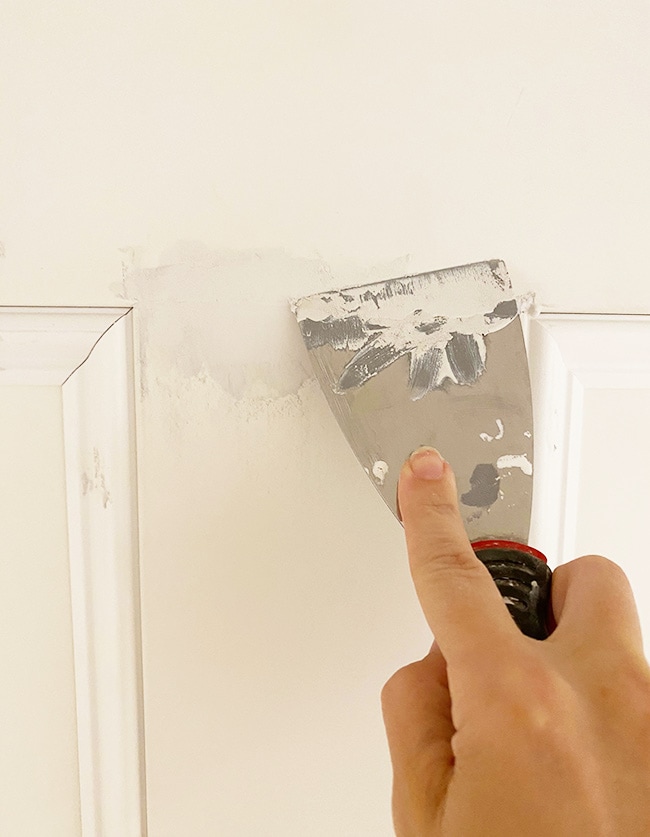
Before I could finish applying it to my seams, it was already starting to dry and flake off. It needs to be applied in a more liquid form otherwise it won’t bond to the surface properly.
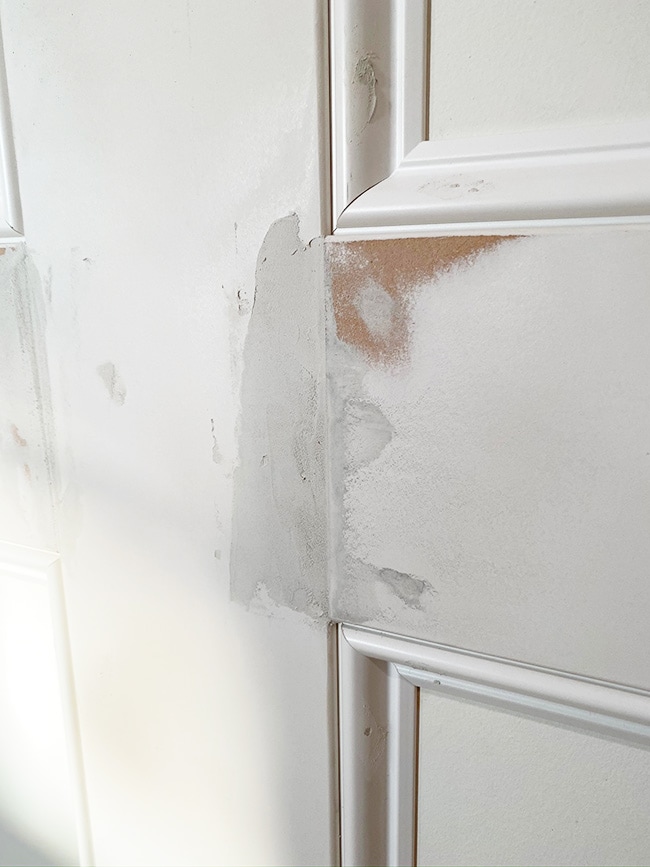
Tip: make sure to overfill the holes and seams, so that you can sand it down to the level you need. Wood putty (at least this stuff) will shrink as it dries, leaving small gaps if you don’t overfill.
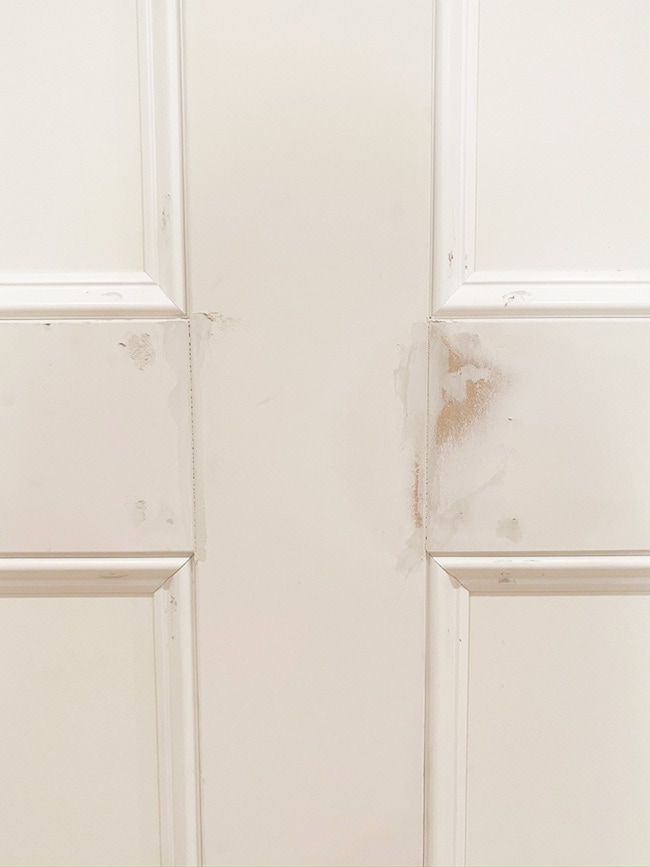
Larger gaps may need a few coats, and it can be helpful to sand in between.
Step 7: Sand putty smooth
After sanding the first coat, make sure the surface is completely smooth. You can see some texture in the photo below because the putty was too dry when I applied it. I had to use 2-3 coats of putty on a lot of the seams for a perfectly smooth finish.
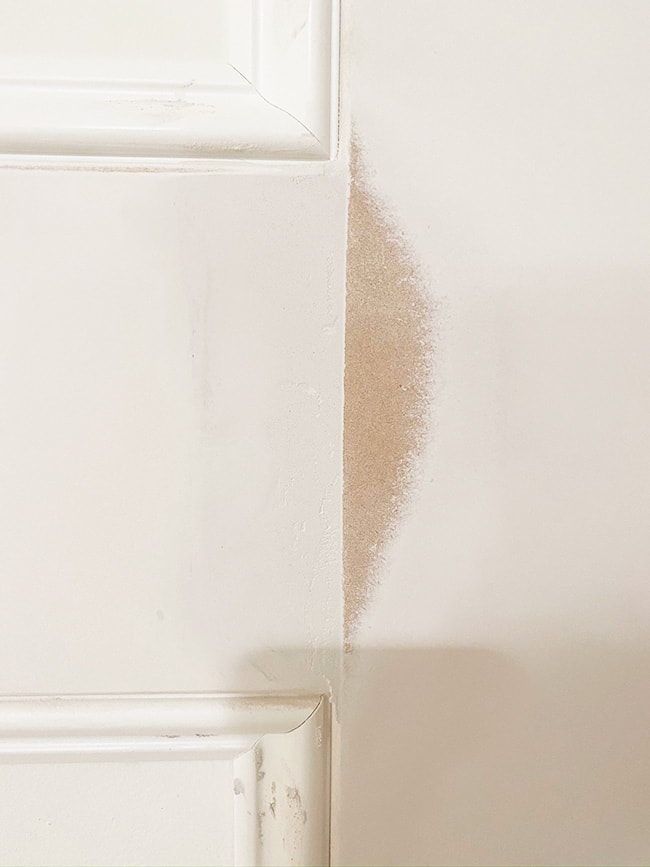
Use your electric sander and either 220 or 320 for this part.
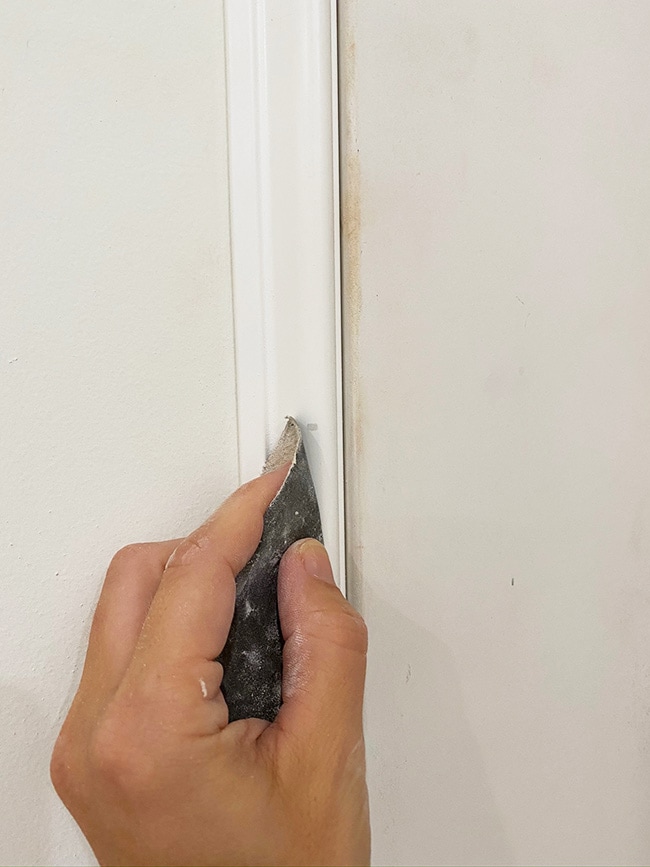
For the nail holes, I found it easiest to use 220 paper by hand. You don’t want to use anything grittier because the PVC will scratch.
Here’s how you know when you’re done sanding: run your fingers across the surface. if you feel any imperfections at all—bumps, ridges, texture differences—these will all be visible after painting, even if you can’t see them right now! Trust me, paint exposes everything. Take the extra time to be a perfectionist, because it will be much more difficult to redo after painting.
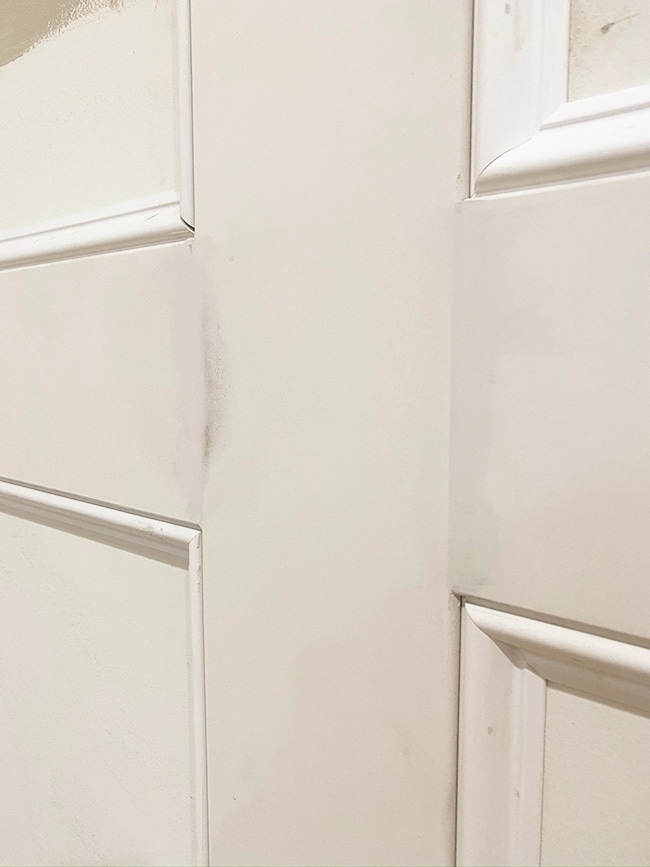
Step 8: Fill gaps and edges with caulk
After everything is patched and sanded, use a vacuum to thoroughly clear out all of the dust hiding in the molding. Now it’s time for the least fun part of all… caulk.
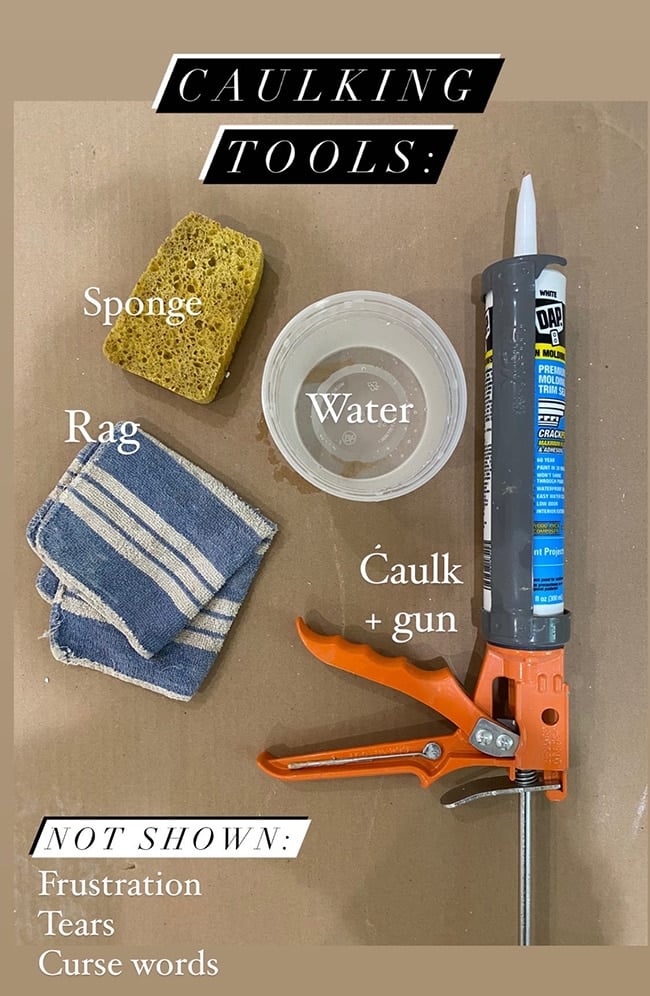
In all of my years of caulking, it has never become easier or more enjoyable. I’ve learned a few techniques to help but it still sucks, and the feeling seems to be unanimous (yay, I’m not alone!)
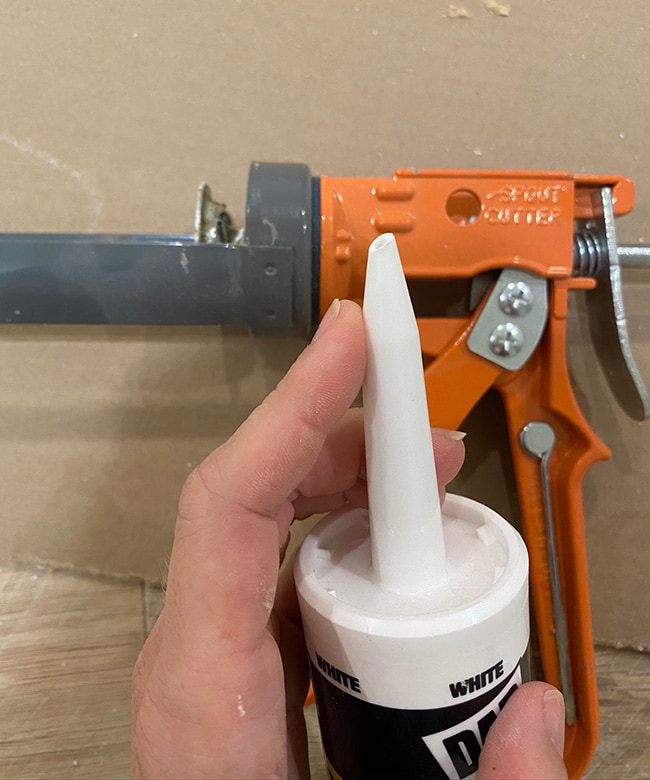
The first key is to make sure you cut at an angle (most caulk guns have a built-in spout cutter by the handle, and a lot of them are pre-angled) and most importantly, make sure the hole is the right size! If it’s too small then not enough caulk will come out, and if it’s too large too much will come out. You want it right in the goldilocks zone, which you’ll figure out with time, but it looks something like this:
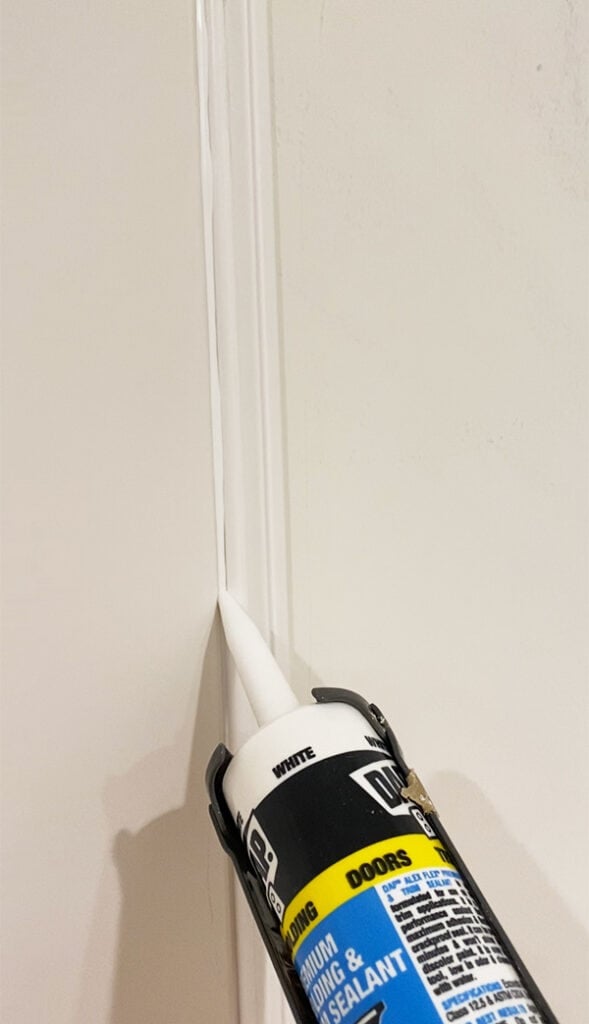
The two keys to success are making sure you’re using just the right amount, and it’s in just the right spot. You do this by keeping the tip pointed up, pushing it into the groove as you go and keeping the pressure/speed consistent. Here’s a pretty decent attempt:
To smooth it, I’ve found that a wet finger always works best. A rag or sponge aren’t solid enough to keep the line smooth, although some folks recommend using a thin rag around your finger. Either way, I think it’s about what works best for you personally.
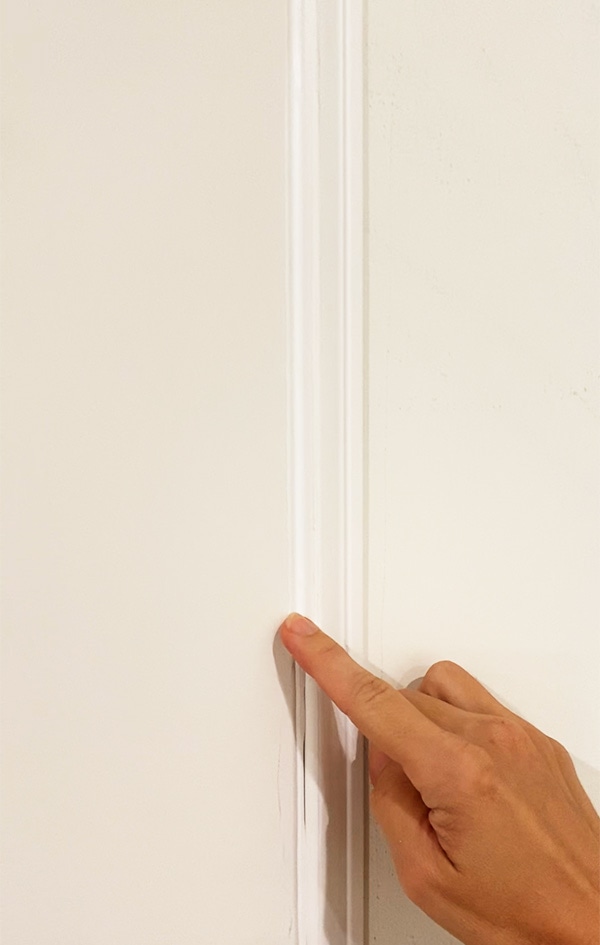
If you end up with a perfect caulk line, then all is well and caulking is fun, yay! But the second you mess up, all hell breaks loose. Here’s an example of the dreaded holy caulk (aka not enough):
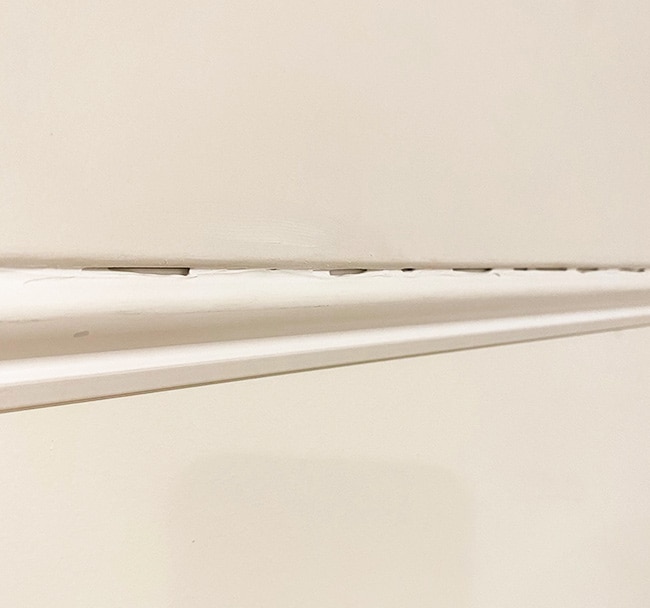
And this, of course, is too much:
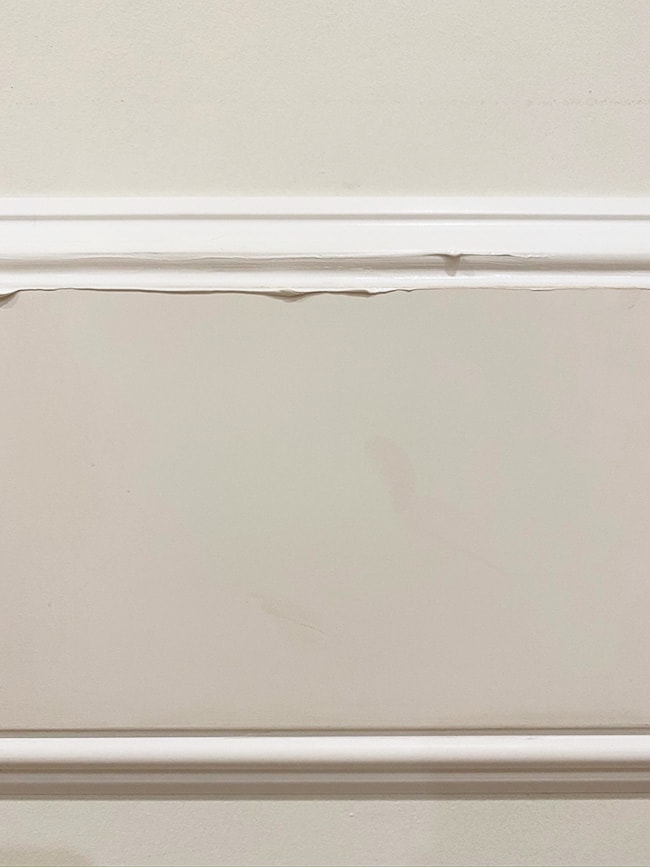
When there’s too much, you have to quickly go over it again and again until all of the caulk has been cleaned off the surface—and every second counts because this stuff dries in minutes.
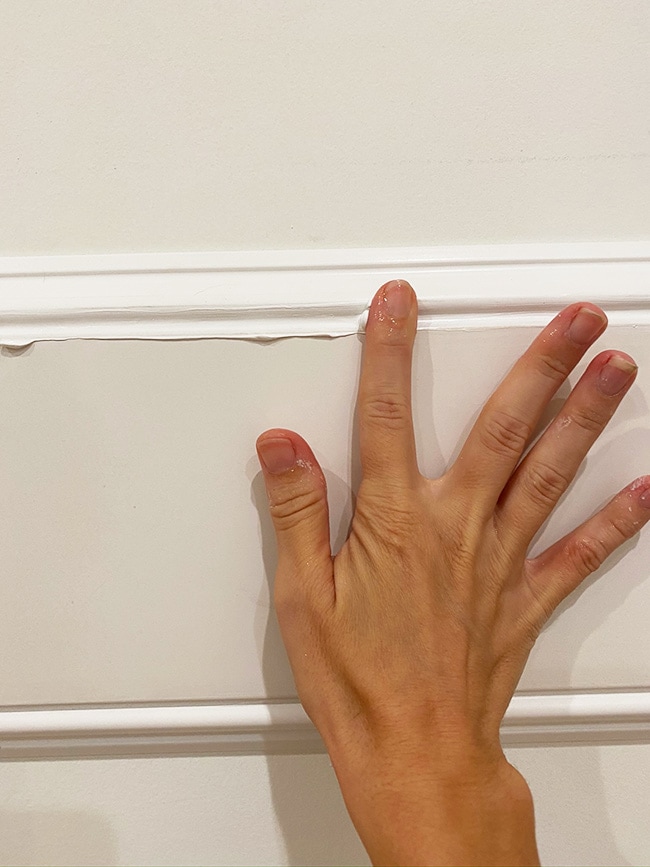
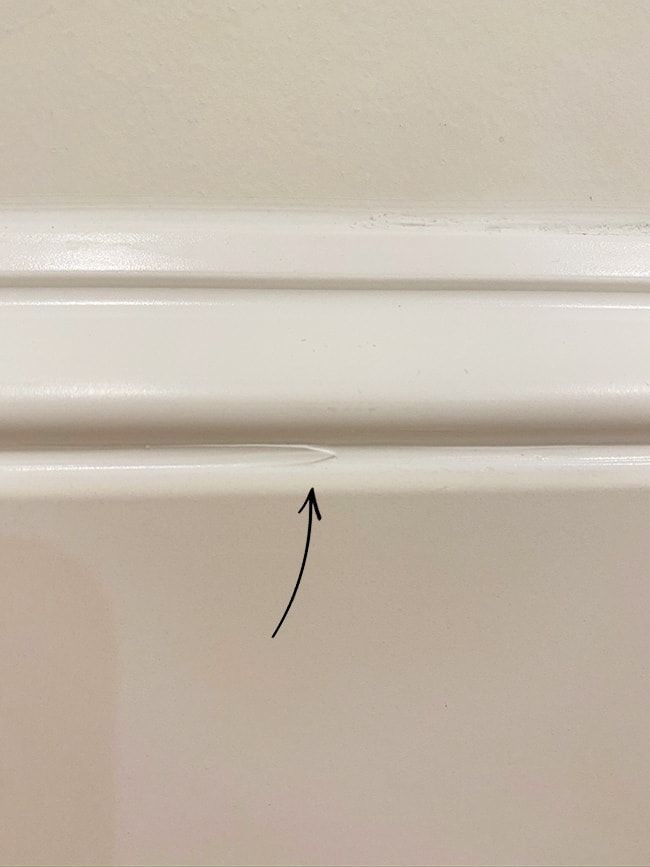
When there’s not enough, you have to carefully apply more without over filling, and smooth out the entire piece of molding, once again, in one single pass. If you lift your finger too early while smoothing, this is what happens:
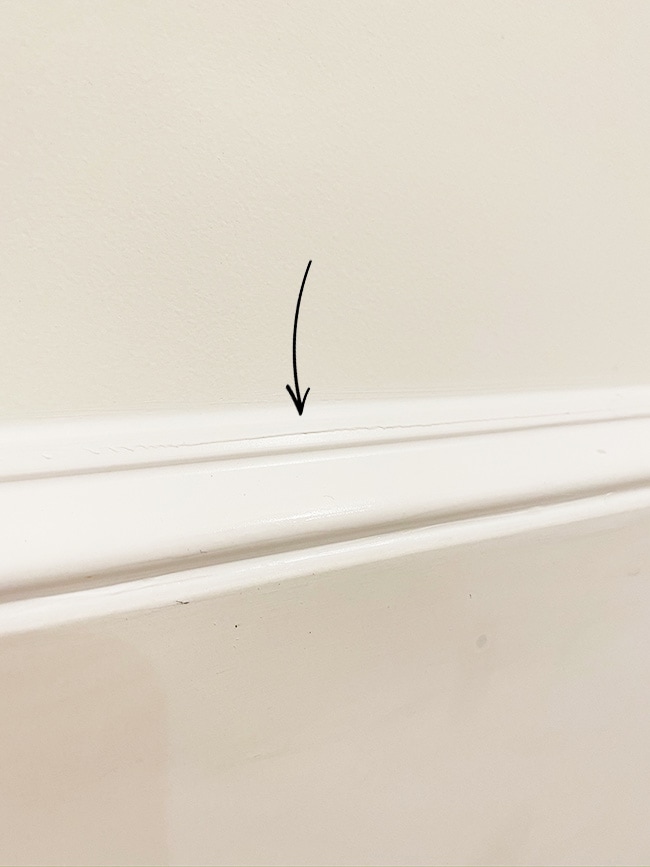
And if you aren’t careful enough and don’t completely smooth it out, you’ll end up with a ridge that you have to then scrape off and start over because this stuff isn’t sandable like putty.
Also, don’t even try caulking with one hand while attempting to record an IG story with the other. Caulking needs your FULL 100% ATTENTION AT ALL TIMES.
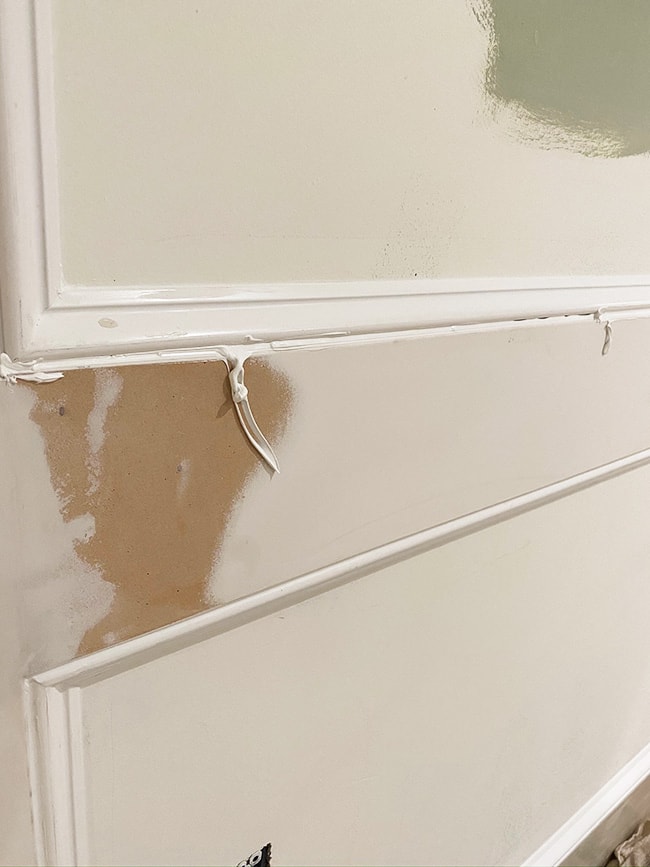
It’s a sticky little white devil but it’s a necessary evil. Look at the difference between caulk (left) and no caulk (top):
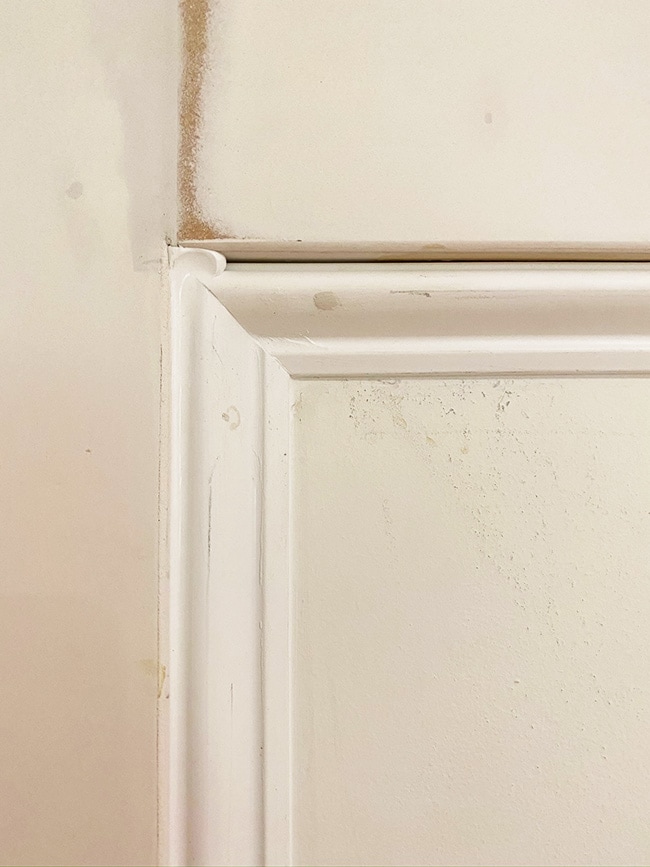
And it has to be done on every edge of every piece of trim. Before:
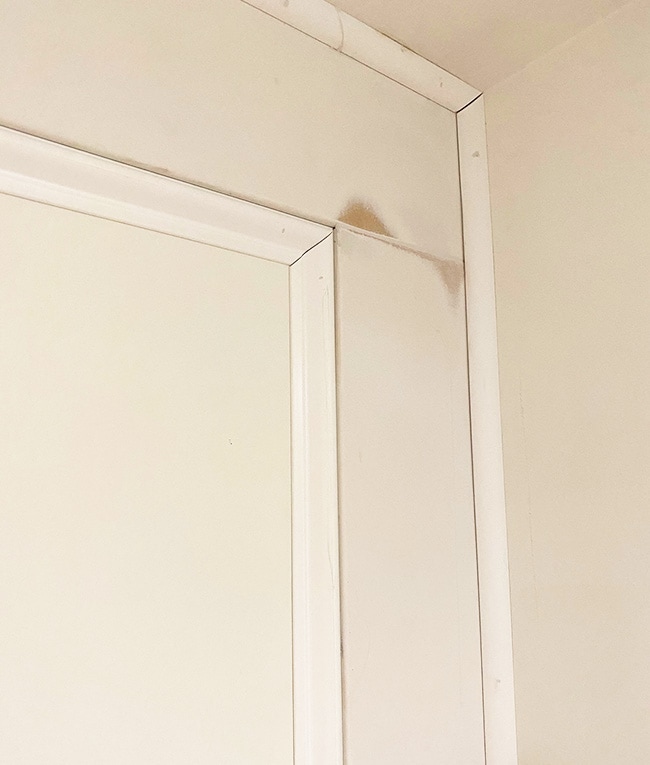
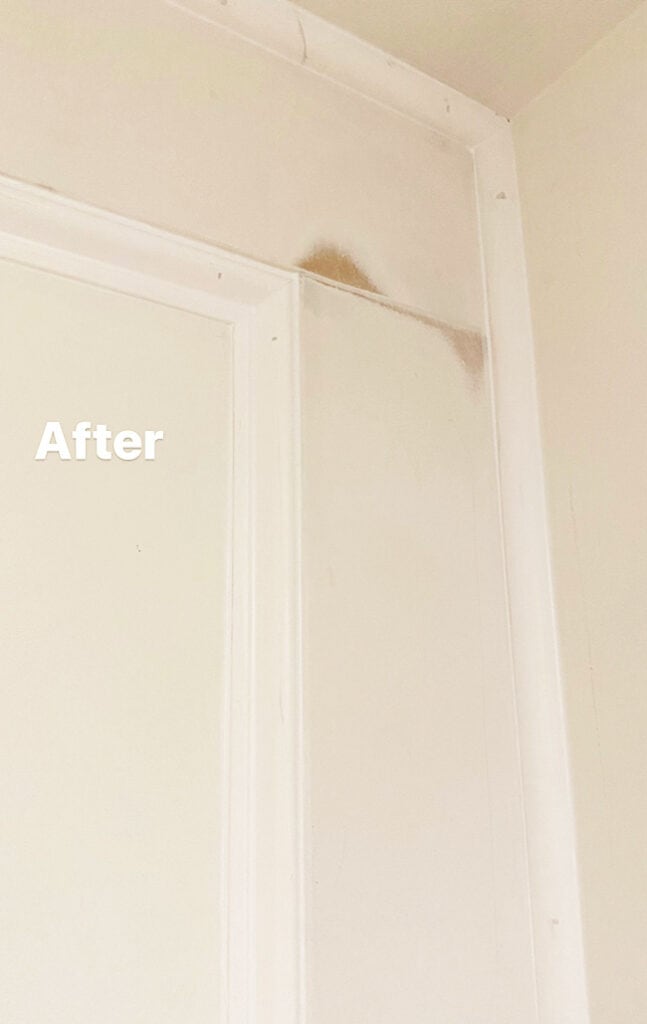
It makes all the difference!
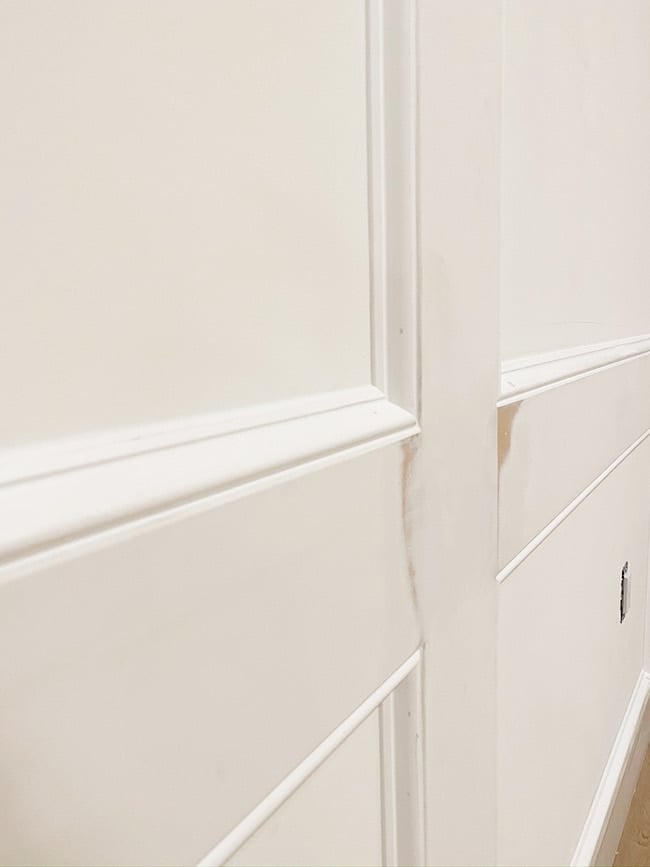
Step 9: Prep & paint
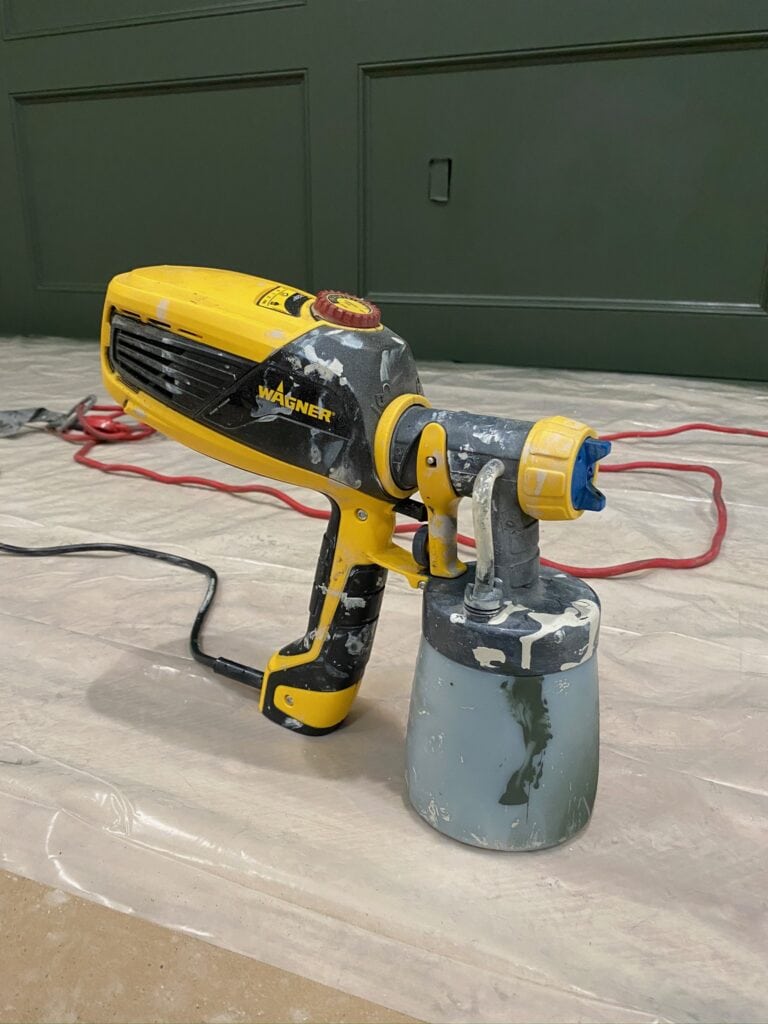
Now that you’ve survived the caulk, it’s time for paint! I chose Sherwin Williams Ripe Olive (in eggshell, Showcase formula from Lowe’s). We decided to use our Wagner Flexio paint sprayer for more a professional result.
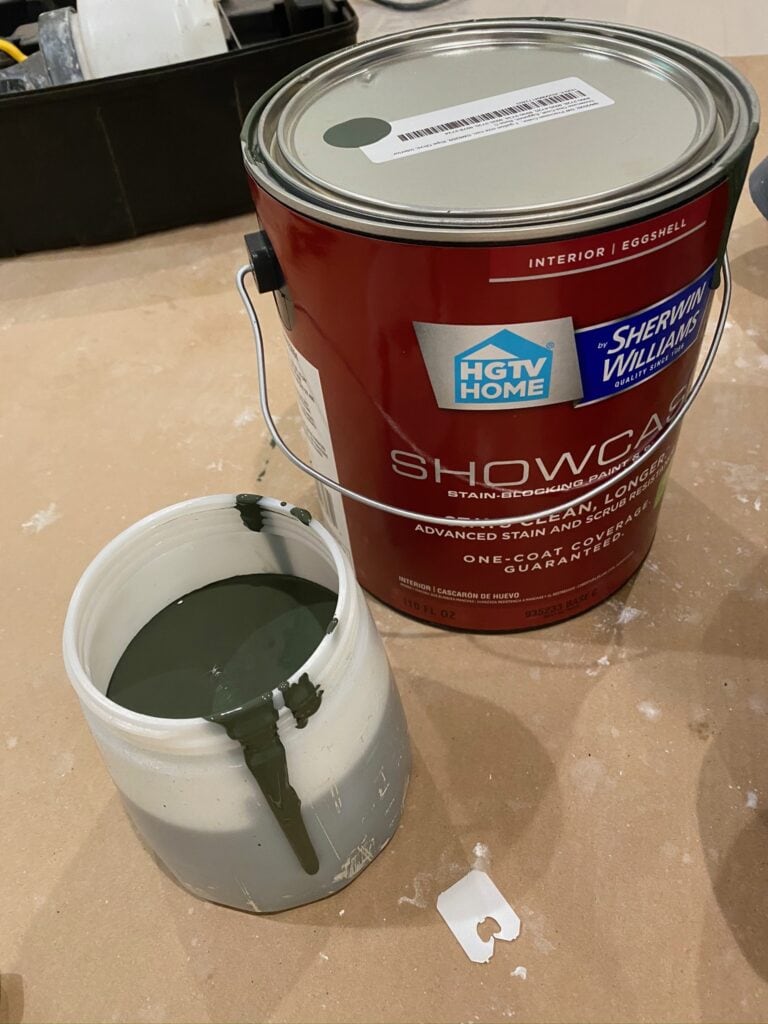
This is only our third time using the sprayer so we’re not experts by any means. I just know from experience that dark paint shows brush/roller marks, no matter what you use or how careful you are. A few of you suggested velour and flock rollers for a spray-like finish, but we’d still need to use a brush around the detailed base molding and I didn’t want to risk it. We already own the sprayer so why not? (FYI, if we were using a lighter color, I would have just rolled it on since the roller marks aren’t as visible)
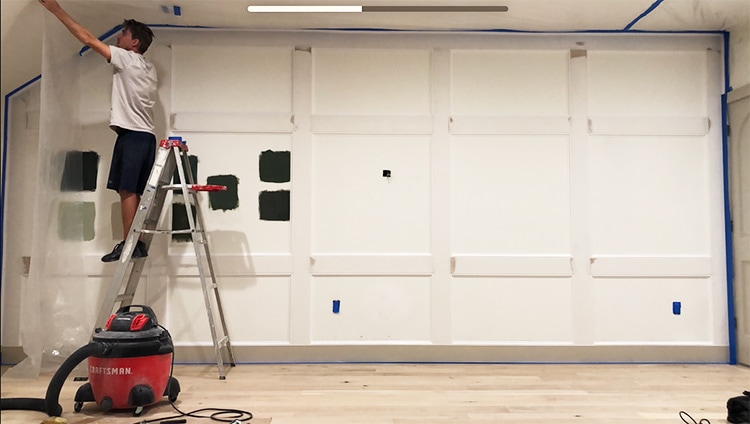
While spray painting is faster than rolling, there is some prep work involved. After a final vacuum and wipe down with a damp cloth, we had to carefully tape the ceiling, walls and floor, then tape up a few feet of plastic in case of overspray. We also covered the AC return vent in the room so the air wouldn’t circulate through our system (we did this in the beginning before sanding).
Make sure you have a respirator mask, too!
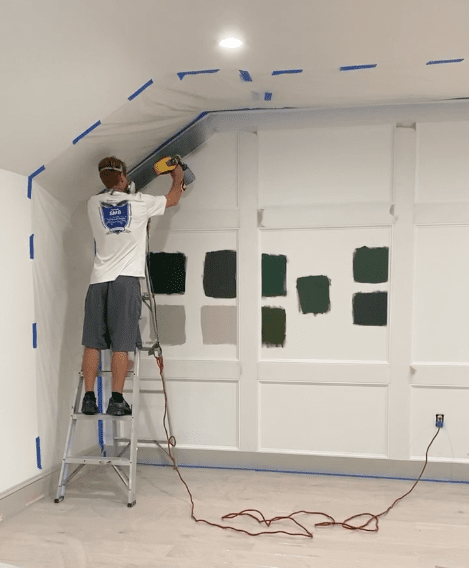
We used the detail (fine) nozzle on our sprayer for the smoothest finish, applying the first coat in a side to side motion.
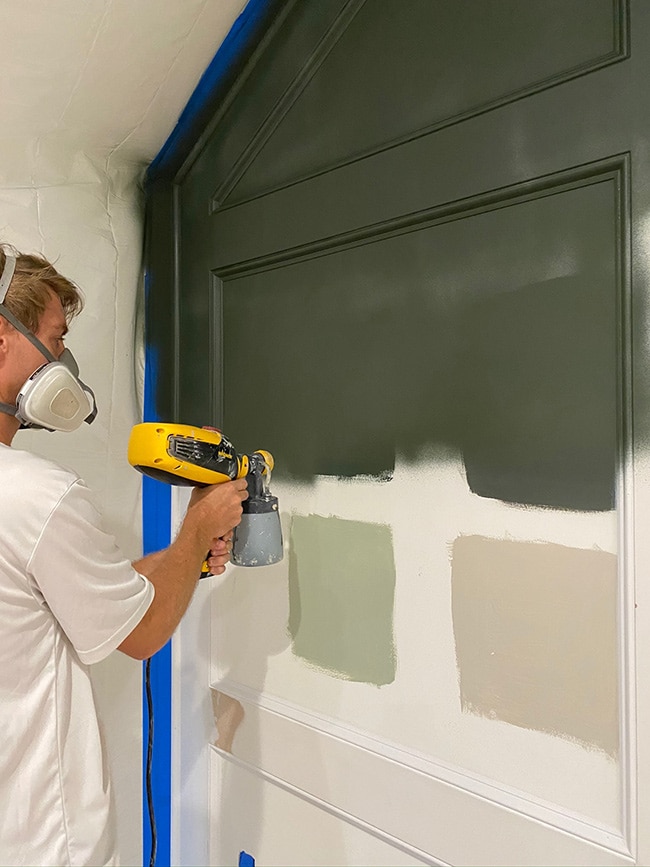
I asked Lucas to share a few helpful tips for anyone just starting out. Remember, this is only our third time so we’re still learning!
- When taping, it’s easiest to do a single row of tape along the edge, then do a second row that is attached to the plastic to protect the ceiling/walls/floor (if not using a hand masking tool)
- There are different types of tape with different adhesion levels for attaching protection to different surfaces (wallpaper, flooring, recently painted walls, etc.)
- Mix the paint well, and strain if necessary with older paint, to avoid clogs.
- Practice the technique and speed on a scrap piece of wood or cardboard and adjust the settings accordingly prior to starting
- When spraying, always start the spray off to the side of your surface and then keep the sprayer at a consistent distance away from the wall
- Overlap ~50% each pass to ensure even coverage
- Be sure to clean the sprayer very well after each use (extremely important)
- Run warm, soapy water through the paint sprayer prior to taking it apart and cleaning each piece
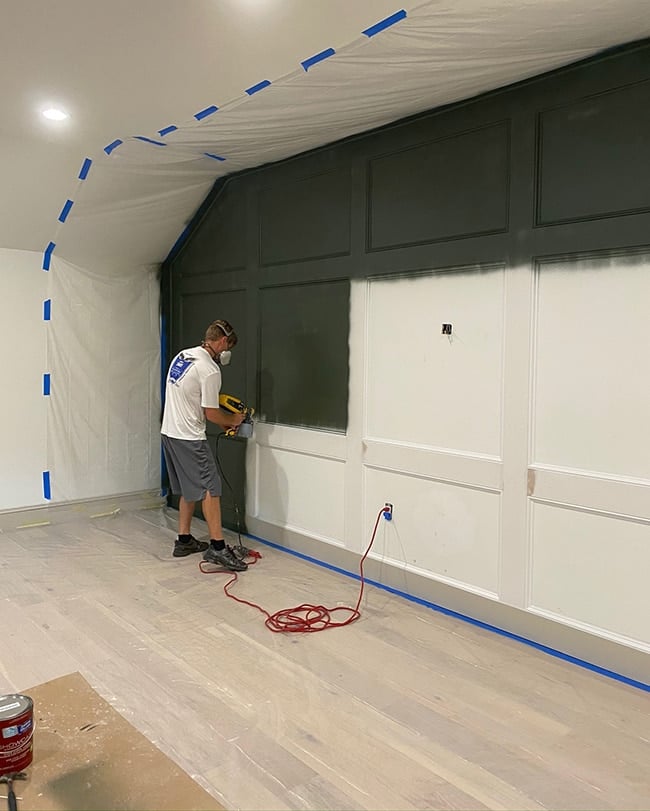
The first coat took around an hour, then we had to clean out the sprayer before recoating in two hours (you can’t risk any paint drying and clogging the sprayer!)
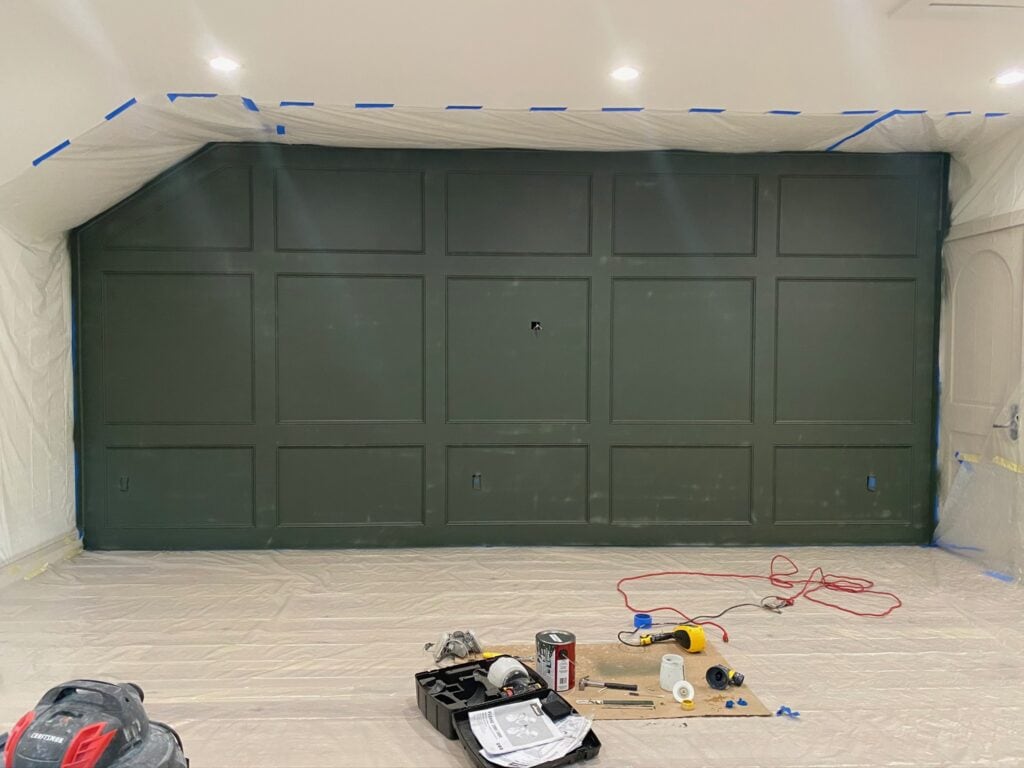
There were a few splotchy areas but that’s normal for the first coat and would be covered in the second pass. The most important thing to check for were any imperfections that we missed, like this paint drip from the original wall…
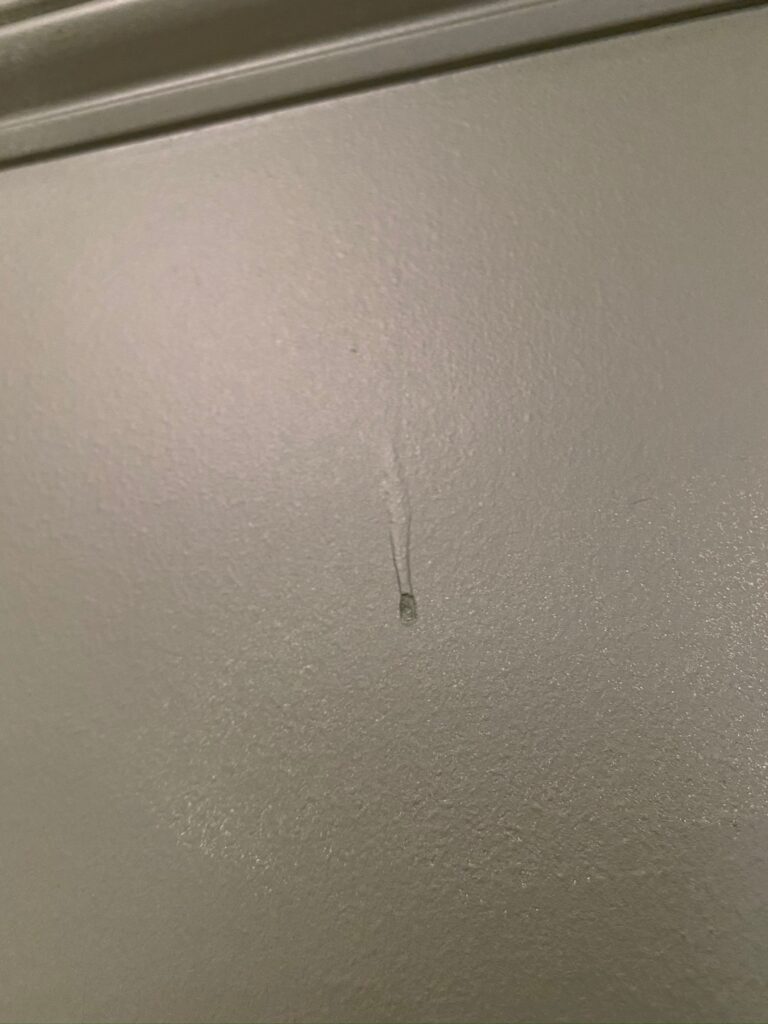
We sanded this down by hand with 220 grit, added a touch of putty where it needed to be filled, then waited to sand one more time.
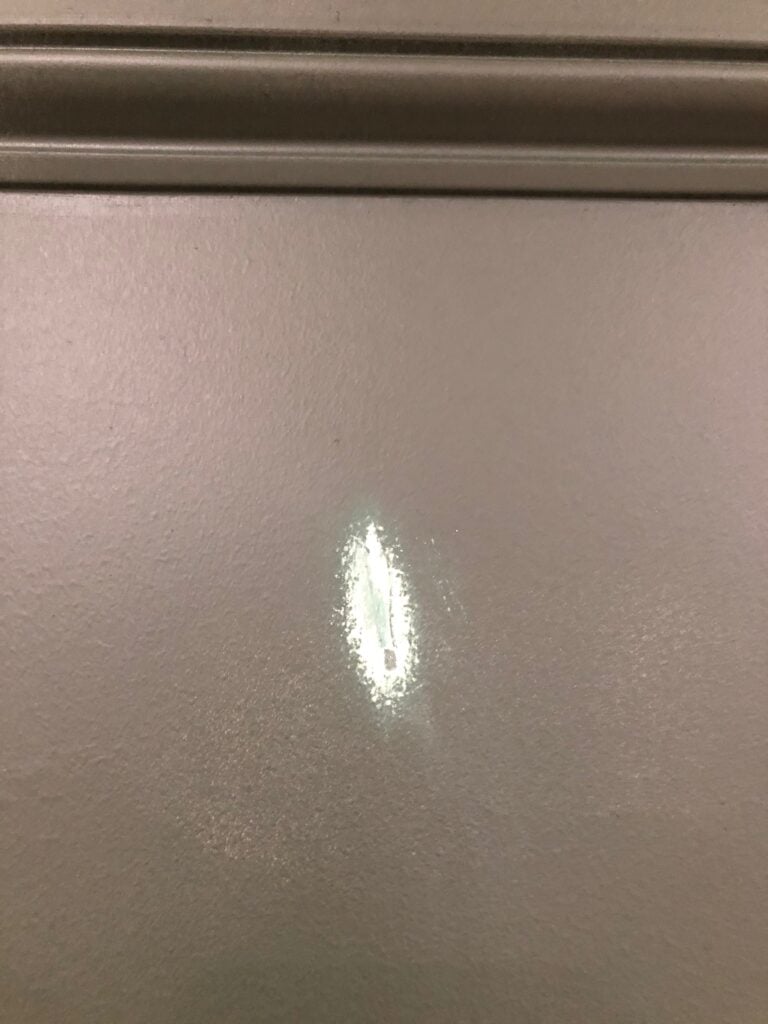
That was the biggest imperfection we found, but there were several little spots that needed a touch more putty, or particles that got stuck onto the paint and needed a quick sanding. You have to be extra meticulous when spraying paint, because you can’t go back and touch up with a brush later!
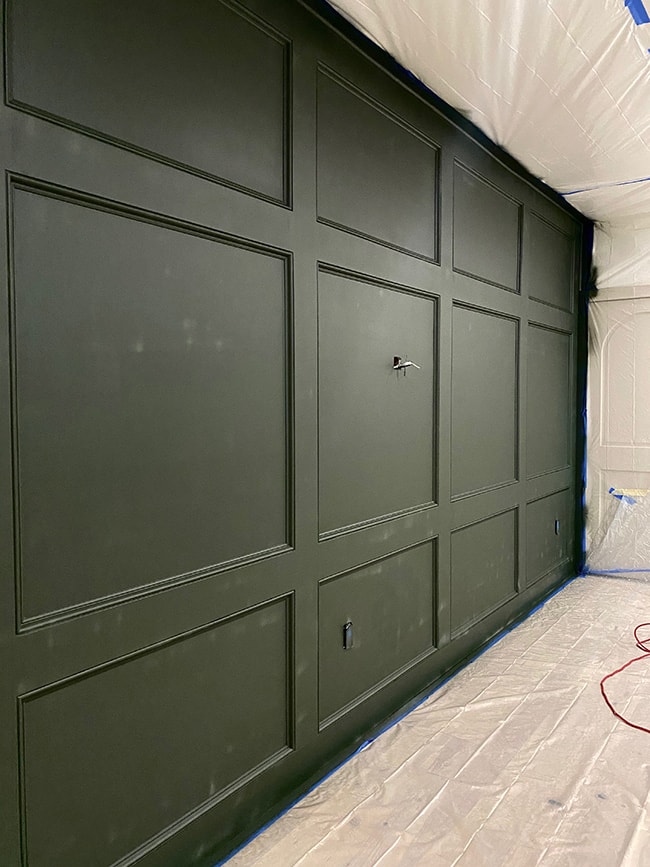
Once the touchups were sanded and cleaned, the final coat of paint was sprayed on in a top-to-bottom motion (opposite of the first coat to cover from every angle).
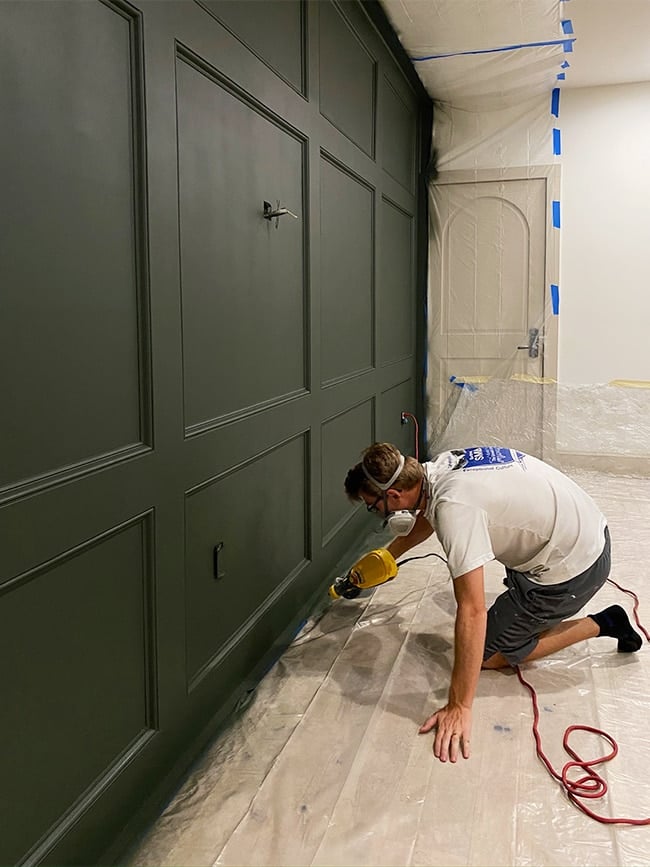
This coat took less time, closer 30-40 minutes. In the end we used up around 40% of the can, which is slightly more than if we were to roll/brush it on. But look how smoooooooth!
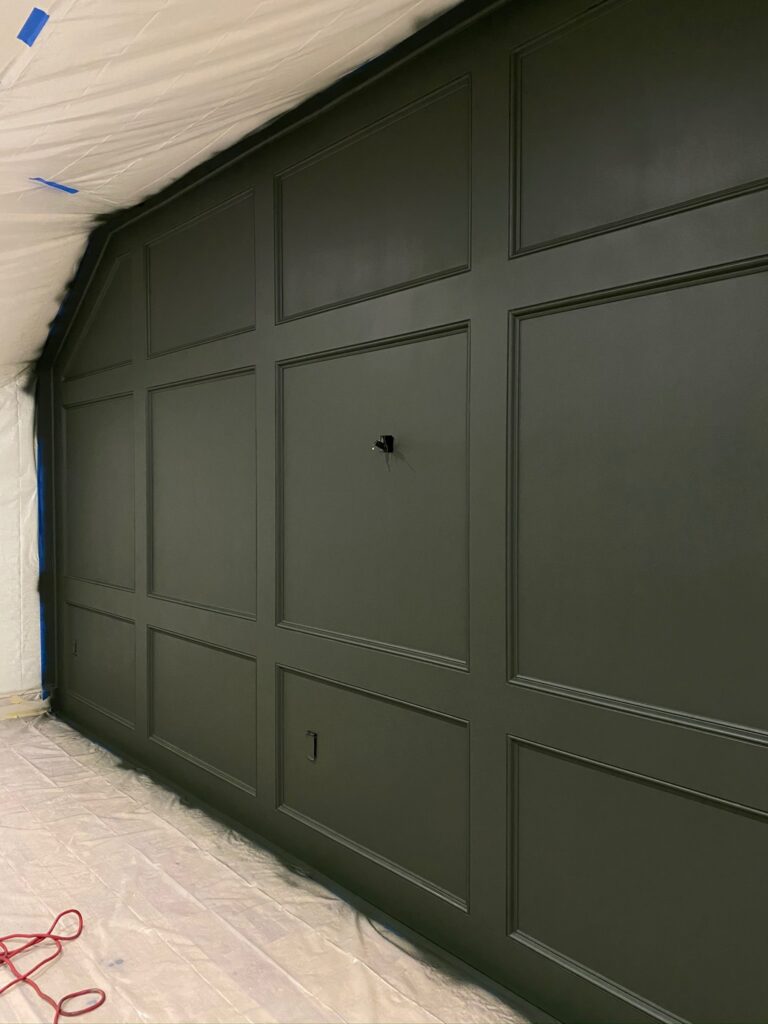
We’re debating on giving it a final finish sanding with an extra fine sanding sponge (400 grit) to see if we can get it even smoother where you can see some of the paint spray overlap, but I’m scared to mess anything up since we already took the tape down. Anyone have experience with this?
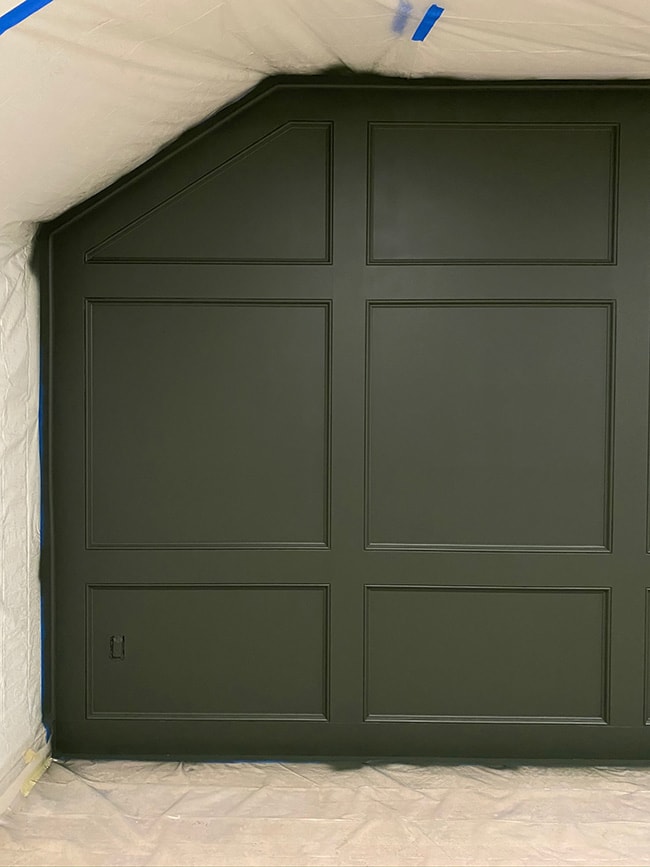
Overall I think this is the most professional molding/paint job we’ve done, and I’m so pleased with my color choice. It’s the perfect deep charcoaly forest green. De-li-cious.
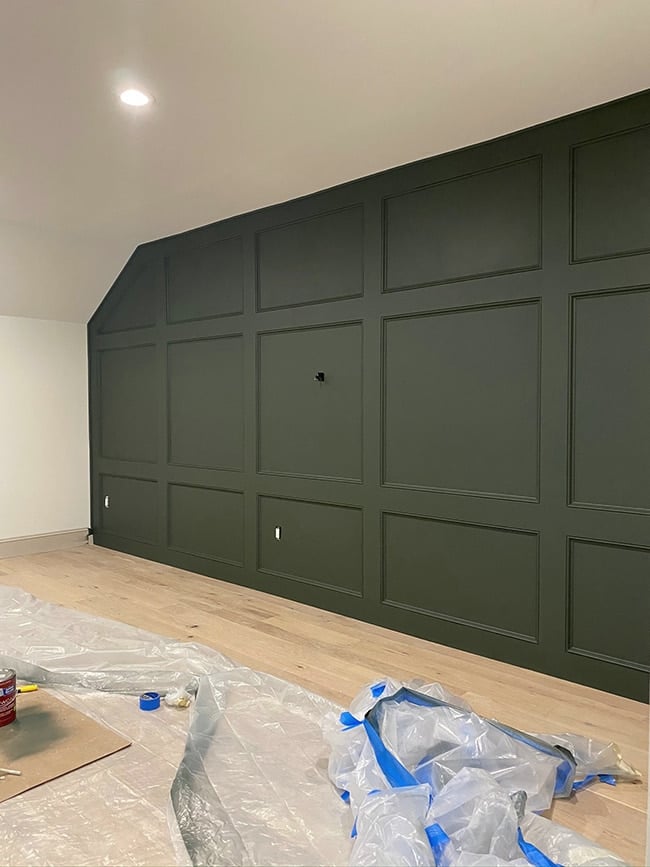
In total, the project cost around $275 for our 9′ x 19’6″ wall. This includes 35 pieces of trim, caulk and liquid nails, and a gallon of paint. Everything else we already had on hand. Eventually I’ll get around to painting the outlets (same green to blend in) and next we’ll be installing the sconces!
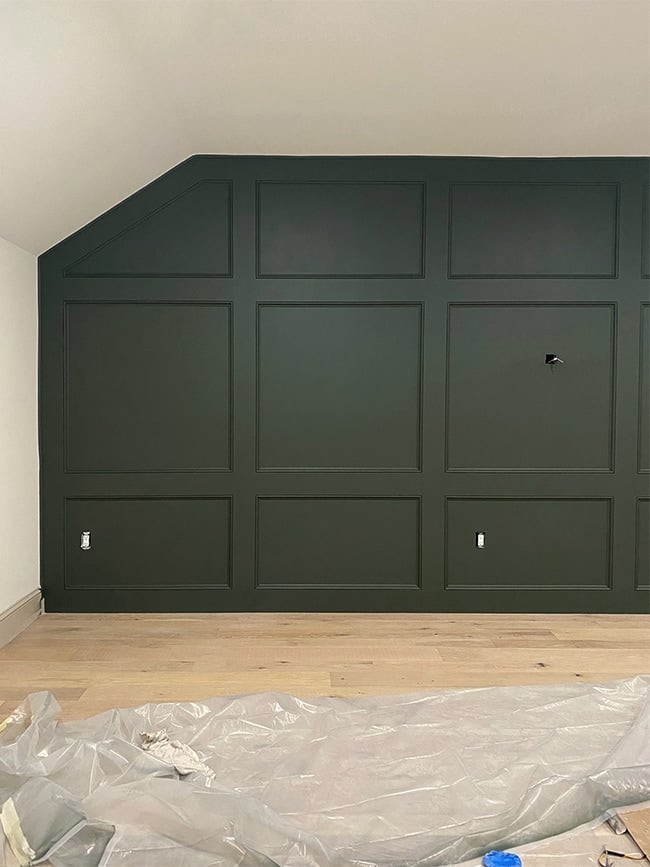
Yes I know, we should have installed those first. We’re jumping around a little with this room, and we don’t have the sconces yet but I finally decided on these. Can you picture it?
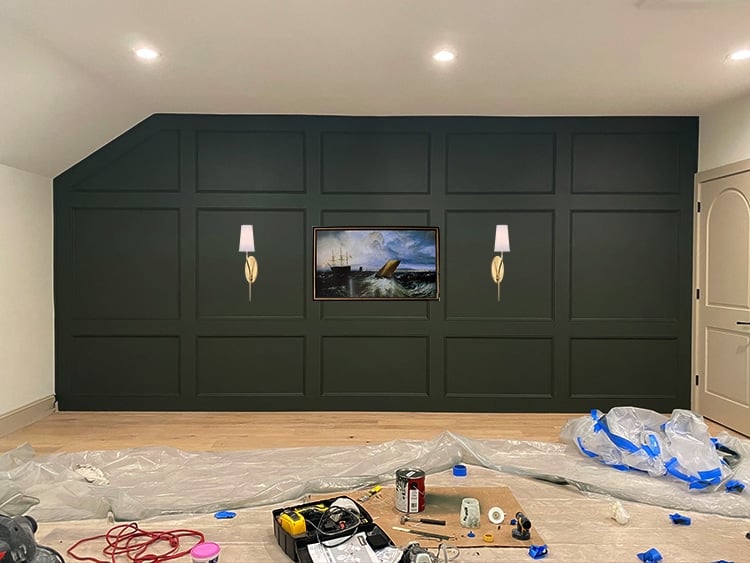
The TV mockup was taken from Cass Makes Home—she made her regular flat screen look like a Frame TV in this brilliant tutorial, and I think I’ll be doing the same. It feels so nice when your vision comes to life!
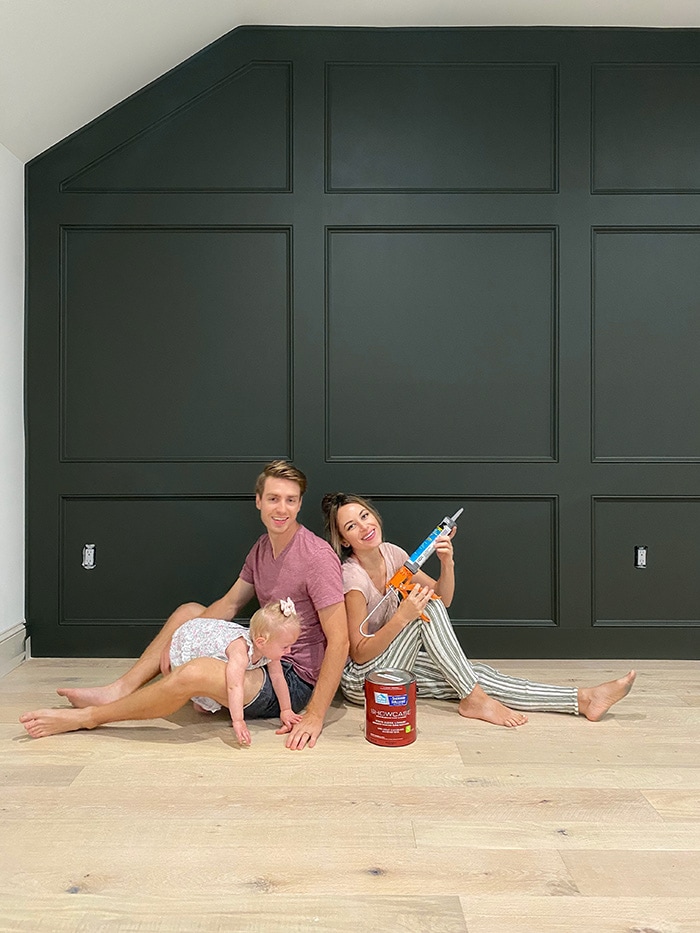
Who said DIYing is impossible with a baby? It may have taken us 3x as long, but we’re inching our way closer to a finished room, one project at a time.
And on that note… I have some good and bad news. The good news is that I finally found a sofa for this room… the bad news is that it will take 10-12 weeks to arrive (which means at least 10-12 weeks before the reveal). I know, I don’t want to wait that long either. But two of the Ikea cabinets we need are also still out of stock until next month (supposedly) so we’re just behind all around. Home wasn’t built in a day!
This weekend we’re turning our attention towards our master bedroom, and next week I’ll be sharing a sharing a quick refresh before the reveal. Tune into my Instagram stories on Friday to catch a fun art project I’ll be tackling for the space!


Natasha says
Loved this (started with your bathroom) so much that we’re recreating it in our bedroom. We have an outlet in the way of one of perimeter 1x6s though (so we can’t rearrange to avoid). We’ve cut around the outlet and it looks so bad because it’s so far recessed into the moulding. Suggestions?
Annie Lam says
It’s beautiful! As always ❤️
I really want to this in my WFH office/gym but I had another question. Our walls have knock down texture. Would you recommend us laying down plywood between each section or laying it first then applying the 1×6 boards?
Jenna Sue says
Hi! I would actually use thin hardboard instead, and apply before the 1×6’s. I have a tutorial for this here: https://www.jennasuedesign.com/2014/07/master-makeover-diy-paneled-wall/
Margery says
Another triumph! Bless your hard-working, talented hearts.
Bobbie T says
What an awesome job! My husband and I have done so many diy projects over the years and would have loved to have had tutorials like this to have prevented so many “learn the hard way” mistakes. When you caulk or use filler, keep a spray bottle of water and mist to keep it from drying too fast. Looking forward to your next post and that sweet baby.
Jenna Sue says
Great tip, thanks Bobbie!
Mary says
Oh my goodness, this is the most detailed and helpful post. I am planning on tackling trim work in one of our bedrooms, so I will be referring to this post (many times, I’m sure). Thank you so much! ??
Jenna Sue says
So glad this was helpful! Let me know if you have any questions on your project 🙂
Canela says
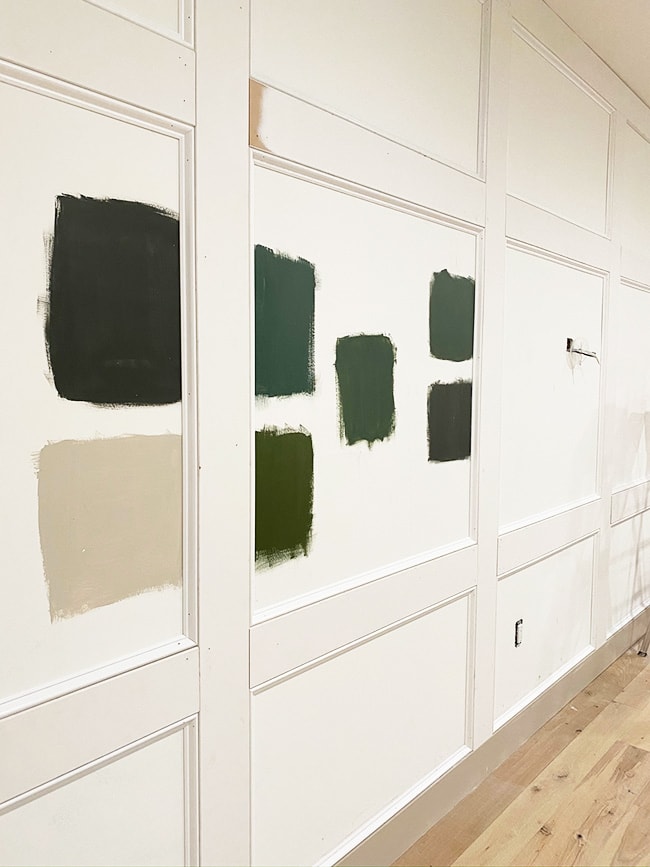
What’s the paint colour of the bottom left that you didn’t use. I’m living for it !!!!
Jenna Sue says
It’s Sherwin Williams softened green. You can see it here in our laundry room! https://www.jennasuedesign.com/2018/10/laundry-room-makeover-riverside-retreat/
lilly says
this is why you are my favorite DIY blogger. Details, precision, beauty and elegance…and you are sharing!!! love, love, love it all….what an excellence work of art!!! icing on the cake is seeing Esme around!!
Jenna Sue says
That made my night Lilly, thank you so much for commenting! I think Esmé should be included in every post, ha…
Mary says
You guys did a beautiful job! I love everything you did with that wall and it will be worth the wait for the furniture you’ve ordered! Thank you for all the detailed pics on the job but nothing is ever easy and there are snags along the way in projects so thanks also for the things that can go wrong and get frustrating when you’re tackling a job like this. You’re both amazing!
Jenna Sue says
Thank you Mary! I’m glad you appreciated all the details 🙂
Michele M. says
First off…WOW!!!!! That looks absolutely unreal! Your choice of kind of wood treatments, decision on color – and that tutorial – win win win!
You guys did a fabulous job and you took a boring room and made it amazing.
And your sweet helper is sooooo cute. They grow too fast.
Jenna Sue says
I appreciate the kind words, Michele! This girl sure keeps us busy, thankfully we have the grandparents close by so we can DIY 😉
Katie says
Do you have any tips/best practices for walls that include large cases opening that leave wall “uneven” in terms of measurements. Ie. wall on one side of door casing is 50 inches and on other side it is 30 inches. Trying to make a plan for whole room but confused on how to tackle walls that include windows and doors???
Jenna Sue says
There’s no one right way, just do what you think looks most balanced visually! I’d take a photo of the room, print it out and draw lines on it until you find an arrangement you like best.
Maria says
Thank you so much to be totally honest, when i painted and sand and caulkin i have to much errors and frustations and always said the bloggers never talk about this but your honest like this then you pass the same process like us but your sharing that and how you fixed and its refreshing for me, thank you, i have a question the color at the template boards i count 10 colors but you use 8 boards, maybe you have 2 tables at home? i love how you choose colors like olive and looks wow i never think on that, you can write the book, maybe an electronic book yes!!, also then what you use for the joints? the plastic wood or the other wood filler or both mixed? depend the area? thank you love your blog.
Maria
Jenna Sue says
Thank you so much Maria! I worry these posts are too long but I’m glad people are getting value from them! For the boards in the template, there would be 10 if we were starting from scratch but we left the existing baseboards, so we only needed 8 🙂 We used the plastic wood for this but next time I would try a different brand of wood filler that didn’t dry so fast.
Teddee Grace says
Love the paint color! I know you two are perfectionists, but the wall looks great. Leave well enough alone.
Jenna Sue says
Thanks Teddee 😉
Monica says
I am definitely trying this – THIS weekend! Thank you so much for the detailed tutorial, I will be referencing this for sure.
This room looks fabulous and I’m looking forward to seeing to completed.
Jenna Sue says
Wooohoo! Good luck Monica, I’m sure it will be amazing!
Faith says
Y’all, this looks amazing! You both are extremely talented. One day when we finally are able to build our house, I will be referring back to y’all’s tutorials. Thank you so much for sharing!! 🙂
Jenna Sue says
Thank you Faith, I’m glad this was helpful! 🙂
Hillary says
I just wanted to stop and comment on how amazing your step by step tutorials are. I will probably never tackle 95% of the DIYs you post but I give you so much credit for breaking them down so clearly for your audience. I’m sure it takes a TON of time – just wanted to say that it doesn’t go unnoticed. A round of applause for you both! I so enjoy following along.
Jenna Sue says
I appreciate that so much, Hillary! These are the posts I wish I had before doing these projects so I’m happy to share our experience with everyone! I’ve gone back to reference them myself because there’s too many details to remember 😉
Janice kirwan says
Exactly, Hillary…ahe spends an incredible amount of time to share and explain and answer. She is the best!! I am saving them myself. I so wished I had these available years ago. One day the goal is to build a new home but by then I may not want to tackle the DIY.
Jenna Sue says
Aww you’re the sweetest Janice! I wish I had this tutorial years ago too lol, that’s why I make them! Next time we do this project I can reference it too 🙂