And the award for the Most Fun project of the Year goes to… DIY concrete lamps!
Jump to:
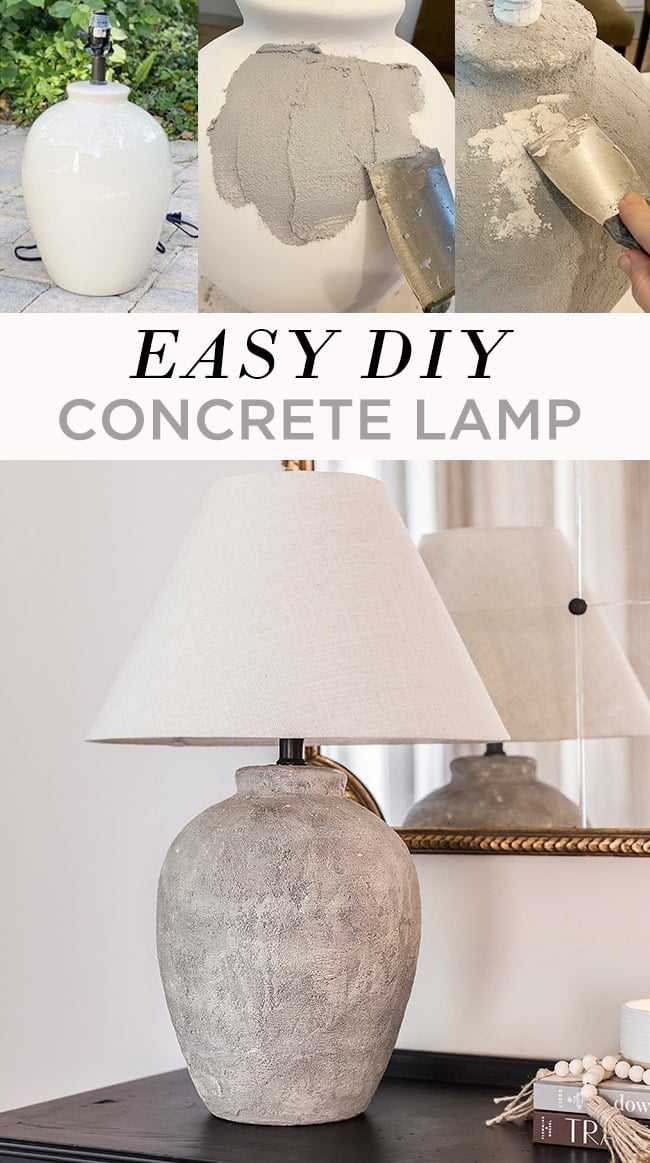
How to make a DIY cement lamp
Today I’m sharing how so you can make your own cement, concrete or stone lamp in two different styles—no DIY or artistic skills required (really!)
Materials:
- Lamp base and lamp shade (I found mine at a thrift store and Walmart)
- Ready-mix concrete patch
- Spackle
- Spray primer
- Paint (any kind will work—I used shades of white, brown and black)
Tools:
- Putty knife
- Coarse sanding block
- Paint brush
- Gloves
- Optional: wire brush
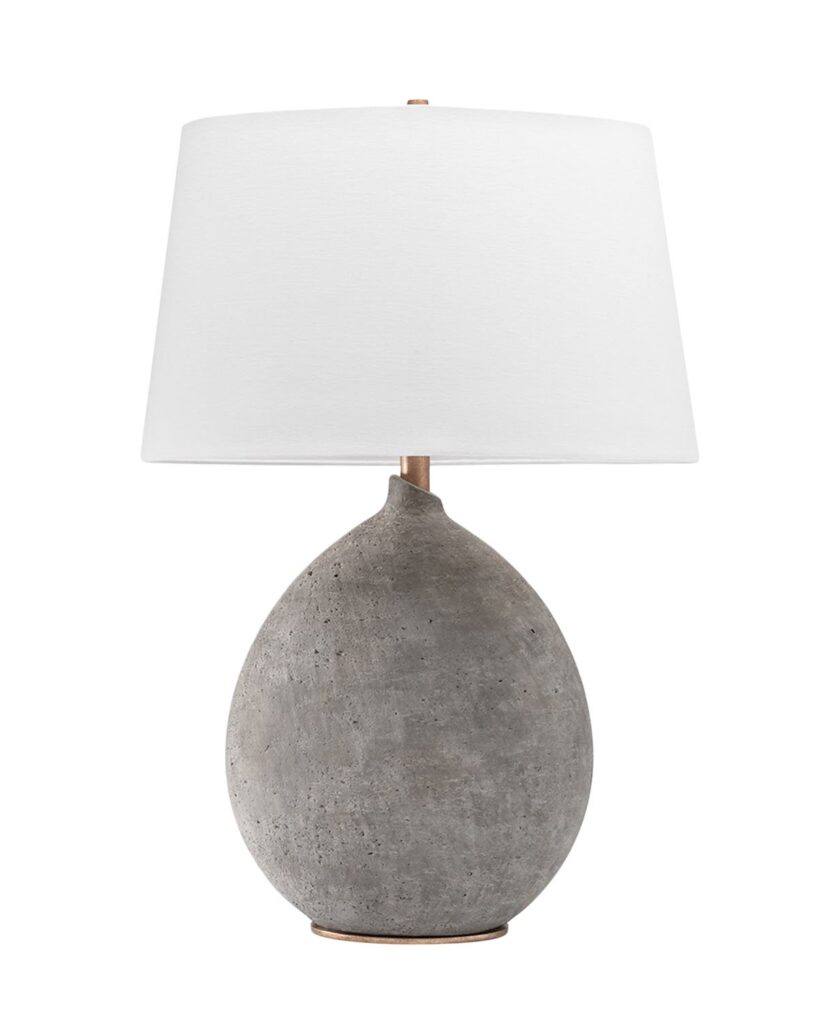
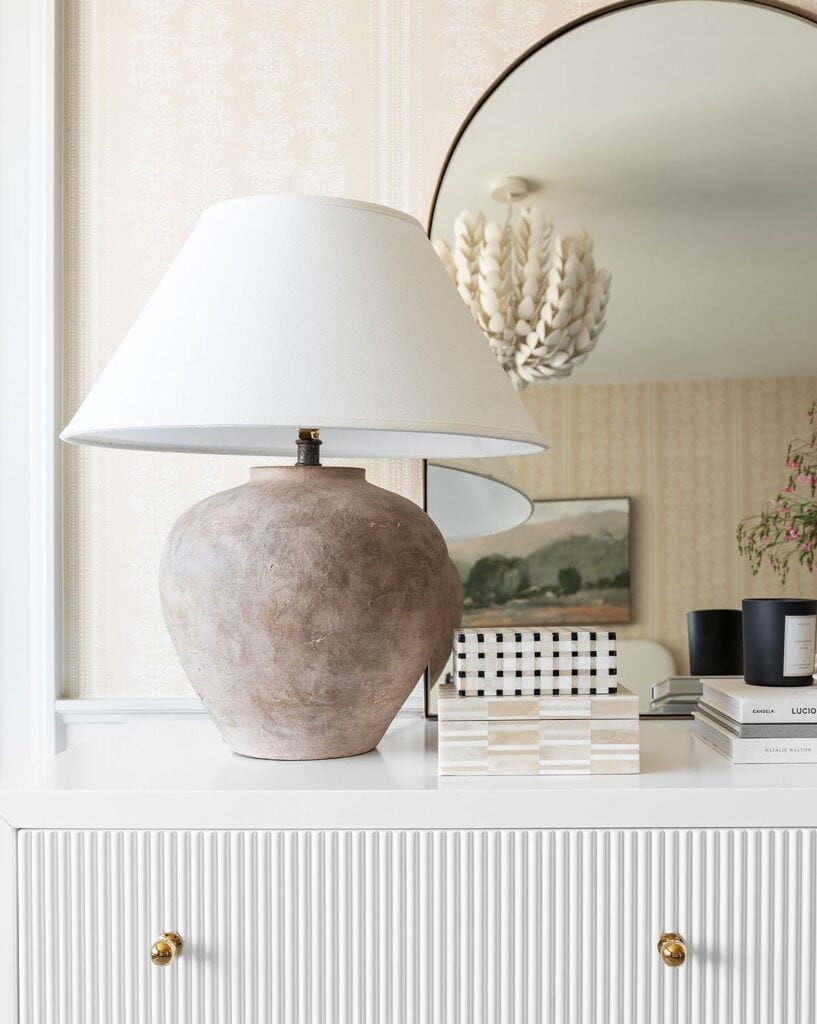
Here was my inspiration—I’m sure you’ve all seen these beautiful but very pricey lamps all over your favorite designers Instagram accounts…
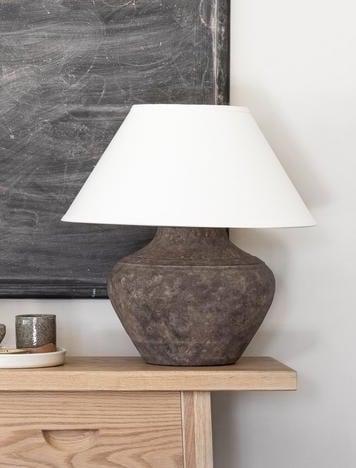
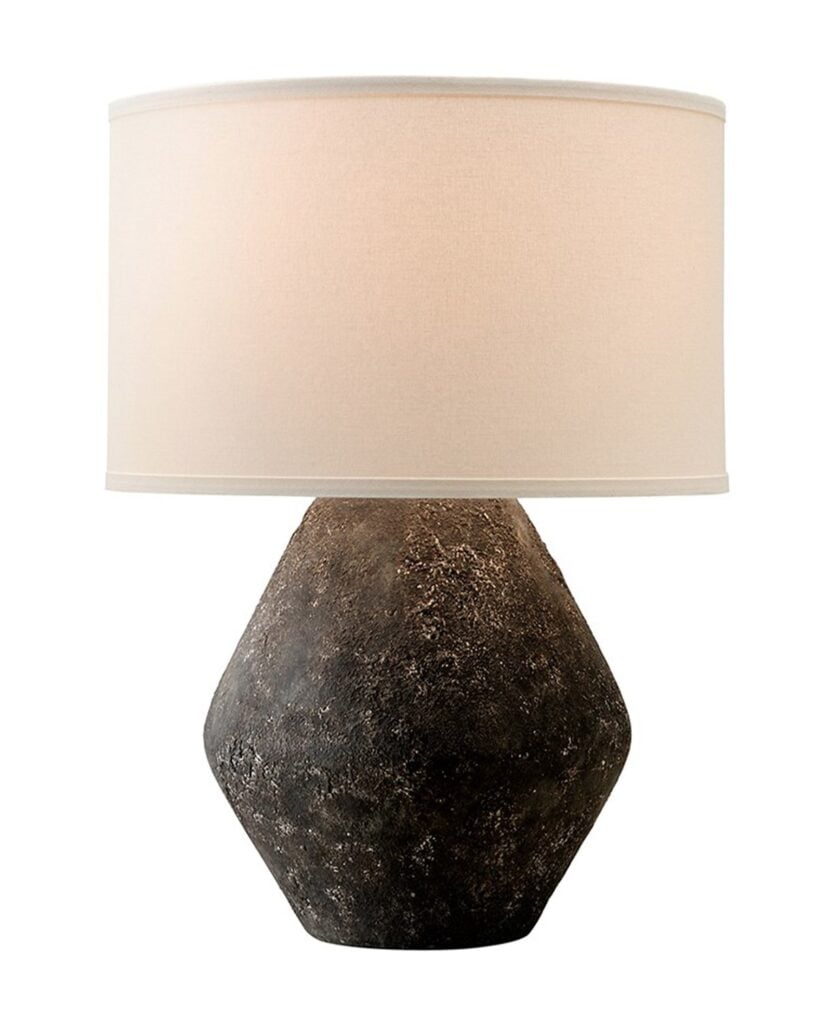
There are a multitude of ways to achieve this aged stone/concrete look, and I’ve experimented with a few myself (see DIY Hypertufa planter, DIY aged stone planters). This time around, I wanted to try something new and foolproof for complete beginners. This technique I found might be my favorite so far, requires only a few basic ingredients and anyone can get awesome results!
Step 1: Find an old lamp (or any vessel)
Preferably something used/inexpensive. I found mine at Walmart and a thrift store—Facebook Marketplace is another good place to look. There are no shortage of these lamps out there!
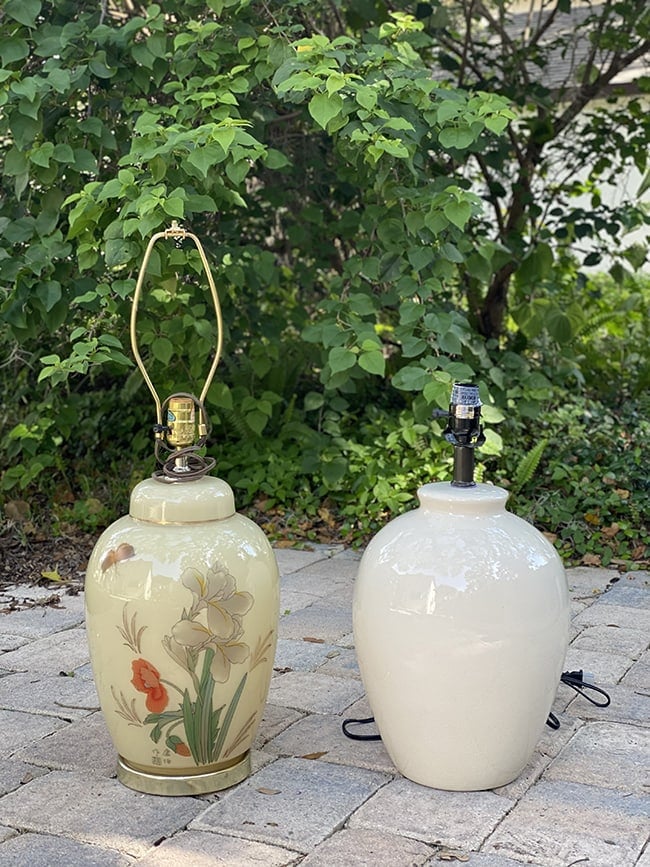
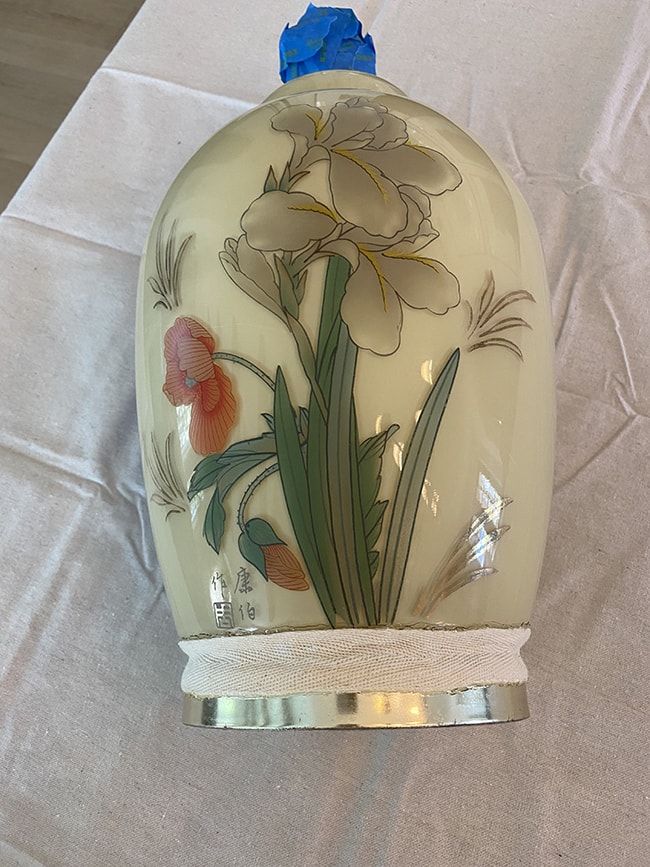
Choose something with a rounded/jug shape—if it has handles, even better. The material doesn’t matter. My thrifted lamp had a gap along the bottom, so I decided to fill it in by shoving painters tape into the crevice and using a hot glue gun to attach a ribbon around it. It was all I could think of at the moment but it worked just fine!
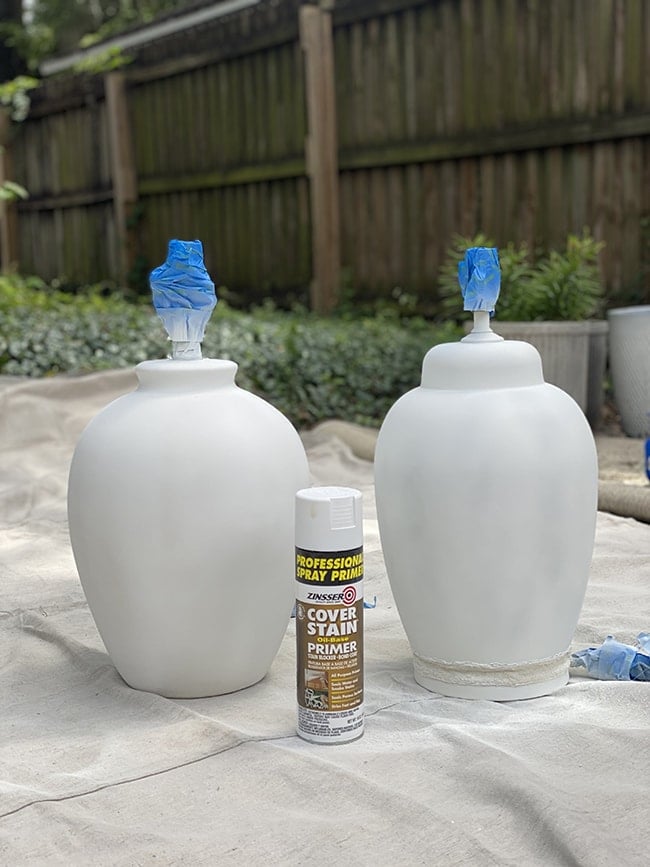
Step 2: Prime
First, mask the socket base and cord with painter’s tape. You’ll first want to coat the lamps with a oil based spray primer to de-slick the surface so the concrete patch has the best chance of sticking. This is the stuff I swear by for anything non-wood—it dries almost instantly and covers very well.
Step 3: Apply concrete patch
Now it’s time for the fun part!
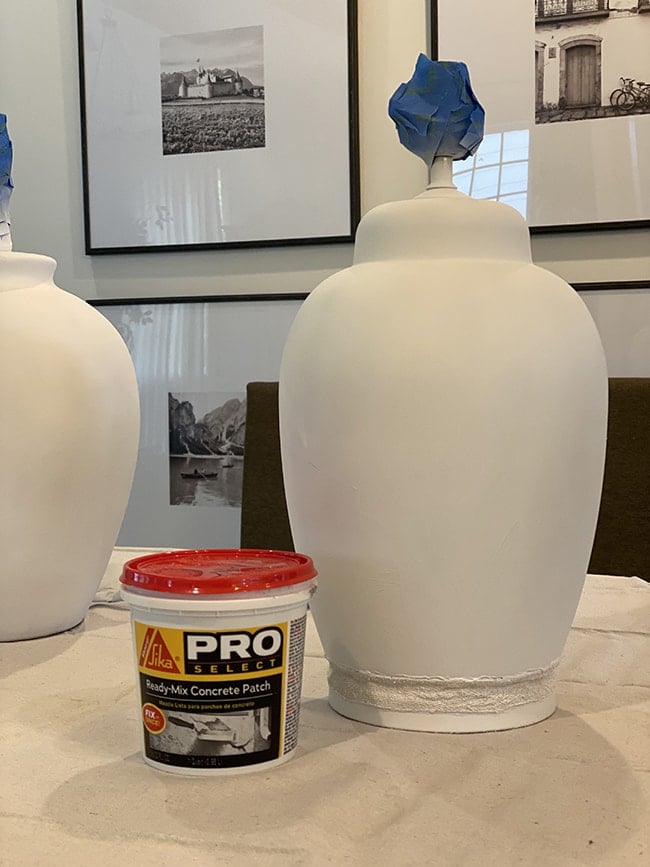
Using a putty knife, apply a layer of concrete patch (found at Lowe’s or Home Depot) to the entire surface. You can make it as thick or as thin as you’d like, and don’t worry about making it even and smooth at this point.
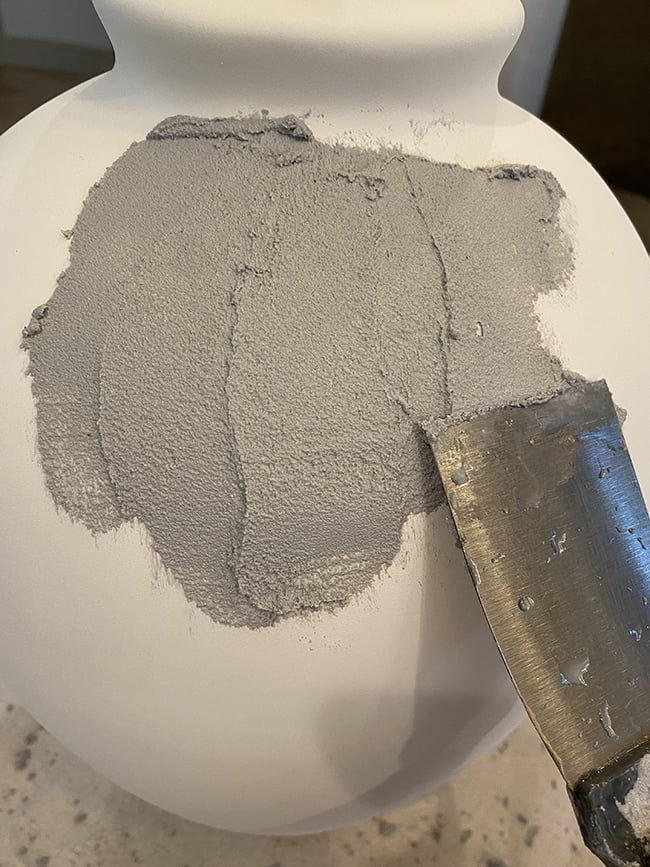
I found that the putty knife spread the concrete mixture quite well—just make sure that the concrete patch is fresh and not dried out.
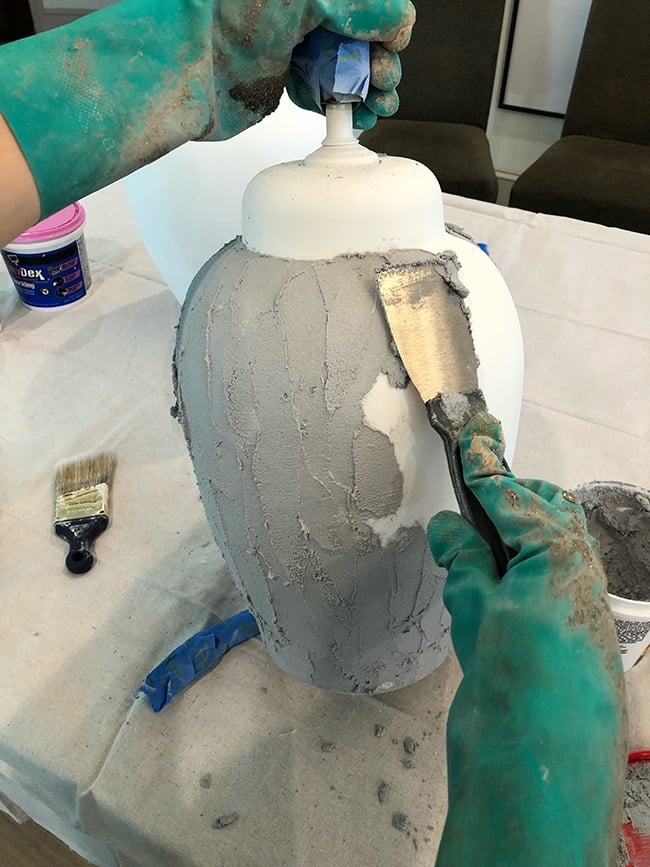
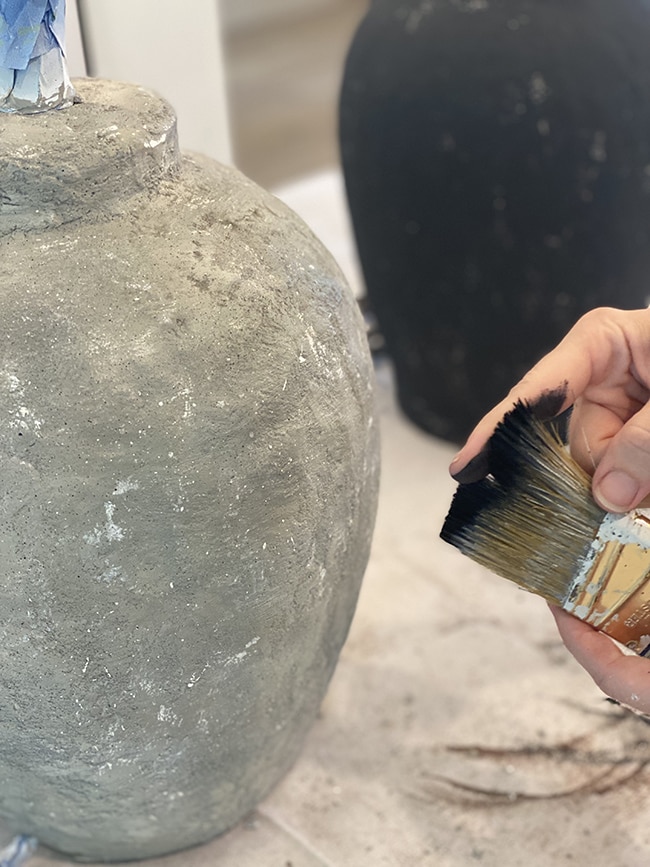
Once the lamp is covered, you may notice that it is already starting to dry and set. When I tried smoothing the edges with the putty knife, the pressure made the concrete patch start to rub off in some areas, so I came up with a different approach: use a stiff paint brush to stipple the surface and even everything out.
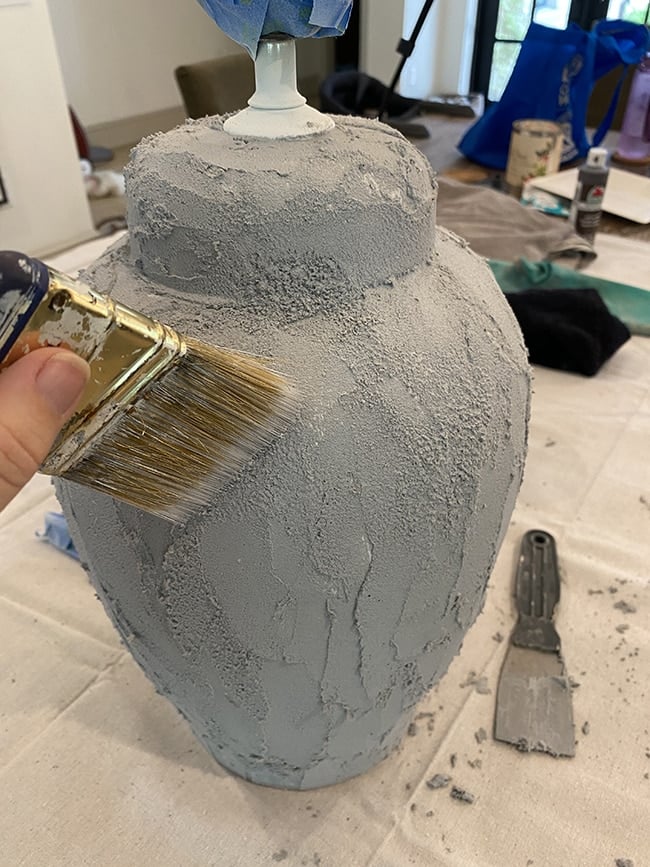
This not only blended in the lines, but it gave it a nice rough texture that looked more like concrete/stone. Definitely don’t skip this step!
Allow to the lamp to fully cure for at least a few hours. You can also add a second coat if you think it needs more.
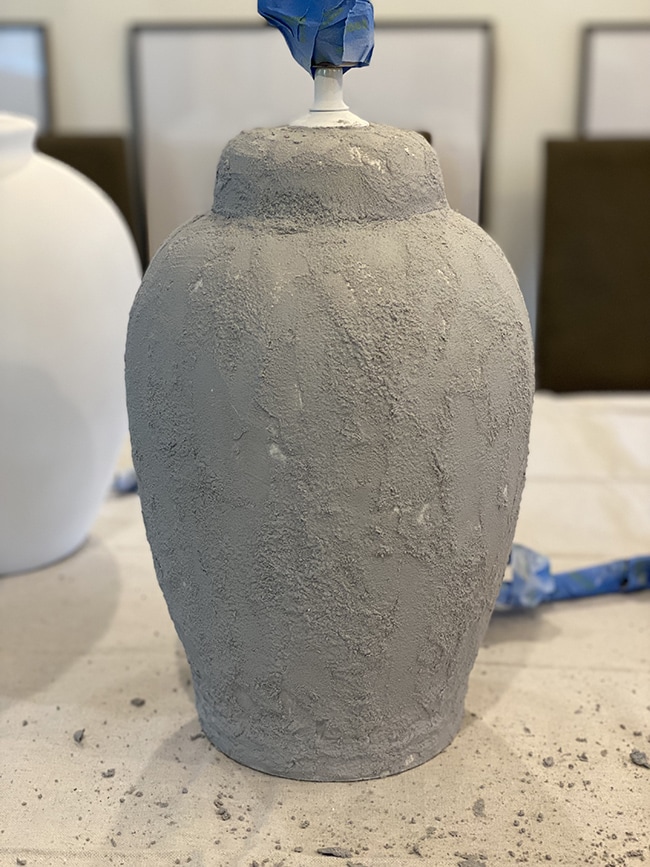
Step 4: Apply joint compound
At first I thought this could be an optional step, but now I’m convinced it’s necessary—and it’s a fun step!
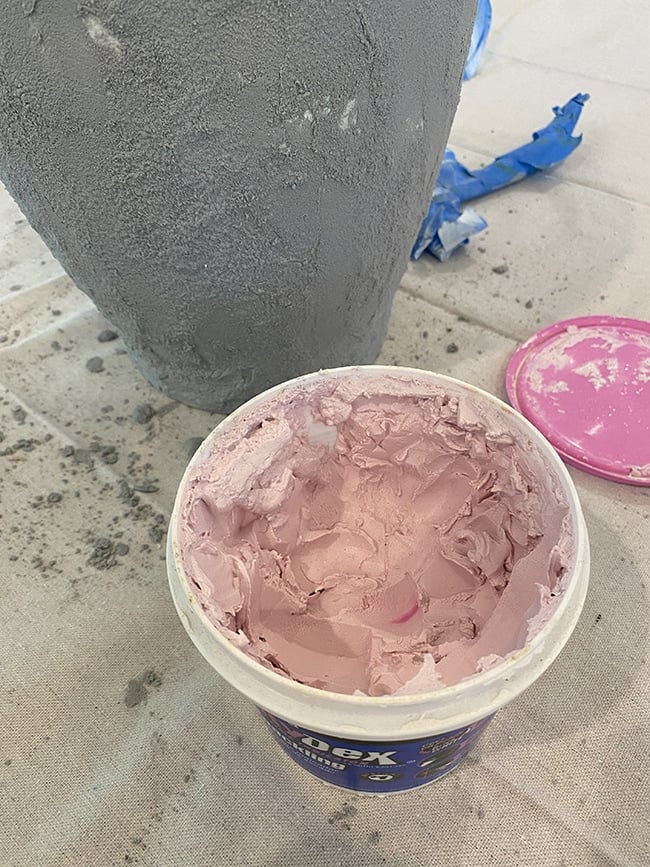
I used this spackling, but literally any kind will work.
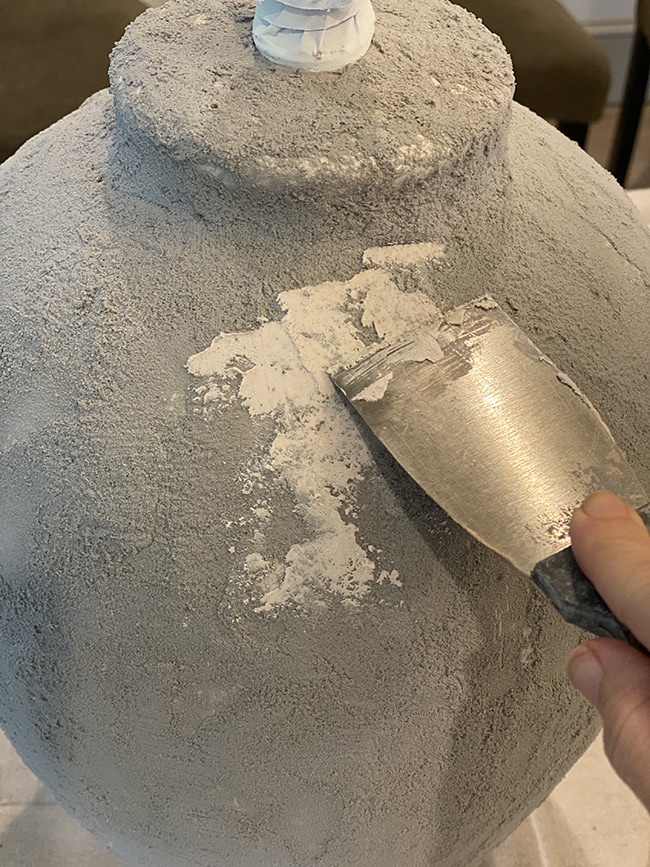
This is also best applied with a putty knife, and the idea is to apply it to random areas (not the entire surface).
Unlike the concrete patch, joint compound will dry smooth which creates a nice variation in texture.
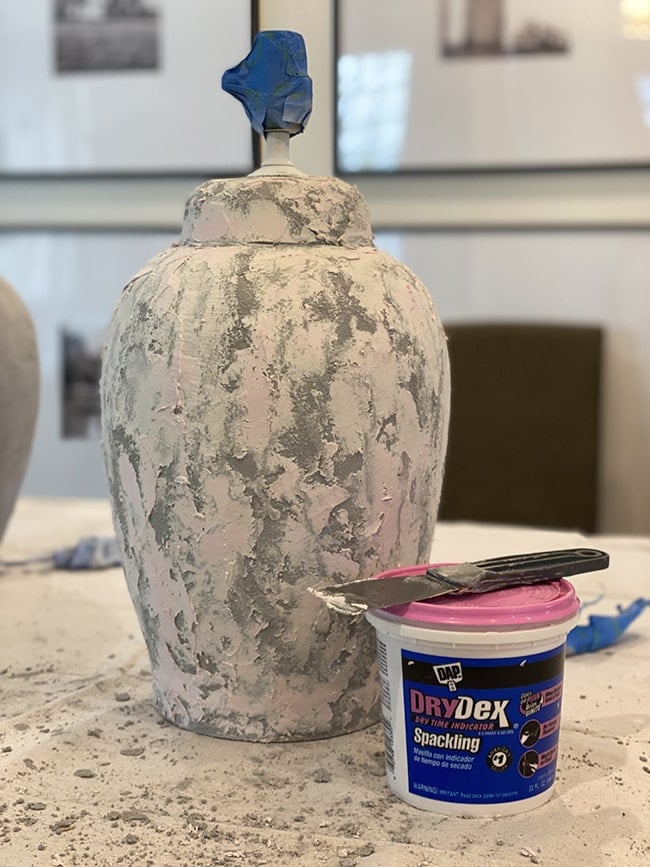
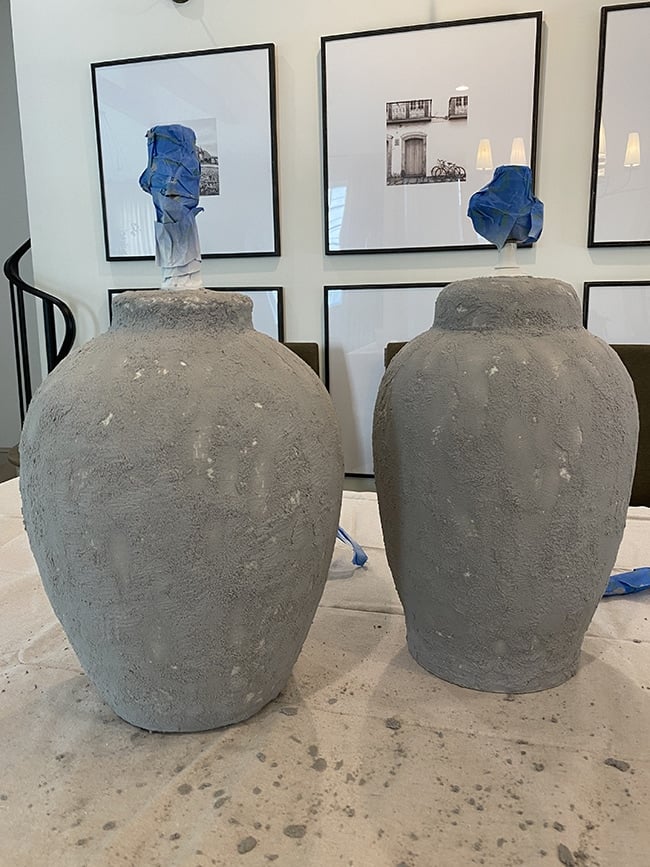
I applied a lighter coat on the second lamp to see if it made any difference, and I don’t think it was noticeable either way in the end.
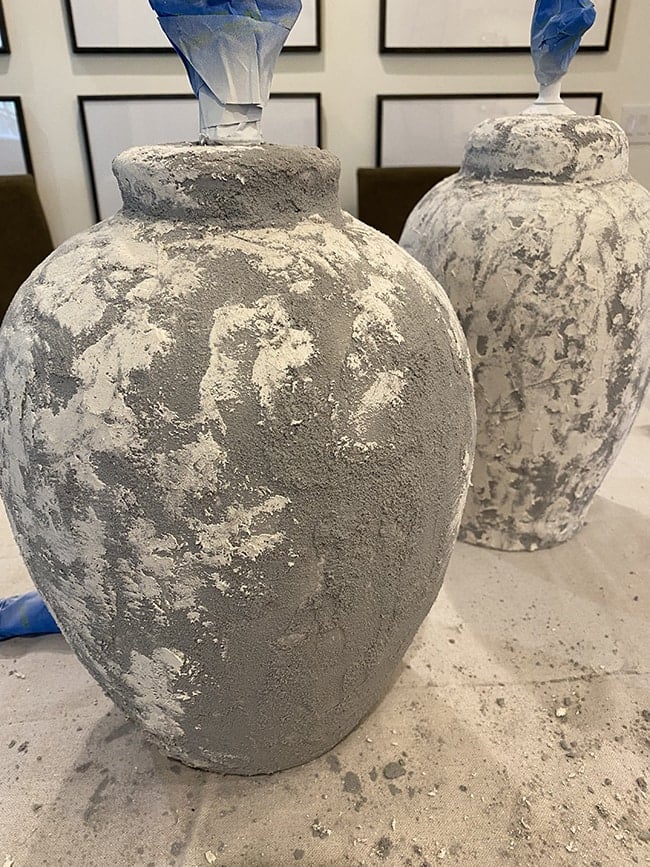
If you’re going for a natural gray cement lamp, I’d go a little lighter on the spackling so that more of the gray can show through.
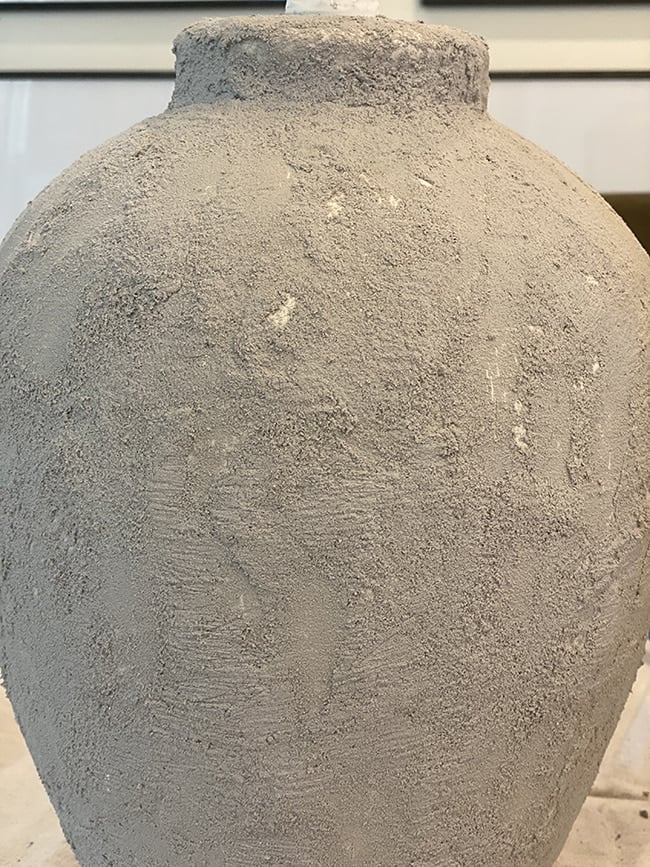
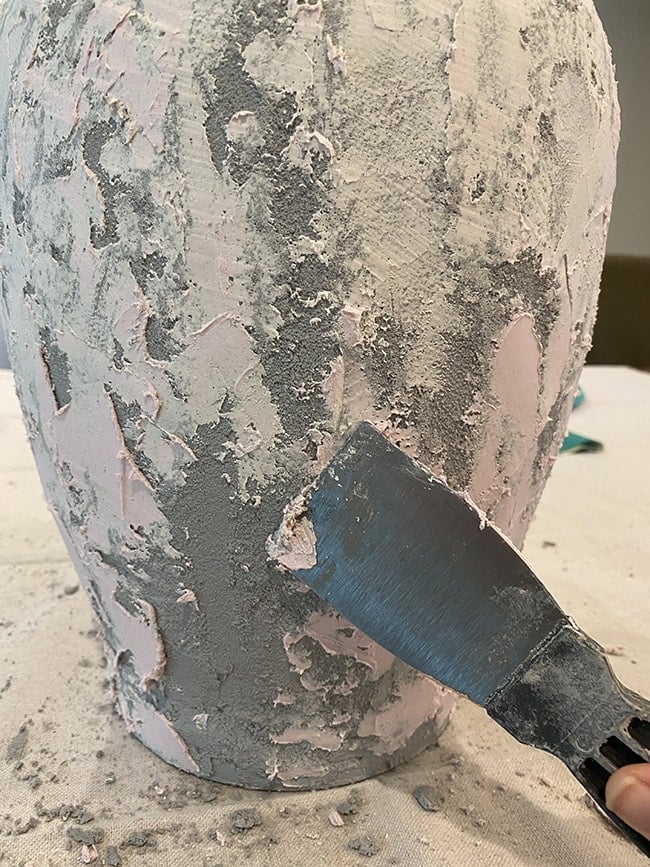
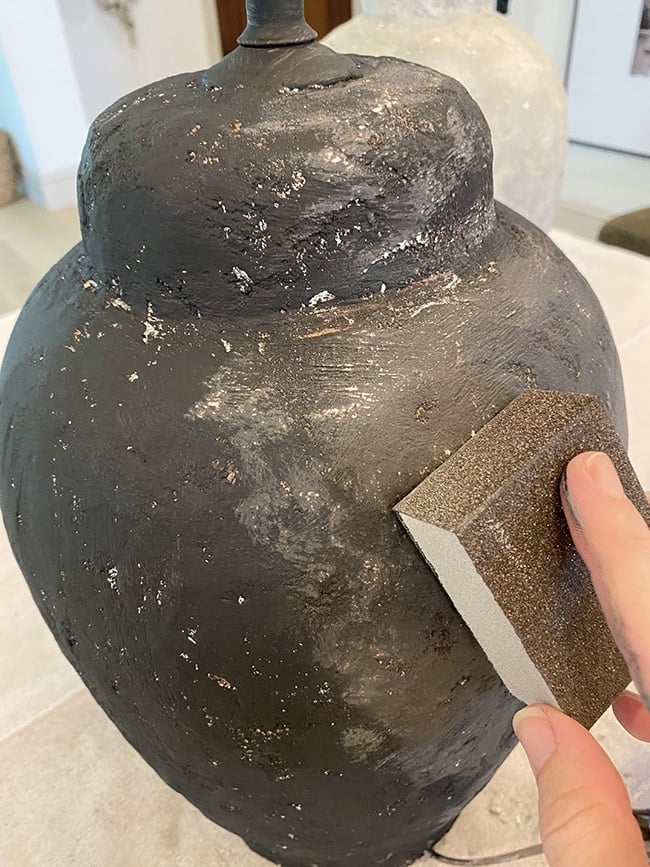
Step 5: Sand
Once the joint compound is dry (mine was dry in an hour or so) it’s time for the easiest part—sanding! A sanding sponge is the easiest way to do this, and it only takes a minute to go over it just enough to blend it in.

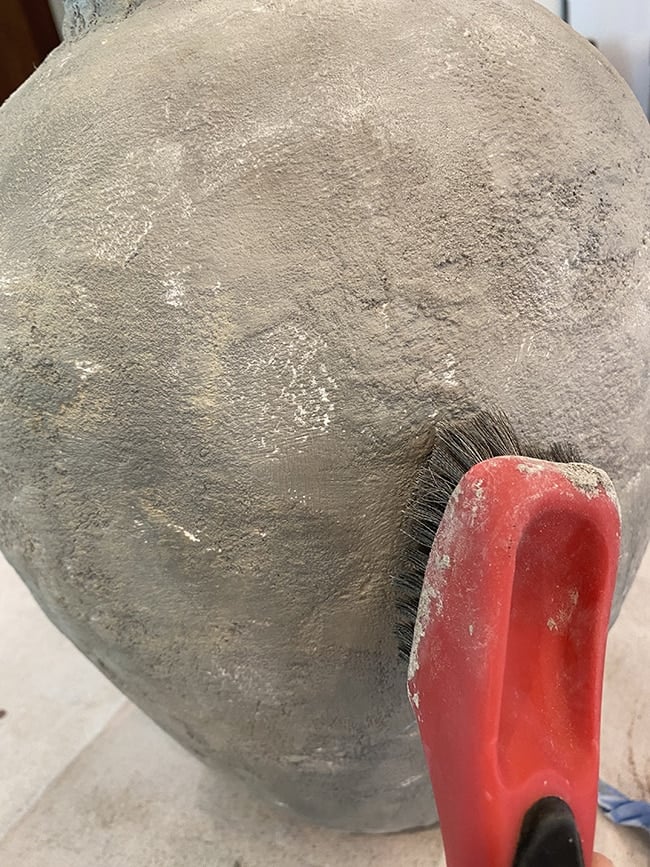
One tool I had forgotten and wish I would have used before the concrete patch dried is a coarse wire brush. This will really roughen up the surface and add texture that makes it look authentically worn (it’s also my secret to aging wood!)
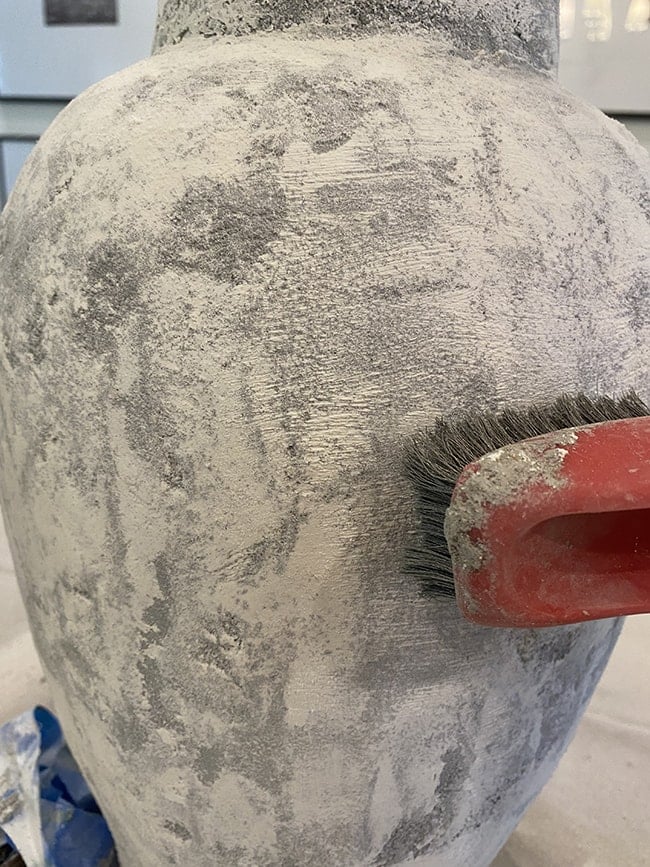
I used it to scratch up the surface as best as I could after the spackle dried, but it would have been even more effective to use before the concrete patch had dried. Not 100% necessary, but it adds a little extra something!
Step 6: Paint
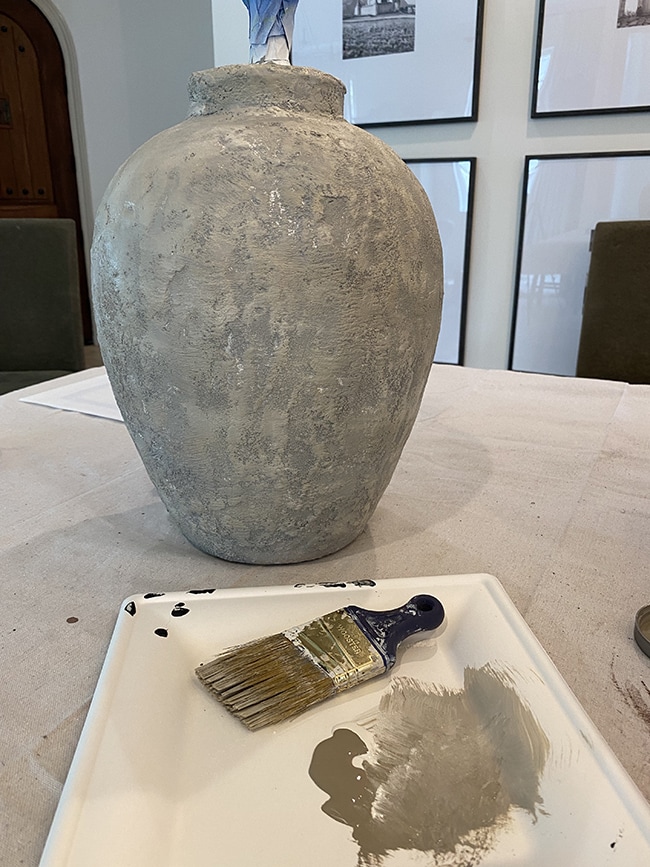
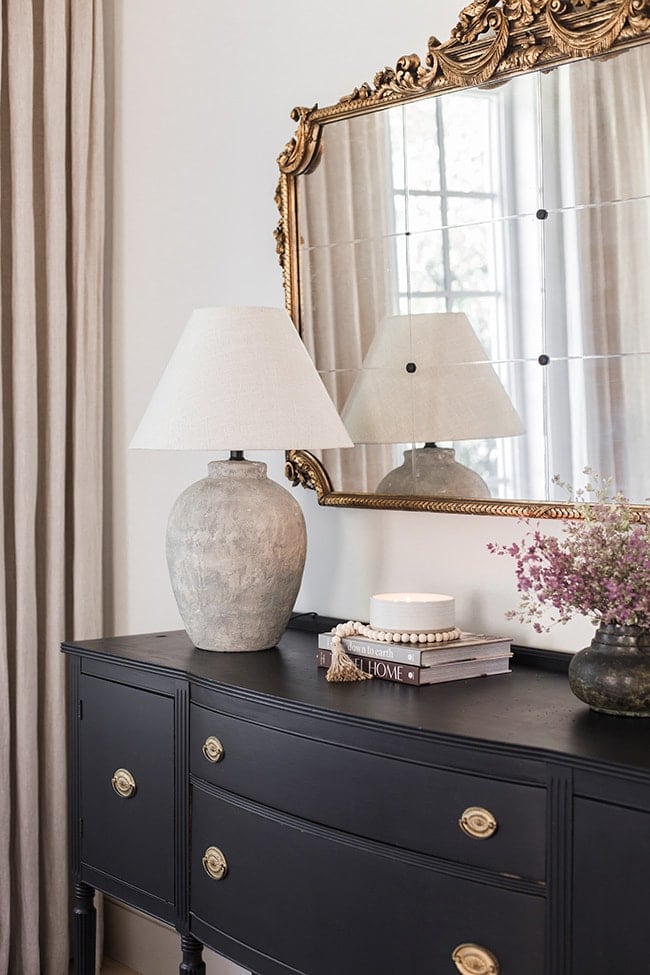
This is where things really start to take shape. For the gray concrete lamp, I mixed up a muddy beige color from old paint samples and brushed on a thin layer.
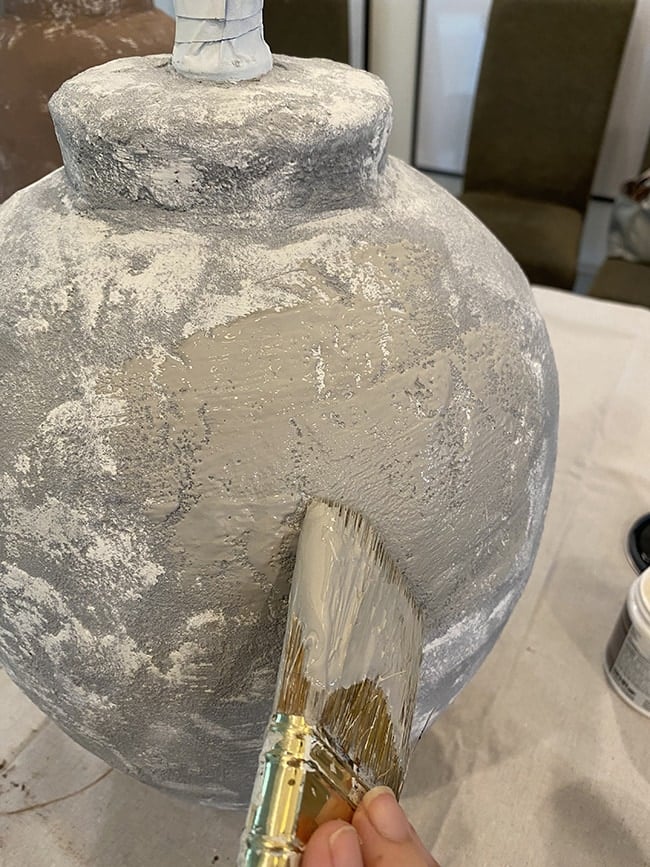
You want to keep it light so that the white and gray underneath shows through. In hindsight I wish I would have done a slightly thinner coat.
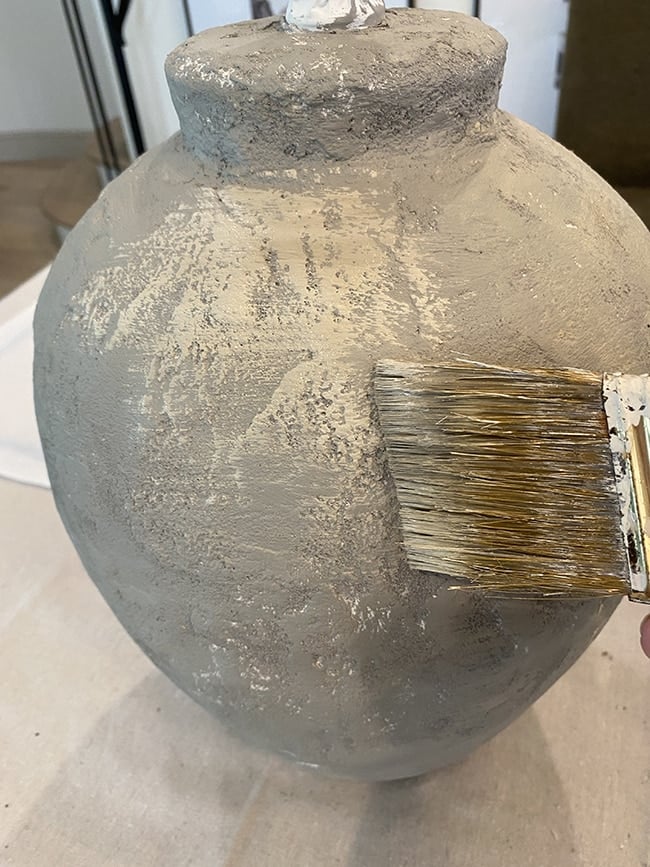
The first muddy beige color I applied ended up drying more gray than I wanted, so I went over it again with a true beige. The goal is to add as much variation and layers (of both color and texture) as possible—and anything pure gray will dry too blue, so use warmer tones!
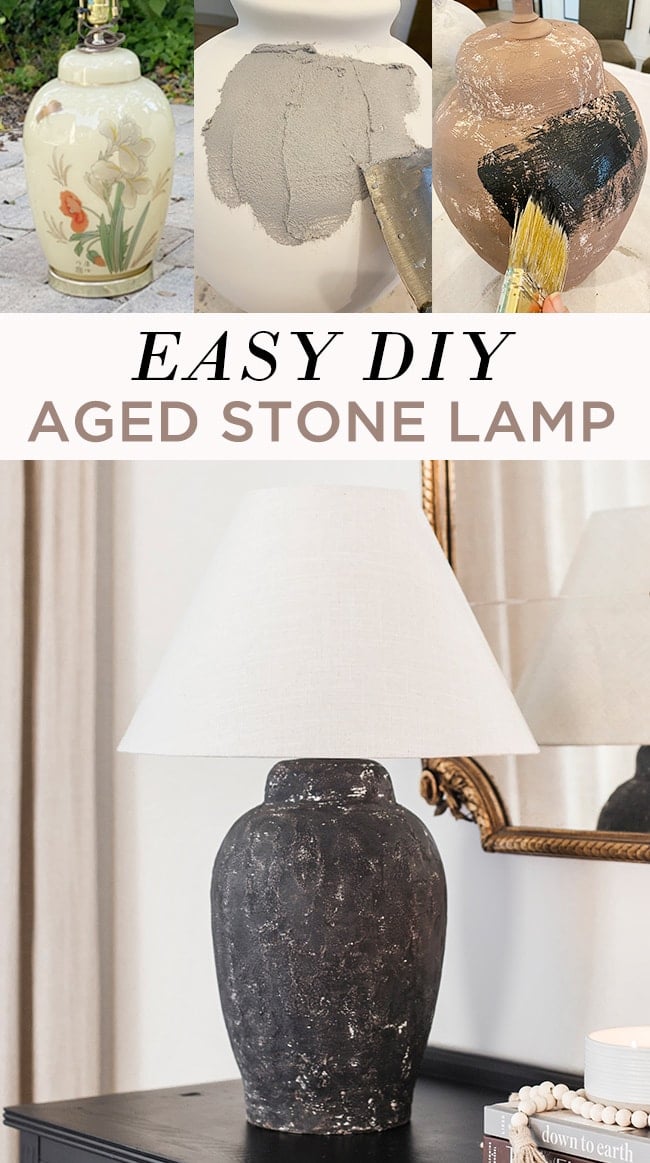
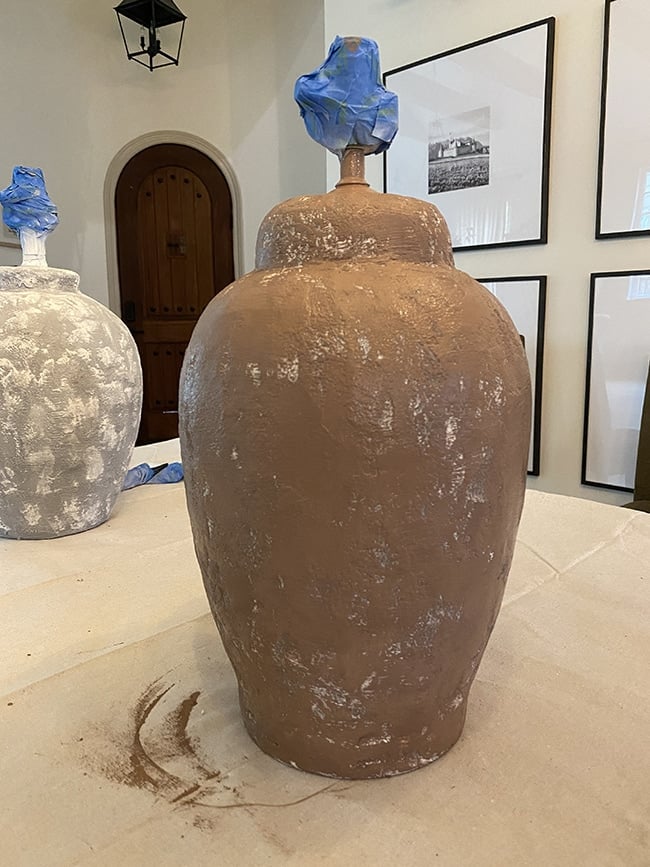
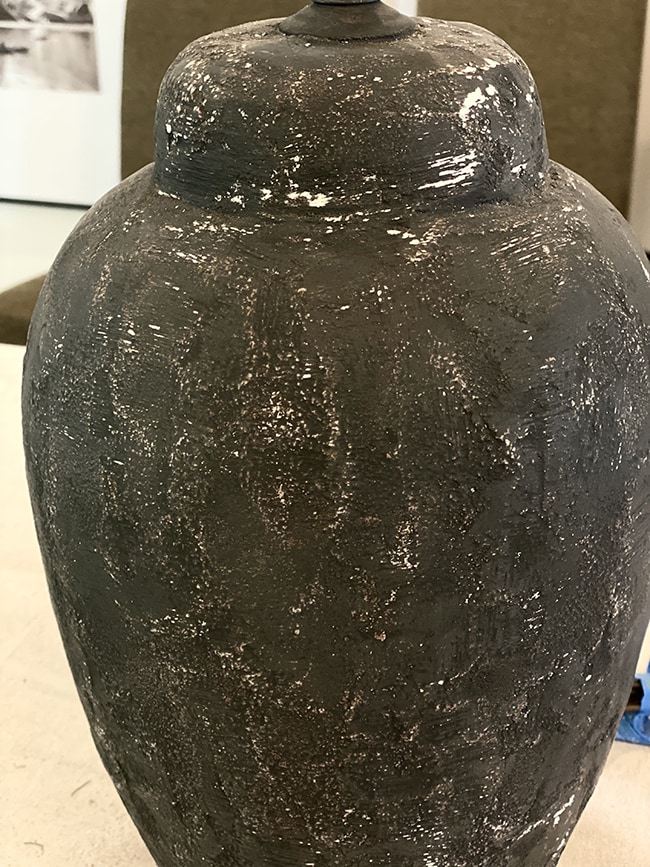
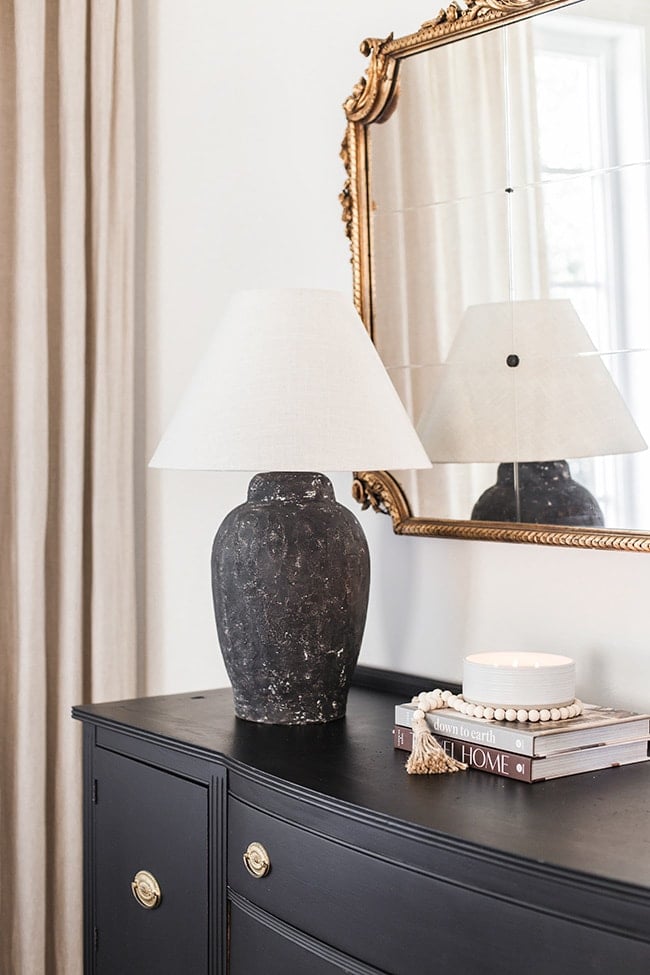
For the black lamp, I wanted a dimensional look, so I mixed up a rusty brown color with random paints (any type of paint will work here).


The fun thing about this project is that there’s no right or wrong. Use any colors you want, and as much or as little as you want!
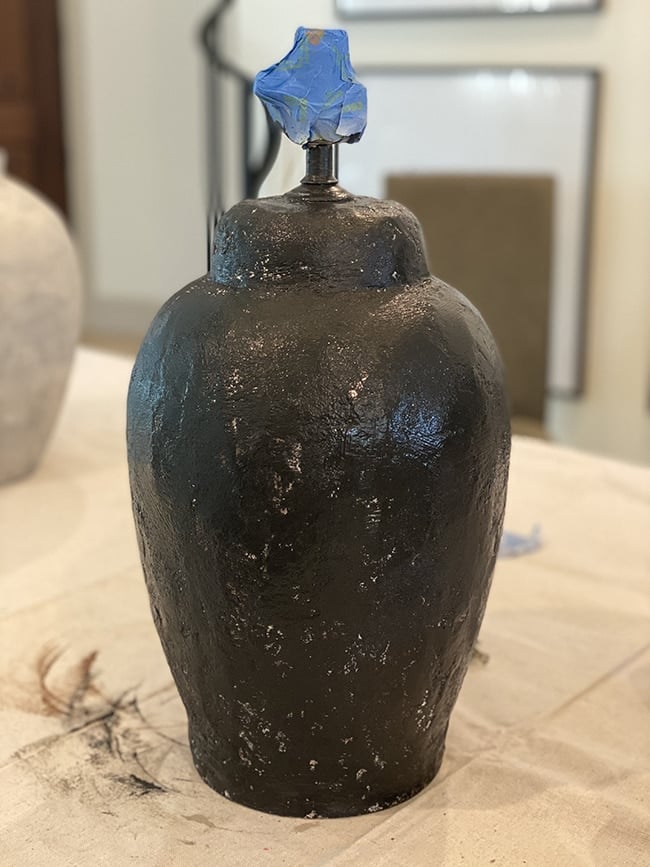
Once the brown paint dried, I gave it a light coat of black—still allowing some of the brown, white and gray to show through.
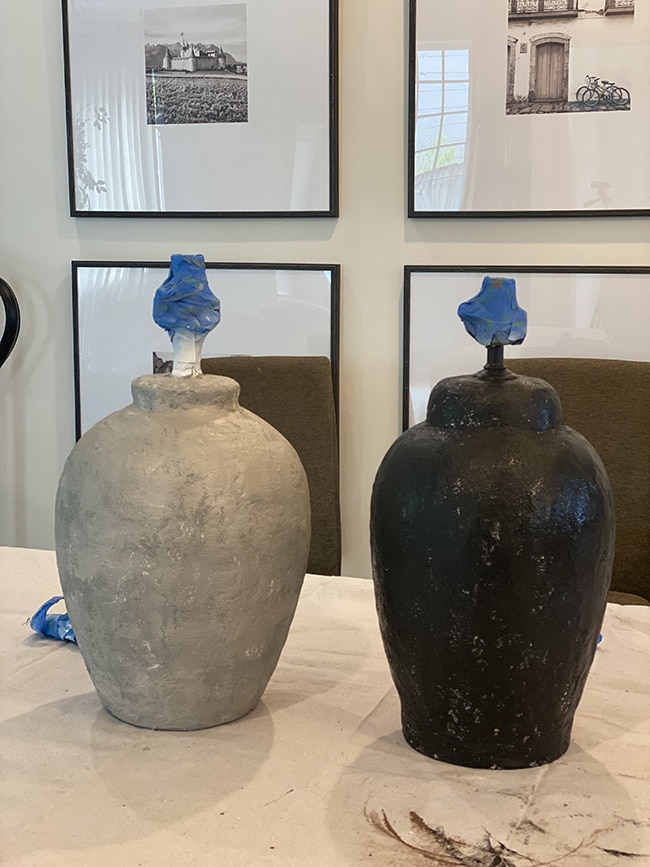
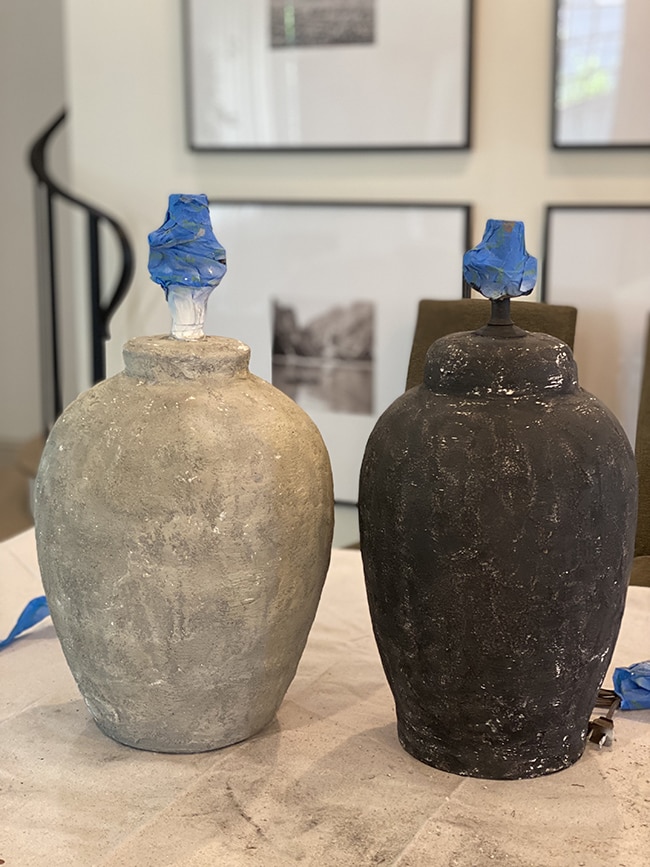
Two different looks, same technique:
Step 7: Sand
Almost done! Now we put the finishing touches on our creations by sanding to reveal the layers underneath.
To keep more of the color you can give it a light sanding, or continue sanding to make it more distressed. Anything goes!
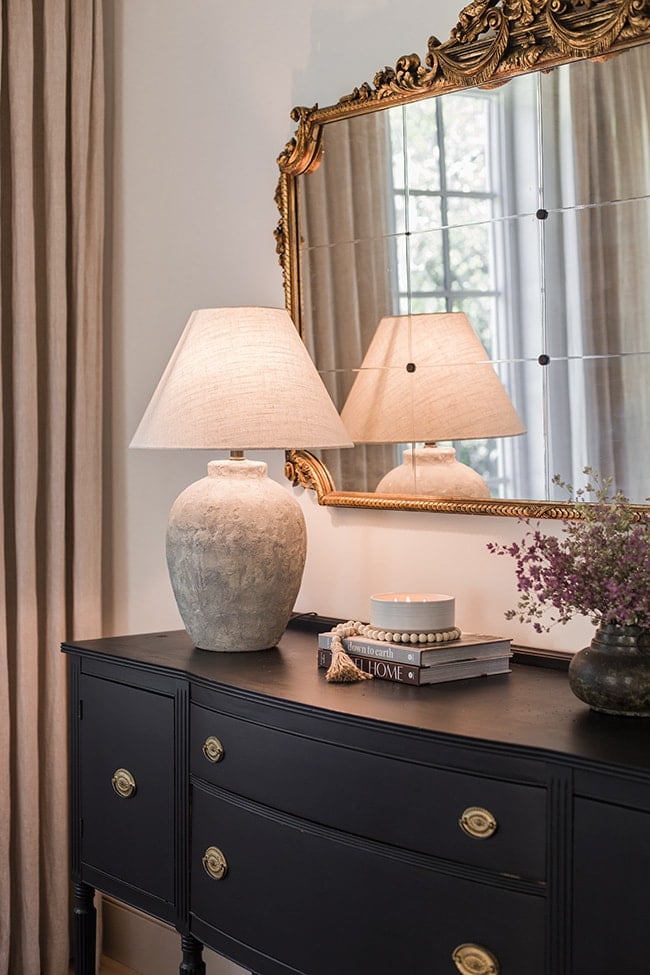
For the gray concrete lamp, I sanded and went over it with a wire brush which gave the unintended but interesting result of burnishing the surface to make it darker.
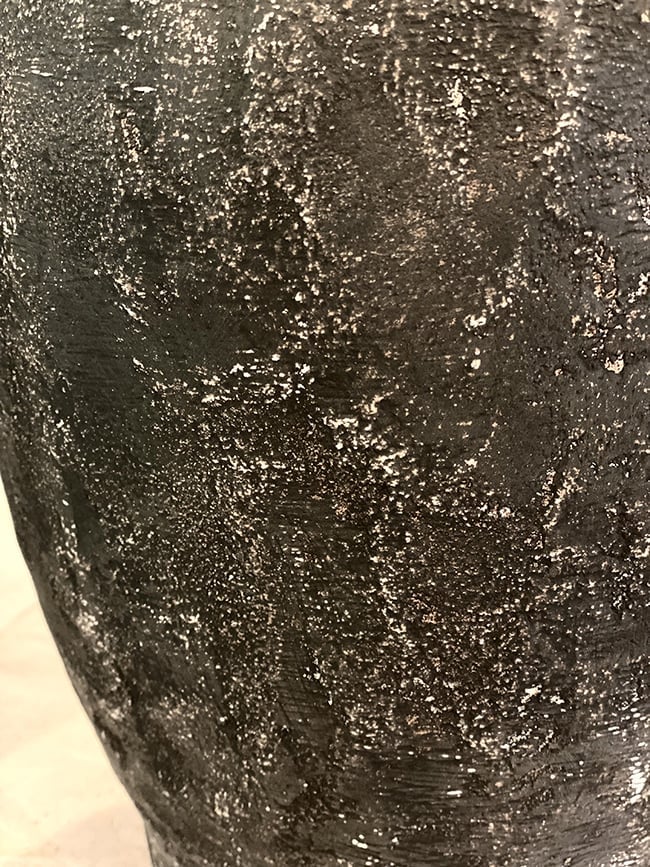
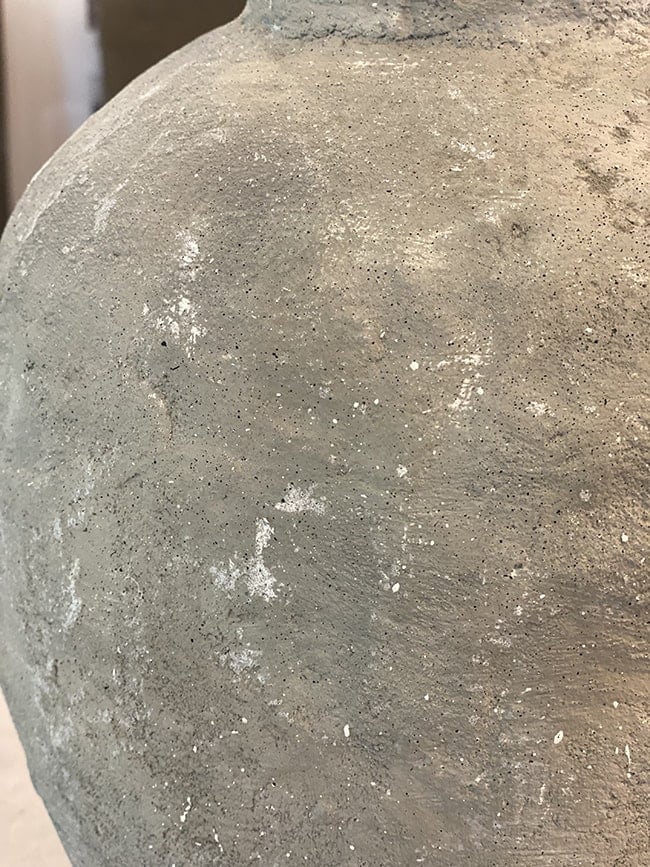
As a final step on this lamp, I dipped my brush in black paint and flicked the bristles to add tiny splatter dots.
I repeated this with white and beige paint, and love the effect! It makes it look porous like real concrete/stone.
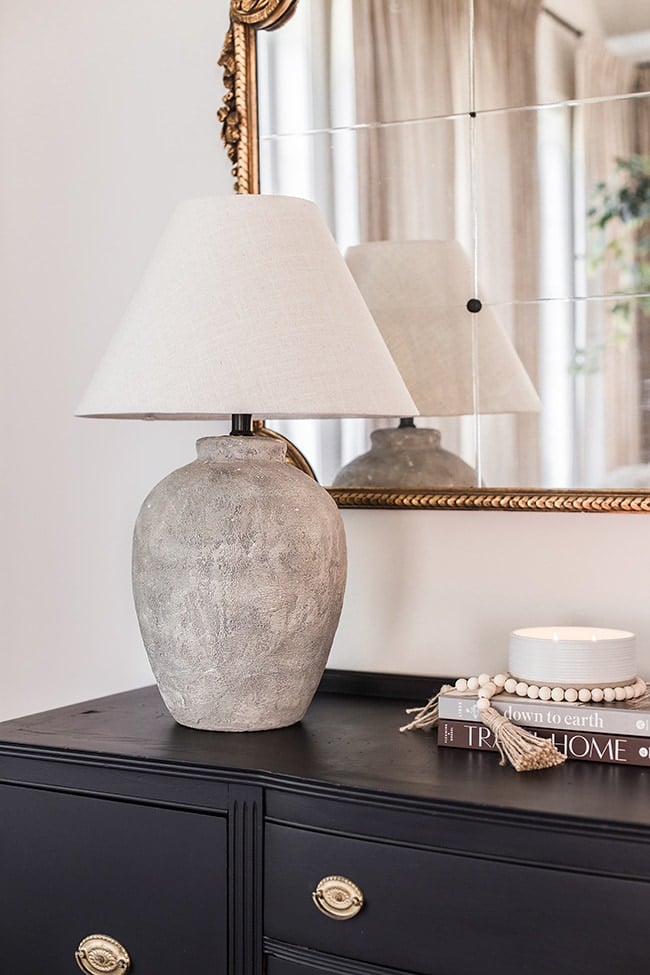
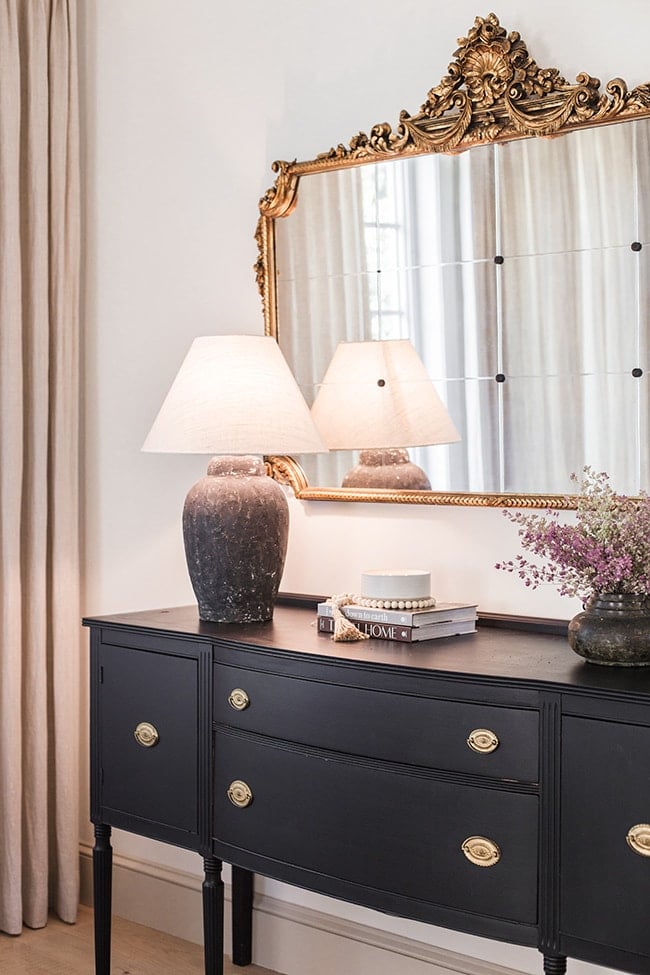
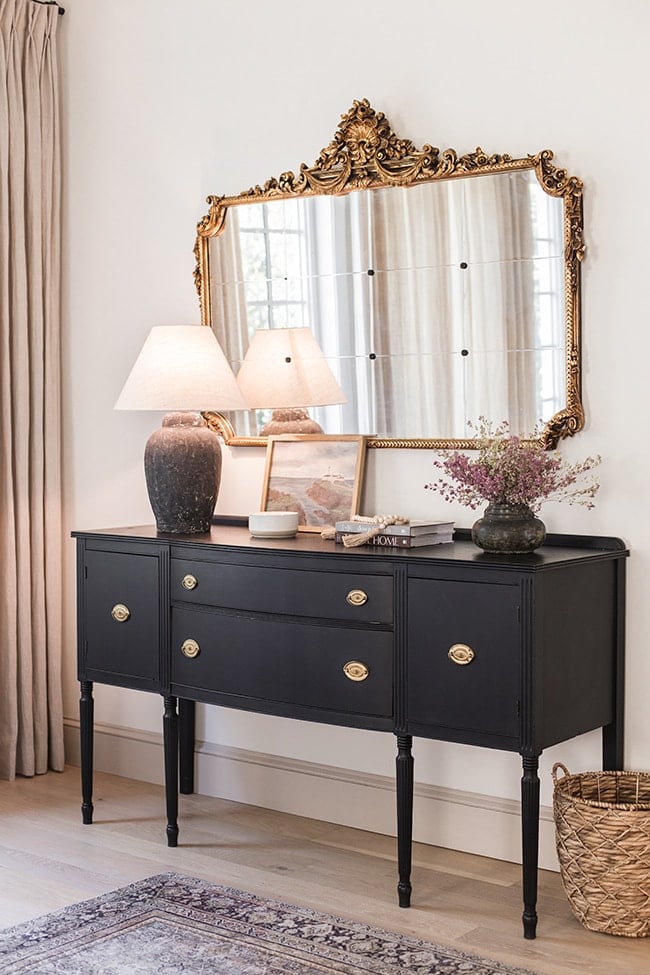
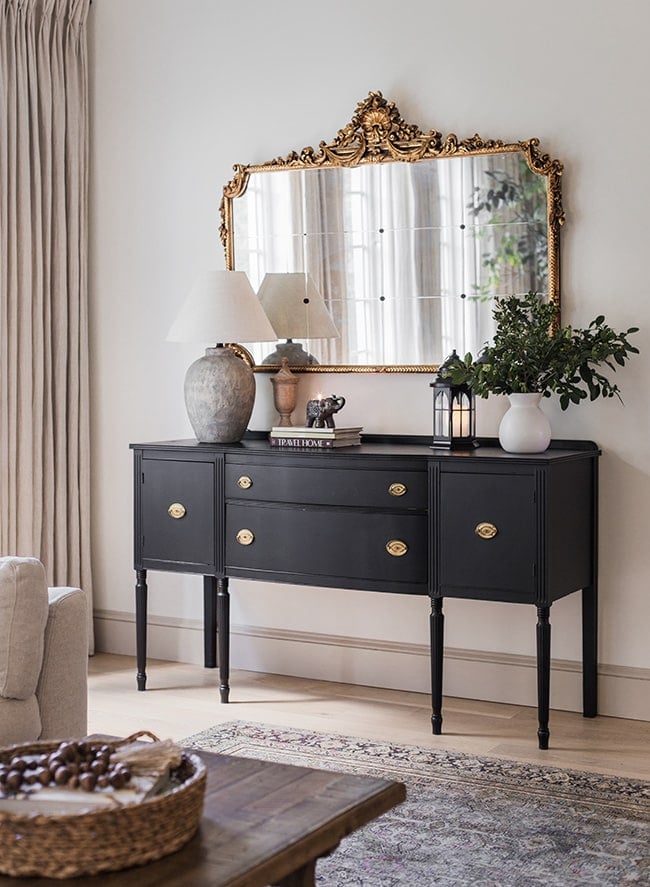
And here they are… just screw a light bulb in, pop a lamp shade on and you’re done!
I think you could put them in a lineup with those $340 lamps and no one would ever know.
Do you have a favorite?
You don’t have to choose—you can make both! And maybe even 50 more for the price of one of those real stone lamps 😉
Honestly, I had so much fun making these that I’d actually pay to spend a weekend making them again. It’s a legitimate hobby.
Who wants to get together and have a lamp glow-up party?
Or maybe I should just retire from blogging and make these all day. Hah!
There are still more aged pottery/stone techniques I want to try out (and I’ll share those results with you when I do!) but I’m definitely adding this one to my DIY arsenal. Have you tried a similar project?
If you like this project, check out these similar beginner DIYs from my Project Library!
- Faux stone planters
- DIY Hypertufa ‘Stone’ Planter
- How to realistically age wood (the easy way!)
- How to make anything ‘antique’ brass


Sara Garner says
I have been following this tutorial step by step and I’m so excited with how it’s turning out! I’m at the painting stage now and I’m totally gun shy. Trying to get the same earthy colors as the Decker lamp – do you have any recommendations for colors to achieve this?!
Jenna Sue says
Hi Sara, I’d just try a variety of warm browns and tans and mix until you get your desired colors!
Oriental Lamps says
Nice thought and images!
Carolyn Kellam says
Beautiful! Just like everything else you do! My favorite is the lighter one! You are amazing, truly!
Jenna Sue says
You are too kind to say that, thank you Carolyn!
Oriental Lamps says
What a unique project. great idea!
Kristen says
So glad you did this! I picked up the same lamp from Walmart 3 weeks ago & have been too scared to try it.
Do you have a link for the shade you show?
Jenna Sue says
I promise it’t not scary at all — you’ll LOVE the results! I linked the lamp shade I found at Walmart in the beginning of the post 🙂
Kathryn says
Inspired!! Thanks!
Jenna Sue says
Thank you Kathryn!
Sam says
They came out great! Where did you purchase the lamp shades?
Jenna Sue says
Thanks Sam! I linked the lamp shade I found at Walmart in the beginning of the post 🙂
Penny (jewelonthehill Instagram) says
They turned out fantastic! I think even I can handle that DYI.
Jenna Sue says
You absolutely can, I promise you can’t mess this one up! And it’s a ton of fun too. Give it a shot and let me know how it goes 😀
catherine says
très jolie idée! my favorite is the black one, so cute!
have a good day
catherine
Jenna Sue says
Thanks Catherine! So glad you like how they turned out 🙂