Love the look of reeded glass for your windows or doors, but not the hassle and expense of replacing the glass? I found a quick and inexpensive solution that looks like the real deal! This method can be used to add elegance and privacy to any window, door or glass cabinet in your home.
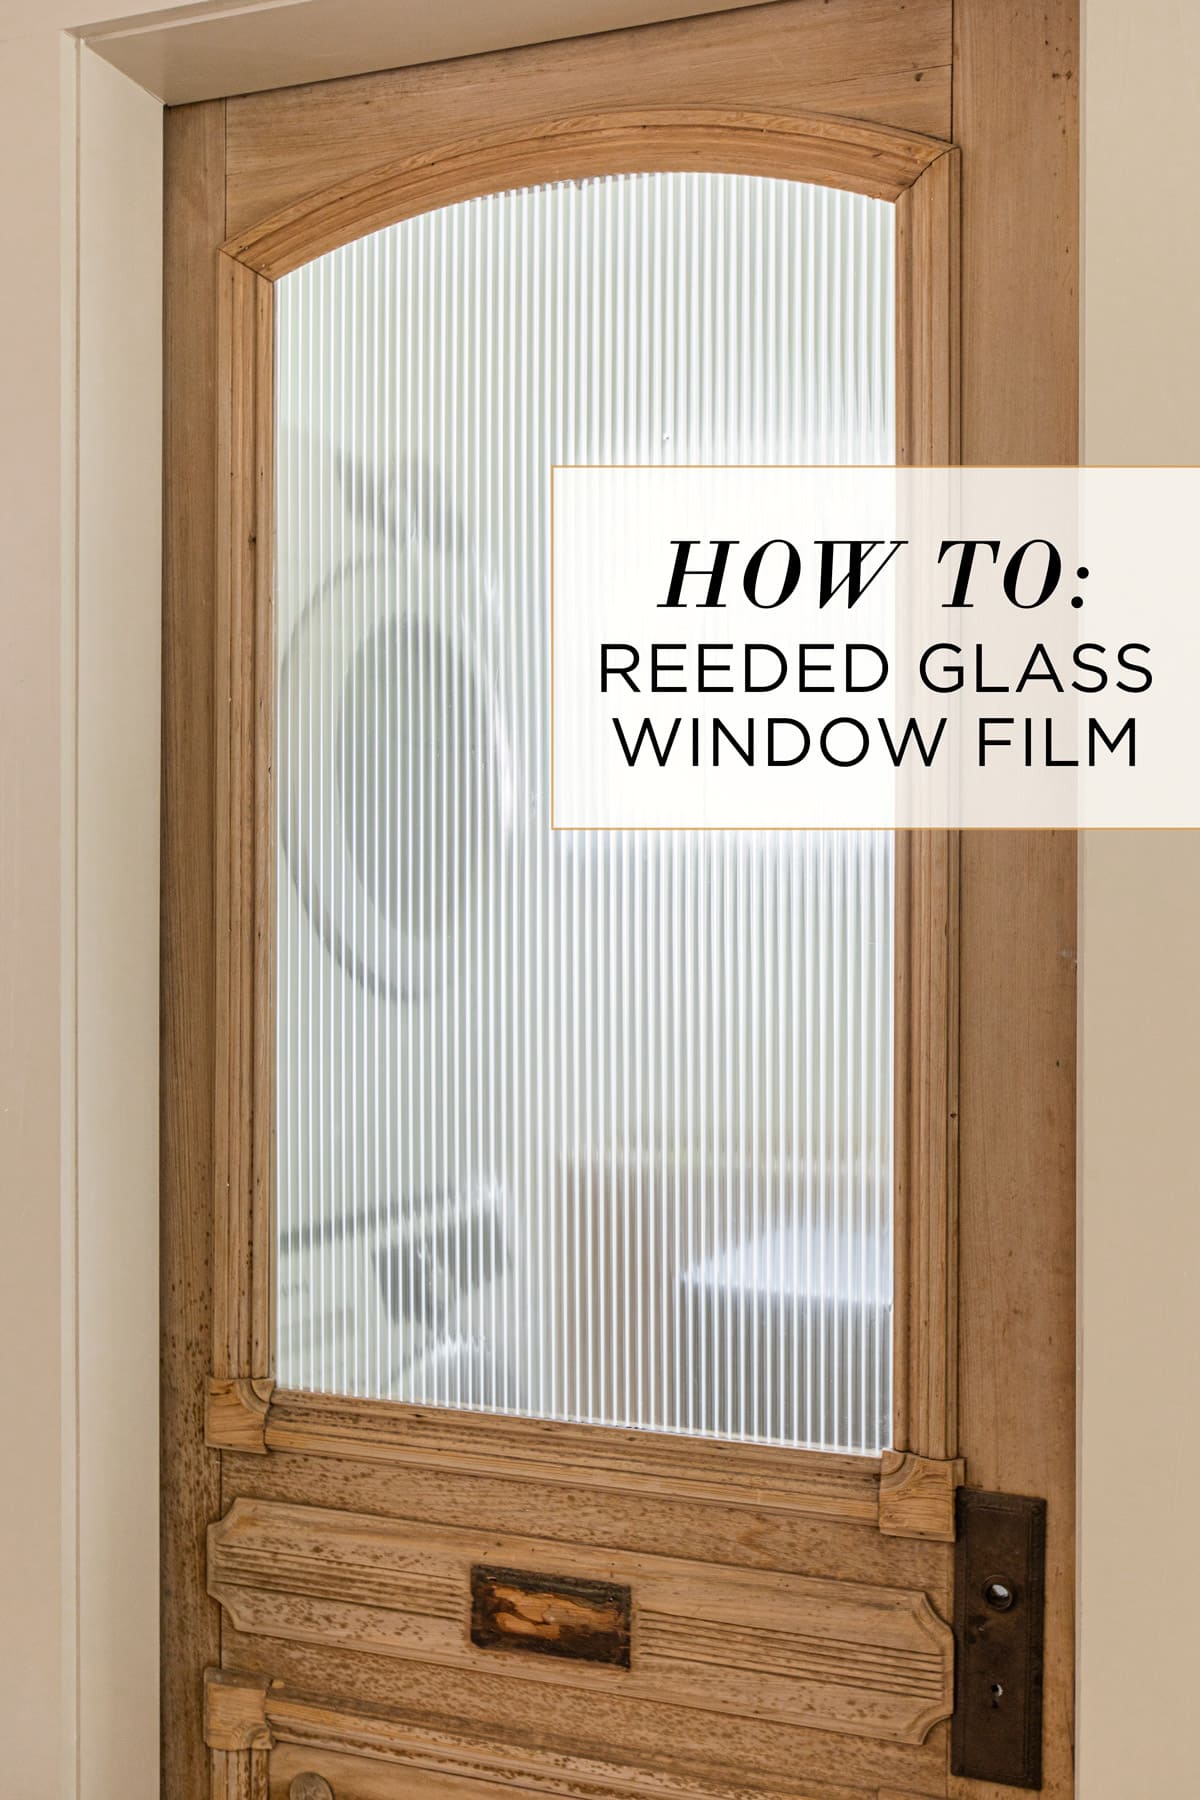
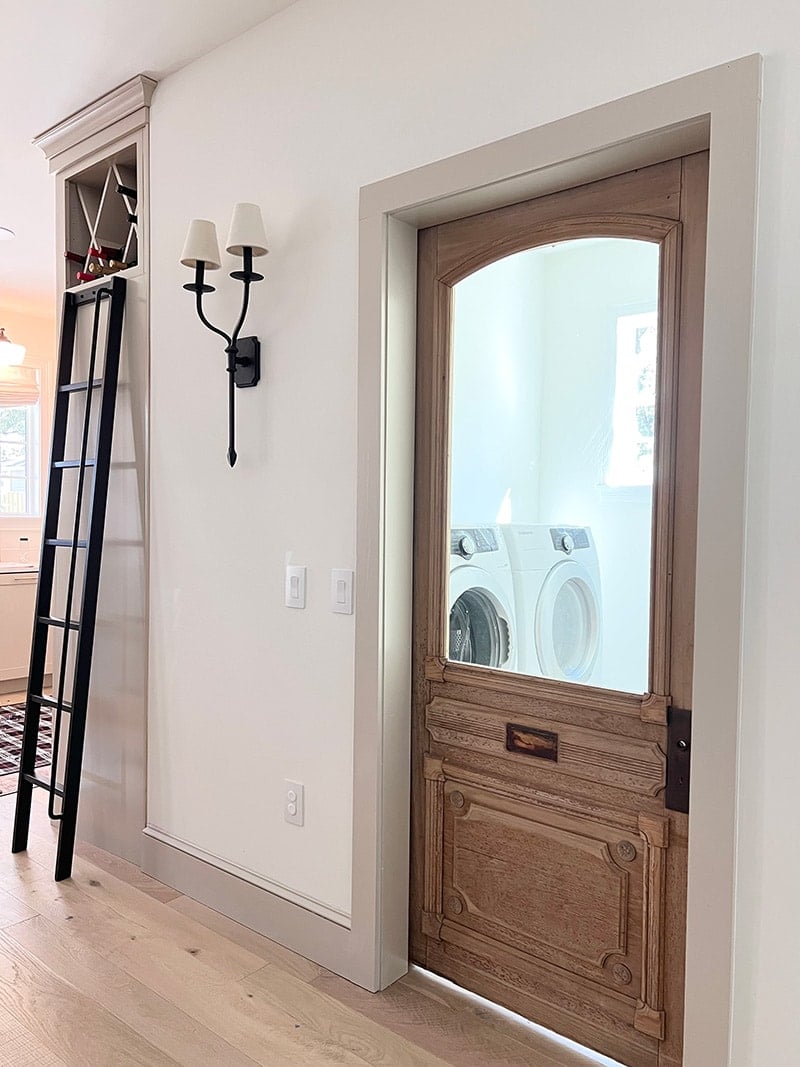
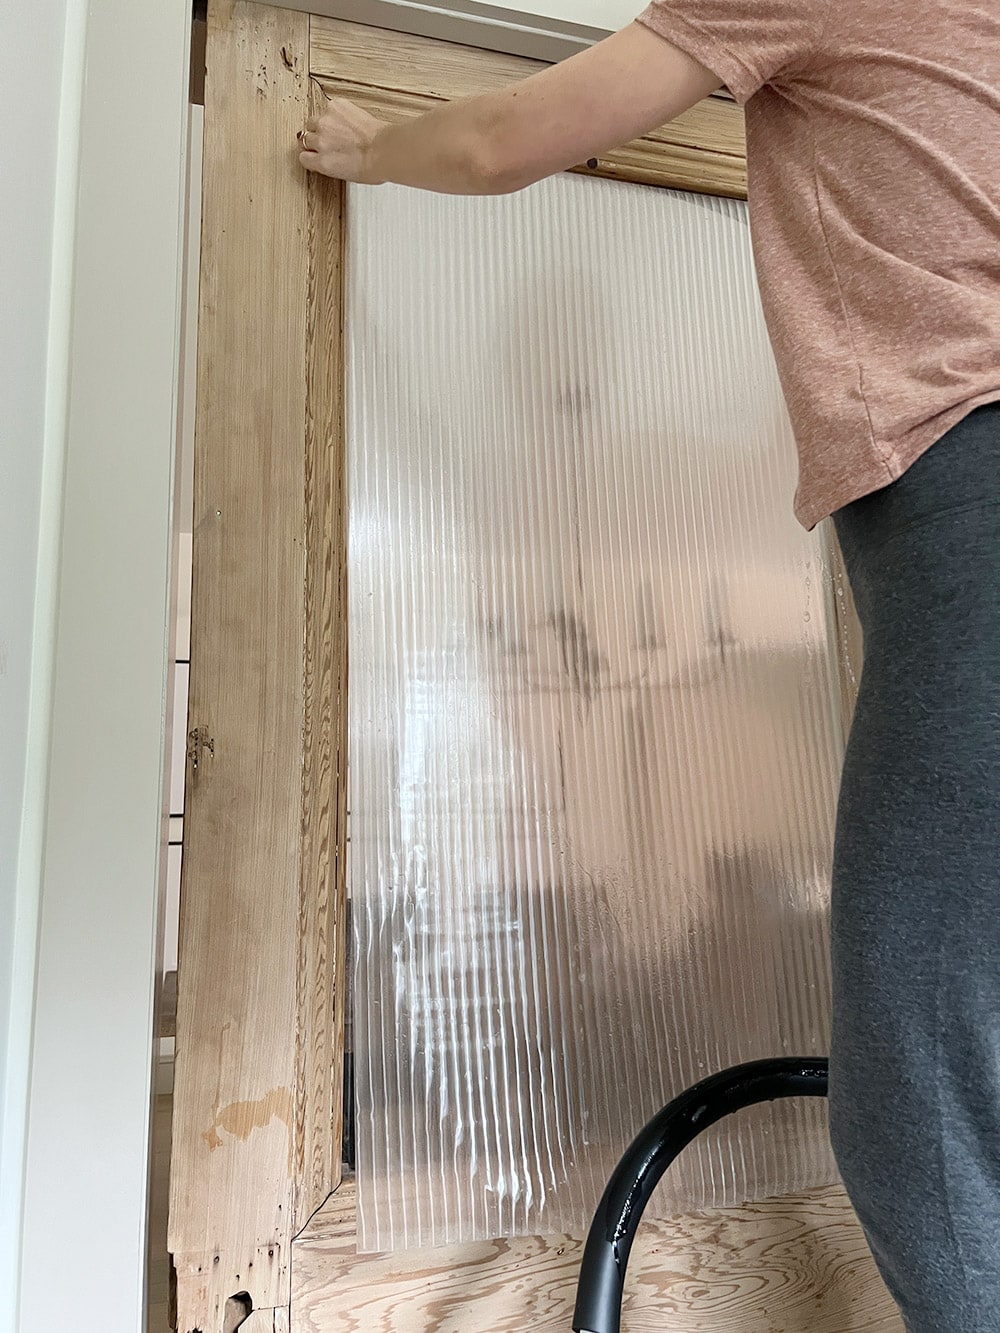
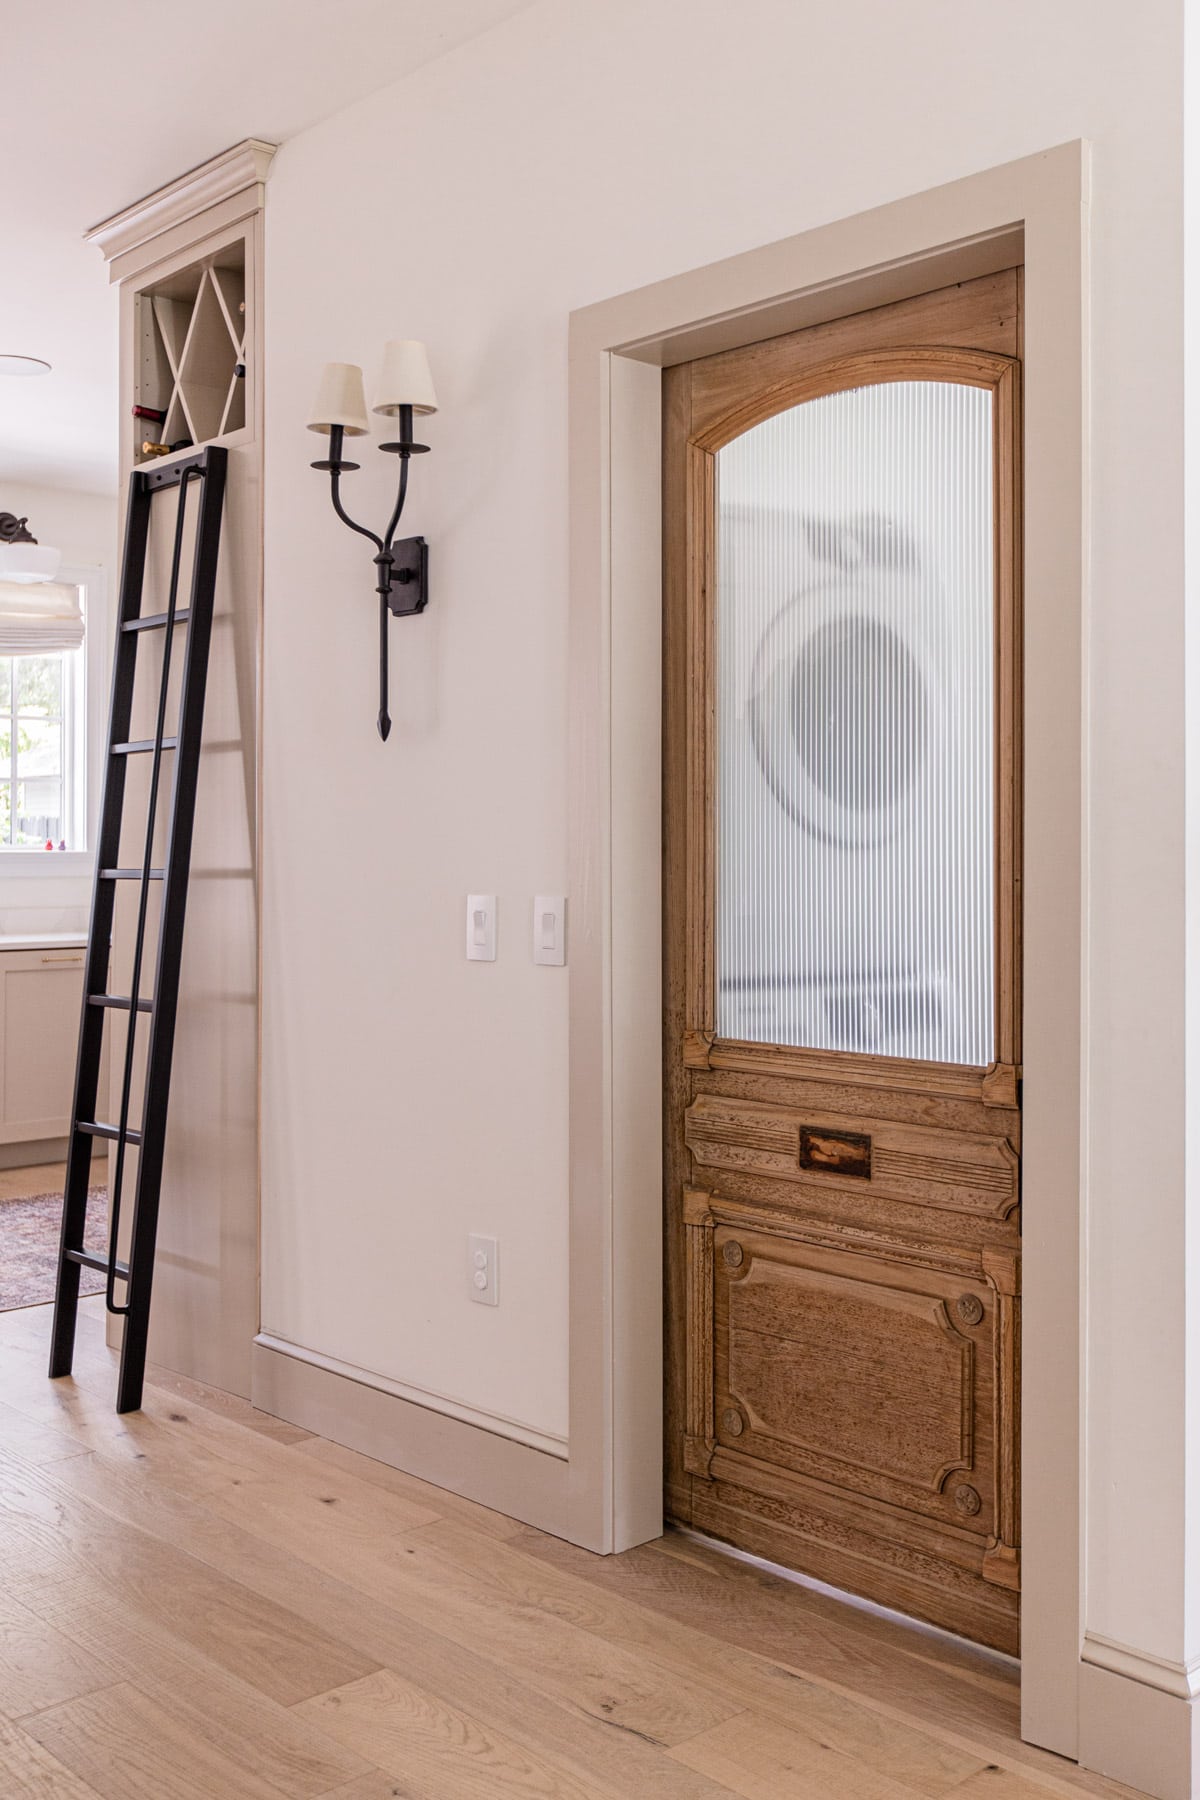
I bought this vintage glass door at a salvage store before we even built our home, and thought it would make the perfect sliding laundry room door. Our laundry room is in a very visible area, just off the dining room, and has been quite the eyesore during this extended renovation.
I was saving this project for the end, but decided I couldn’t live with the sight of the mess another day. I wish I wouldn’t have waited at all—this DIY took was less than $30 and took under 30 minutes!
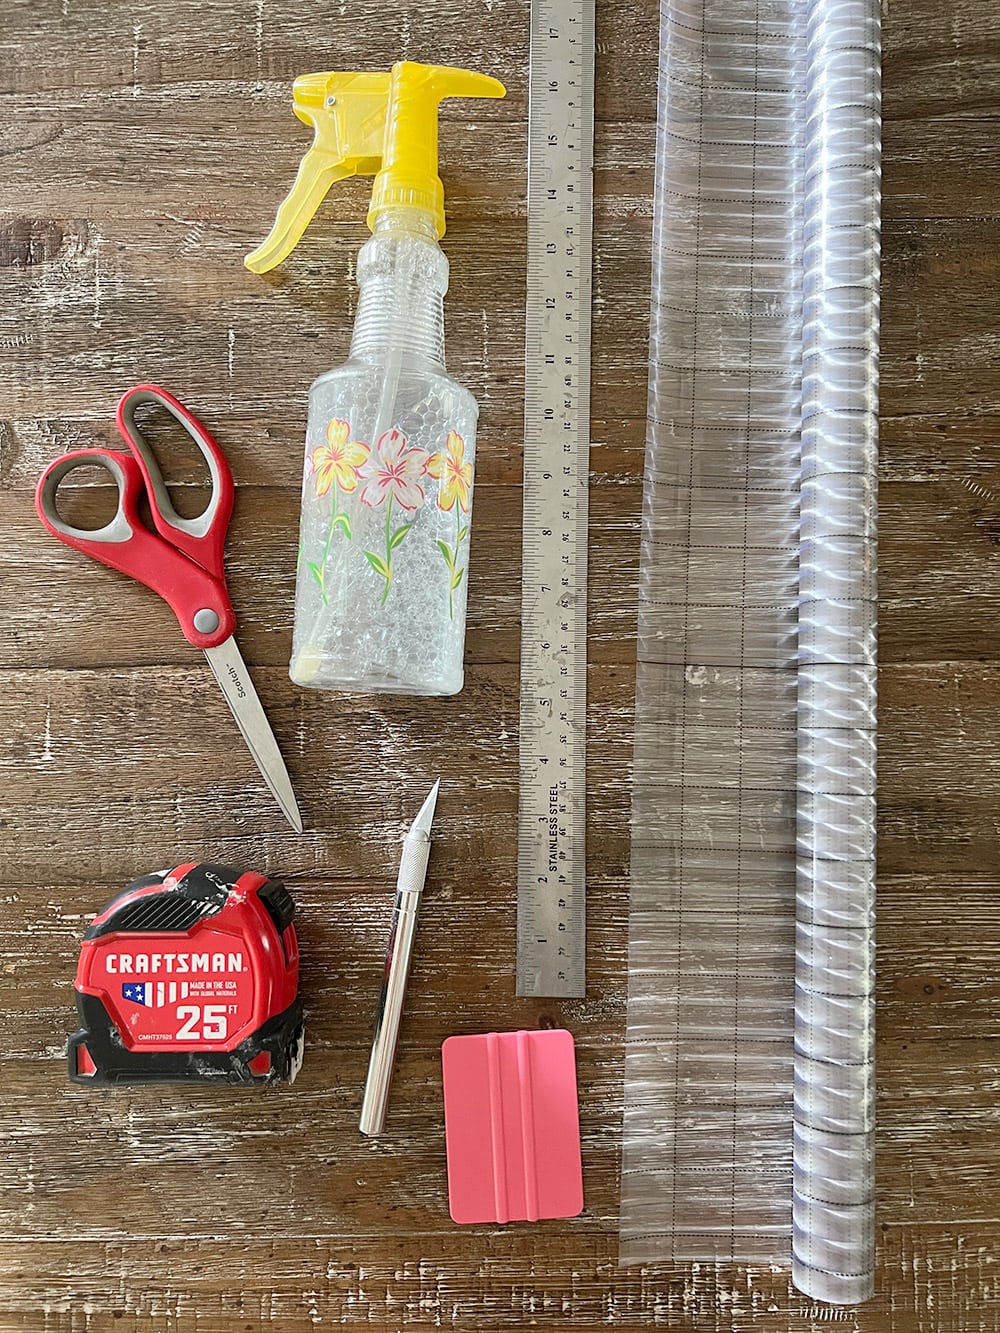
Supplies
- Roll of reeded glass film
- Utility knife
- Plastic card (or this kit!)
- Spray bottle with soapy water
- Ruler/straight edge
- Scissors
- Tape measure
How to apply glass window film
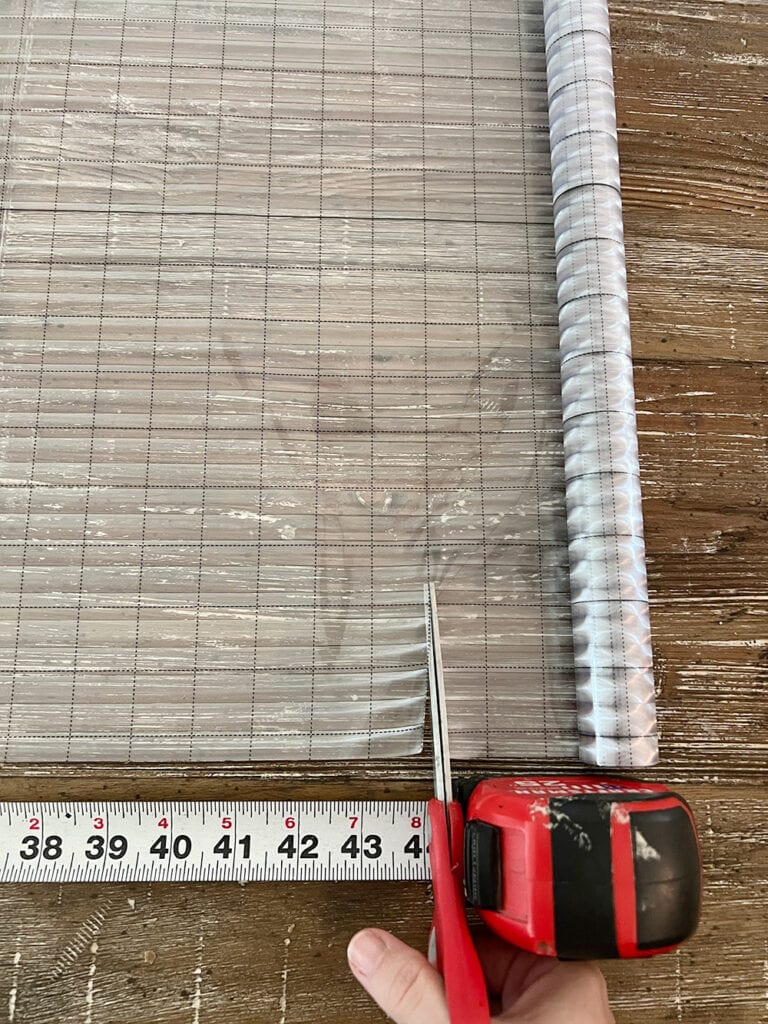
Step 1: Measure and cut
First, measure the size of your glass. Unroll your window film and cut the length and width approximately 1″ larger on each side. The backing on this film has a grid with dotted lines, which makes it so easy to cut straight lines!

Step 2: Wet the film and window
Peel the backing off of the window film, taking care to keep the surface clean.
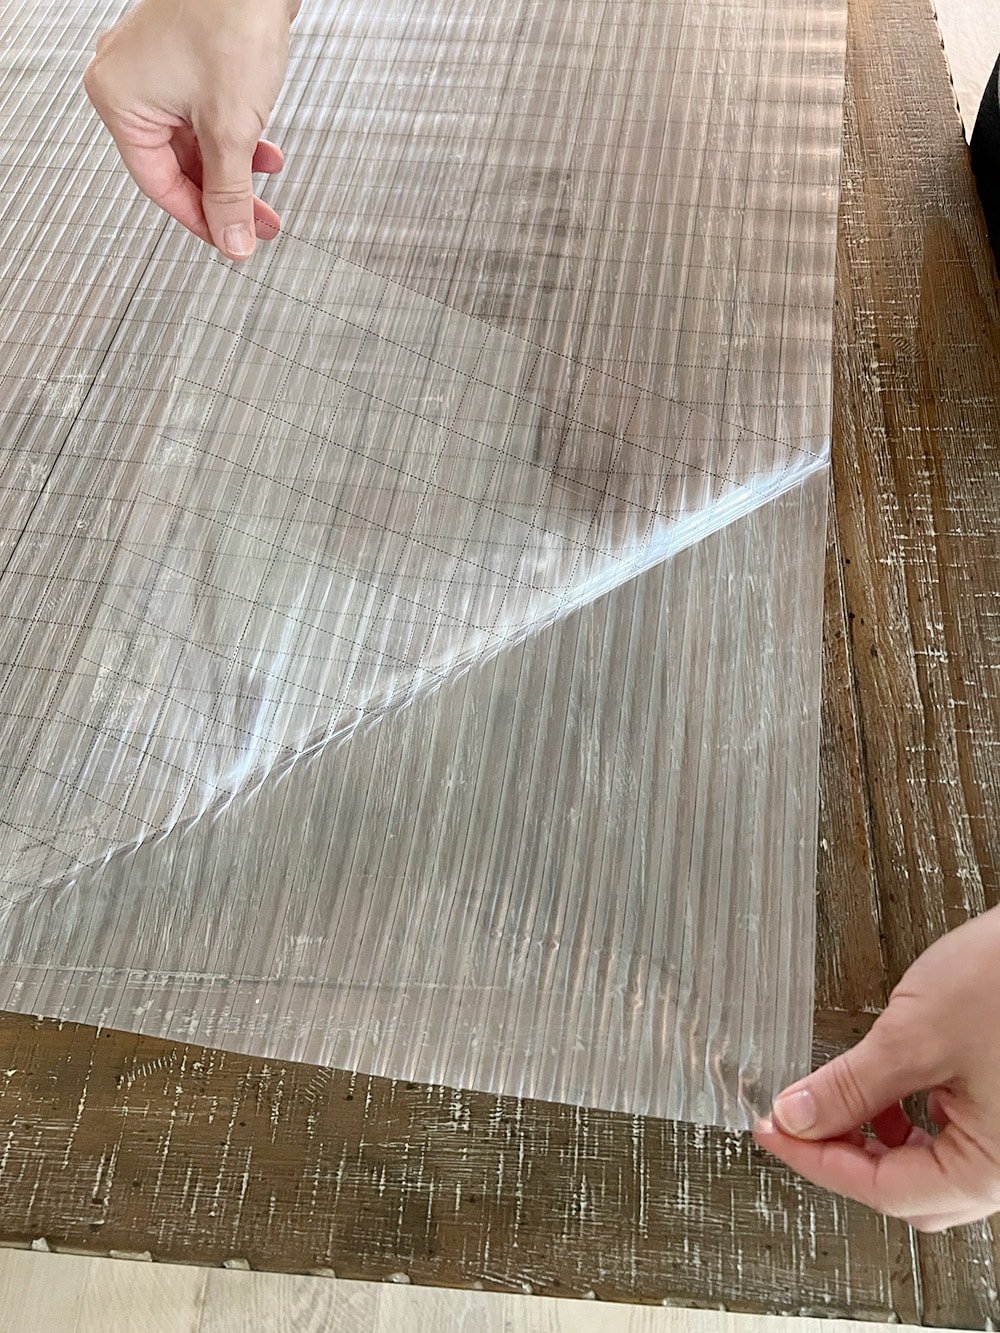
Spray both the film and the door with the soapy water mix. You only need a drop of soap to help the film easily slide into place. Make sure to fully saturate both surfaces—wetter is better!
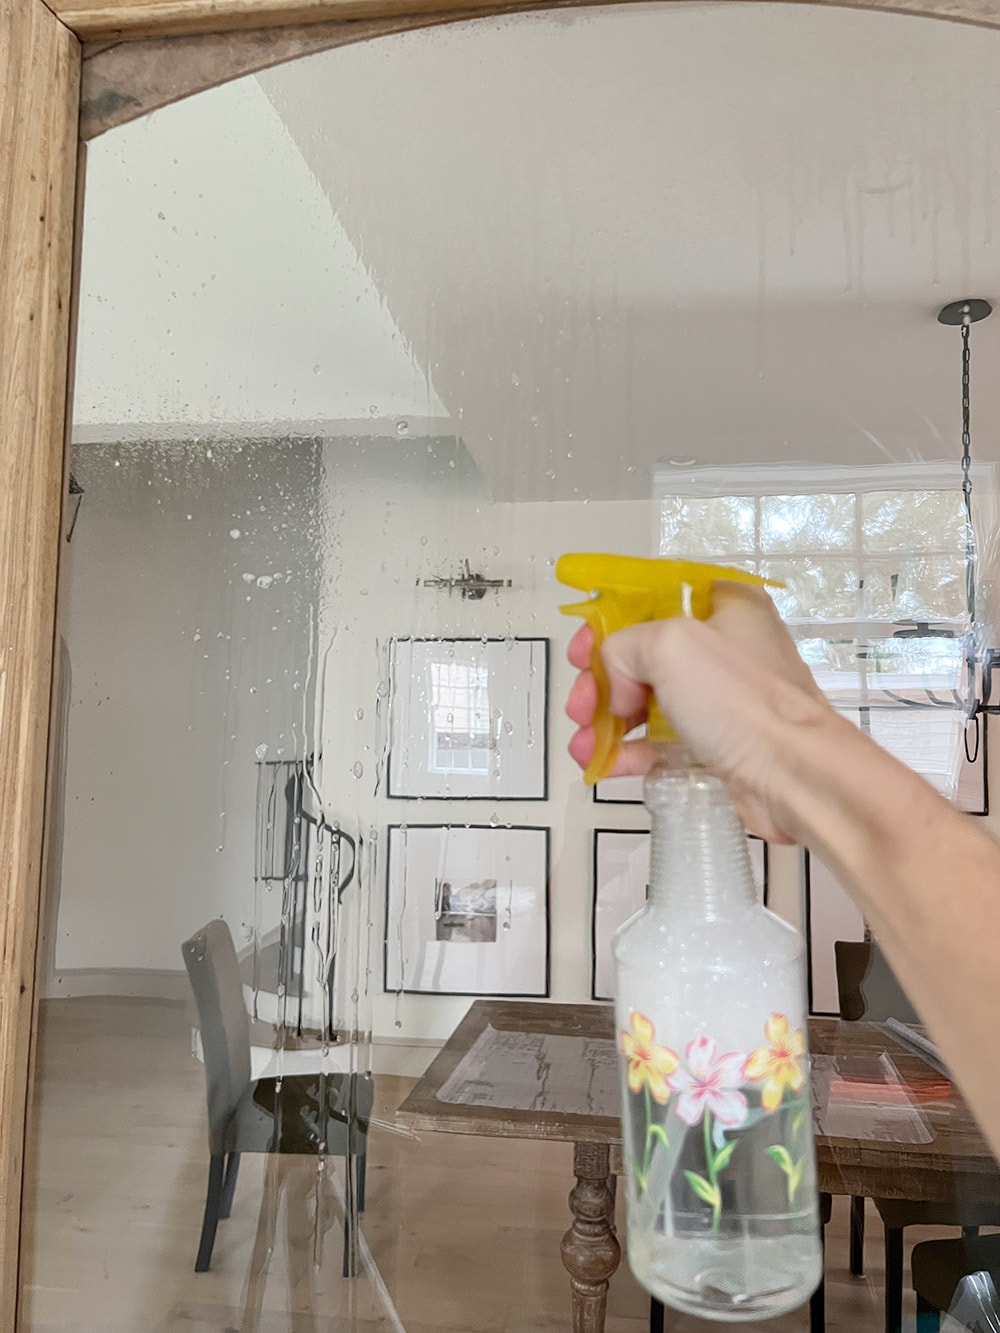
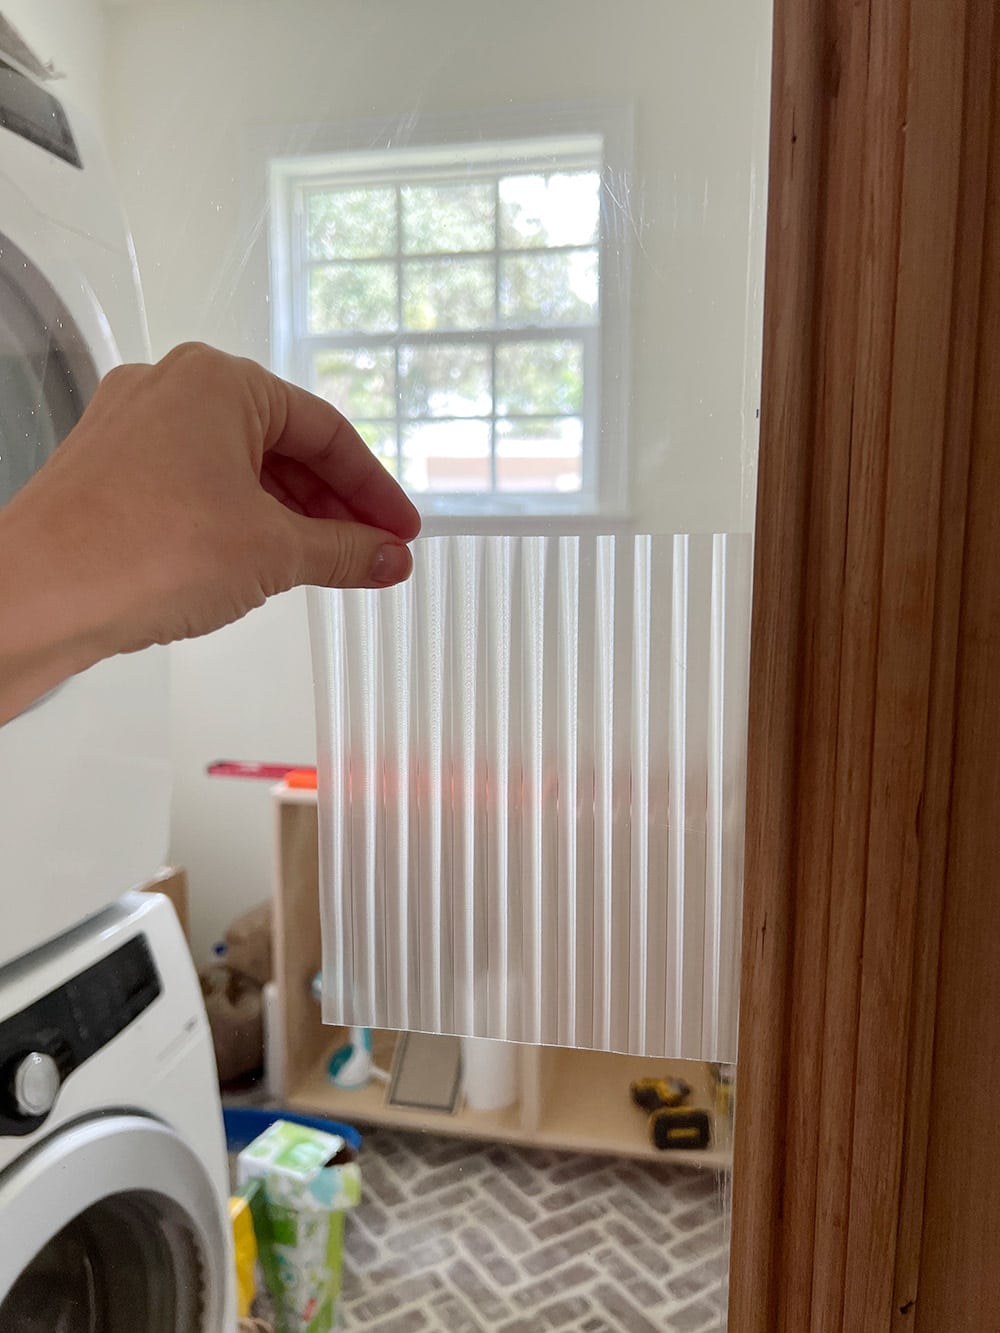
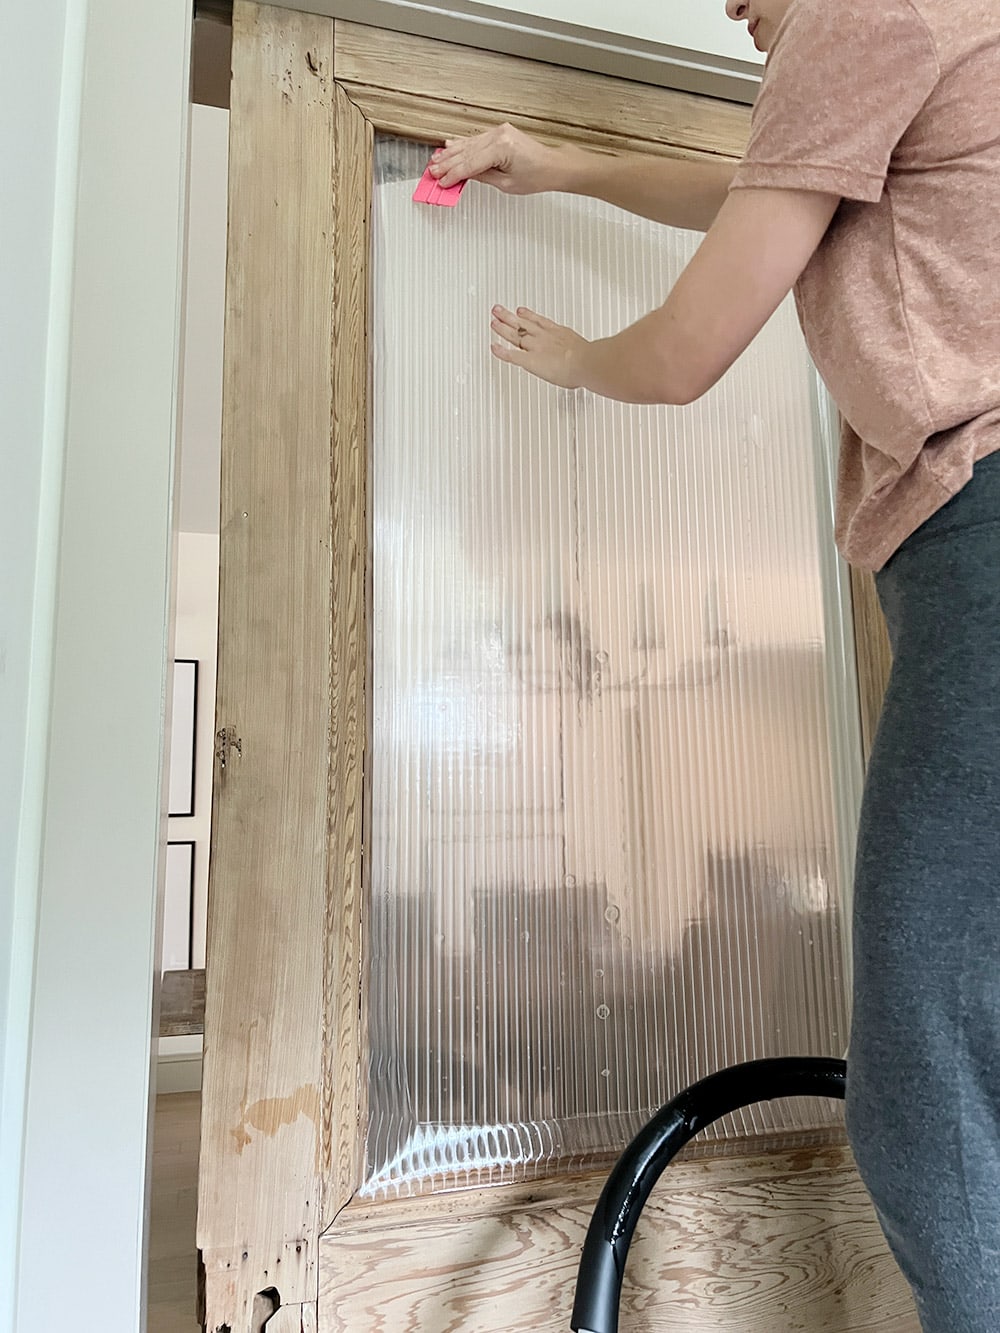
Step 3: Align film and smooth out bubbles
Align the window film to the back of the glass. I chose to line mine up along the top edge to ensure the pattern was perfectly straight. You can easily reposition it until it’s perfect.
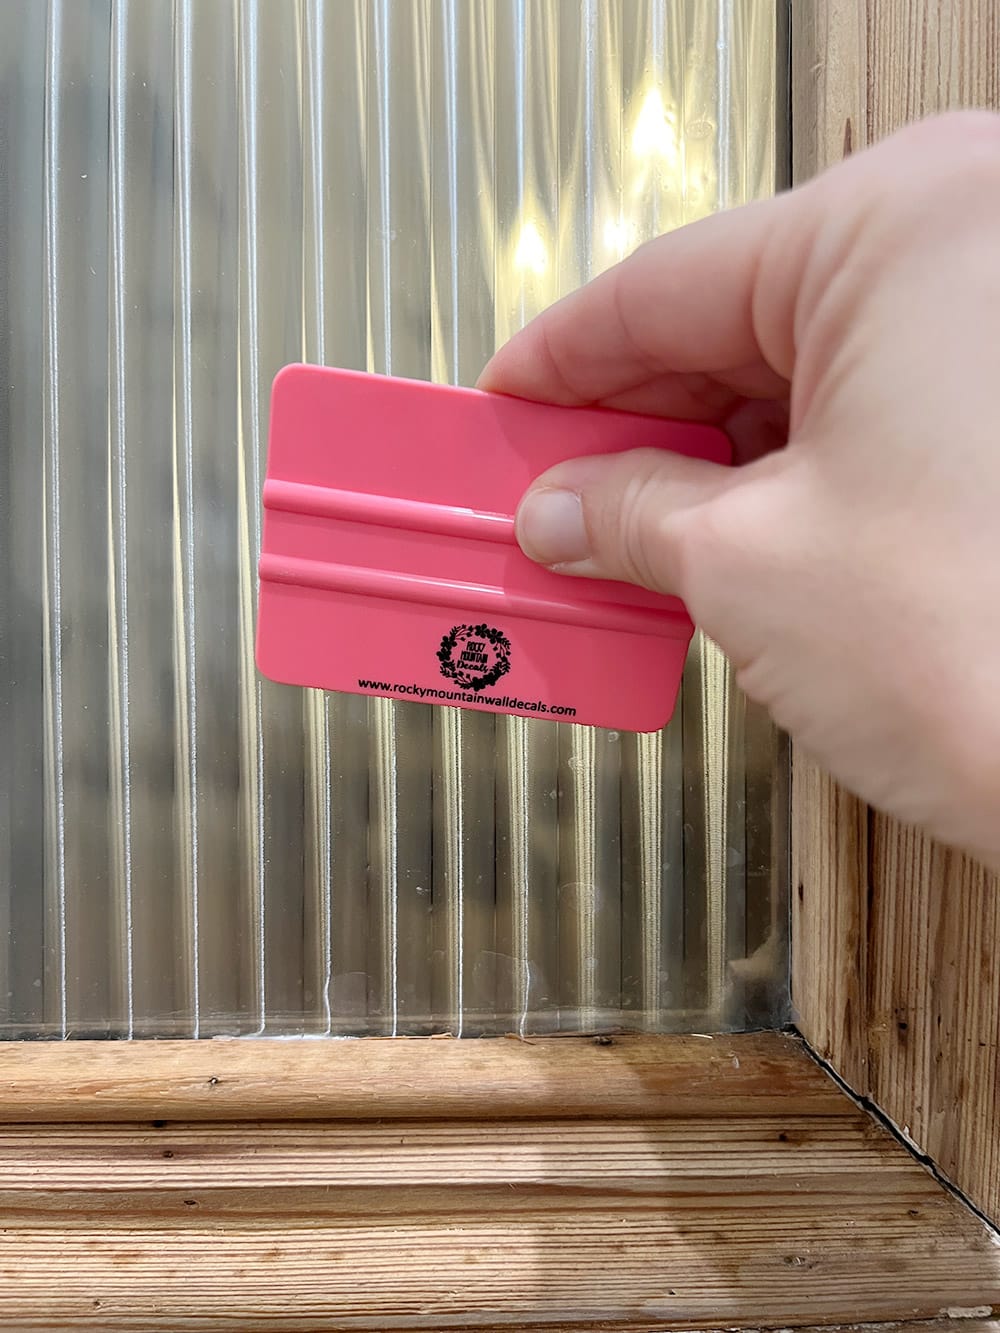
Take your plastic card and smooth all of the bubbles outwards, to the edge of film on each side.
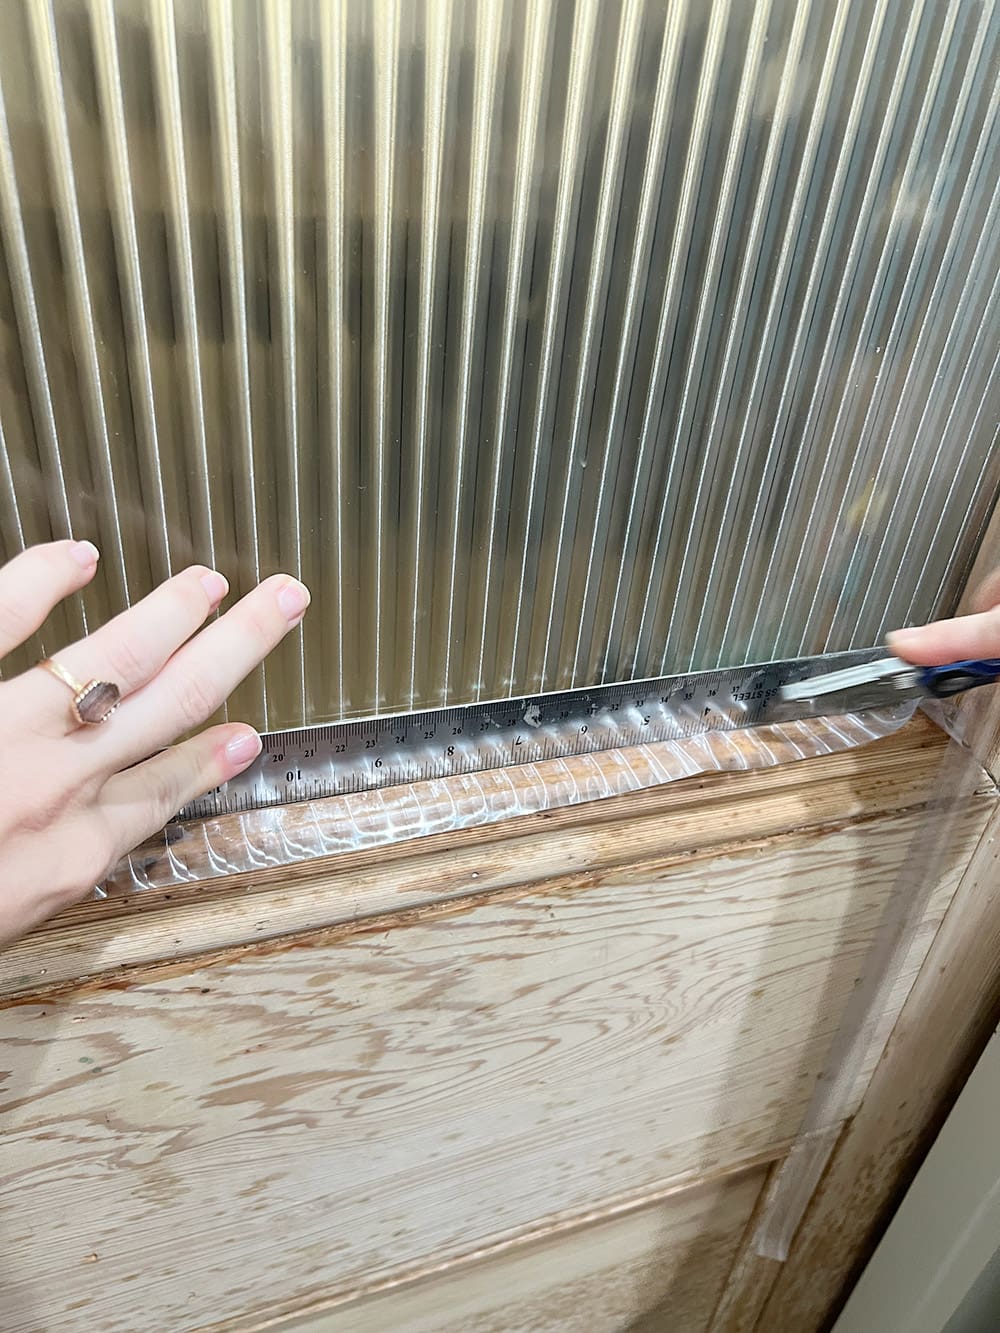
Step 4: Trim excess film
Using a ruler/straight edge and a utility knife, carefully cut along the edges. It’s important to use a brand new sharp blade to easily cut through the film. It may be helpful to leave a 1/16″ gap to allow any trapped water to escape.
Finally, take your plastic card and smooth out any remaining bubbles.
And that’s it—you’re done!
The Reveal
I’m so pleased with the way this turned out, especially with such minimal effort and cost.
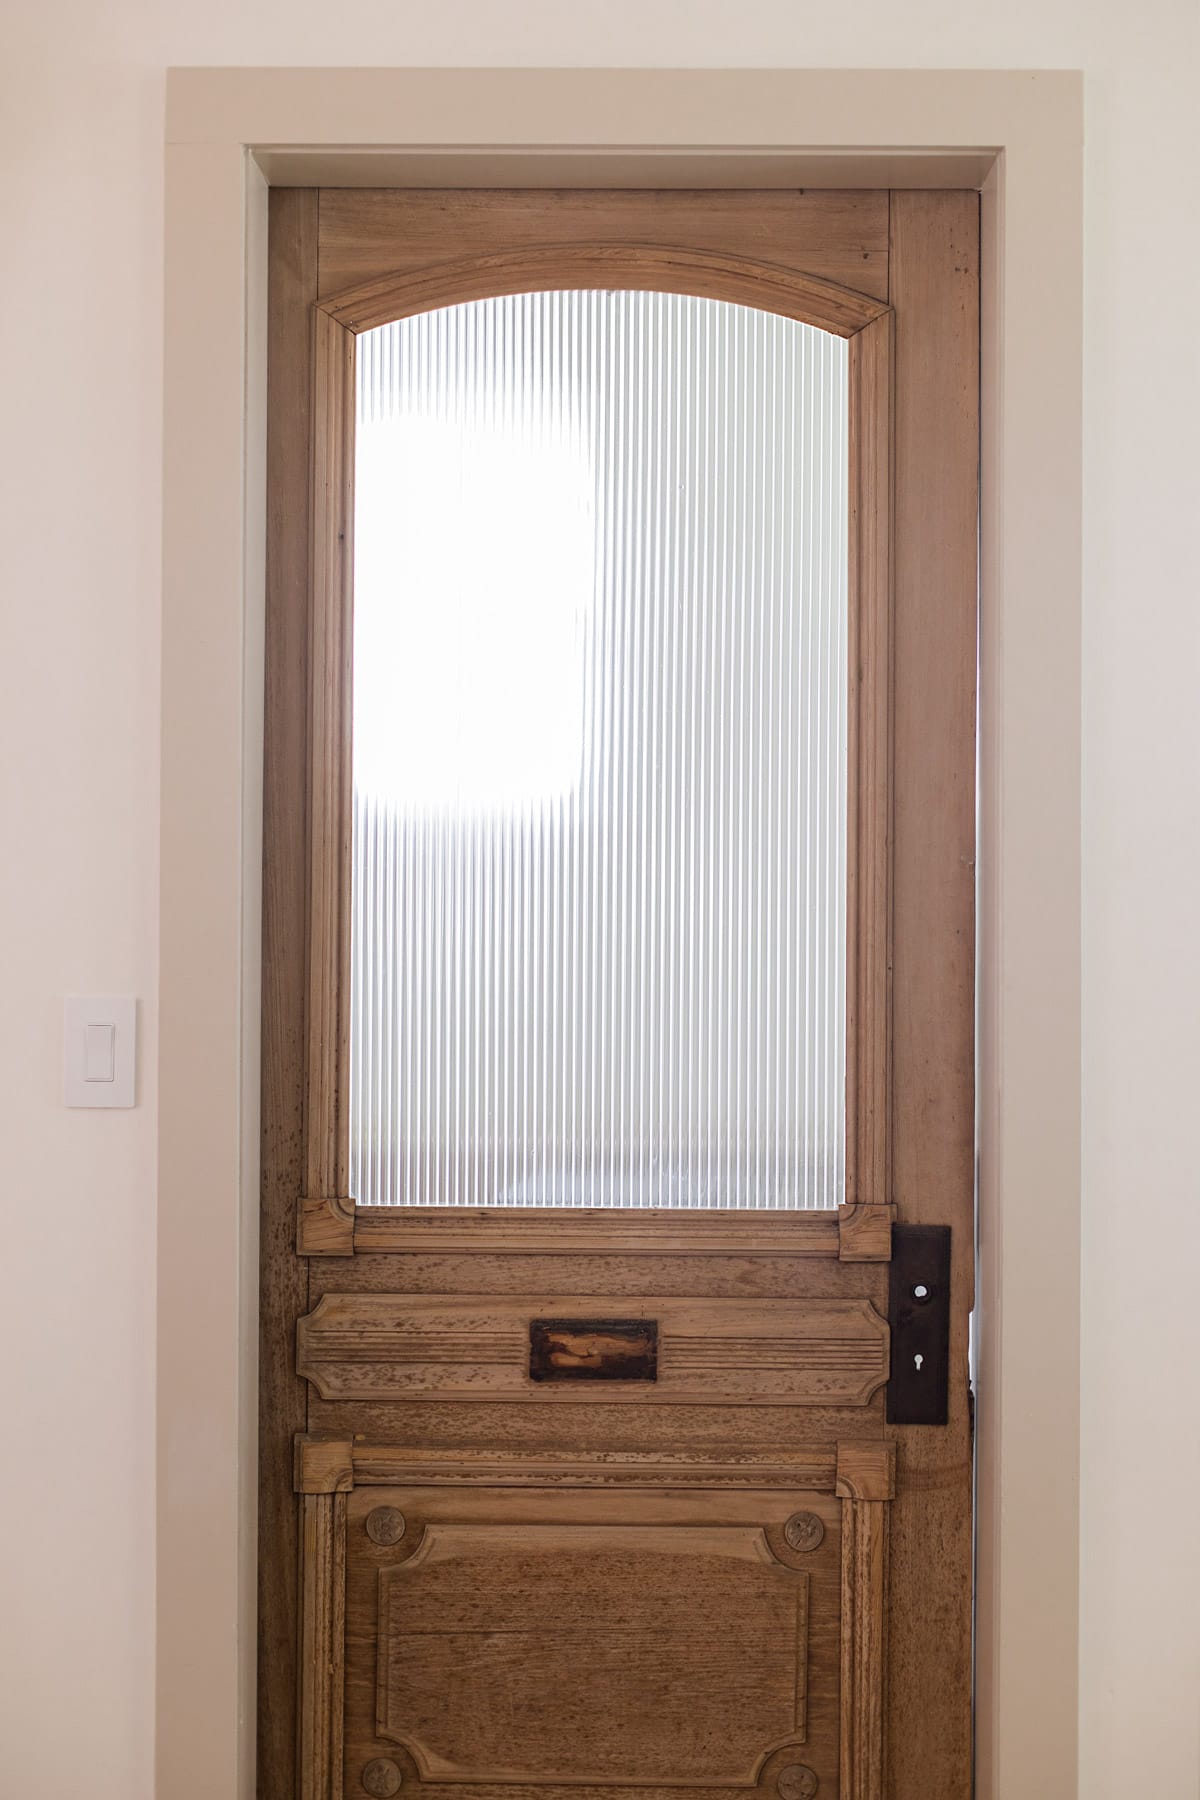
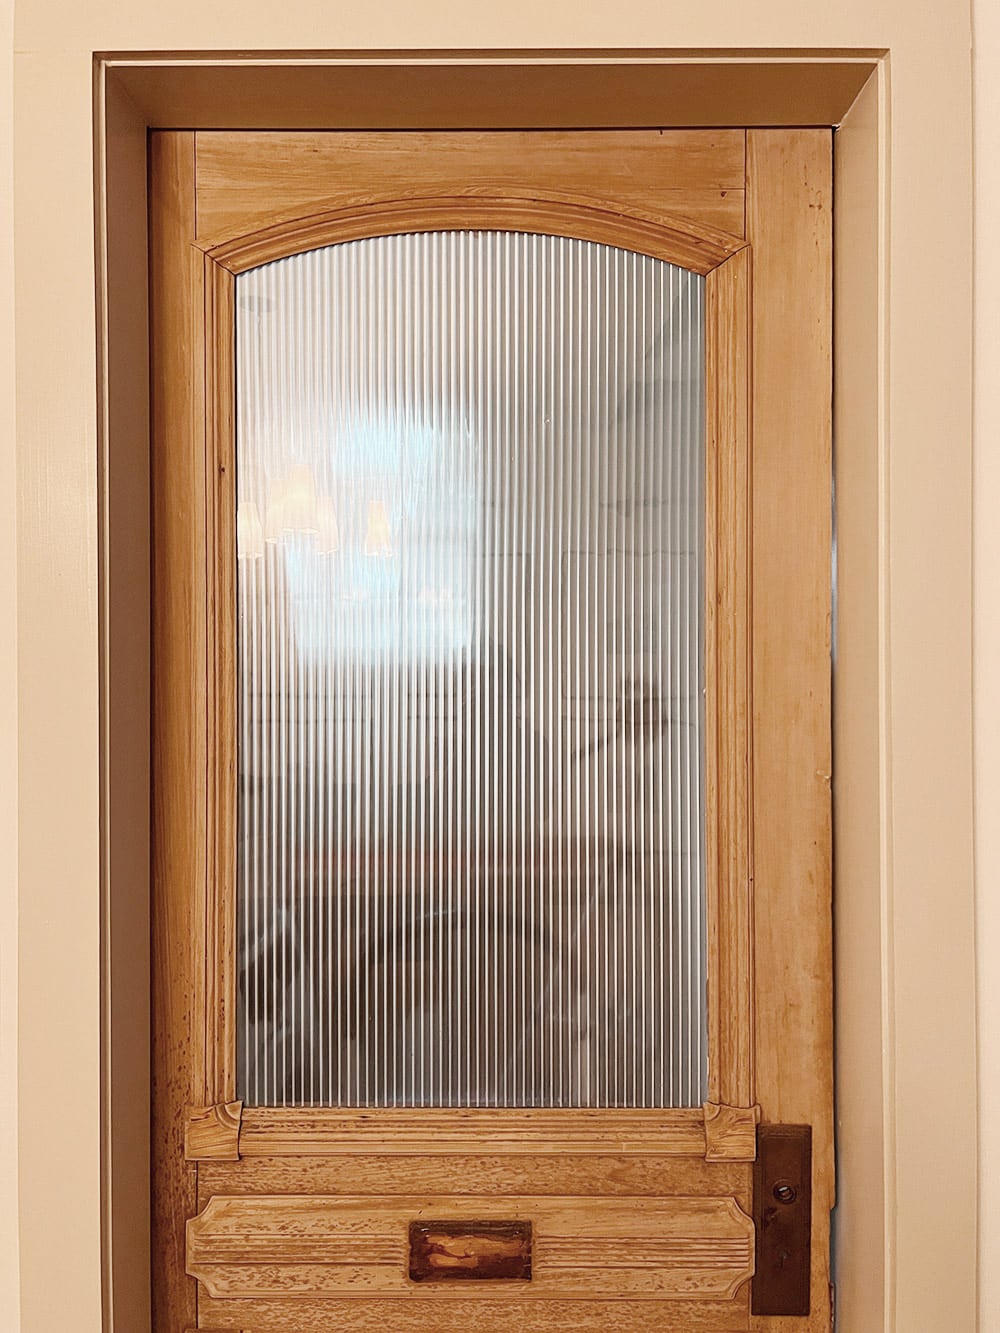
Of course, this film doesn’t provide full privacy, but it does help make it less noticeable. I will also say that it doesn’t feel as transparent in person as it shows in photos. When you move, the vertical reeds have a blurring effect.
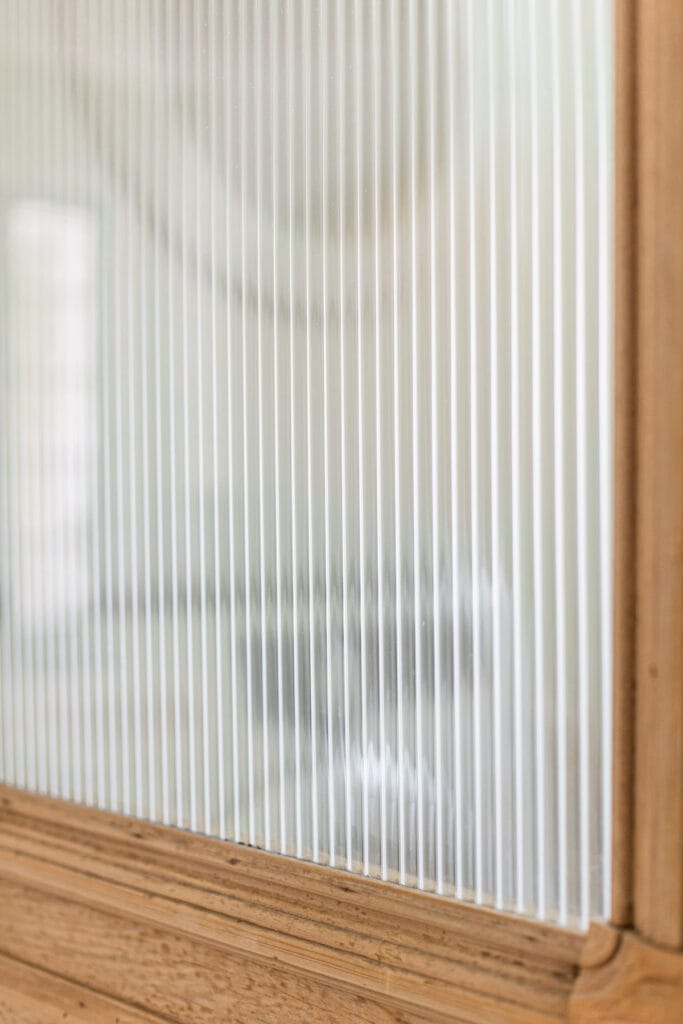
Reeded glass (also called ribbed or fluted) has become especially popular in recent years, and I am here for the trend. It’s also nice to know that if I ever want to switch it out, I can simply peel it off and try something else!
Have you ever used window film? We have ivory frosted glass on our pantry cabinet and I’ve been really happy with that, too. It’s such great low cost alternative to permanent glass, don’t you agree?


Jill says
This looks fabulous! The link for the film only has a 17.7″ wide product but it looks like your window is wider than that, and since the pattern should run vertical I’m wondering how the product linked could achieve that effect. Did they have a wider width option available previously or have you pieced the pieces to fill your glass?
Jenna Sue says
Oh bummer! Yes, there was a wider option when I ordered. Hopefully they’ll restock soon!
Tina Diaco says
Jenna, what a great idea and it looks beautiful. Not to rush you or anything…LOL… but when will you be renovating your laundry room? I need to renovate mine, but I want to see what you do first! I love your ideas, that’s why I’m waiting. 🙂
Jenna Sue says
Lucas started on the cabinetry but we keep getting pulled back to projects at the Hacienda! I wish we could do both at the same time. I don’t really know… sometime in the next year?? :\
Vicki says
Perfect. I am a fan of window film, especially when a curtain will not meet my design esthetic. I love that you were able to get a reeded glass look with out the additional weight of a heavier glass insert. Thanks for sharing.
Carly says
Love the reed glass look. I did this as well to my 2 front french glass doors that are 3/4 glass using a similar product and a slightly different glass look. I did exactly the same steps but using a larger plastic wallpaper applicator to press the air bubbles out. I second you need it sprayed well and a slight air gap space. My glass doors get sun and a lot of light and they have held up well for a year. I saved thousands as these doors were standard with our builder and the upgraded doors were several thousands more. I spent $60 for 2 rolls on mine. Love that antique door, a great find!
Kathryn says
Wondering about the soapy water…will the soap mold over time? But the window looks FABULOUS and of course that door is amazing! Thanks for sharing.
Jenna Sue says
Hi Kathryn, the water all gets pushed out so the film is sealed to the window. No mold to worry about!
Kim says
Looks so good! I’m curious and it’s hard to tell from the photos but is the actual film textured or is it printed to look like it’s reeded? Thank you for the detailed tutorial!
Jenna Sue says
There is the slightest bit of texture but it’s super thin — I’m honestly not sure how they manufacture the film to appear this way!
Teddee Grace says
And it looks classy, too! Like something from an old black and white movie.
Robin says
I love this idea, and looks so great! It looks like to the door was made originally with the “glass”, and looks very professional. Thank you for another amazing idea that’s beautiful and cost effective!
Jenna Sue says
I’m thrilled it all worked out! Such a great DIY anyone can do.
Liz says
Gorgeous. But where do I get doors like that?
Jenna Sue says
I found mine at a local salvage yard
Lisa Stokes says
Gorgeous and ingenius! Love your style. How did you get the vintage door onto a pocket door frame?
Jenna Sue says
Thanks Lisa! We had our builder install it on a pocket door track.
Vicki Bray says
I like that look! I have plenty of windows that it will definitely work in. Thanks for the inspiration!
Jenna Sue says
Glad this inspired you Vicki!
Janelle says
This is a really great idea! Your door is gorgeous! I wonder if you put the film on the other side of the door as well if it would make it even less transparent?
I copied your framed mural in my hallway. (Different mural.) I love it!
Jenna Sue says
Thanks Janelle! The transparency is the same either way. But it looks more realistic with the glass in front.