If you’ve been following this blog for a while, you know my obsession for doors runs deep. I have more door tutorials on my Projects page than any other kind, and for good reason. Unique doors add instant character, it can be a simple and cost effective beginner/weekend DIY project, and there’s a million ways to spruce up an existing plain door or build your own from scratch. Today we’re tackling the latter—a custom X style sliding door made from just 1×3’s and plywood:
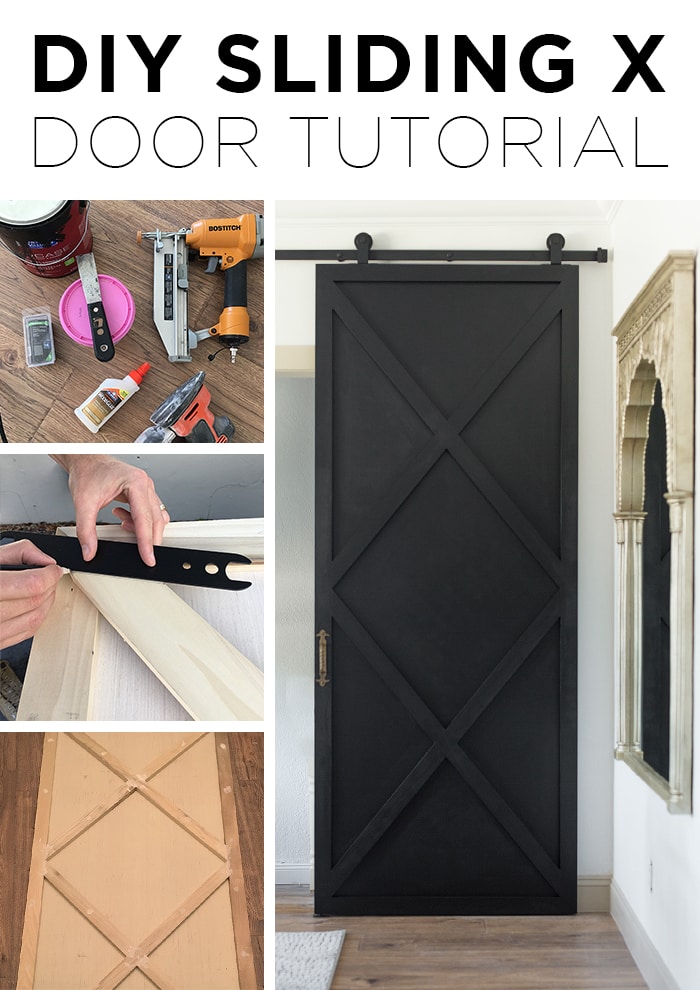
This is a weekend project that’s beginner friendly and requires basic tools (we also used a router but that’s not necessary, depending on how you want to hang your doors).
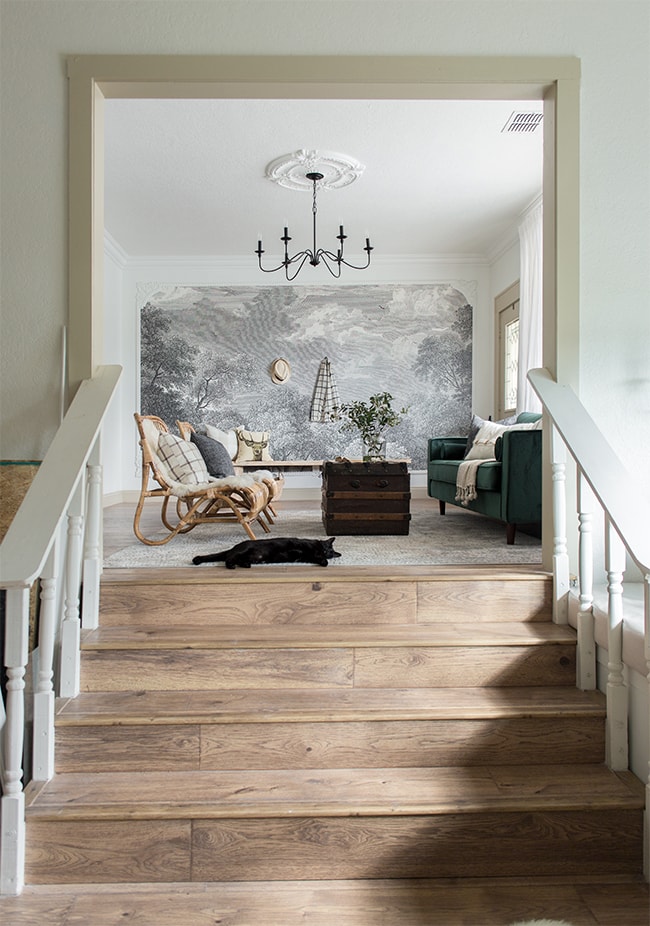
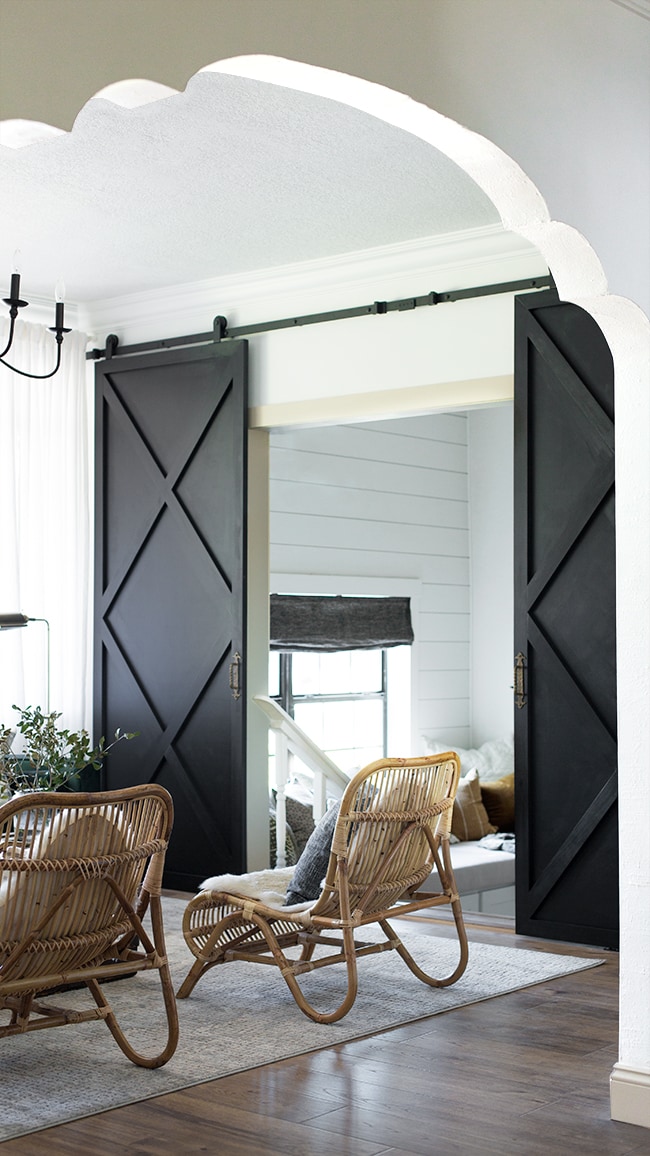
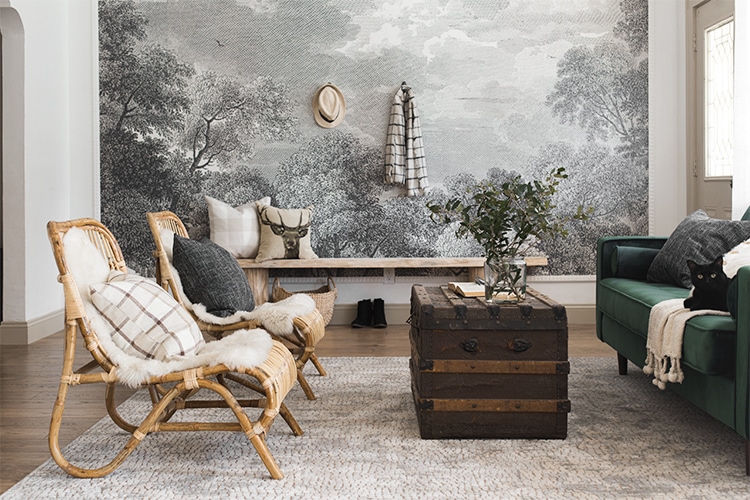
I came up with this project as a solution to the open entryway between the living room and downstairs bonus room here in The Riverside Retreat.
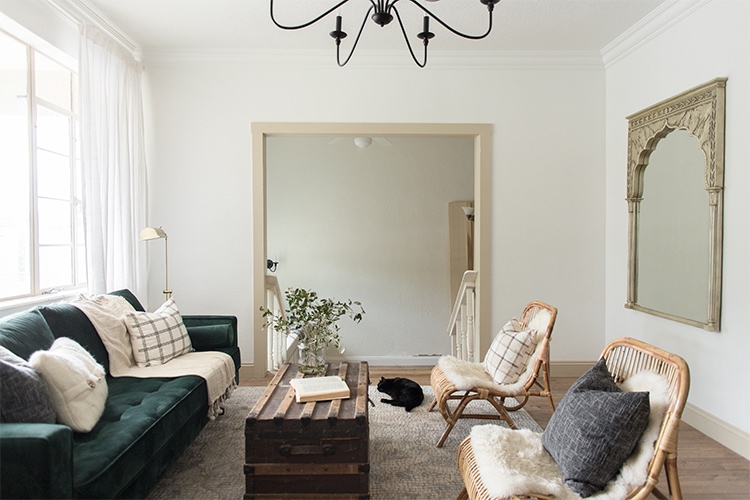
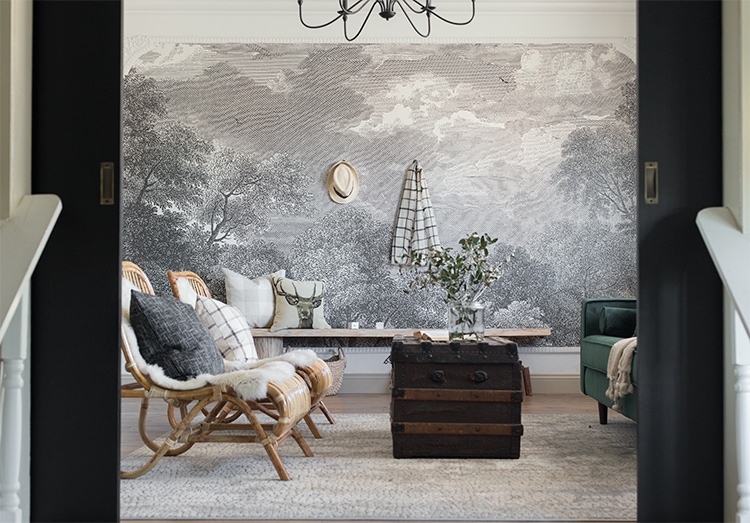
We needed a way to separate the two spaces, since we’ll be using the downstairs space as a TV/game room and sleeping area. Here’s the view from downstairs:
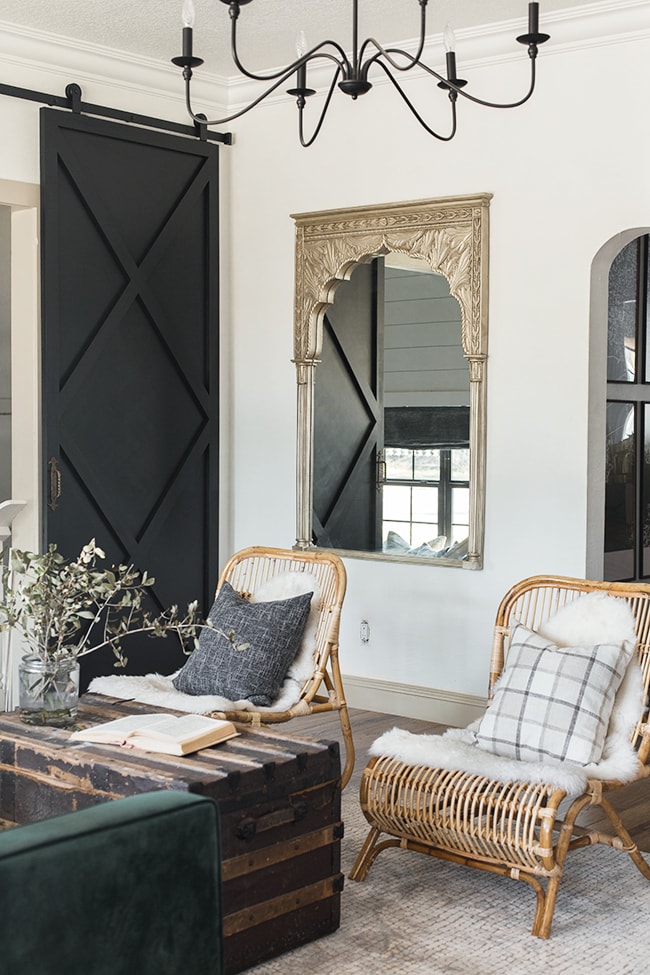
Plus, that empty wall was just calling out for something tall and dark to give this room a little drama!
I already had a vision in my head of the perfect design, and spent some time working through my options. I used Illustrator to mock it up to scale, until I finally settled on the right look and dimensions.
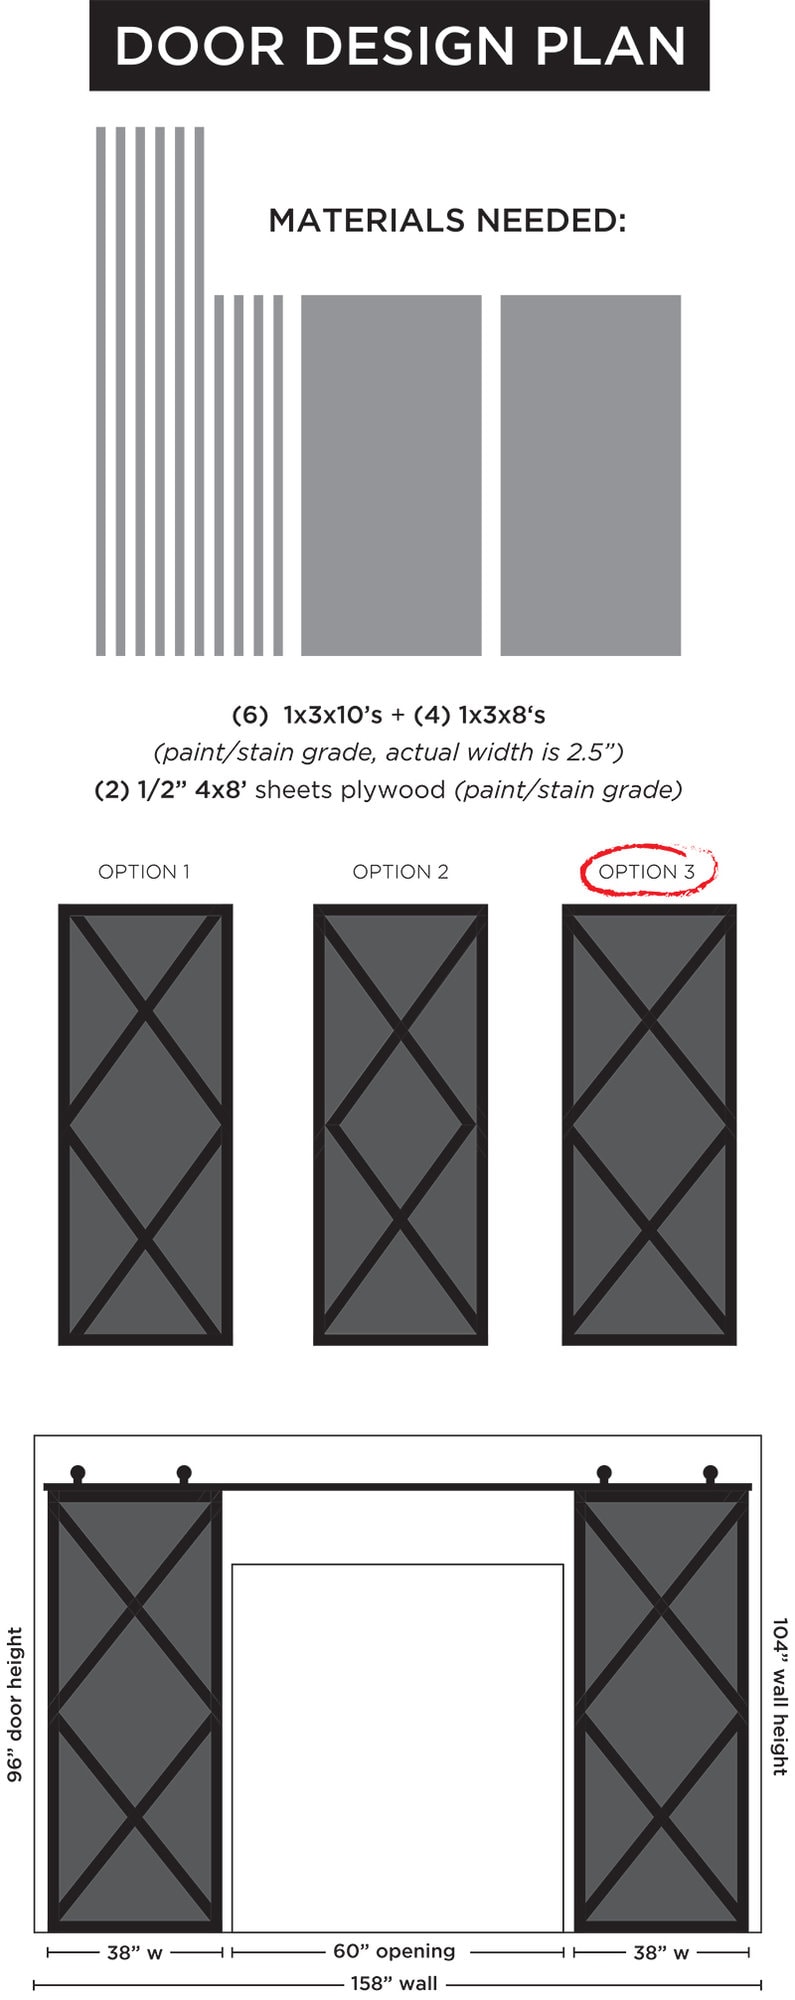
If you look closely, you can see that there’s a few different ways to overlap the X’s, and I thought Option 3 looked the most balanced. We already had a couple 1x3x10’s leftover from our window seat project, so I calculated the amount still needed based on our door size. This will vary depending on your opening/door size, of course, and you can get the 1×3’s in any length that makes sense for you. We wanted our doors to have some overlap when closed, so we made them 38″ wide. And I love a tall door, so an 8′ height was just right for our 9′ ceilings.
Here’s the materials list along with the tools you’ll need for this project:
Materials
1×3’s – We ended up using (6) 1x3x10‘s and (4) 1x3x8‘s to cover both doors. Spend a few bucks more and get a higher grade wood like poplar or oak, to ensure the boards are straight and free of knots/imperfections (I recommend selecting these in person so you can pick the best boards).
1/2″ 4×8′ stain/paint grade plywood – Quality matters here—you want a smooth, flat surface. We used top choice blondewood. Note: you can also use thicker 3/4″ plywood, but we preferred the lighter weight 1/2″.
Wood filler – Spackle can work in a pinch
Door handles – I picked out these really cool rustic iron handles for the front, and simple bronze recessed pulls for the back.
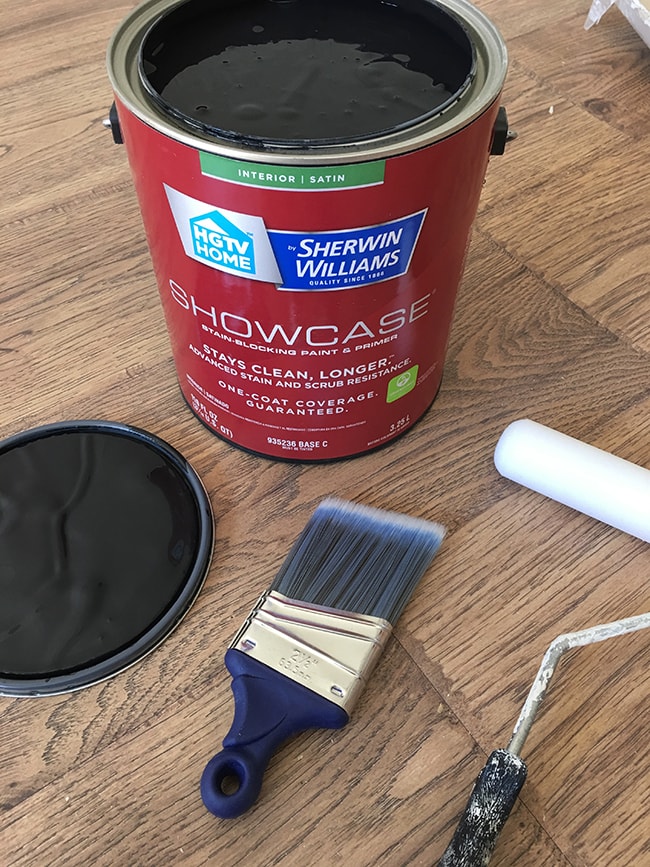
Paint or stain – I used Tricorn Black from HGTV Home by Sherwin Williams in a satin finish (the deepest black I know of)
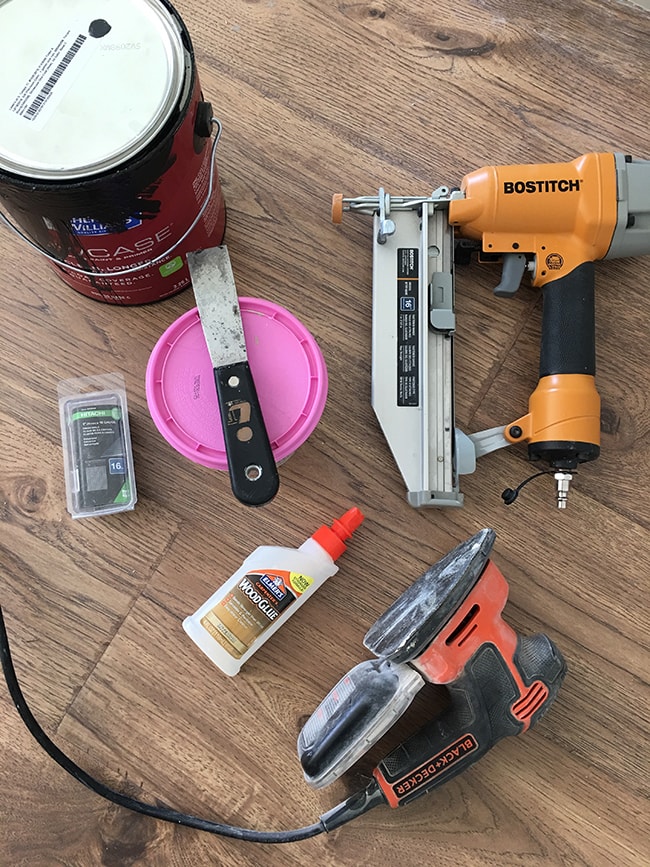
Tools
Miter saw – Can’t say enough good things about our Dewalt 12″ miter saw
Nail gun – We used our 16 gauge Bostitch nailer and 1″ nails
Air compressor (for pneumatic nail guns) – We just replaced ours with this 6 gal Craftsman, easy to carry around and can’t beat the price!
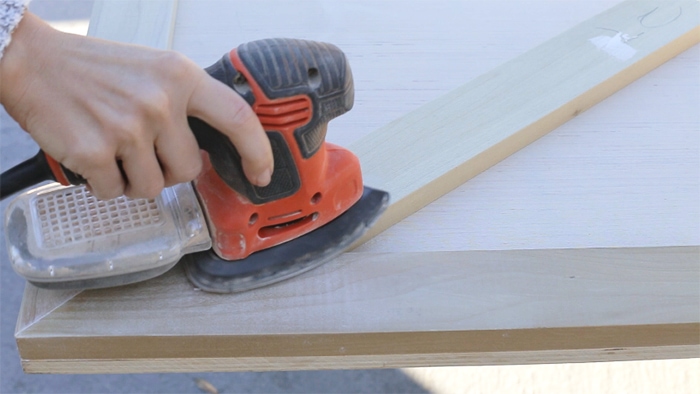
Detail sander – You can do this by hand but there’s no reason not to pick up a $40 Mouse if you don’t have one already!
Optional:
Table saw – We used our 10″ Dewalt table saw to cut our plywood to size, but Lowe’s can also do this for you.
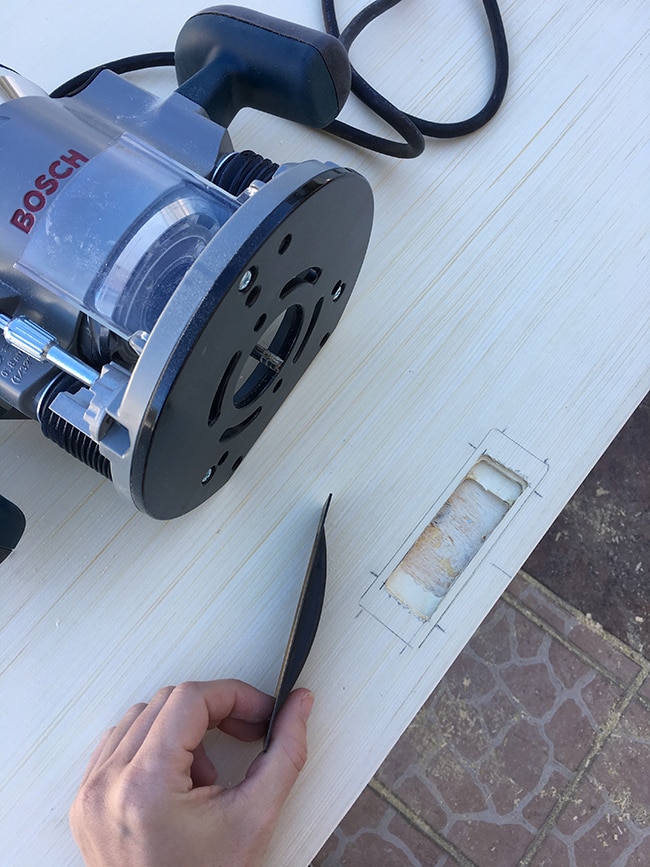
Router – Lucas has been anxious to try routing, and we thought this project would be the perfect opportunity to learn a new skill. After a few uses, our Bosch fixed/plunge router has already become a favorite tool of his.
Clamps – to keep the wood pieces secured together when nailing
Let’s get to building!
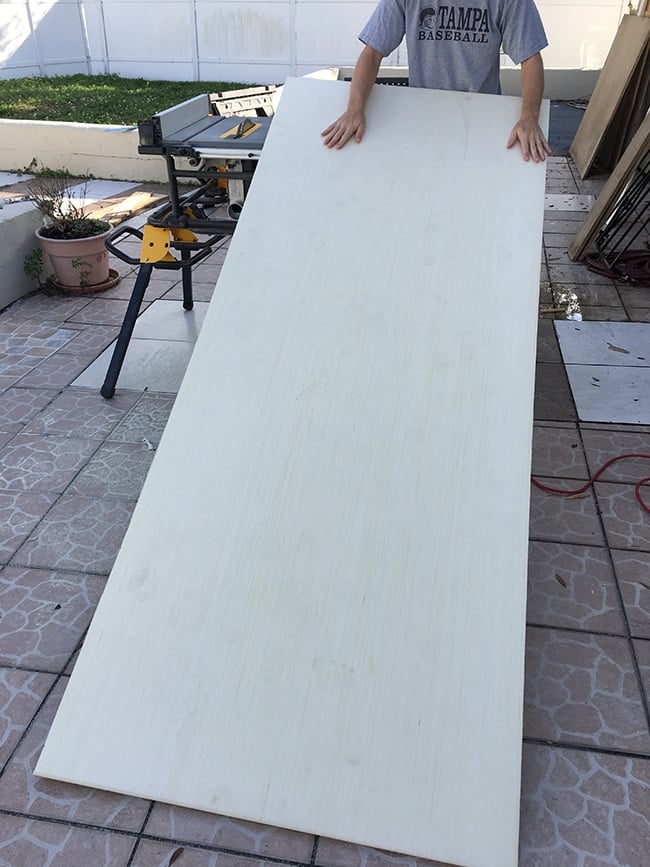
First, you want to cut your sheet of plywood to the size of your door. This will be the entire backside of your door. Since our doors were 8′ tall and the plywood came in 8′ sheets, we only had to trim the width down to 38″.
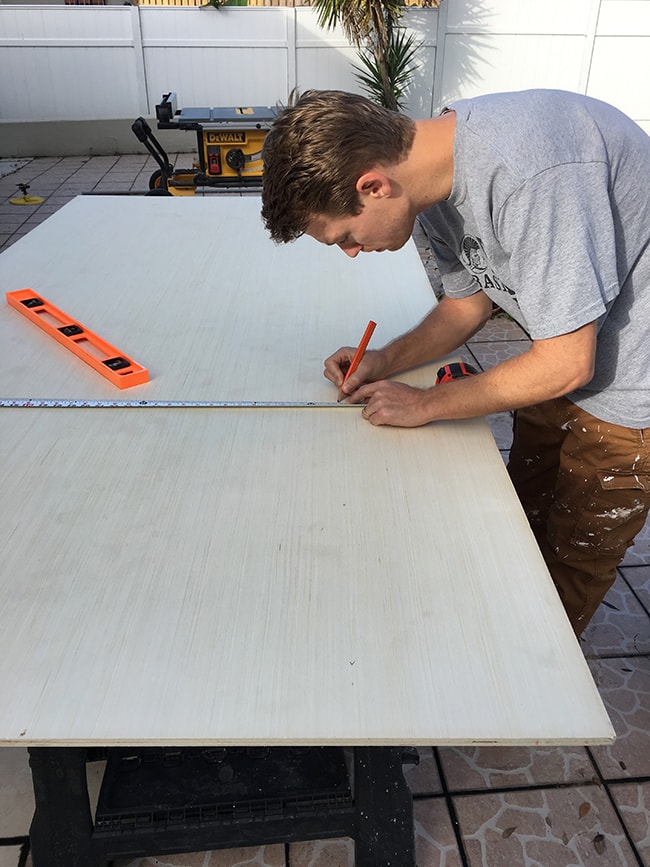
A couple passes with the table saw and voila! Half of both doors were done.
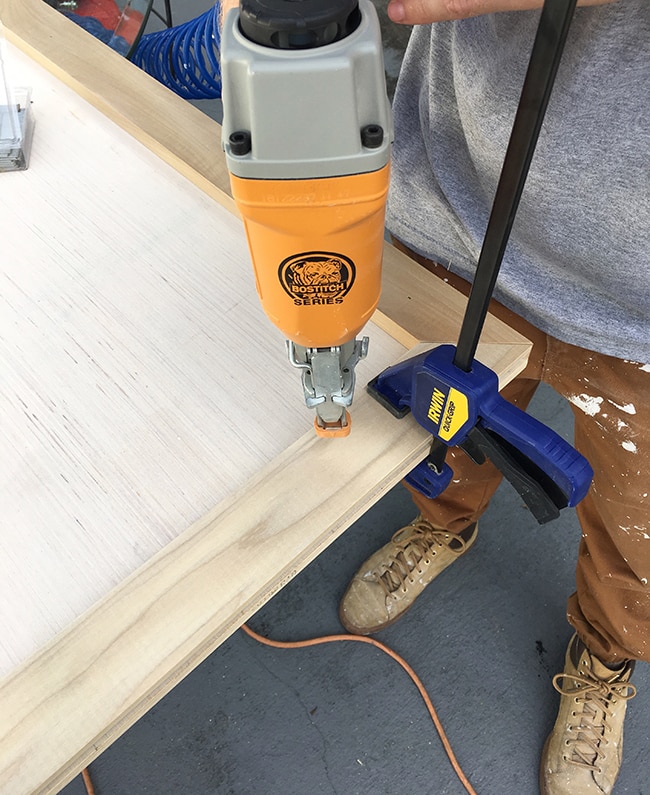
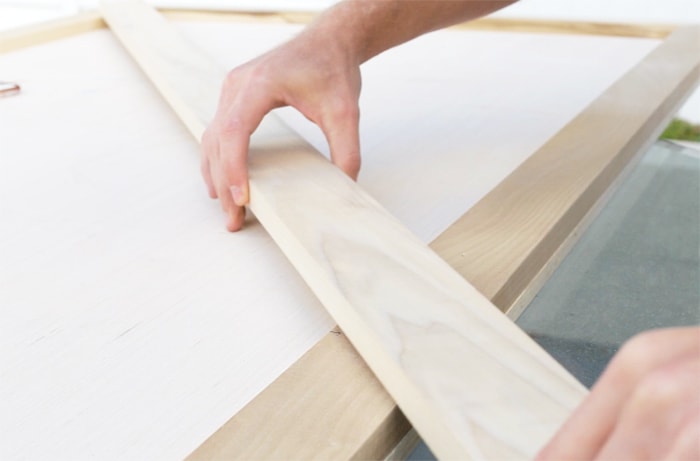
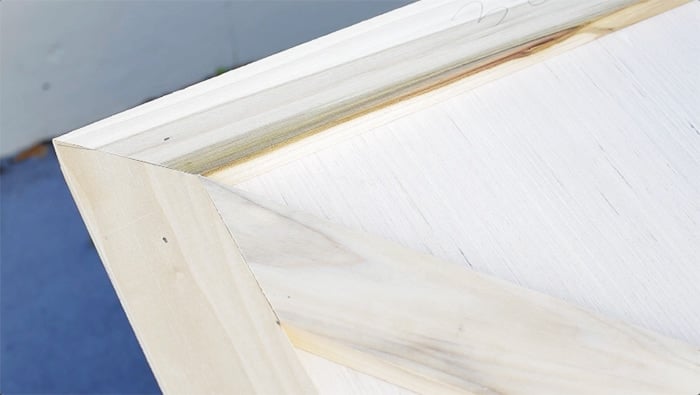
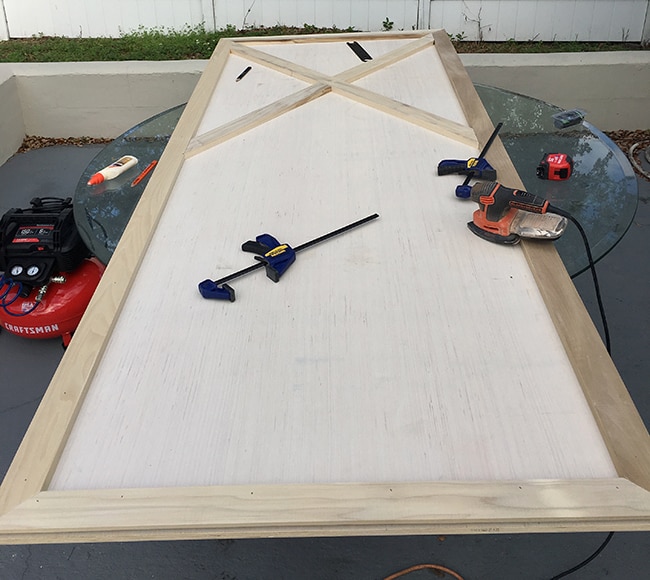
Now for the 1×3’s. We attached our tall vertical sides first, and since we were using 8′ lengths for those, all we had to do was miter the edges to a 45° angle (note that a miter cut isn’t necessary, but I think it looks a lot cleaner this way).
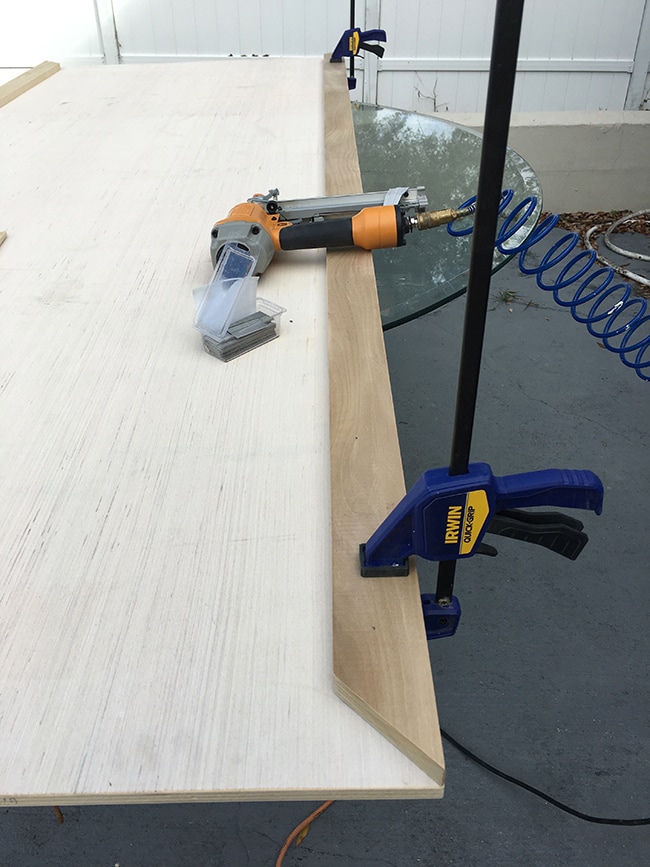
Using wood glue and clamps to secure the 1×3″ flush with the edge of the plywood, we nailed the board in place and moved onto the top and bottom pieces.
Lucas went ahead and routed a groove along the bottom edge before installing, which is where the floor guide would go.
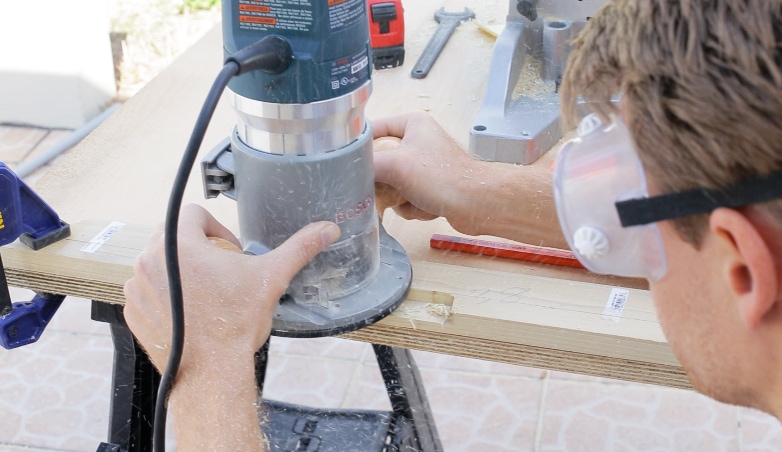
Depending on how you plan to install the doors, this isn’t absolutely necessary (I’ve installed my fair share of barn doors without this) but it does prevent the door from wobbling which is important for us since this will be a rental.

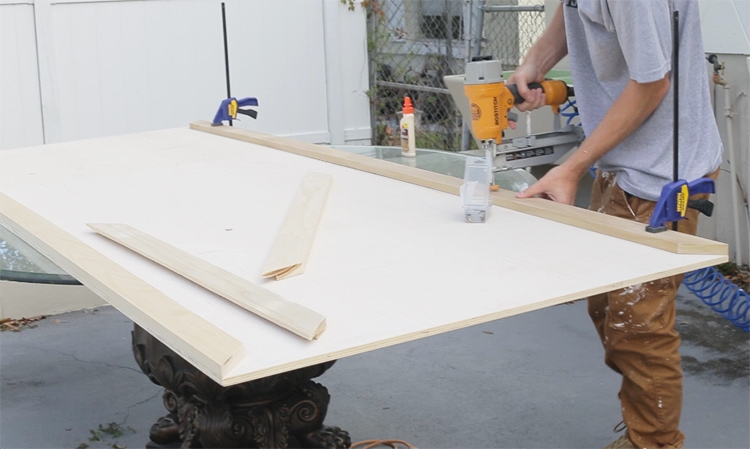
With the top and bottom pieces cut to size, we repeated the wood glue/clamp/nailing process for both.
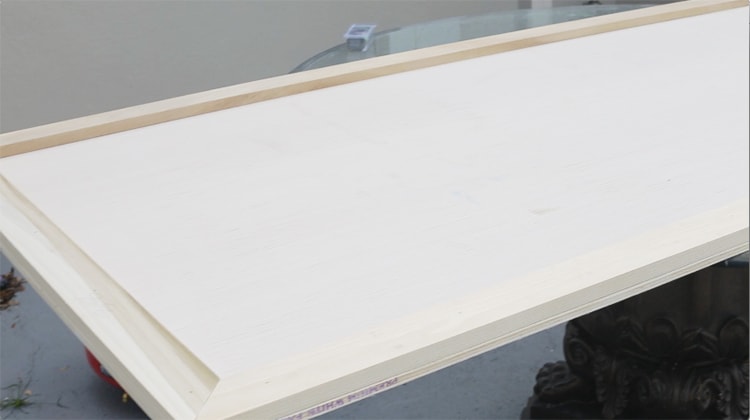
And the outside perimeter is complete!
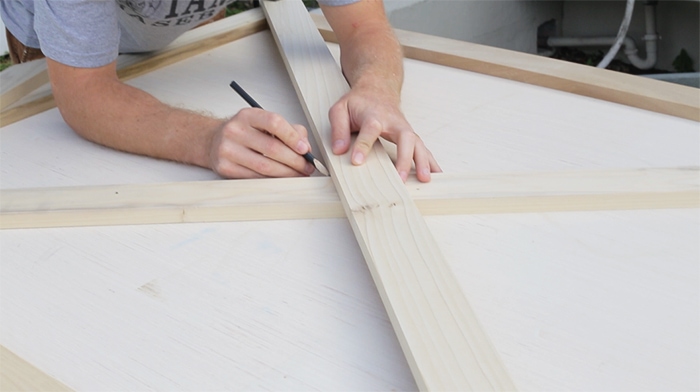
Now for the fun part—making the X’s. Someone had commented on Instagram that I must be a math whiz to figure out all these angles—well guess what my friends, today is your lucky day! Would you believe that there is no math required whatsoever for this? It’s all visual (fellow right-brainers rejoice!)
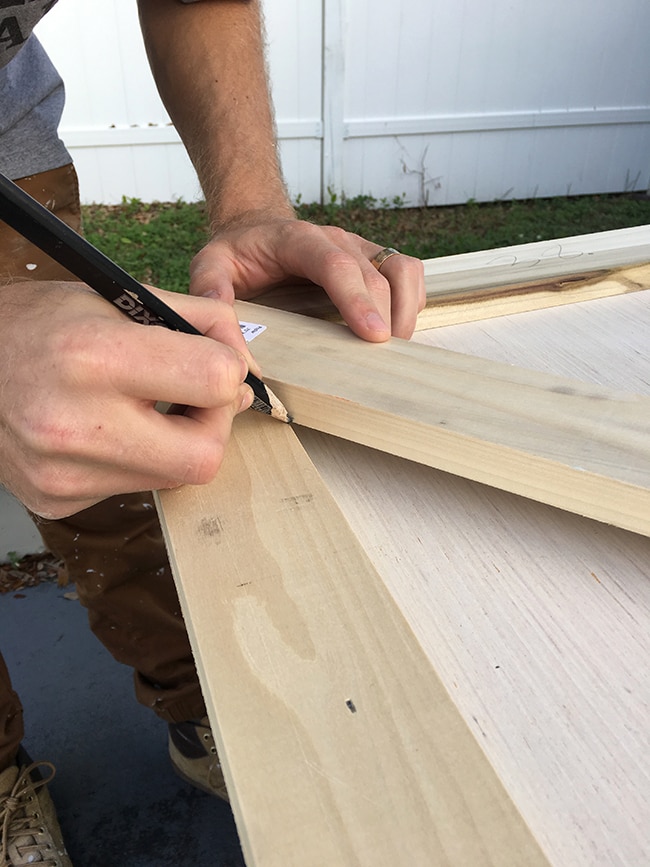
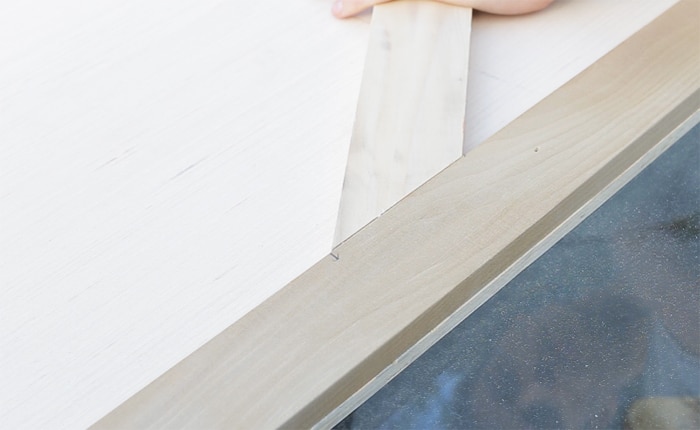
Here’s how easy it is: first, measure and mark the center of the door height on the inside edge of your 1×3. Ours was 48″:
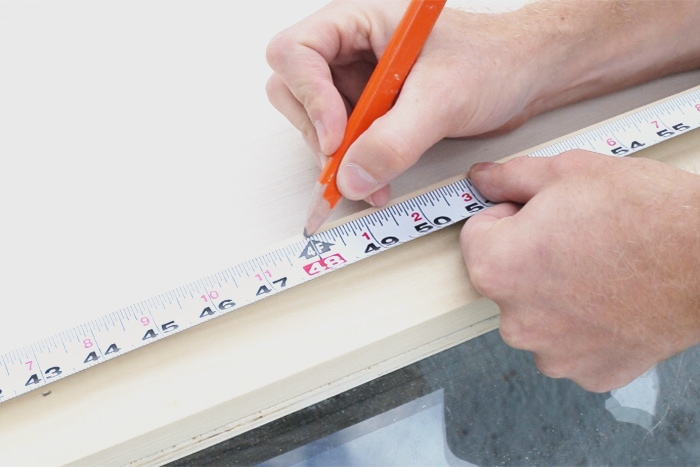
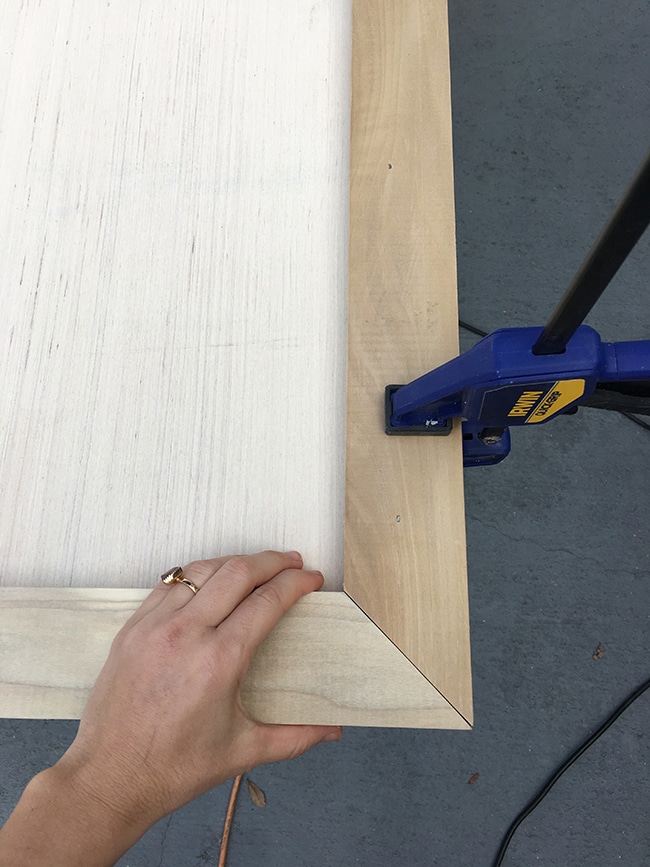
Then grab a 1×3″ and lay it diagonally across the top, as shown in the door mockup. The top should line up with the 90° corner, and the bottom should intersect with your center mark.
Once it’s lined up, go ahead and put a pencil mark on the bottom edge of both sides of the 1×3, where it intersects the vertical piece.
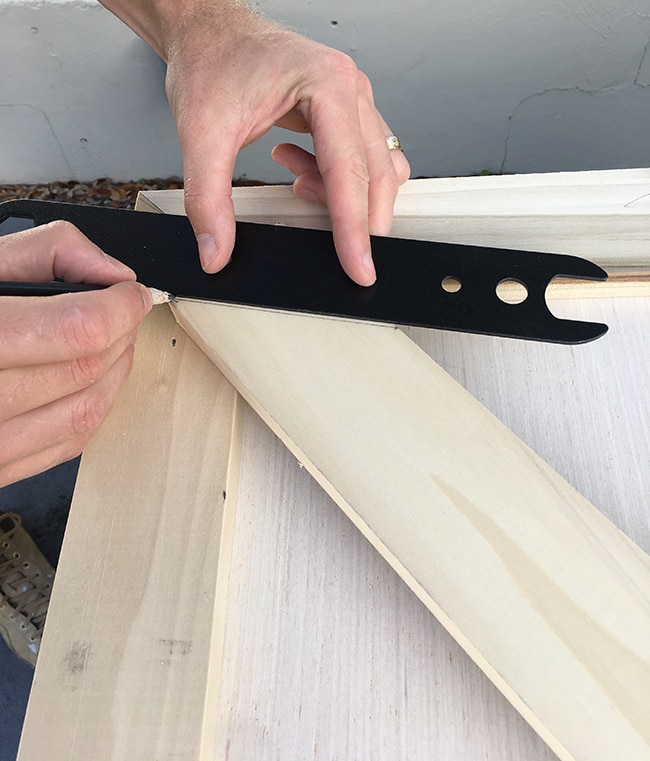
Once both sides are marked, you can flip the board over and draw a straight line connecting your two marks.
Then set your board down on the miter saw and line up the blade/laser level to the angle that matches up with your line (you can watch the video for a visual of this process):
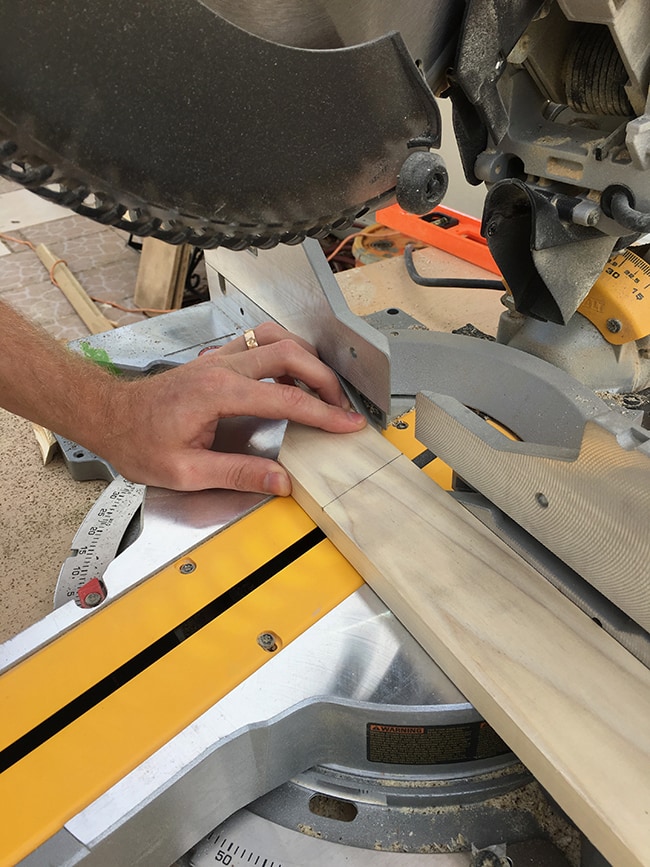
Look at those perfect angles! Shout out to Lucas for coming up with this method.
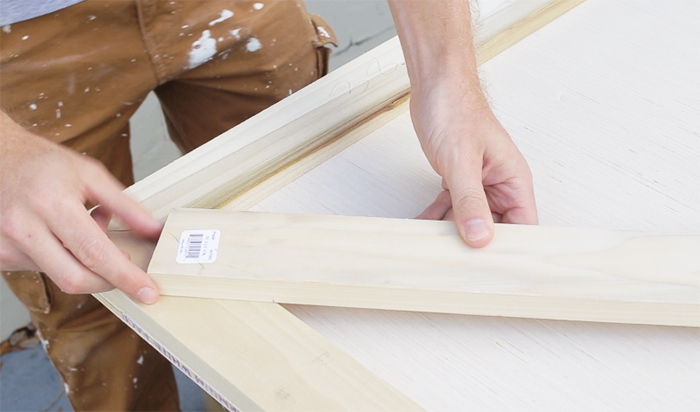
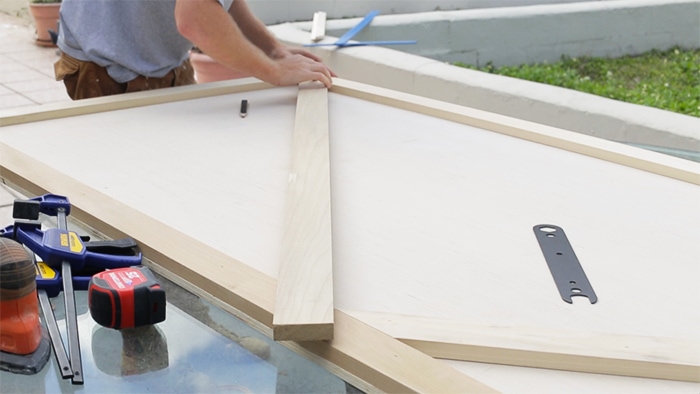
Once your first cross piece is in, it’s time to repeat the process with your overlapping board. This one requires you to mark where the boards intersect in the center as well, since you’ll need to cut two pieces this time.
Same process, just two more cuts.
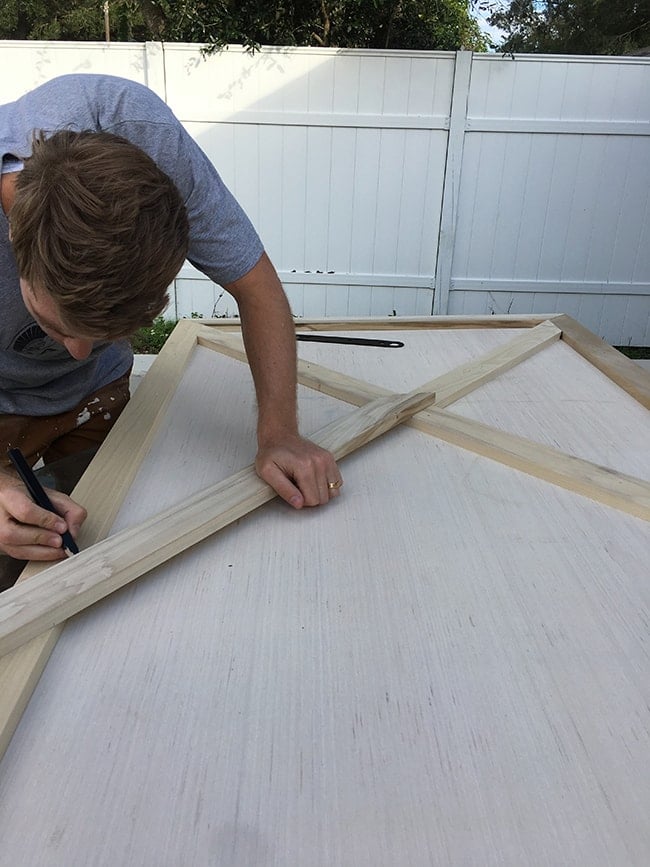
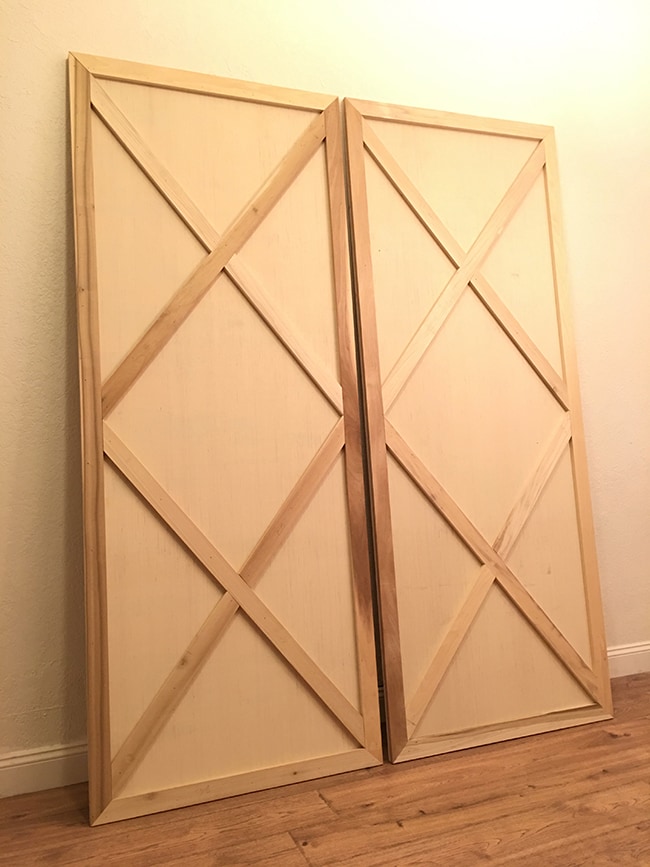
Before you know it, the first X is done!
Now it’s just rinse and repeat…
Until you end up with these:
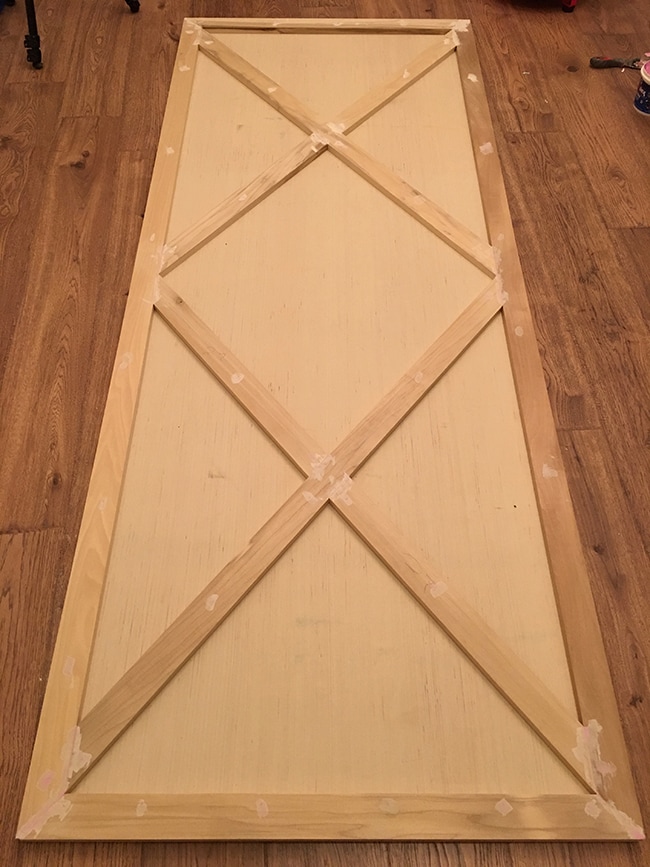
Next is the easy part, patching the nail holes and any gaps.
And putting the mouse to work, making sure all the edges are smooth (sidenote: I actually sanded the edges of my boards before installation as well, since they can be tricky to reach once they’re attached).
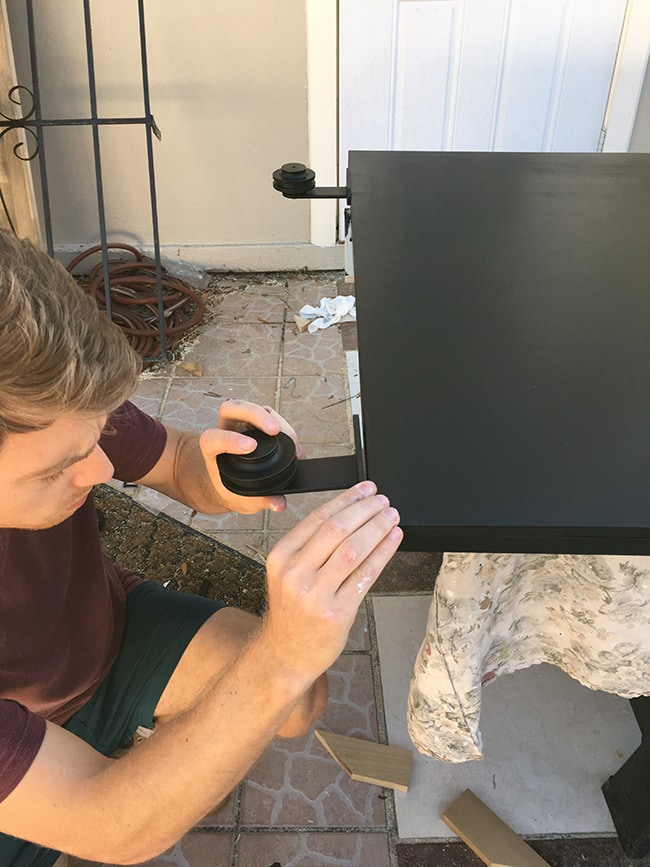
Lucas also used the router to notch out a section for the recessed pulls.
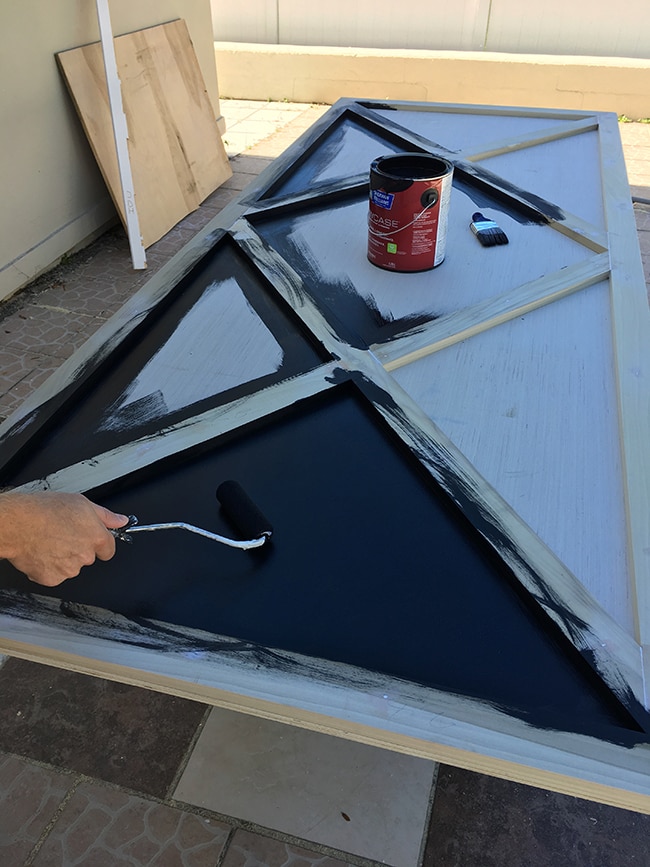
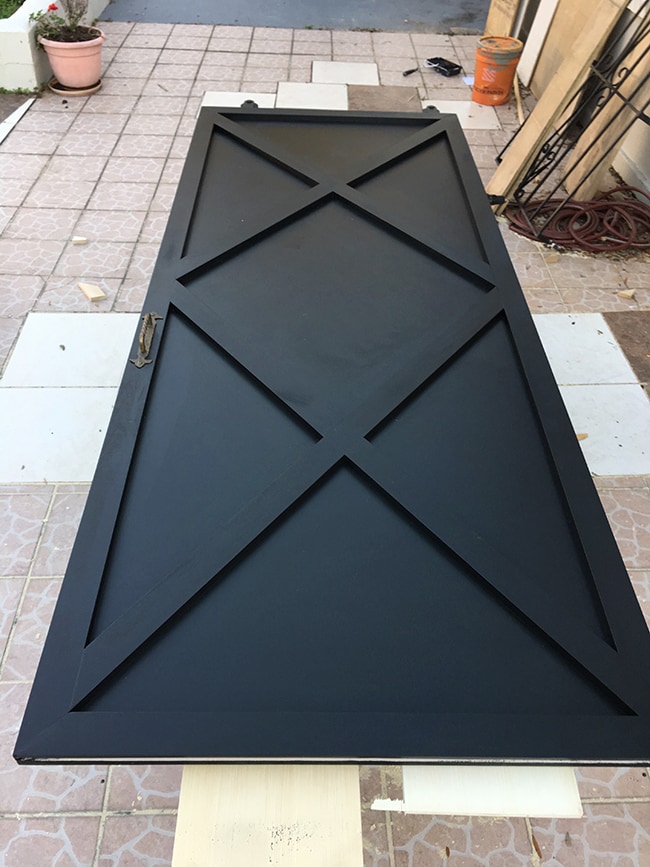
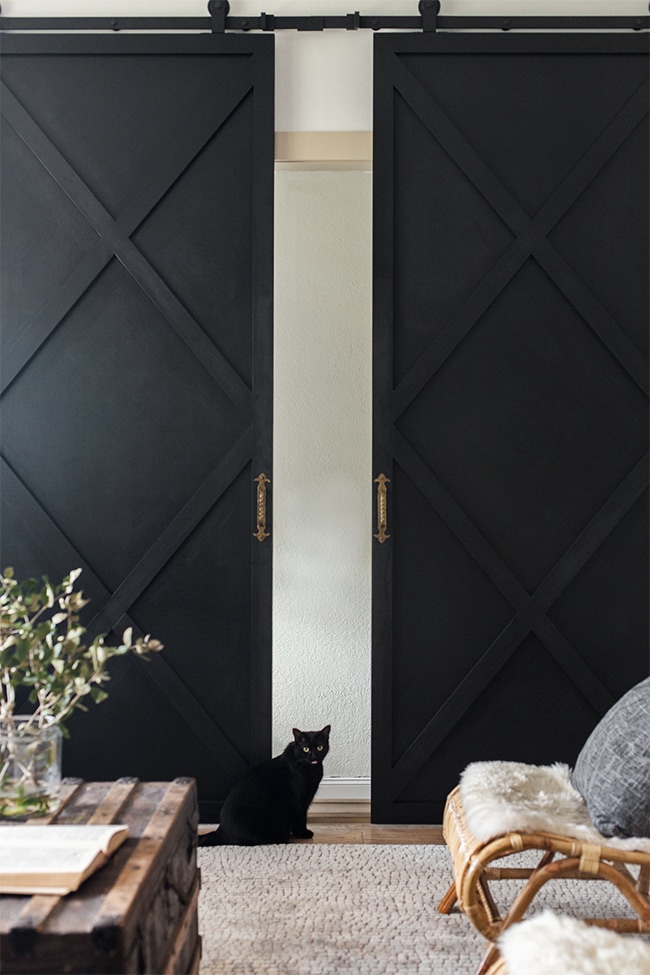
Last but not least, paint! You could choose to stain the doors, but I wanted a less rustic and more sophisticated look, so I gave it a couple coats of the richest black out there:
A smooth roller for the flat surfaces and (the best ever) short handled brush for the corners makes the job go by super quick:
Finally the jewelry—how gorgeous is this hand forged antique iron pull?

We used a 13′ double track to hang the doors, and followed the installation instructions:
And we’re ready to roll!
How about this Before + After?
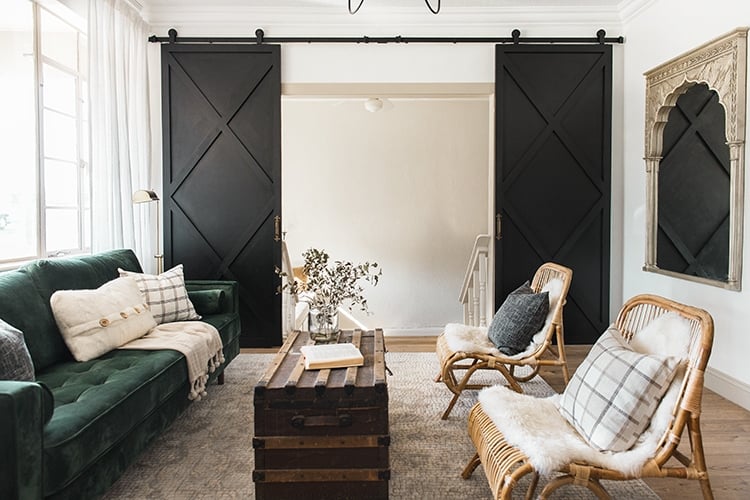
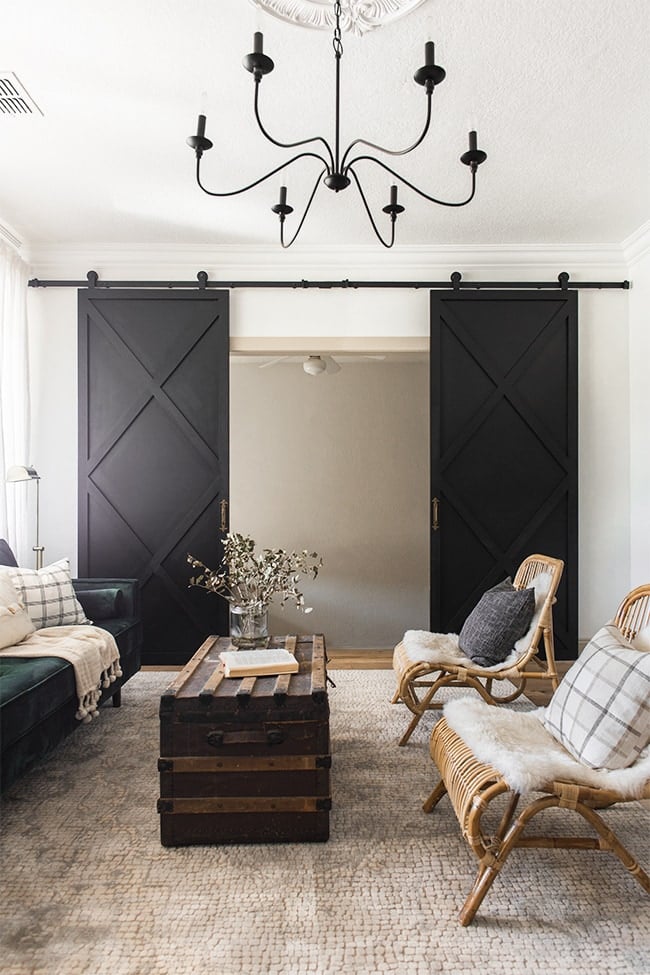
Tall, dark and handsome has entered the room…
Good thing Lucas isn’t the jealous type 😉
These doors just took this room to a whole new level. So much class and style.
And best of all, the two rooms can finally be separated!
Gotta love these projects that are equal parts form and function.
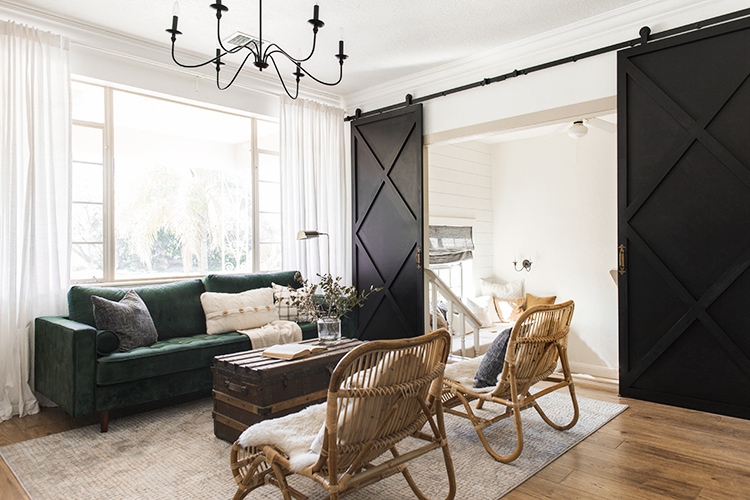
Loving the rich and earthy tones in here, what do you think?

And guess what—this was the last to-do item in the living room! This space is officially Done—well, with the exception of the perfect faux tree I’m still on the hunt for—but I’m calling this room finished and it feels great to cross another one off our list.
With the finish line in sight for our Heights House, we’ll soon begin to shift our focus towards projects in that house (our builder is hoping to have it completed by March!) so you can expect some changes around here over the next couple months. I’ll explain our new plans/timeline to complete the Riverside Retreat in an upcoming blog post and vlog, so stay tuned for some important updates on that shortly.
I hope you’re enjoying these first days of 2019 (and sticking to those resolutions!)


Amanda B says
Amazing! This is exactly the doors I have been envisioning , thank you for this turtotial. My husband will be busy 🙂
Francesca says
This is a really brilliant tutorial – it seems very easy to follow. And the results are gorgeous, the black is beautiful. Many people would be too scared to go for the bold black but it works so well with your cream furnishings.
Jenna Sue says
Thanks Francesca! Black is such a classic, you really can’t go wrong!
Leslie Wiesman says
Hi Jenna! Two things:
1. Love the tutorial. Any time you do anything with black it makes me swoon.
2. In case you didn’t see… you were featured on Studio Mcgee’s blog! So cool!!
https://www.studio-mcgee.com/studioblog/2019/1/3/friday-inspiration-cheers-to-2019#comments-5c2e9aa788251bade4abfd44
Jenna Sue says
Thank you so much for that Leslie — I didn’t catch the feature, that’s awesome! 🙂
Leslie Wiesman says
Your adorning fans just continue to grow! ?
Alisa says
Looks amazing! Question though!
Did the track come with spacers or how did you get the doors out far enough that they don’t hit the door casing when operating?
Jenna Sue says
Yes, all tracks come with spacers! 🙂
Mary says
The doors make a nice counter with the tapestry wall. They balance the room out beautifully! Well done Luas and Jenna!!
Jenna Sue says
Thank you Mary!
Claudia says
Wow!! Beautiful and classy. I love your style , would you mind to tell what program you use to draw you plans? ?
Jenna Sue says
Thanks Claudia! I use Adobe Illustrator.
Heloisa Guzman says
Love the doors. What is the color of the black paint?
Jenna Sue says
It’s SW Tricorn black, linked in the post 🙂
Kathryn says
Absolutely stunning. I wonder why you don’t have a show by now!! You and Lucas are a march made in heaven on multiple levels. Kudos for a magnificent project. WOW!!!!
KD says
What perfect timing!. I’ve been designing our new build and looking for ideas to close off the dining room when needed! These are perfect!. I would love to see a close up picture of the door glide .. is it attached to the doors or attached to the floor?….All of your ideas and designs are awesome!!!
Jenna Sue says
So glad you found inspiration from this project, KD! The glide is screwed into the floor and it just has a little plastic piece that sticks up a little less than 1″ and sits inside a groove in the door. Most track kits come with this!
Clarissa says
I could seriously stare at this room all day. I’ve been following the transformation, and with every project I’ve thought “wow that really elevated the space, mission accomplished,” but you’ve gone above and beyond. I’m so impressed! I really can’t believe you DIY’d this into such a beauty! I mean I can – because I watched it happen, but it looks like it must have taken a team of craftsman. You guys are killing it!
Jenna Sue says
Thank you for the kind words, Clarissa! This room took a while to piece together but in the end it turned out pretty much the way I had envisioned so patience has paid off 🙂 So happy with the way the doors finished off the room!
Monica says
I love everything you do but this room—another level. Maybe it speaks perfectly to my taste but I love how all the seemingly different elements work together. I wouldn’t have thought the rustic bench would compliment the mural but it’s perfect! What a vision you have.
Jenna Sue says
Thanks Monica! I think every room needs a mix of styles to keep it interesting 🙂
Linda Grubbs says
WOW!!!…..SO MUCH CLASS! Those doors are SO beautiful. Just the perfect touch in that room….(form and function) for sure.
As I said earlier somewhere….your vision never ceases to amaze me!
Oh, and I love that they match Susie! You + Lucas = awesome team!
Jenna Sue says
So sweet of you to say, Linda! So glad you love this project 🙂