After 2.5 years of putting off this project, the wait is over! It’s time for our little laundry room to get some love…
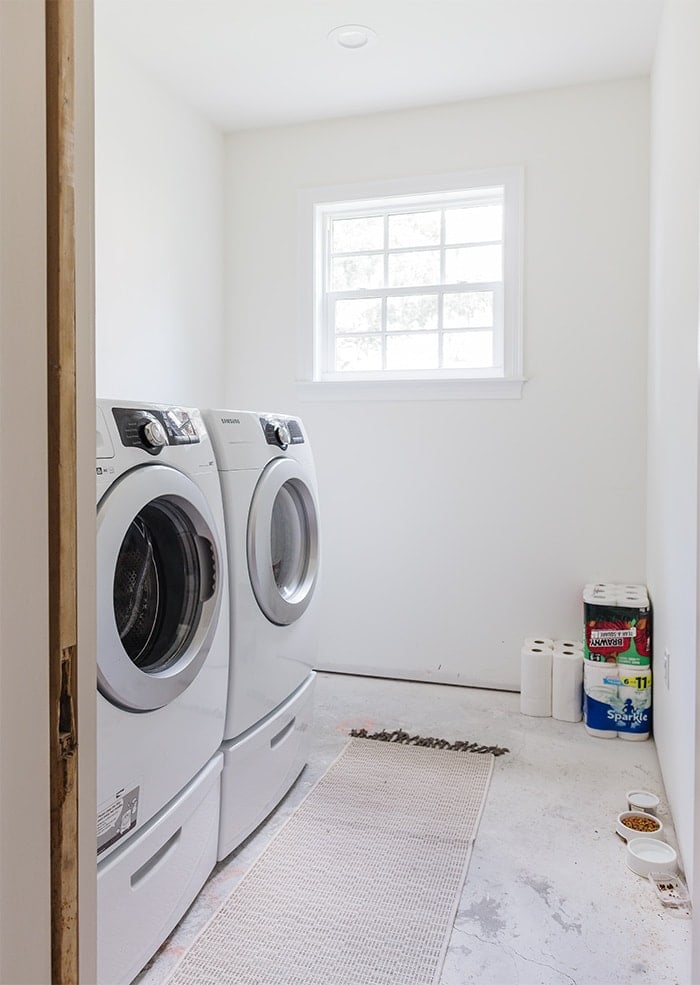
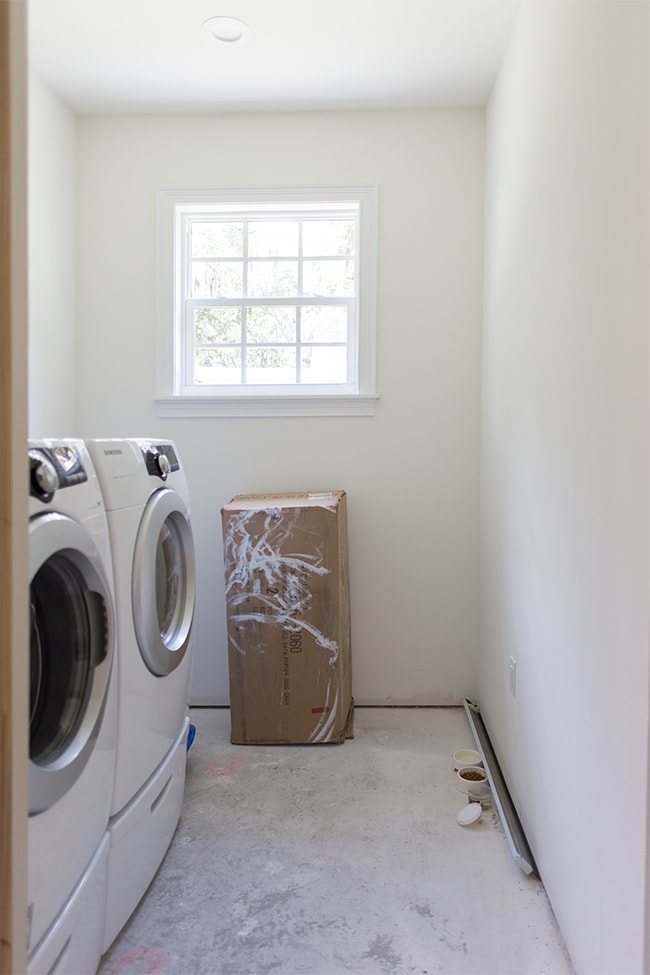
Still rocking the subfloor and no baseboards, this unfinished space has become our cat’s dining room/bathroom and random box storage area.
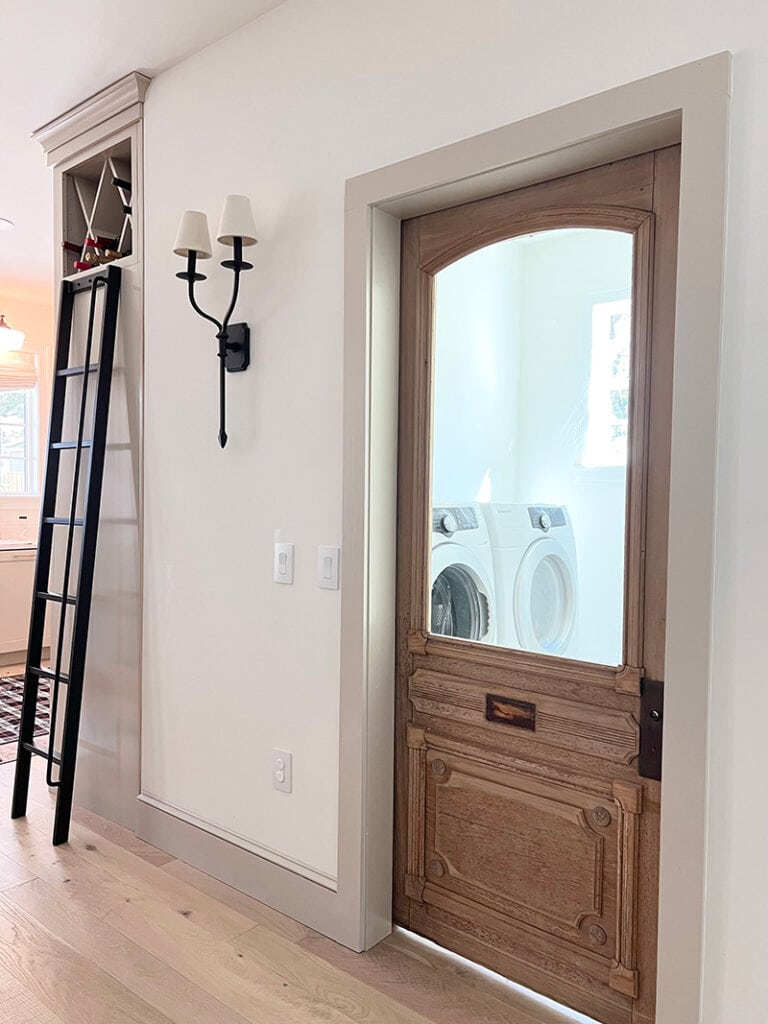
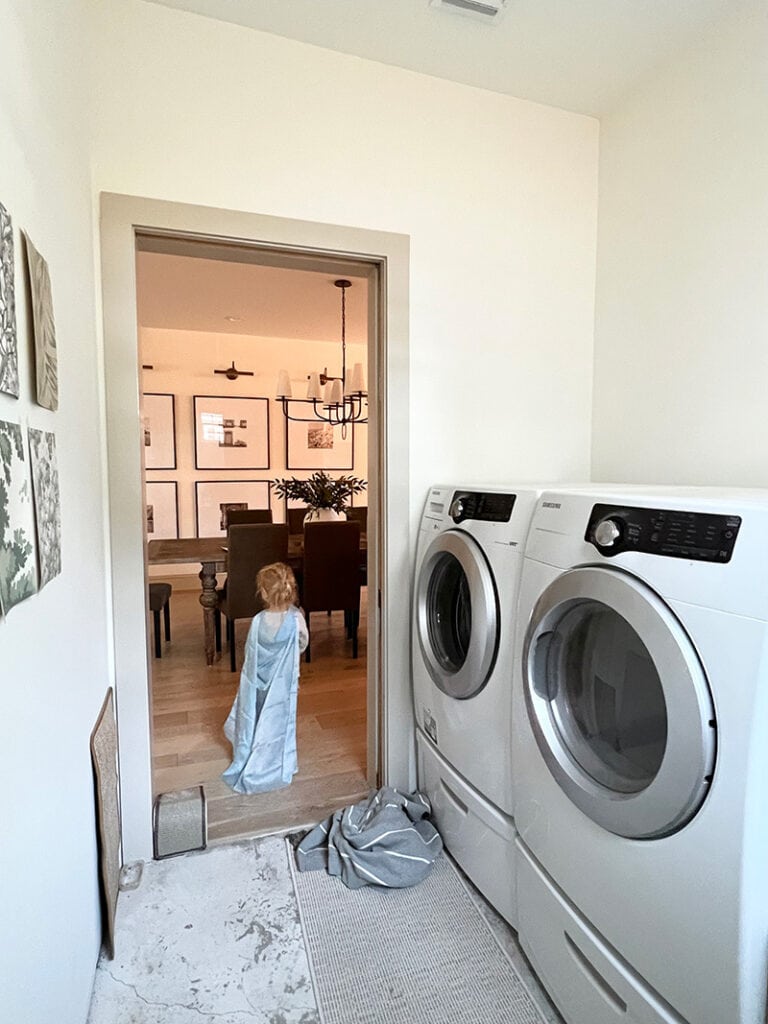
It’s located just off the dining room, right next to the kitchen (and quite the embarrassment with a glass door exposing our perpetual mess).
I never anticipated we’d still be living with an unfinished laundry room, but this is the year we’re finally making it a priority—and the renovation kicks off now!
Jump to:
Inspiration
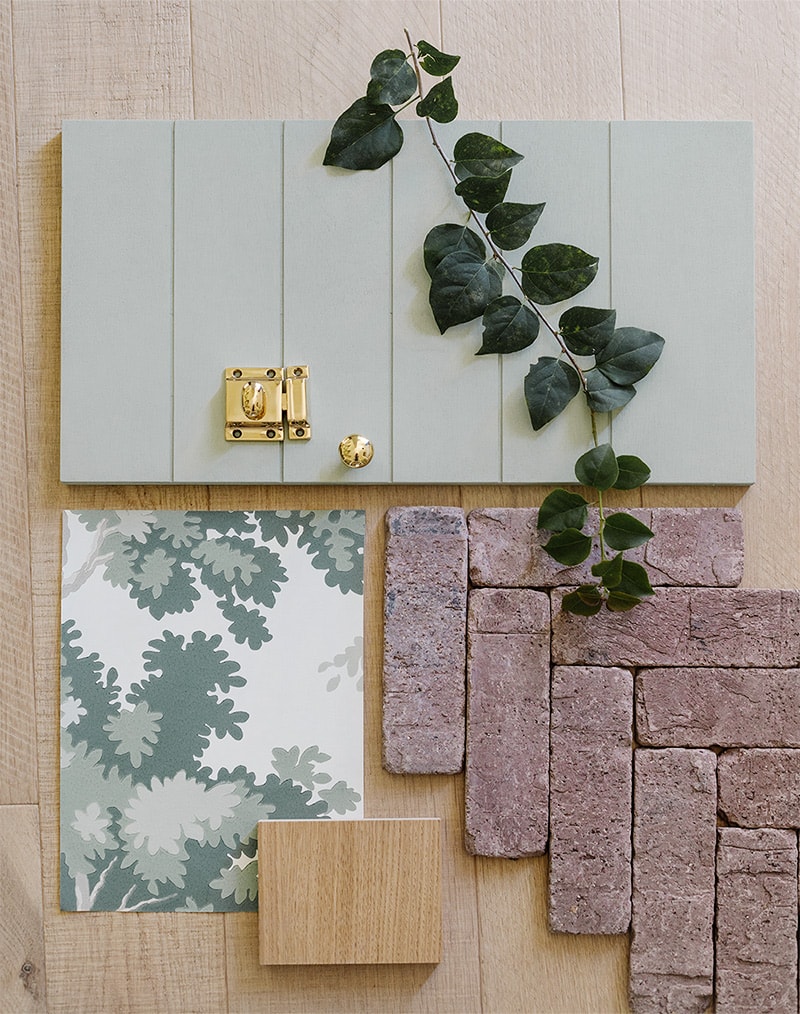
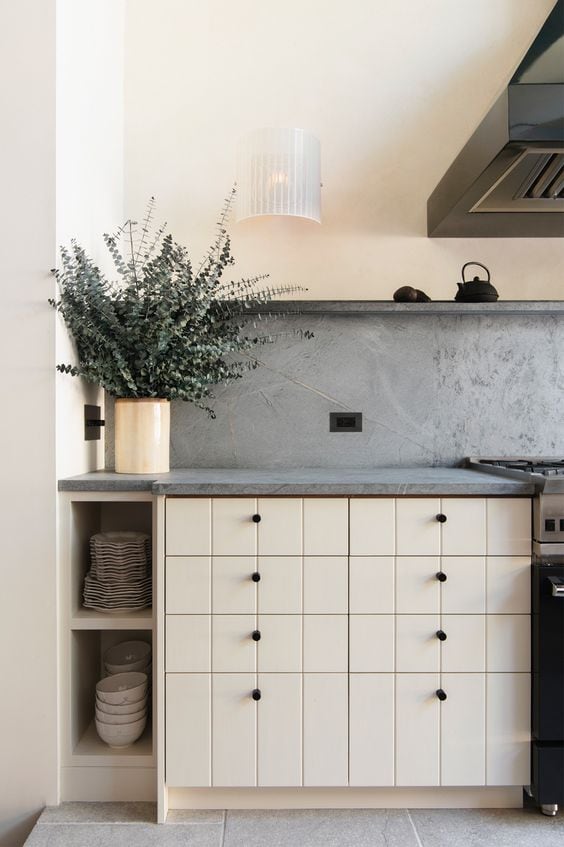
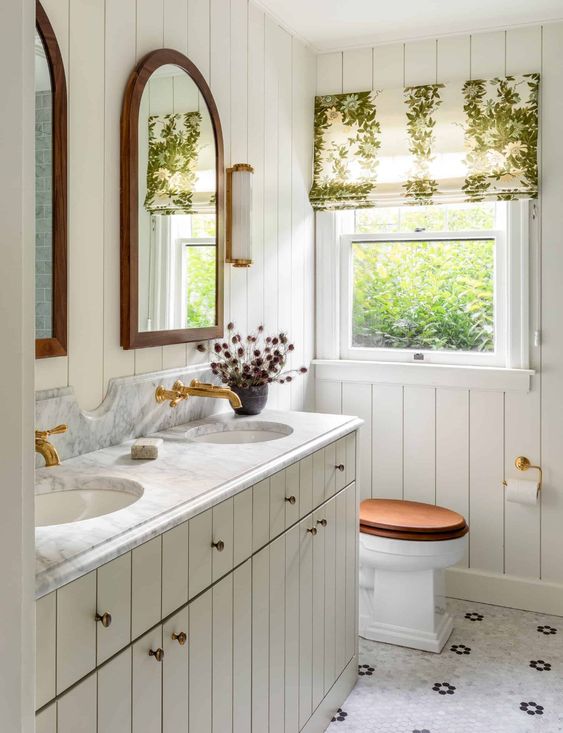
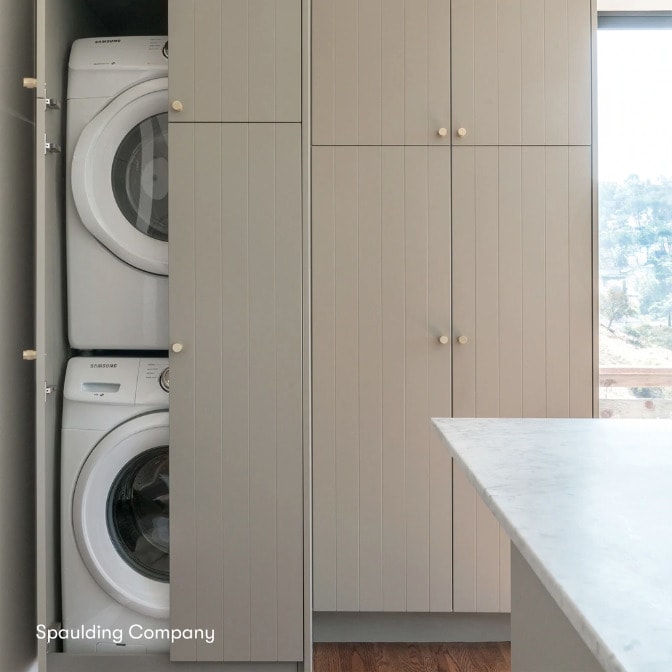
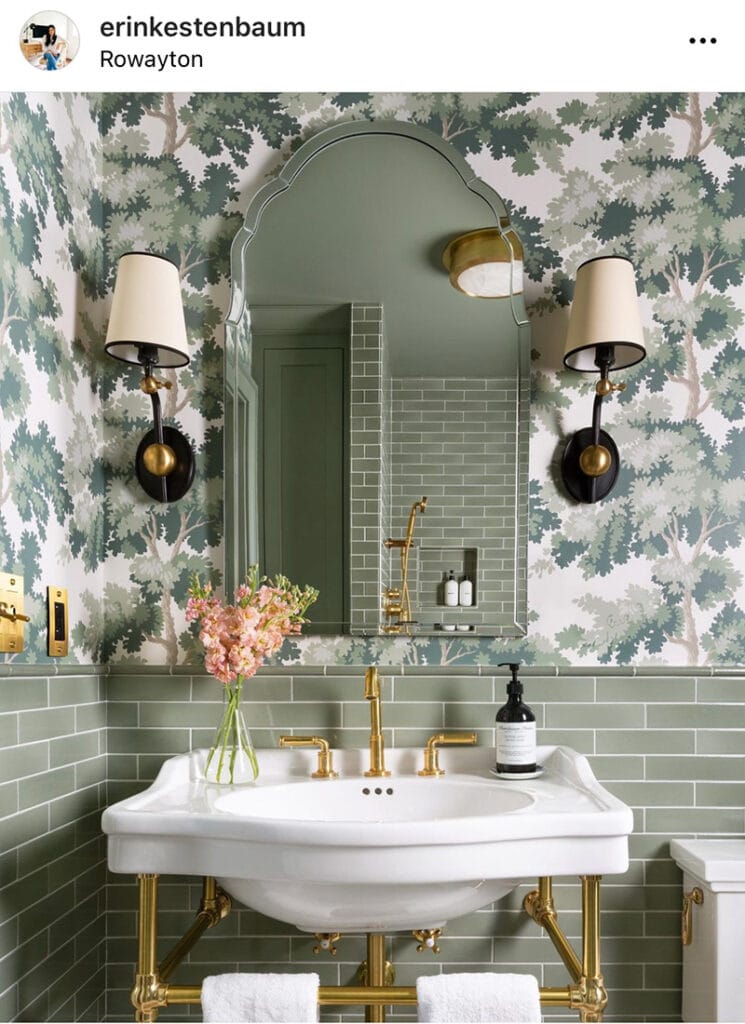
I’ve had plenty of time to dream about what I wanted this space to look/feel like—here are a few images that stuck with me, and what drew me to them:
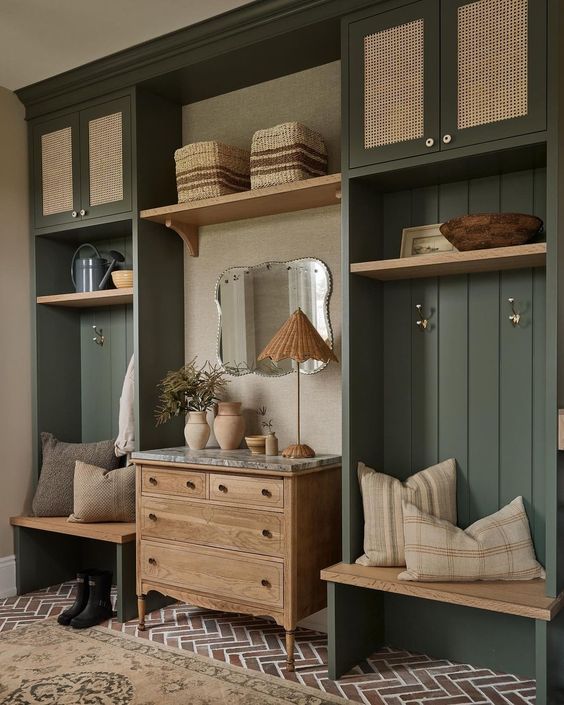
What I love: Muted green cabinetry, wood accents, herringbone brick floors, use of vertical space, overall feeling of warmth.

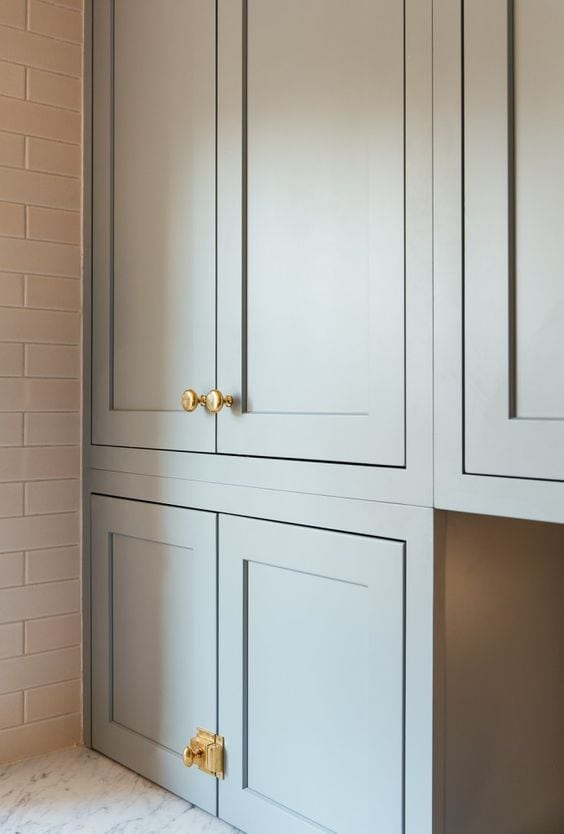
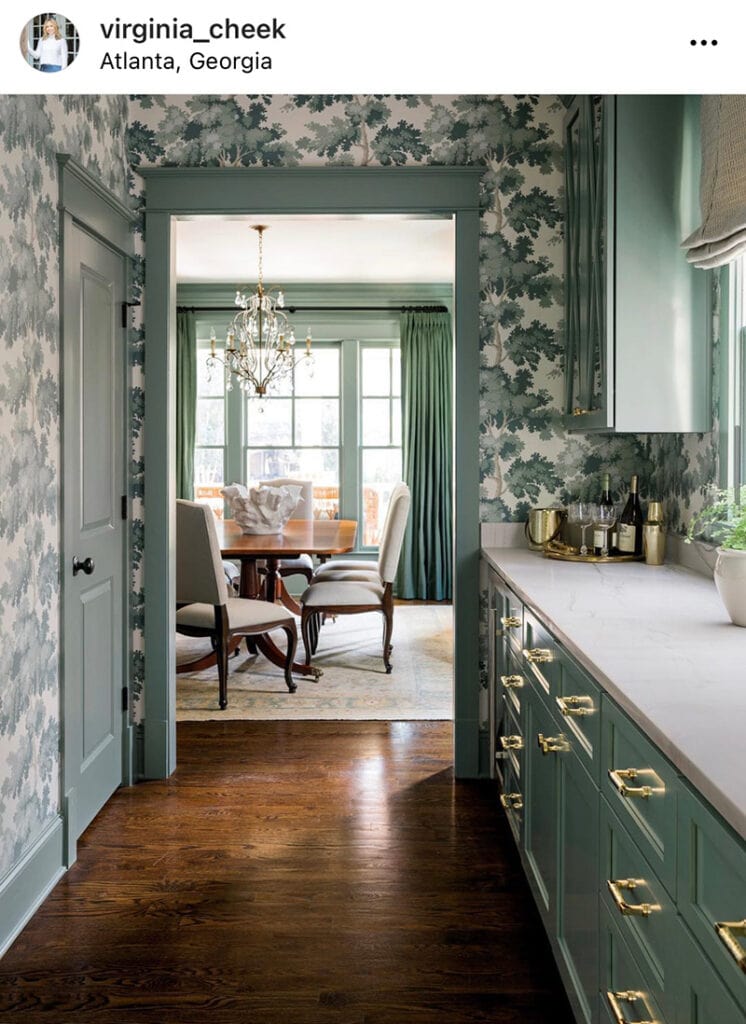
What I love: Sage green built-ins, brass hardware, herringbone floors, floor to ceiling storage, fresh clean feeling.
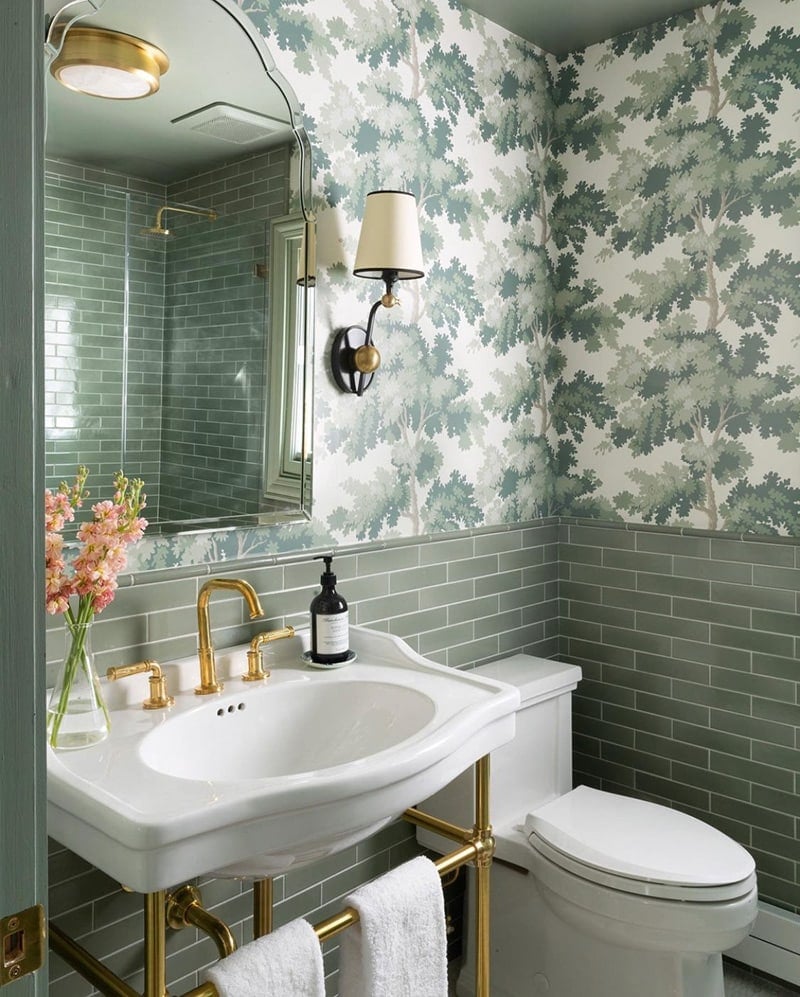
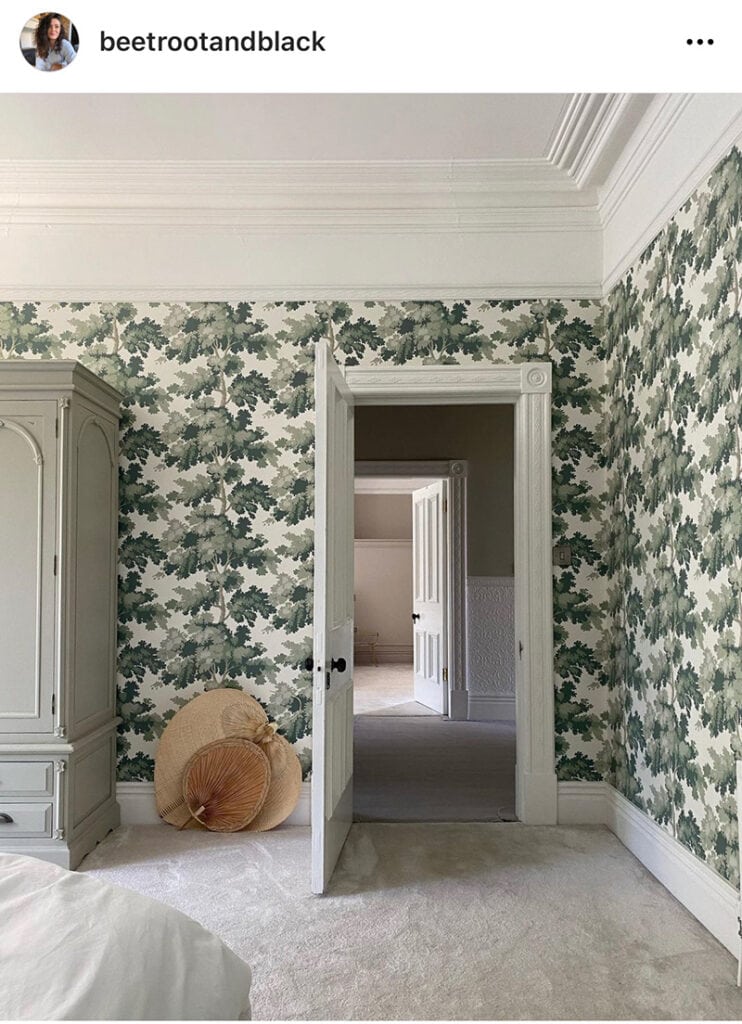
What I love: Wallpaper design, coordinating green walls and ceiling, clean white and brass accents.
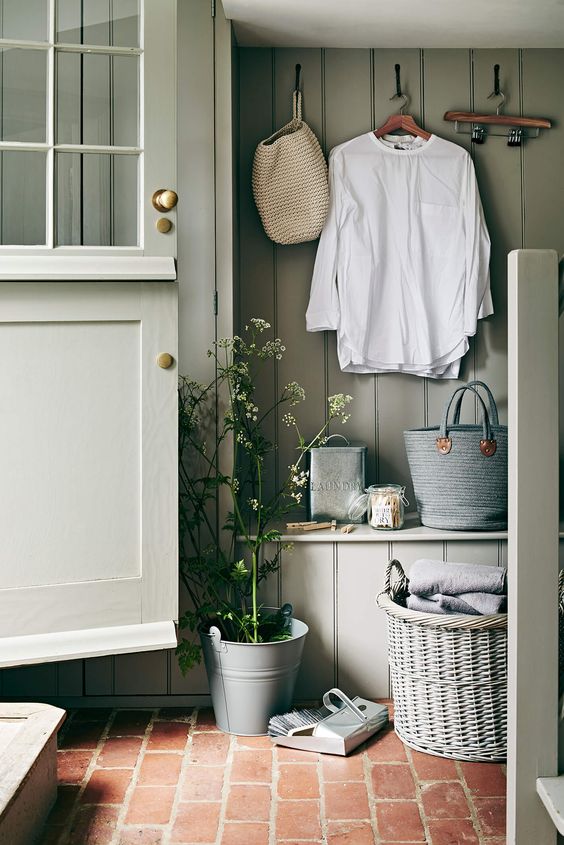
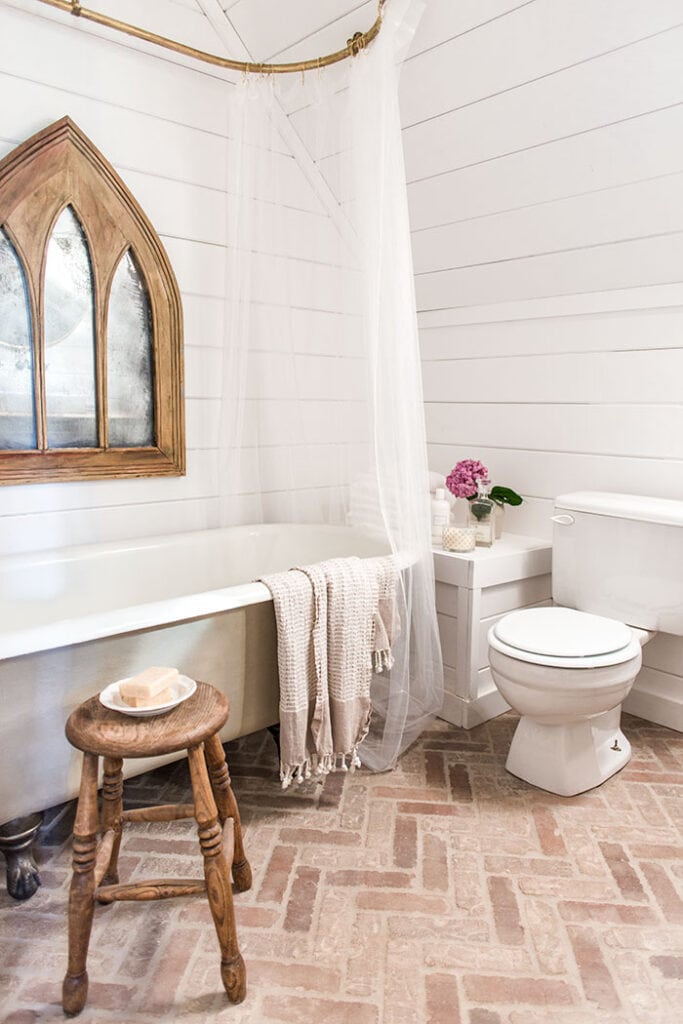
What I love: Pale gray-green walls/trim, old brick floors, vertical paneling, simple and classic design.
Layout + Design
At less than 50 square feet, this room is tiny, so we have to be very strategic about the layout. There are many functions needed from this space—laundry machines, beverage fridge, cleaning/household storage, pantry storage, cat litter/feeding station.
Here’s how we plan to do it:
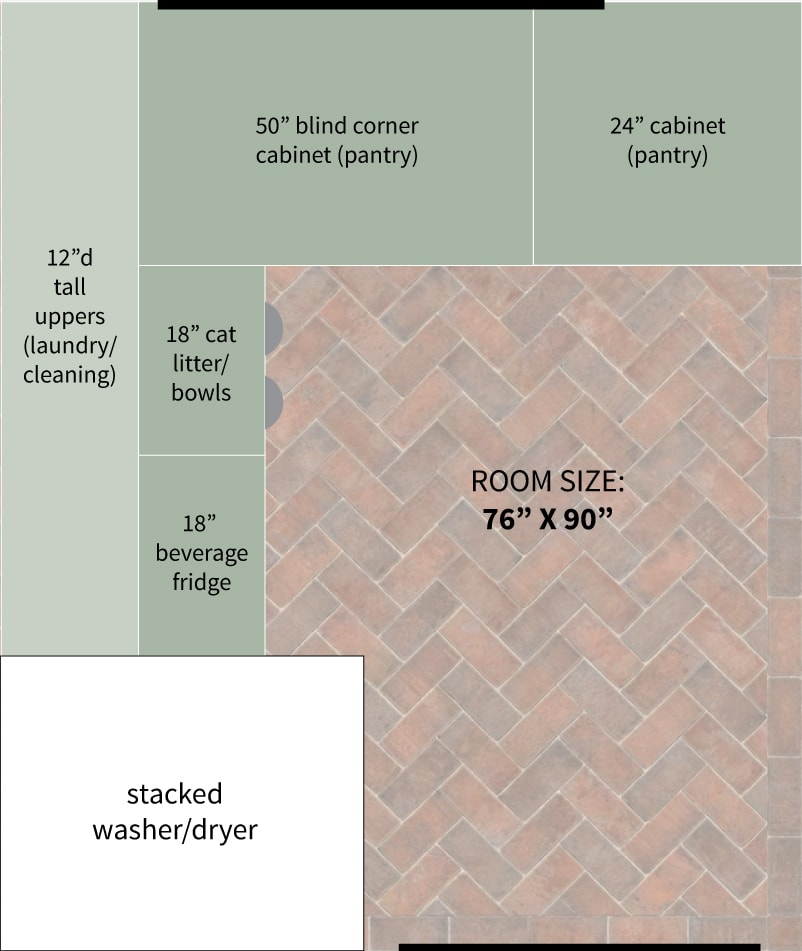
Right away, it was clear that a stacked/washer dryer was the best way to maximize the layout. The ceilings are 9’4″ so we have lots of vertical space to work with. We’ll add lower cabinets in an “L” shape, and 12″ deep upper cabinets along the left wall.
Ready to see the design? Let’s dive into each design element!
Cabinetry
After a lot of thought, we’ve decided to build our own cabinets completely from scratch. Lucas just finished building our garage cabinets so he feels pretty confident taking this on, we don’t have to wait on anyone and can make them completely custom to fit our needs.
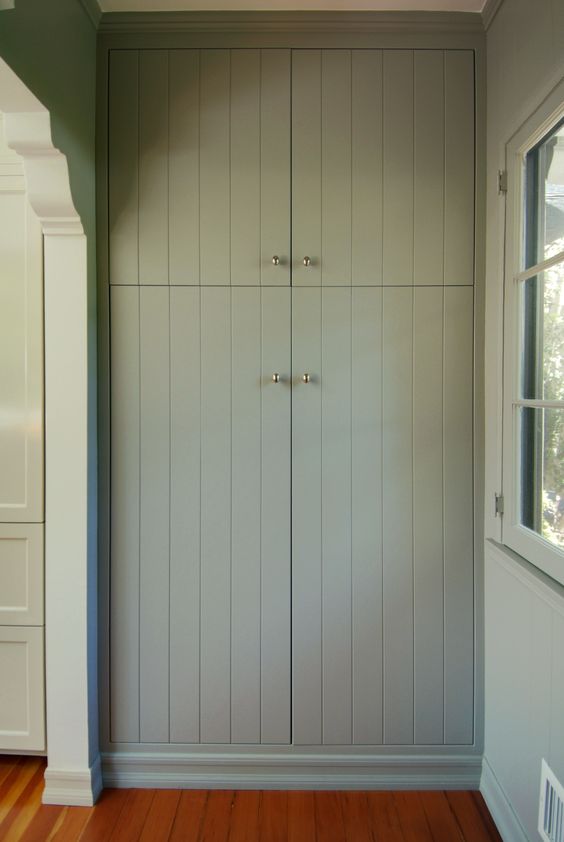
More importantly, I want a very specific look for the doors and couldn’t find it available anywhere, so the only way is to make them ourselves! Have you seen these v-groove panel cabinet doors? They’re having a moment right now and I am here for it…
I’ve been saving and pinning this look for quite some time, but you won’t find this as option from most manufacturers.
Semihandmade offers this door style, but in pre-finished colors and only for Ikea cabinets:
Here’s an example in a sage green, very similar to the cabinet color I plan to use:
The design seemed simple enough to figure out a way to DIY it, so I talked it over with Lucas, and we came up with an easy solution—run the wood through a table saw. IT WORKED LIKE A CHARM!
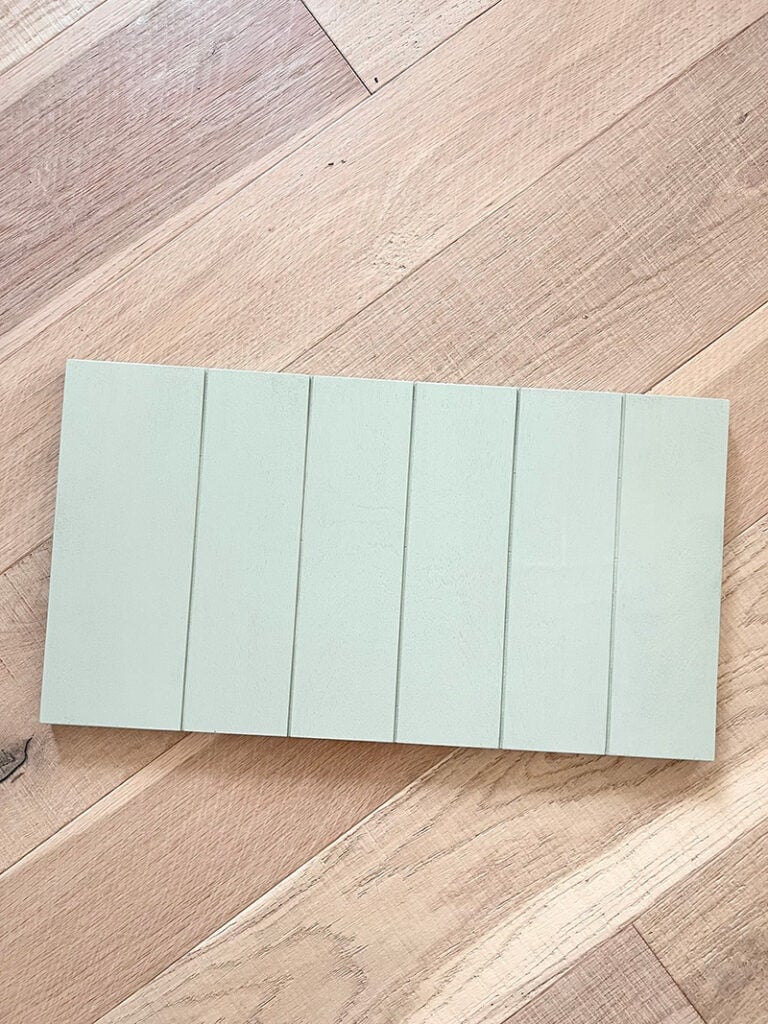
I can’t tell you how excited I am about this discovery. No router or fancy equipment needed—just lower your table saw blade, set the width and push it through. This is a game changer, fellow DIYers.
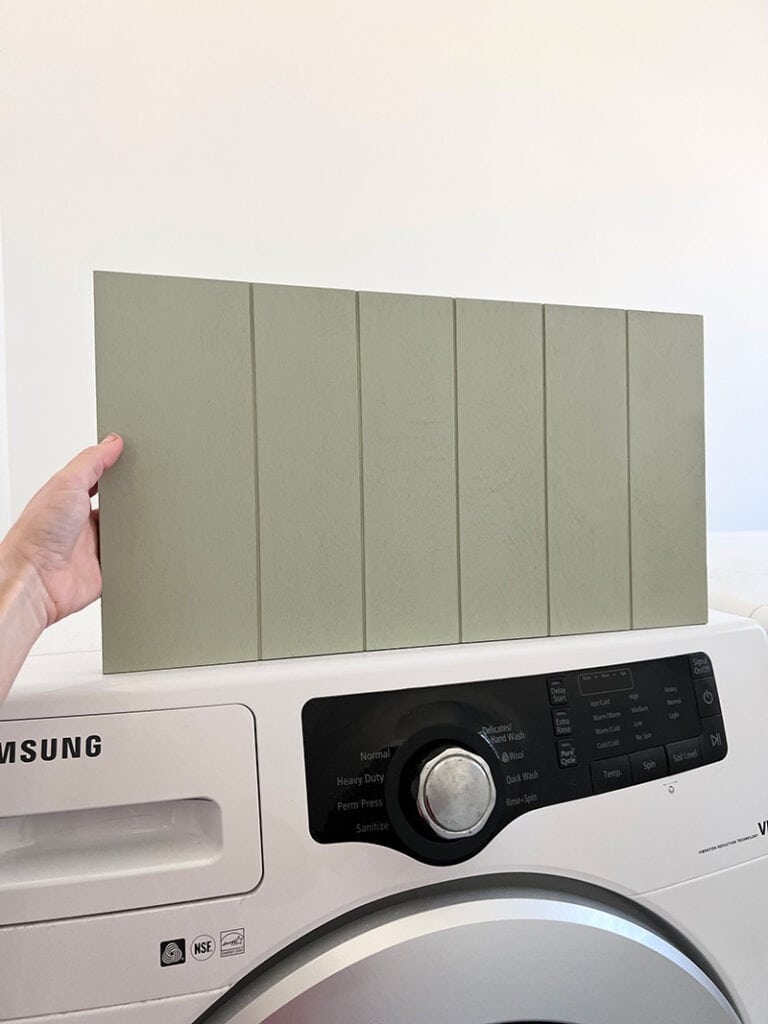
We used a random paint sample (SW Softened Green) and crappy scrap wood for this, but you get the idea.
For the hardware, I’ll be using these unlacquered brass knobs and latches:

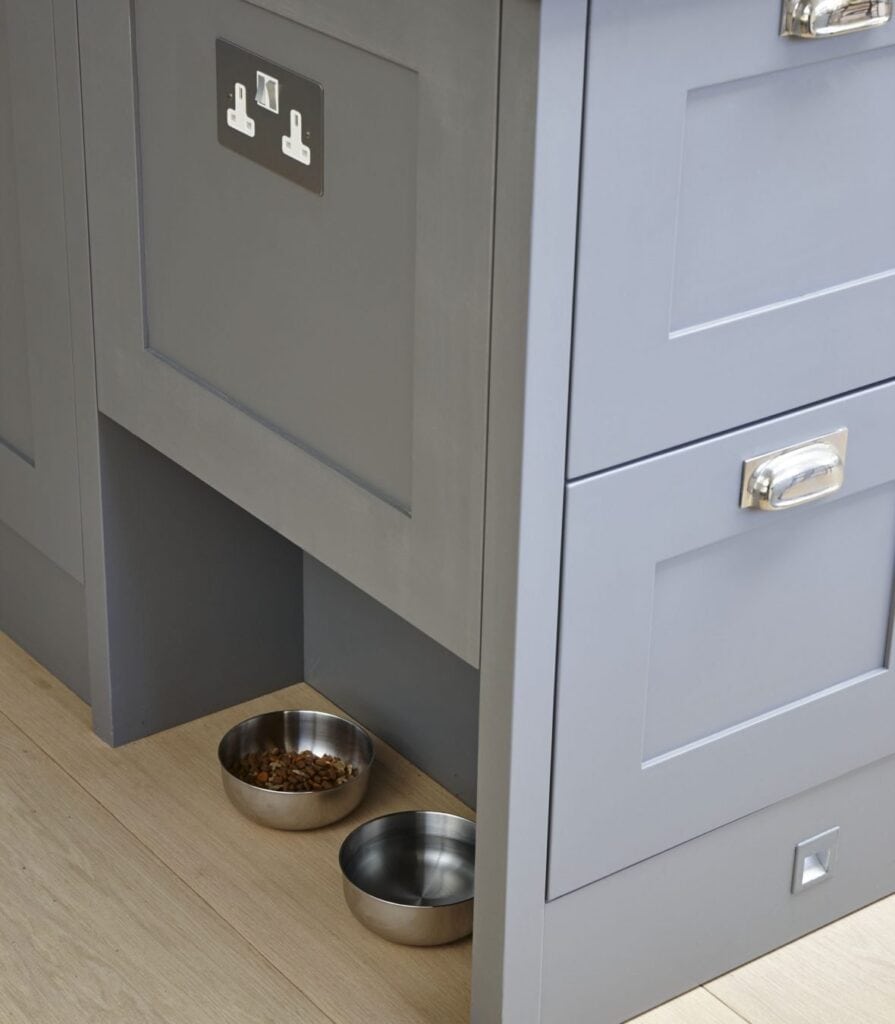
The base cabinets will consist of a panel-ready beverage fridge, two large cabinets for pantry items/storage, and a special cat enclosure with Susie’s litter box. We’ll cut out a little arched entrance for her, and below the door we’ll build in a feeding station—similar to this:
For the upper cabinets, I’m debating the idea of bringing them all the way down to the counter for additional storage—like this:
We’ll have to figure out if we really need all the extra enclosed storage, or if more counter space is better (or maybe a mix of both?) I plan to use this butcher block + a custom white wash stain for the counters—just like we used in our Playroom and Closet.
Walls
Now for the real fun! After a lengthy search, I narrowed the options down to a handful of my favorite green patterns from Sandberg Wallpaper:
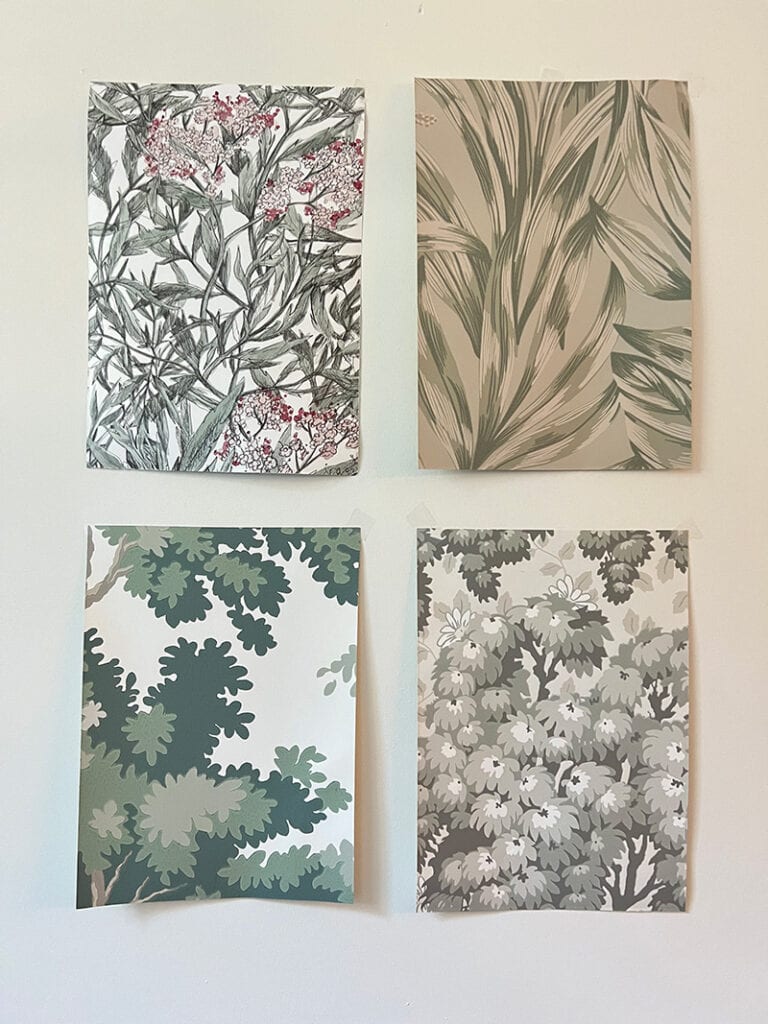
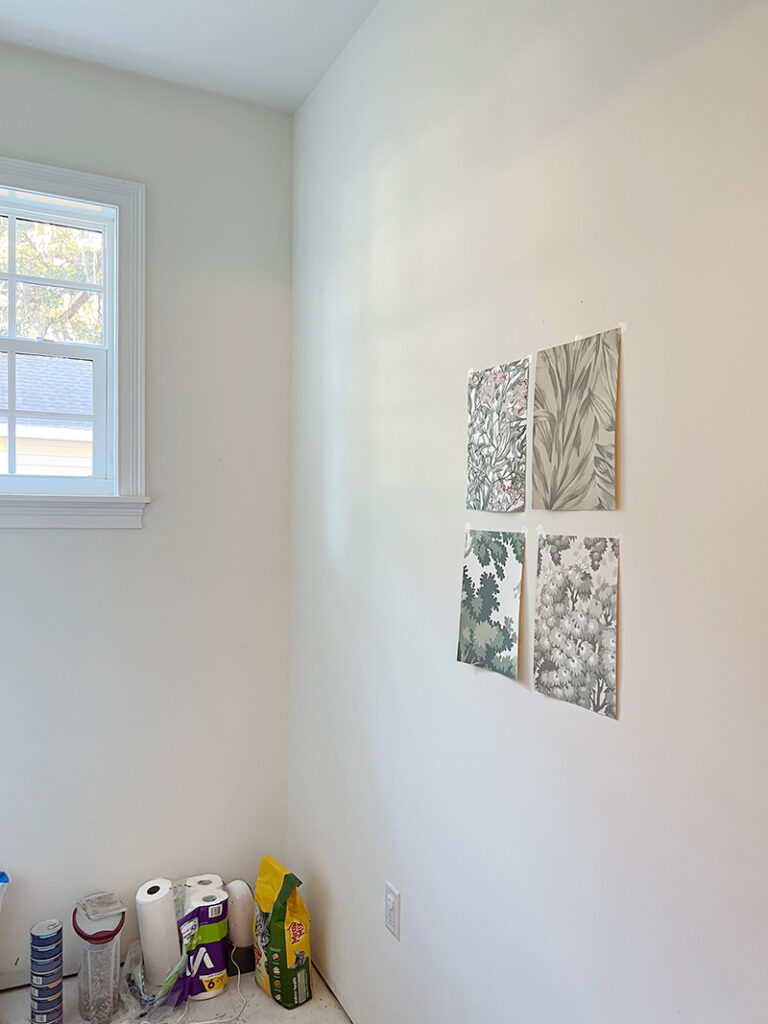
My immediate favorites were the bottom two. Here’s how they look from farther back:
On the sample sheet, I was most drawn to the Ragnvi Spring Green, but the color is a little too gray for me. Here’s how it looks installed:
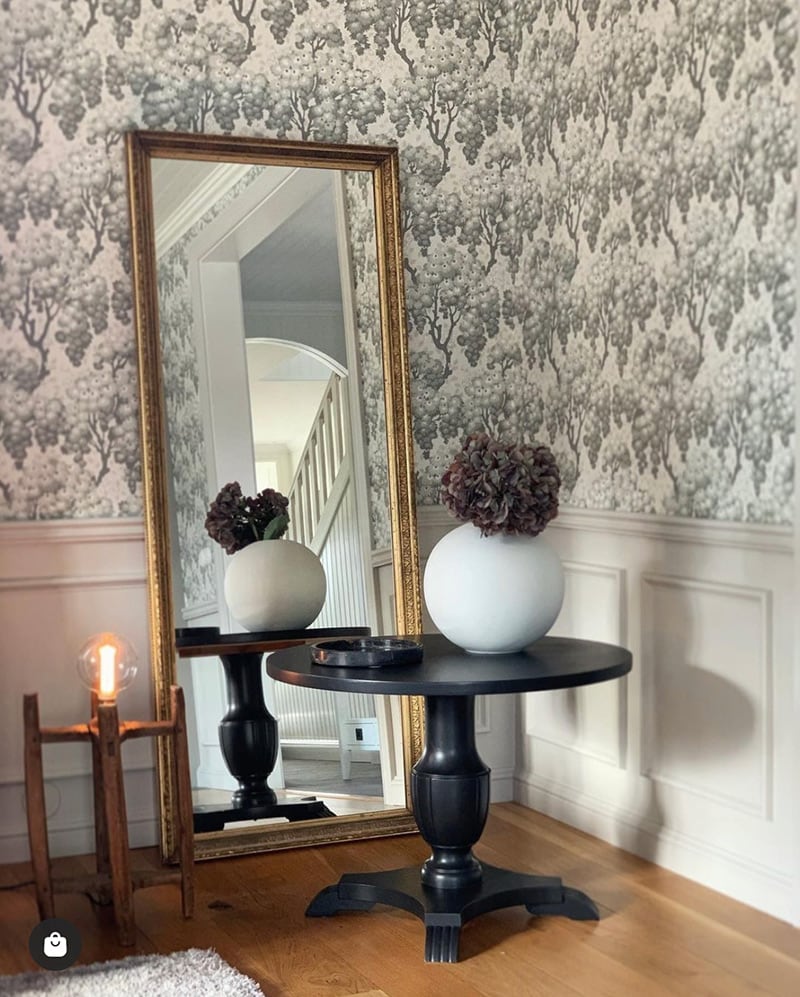
Truthfully, Raphael Green has my heart…
I know a lot of designers/bloggers have used it before and I typically try to do something different, but this paper is just so dreamy.
Can you picture it in our laundry room, surrounded by a coordinating sage green wall/trim/ceiling?
Bold wallpaper is always a good idea in small doses! I might end up frosting the glass door since this room is very visible from the rest of the house, but I think it will make me happy every time I walk in. #YOLO!
Floors
Ever since installing thin brick pavers in the upstairs bathroom and laundry room in the Cottage House Flip (five years ago!), I’ve been waiting for the perfect spot to use them again. This was the very first design choice made for this space.
I loved the Old Mill Thin Brick product so it was an easy decision to use them again—and now it’s even easier because they sell these pre-assembled herringbone sheets!

This time around I chose the color Monument, which has more of a warm gray tone and slightly less color variation. I’ll be installing them in this pattern, with a single row border around the edge:
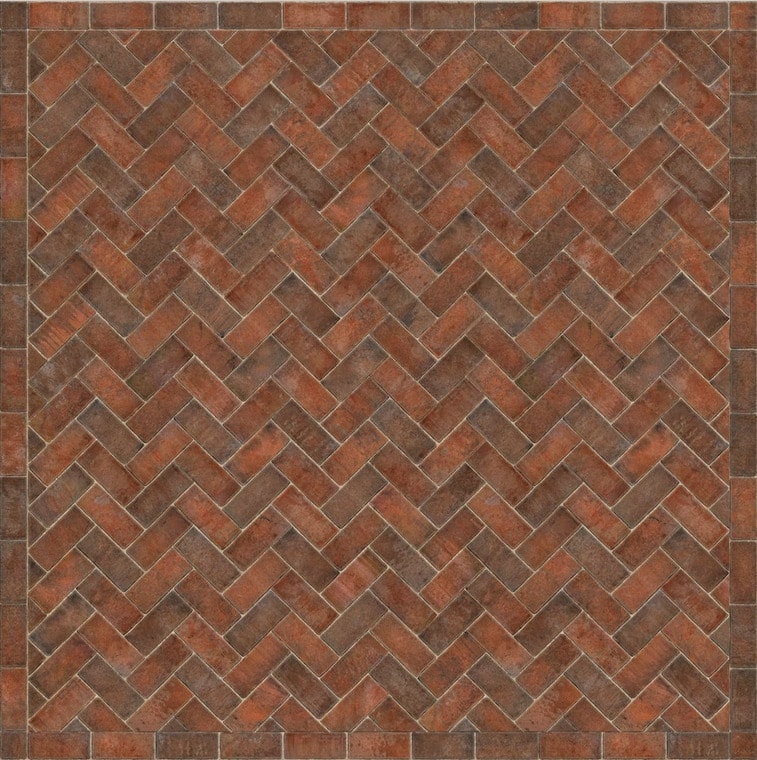
These floors will be our first project in this room, and we plan to install them next week. Make sure you’re following me over on Instagram to see the live progress! I’ll also share a blog tutorial soon.
I think that just about covers everything! I’ll share more details in future update posts, and try not to drag this renovation out for too long (we’re simultaneously working on projects at the Hacienda Hideaway so there’s a lot going on at once!)
Next week: Design plans for the Hacienda Hideaway bathroom…


Ale says
This laundry room is going to be stunning. I have been wanting to add brick floors to an addition we are thinking about. I am curious…how are they to clean? Obviously you like them as you have used them a bunch, but I had worried about the texture making them hard to clean.
Thank you!
Jenna Sue says
I’ll be sealing the brick first, so they should do great! The color/texture honestly hides everything, and there is some color variation so even stains should blend in.
Julia says
This looks awesome Jenna!
I like the table saw cuts in the wood. I did a similar treatment to large plywood panels that I wanted to install in a ceiling treatment (between beams). I marked out the distance I wanted the grooves then clamped a board to the plywood (as a jig) and run the router down it . I was pretty quick once I got going.
Cant wait to see your progress.
Jenna Sue says
A router was our backup plan and works great too — such a simple and easy way to customize wood panels! I’m sure yours looks amazing 🙂
Jolene says
Beautiful! I don’t know why, but I always enjoy your laundry rooms so much. And I was happy to hear you might frost the door; that was one of my favorite things about the house with the basement laundry room (and the theater room), I’m blanking on the house name?? I’ve always wanted a frosted door somewhere in my house, so I suspect it’s just my vicarious living, that I do through you! Love the look of the scored cabinet doors. Lucas is so clever and handy, you two are quite the combo!
Jenna Sue says
Thanks Jolene! That door was in the modern farmhouse, and I almost forgot about it 🙂 I loved the cute decal. The jury is still out on the privacy film but we can make that call at the very end.
Carla from Kansas says
Cats tend to prefer litter in a separate room from eating.
Jenna Sue says
Thank you, I will look into other options.
Mélissa Delaunay says
I love yours ideas, i’m fond of the floor. I would be worried about cat litter falling in the cat good or water, so i’m eager to see this arched door.
Jenna Sue says
Thank you for bringing this up Melissa, somehow this thought never crossed my mind. But you are absolutely correct and it looks like we may need to rethink this plan!
Jae says
Totally love your design! Am interested in seeing how the litter station works out since we also have indoor cats. Only question I have is how to prevent any litter stuck on paws from dropping into the food and water if the box is above the feeding station (even the non tracking seems to stick in small amounts).
Your wallpaper choice looks perfect.
Jenna Sue says
Thanks Jae, after reading some others comments we may need to rethink this plan! Definitely don’t want any food contamination. Might need a Plan B…
Megan says
We have our cat box in our garage, where our cat can access it through a little cat door in the wall. We built a box to hold the litter box and it’s mounted to the garage wall 🙌🏻
Can’t wait to see your laundry room!
Jenna Sue says
That is a great idea! I wish we had an attached garage sometimes, we would definitely do something similar if we could!
Terrillr says
Maybe reverse the locations, with the food above the litter enclosure? Don’t know if that would work or not.
Jenna Sue says
After some thought, I think we’ll be relocating her food/water to another location in the house. I would have loved to make this work but I just don’t think it’s worth the contamination risk!
Tina Diaco says
Absolutely love your ideas! Can’t wait to see it all come together!
Jenna Sue says
Thanks Tina!
Paula says
This is going to be completely gorgeous! Can’t wait to see it finished!
Jenna Sue says
Thank you, Paula!
Jenni says
I was so excited about your DIY idea because I have been wondering for some time if I should try this for the same look on my cabinet doors – you were the guinea pigs! And yes, it looks great! Thanks for sharing!
Jenna Sue says
I’m so glad the trial run worked like a charm — I’m hopeful the doors will turn out great 😀
Christine D-J says
Okay, that laundry room pocket door is EVERYTHING!
Have you posted about its origin before? I am in love!
Jenna Sue says
I found it at a local salvage yard years ago — before we even built the house! I was saving it for our future laundry room 🙂
Caroline says
Love it! I can’t wait to see the litter box cabinet. We have been trying to find a solution for ours so we can get it out of our bathroom and into our pantry.
Jenna Sue says
It will be trial and error, but I’m hoping we can make this work!
Carly says
Jenna- STUNNING! Love all the choices. On the decision of extra long cabinets for storage versus more counter. Had many different layouts in laundry rooms(17). I find I rarely use counter space. I prefer to have one counter spot close to washer/dryer to set supplies, have a mini basket for items etc. I would rather have more cabinet storage. Right now I have a large laundry with cabinets/stone counters. All the cabinets are full and I am not a junk keeper. I rarely use the counters other than a small area next to washer. I never want to fold laundry in a laundry room rather do it somewhere else. I do like hanging space for wet clothes. My current laundry layout it was a problem to find a way to hang wet clothes, no room for a rod hanging space. I found a great product attached to the drywall that is 6 inch height x 1/2 inch wide to pull down when needed to hang clothes. Love it, small compact and just what I needed for occasional drying. Just my experience on laundry counters. Anxious to see the beautiful design come to life. LOVE the cabinet style!
Jenna Sue says
Thank you for sharing that insight, Carly! I do agree that cabinet storage would probably be more useful. I just worry about the already tiny room feeling too small/enclosed. I could always tuck a supply basket/glass jars underneath the cabinets if they were raised. And I didn’t even think about a drying rack — we throw much everything in the dryer, or just hang them over the dining room chairs to dry overnight. A wall mounted rack is something I should consider though, and the entire left wall is currently empty. Will look into that now — thanks again!
Erin says
This is going to be spectacular! Everything you touch turns to gold. I am literally obsessed and wait anxiously each week to see what your up to next!
Jenna Sue says
Thank you so much, Erin!
Renae says
I love your design plan. I have brick floors on the main floor of my house, in a herringbone pattern and I love it. My heart sings every time that I see them. I’m a huge fan of green. Too. I can’t wait to see the reveal.
Jenna Sue says
I would put herringbone brick in every home if I could — it’s just so classic and timeless. Can’t wait to see how it turns out!
Teddee Grace says
This is going to be so pretty! Can’t wait to see the finished project and all the steps in between.
Naomi says
Looks beautiful! The fold-down drying rack suggested by Carly is a great idea. You have the wall space. I always need more places to hang clothes.
Jenna Sue says
Thanks Naomi, and you’re definitely right! I can always count on you guys for great suggestions 😉
Jenna Sue says
Thank you Teddee! It won’t be a quick renovation but I’m glad we’re finally breaking ground on it.