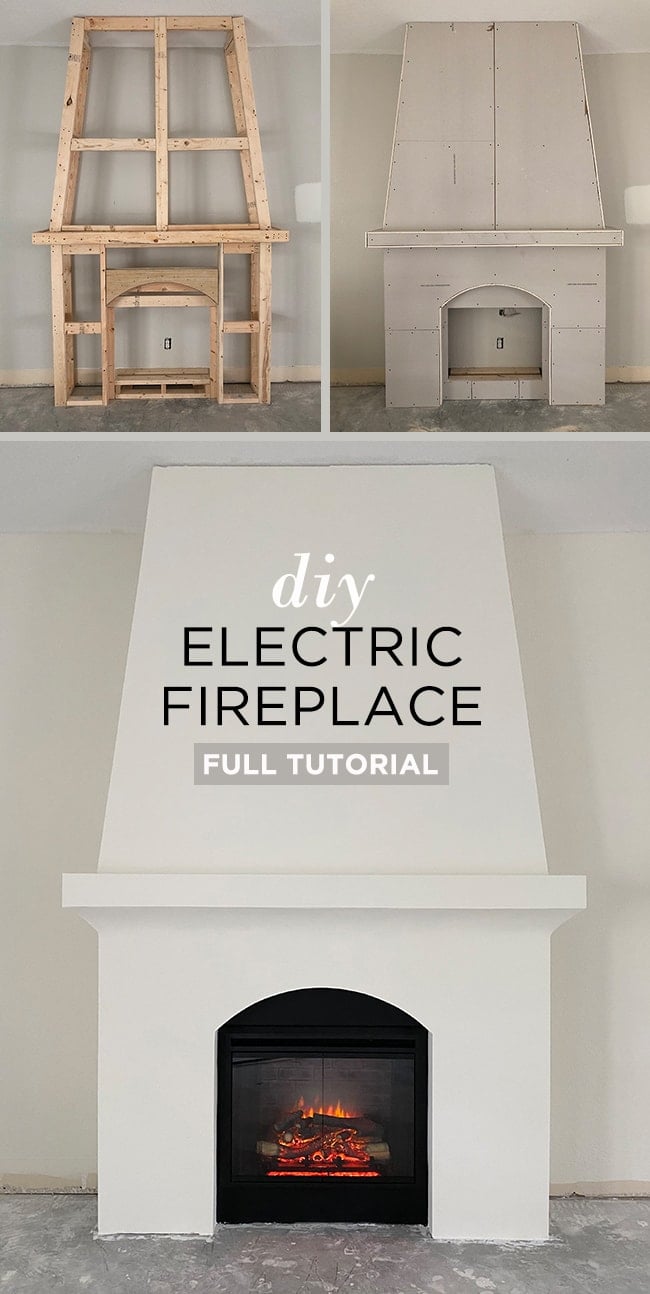
If you’re looking to add a gorgeous and cost effective built-in fireplace to an empty wall, this tutorial is for you! Learn how to frame and finish a drywall fireplace with an electric insert in this step-by-step tutorial.
This has to be one of my favorite DIY projects to date—partly because Lucas did all the work (ha!) but also because it turned out exactly the way I had pictured, is relatively low cost and looks like a million bucks (you’d never know it was Lucas’ first time building a fireplace!)
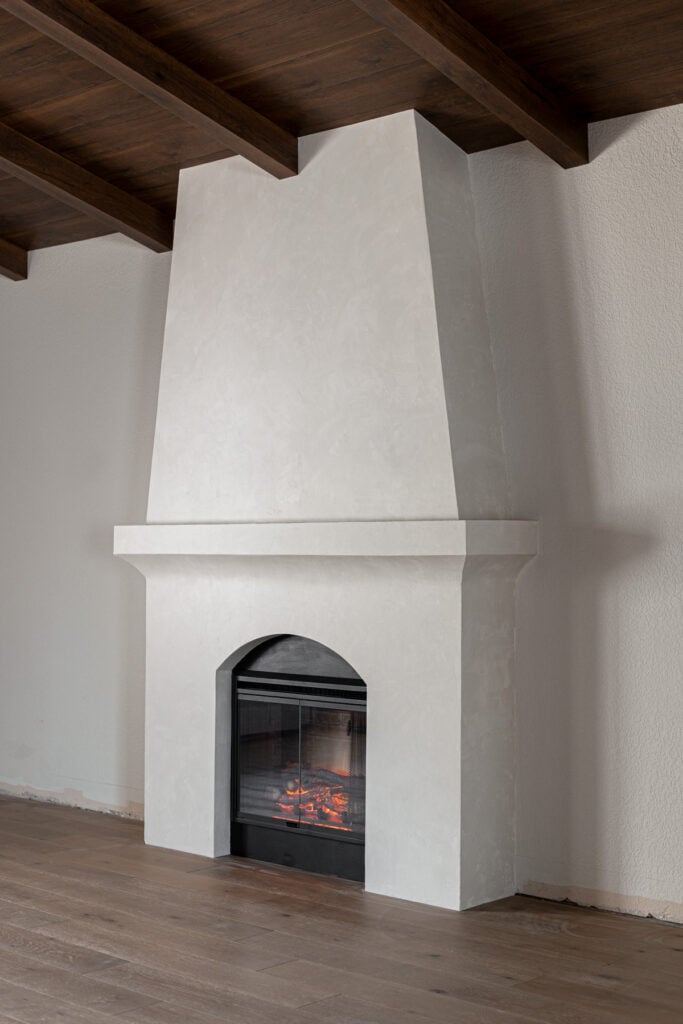
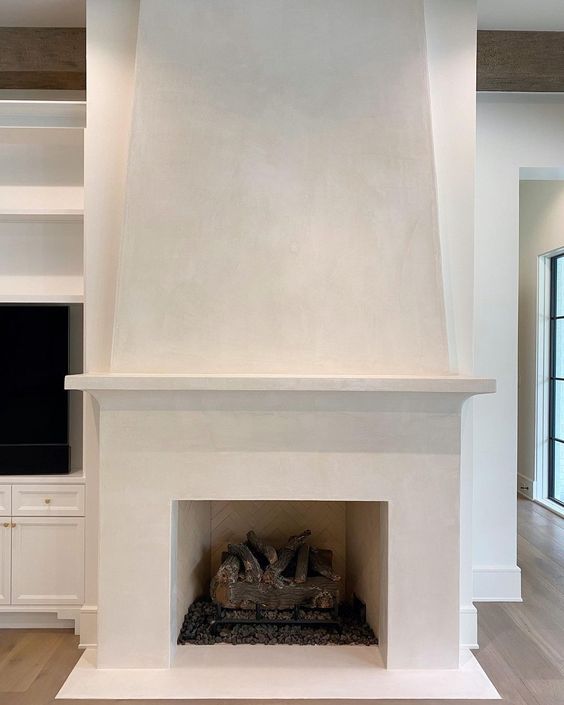
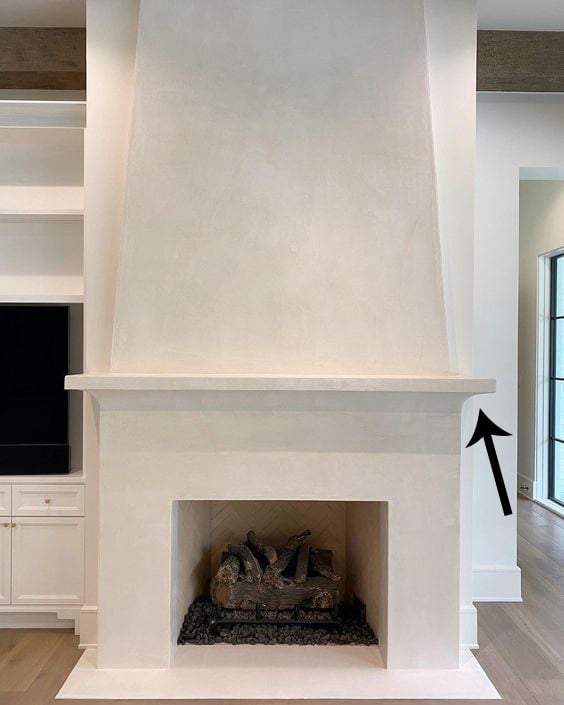
Update: here’s how the fireplace looks after my DIY Venetian Plaster finish:
Jump to:
How to DIY a built-in electric fireplace
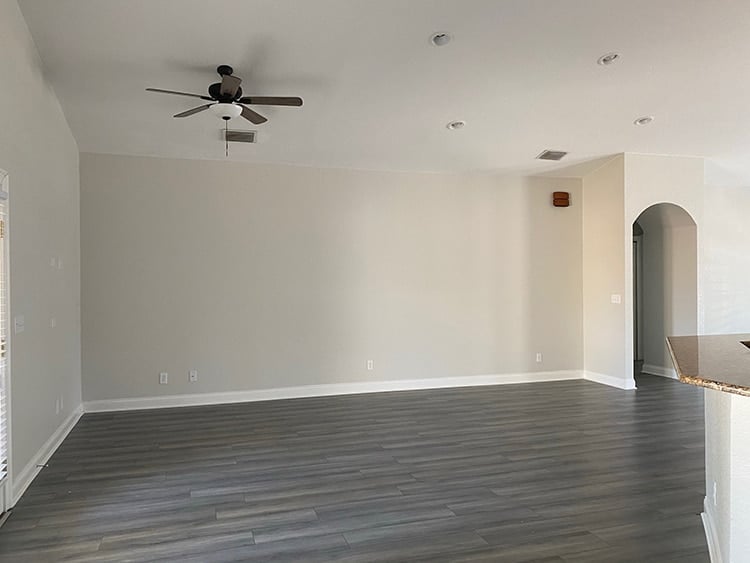
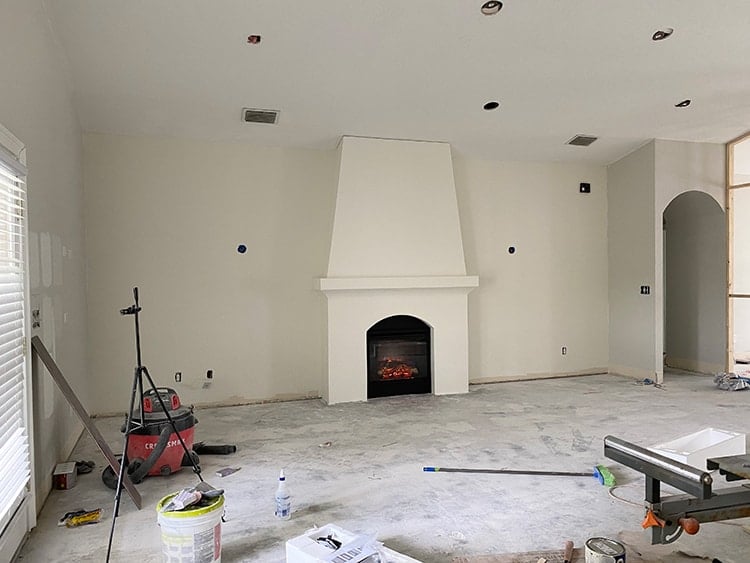
Last year, we built a simple fireplace surround using an old mantel for our own house, but that was just a warm-up compared to this one. I wanted a show-stopping, classic Spanish style realistic-looking fireplace that would transform this blank wall and be the main focal point of the living room.
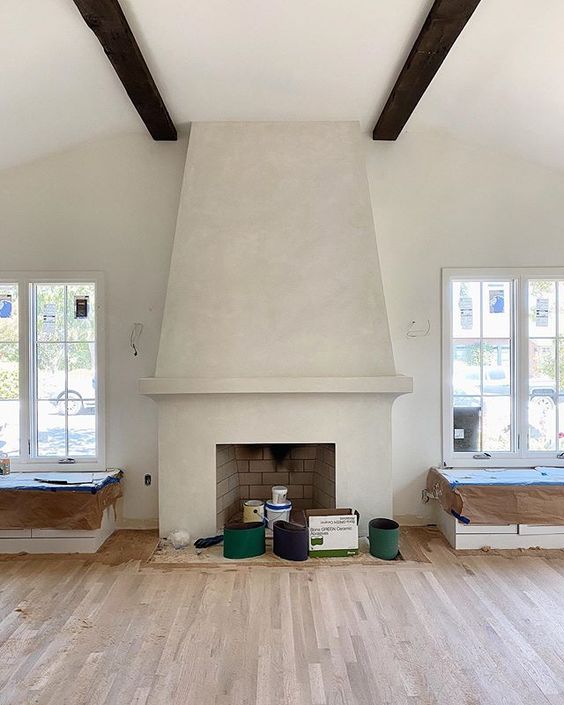
I gathered up some of my favorite inspiration photos on Pinterest, and Lucas and I brainstormed ways to make it happen:
Disclaimer: This was Lucas’s first time working with curved drywall, tape, corner beads and finishing techniques and Lucas figuring it out as he went. If he can do it, so can you! Take it away, Lucas!
Tools
- Miter saw/chop saw
- Drill
- Kreg-jig
- Jigsaw or Dremel multi-max
- Level
- Stud finder
- Angle finder
- T-square
- Clamps
- Utility knife
- Tin snips
- Taping knives
- Drywall saw
- Painter’s tape
- Extra fine sanding sponges
Materials
- Electric fireplace insert
- 2×4’s for framing (we used 20 8′ boards)
- Power Pro construction wood screws (2″, 2.5″ and 3″)
- Drywall screws
- Drywall nails (or spray adhesive)
- Shims
- Wedge anchors (optional; for securing into concrete subfloor)
- 3 sheets of 1/2″ 4×8′ drywall
- 4×4′ sheet of 1/2″ plywood (for the arch)
- Joint compound
- Vinyl corner bead
- Drywall tape
Total cost
$779 for materials (we already owned the tools).
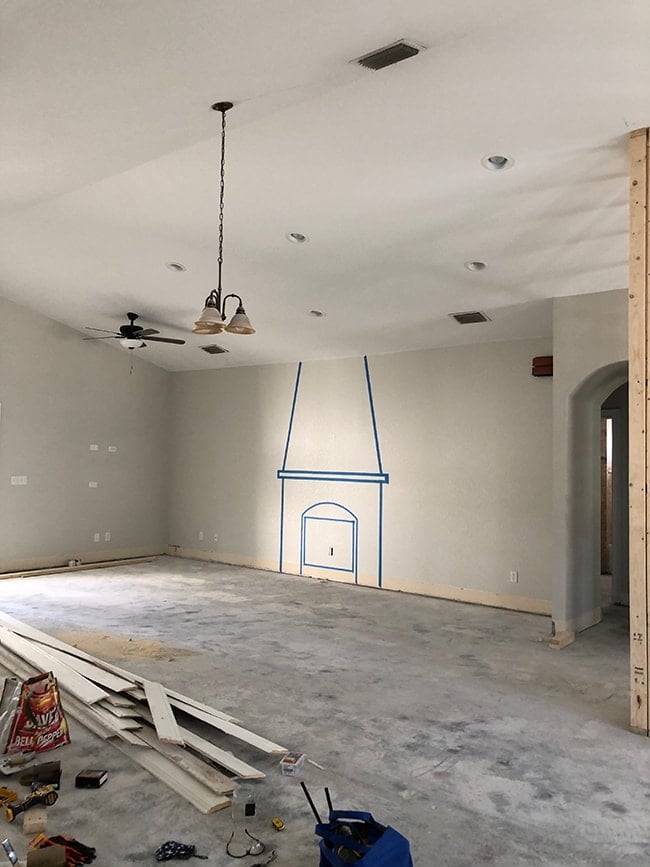
Step 1: Tape the outline of your fireplace on the wall
It is critical to get a visual at scale in the actual space, and Photoshop can only do so much. After a few adjustments, this is the final outline we ended up with:
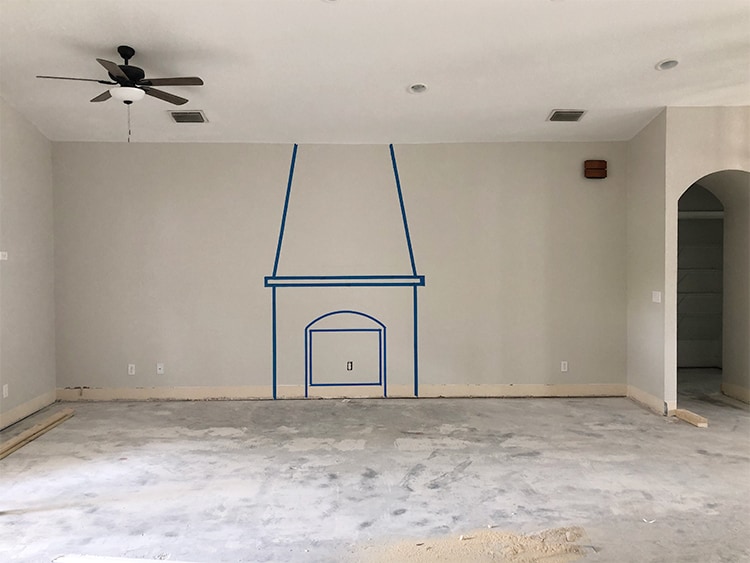
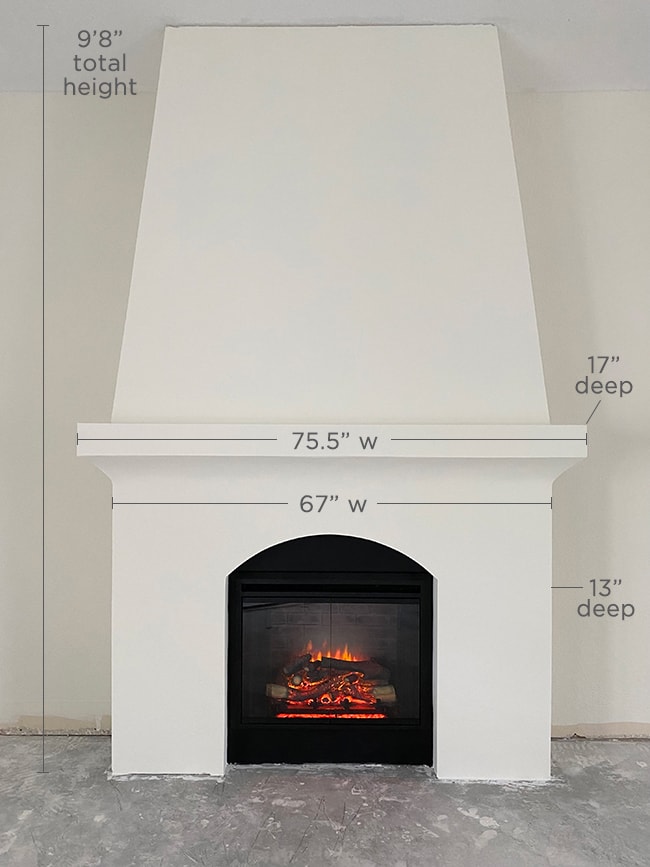
We had some wiggle room so I used a stud finder to locate the nearest stud, and adjusted the width so that each end would hit a stud, making the lower portion 67” wide (after drywall). Our ceilings are vaulted and the fireplace height at the back wall is 9’4″, for reference.
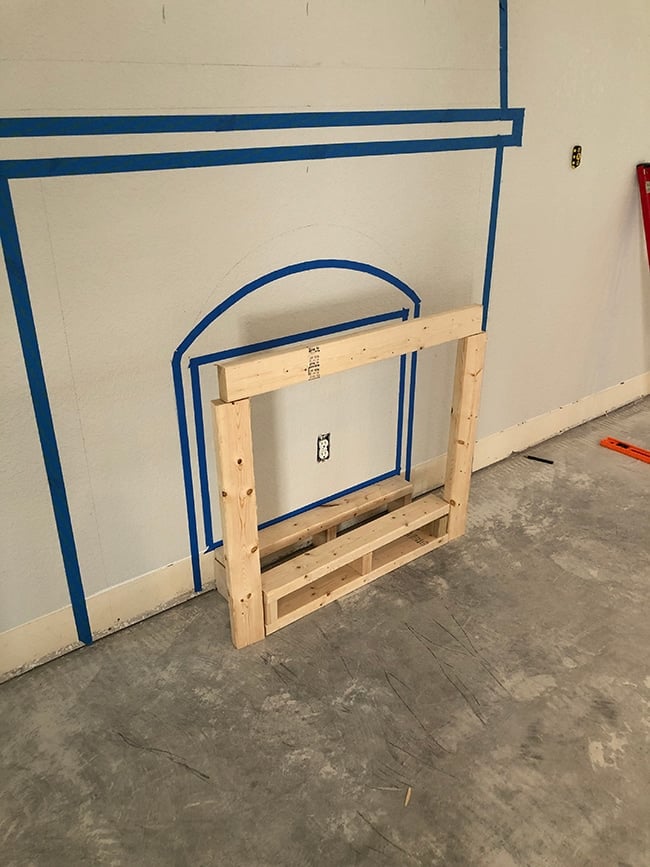
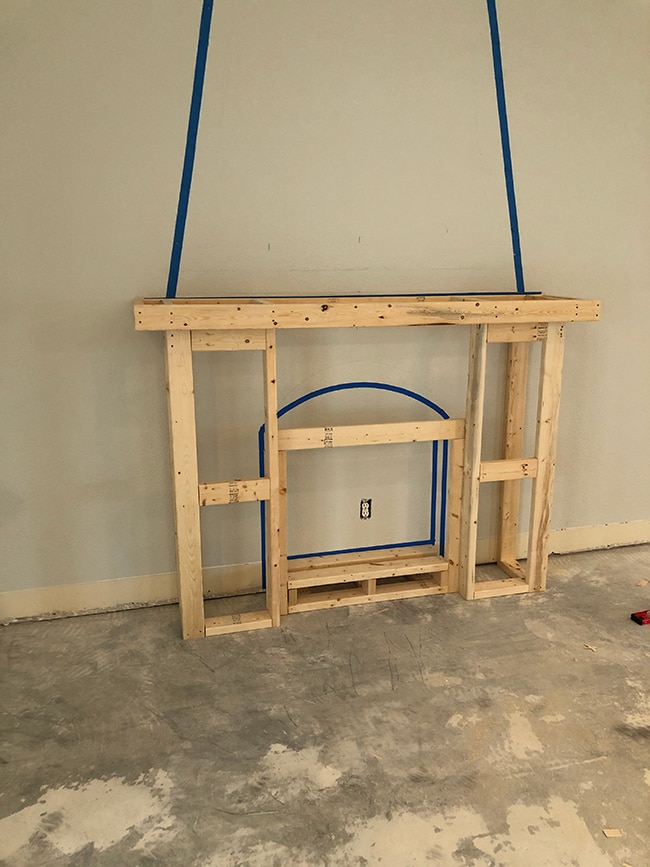
Step 2: Build the frame for the fireplace insert
First, make sure you have an electrical outlet on a dedicated circuit located behind your fireplace (we had our electrician add this). Electric fireplace inserts must fit into the framing relatively snugly with minimal wiggle room. Therefore, it’s best to start by building the frame to the exact dimensions you need and go from there.

We decided to position our insert 6” above the floor, as we won’t be building a hearth in front of it.
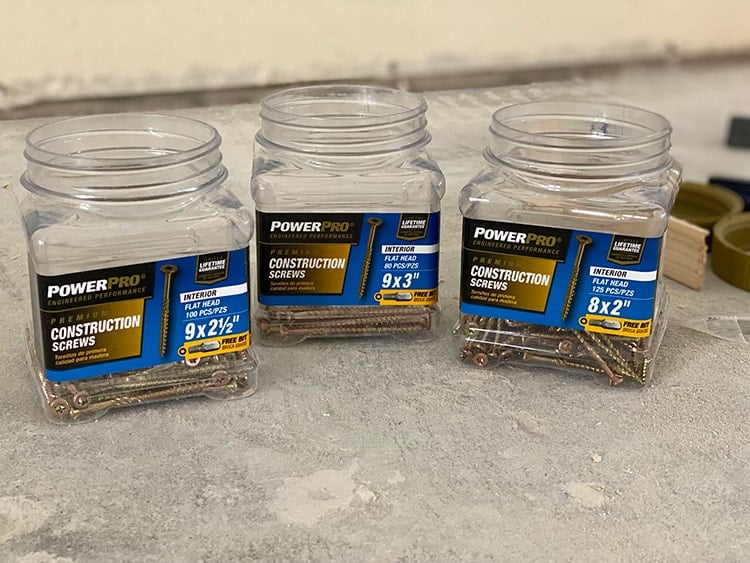
For the framing, I used Power Pro construction screws, which are my go-to wood screws for any project. They’re self-drilling (meaning no pre-drilling required and no splitting wood!) and they include a star drive so they won’t strip. They’re also easy to countersink into the wood. I used 2”, 2.5”, and 3” screws throughout this build.
I also used our Kreg Jig to create pocket holes, which were essential to attach many of the fireplace frame pieces together.
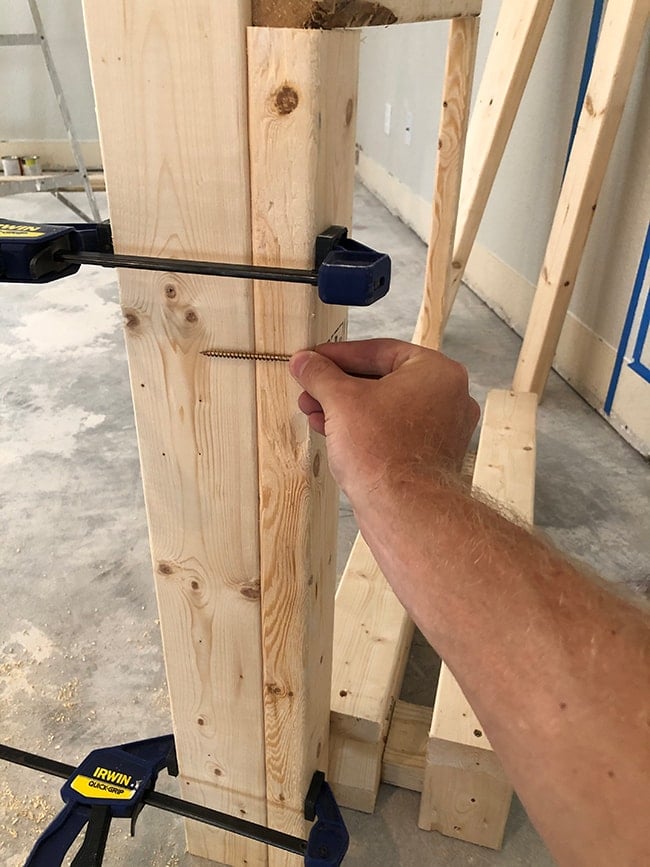
Whenever possible, I used these clamps to help keep the boards flush and secure while I attached them together.
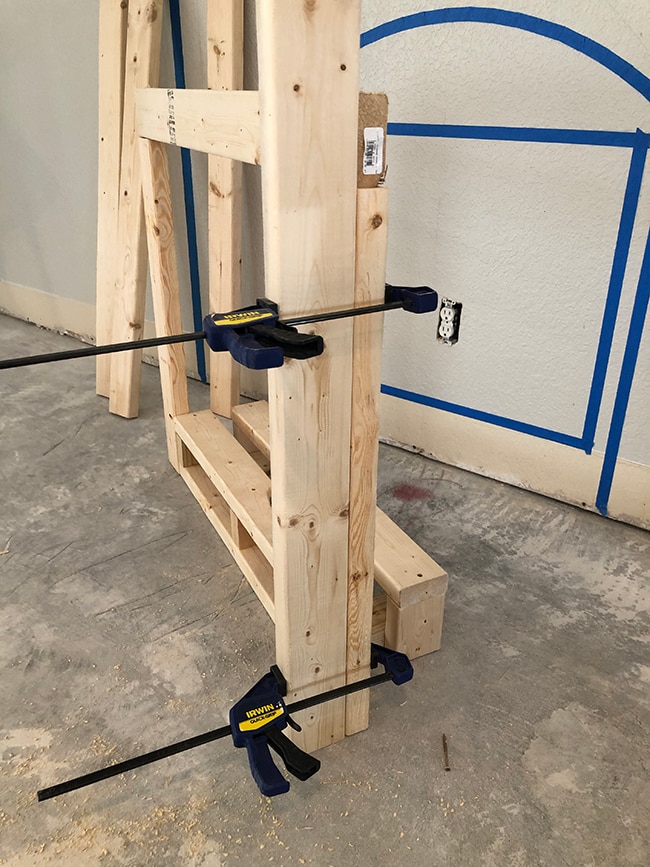
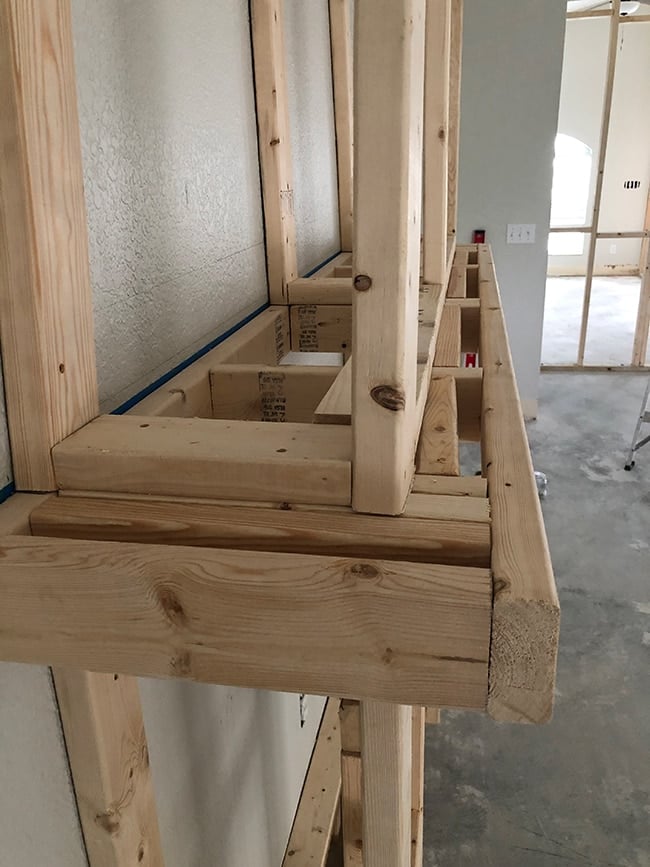
When assembling the insert frame, I added a temporary horizontal piece of wood across the top to help keep the shape square (that’s why there are two boards at the top). I’ll remove it later in the framing process, but it is critical to make sure all four corners are square at this stage as it would be very hard to correct the wrong size opening later on.

Step 3: Cut and assemble the framing for the bottom half of the fireplace
With the insert framing done, I cut and assembled bottom vertical framing pieces for the surround.
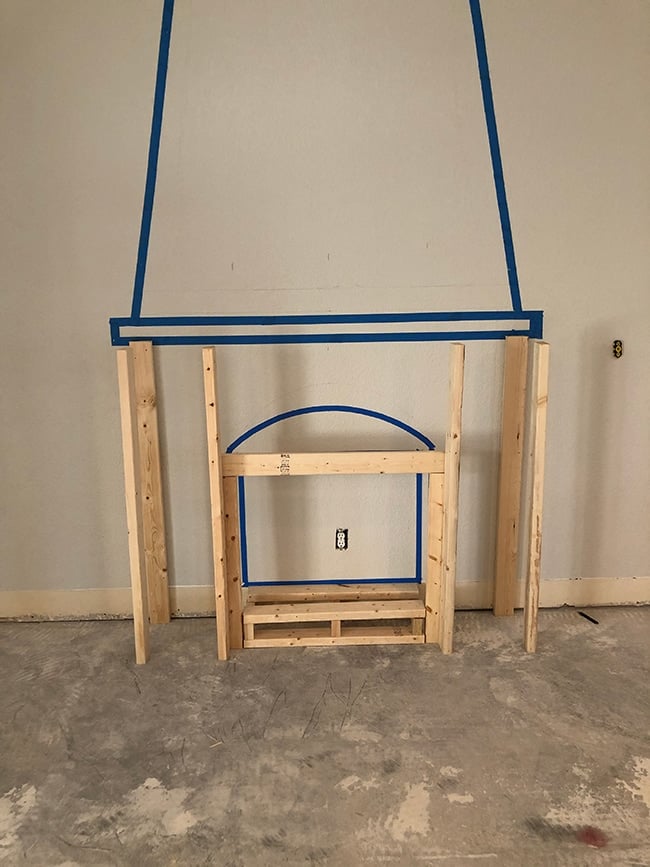
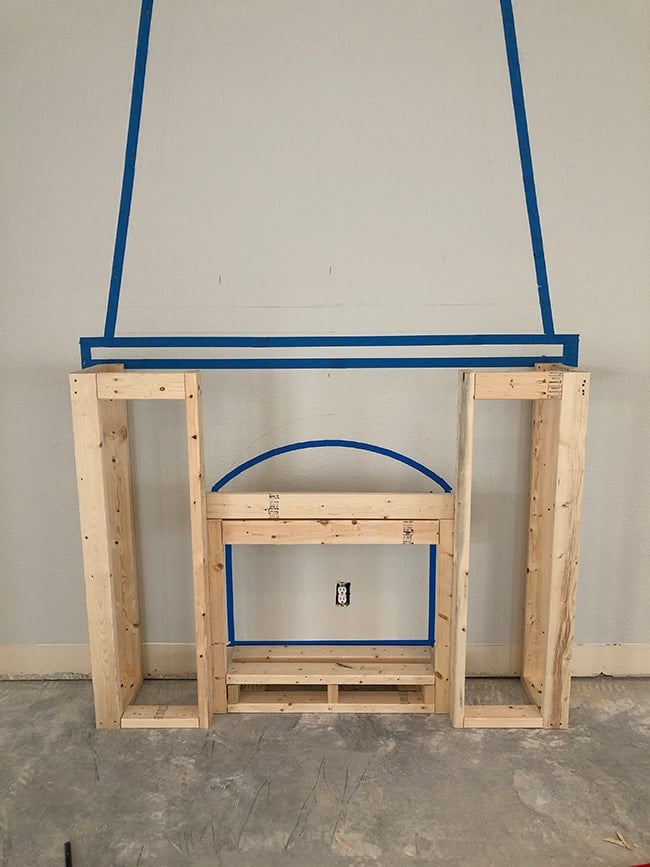
One key feature of our build was to have the insert recessed from the front of the fireplace, so I positioned 2×4’s facing out on both sides to create a 3.5” depth. This would give the fireplace a more realistic look.
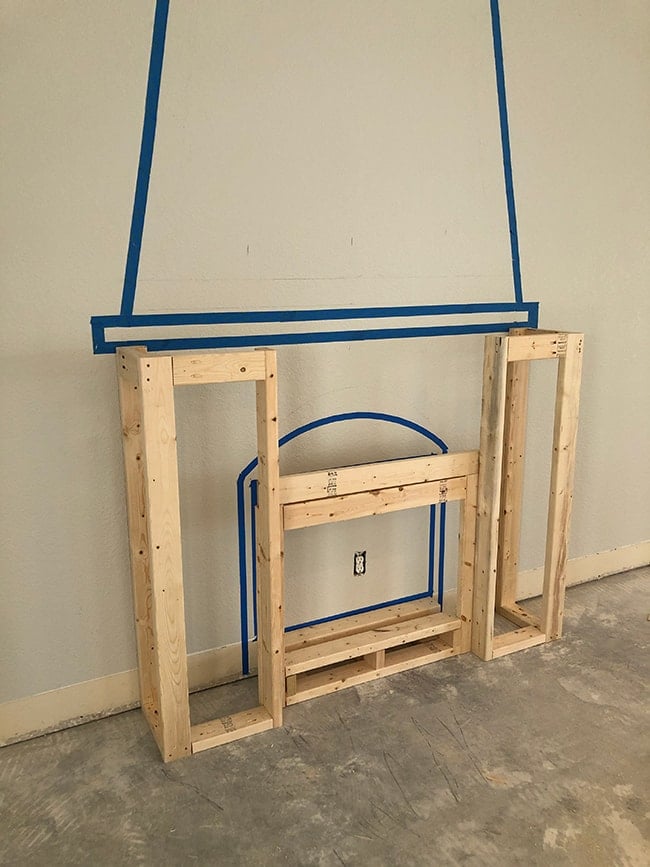
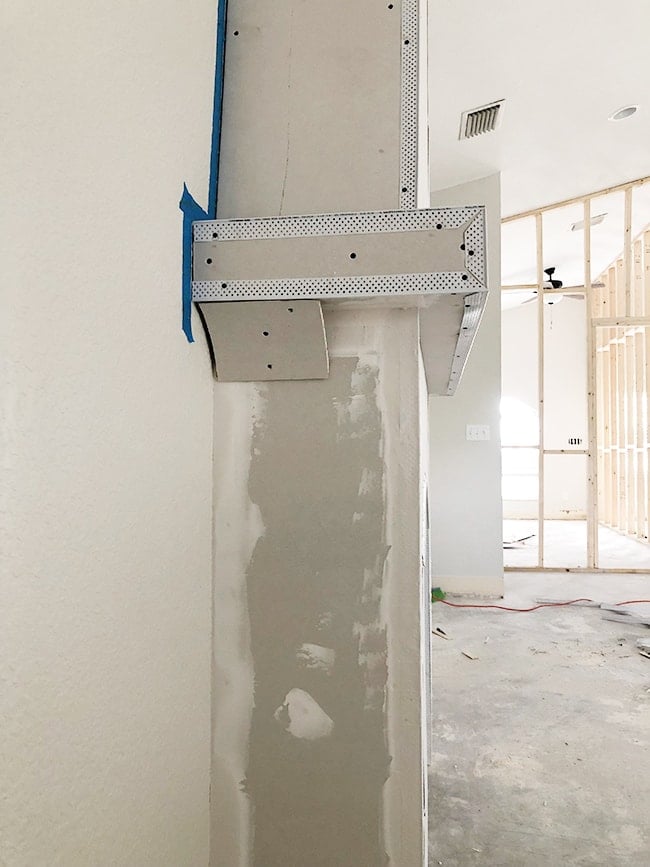
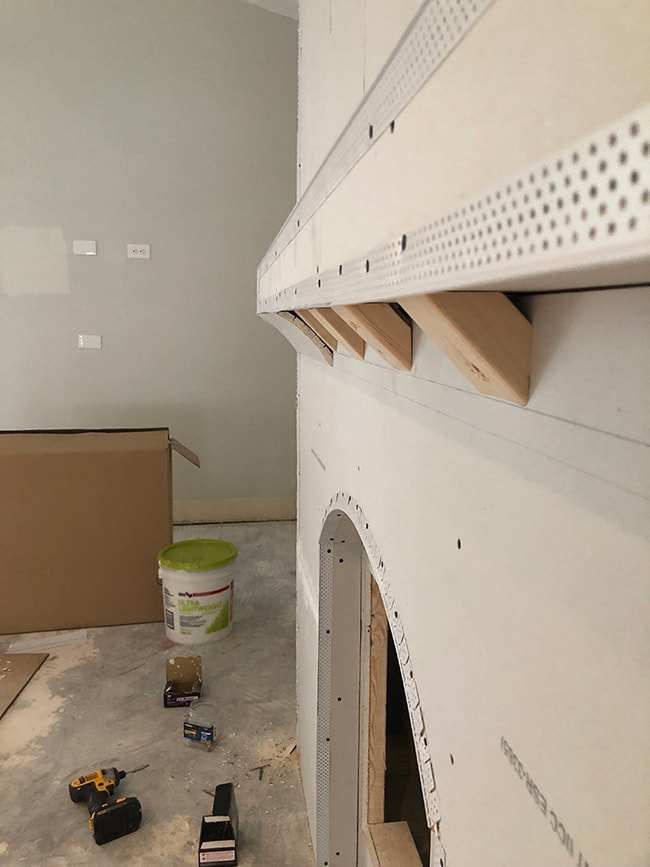
Step 4: Build and attach the mantel
I built the mantel to extend 4” out from the surround (front and sides), which was the dimension we landed on based on our tape outline on the wall. The key with the mantel assembly is to have the cross pieces line up with the vertical framing below, as they all need to be screwed together.
It’s at this stage that you want to make sure everything is level before securing the framing to both the wall and the floor. I had to use some shims to raise the right side of the mantle up about ⅛” to make ours perfectly level.
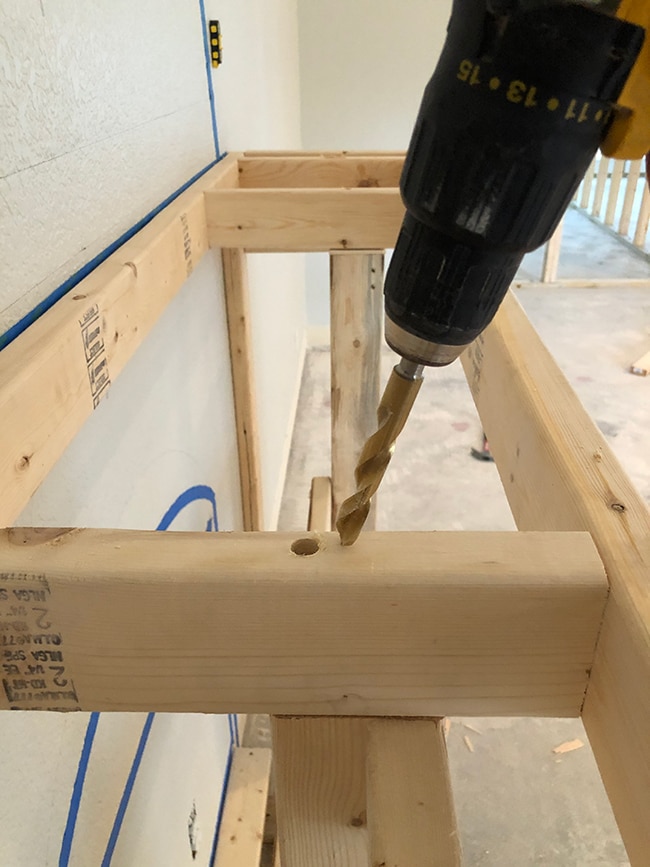
To secure the mantle to the bottom framing, I had to drill about halfway into the side of the 2×4, as the longest screws I had were 3”. You can use 4.5”+ wood screws if you have them, but if not then this trick works perfectly.
Our outside framing pieces landed on studs (by design), but if that’s not the case for you, you can simply use heavy duty drywall anchors or toggle bolts to attach the framing to the wall.
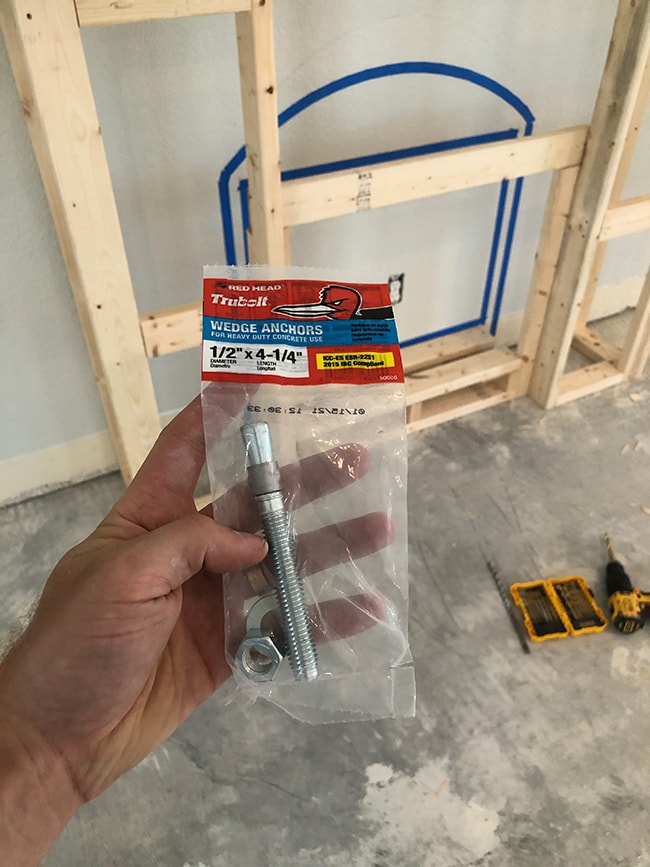
I also decided to attach the framing to the floor for extra reinforcement. For our concrete subfloor, I used 4 ¼” concrete wedge anchors. These heavy duty anchors are used to attach wood to established concrete. They’re the same ones I used for the framing in our garage remodel as well as the new bedroom at Hacienda Hideaway.
You’ll need a hammer drill with a masonry bit to drill through the concrete, then you can insert the anchor and tighten the nut to secure everything together.
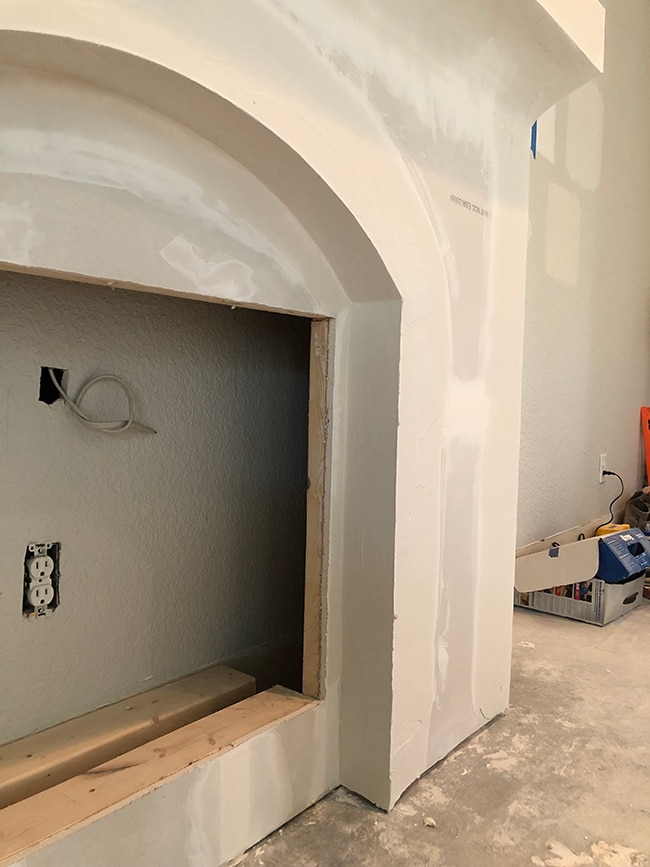
Step 5: Build the fireplace opening arch
This step had a lot of pressure to get right since it would be obvious if the arch was off even a little bit.
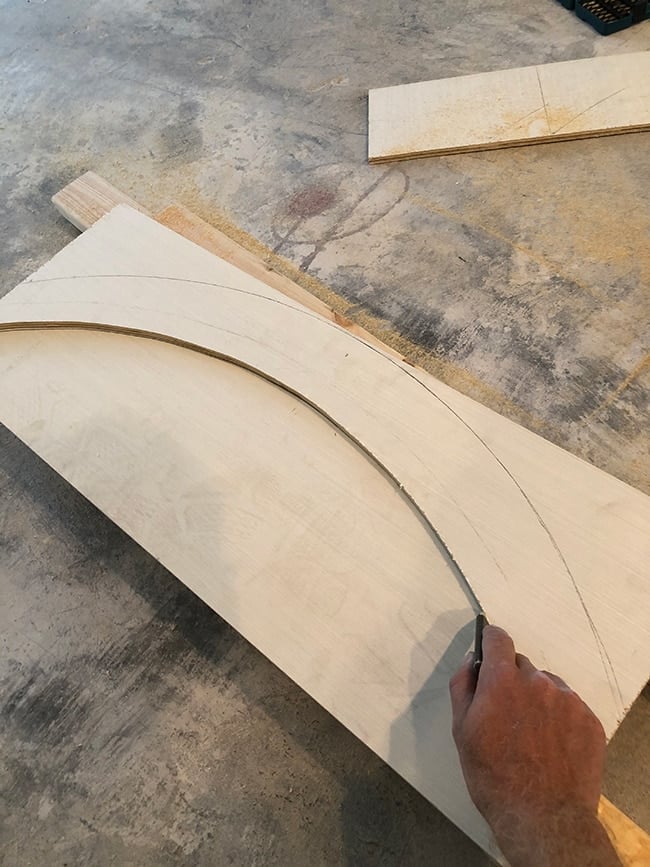
To get the exact arch shape, I used my belt as a fulcrum (a string would be easier but I didn’t have one around) and held a pencil on the end to trace a curve on the wall. I then used the same length of belt to transfer that arch to a sheet of ½” plywood (you can see this step in action in the Fireplace Part 1 tutorial on Instagram).
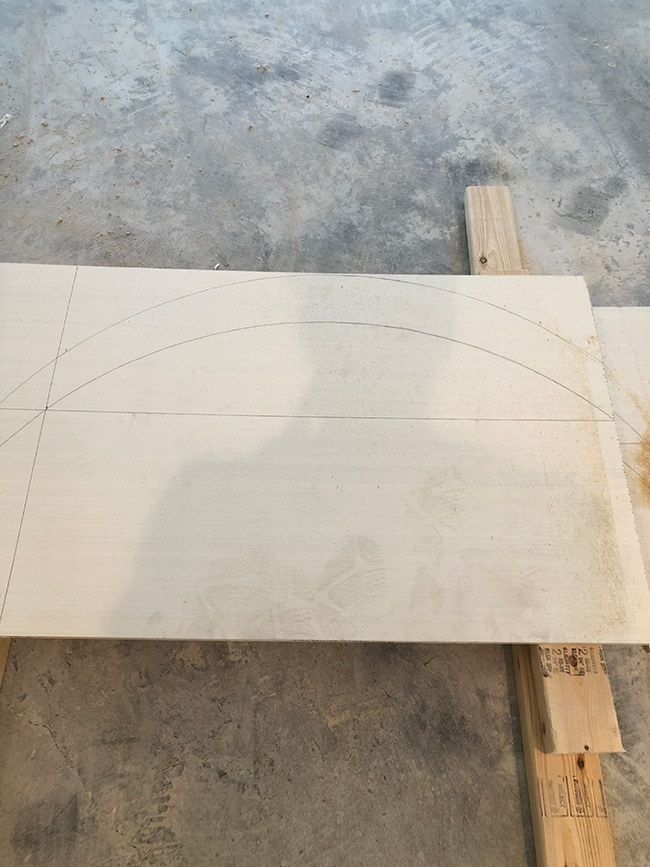
Be sure to leave enough plywood above the line as you’ll need it to attach the 2×4 blocking to (I realized my mistake after I drew the top arch on the wood).
Using the exact measurement of our insert opening and a large t-square, I drew a line across to find the intersecting points of my arch.
I cut out the shape using our jigsaw, then used the first cut as a template to create an identical piece with the remaining section of plywood.
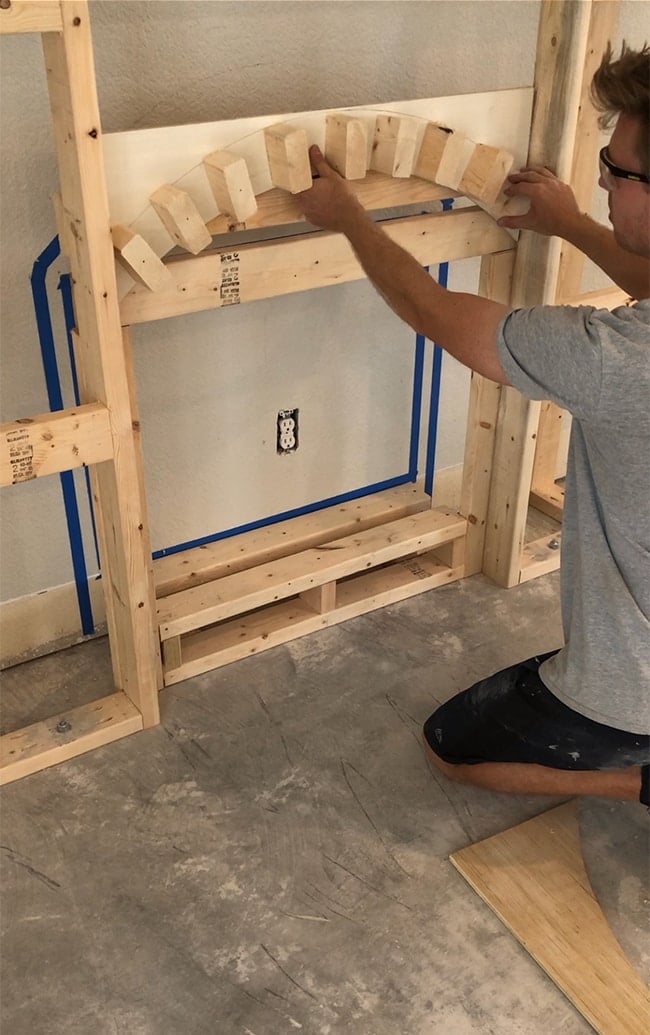
I then cut several 2×4 blocks at 2 ½” thick to be sandwiched between the two pieces of plywood. Once it is all assembled, it will be 3 ½” thick and match the bump out from the insert framing to the face of the fireplace surround.

Using wood glue and 2” Power Pro screws, I attached the blocking to the first piece of plywood. Then I secured that assembly to the overall frame, and finally attached the 2nd piece of plywood to the front. It is easier to piece it together like that to give yourself plenty of space to attach it to the framing. If you build the “arch sandwich” completely first, it would be difficult to screw it securely into the main framing.
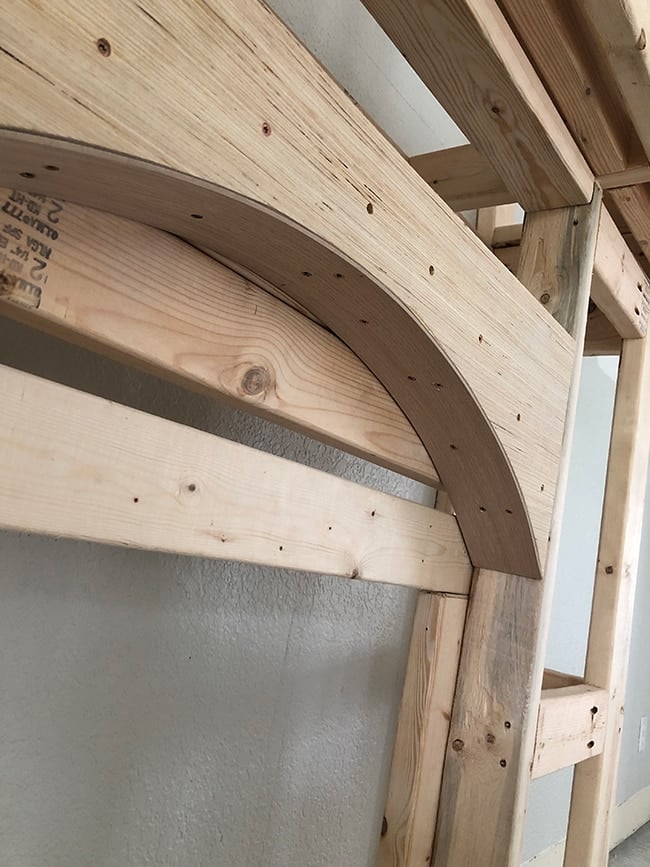
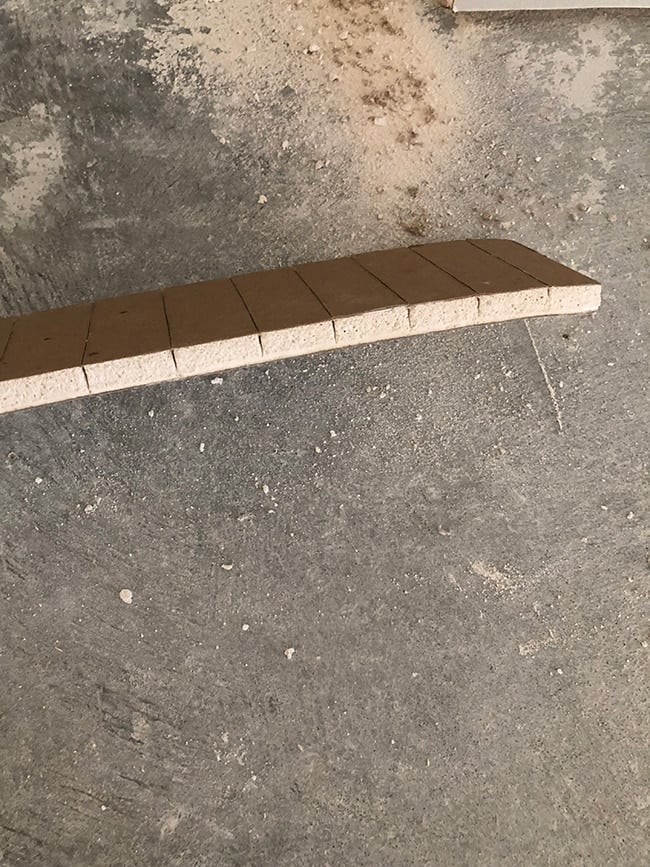
With the arch shape in place, it was time to attach something flexible but hard underneath for the drywall backing. This isn’t a required step, but it helps keep the right arch shape and eliminate any creases that might occur on the bent drywall.
Usually you’d use masonite or hardboard for this, but I wasn’t going to buy a 4’x8’ piece for my little strip (and pricing was ridiculous at both Lowe’s and HD, thank you pandemic). So with some help from a friendly Lowe’s employee, we tracked down a kitchen toe kick that worked perfectly. I simply cut/ripped it down to fit the arch opening, and screwed it into the 2×4 blocks.
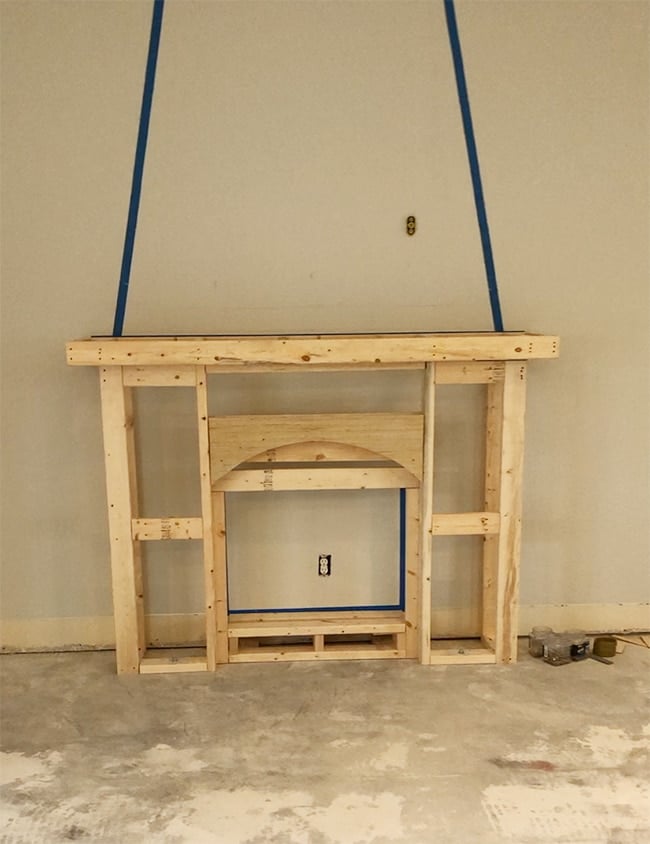
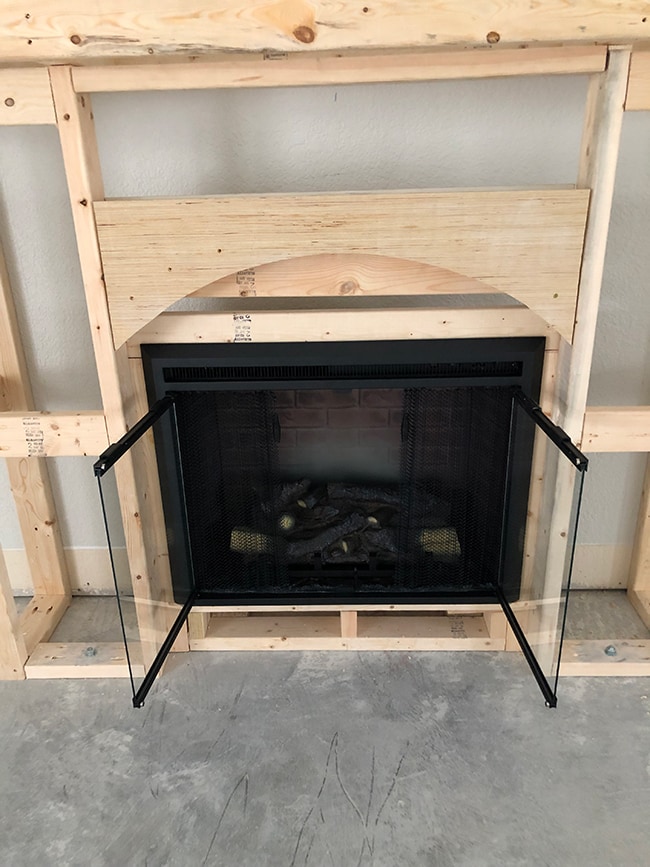
Before you finish framing the bottom portion, make sure to test fit your insert to confirm that everything fits:
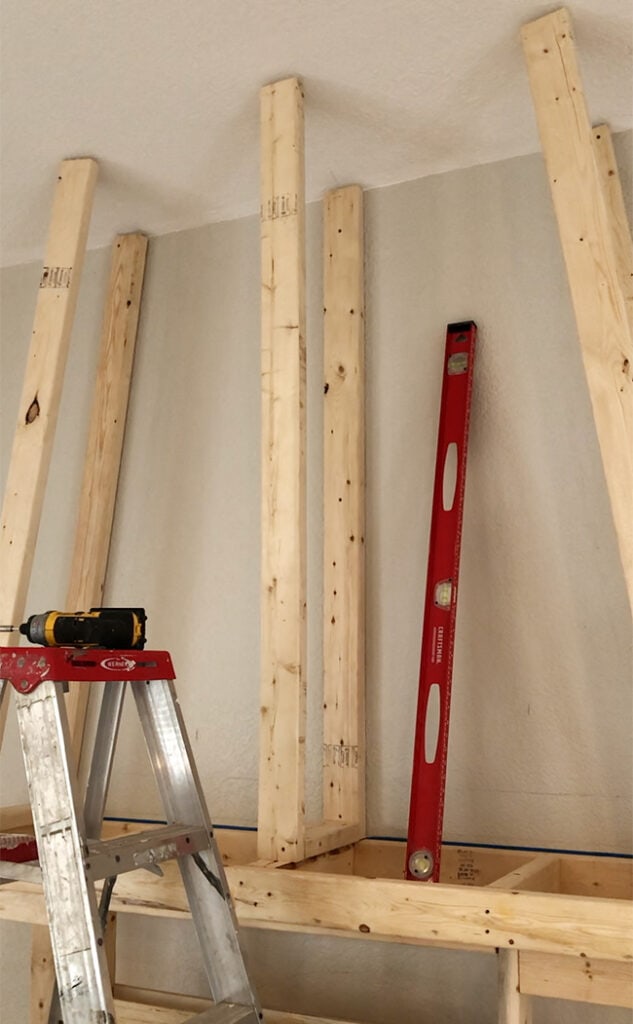
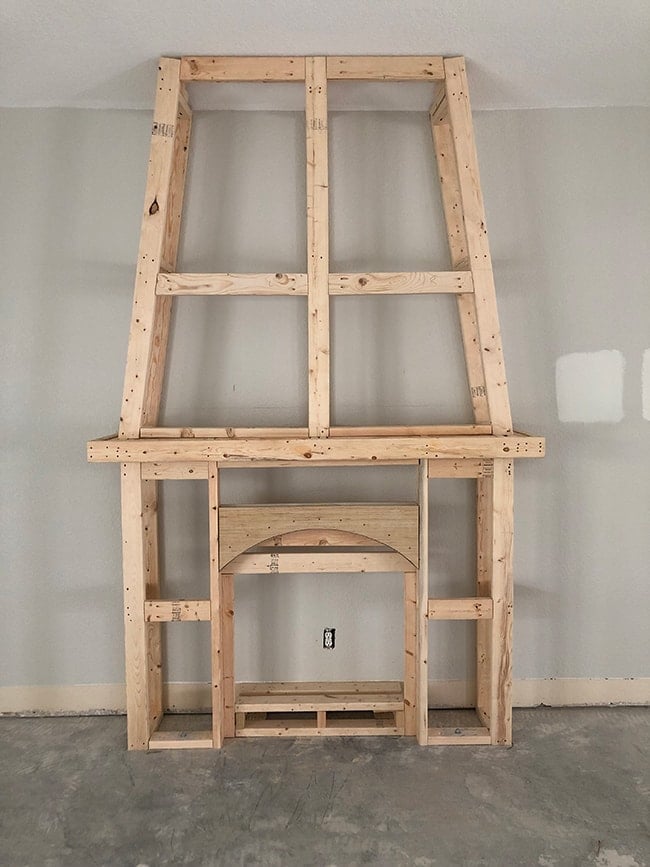
Step 6: Build framing above the mantel
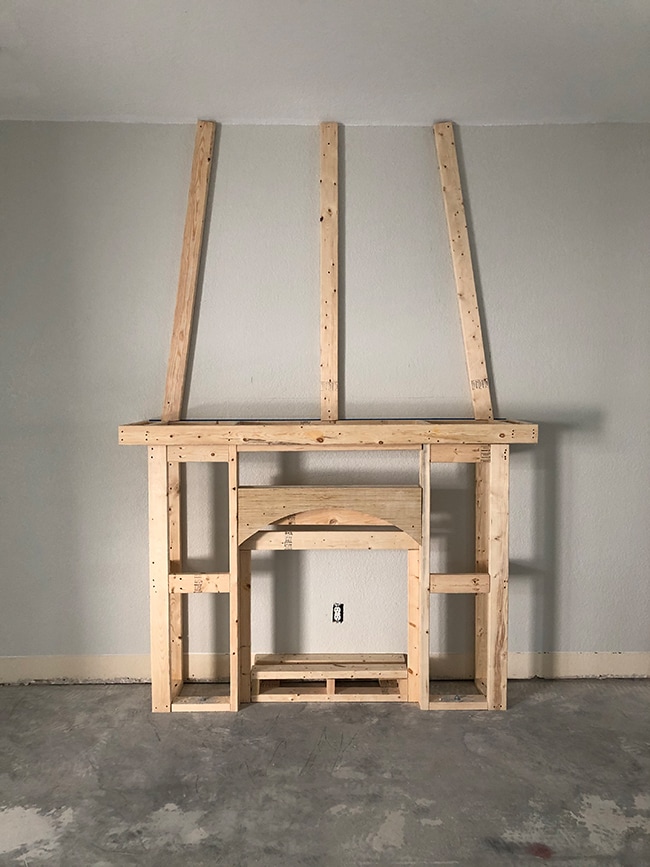
At first, I was going to attempt to build the entire top portion separately then attach it all to the bottom and the wall, but I quickly changed plans once I started taking measurements. It would have been way too difficult to make everything perfectly level and plumb all at once as the walls and the ceiling weren’t perfectly straight. So instead, I started by attaching three vertical pieces along the wall into studs (you can use drywall anchors/toggle bolts if there are no studs).
Using our angle finder as well as multiple measurements, I made sure everything was perfectly symmetrical. At this stage, I realized I needed to add a lot more blocking to the mantel to support the top section.
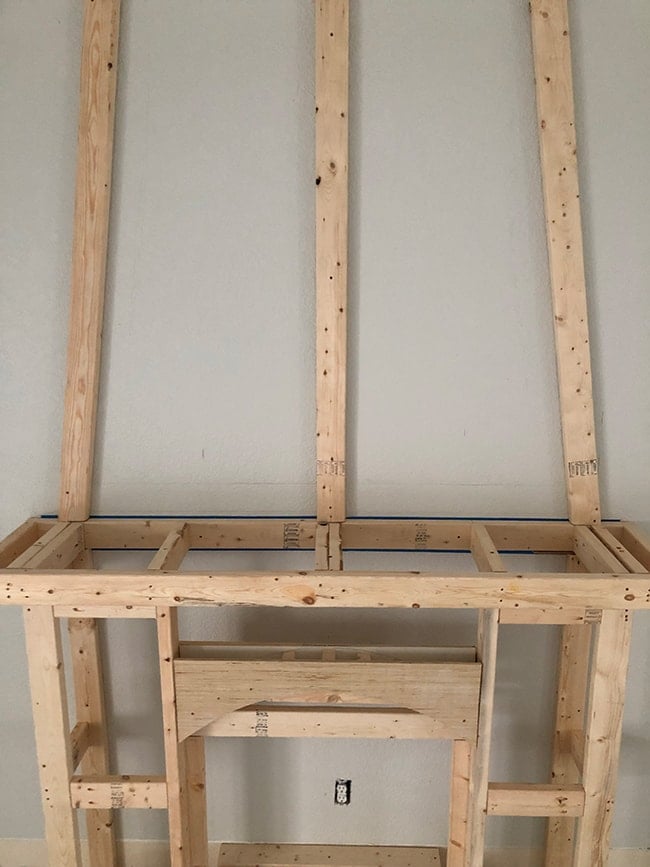
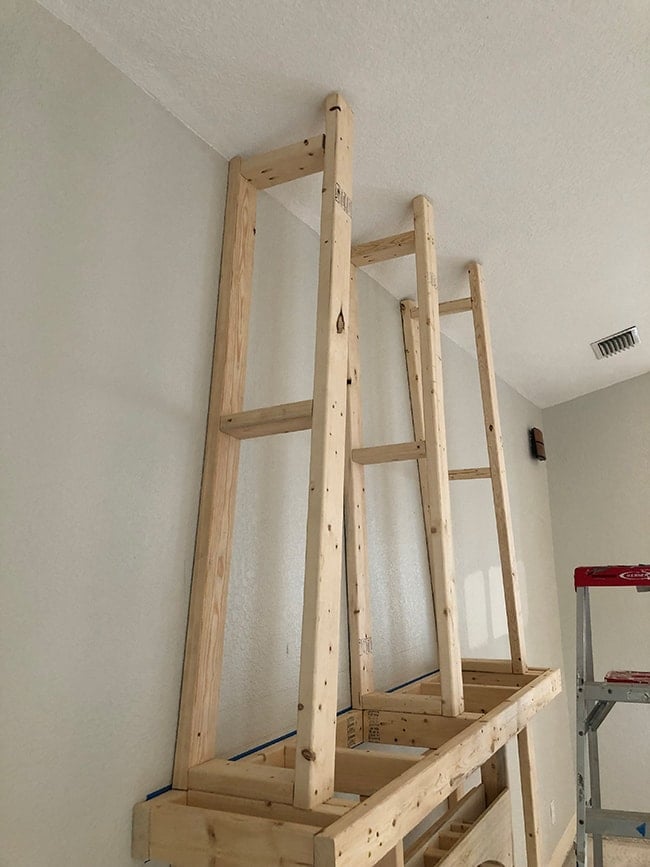
After attaching additional cross pieces inside the mantel, I measured, cut, and attached the other three top vertical pieces.
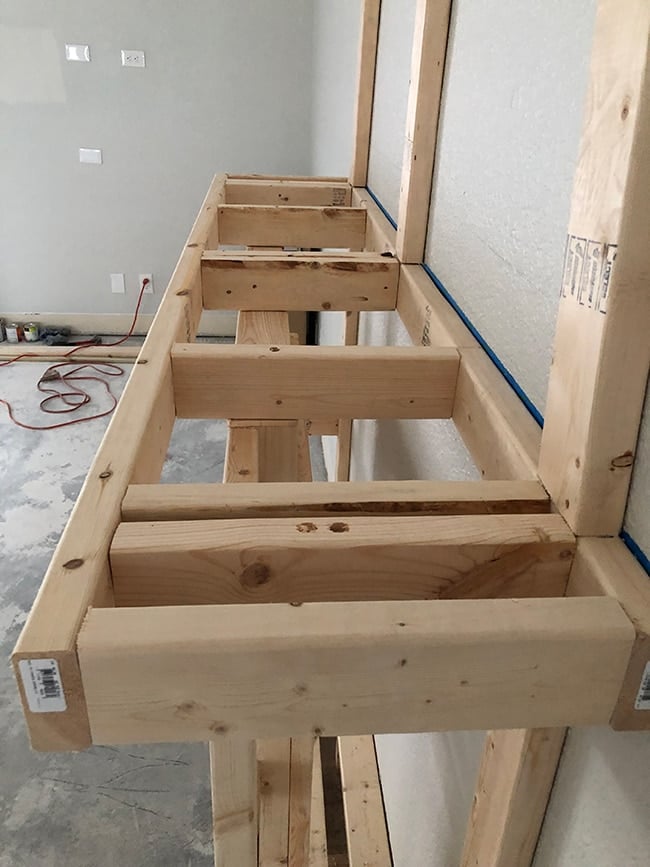
Once I made sure everything was lined up properly from every angle, I then attached blocking between the three sections to make them sturdy.
A cross section was added to the front as well, which drywall would later be attached to.
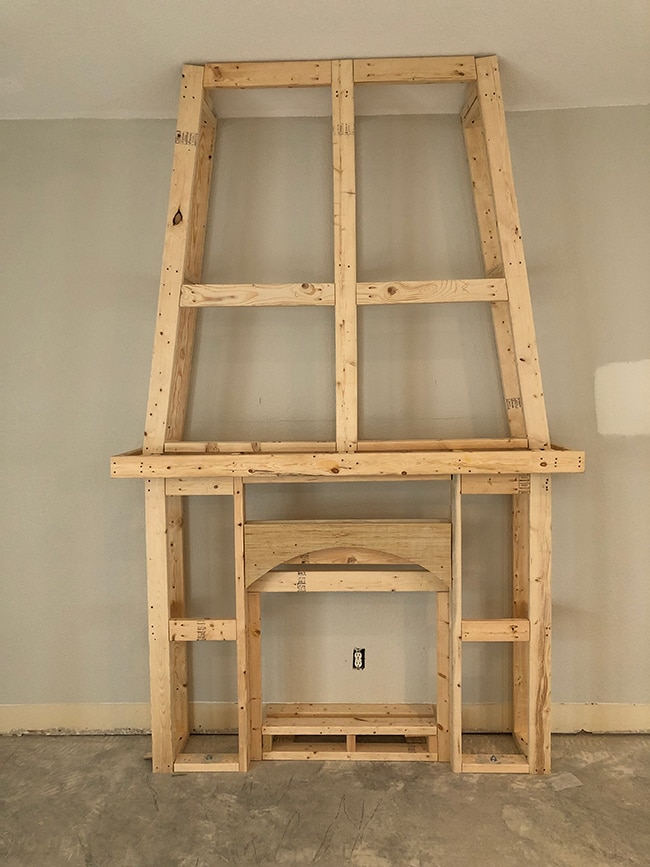
There was an awkward gap created at the top by the cathedral ceiling, so I cut small 2×4 pieces to fill it in. That would just ensure the drywall has something to attach to along the top edge.
More blocking was also added to the front of the mantle to so that every edge of drywall could be secured to a 2×4.
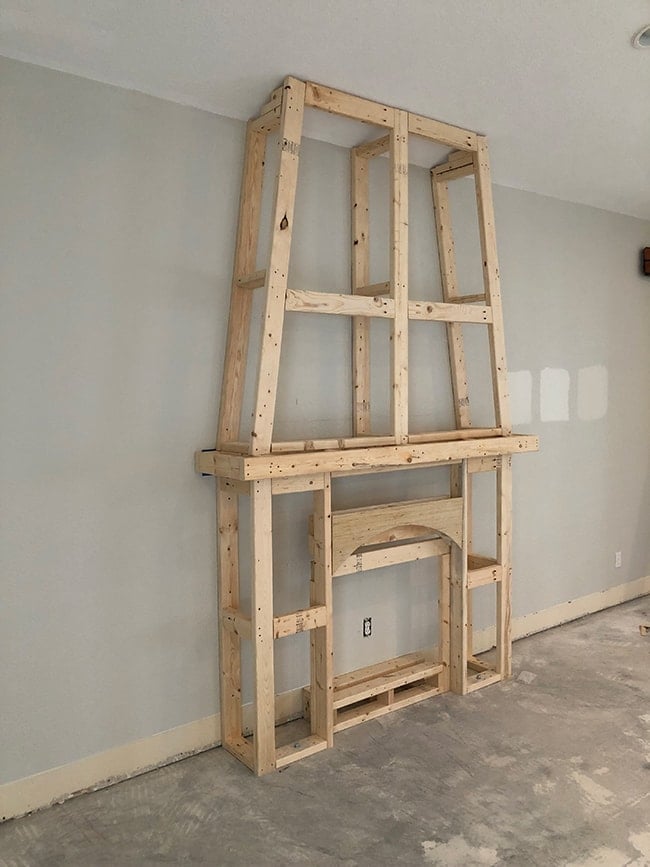
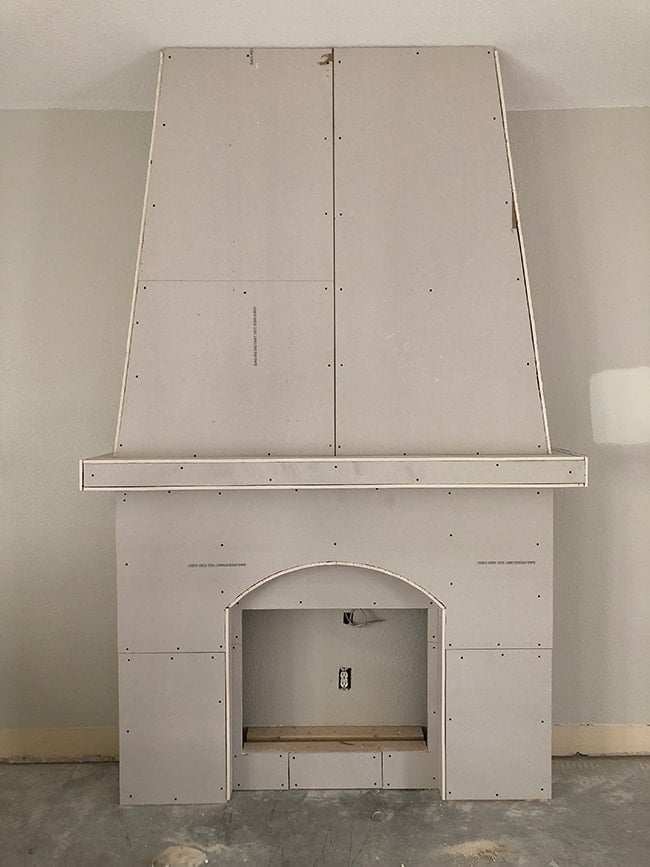
And with that, the framing is done!
Step 7: Cut and attach drywall
For those wondering, I used drywall instead of cement board for a few reasons:
- Cement board wasn’t necessary because the insert does not emit enough heat to require it, and we weren’t planning on tiling the surround
- Drywall is nearly half the cost, and I already had an extra piece on hand
- I’ve never worked with cement board and am more familiar with drywall
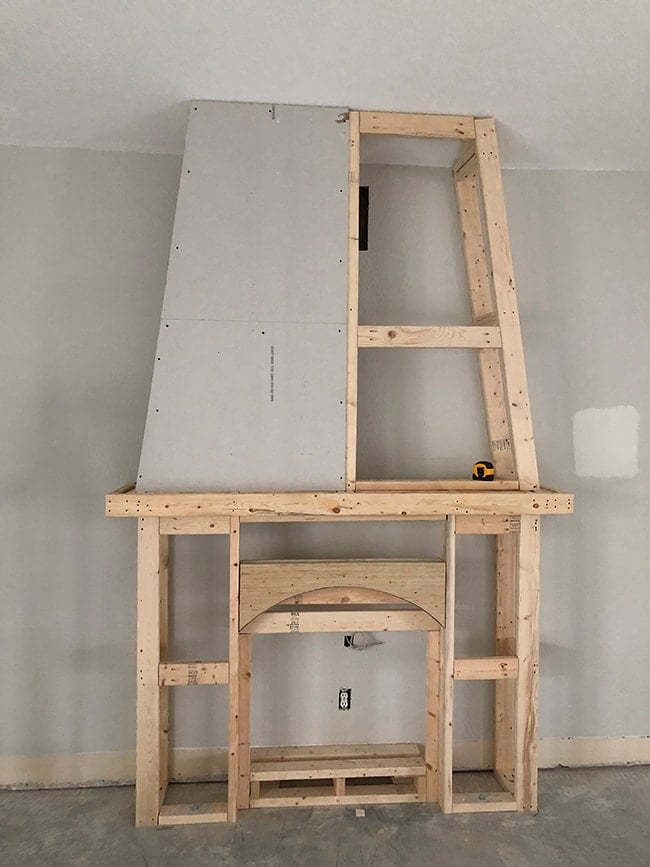
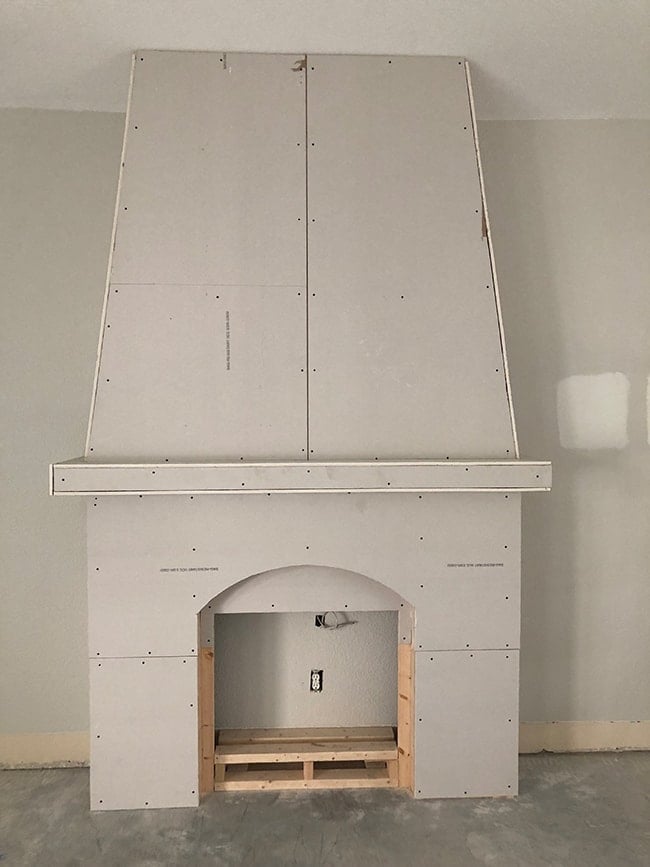
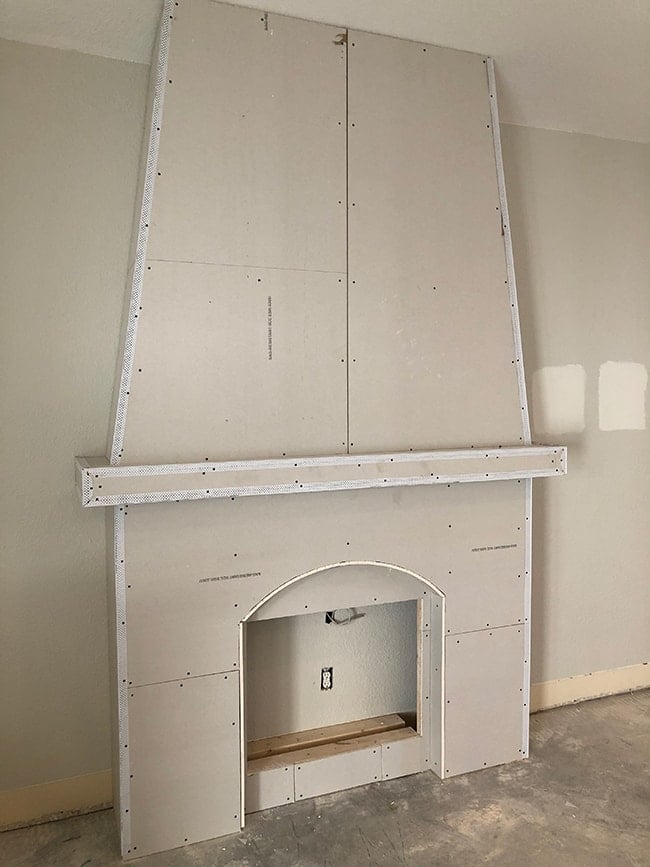
First, I measured and traced out the drywall cuts to minimize waste on my 4’x8’ sheets. With everything mapped out, I cut and attached each section, starting from the top down.
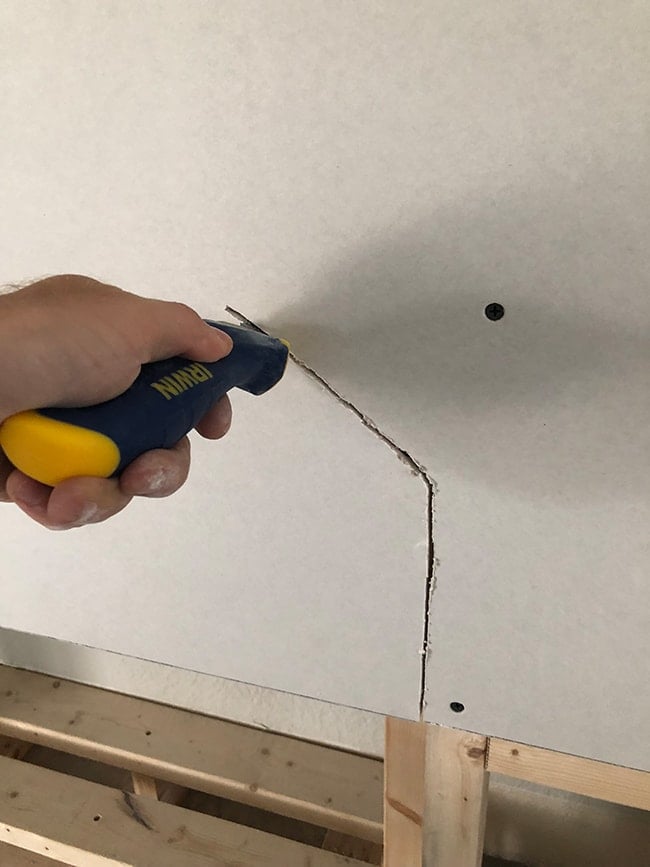
To cut drywall, you simply score along your line with a sharp utility knife (you can free hand it, or use a metal t-square/straight edge to cut along) then bend the material. This will break the gypsum, and form a crease on the back side of the paper which you will then finish cutting with your knife (apologies for the lack of photos of this process, but YouTube is a great resource to find video tutorials of this!)
Make sure to use special drywall screws for this step.
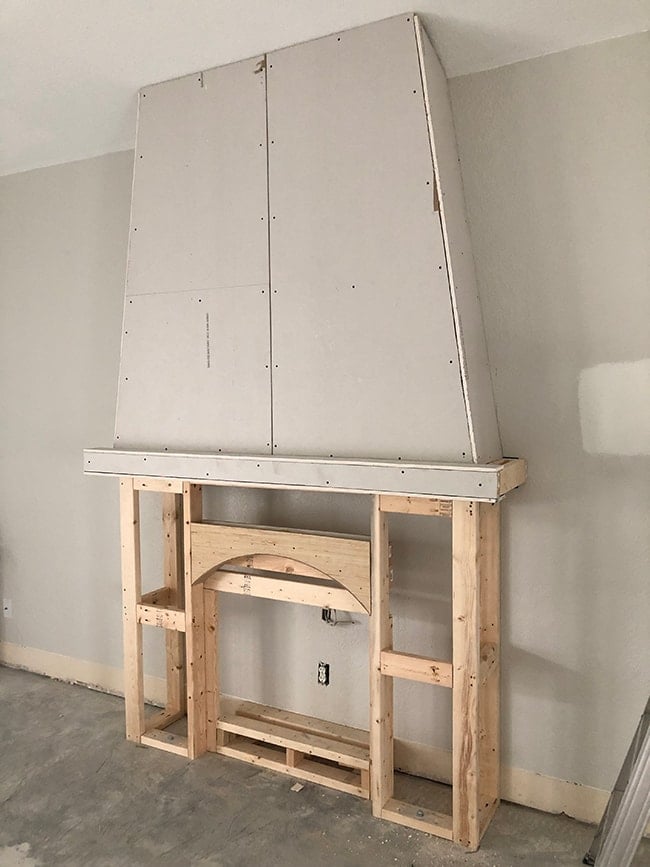
You want to keep the pieces as large as possible to have fewer seams (it will also make your life a lot easier when it comes to taping/mudding). It also adds more strength to have fewer seams. With this in mind, I attached a large piece across the top half of the bottom.
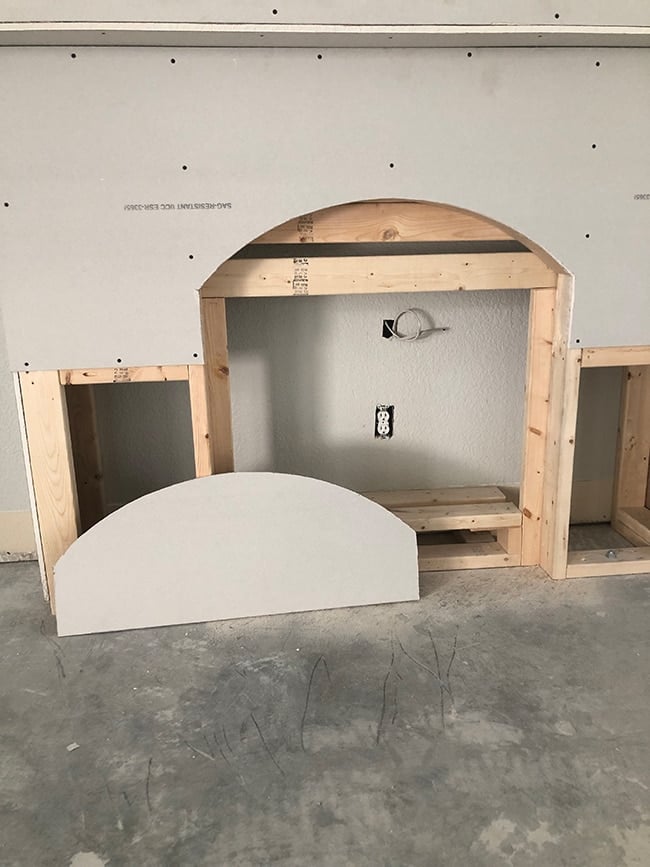
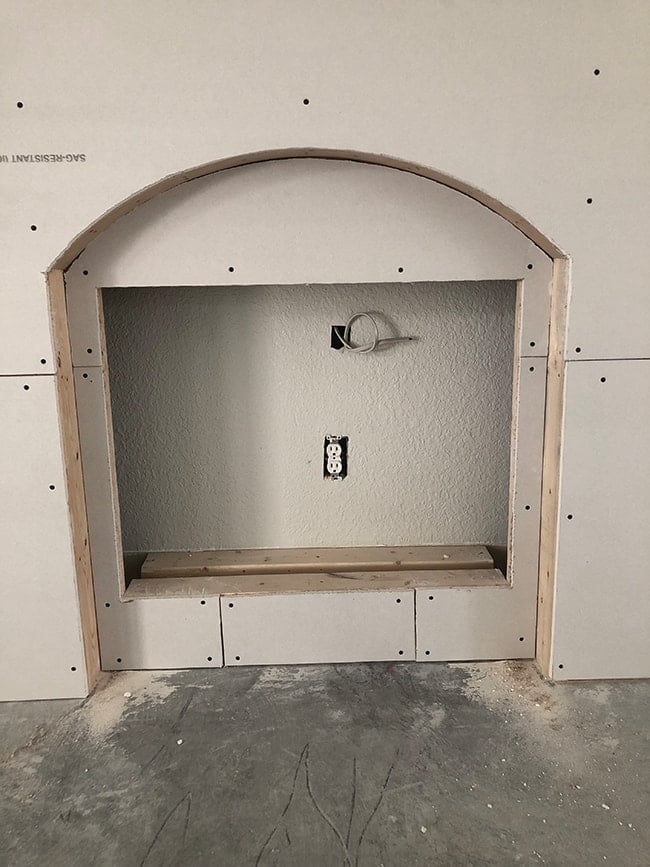
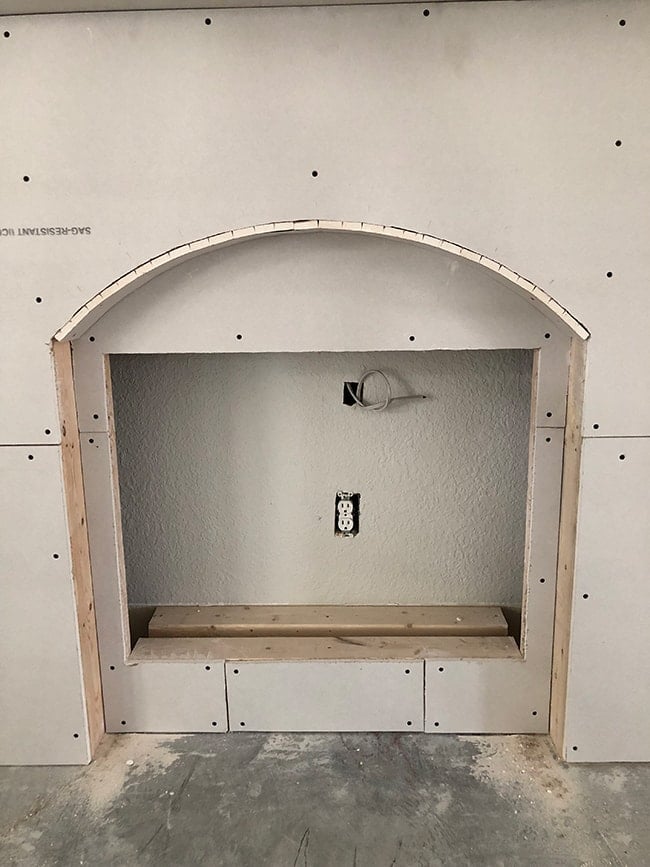
I figured this would also be the easiest way to cut the arch out, rather than attempting to trace it and match the curve perfectly. I used a drywall knife to cut along the frame opening which worked very well.
And the best part? I was able to use the piece that I cut out for the back wall underneath the arch, which was a perfect fit.
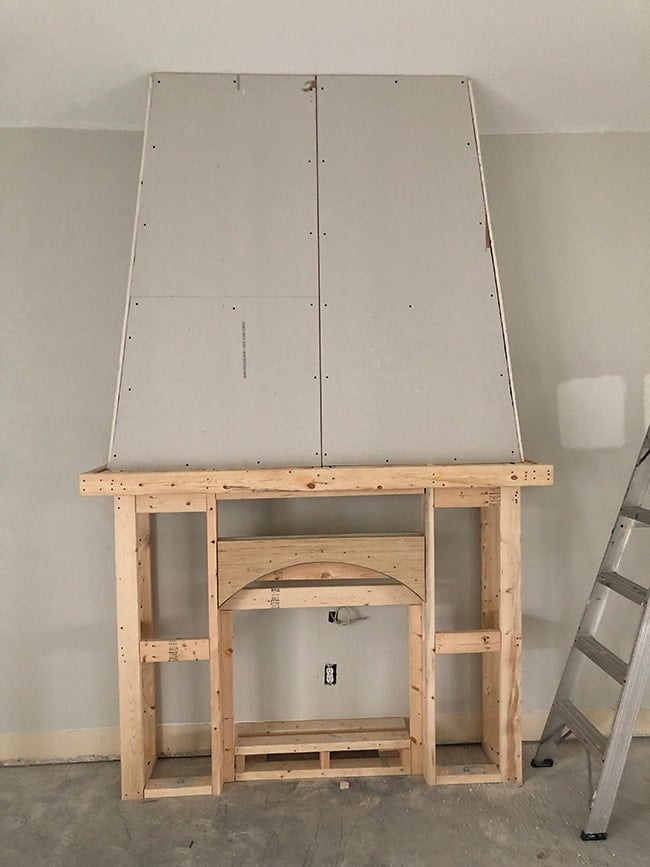
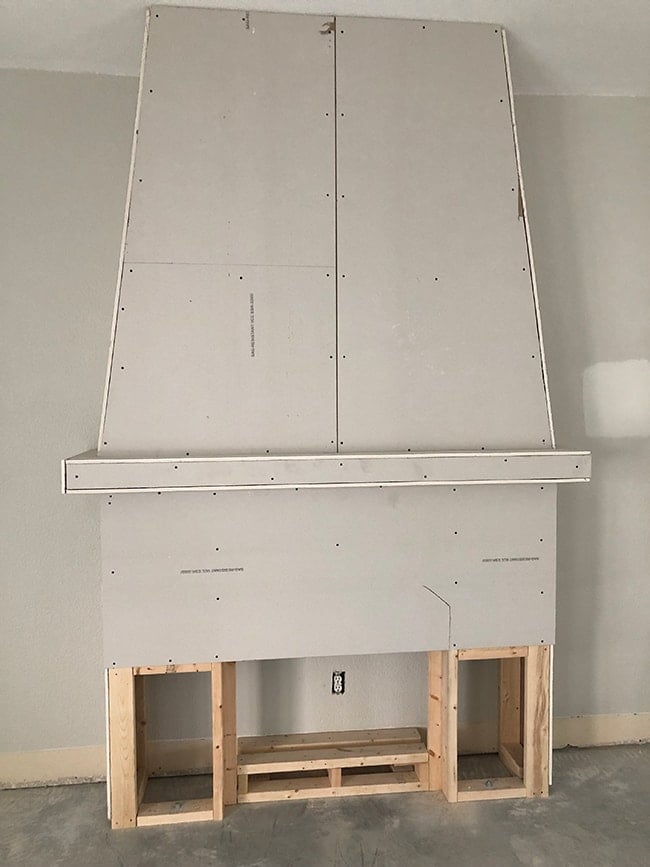
A few final pieces later and the drywall was installed…except for the curved piece underneath the arch.
Hot tip: don’t attach a cut edge of drywall next to an uncut/factory edge! The factory edge is beveled, so the cut edge sticks out past it, forming a lip. You’ll end up having to fill the uneven seam with mud to smooth it out before taping (I made this mistake).
After doing some research, it sounded like it would be easy to bend the drywall to fit the shape I needed. All you do is wet down the piece with a spray bottle or a wet sponge, let it soak in a bit, then bend it. I also watched the drywall crew do this with a large sheet at our house when they were drywalling our round turret in our entryway.
So off I went, getting the piece nice and wet and letting it sit between a ladder and a box (it’s all I had on hand) to facilitate the curve.
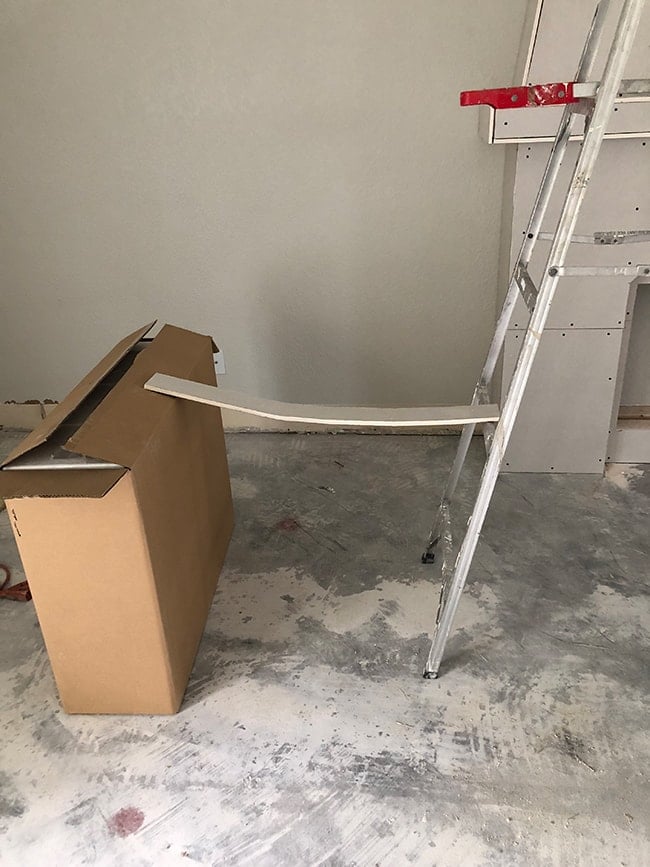
It was looking good… until it wasn’t.
(enter sad face and maybe a few swear words here)
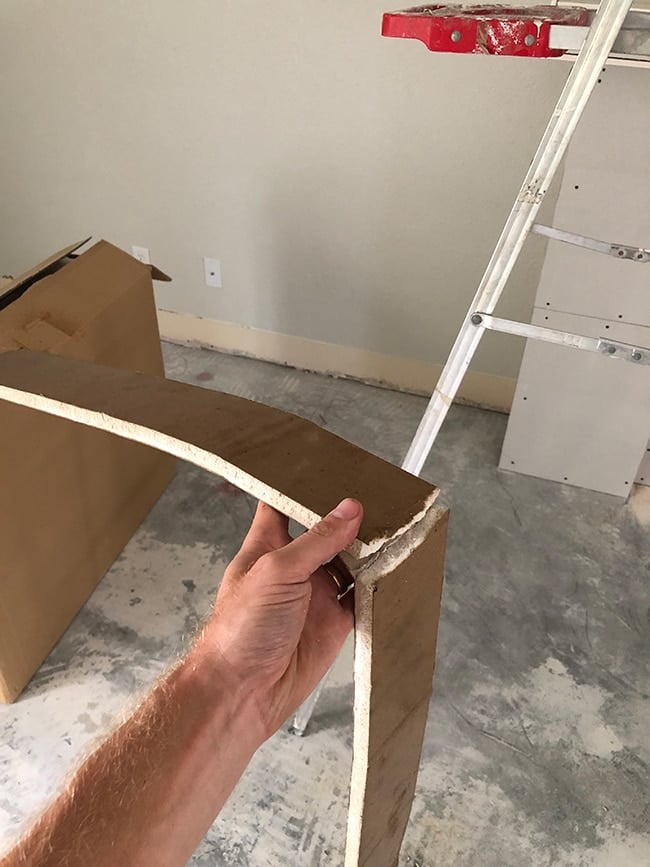
I tried again. Same result.
I’m sure this was a case of user error, and tips would be greatly appreciated for the next time I attempt this. Plan B was scoring the back every 1” and breaking the gypsum to create my curve.
This worked, but it’s not ideal because it left creases in the paper.
I’d have to spend time adding extra mud and smoothing out later on.
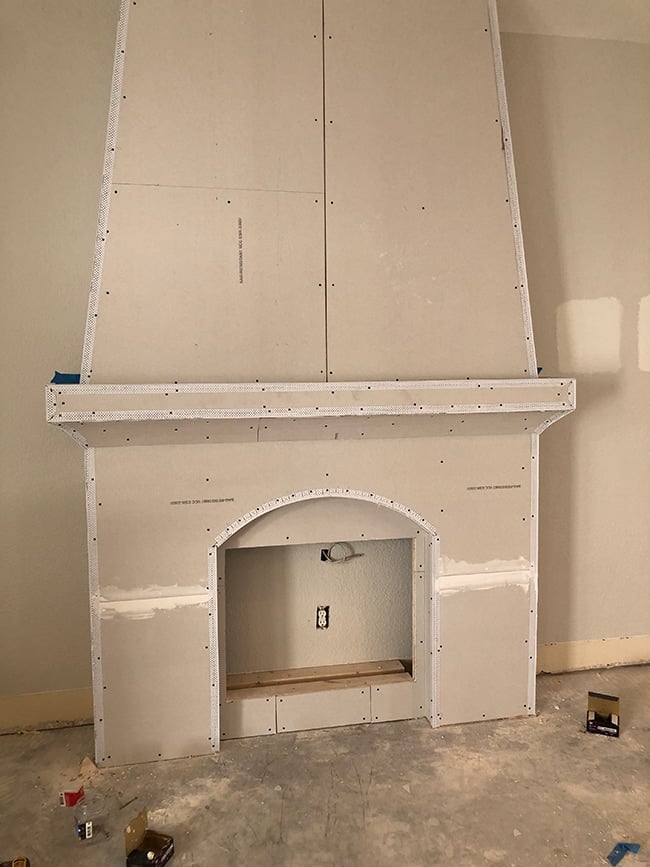
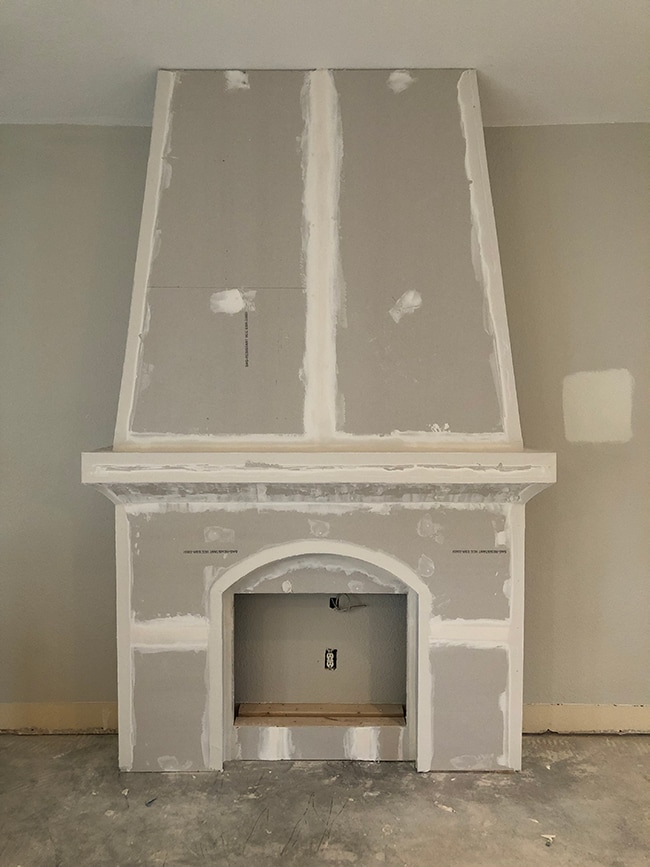
But, I made it! The drywall phase was officially complete.
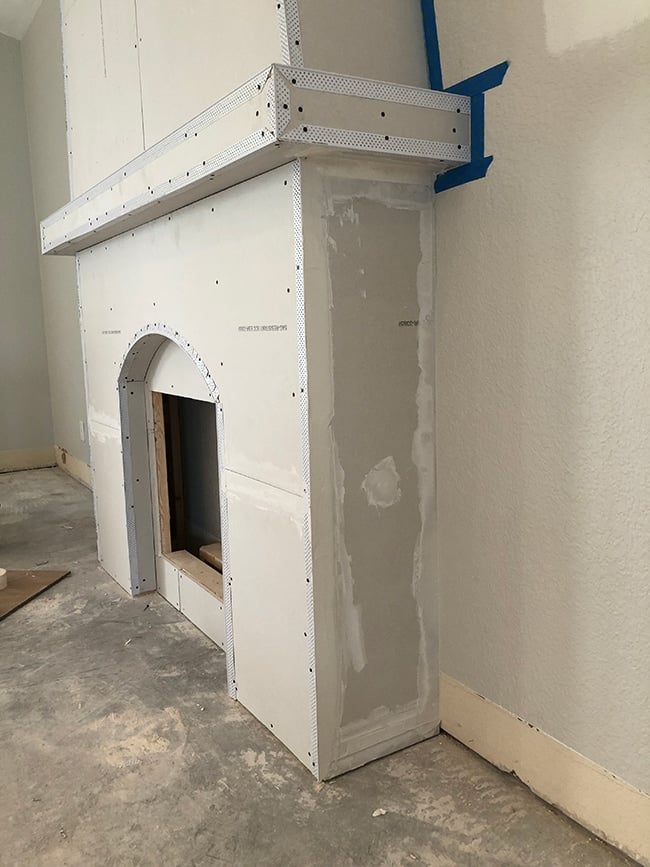
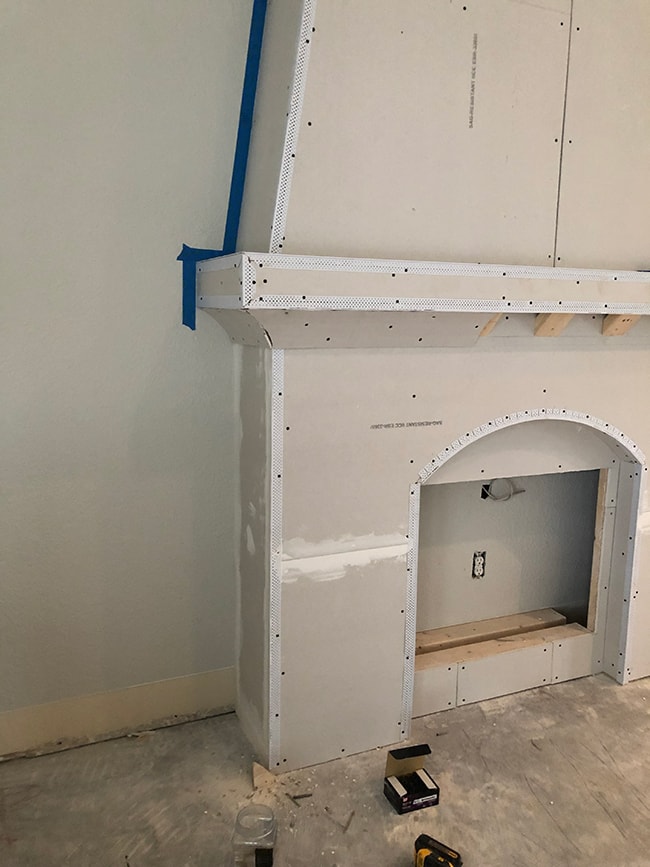
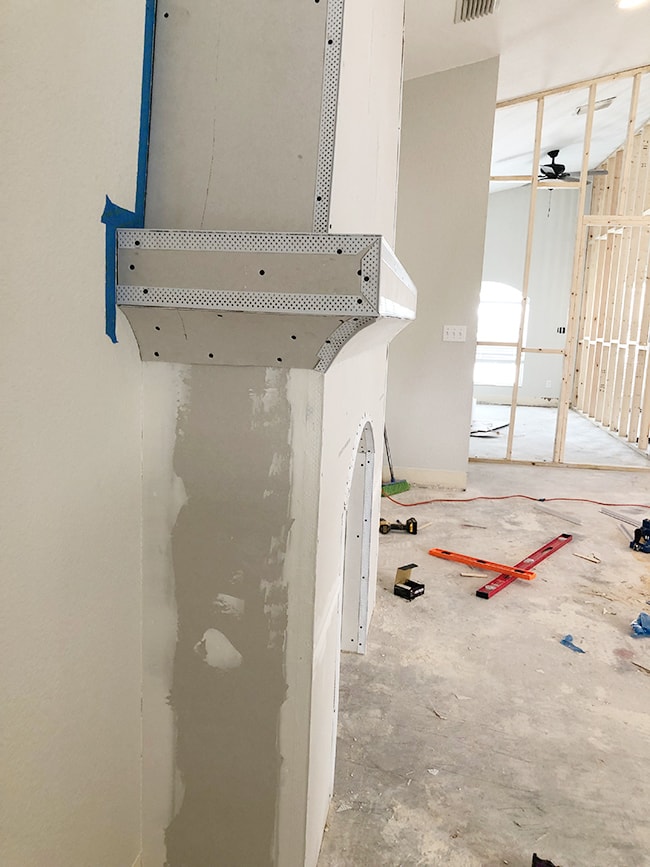
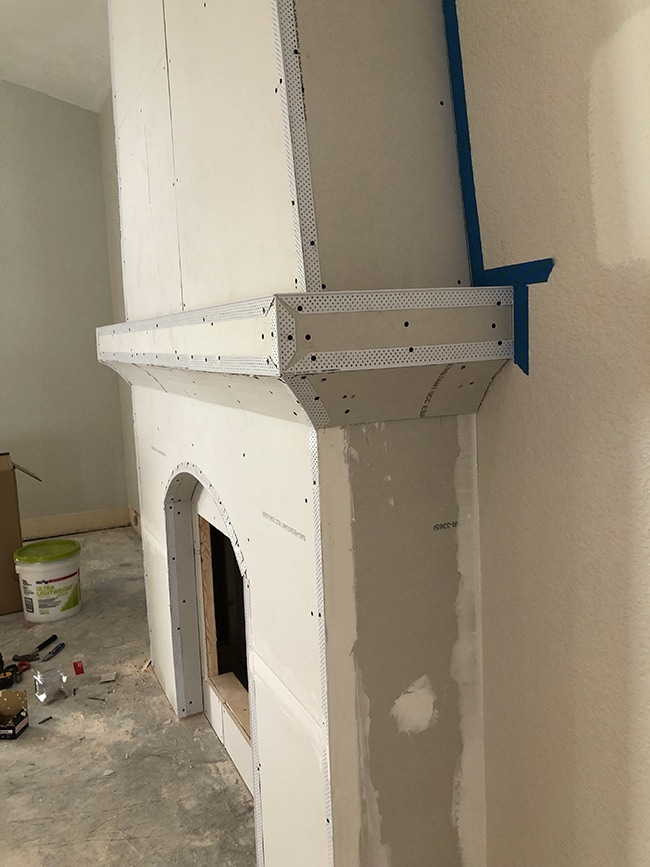
Step 8: Add corner bead and tape along all seams/edges
When it comes to beading for outside corners on drywall, there are a few options. The most common is metal, or paper lined metal, but the strongest is vinyl. While metal can dent, vinyl can withstand much more before any damage is noticeable, which is why I went with that option as the fireplace is going to be in a high traffic area.

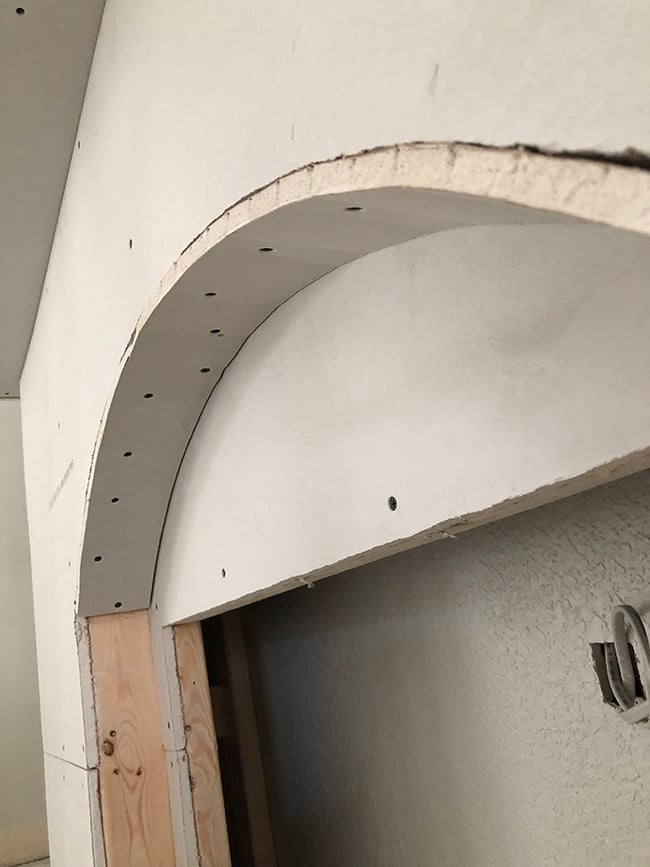
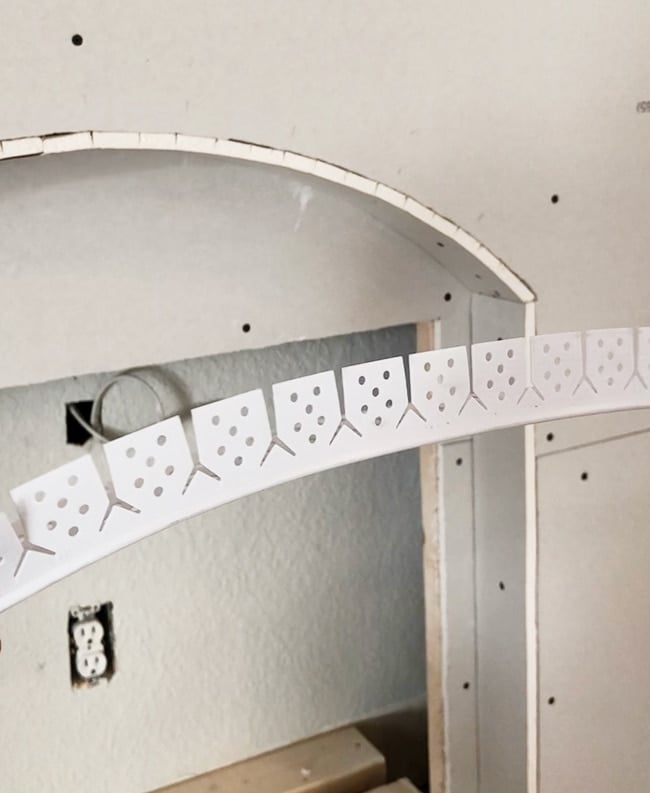
They also make vinyl beading specifically made for arches, which I used for this.
There are a few different ways to attach corner beading. The most common is using a construction spray adhesive, but I didn’t have any of that available. So I opted to use phosphate coated drywall nails that I had on hand. It’s important to use phosphate coated nails/screws, as that will help the drywall mud stick and cover the nail holes properly.
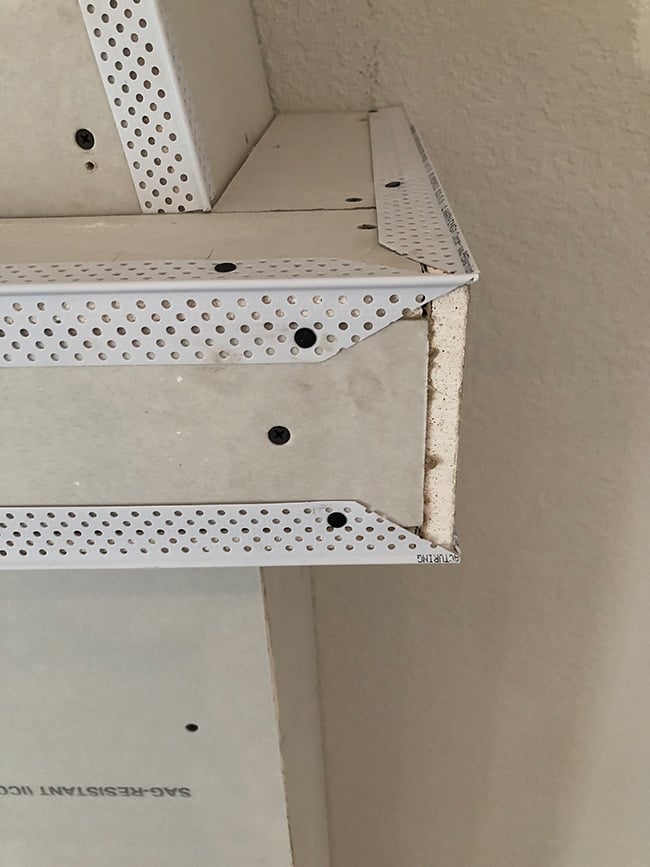
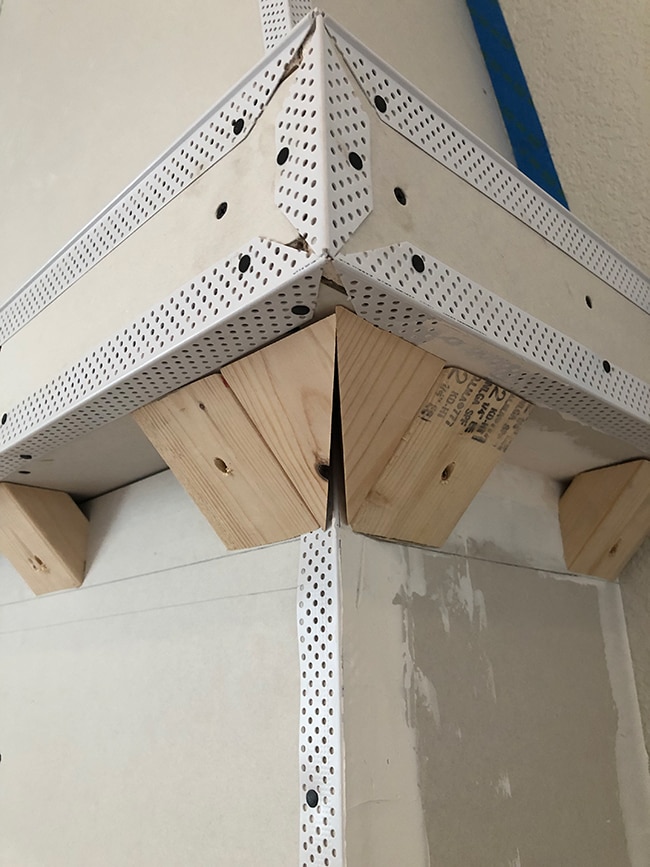
For the 3-way corners at the edge of the mantel, you simply cut back each piece greater than 45 degrees to create a point.
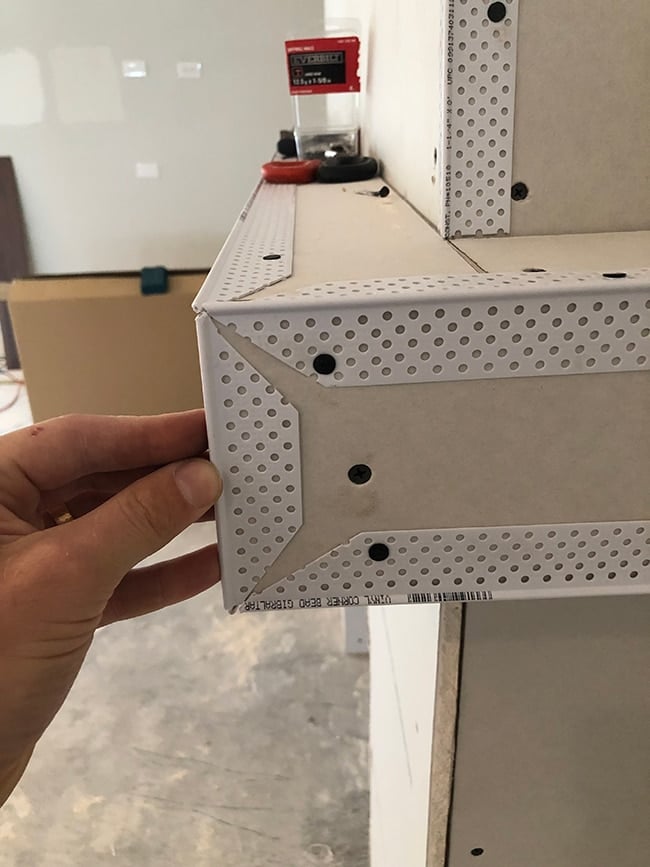
Then you can line them all up so the points touch without any overlap. The gaps left in between will be filled in with mud, so you don’t have to worry about that.
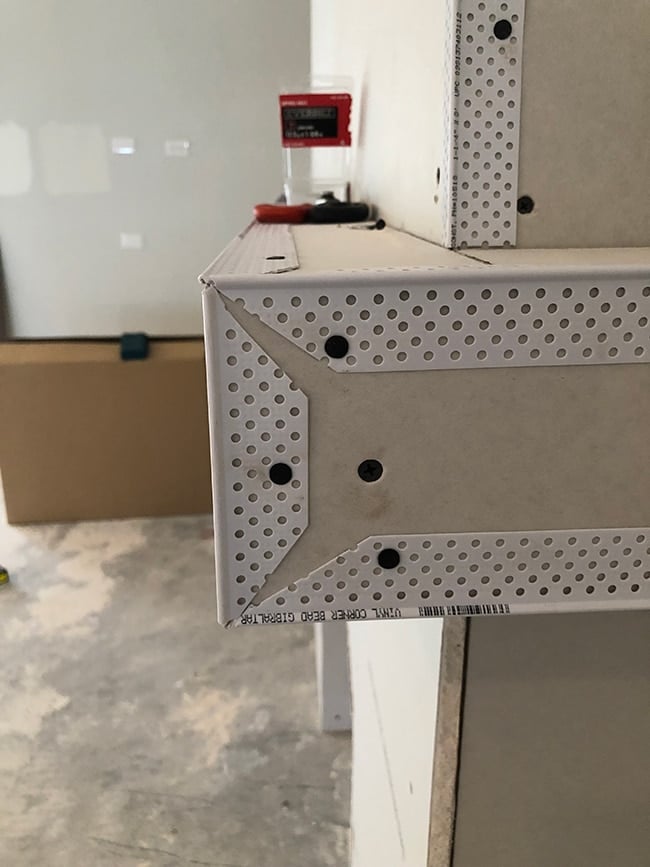
Continue until the beading is attached to each outside corner.
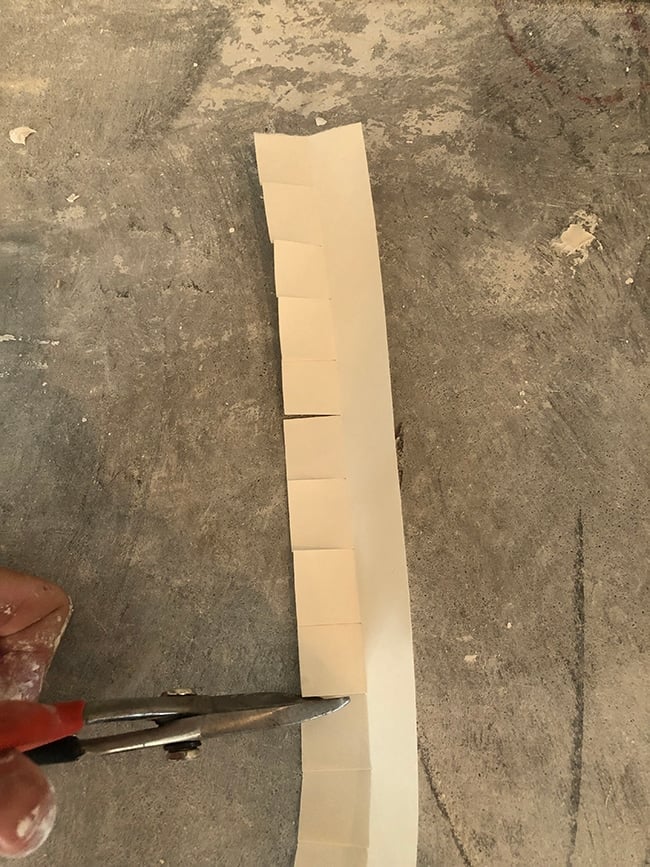
For the inside corners and drywall seams, you’ll need to use drywall tape. This is applied on top of a layer of joint compound while it’s still wet.
To curve the tape into an arch, you’ll simply cut notches every inch or so (similar to the corner beading) and bend it to shape.
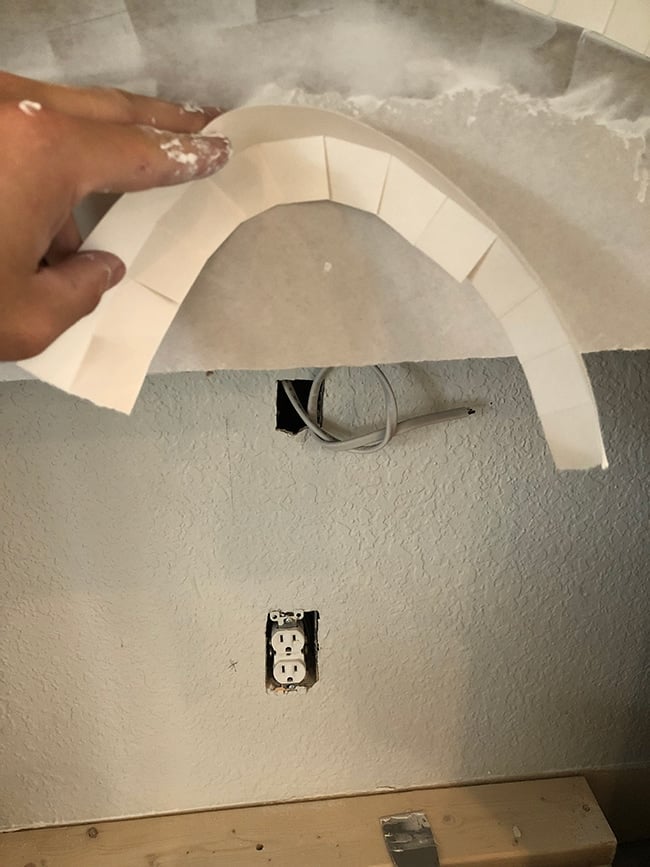
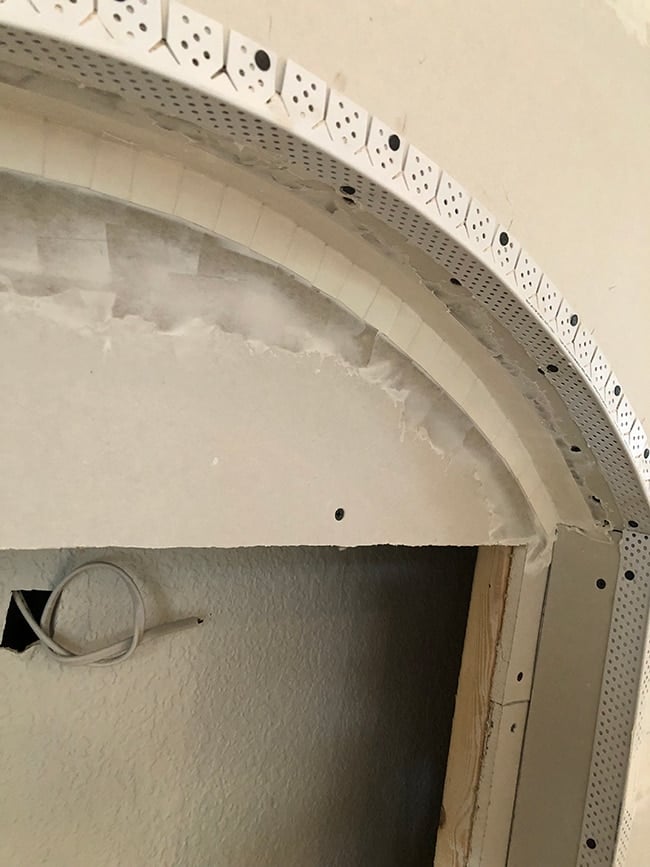
Once all of the edges and corners are beaded and taped, it’s time to move onto the next step.

Step 9: Create a curve underneath the mantel
It was at this moment that I realized I messed up. I had completely forgotten to include a key element of our overall design: the concave curve underneath the mantel.
Luckily, it wasn’t too late and I came up with a plan that included adding more blocking and more curved drywall. Here’s the first test fit:
A piece of drywall was cut to fit, and scored along the back so I could bend it and create an arch.
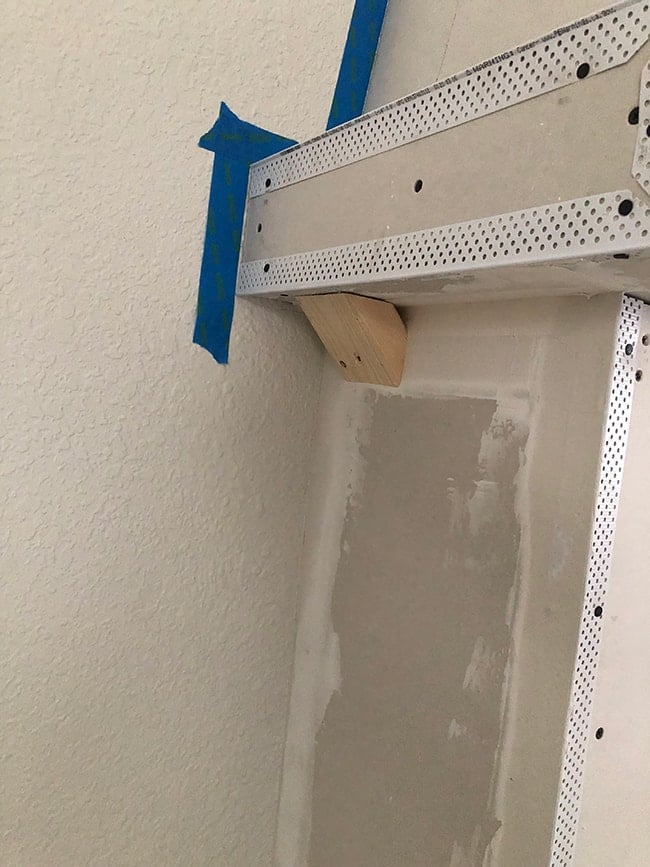
The plan seemed to be working, so I attached blocking along the rest of the mantel.
The corners were tricky, no way around that. I ended up cutting a ton of test pieces before I came up with something that worked: cut one of the regular blocking pieces in half from corner to corner at a mitered 30 degree angle. I’m sure there is some math equation there that would have made this easier, but good ol’ trial and error worked this time for me.
Since there wasn’t an easy piece of the frame to attach the corner blocking to, I used wood glue and a screw to attach it to the piece next to it. When it was all in place and dry it felt very strong.
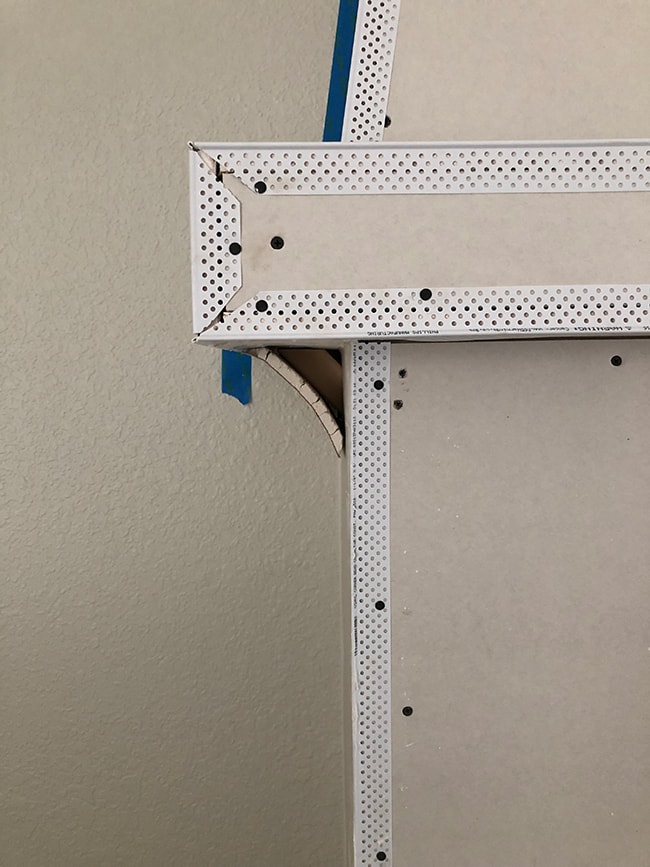
The drywall was scored along the back to bend, and the edges cut at an angle and shaved off to taper them down (essentially forming a compound miter cut). Then I pressed it into place, curving it around the block as best as I could.
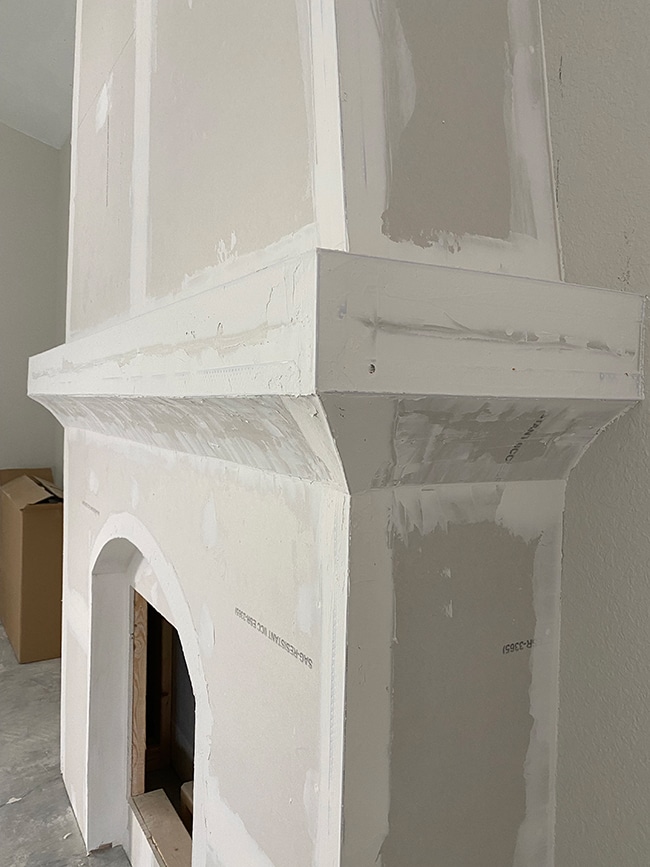
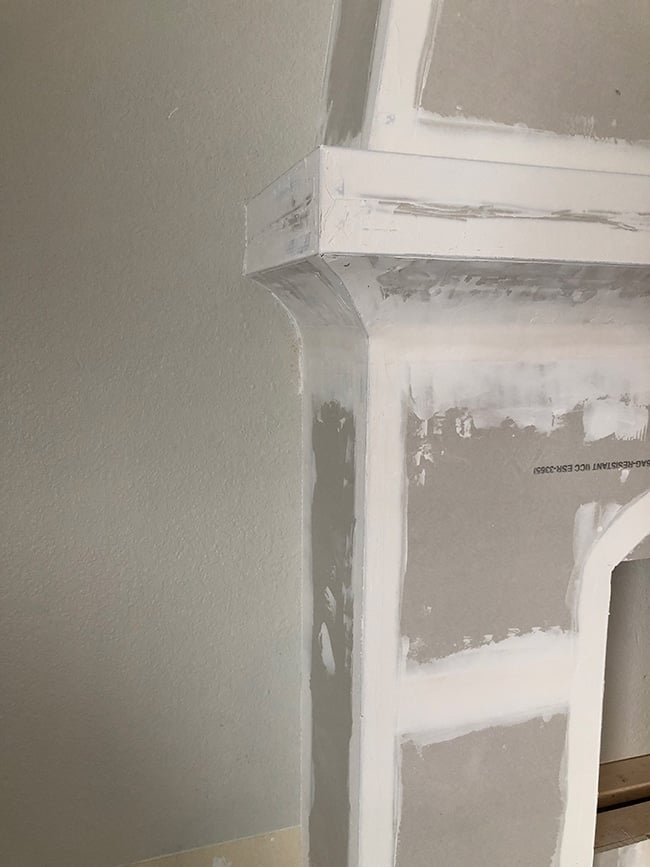
With the curve successfully added, I breathed a sigh of relief and finished the last bit of corner bead and drywall tape.
Step 10: Add the first layer of mud
I used a bucket of pre-mixed drywall mud instead of the powder you mix yourself. Some pros and cons here, as the pre-mixed material is very easy to use and you are guaranteed to have the right consistency. But it takes much longer to cure (24 hours vs <90 minutes) before you can sand it and apply the next layer.
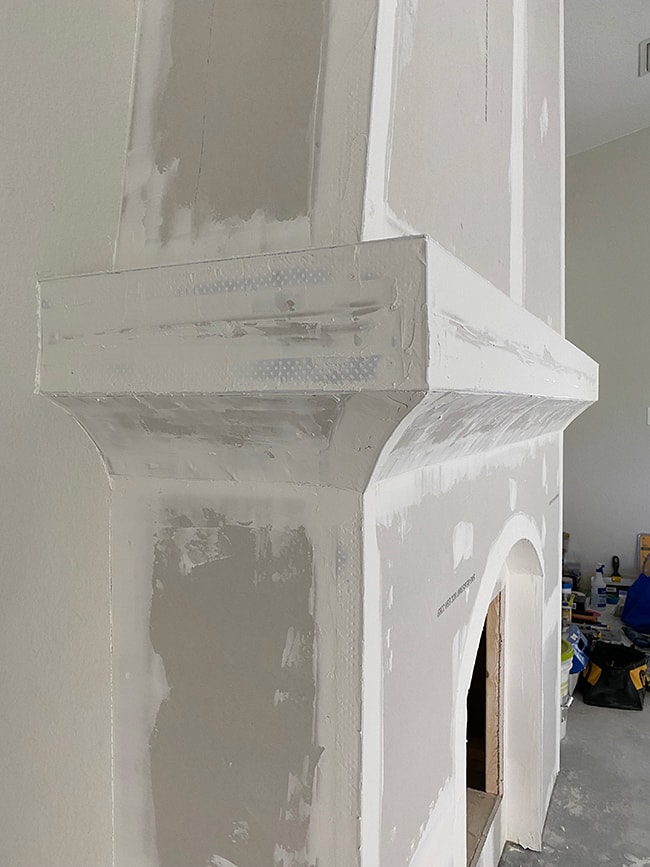
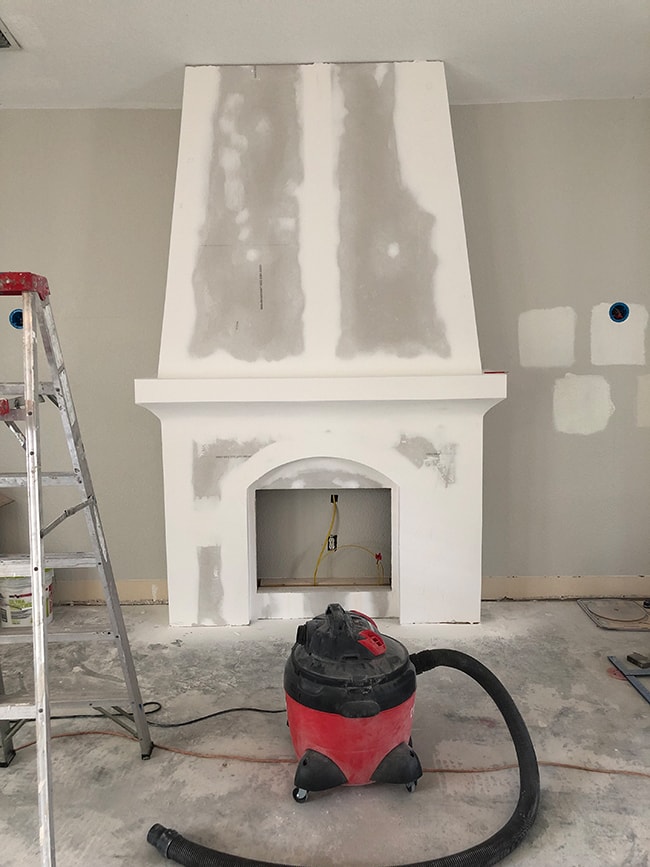
I’m glad I went with the pre-mixed though, because mudding the curves took a long time and I needed the extra working time the mud allowed to make it look right. Here’s how it looked after the first coat:
The first layer of mud is usually applied with a 3” or 4” taping knife. The goal here is to cover all the screw holes, corners, and any dings that might have occurred in the drywall. You don’t want to be shy about using too much mud here. Just be sure to squeeze out any air bubbles as you go.
Step 11: Sand and repeat as necessary
After letting the first layer of mud cure, it’s time to sand it down with an extra fine sanding sponge (I used 220) then repeat the process all over again. On the second layer, use a larger taping knife than you did the first time, with the goal of feathering out the mud over the seams.
This is when I added the tape along the seam of the mantel curve, after I had built it up with an initial layer of mud.
Repeat this process as many times as it takes to get it right. For the main seams and corners it took three applications for me, but the curve under the mantel required about five (mostly to smooth out the visible crease between the two pieces of drywall).
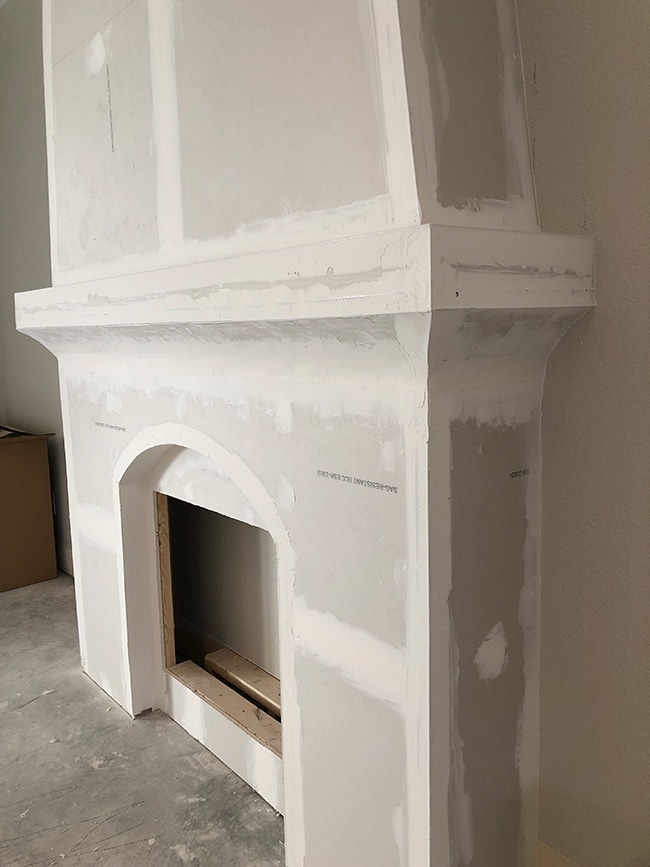
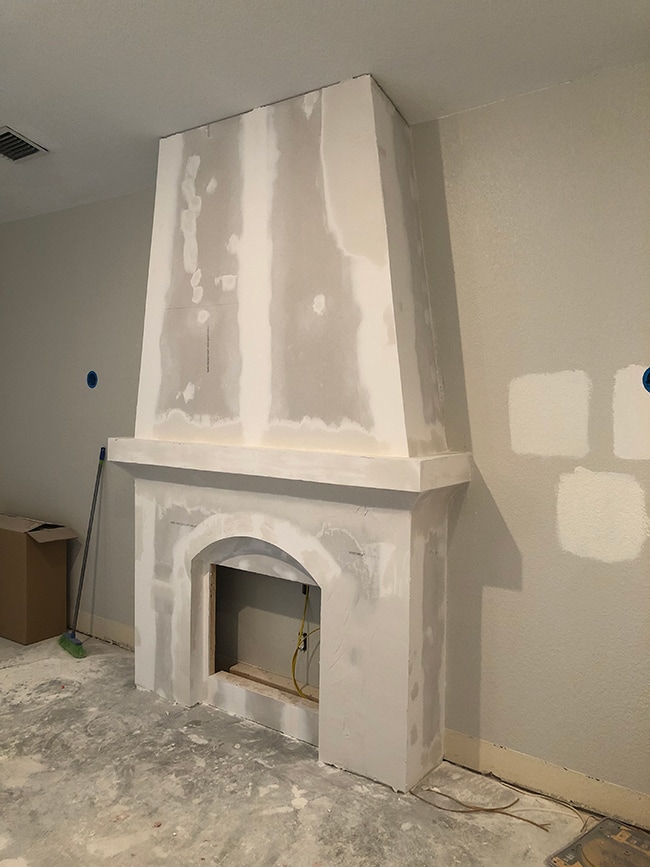
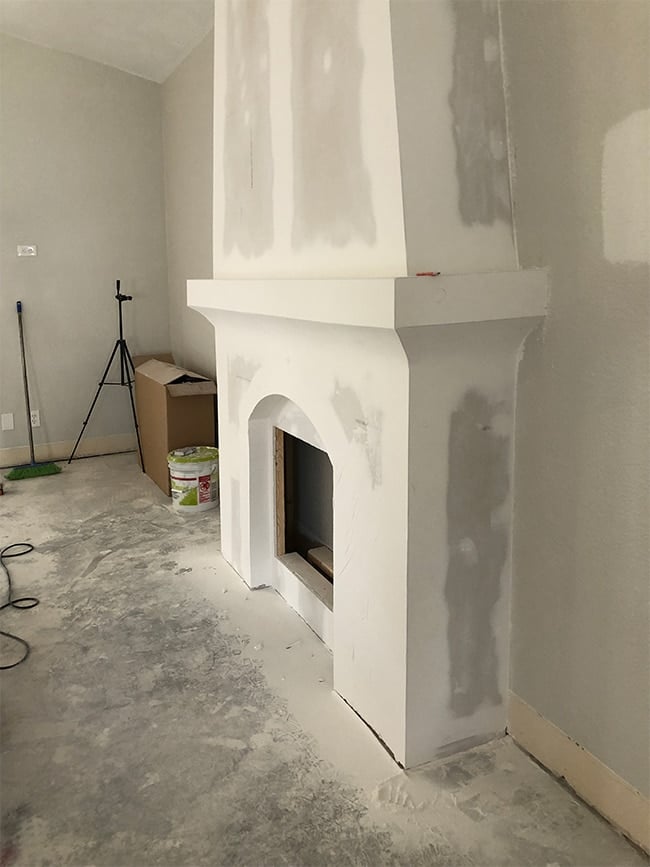
Here’s how it looked after two coats of mud:
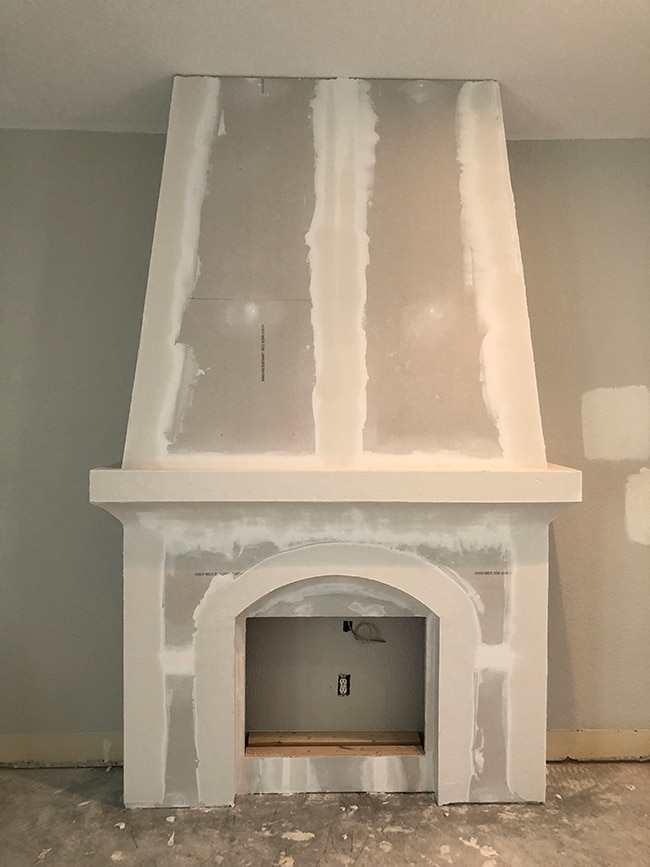
And finally, the third coat (only added where the surface was still uneven):
If you’re using the premixed joint compound, make sure you allow at least a few days to complete this step. You don’t want to rush through it!
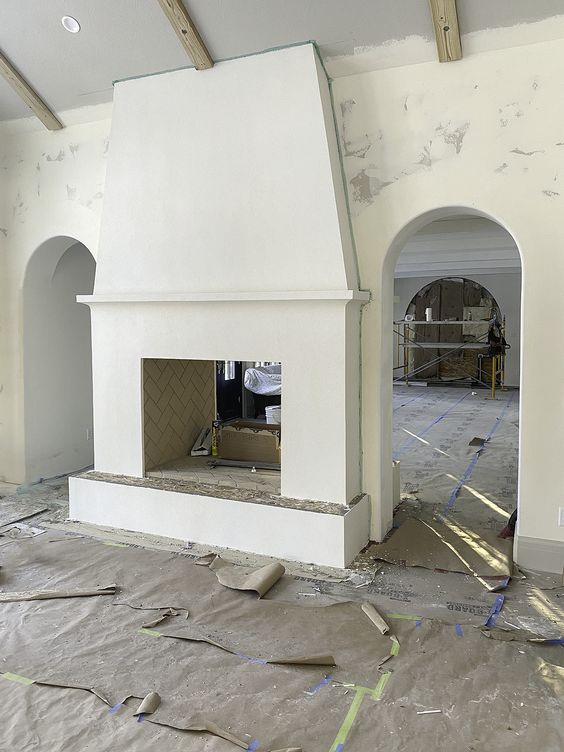
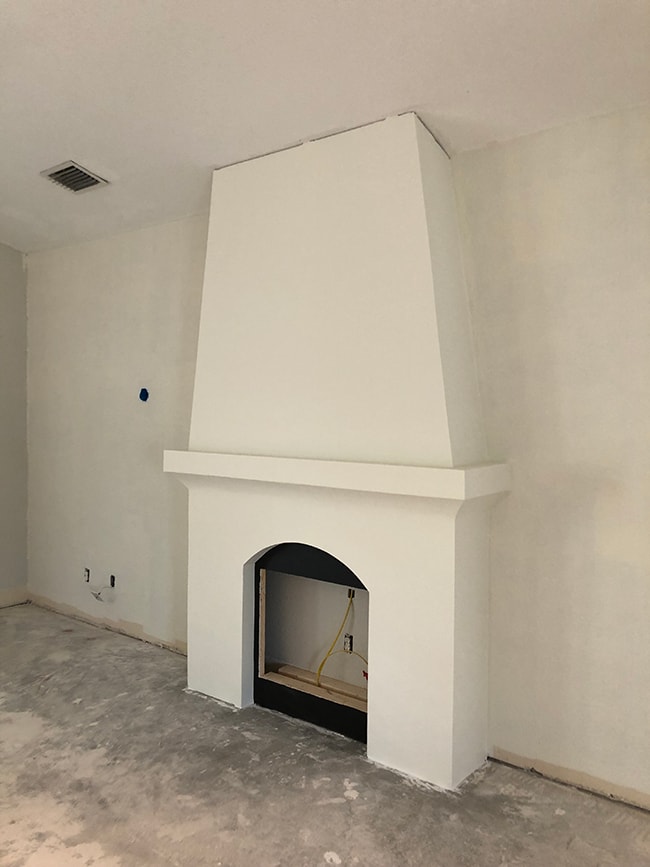
Look at that beauty!
Step 12: Prime and paint
After each layer of mud is cured and sanded to perfection, you’ll need to get rid of the dust before priming. First, use a vacuum with a soft attachment to go over it all, followed by a damp rag. Try not to go straight for the damp rag, as the drywall dust could bead up and become visible after painting. Always prime fresh drywall before painting.
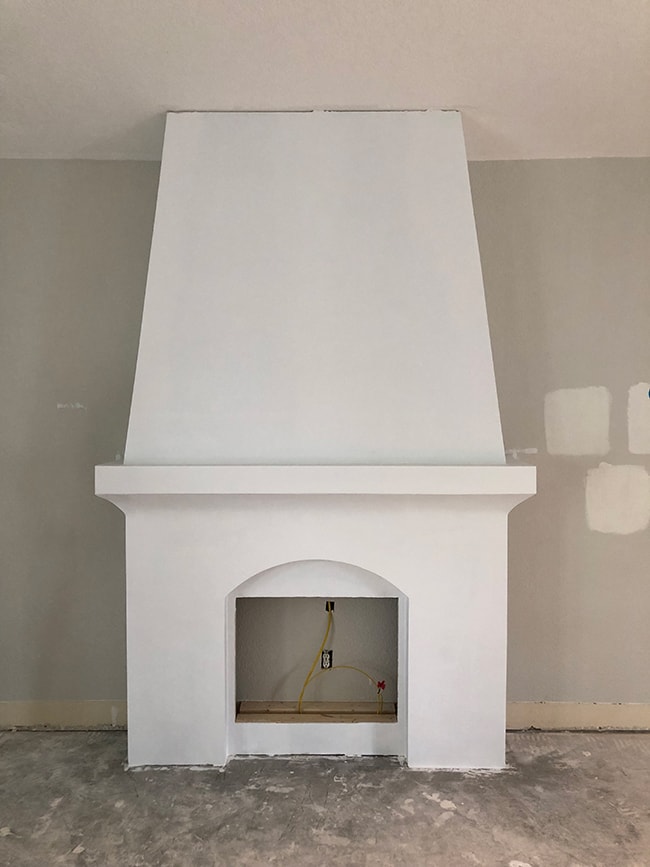
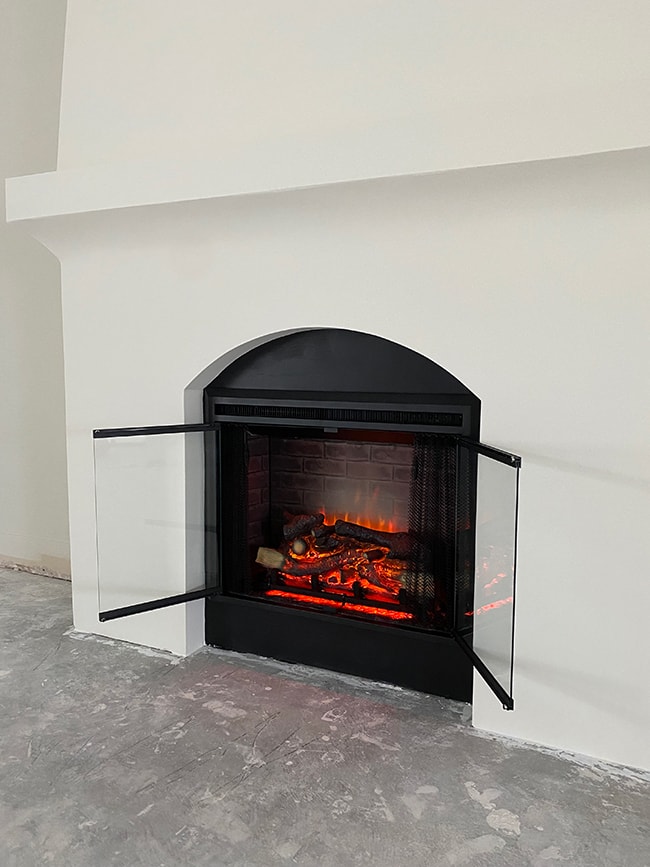
We decided to paint the section below the arch black, to help the insert blend in (how a real fireplace would look).
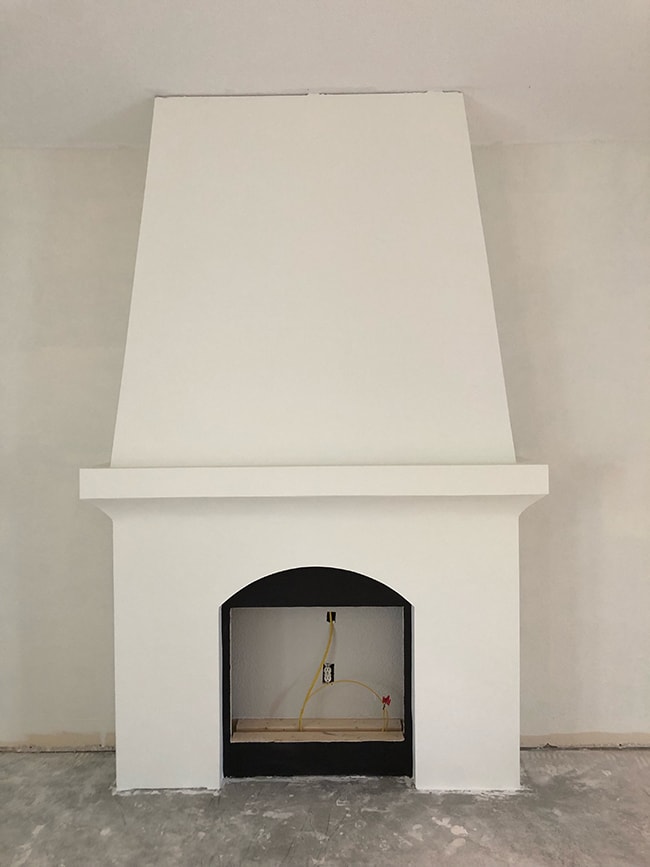
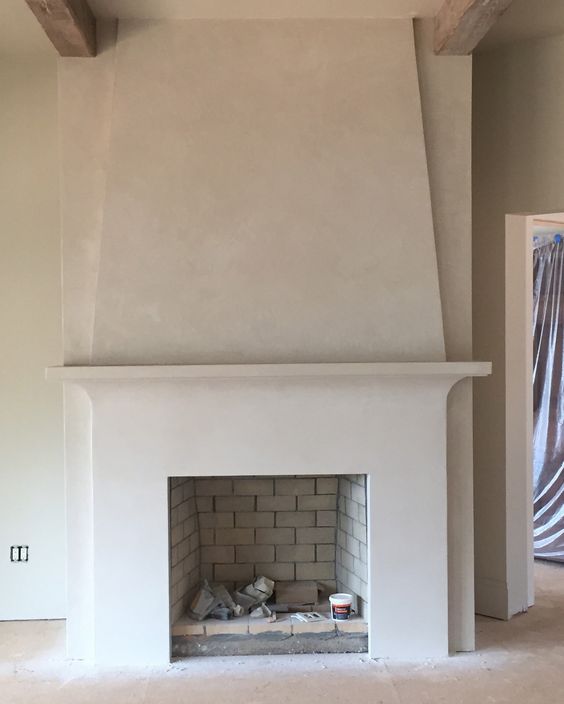
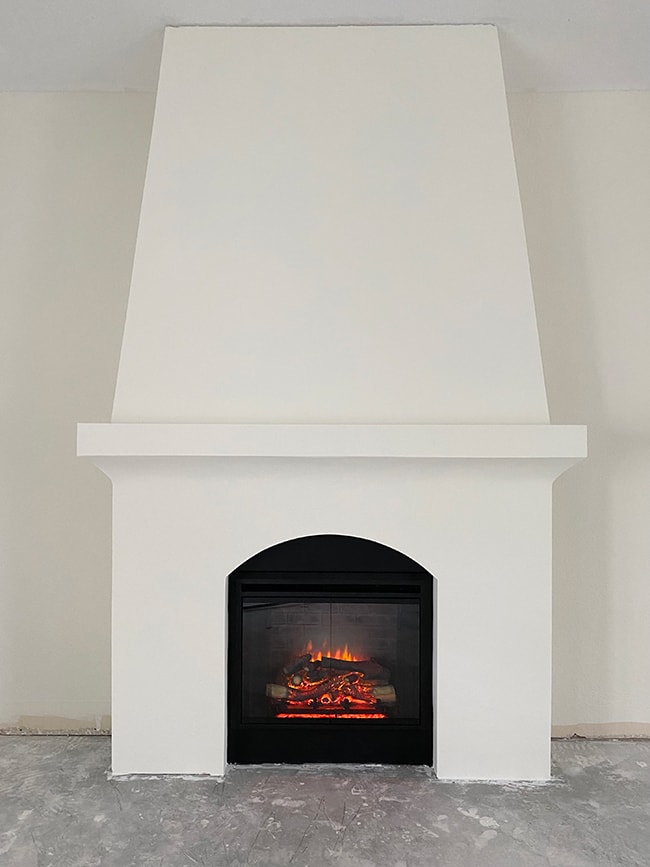
The fireplace (and entire wall) was painted SW Dover White, which was my favorite sample I swatched throughout the house. However, it looked more yellow than my test sample—here you can see them side by side to confirm I wasn’t going crazy (psst, this is Jenna typing now!)
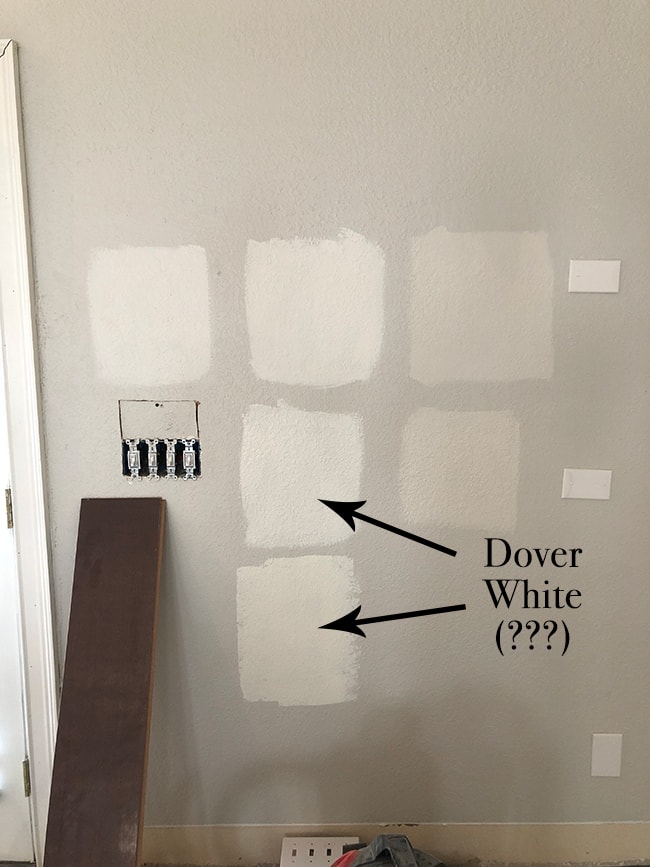
Perhaps it was because the sample I had was over two years old and had been sitting in the garage? Either way, I’ll be choosing a new color for the interior walls. It’s not a bad color in person, just slightly more yellow than I had wanted.
FYI: The original plan was to use Venetian plaster instead of paint (to achieve the same look as our inspiration photos) but the plaster I wanted to use is currently back-ordered. It worked out fine this way though, because now we can see how it looks with the smooth drywall to make sure Venetian plaster is the look we want, and if we want to have any variation in the color or texture.
Plus, now we can do a separate tutorial in more detail for the plaster finish. Woohoo!
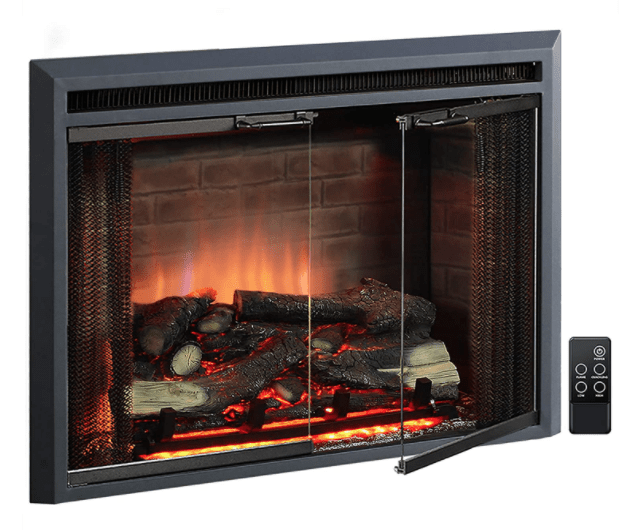
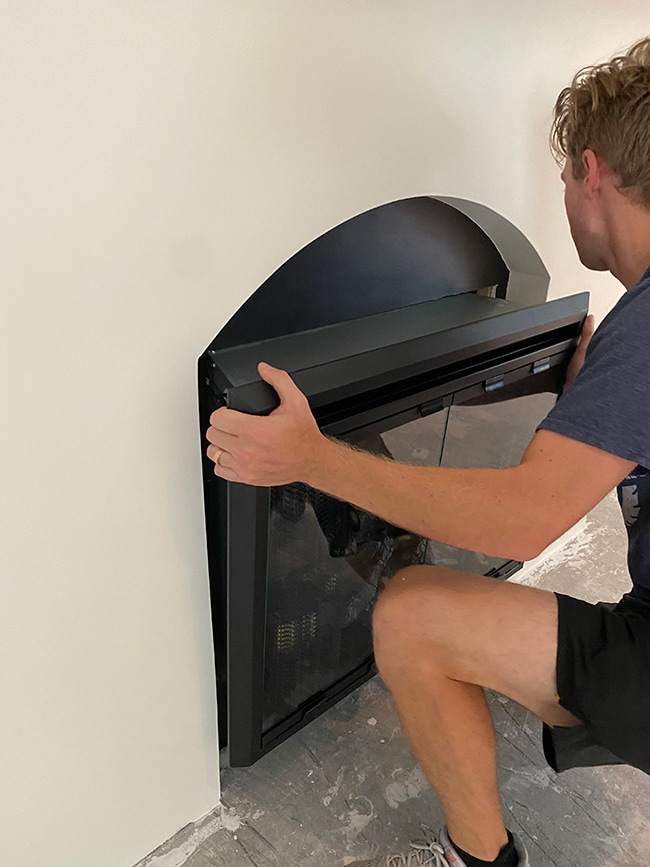
Step 13: Install the electric insert
We chose this insert after researching several options and looking at the reviews. It has 5-star ratings with a solid warranty, is available in several sizes, and has a built-in heater that can heat up to 400 square feet.
Installation is a breeze—simply plug it in, push the insert into your frame and attach it with screws along the inside.
The biggest selling point for me are the realistic features—life-like logs that sit on a grate, interior brick walls, a retractable mesh screen and glass doors.
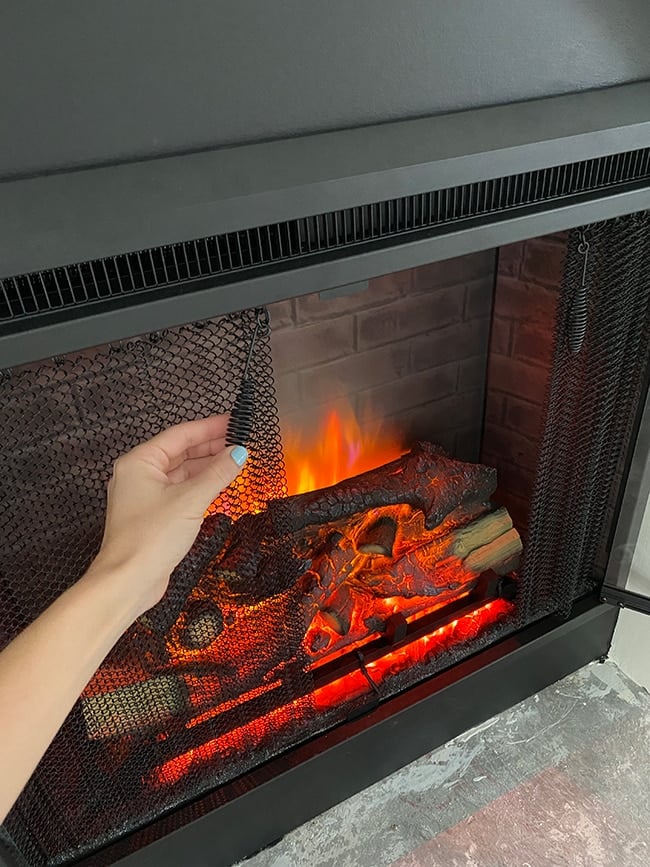
There are two heat settings and three flame settings (that can be on with or without heat, controlled via remote or buttons at the top) plus an optional crackling sound.
The heat comes out through a vent at the top to provide warmth but the insert doesn’t get hot, so it’s safe for kids.
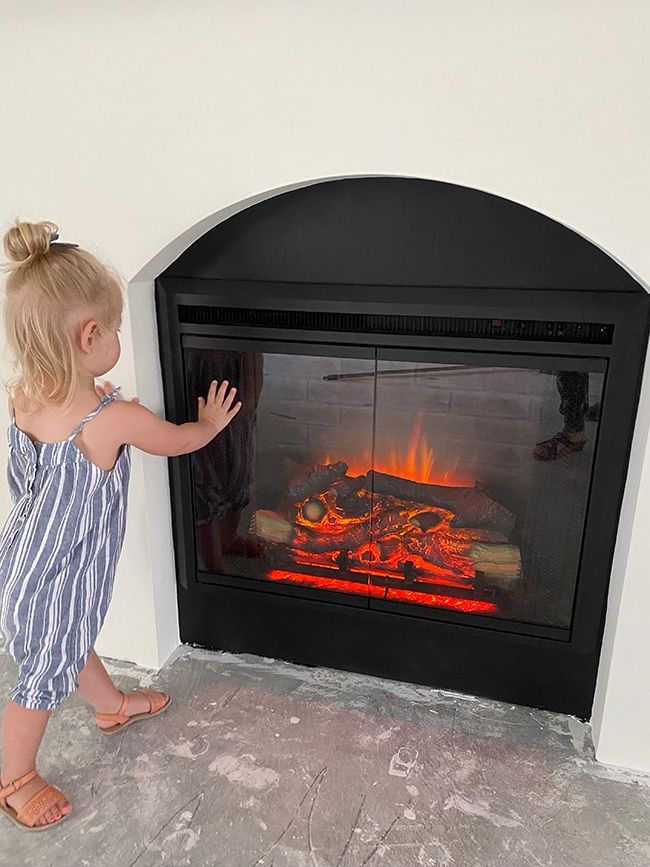
Can you tell how much I love this thing?? I’ll share videos of it today in my Instagram stories if you want to see it in action. I’m convinced the curved detail below the mantel is what gives it that high-end custom look, and what sets this fireplace apart from your standard builder grade fireplace. If you’re following this tutorial: don’t skip this step!
Here’s a diagram showing all of the final measurements:
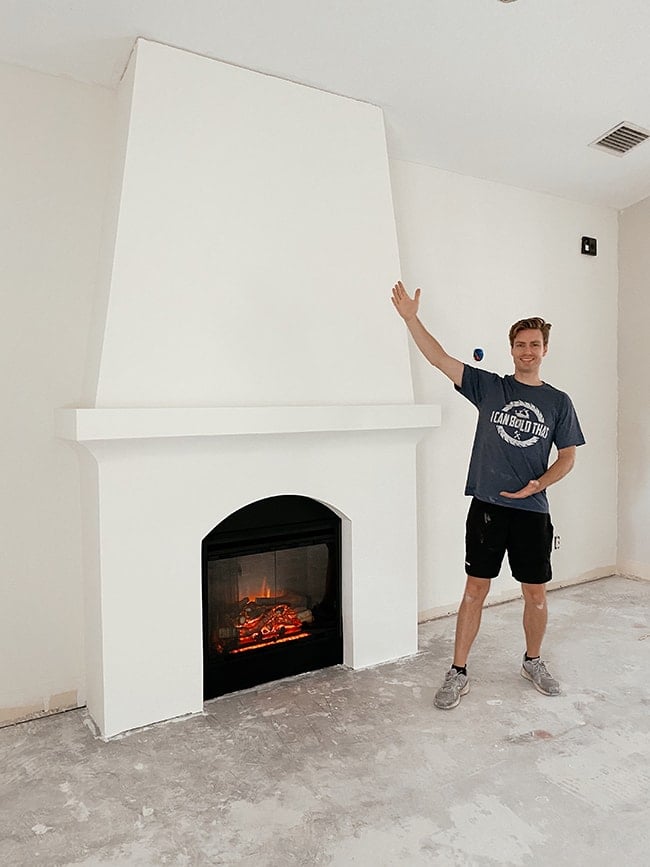
Ahhh, I love it so much! It feels like it was always meant to be in this room.
If you’re wondering about the gap along the ceiling, don’t worry about that. It will be covered once we install our wood beam ceiling—that should be the next big DIY for this house.
This tutorial was a lot of info to cover, so if you have any questions, please don’t hesitate to ask in the comments and we’ll answer!
If you like this project, check out these popular DIYs from my Project Library!
- DIY Budget Electric Fireplace
- DIY Venetian Plaster
- DIY Frame TV
- $10 canvas floating frame
- Beginner Board + Batten tutorial


Jessica says
Hi!
Legit I’ve been dying to add an electric fireplace in our living room and couldn’t figure out the style I want until I saw this post. It hit me—“this is it!!!”. I love when that happens but now I need to convince my hubby to build for me ?. These instructions are a game changer when requesting projects around my house, so thank you! Would you mind sharing the width of the fireplace at the top?
Thanks so much and job well done!!
Jess
Jenna Sue says
Thanks Jess! It’s 77″ across at the top.
Michelle says
THIS is amazing !!! You must be so proud of Lucas !! Really beautiful !!