There’s just a few more things to do after tackling one of my favorite parts last night—window treatments.
Here’s the space a few days ago:

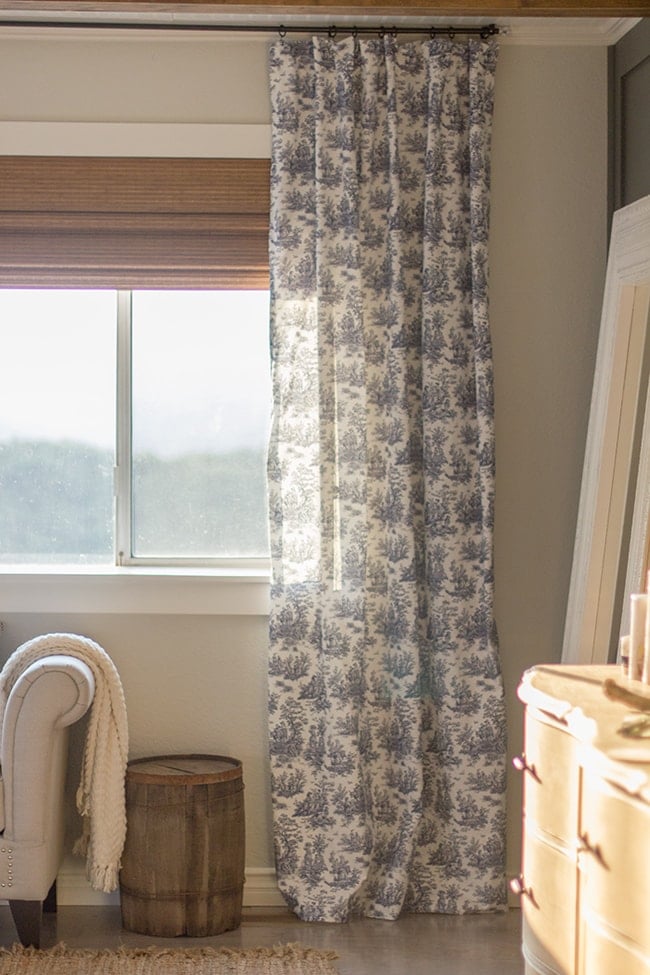
It was feeling a little cold and empty. I needed to bring some softness to the space, and flowy curtain panels are always great for that. Not only that, but this room has zero pattern (aside from subtle striped sheets). Everything is a solid color. Boring!
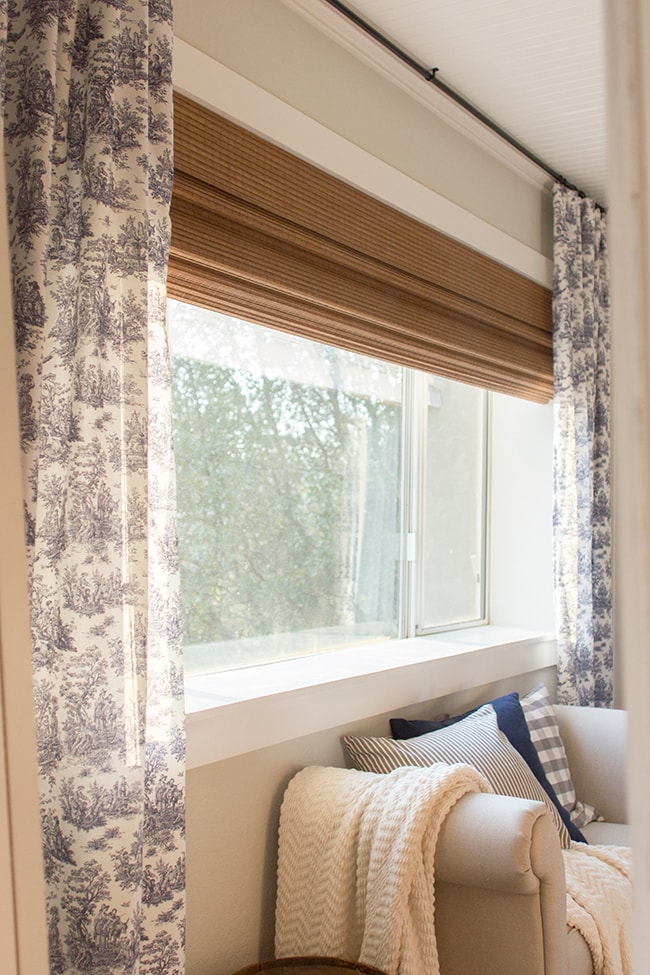
I knew from the very beginning that I wanted navy toile. I considered using it in the bedding but decided that it would be more commanding on curtains. Remember my mood board?
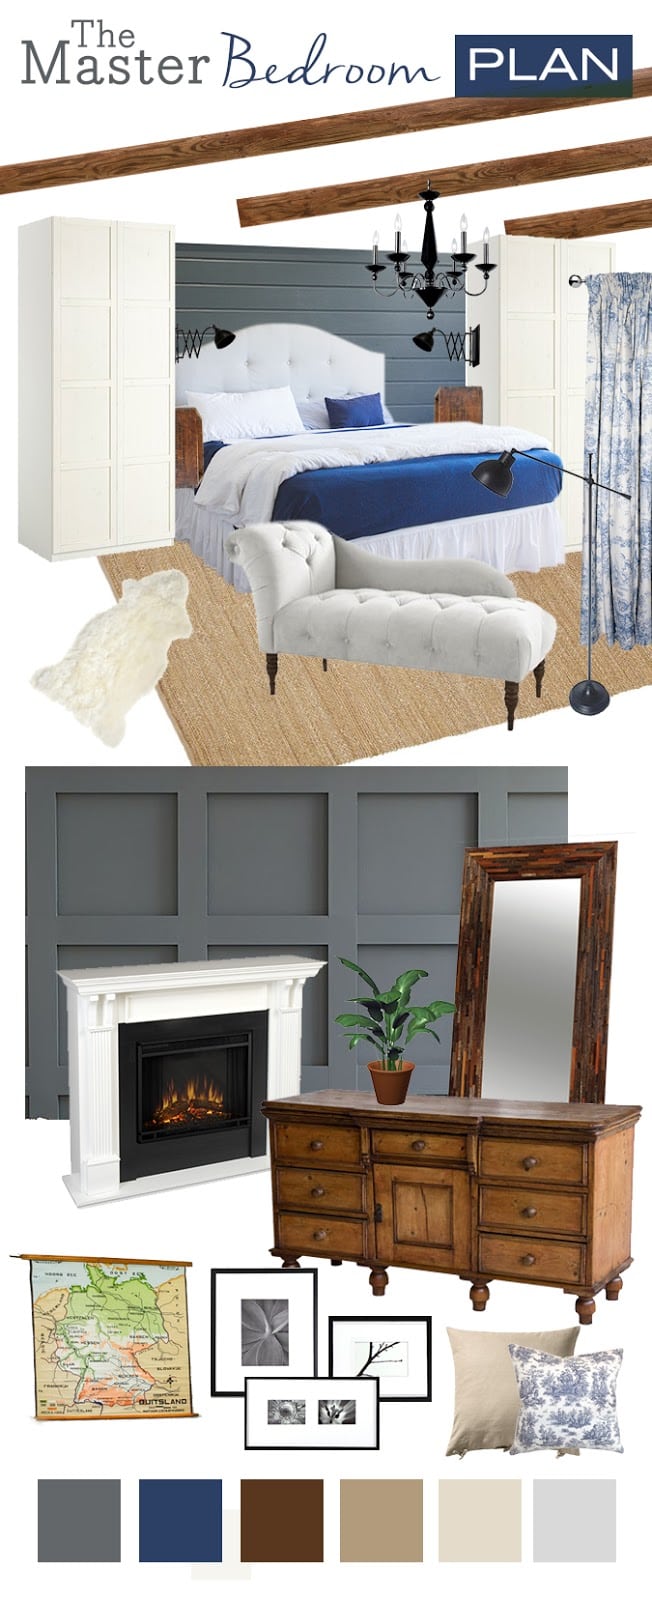
Yep, they were in there.
After scouring the internet for the best deals and coming up short (literally) when trying to find curtains long enough in the right fabric, I commissioned a seller on Etsy to sew some custom panels for me. I went with two 50×94″ panels and it came to $96 shipped (which is actually not bad compared to other places online). It was worth it.
Then I had to figure out how to mount these. I couldn’t use a traditional curtain rod because there was a wardrobe in the way, and the top of the door is 2″ from the ceiling. That meant I had to come up with a ceiling mounted solution. I found tons of tutorials on Pinterest using galvanized metal pipes and fittings, but even those methods would make the curtain rod stick out too far.
So I went to Lowe’s and found this 1/2″ copper pipe (in the plumbing section) for around $10:

It came in 10′ sections which was perfect, I didn’t even need it trimmed down. I preferred this over the 1/2″ galvanized pipe because a) it was $5 cheaper, and b) it was super light weight (the galvanized steel is so heavy!)
To hold it up to the ceiling, I grabbed a bag of these plastic U shaped brackets for a couple bucks (that makes this 10′ curtain rod around $12 total… nice!) I couldn’t find any metal brackets (I think those are in the electrical section) but the copper pipe is so light, and everything would be spray painted black so the material didn’t matter.

After giving the pipe a good buff with steel wool, it was time to paint.

I used a satin black for both the pipe and brackets (it’s shiny here but dries satin).

Once dry, it was time to hang!
Since we weren’t drilling into studs (just bead board & drywall) and didn’t want to deal with inserts, we used wall dog screws (best invention ever) which grip the drywall so well that you don’t need inserts.
We attached the first clamp all the way up to the corner of the crown…
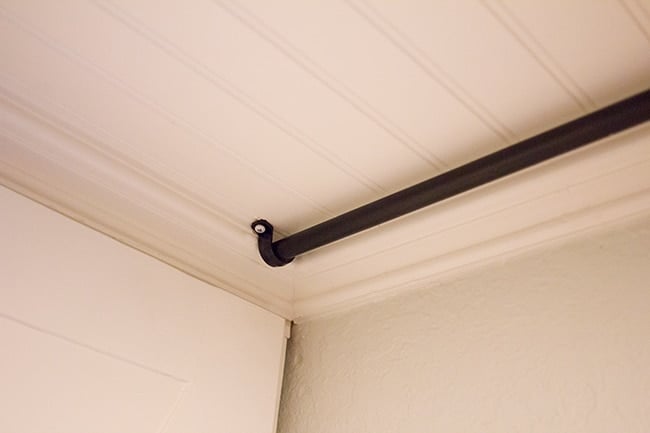
Then a clamp in the middle to keep it from bowing…

Then a third a the end. The first end was in a corner and would be completely hidden by the bracket/curtains, and I used a small glass cabinet knob to plug the visible end.
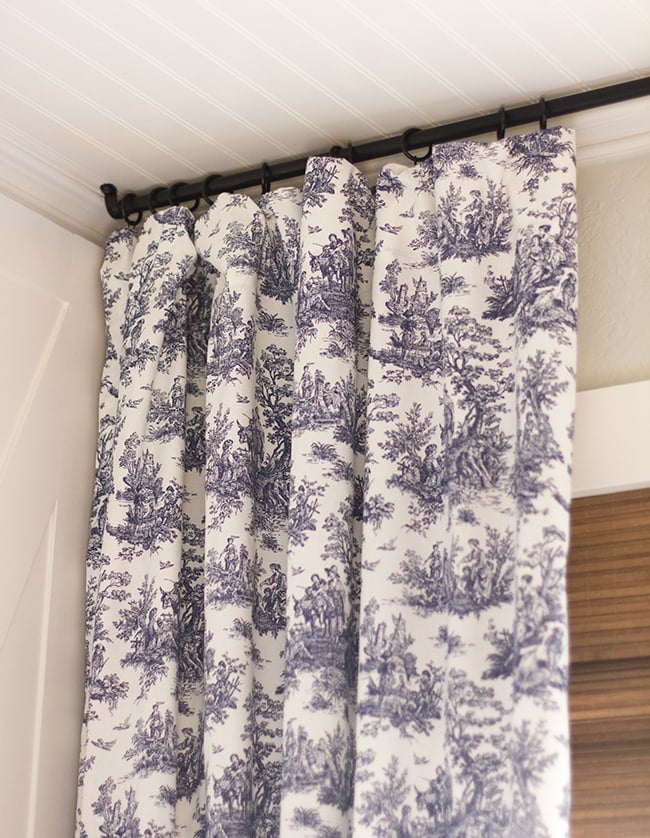
When I was at Ikea earlier in the year, I picked up a couple packs of these curtain rings. I thought I might need them for the living room but that didn’t happen—luckily they were perfect for this occasion:

After trying out a few possible ways to hang them, I decided to clip them in the back so you wouldn’t see the clips.

It makes for a nice, clean look when hung. And I’m happy to report that the paint doesn’t chip off when the rings slide across (I think buffing with steel wool helped).
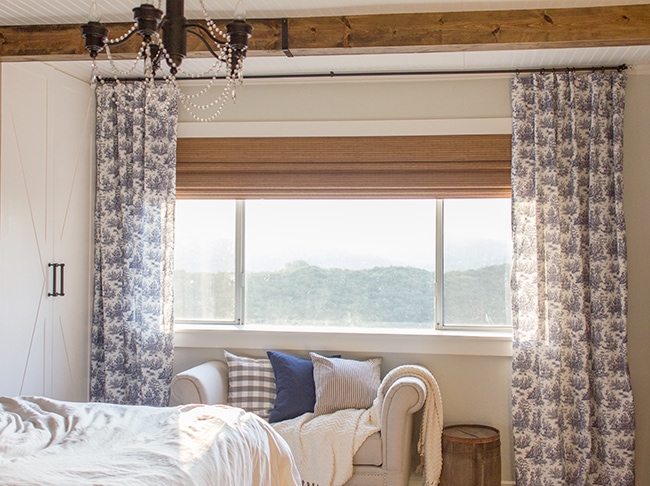
And here they are!
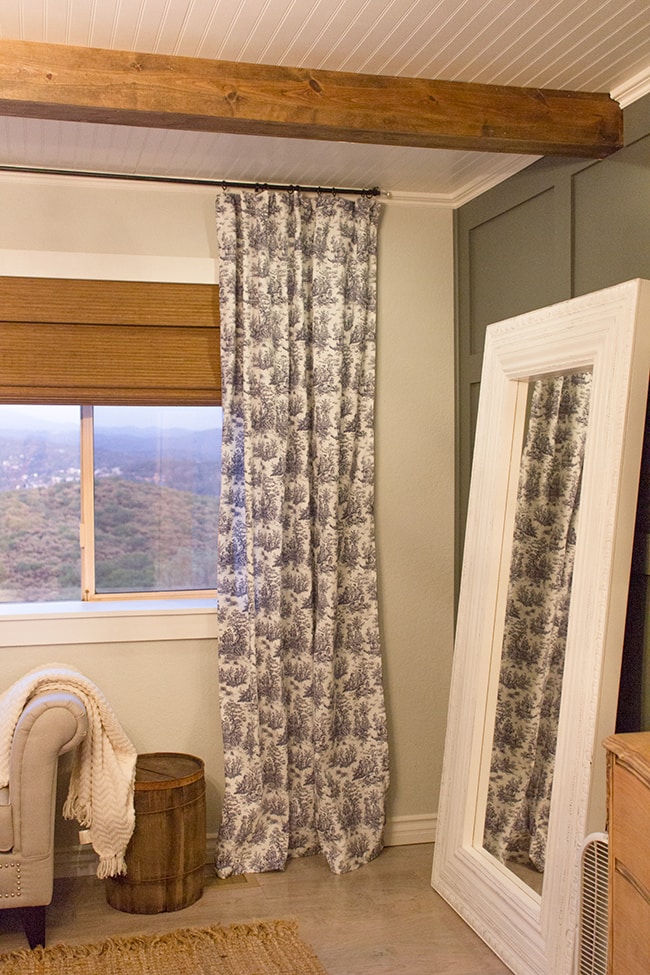
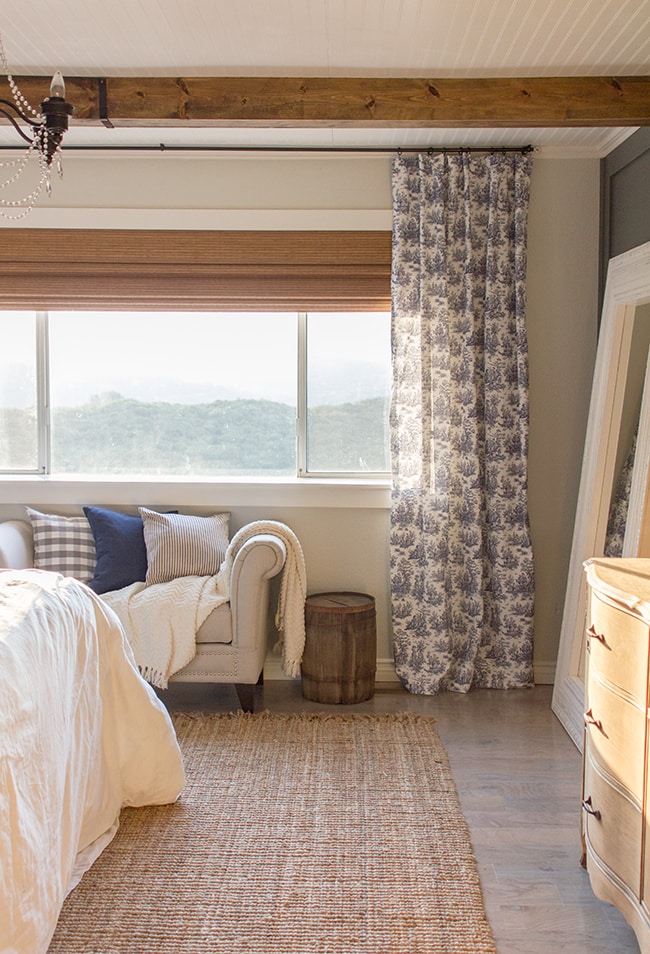
I snapped a couple shots after we finished up as the sun was setting…

And then a few more this morning at sunrise…
There’s just something about navy and toile…
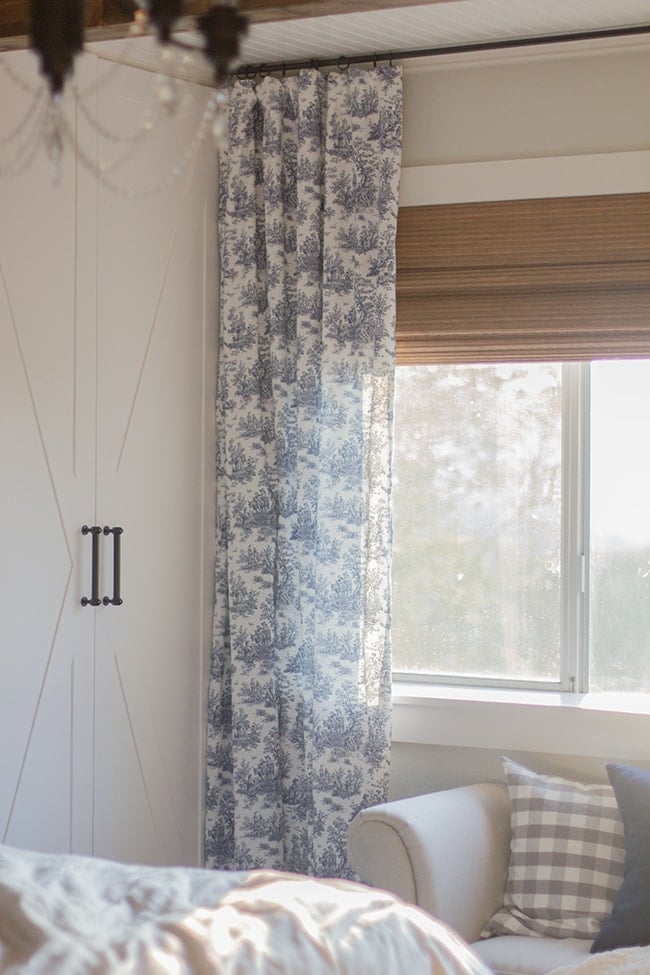
It adds the perfect touch of french farmhouse.
And also a bit of romance next to the chandelier.
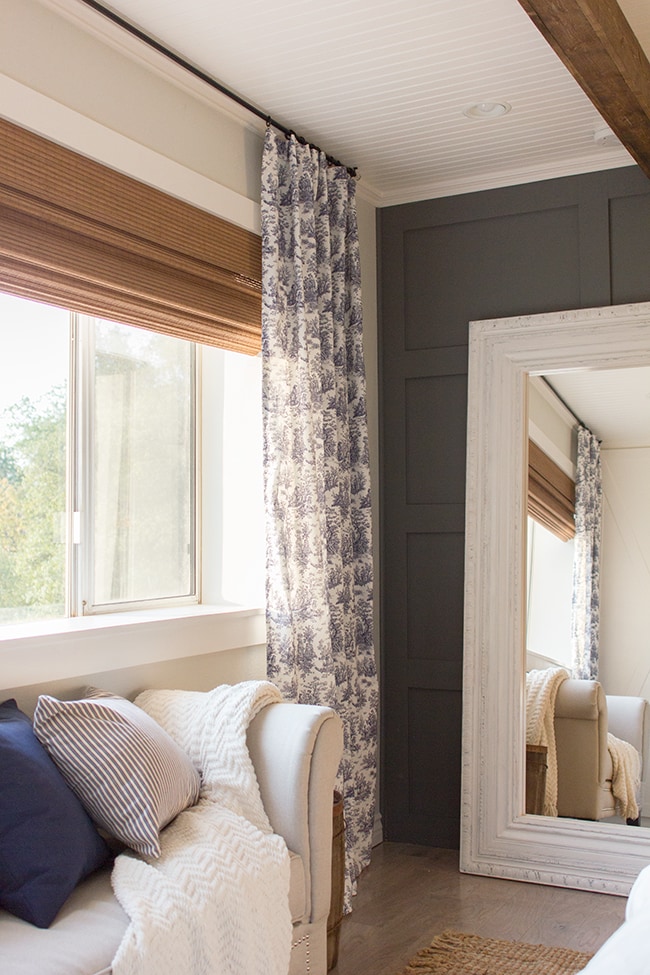
Here’s a shot looking into the mirror…
Sigh. I’m just in love. Curtains make such a difference. Every week this room takes on a slightly different feeling with every change we make. It’s so fun watching it evolve. In less than two weeks it will be complete!


stephanie, sandpaper & glue says
your bedroom is freaking awesome, I love it! 🙂 As for the living room, I like the chair & chaise because the ottoman can always be scooted around for extra seating and just gives it less of a matchy-matchy feel.
stephanie, sandpaper & glue says
your bedroom is freaking awesome, I love it! 🙂 As for the living room, I like the chair & chaise because the ottoman can always be scooted around for extra seating and just gives it less of a matchy-matchy feel.
Michelle says
The one issue I see with this arrangement is whoever is sitting in the chair/chaise will have their back to the window and won't be able to enjoy that awesome view. I agree with the comments above about putting the chaise back with the couch to make a sectional. And then maybe putting the chair over by the fireplace angled toward the stairs?
Jenna Sue says
It's funny to hear people saying that! We're very informal people. Our guests are mostly family/close friends and I don't think they'd have a problem lounging with their feet up (no shoes on, of course!). And I'd prefer it to be a casual/relaxing space moreso than a formal seating arrangement. I do like the idea of a pouf instead of ottoman though… hmmm.
Sarah says
Your bedroom is beginning to look like such a retreat! What a million dollar view.
DianeTaylor says
Congrats Jenna on the win – I voted for you and I'm so happy you won!!!! I can't wait to see what you do with the LR and the big reval on your bedroom. Those curtains are dreamy…..
Callie says
So many suggestions, it's fun to read everyone's re-arranging thoughts! My vote is for keeping the chair (rather than replacing it with a second chaise), and I like the idea of replacing the ottoman with a pouf in another texture, to keep everything from looking too matchy-matchy. In some parts of the world (I was in India, and I think the Middle East is similar), it's rude to show the bottoms of your feet to other people. Even though I haven't been in India in years, I would still feel really uncomfortable putting my feet up on a chaise in someone else's living room. I wonder if other travelers/visitors might feel similarly.
The Bears Four says
Have you thought about reattaching the chaise to the sofa but on the other side so by the railing? Stand alone chaises always strike me as a little odd when in a living room, great in a bedroom though. Maybe just me but I would feel really awkward about lounging on a chaise in someone else's home. We have one attached to our sofa and guest always avoid it and seem to prefer sitting in our armchair, so could imagine if you had two they would only be used by you two.
Gail king says
Loving seeing the bedroom come together! My personal opinion about the configuration of your living room is that if it were me, I would get rid of the chaise lounge. To me they're one of those pieces of furniture that seem like a good idea but are just not practical in most homes. They're just so big, chunky and chop up a space instead of making room feel harmonious, cohesive and cozy. I'd get two matching chairs instead. You won't lose seating since in most cases only one person sits on a chaise lounge anyway. But you'll instead get a much less choppy, cramped feeling in the room. In terms of having more options for switching things up when the mood strikes you, well it's much easier to do that with two chairs versus two bulky chaise lounges. Interested to see how you go with it!
Jenna Sue says
I considered that but thought it might create too much of a tight space between the chaise and the chair across from it, and then I'd still have to buy more furniture. I'm going to play around with a few arrangements to make sure though, so it's still an option!
Anonymous says
Although, I love the chaise (as I have the same Ikea couch), I feel that it separated from the couch makes it feels more beach house than the farmhouse style you are going for with this current house. My suggestion would be to move the love seat to the left side (where the chair and chaise currently are). Then move the chair at an angle up against the corner by the stair rail, with it facing towards the sliding door. For the chaise I would repurpose the cushion, and build a new base for it with wood to incorporate it into the farmhouse style (see link). I would put this new chaise/bench up against the wall on the right (where the couch currently is).
https://www.nimvo.com/eclectic-french-farmhouse-style-in-sonoran-desert-arizona/
Meghan says
Love the way your bedroom is turning out!! You've been working your buns off and it looks great 🙂
As for the living room, what if you out the chaise back where to was (with the sofa). Get another chair instead of another chaise and put them angled, across from the sofa. No ottoman for the chairs. Thoughts?
Jenni Ahokas says
I love those curtains! And your bedroom, too ;). You have probably kept moving furniture around for awhile. You can actually see and feel the space, as we can only make suggestions based on photos. I´d try to put the sofa with the chase (in the left) facing the fireplace and then I´d angle the chair in the right corner (in front of the fireplace). Just my opinion. With your suggestion, I´d keep the chair and chaise, but maybe re-slipcover them with different colors. They are different, so enhance it. But the best advice I can give is do as you feel is right for YOU, not right for us!
Anonymous says
I would replace the ottoman with a pouf to make it more casual. Maybe a grey or white moroccan one.
Tanja
amy wright says
I don't know you, just found you through Pinterest, but the living area looks totally inviting to me! There is something about a house that isn't completely perfect (but absolutely adorable) that makes me feel more at home. I love that you are more concerned about enough seating space than everyone being able to face the tv.