The anticipation for this project has been building up since we started 16 weeks ago (not a typo ?) and today is the day my friends!
This post is a recap of my ‘Cabinets’ story highlight on instagram and a two part tutorial—painting cabinet doors and adding DIY fluted trim. I got the idea to add fluting to the doors after they’d already been painted, which is why these steps are out of order, but it was completely worth the extra work (make sure to watch the Instagram story for more details about this project!)
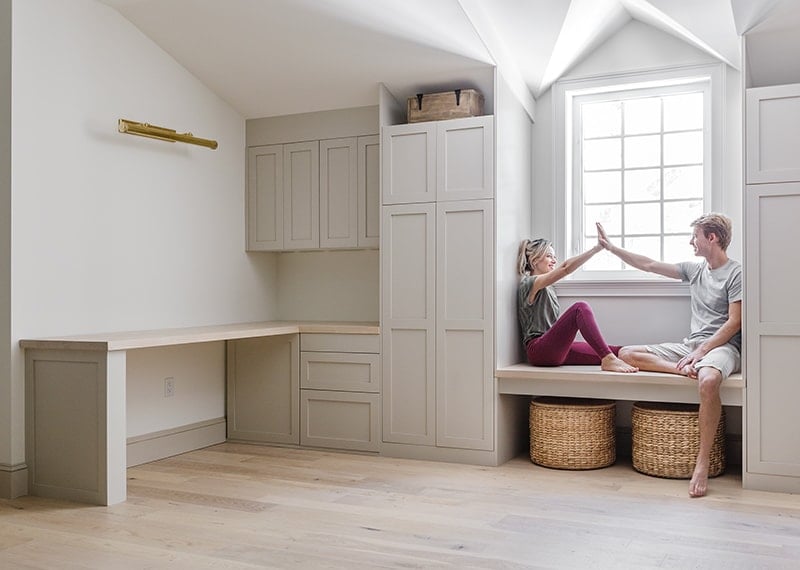
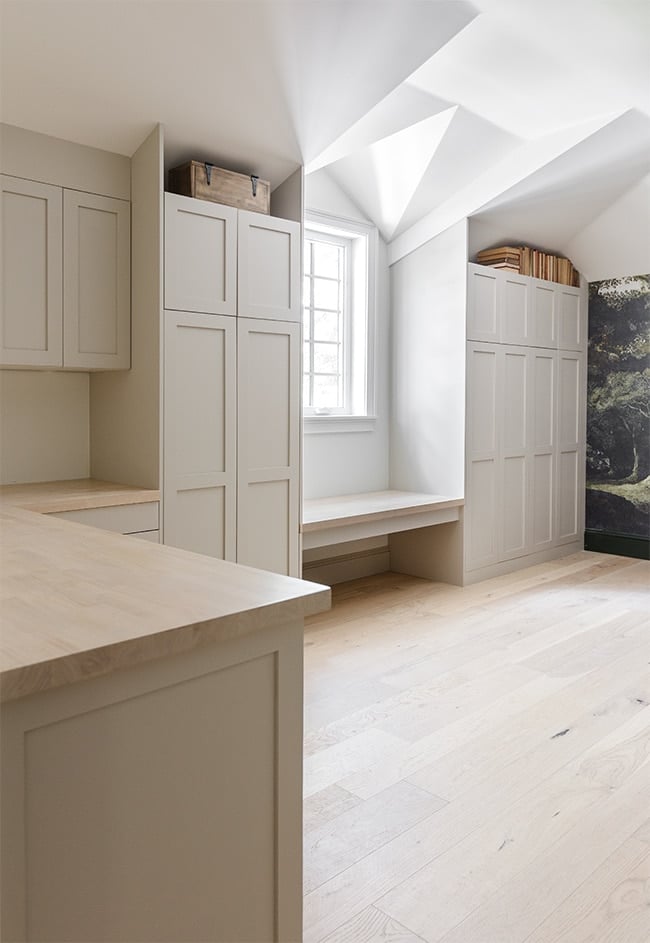
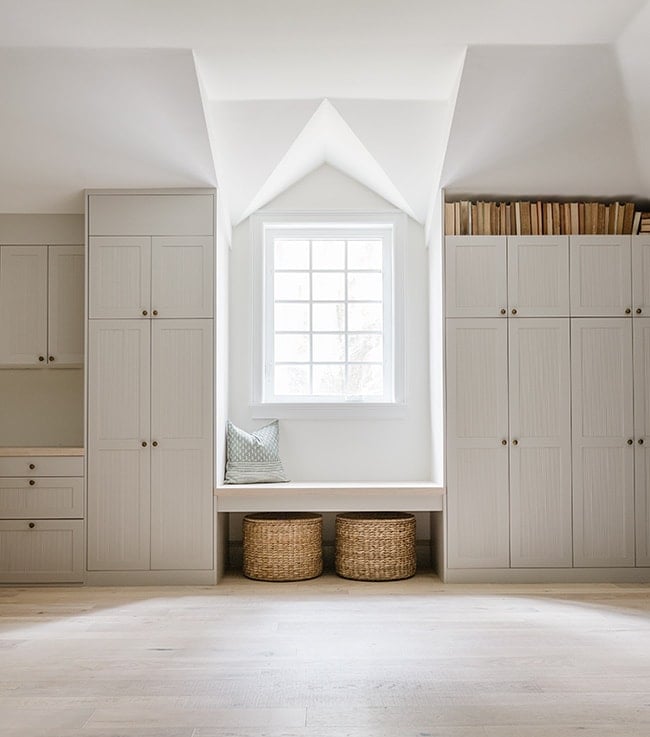
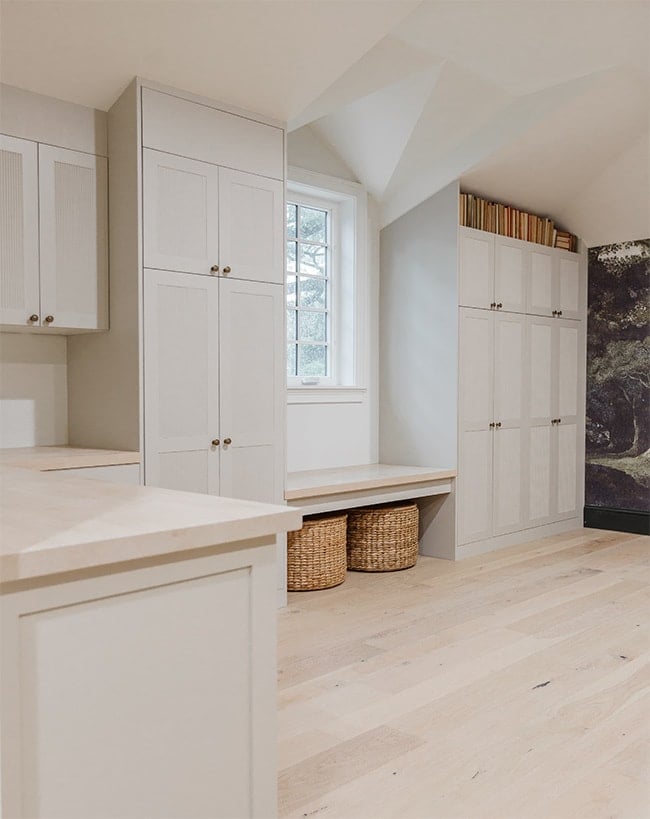
If you’re new around here, we’ve been renovating our work + playroom and one of the main features is a storage wall with custom built-in Ikea cabinets + Semihandmade doors:

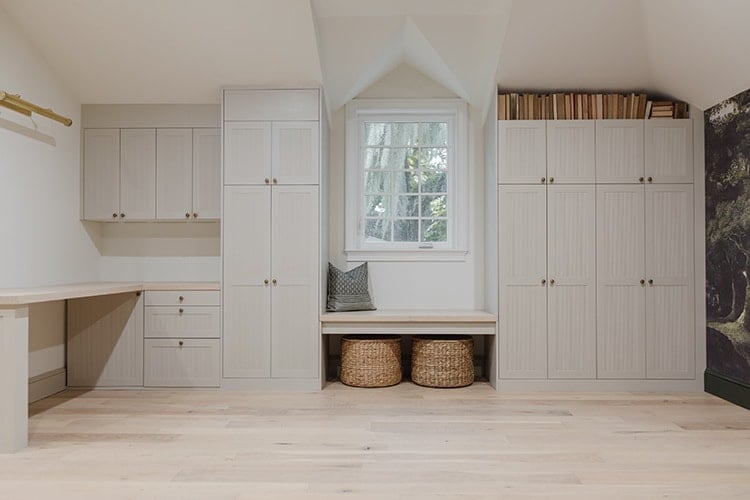
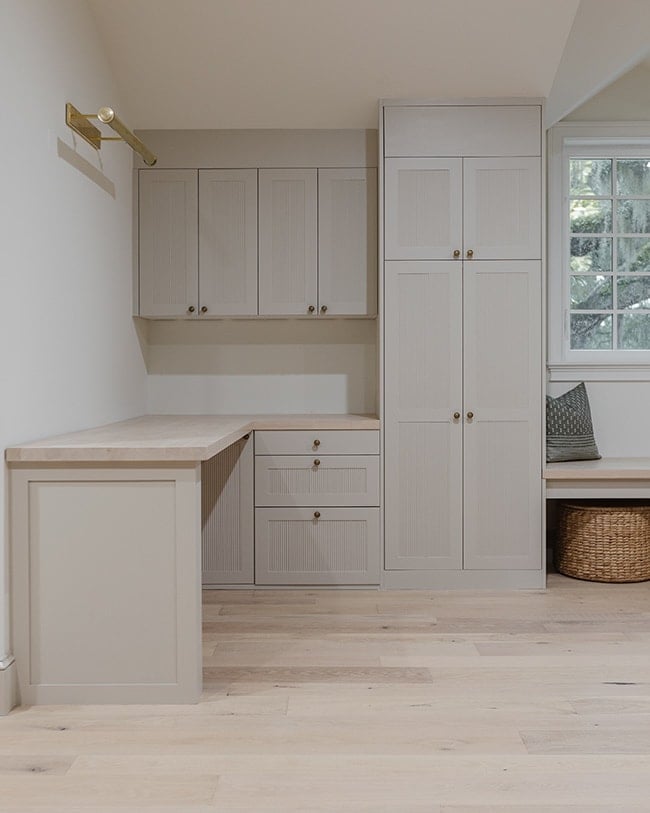
In my last update, we stained and installed the butcher block desk and window seat:
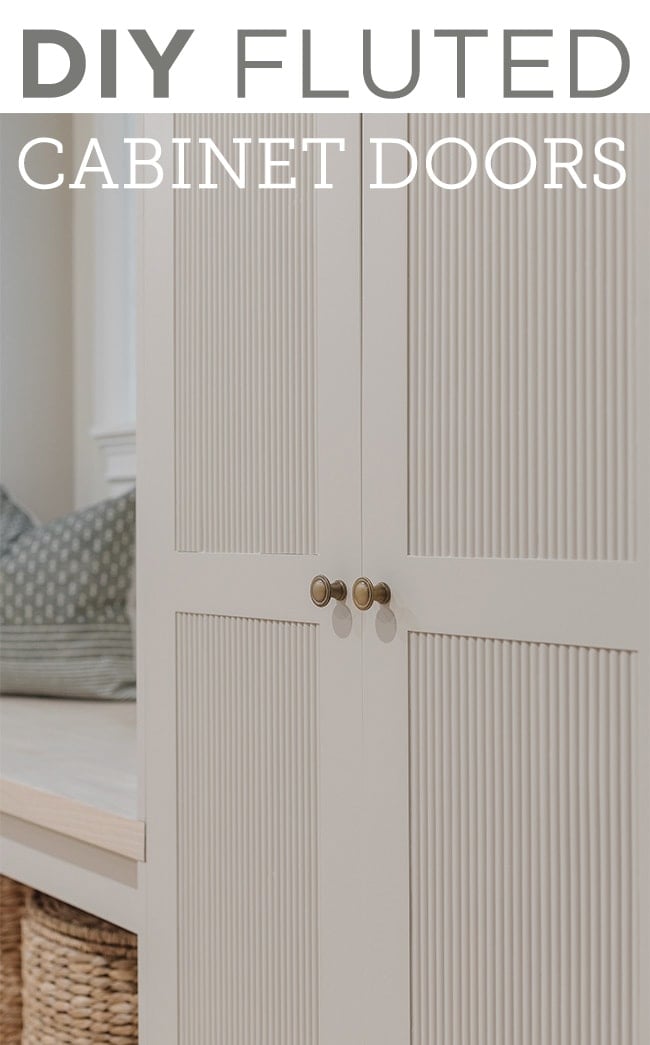
And today, the built-ins are complete with fluting and hardware!
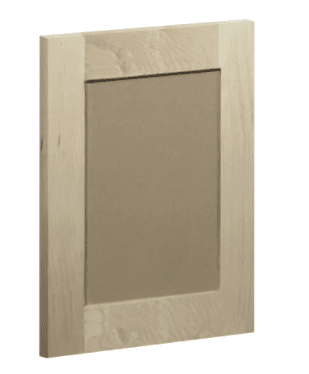
Before I jump to that, let’s talk about these doors. I ordered DIY shaker style doors from Semihandmade to fit our Ikea cabinet boxes (these come ready to paint and actually cheaper than Ikea doors, see the cost breakdown in this post).
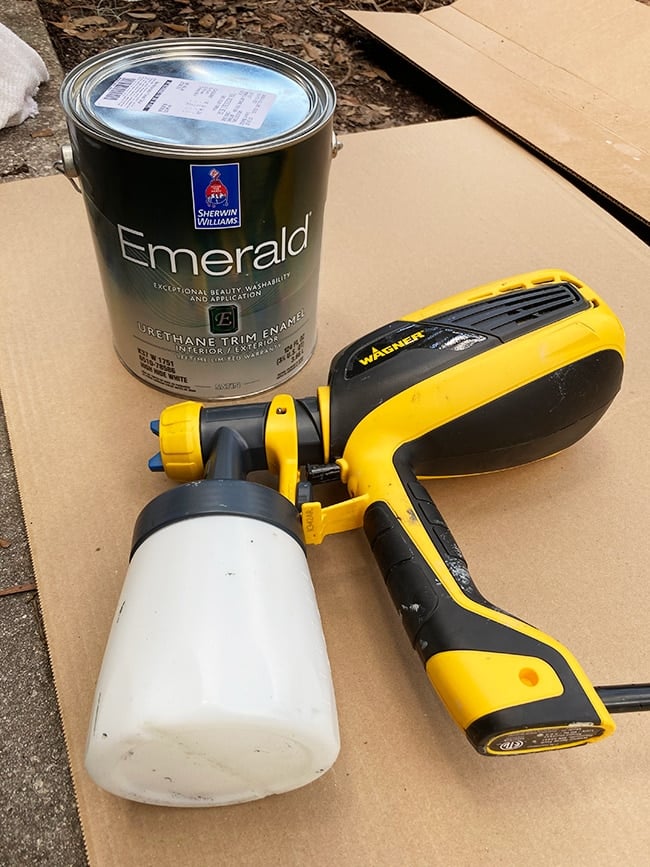
I decided to paint them Sherwin Williams Accessible Beige, which is the door/trim color throughout our home. It’s one of my all-time favorite neutrals and a true greige. For this project, I used SW’s Emerald line in satin which is formulated for cabinets (comparable to the popular BM Advance line):

We used a spray gun to paint them instead of rolling them on for the smoothest finish possible (though a good paint roller would work as an alternative!)
The unfinished doors are ready to paint, so no primer was necessary in our case, but for any other pre-finished surface (like Ikea cabinet doors) you’ll definitely want to prime first.
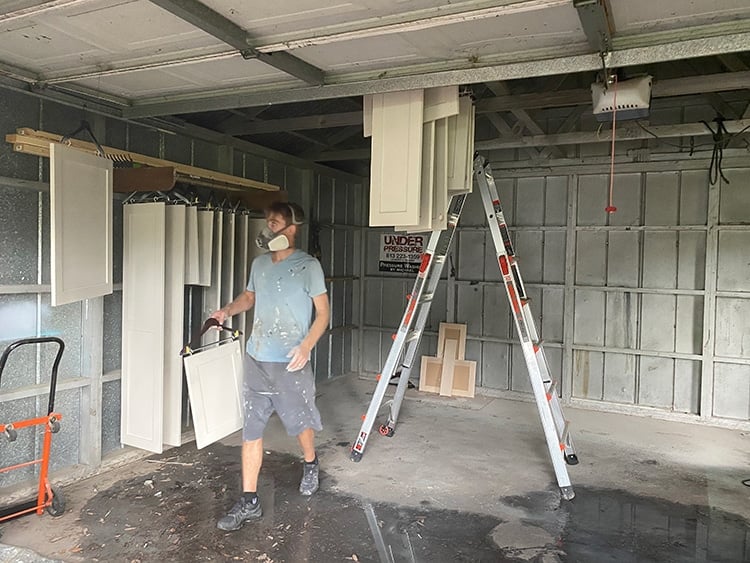
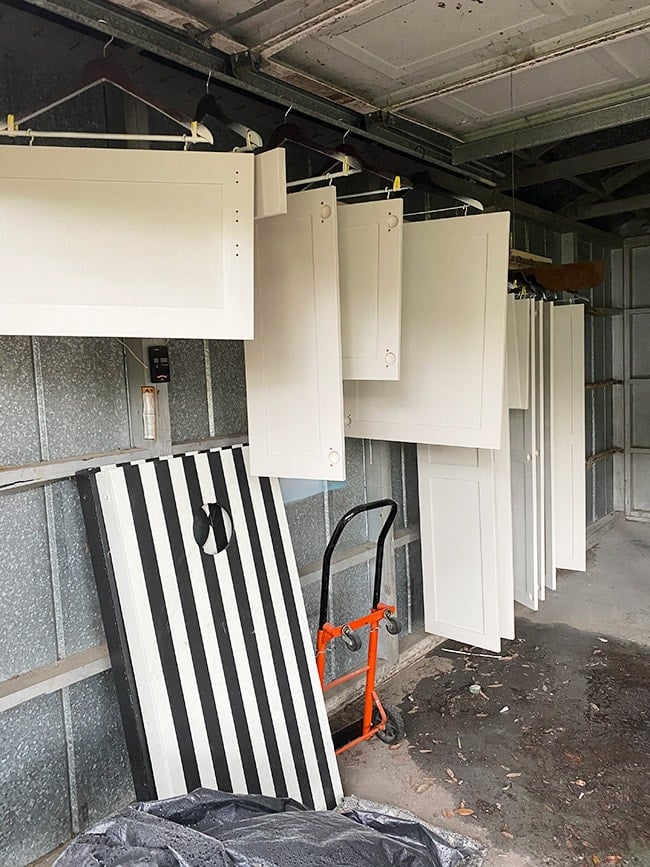
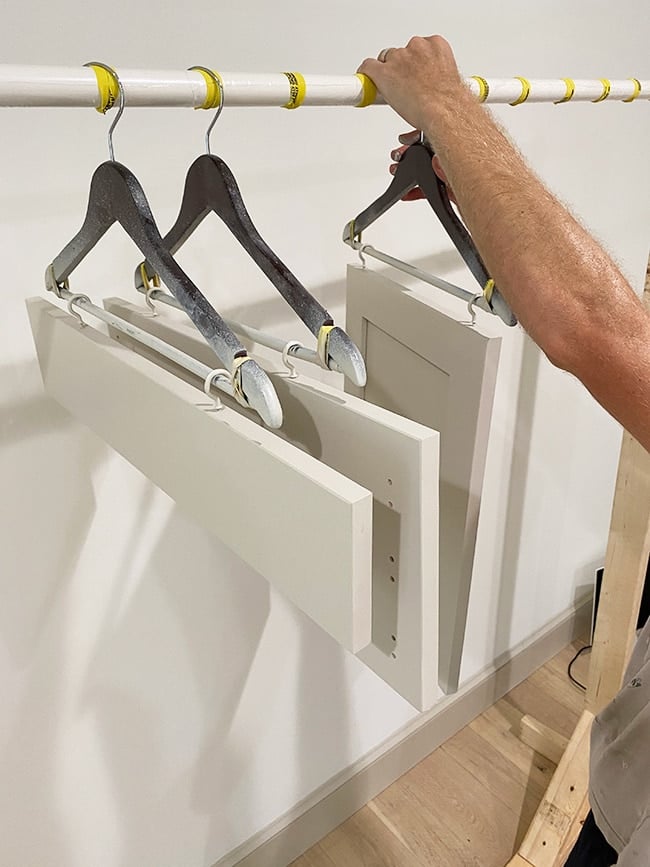
There were a whopping 20 doors to paint, so we had to come up with an efficient system. Our garage is currently gutted (undergoing a renovation) so we were able to use it as a spray booth and assembly line to hang the doors. Lucas found the idea online to attach eye hooks on the bottom (or top) of each drawer and loop them around a hanger:
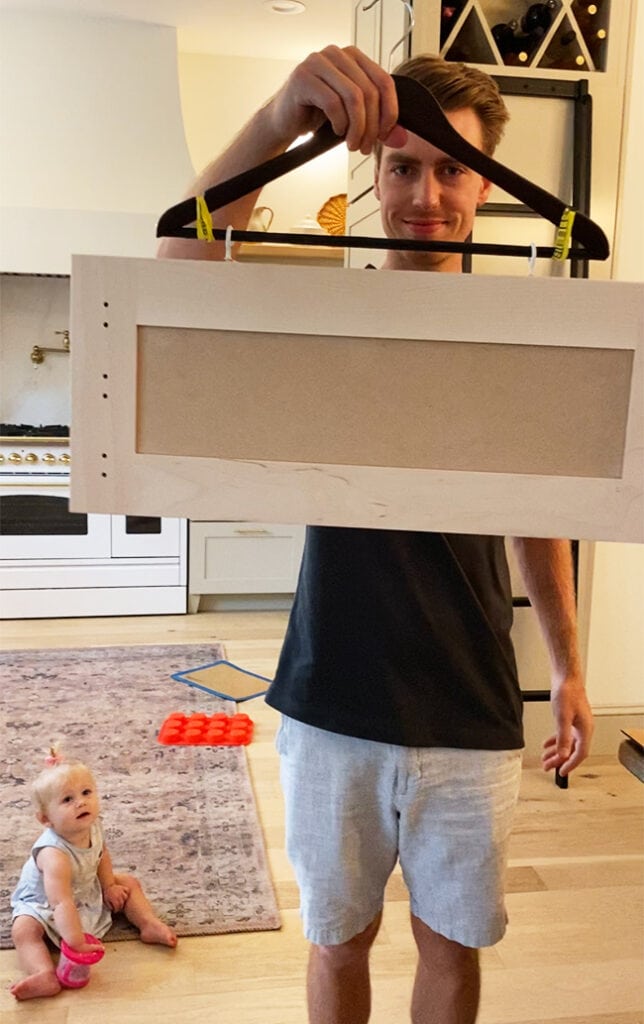
This would allow us to move the doors around without handling them, and the screw hook holes wouldn’t be visible afterwards since they’d be facing either the ground or the ceiling. We can’t take credit for the idea but it’s pretty genius!
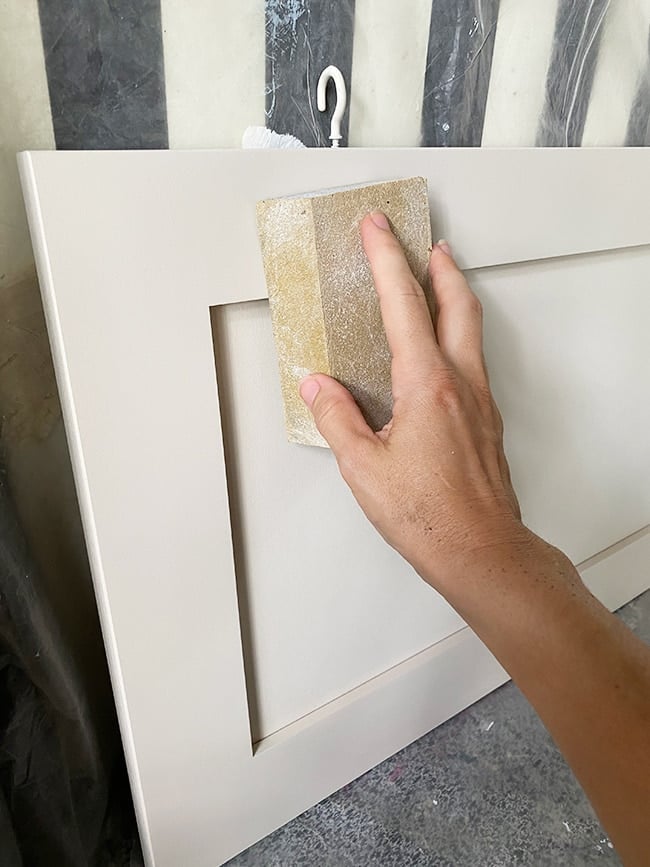
A light sanding with fine paper is always a good idea to prep any wood for paint, followed by a wipe down and spray with an air gun to clear off any dust.
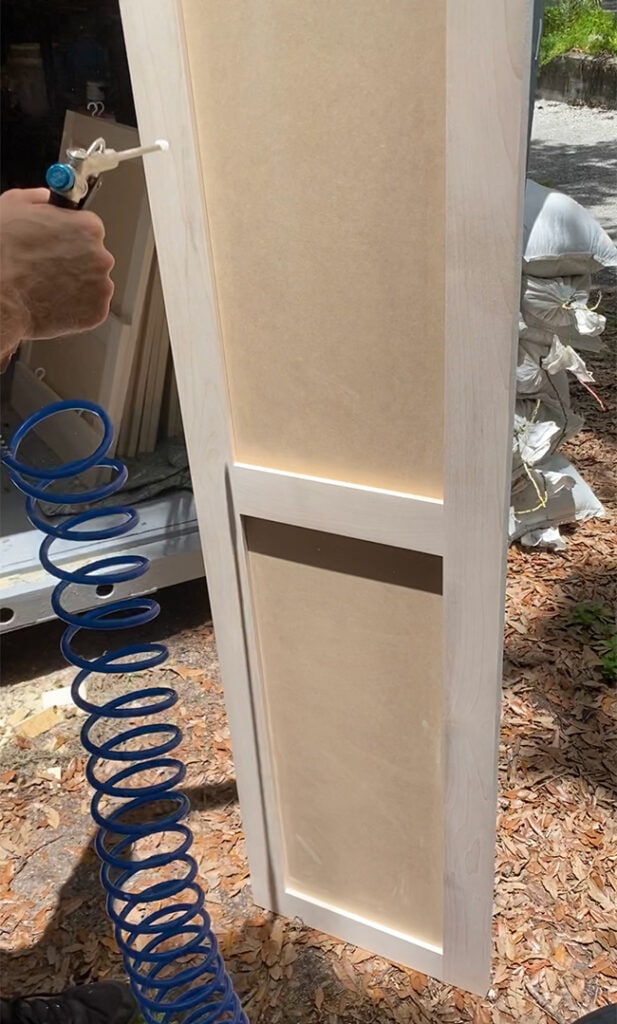
Then it was time to paint! We used the detail nozzle that came with our gun for a finer mist setting (I believe the power setting was at six, but you’ll need to adjust this at your discretion). The directions did not recommend thinning this paint so we used it full strength.
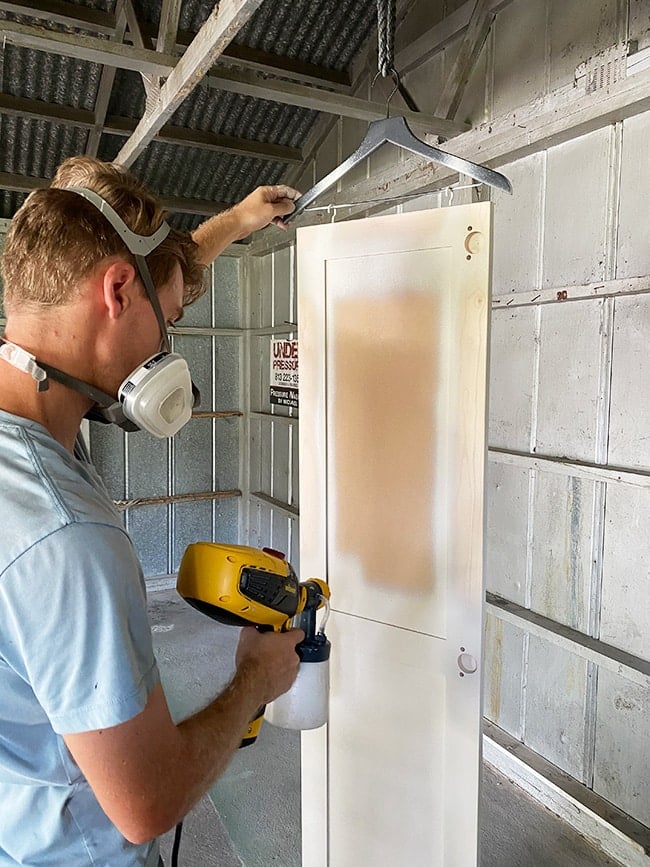
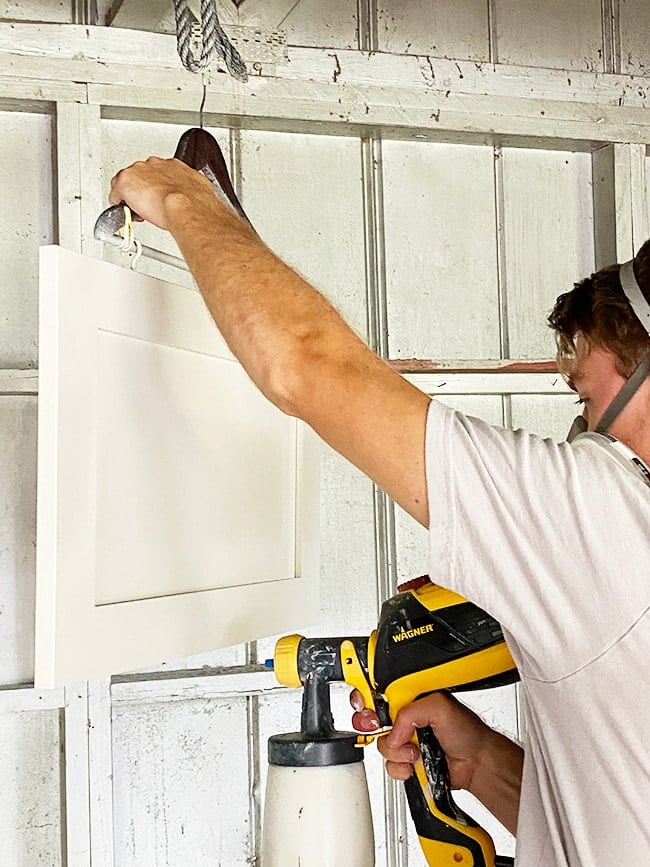
The doors were hung from a rope and painted one at a time. Here are some spray gun tips we found helpful:
- Start spraying off of the door and don’t release the nozzle until you’re past the edge
- Overlap your last pass slightly
- Maintain a consistent distance and pace (8-10″)
- Keep the gun perpendicular to the door
- Spray along any grooves/joints first
- Use a respirator mask for safety
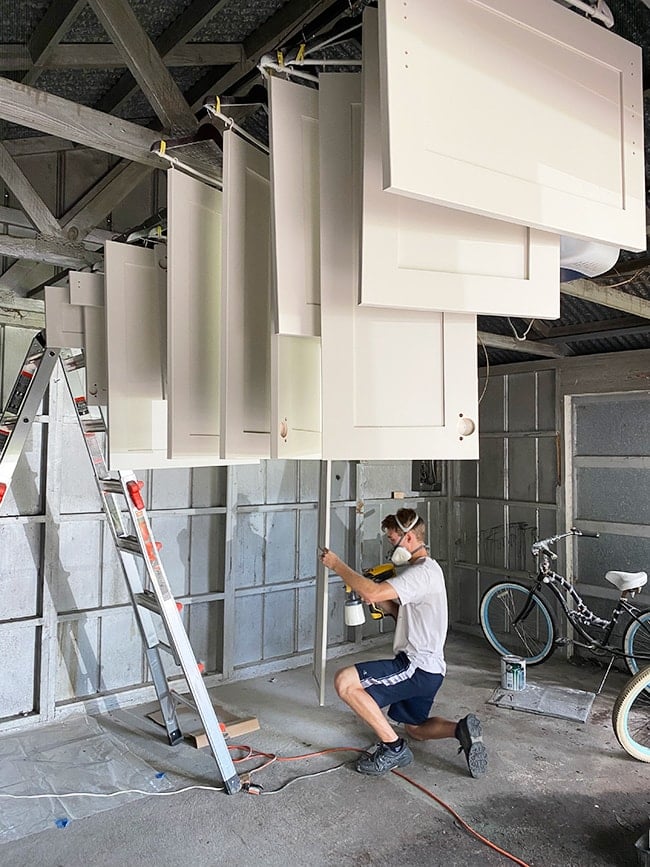
Once all sides/edges of the door were covered, we hung them to dry on a makeshift rack (using a rake).
The only tricky thing about this painting method is that the door likes to move from the pressure of the gun, so it had to be held steady by grabbing the hanger with one hand.
The taller doors were a two person operation, with one of us having to lift up the bottom to spray, and also hold it in place as it was too large to keep steady with one hand.
We let them dry in the garage overnight, and then it was time to sand before coat #2. Sanding is a critical step to get a nice smooth finish, and a 220 grit sanding sponge makes the job quick and easy.
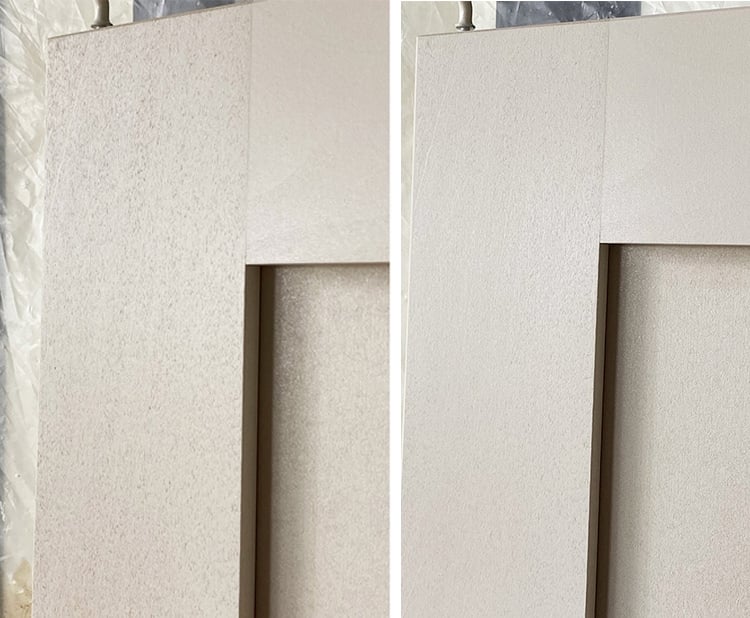
You can definitely feel the difference before/after sanding, and it’s also noticeable in the right light:
Once all the doors were sanded and wiped down, the same process was repeated (paint, dry overnight, sand + wipe down) and only two coats were needed to cover.
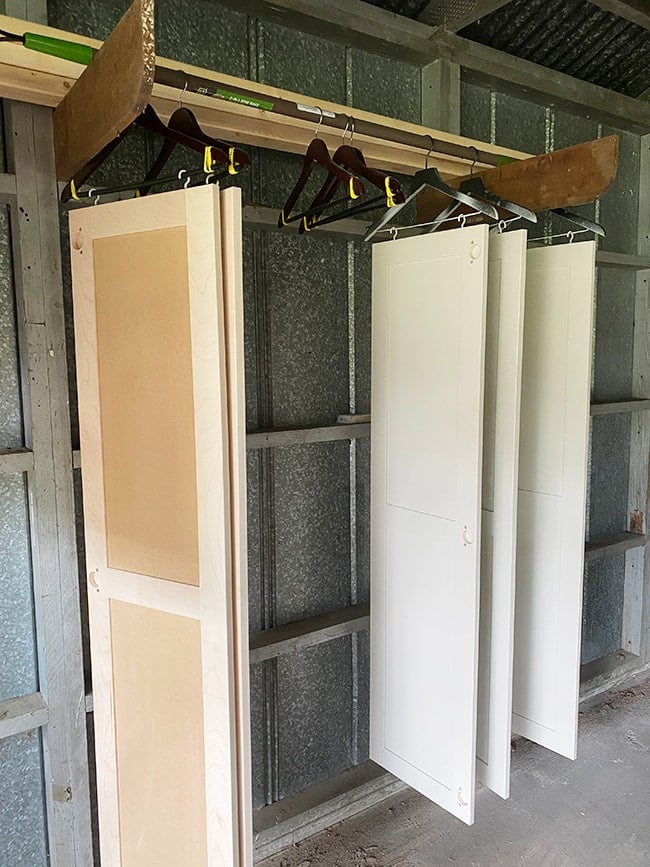
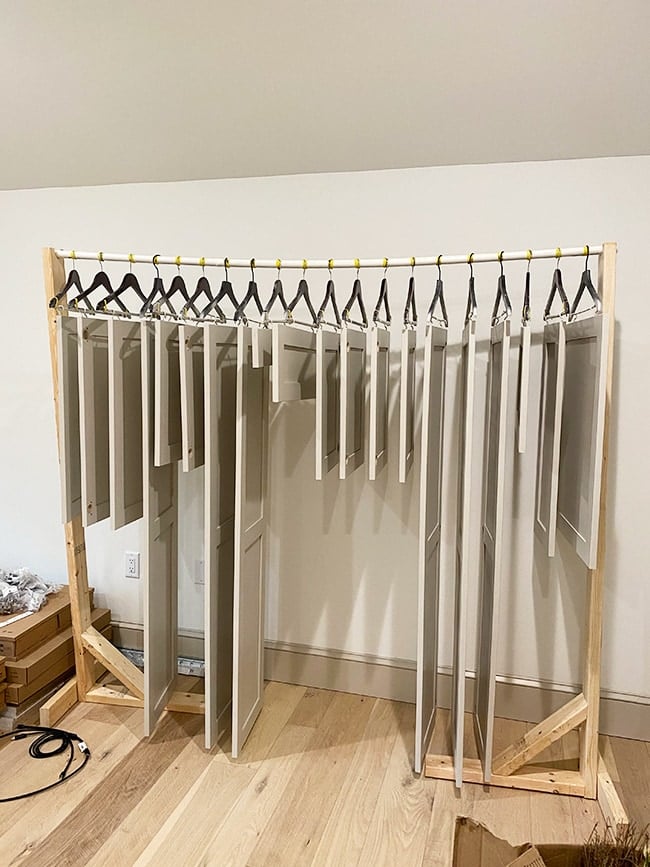
At this point our cabinets hadn’t been built yet, so we needed a place to store the doors for a while. Lucas came up with a pretty great solution and built this drying rack:
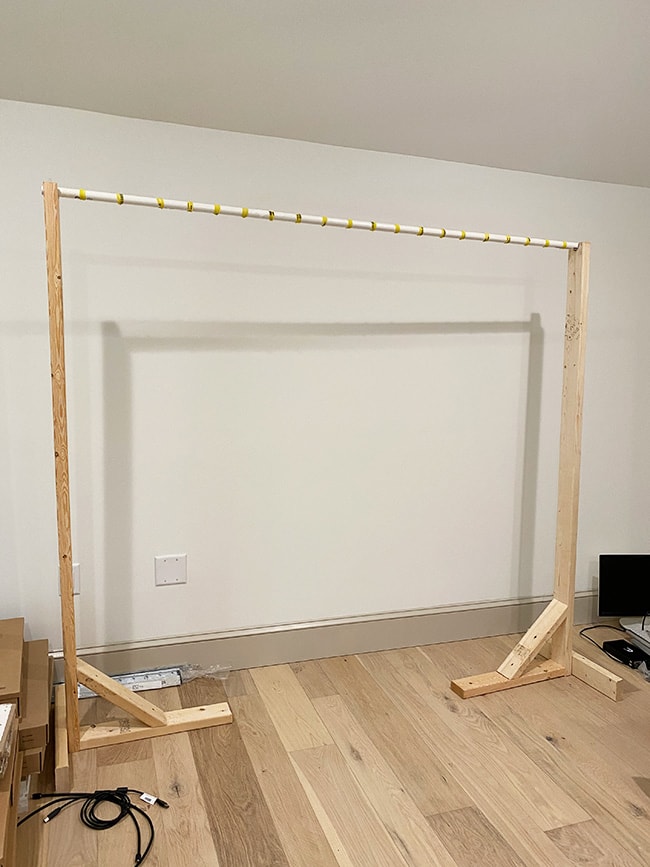
He used 2×4’s and cut a notch to hang a curtain rod. Then he wrapped 20 rubber bands evenly spaced to keep the hangers from shifting.
The contraption worked, and they hung out here for nearly four months…
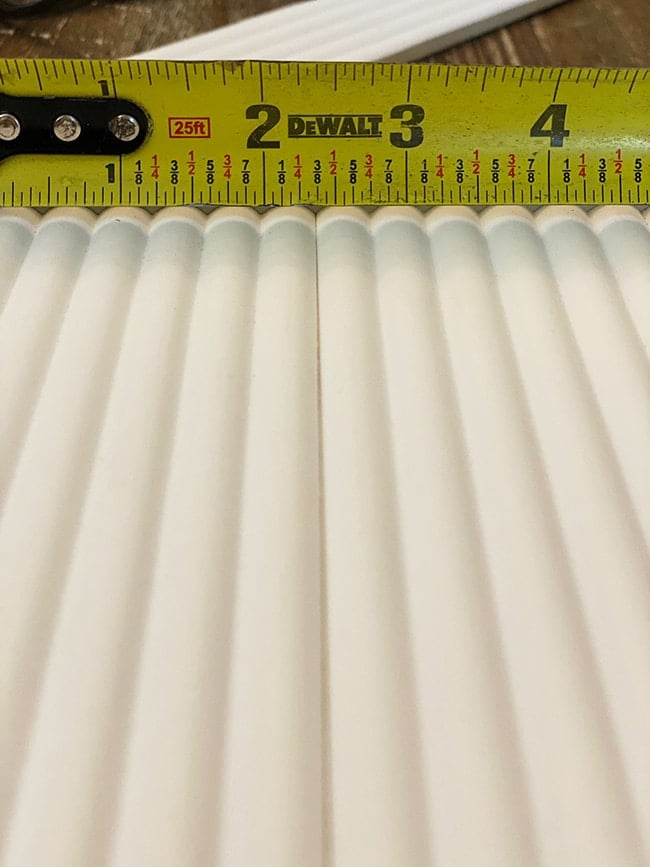
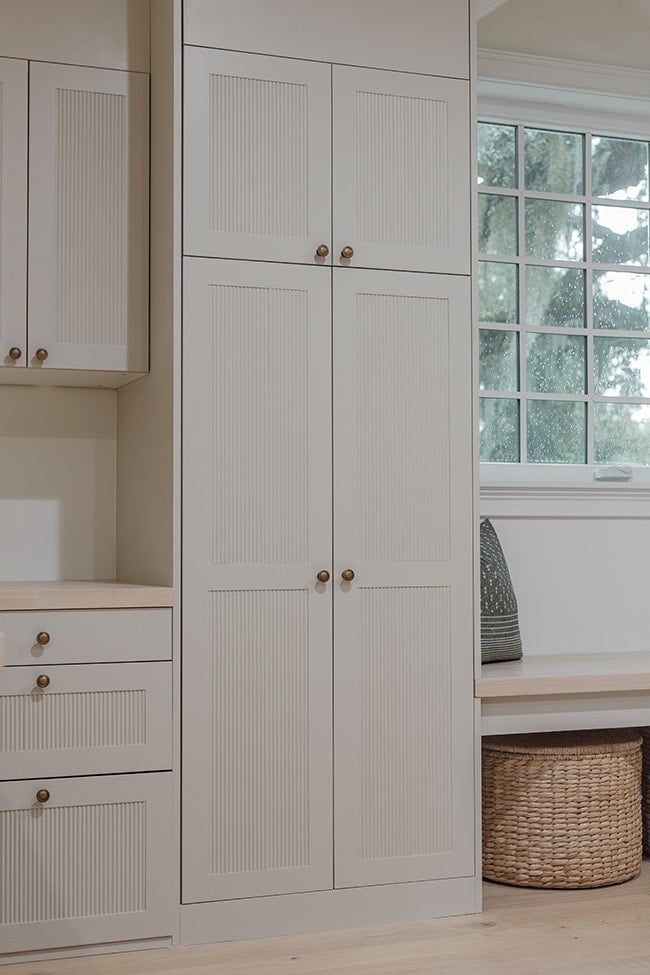
Fast forward to last week. I ordered 20 pieces of this fluted trim from Ekena Millwork after falling in love with my DIY fluted dresser and deciding I needed to flute everything, ha!

I mean, just look how amazing it looks in this wall application by Studio McGee…

You can use any type of molding you want for this technique, but I loved the subtle detail of this particular trim and didn’t want the cabinets too busy to compete with the wall mural or recessed paneled wall.
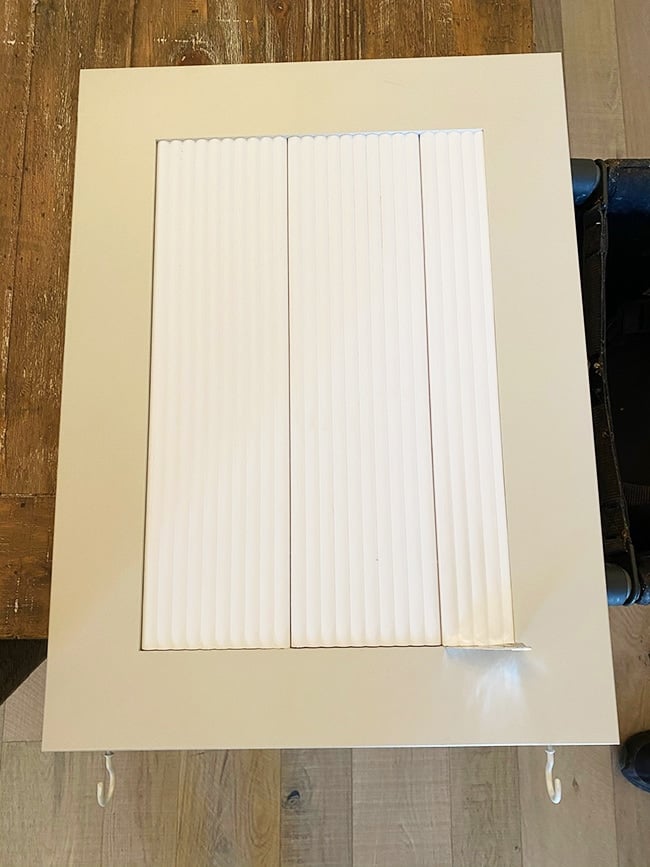
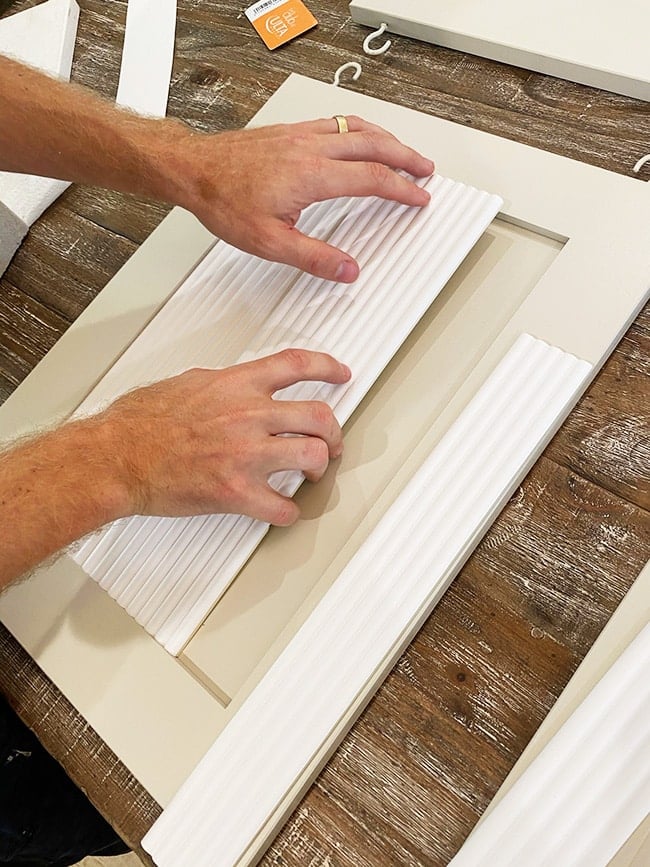
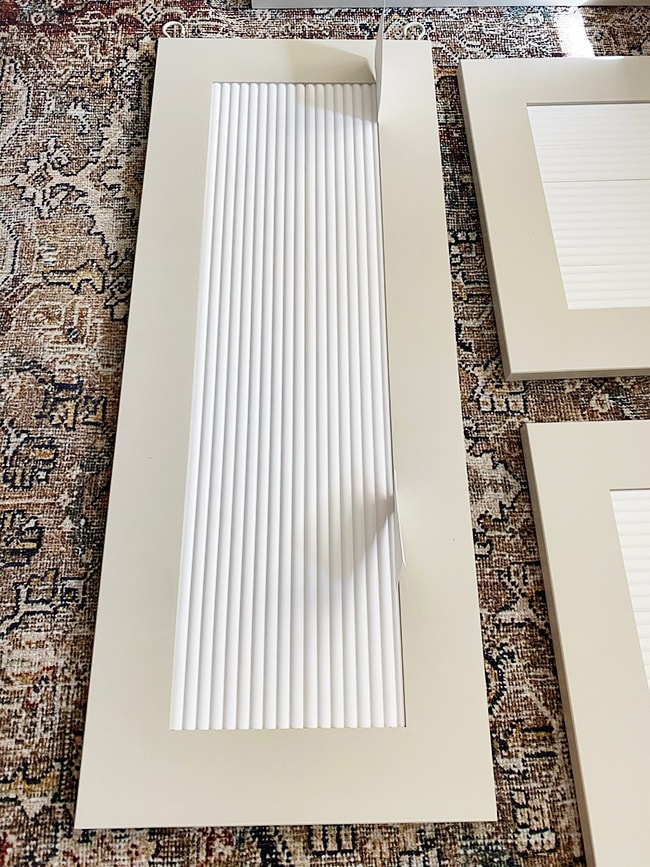
To begin, we grabbed a door and started test fitting. The process is pretty straightforward—you just want the pieces to fit as snugly as possible inside the door panel without any gaps.
There was a tiny lip (hardly visible) on the edges of the trim, which made the gap slightly larger where two boards met, so we had to shave down both sides down with a table saw.
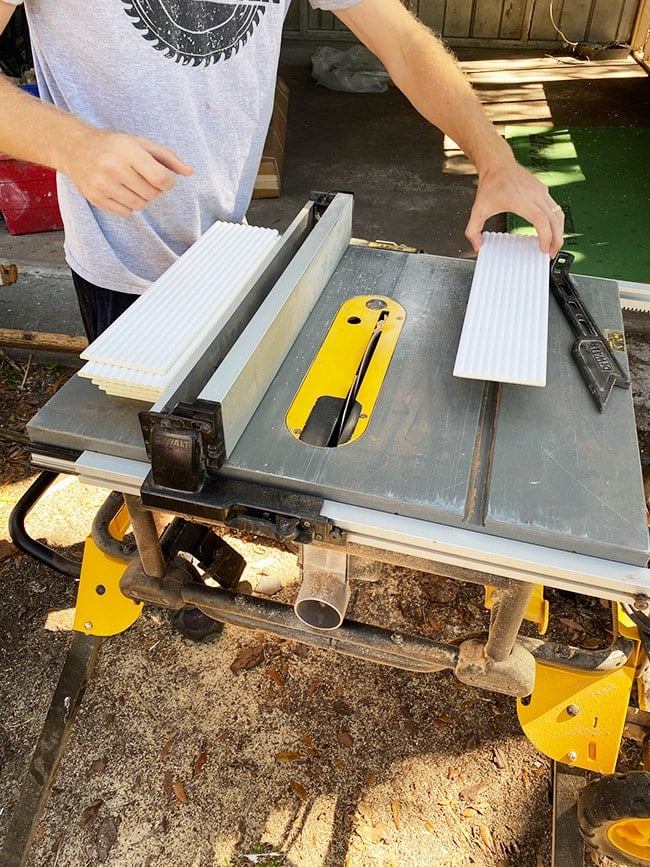
Precision is key with super detailed trim like this, and every imperfection will be noticeable. It took a few tries to get the right measurement setting (it was approx 1/64″ off each edge) but eventually we got it right!
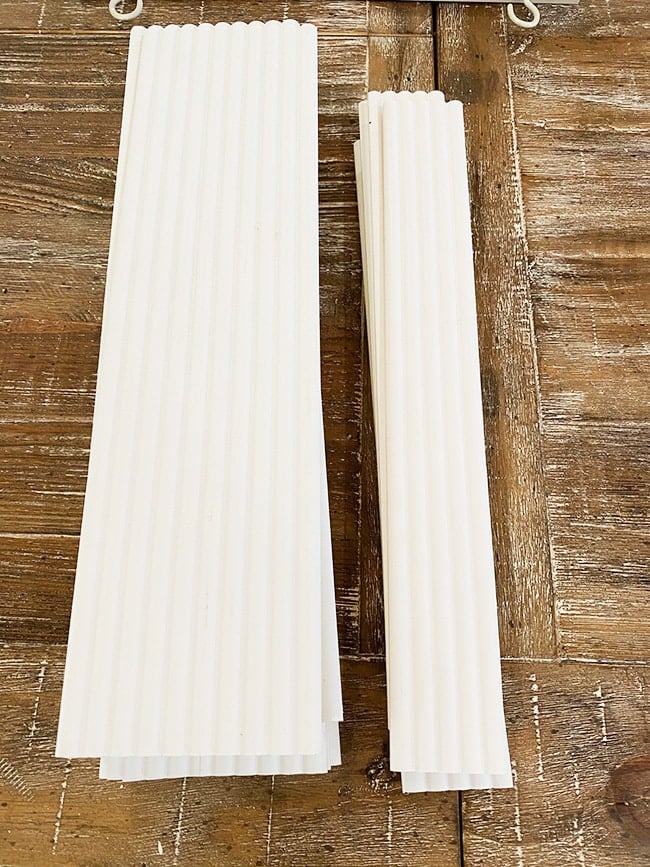
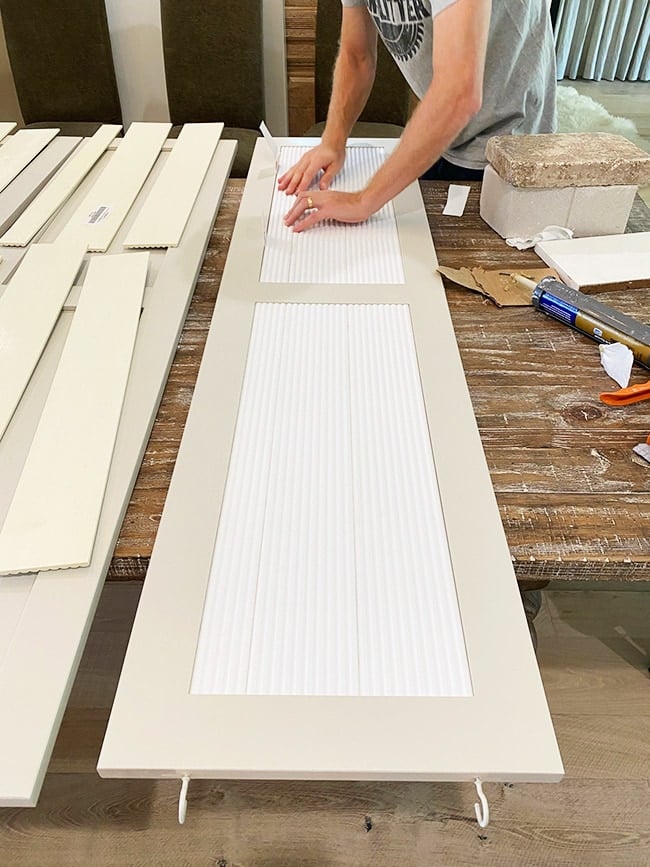
The tall wardrobe doors required three pieces side by side, with the third piece ripped down to fit.
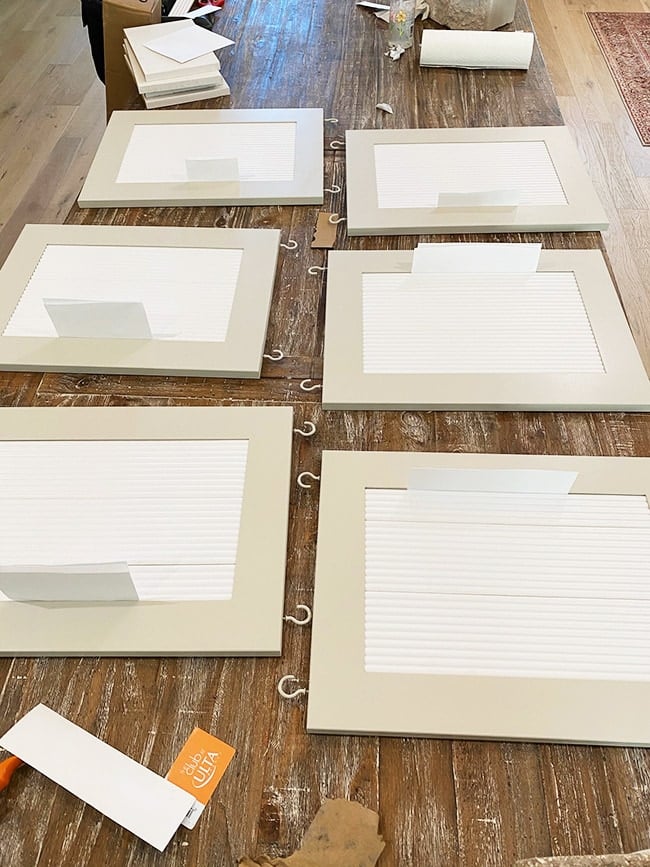
We found it easiest to finish all of the doors of the same size before moving onto the next set.
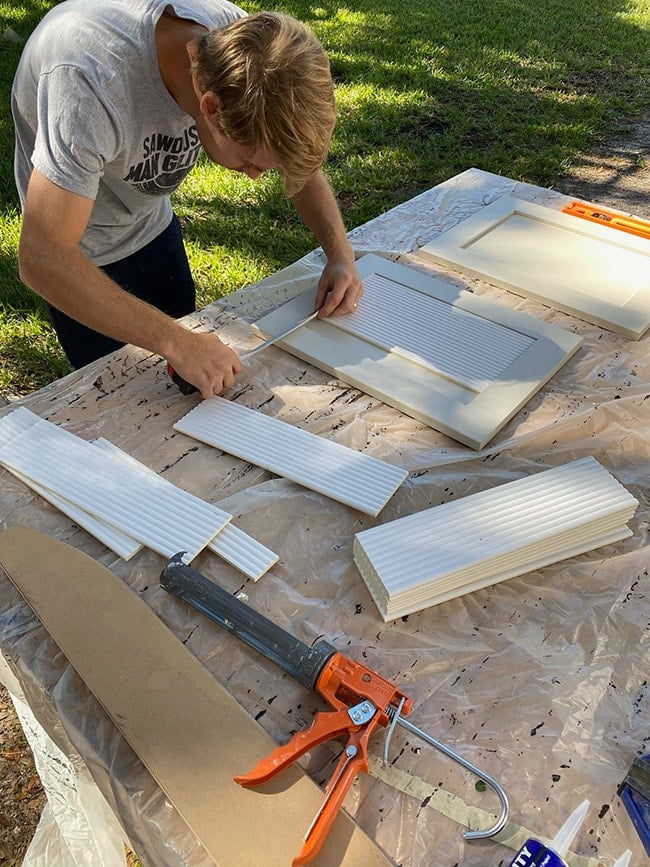
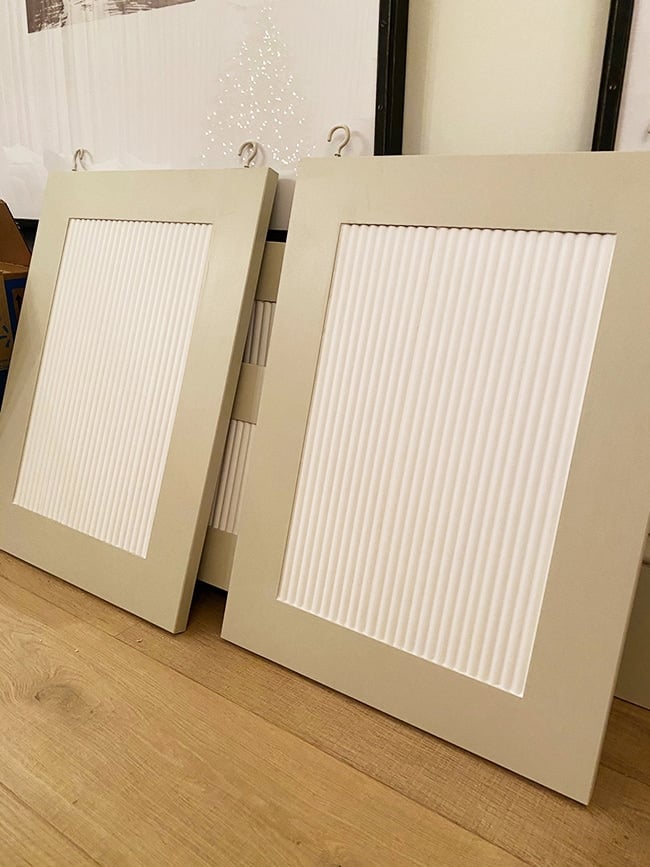
Install was the easiest part! This trim is super lightweight and only needed liquid nails to attach (you could really use any adhesive, but liquid nails is cheap and easy).
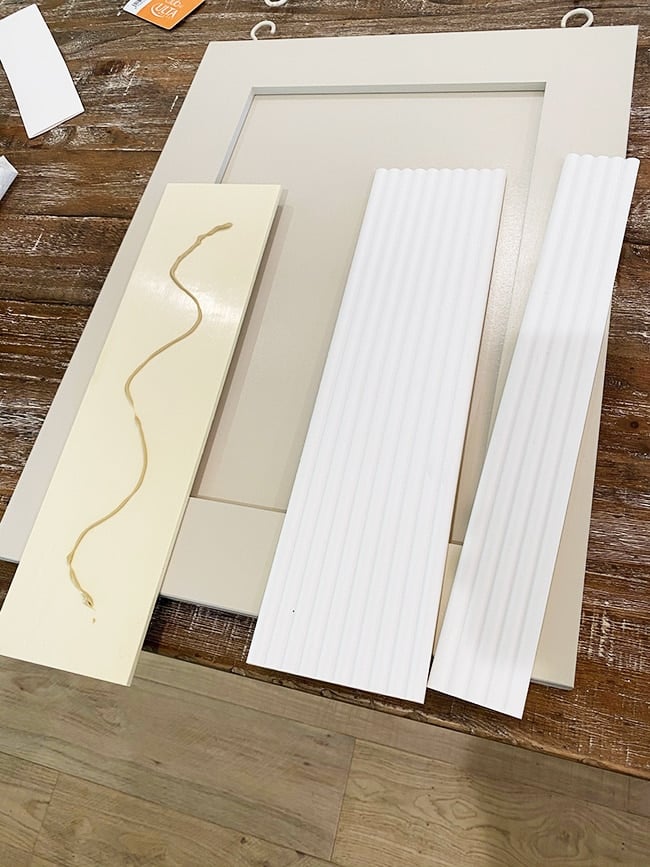
Since the pieces were such a tight fit, they popped in and held together snugly on their own, no clamps or additional weight needed.
With both of us working on it, first set of six doors were finished in minutes.
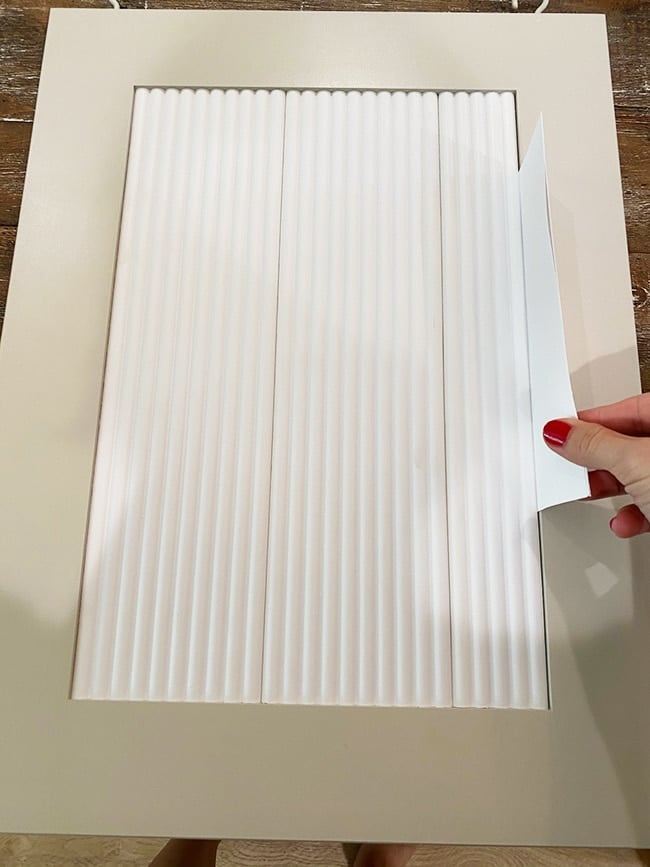
We also wedged some thick paper if there was any gap to make sure the trim stayed pushed together.
The same process was repeated for the rest of the doors.
Looking so good already!
Once the liquid nails had fully cured overnight, it was time for the annoying part—caulk. We tried to make it as pleasant of an experience as possible by turning it into a date night, complete with wine and romantic music…

But Norah Jones can only go so far. Trying to make perfect caulk lines along these little grooves is pretty much the worst punishment I can think of.
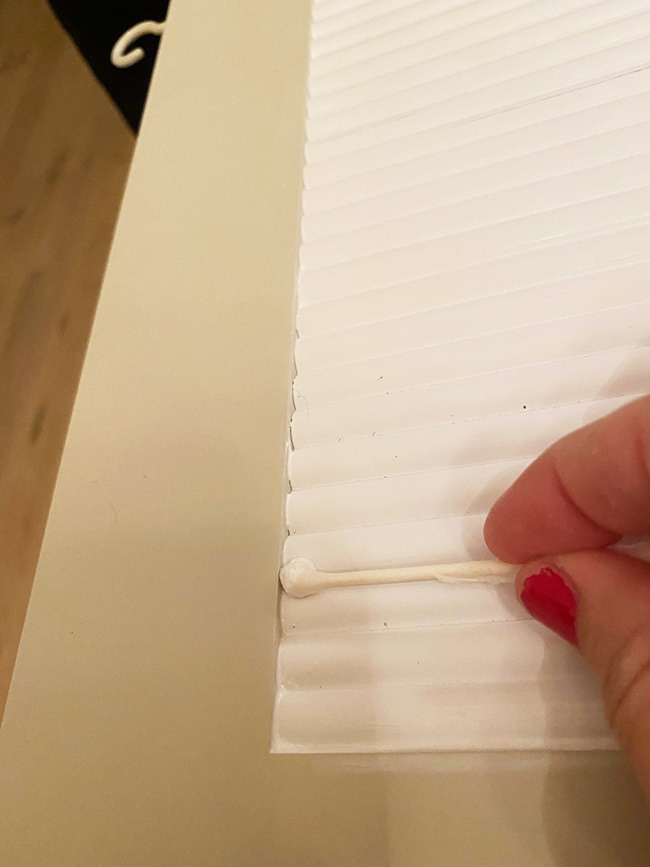
Q-tips, baby wipes, sponges, pinky nails—nothing will make this job easy (or even possible to get perfect, IMO). My blood pressure is up just writing this recap.
Let’s just say, we did the best we could in the 3+ hours it took us without going completely insane and I never want to do it again (but obvs I will).
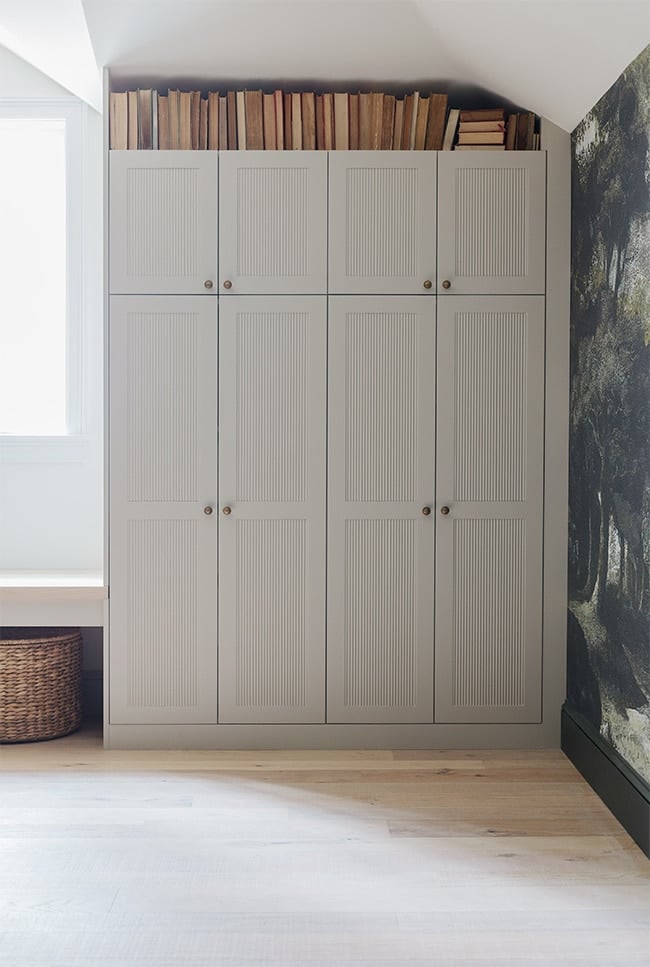
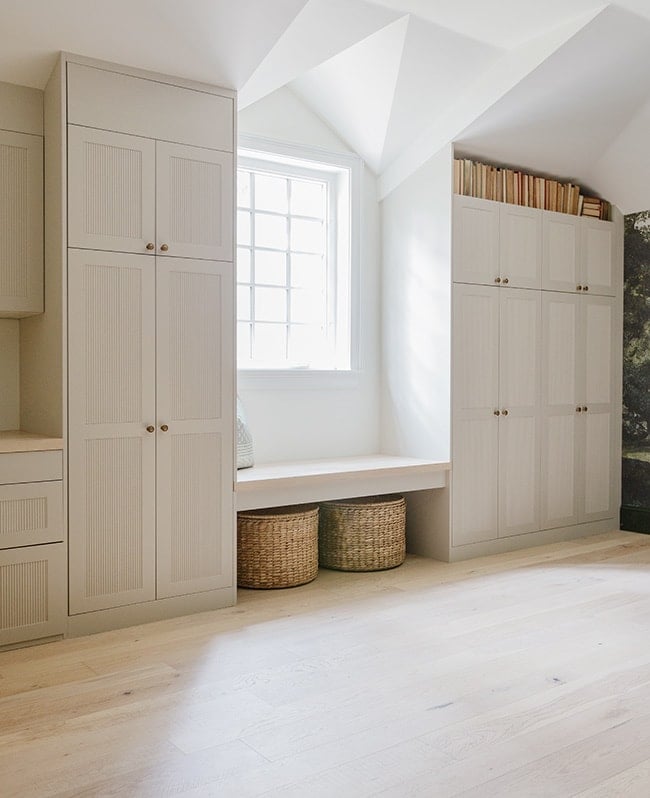
One last thing—I decided to hide the open storage above the cabinets by building custom doors:
At the last minute, I changed my mind about adding a door on the right side because:
- I really like the way the books looks on the right
- I need a place to store my old book collection anyway and would rather not take up valuable shelf space inside the cabinets
- The ceiling on the right is sloped AND curved, so it would be challenging to build a door and would probably look wonky
- We can always go back and close it off later if we don’t like it!
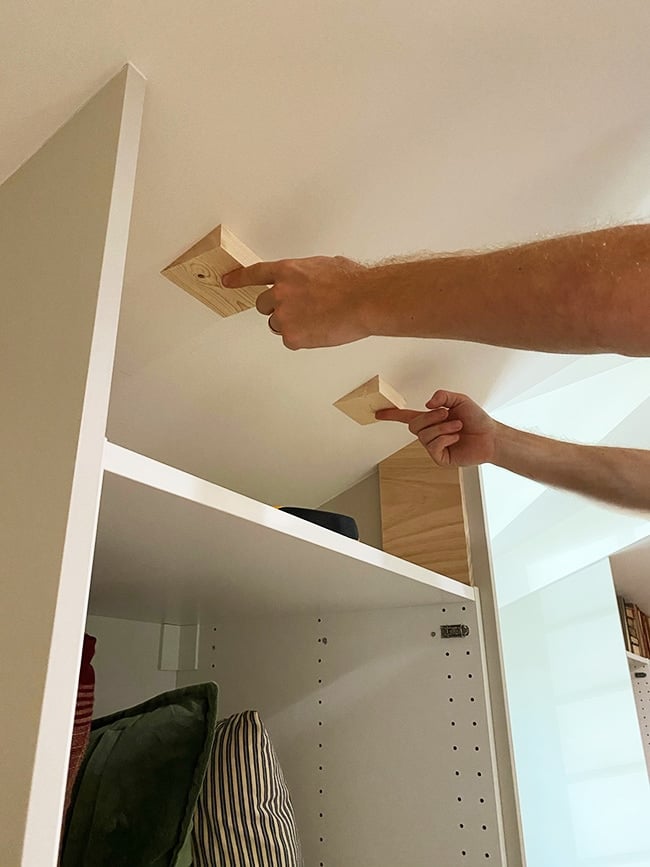
Adding a door to the sloped ceiling on the left side was a little tricky, as Lucas had to make these wedges (cut from a 2×4) so the hinges had a 90º corner to attach to:
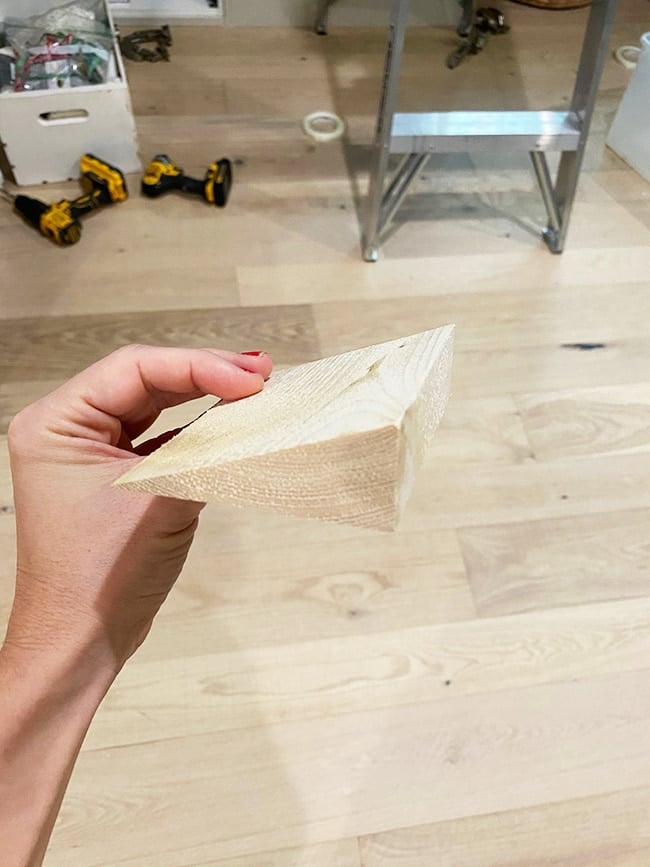
He made two of them, one for each hinge:
He also added a piece of trim along the top, and attached blocking on each side of the panel as a door stop.
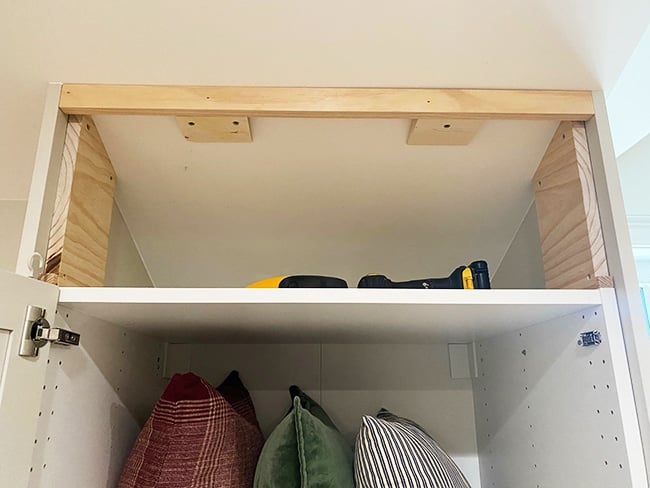
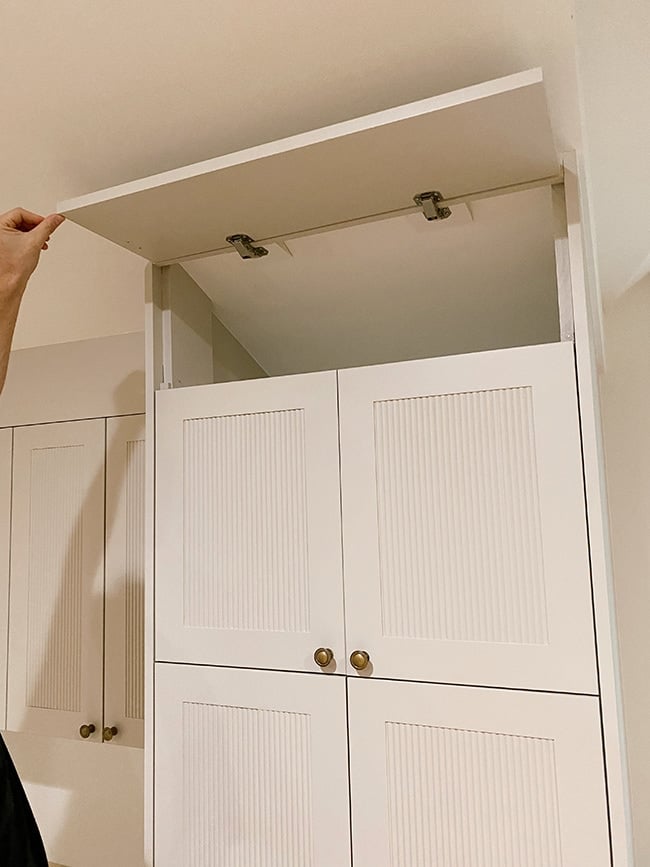
A pine 1×12″ was cut down to make the door, attached with these concealed hinges.

We still need to get a magnetic push-latch to open the door, but here’s how it looks finished:
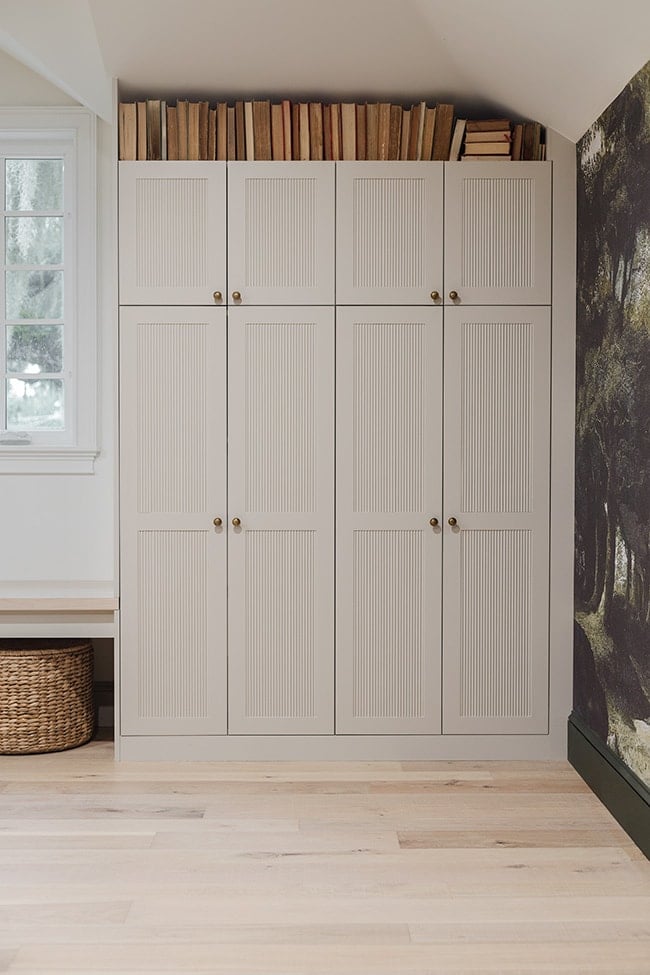
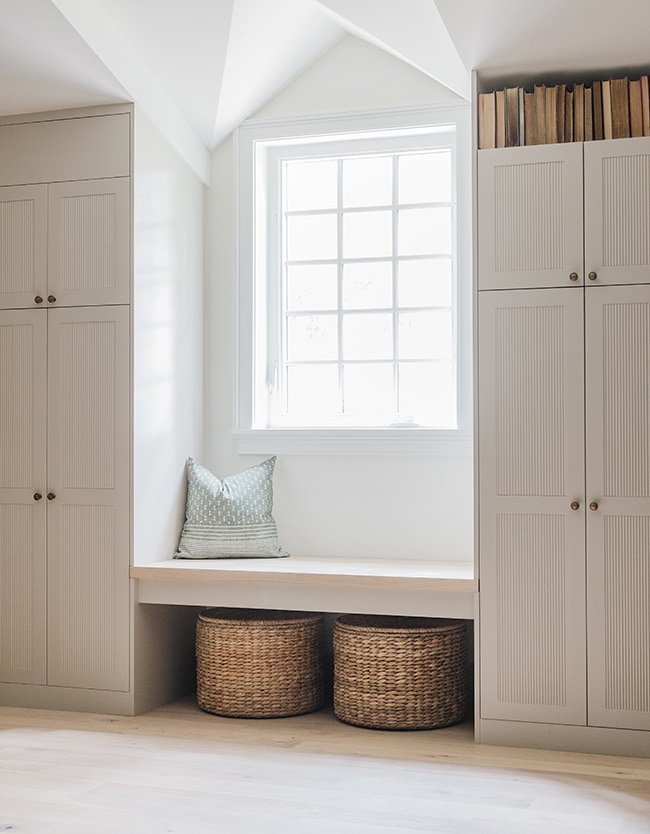
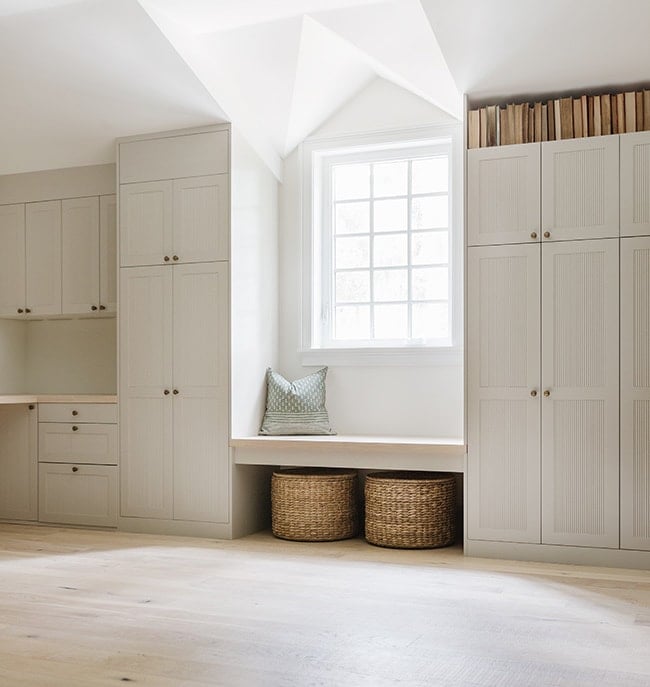
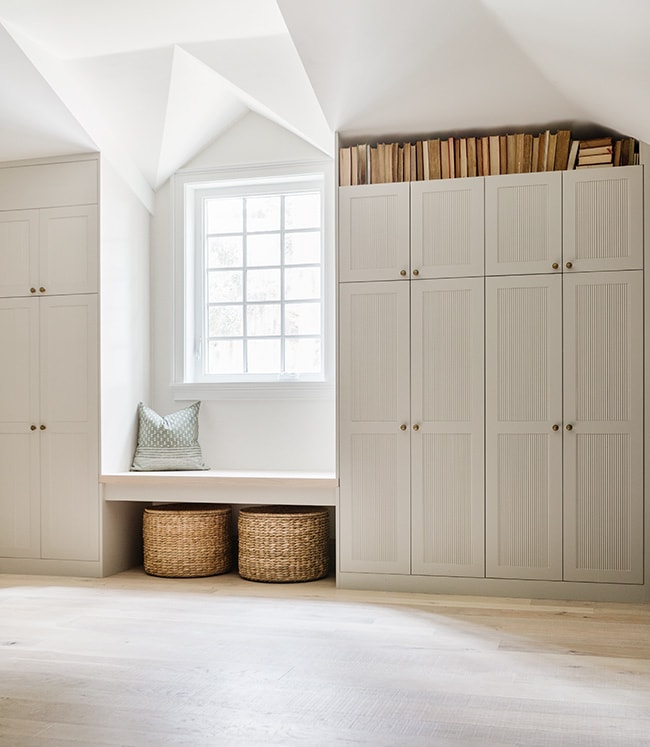
And here are the finished cabinets!
Let me clarify that these are very difficult to capture on camera—the fluting detail doesn’t show up too well and can make funky line patterns that aren’t there in real life—especially from a distance.
This room was also a cave when I shot these photos during a storm so I had to keep the lights on. Definitely not the best photos/representation of the space!
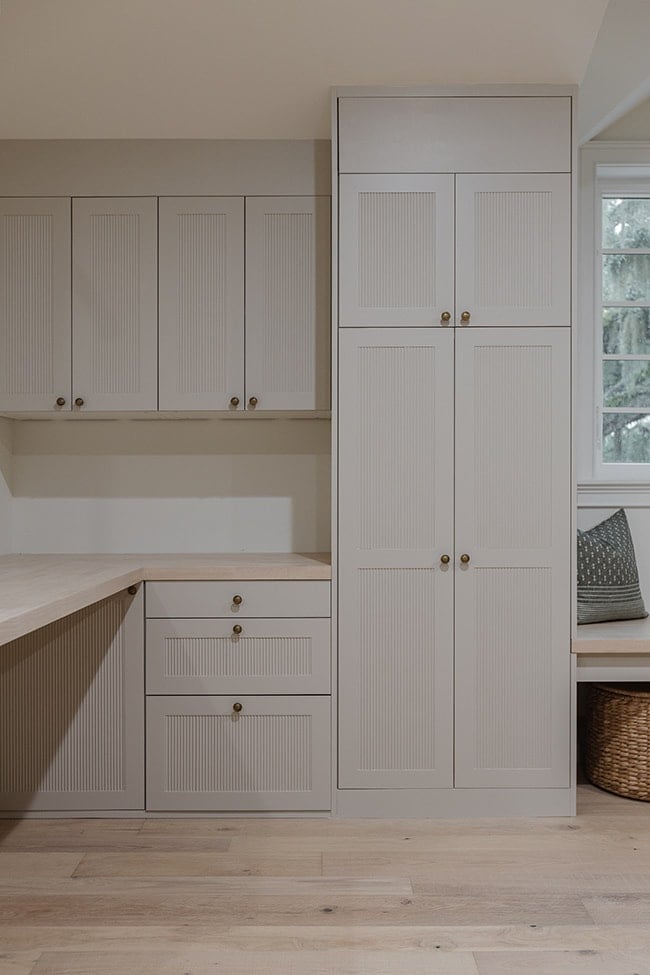
I’d love to invite you all over to see it in person, but you’ll have to trust me when I say the fluting detail makes it feel so much more custom and high end.
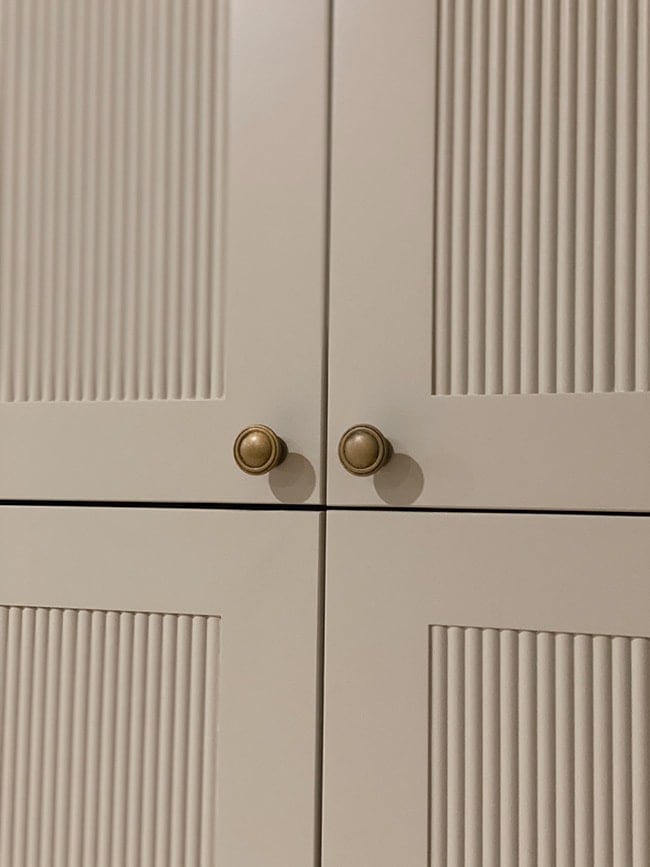
For the hardware I found these inexpensive knobs, updated them with my Rub n Buff technique (in gold leaf) and used this matte lacquer spray to protect them—I’m hopeful the finish will last!
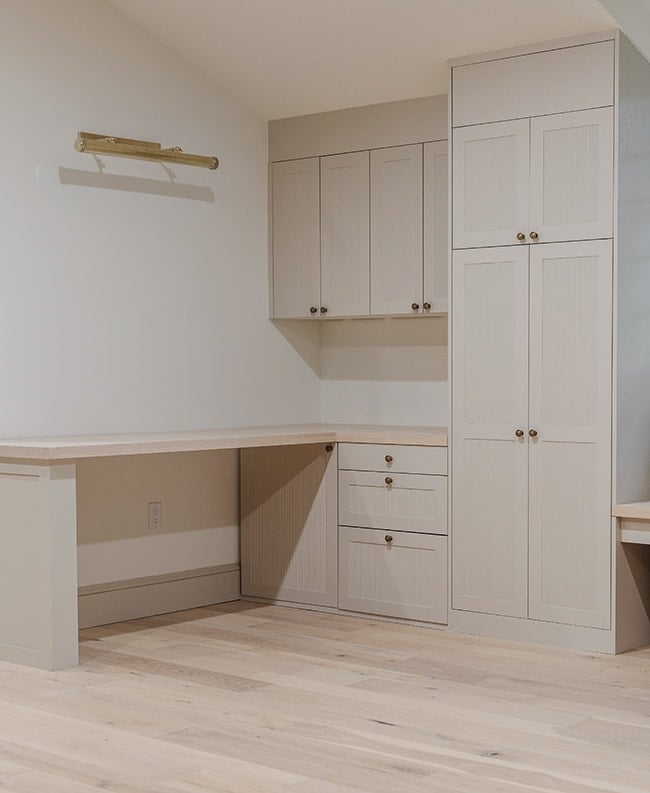
I wish we could say we were 100% done with these cabinets, but we still have to flute the desk panel! I underestimated the amount of trim we needed and we ran out, but more is on the way so you’ll just have to wait for the final room reveal to see the desk completely finished 🙂
It’s looking pretty bare right now but we have a special custom piece soon to be hung under that picture light… and I’m waiting for a Black Friday sale to buy the desk chair!
What do you think about the book storage? I put the books up there on a whim but fell in love with this library look and how well it fits in with the whole work + playroom theme…
I was worried the open storage would feel unbalanced with the closed storage on the left, but the sides are not symmetrical anyway so I think it’s fine.
It’s hard to choose a favorite angle, but I’m really loving this window seat (the storage ottomans are from McGee and Co/Target and will be great for additional seating too!)
I think this is my favorite Ikea hack yet. Is it perfect? No, there’s a few areas that we will probably touch up (ahem, stupid caulk) but this wasn’t an easy project and I’m proud of what we were able to accomplish… even if it took us 16 weeks 😉
I can already imagine all of the memories that will be made in this room…
And I cannot WAIT to show you the rest of it! Our sofa arrived a few days ago (eeek!) so all that’s left are furniture and accessories (including a couple more simple DIYs).
This will be the last blog update for this room before the big reveal, which won’t happen until next month (waiting on a couple Black Friday/Cyber Monday deals!) If you can’t wait that long, I’ll be sharing a few peeks on my Instagram stories so make sure you’re following me there 🙂
Coming next week: My Christmas home finds and decorating/hosting tips!


Teddee Grace says
You both work so hard, but, since you asked, I think I’d prefer the book storage to have a door if possible. Everything else is such perfection, it just jars me a bit. I love the fluting and can see why you wanted it, but, my, what a lot of effort. Can’t wait to see the finished room.
Jenna Sue says
Thanks Teddee!
Stacy says
It’s so beautiful! Perfection is overrated. ?
Marcie says
I love this whole project. It looks fantastic! Are you planning to add any lighting by the window seat/desk? I don’t see any outlets there. A sconce or two would look great. Maybe using the puck light trick so they wouldn’t require wiring?
Jenna Sue says
Thanks Marcie! No plans to at the moment but we definitely might down the road! There’s three different light sources in the room so plenty of options, but we’ll see if it makes sense once we start to use the room!
Michele M. says
Jenna Sue and Lucas- you guys are truly amazing. This project is so incredible I just keep shaking my head in disbelief. Just wow wow wow. You are so hard working and talented.
Well done – the final reveal is so exciting. Whoo hoo!!!!
Jenna Sue says
That is so kind of you to say — thank you Michele!
Mandy says
I’m so impressed. Have you thought about adding just a top trim piece above the open shelf to make it look more purposeful and balanced? Just a thought. You are really an inspiration!
Jenna Sue says
Thanks Mandy! I thought about it and think it would look more finished that way, but the curved wall is really tricky and might end up looking more awkward. It doesn’t bother us right now but we can always add it later if we change our minds!
Taffee says
This is so pretty!! I can’t wait to see the finished room. You two do amazing work. So talented!!
Jenna Sue says
Thank you Taffee, I’m so looking forward to this reveal!
Crystal Brown says
WOW. Just wow.
Janice K. says
You’ve inspired me so much…for my next home! Great job to the both of you! Very talented and perfectionists!
Truly can’t wait to see the finished room. I see that you decided on the one knob! Yay I liked that better..
Have a Happy Thanksgiving!!
Jenna Sue says
Thank you for the kind words Janice! And happy holidays to you <3 <3
Janice says
WOW!!!
Carly says
Jenna-
SOOOOO incredible and love the addition of fluting. Beautiful work and design!! Here’s my however, and this is said with love. I HATE the open upper cabinet with books. I love old books and have many, but this is off scale, and looks unbalanced and takes away from the wall’s overall look. It looks like there was an empty slot and you shoved books up there to fill it in. That is a brutally honest opinion. I like using those old books in many ways but not way up high on a corner of a wall cabinet.
Jenna Sue says
Thanks Carly! We really love the open book look, and that’s what makes design/decorating so great — we all get to do whatever makes us happy and works for our own space 😉
Annie says
Jenna, it’s just so perfect!! This space will bring you all so much joy. I love it!
Jenna Sue says
Thank you so much Annie, it’s already sparking joy! ;D
Dina says
Definitely ‘high-end’ and special!! Brilliant!
Jenna Sue says
Thanks Dina!
Jennifer H says
Incredible job! Thank you for sharing!
Jenna Sue says
Thank you Jennifer! <3
catherine says
c’est trop trop beau! bravo à vous deux, vous êtes très créatifs, très habiles, avec de la rigueur mais aussi de la fantaisie? et une pointe de génie ? je suis très admirative!
Catherine de France
Jenna Sue says
Merci beaucoup! <3 <3
catherine says
?
Erin Allen says
Jenna! This is just… I truly can’t find the word. I’m in awe at your perseverance with all of your projects (especially working together with your hubby so well) but this one takes the cake. I will be staring at these pics all day.
Jenna Sue says
That means so much, Erin! I have to say these DIYs (and working with your spouse) get a little easier over time, and we’re excited to try more advanced projects in the future!