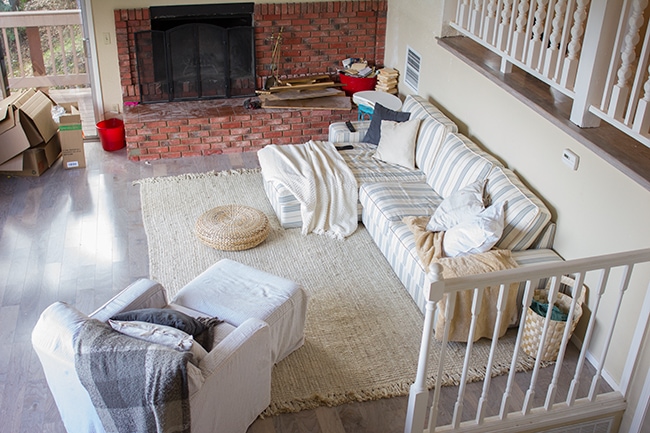
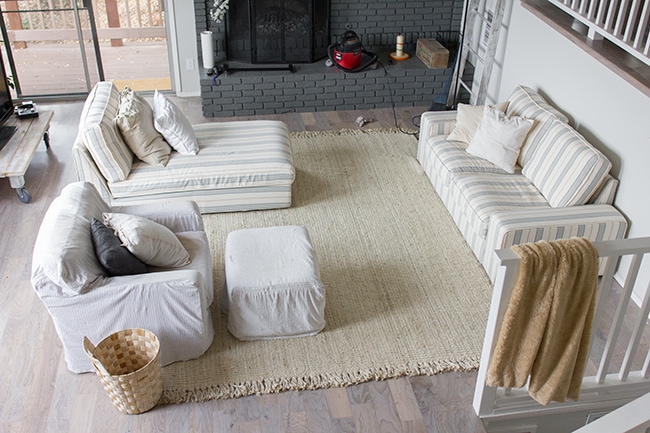
I decided to consolidate this all into one post so I could have a dedicated living room source list next week and you won’t have to scroll through a bunch of chatter to find what you’re looking for. Keeping things simple and easy for ya!
First up, one of my favorite pieces in the entire living room…
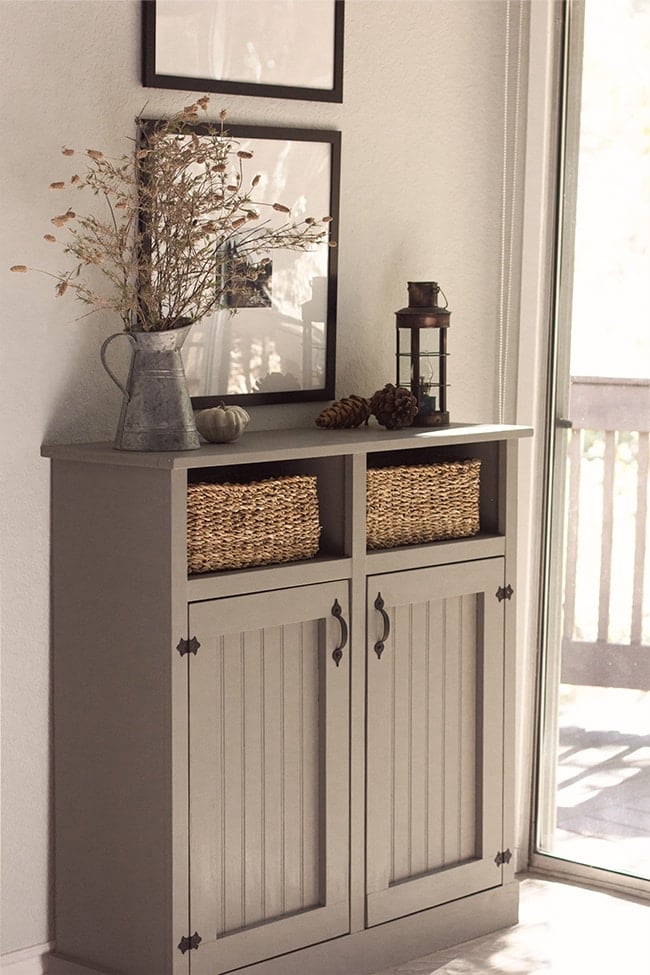
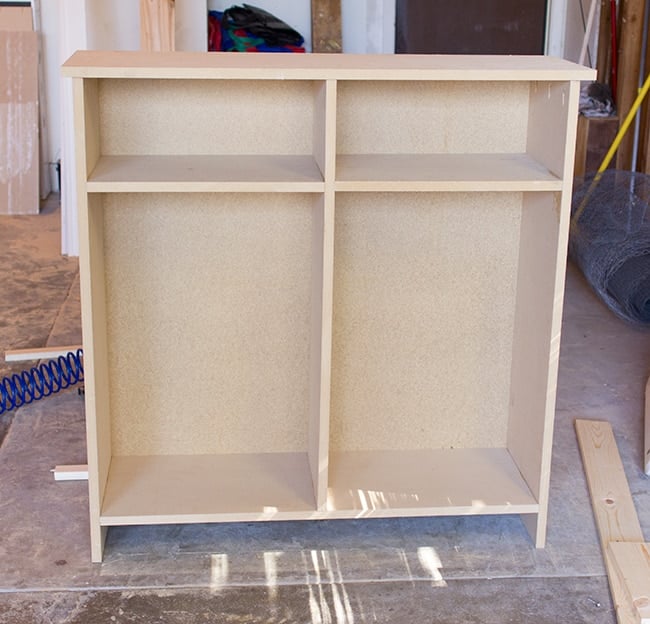
Originally I wasn’t going to have anything on this wall at all. Brad ended up running some wires from the cable jack behind it to our outdoor TV (right on the other side of the wall) and they needed to be hidden, so I had to come up with something.
Then I stumbled across this gorgeous cabinet from Shanty 2 Chic:
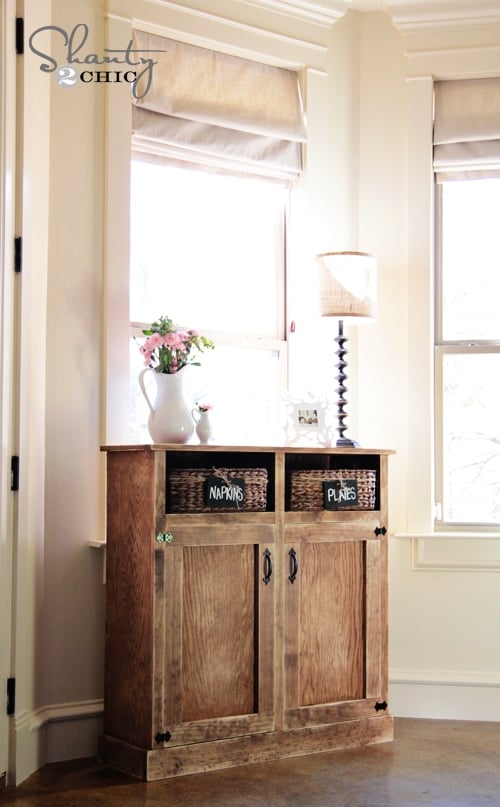
I loved the simple styling and the fact that it was narrow, and the perfect size! The plans seemed easy enough too (I followed the instructions from Ana White as well as referenced the photos from Shanty 2 Chic).
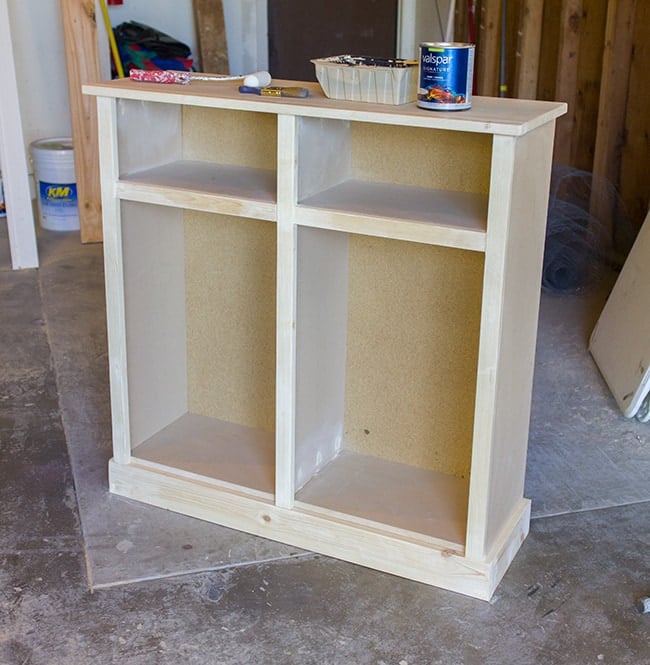
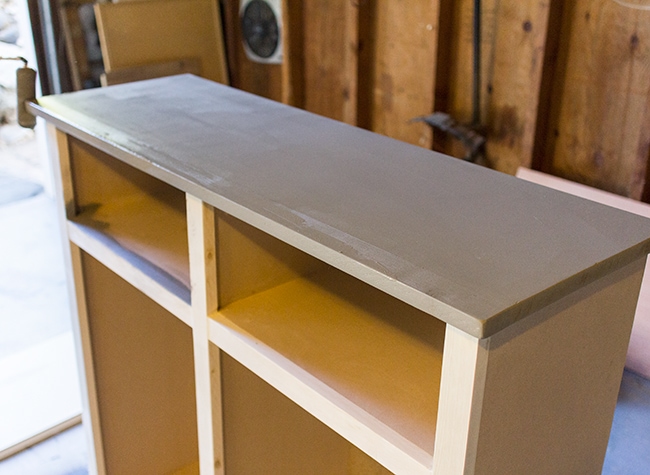
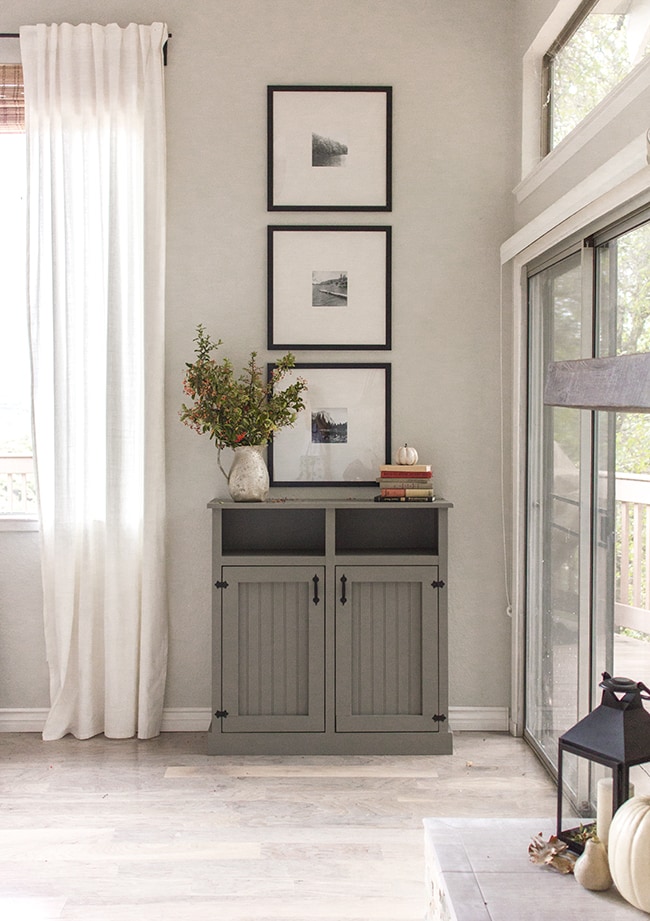
The stained wood she used turned out gorgeous but I realized that all of the furniture I had in the room was wood/brown so I decided to switch it up and go with a warm gray. I’ve had trouble in the past choosing grays—they always turn out bluer than expected, so this time I went with a much warmer shade—Valspar’s Mountain Smoke:
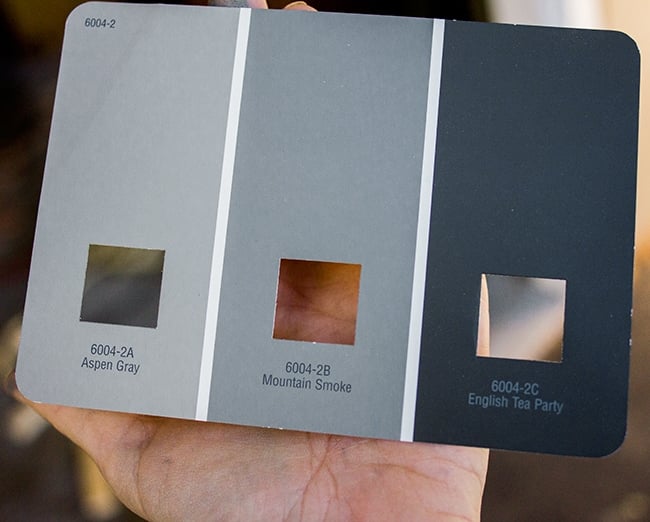
It actually looks pretty cool in this photo but next to all of the other gray swatches, it was a very muddy shade with brown/green undertones. It really is the perfect gray, I think.
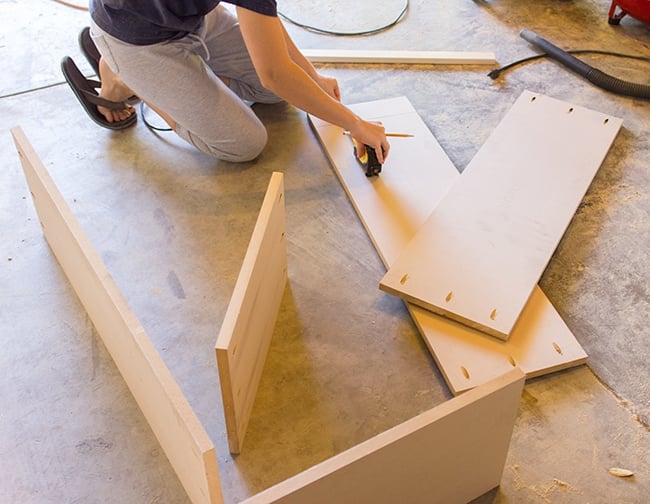
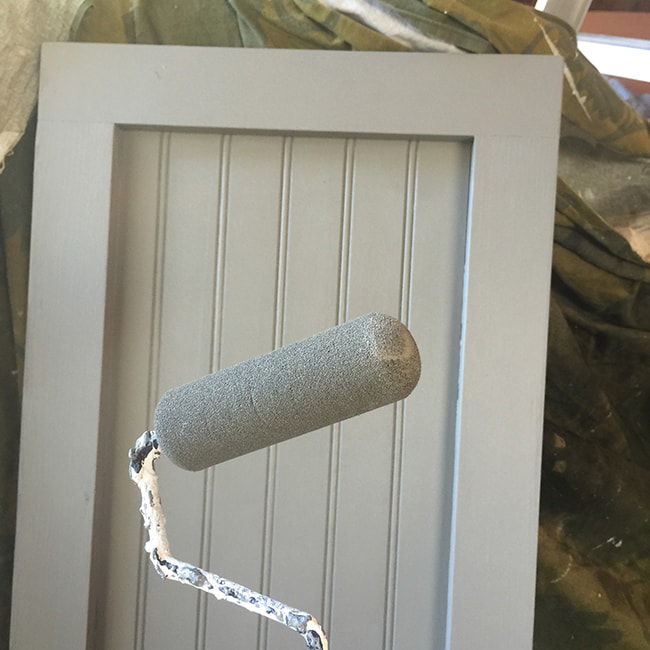
Whitney had ripped down a sheet of 3/4″ Purebond plywood for the main frame, which isn’t available at Lowe’s, but since I wasn’t staining mine I used a sheet of 3/4 MDF instead. Best choice EVER. MDF is so easy to work with—doesn’t splinter or crack and it’s super smooth which makes it perfect for painting.
I had Lowe’s rip it down into strips to make it easier to transport, but their measurements weren’t perfect (as usual) so I ended up having to rip it down on our table saw (I don’t know what I’d do without that thing!)
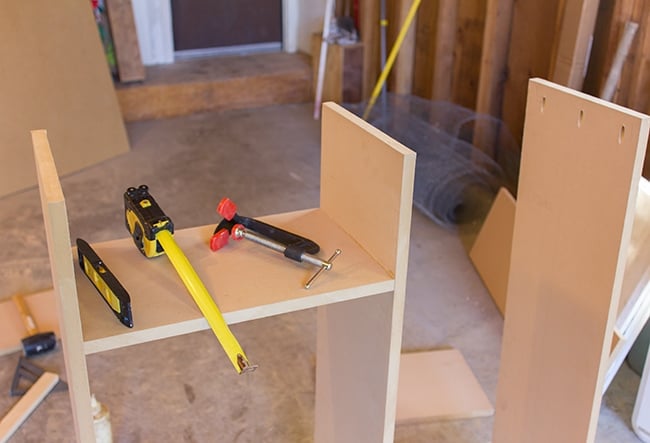
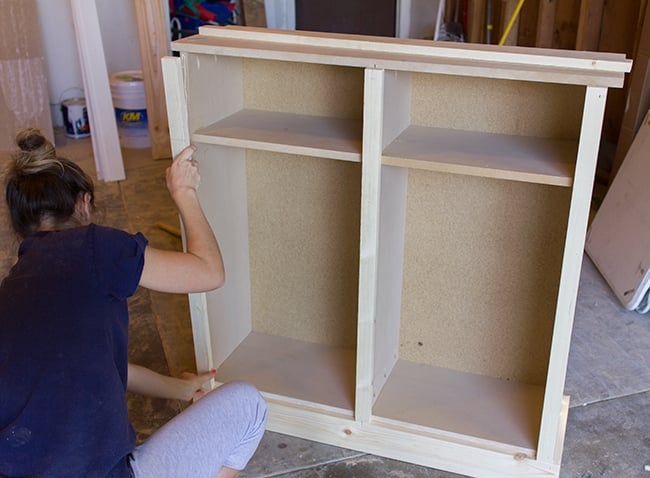
I won’t get into the step by step details since you can find those in the links I posted above, but here’s some photos during the process. This project calls for a Kreg Jig which I’ve had some trouble with in the past (mostly with the wood splintering and the screws poking all the way through) but it worked like a charm this time—great for MDF:

The plans aren’t super detailed—like it doesn’t say what order to assemble the main cabinet pieces in, so Brad and I just assumed it didn’t matter.
First pieces up!
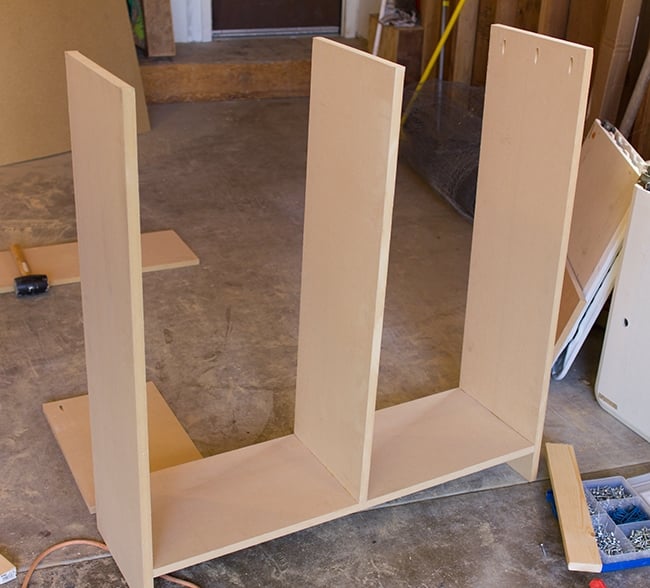
This is where more detailed instructions would have come in handy (or perhaps common sense on our part) because after adding the shelves in we realized we couldn’t fit our drill in there to secure the top. Oops.
We had to improvise with hand held screwdrivers. It’s solid.
There were also a couple conflicting measurements on the cut list which set us back but luckily I had leftover scraps of wood I was able to make work.
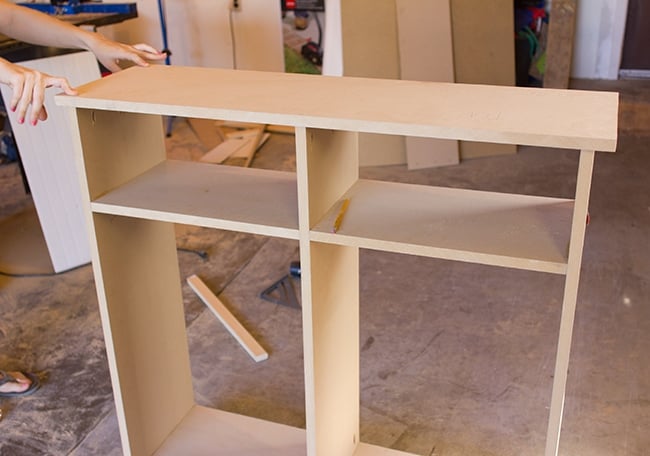
The doors were the easiest part:

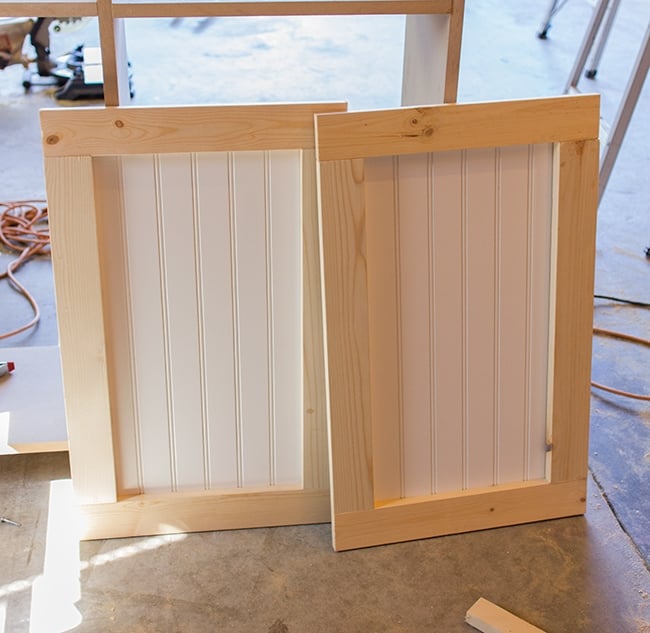
I decided to add a bit of cottage flair by swapping out the plain plywood sheets with beadboard:

 |
| Yes, I wasted good red wine for this test. |
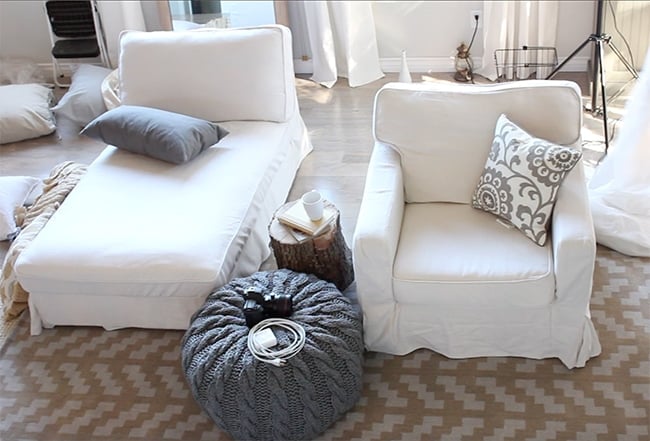
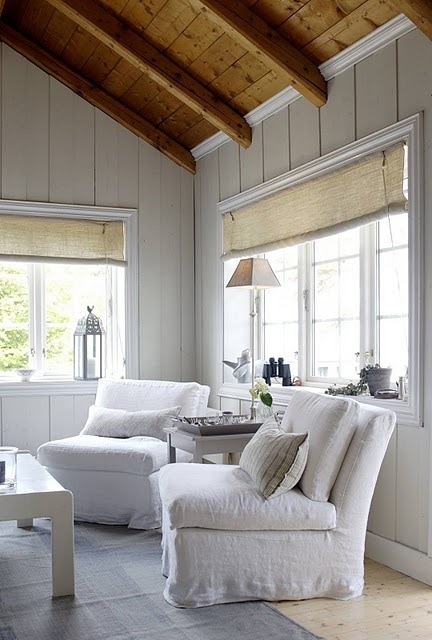
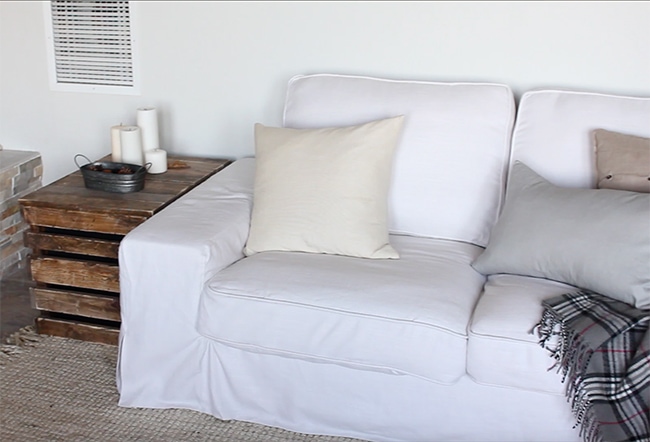
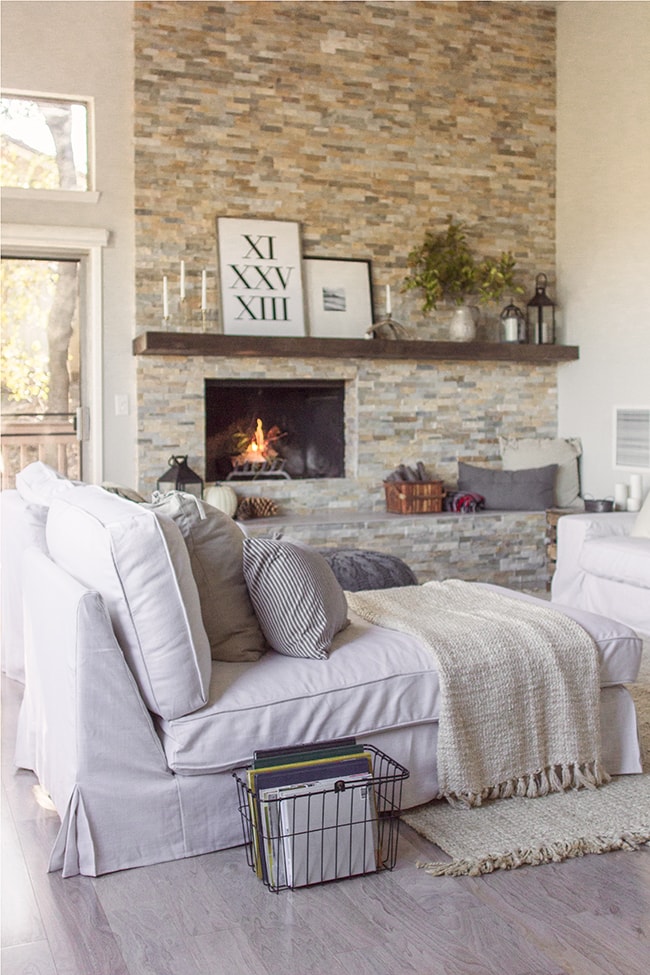
e OCD clean freak) and convinced him to let me buy my white slipcovers. Forget the gray, I want all white.
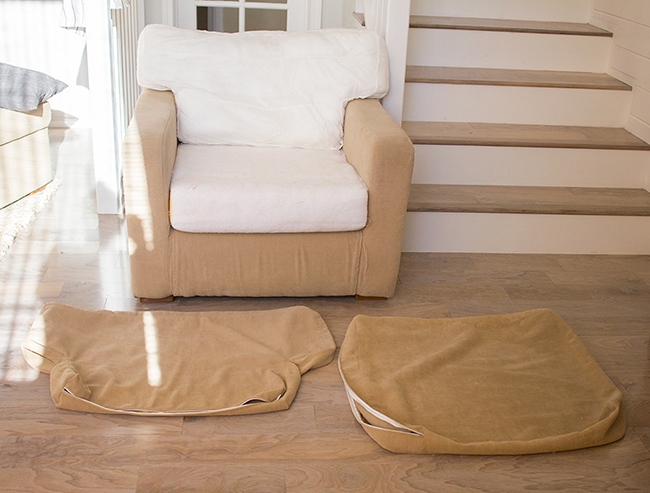
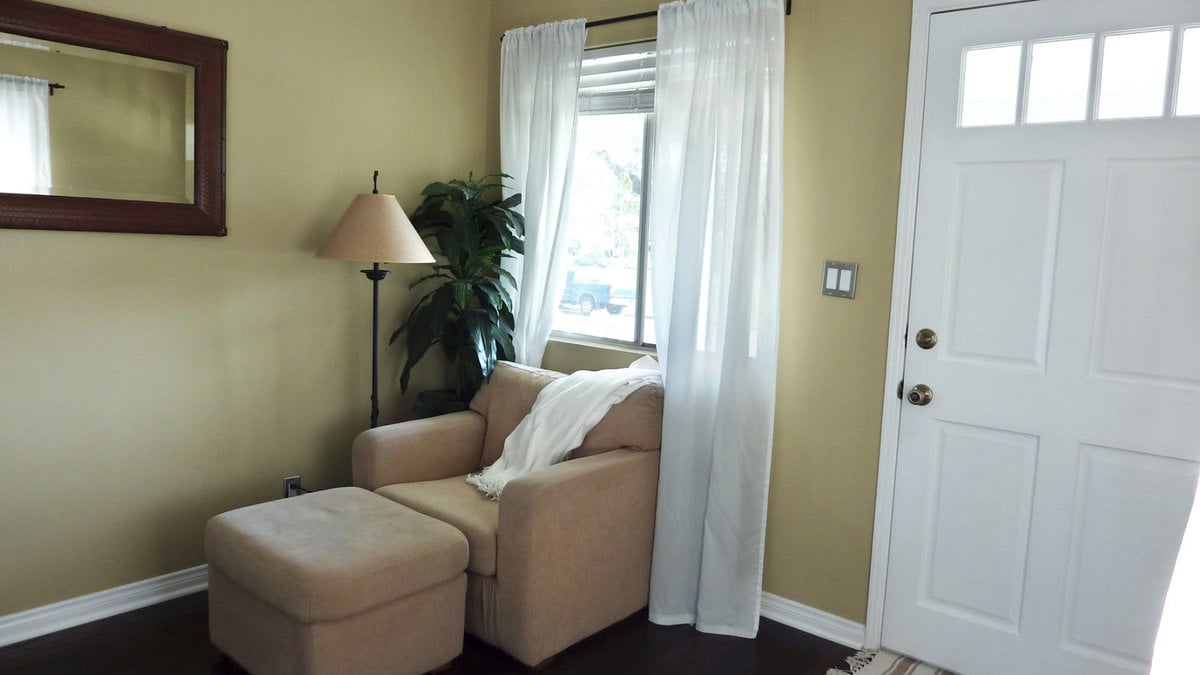
It’s super comfy so I couldn’t bear to part with it (and I didn’t have to spend hundreds on a new armchair!)
 |
| Pin |
 |
| Pin |
 |
| Pin |
 |
| Pin |


Accountants London Lady says
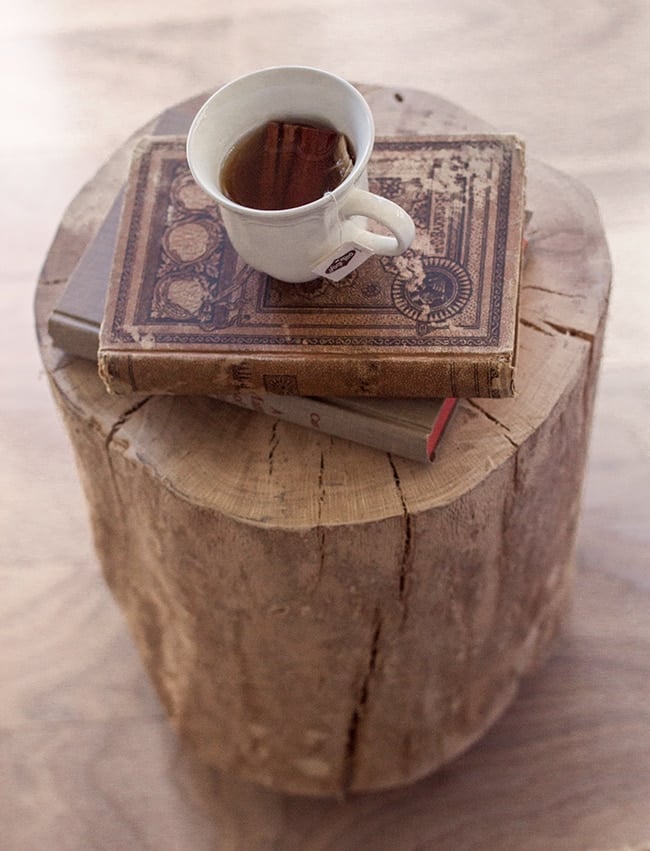
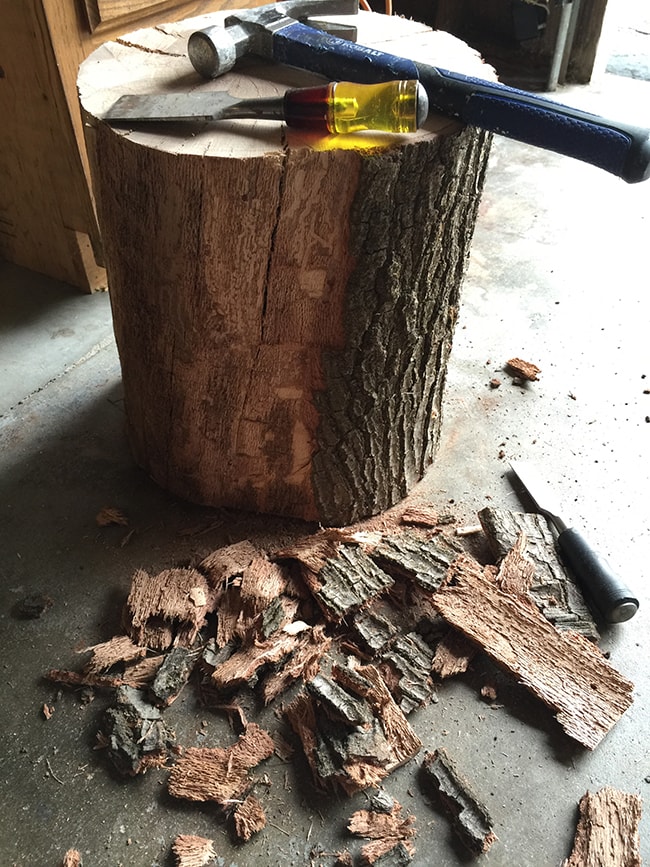
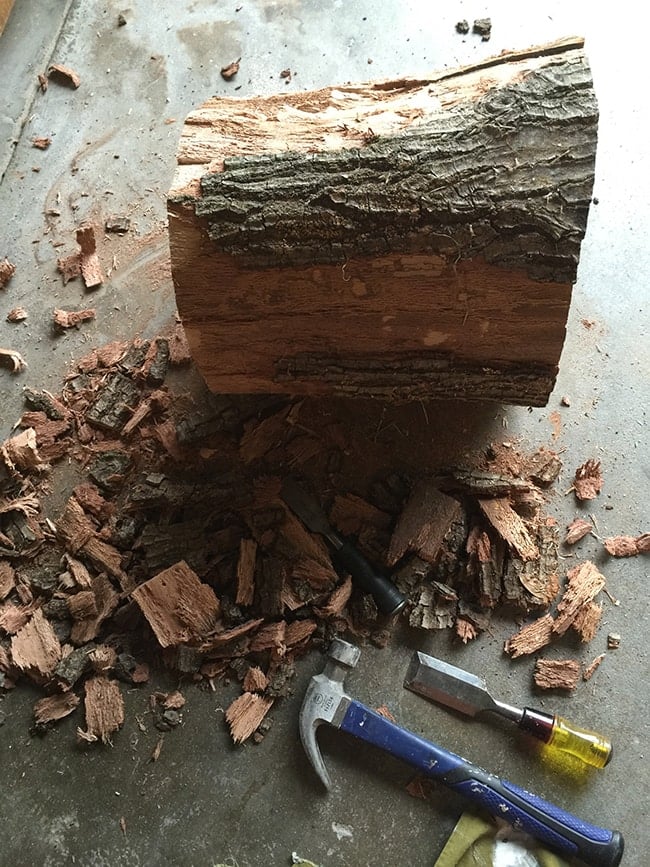
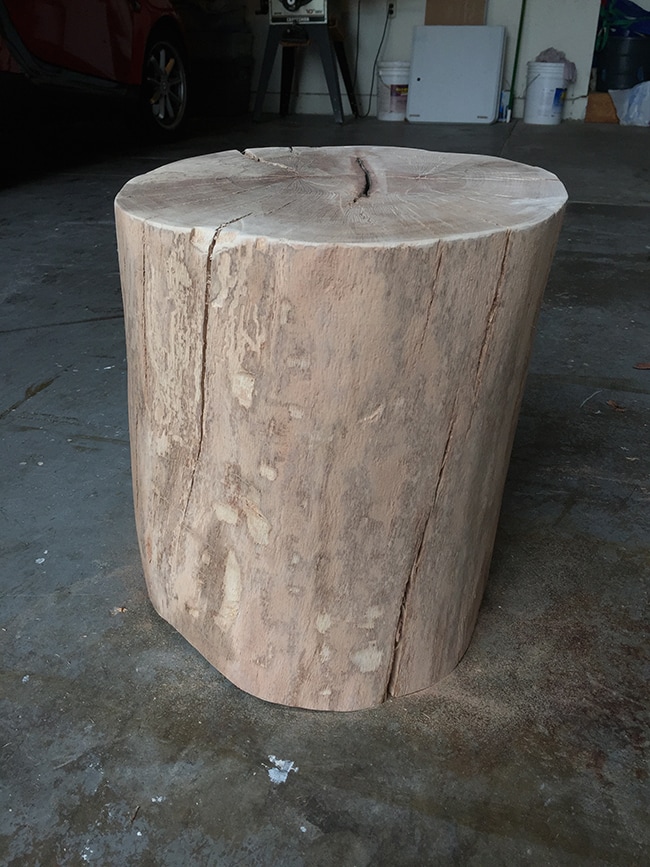
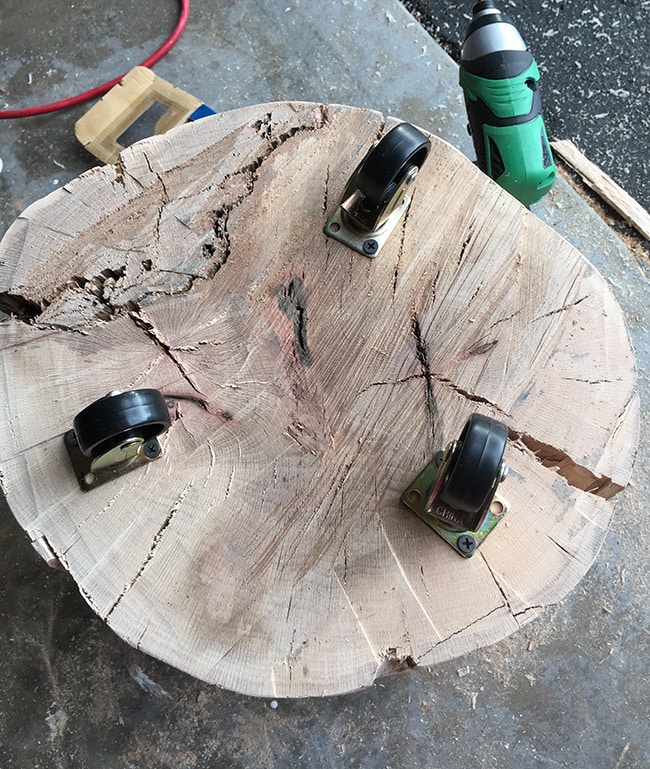
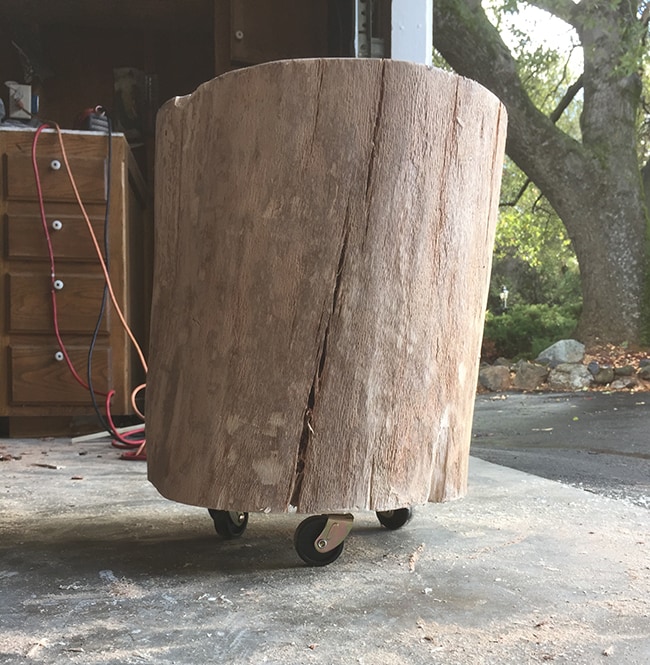
I really like the tree stump table, that’s a fun detail!
Linda Weeks says
wild! you know yer stuff, I think!
Jenna Sue says
Yep, sure did!
Ashley says
For the cabinet, did you use MDF for all cuts (minus the doors and frame)?
Henry says
Hey guys, Henry from CW here.
Sorry for the 2 months late of a reply!
As of early November, all of our linen fabrics will be pre-shrunk as well as nano coated, previously we couldn't do it properly because the coating cancels out the sanforizing effect, but anyhow, we managed to apply both treatment now, so they're machine washable yay 🙂
About it being washed off, all nano coated fabrics actually perform better than a brand new lot after it's first wash and iron cycle, the way it was explained to me was the “heat from the iron kinda jolts the nano particles and re-enhance it's effect”; Don't trust me words, order a free sample !
https://comfort-works.com/home/free-fabric-samples-24
Thanks for lovely photos Jenna, when's HGTV showcasing your home?
Jenna Sue says
Email me at jennadiermann [at] gmail dot com 😉
angela foster says
Love the cabinet and totally want to make one. Your whole home is absolutely beautiful! I have a kivik sofa and my house is more of a beachy theme….any chance you want to sell your old cover?!
Laura Yoder says
Wow…both of those pieces are perfect!
Natalie Land says
Oh wow that cabinet that you made is adorable.
I want one,
Nathalie says
Thank you for sharing 🙂 I'll try again but before I discovered your great work on your blog.
Jenna Sue says
I think it was the 1 1/4″ length fine thread screws. Whatever was recommended for 3/4″ thick material!
Nathalie says
Wonderful. I have also problems with the mdf and the kreg jig. Can you tell me what screws you used?
Jenna Sue says
Hmm, yeah, I'll have to ask them about it! I definitely don't want to pay to have it dry cleaned.
Ashley Berry says
YAY! I am caught up and now I can't wait for more! Seriously Jenna, you have done such a terrific job on all of the design and details on your home. I have been sucked in for a couple weeks now and made it post by post through your renovation. Thanks so much for sharing!
Looky Lou says
Wow, I love the slipcovers for IKEA products from Comfort-Works. I just checked their website for the awesome Liege stain resistant fabric, and I noticed it says “Dry Clean Only”. But then it says “Drip Dry in Shade”. So I wonder if you can't just “throw them in the wash”? Maybe the Nano technology may not last if you wash them, so I would just dry clean them.
Anyhoo, great DIY projects that look just like Pottery Barn and West Elm products!!! I think you and Brad Sue could sell them on Etsy too! I look forward to your source list, just in time for my Christmas Wish List!!!