Update: Check out the finished fluted cabinets and full room reveal here!
Over the past month we’ve been slowly working on the most challenging part of our work/play room renovation—the built-in storage cabinets. Let me refresh your memory of how the wall looked before:

And here’s a rough mockup of our cabinet layout:
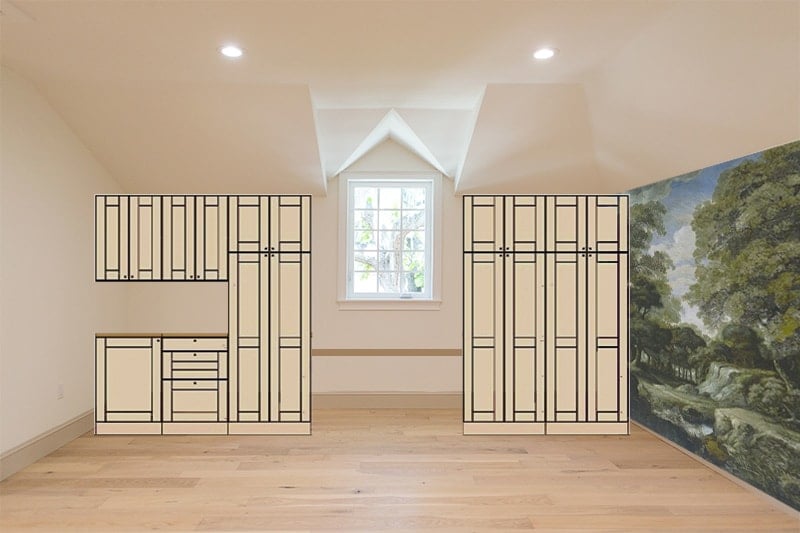
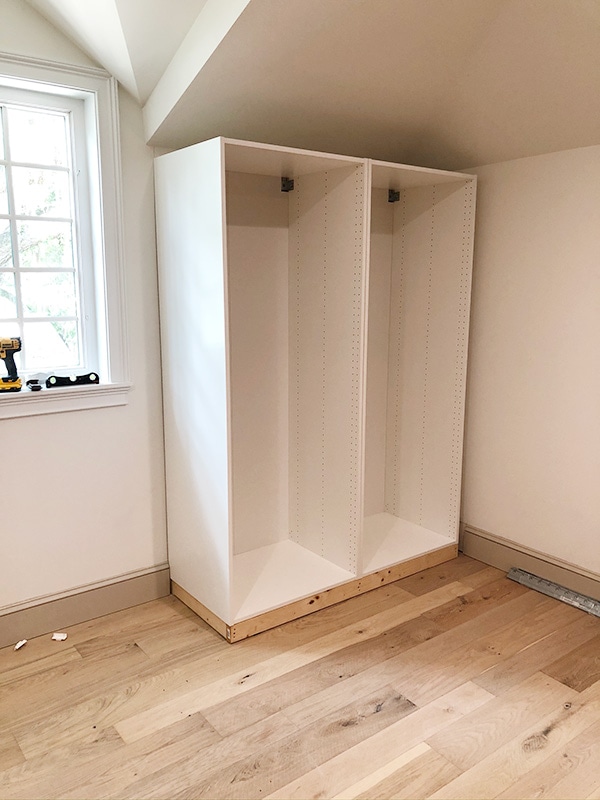
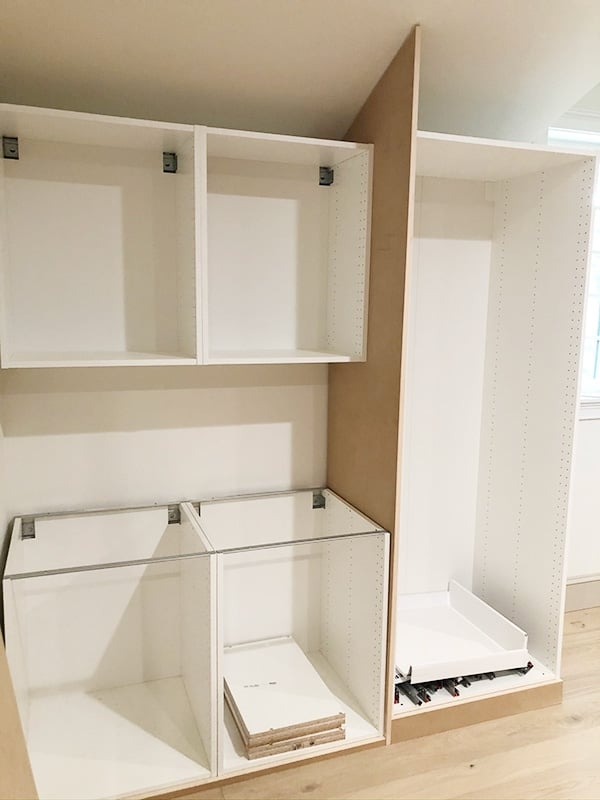
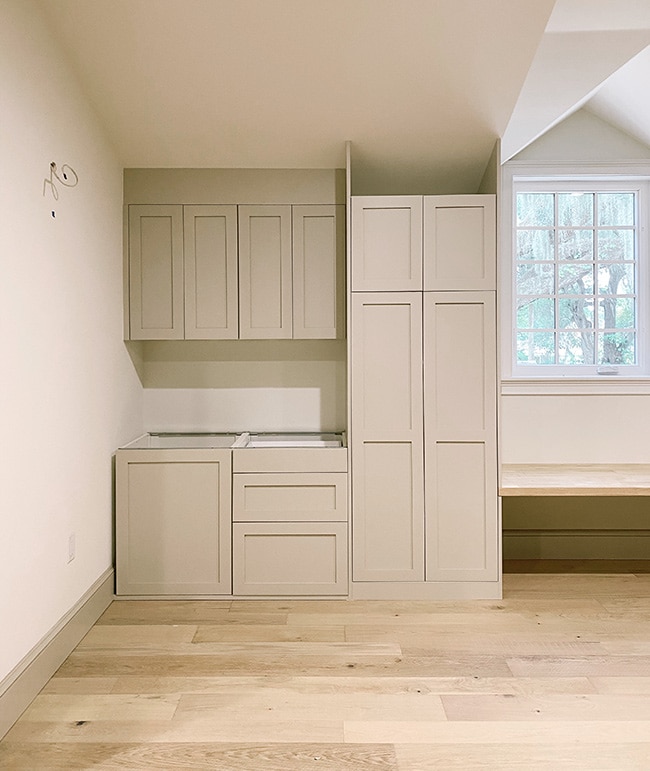
After researching all my options, I chose Ikea’s Sektion (kitchen cabinet) line because of the many configurations and ability to use custom doors. We decided to use three 80′ tall cabinets, two 24″ base cabinets and two 24×30″ wall cabinets.
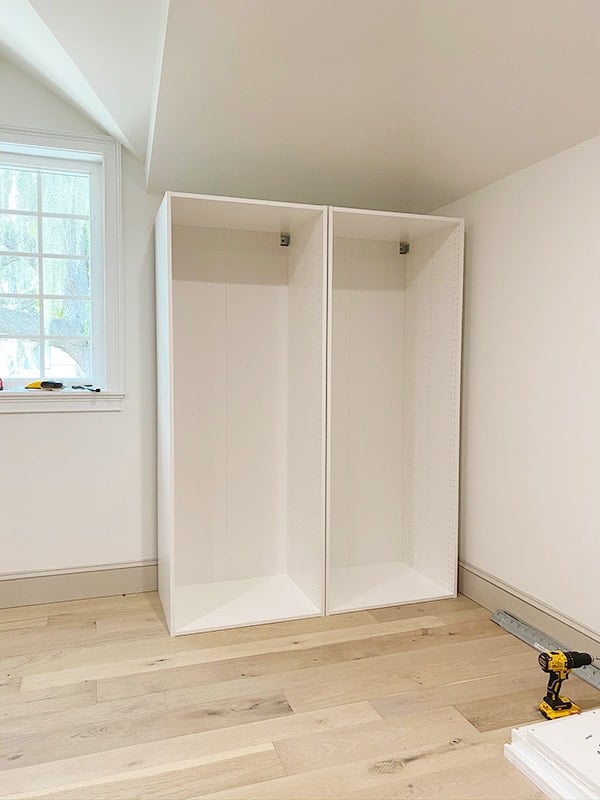
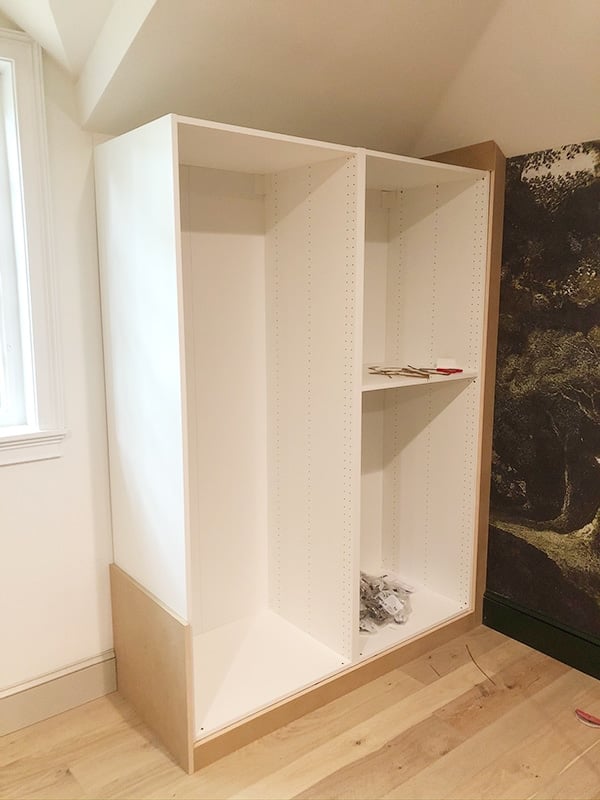
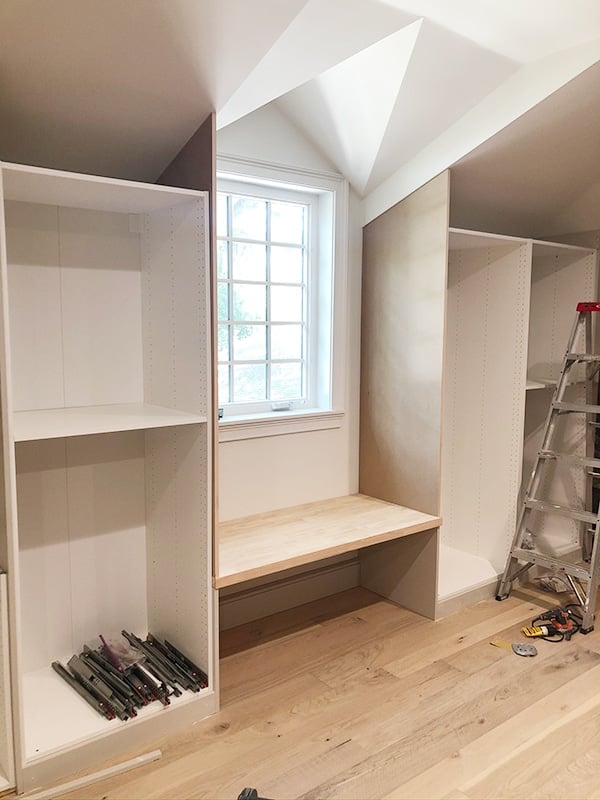
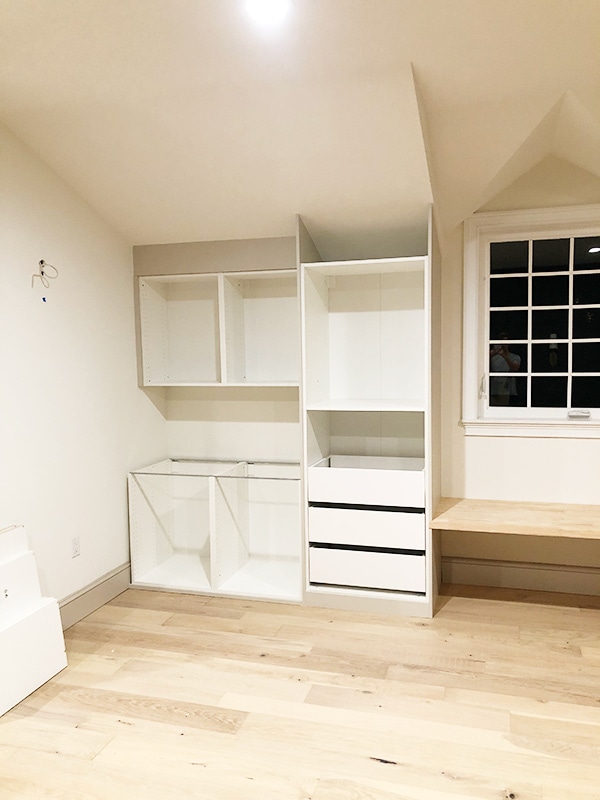
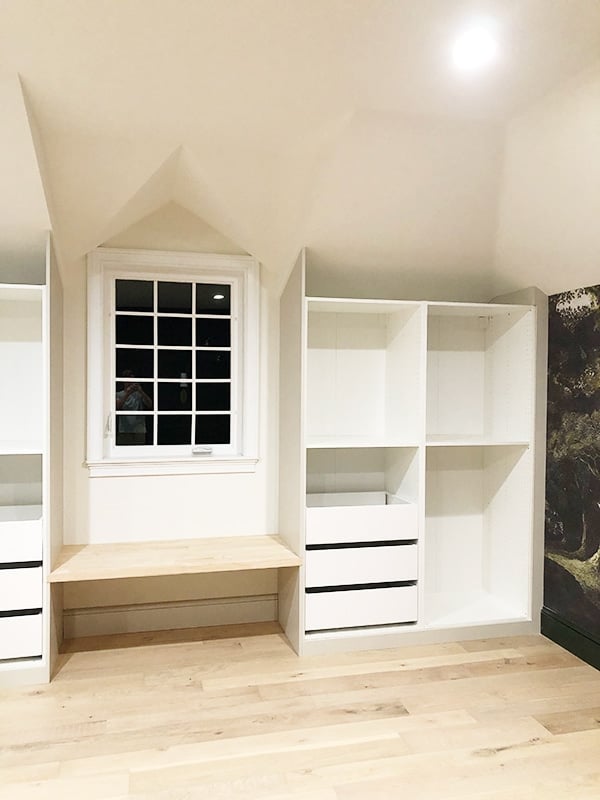
A bench seat/kids desk will go under the window, and a large L shaped desk will run along the back wall and on top of the base cabinets. Here they are assembled (minus the wall cabinets):
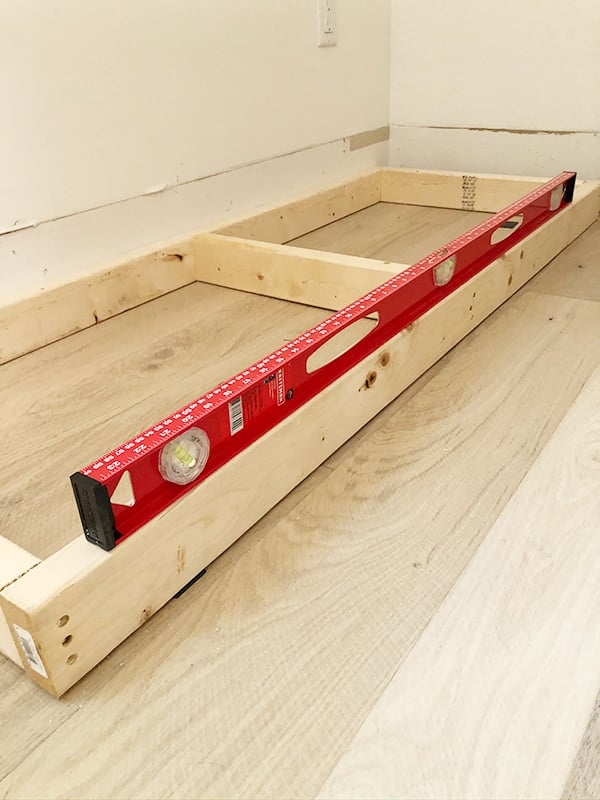
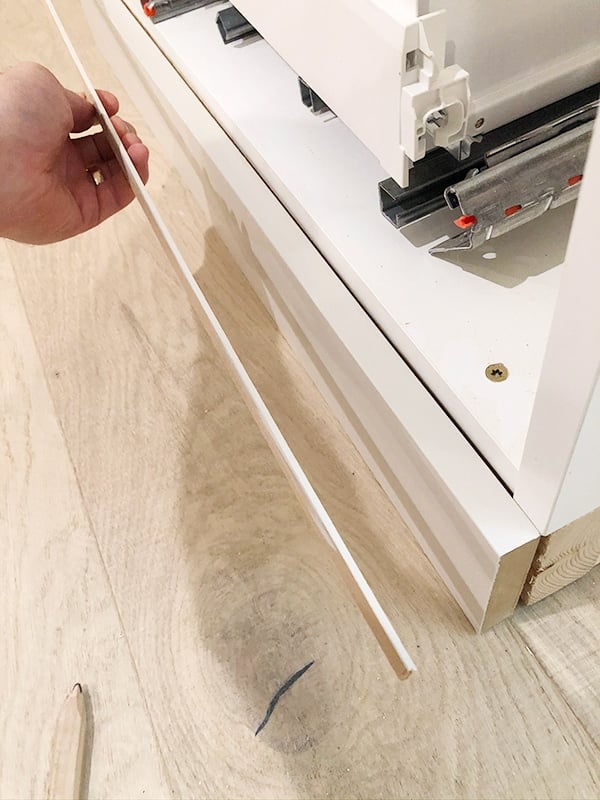
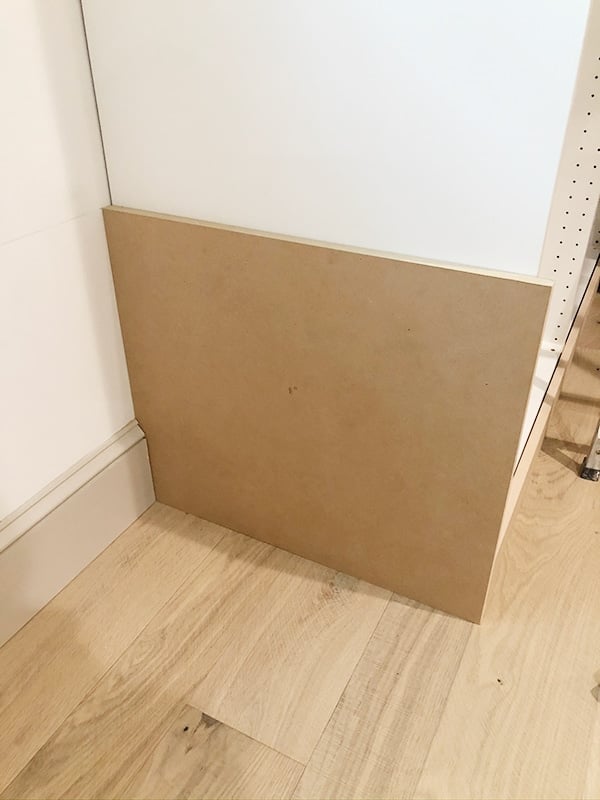
Before securing the cabinets to the wall, we had to build a base for them to sit on. We opted not to purchase the Ikea cabinet legs/toe kicks, and instead build our own since we’d be customizing/painting them to our liking. The easiest and most inexpensive way to do this is with 2×4’s, but before we could build that, we had to cut out the baseboard to allow the cabinets to sit flush against the wall.

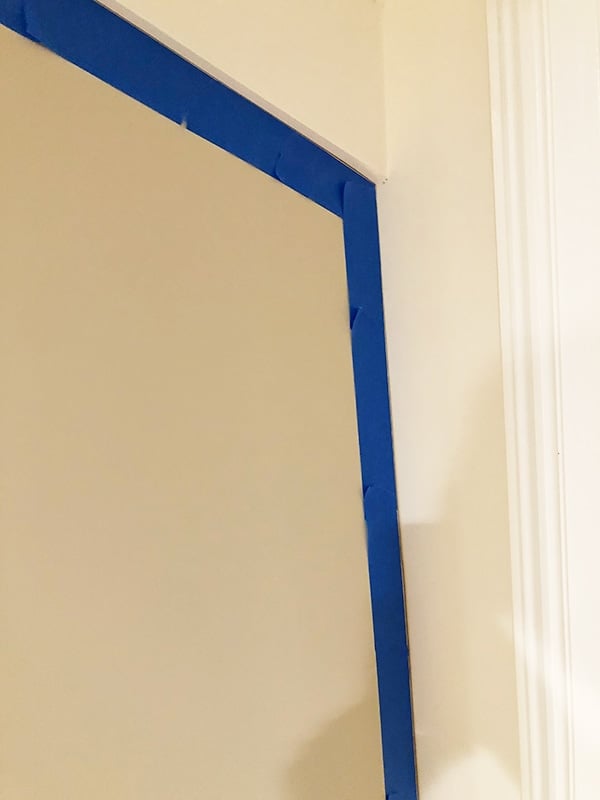
This part is simple—use a level to mark a straight line where the cabinet will go, then cut along the line with a dremel (still one of our favorite multi-use tools!)
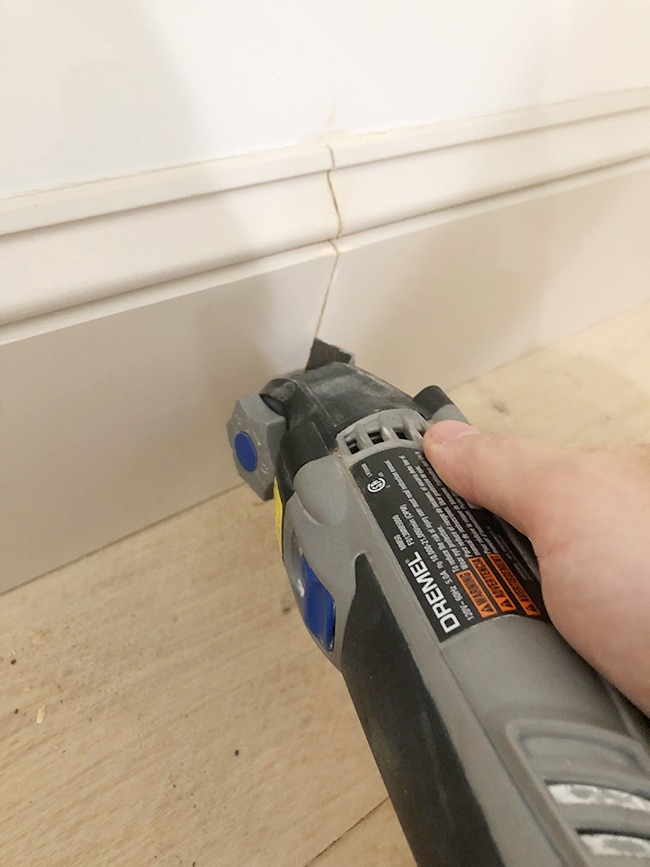
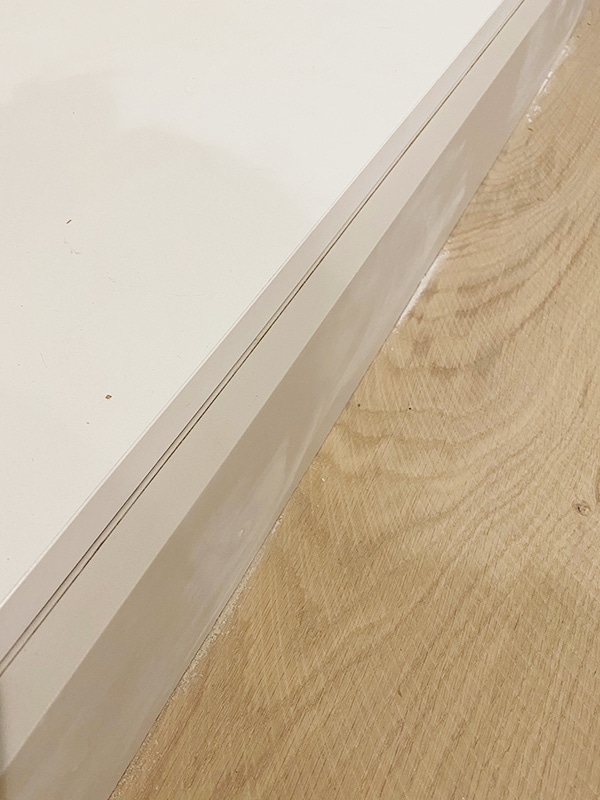
Make sure to score the caulk along the top of the baseboard with a sharp utility knife, and the baseboard should lift right off. Next it was time to build the frame, using 2×4’s cut exactly to the width/length of the cabinets with a support in the center.

It’s important for this piece to be level, since the cabinet will be sitting directly on top of it. We attached the boards with 3″ wood screws at each connection point.
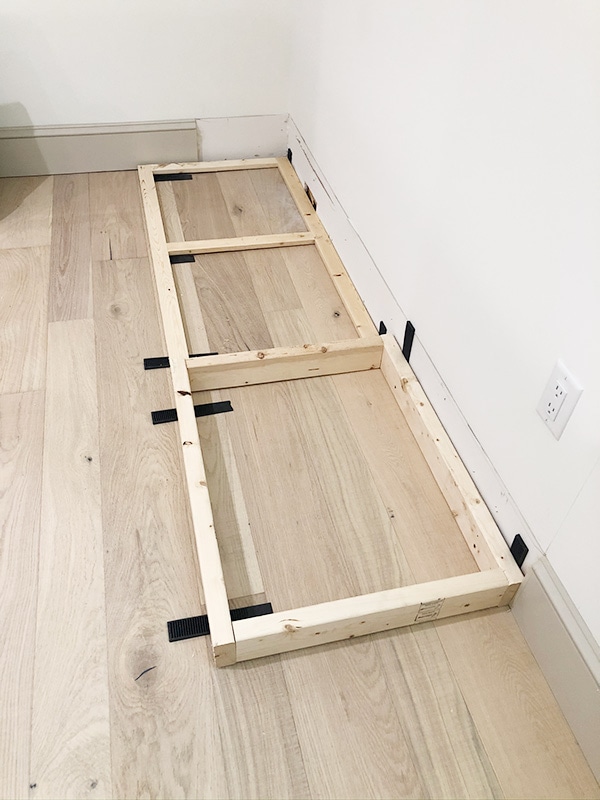
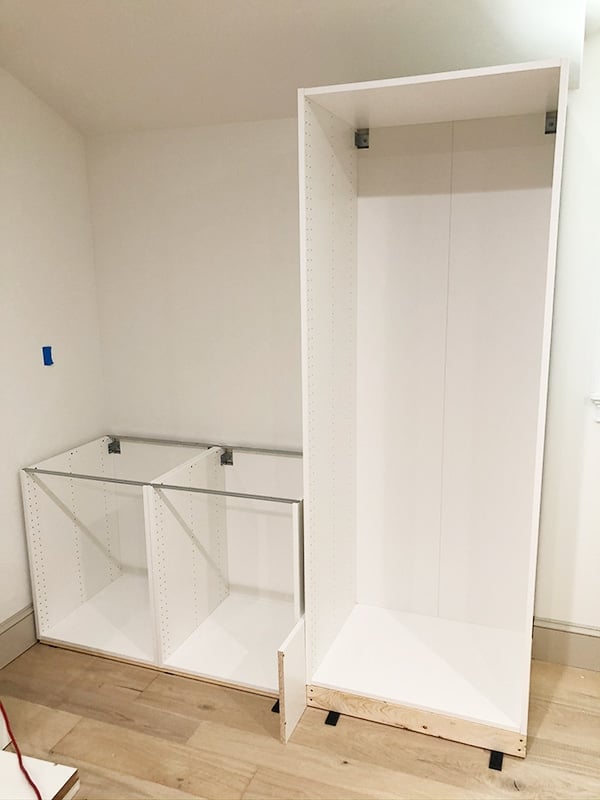
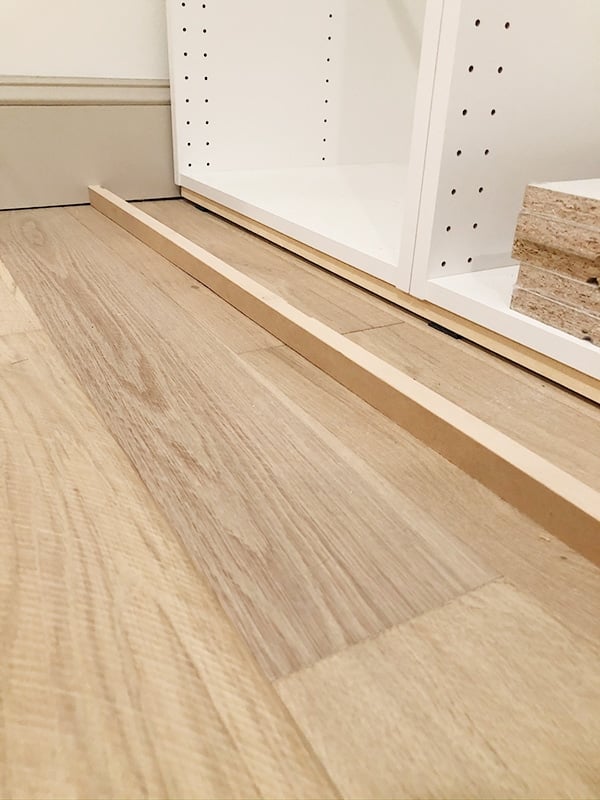
On the other side of the window, the situation was a bit different. We built another 2×4′ frame for the tall cabinet, but couldn’t do the same for the base cabinets as it would make them too tall for a desk. Standard desk height is around 30″, and the base cabinets alone are 30″ tall (add in the countertop and it would be almost 36″—much too tall for a desk!)
We also didn’t want the cabinet sitting directly on the floor (which would allow no clearance for the doors) so we ripped down 2×4’s to 3/4″ inch and built a shallow frame:
Using plastic shims and a level, we adjusted the frames so they were perfectly level in every direction. Even though our house is new, the floor is almost never perfectly level and these adjustments will be necessary.
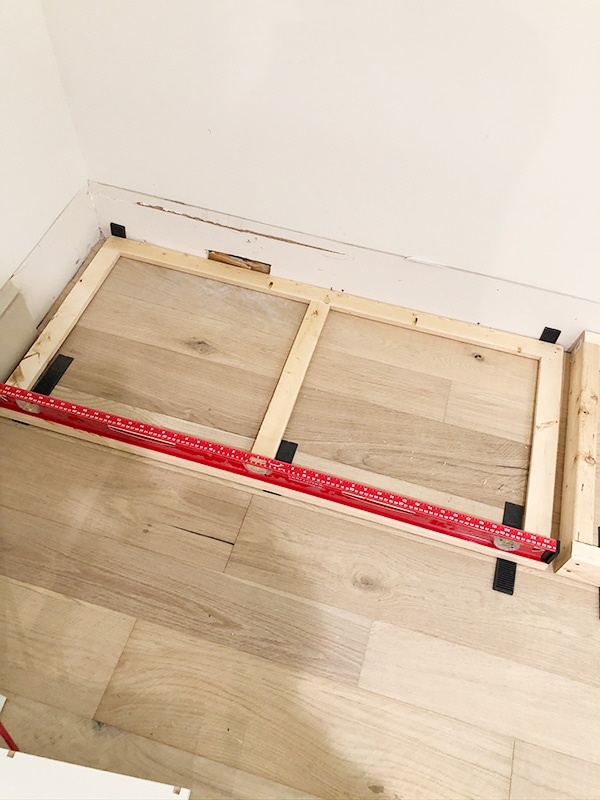
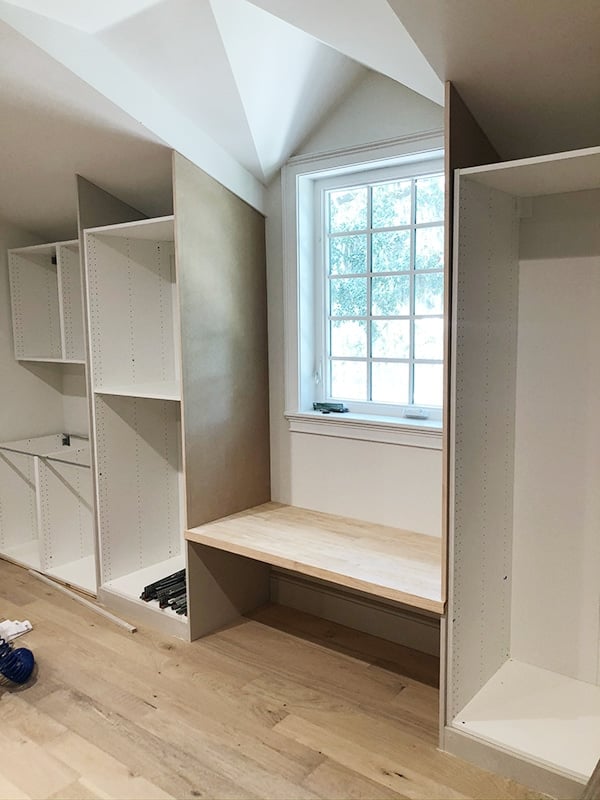
We planned to add a floor-to-ceiling panel in between these cabinets, so we used a spacer to make sure we left the right amount of room for it.
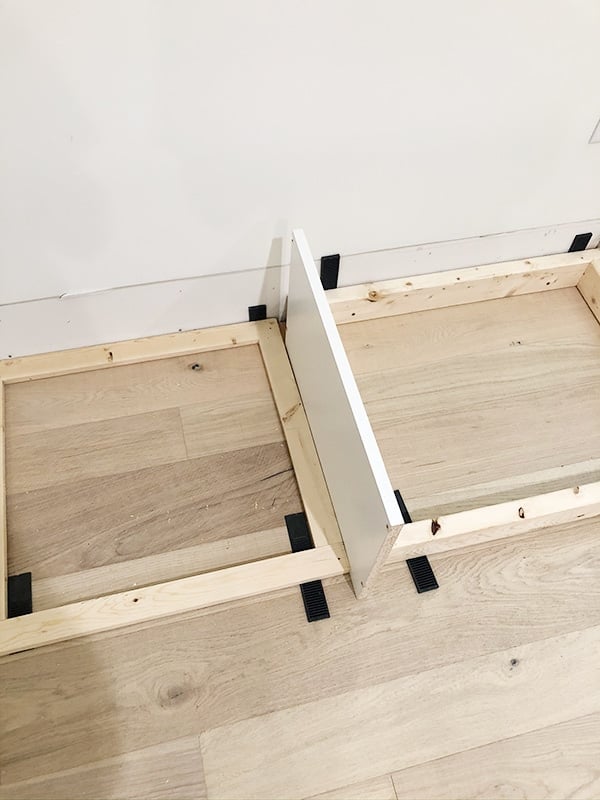
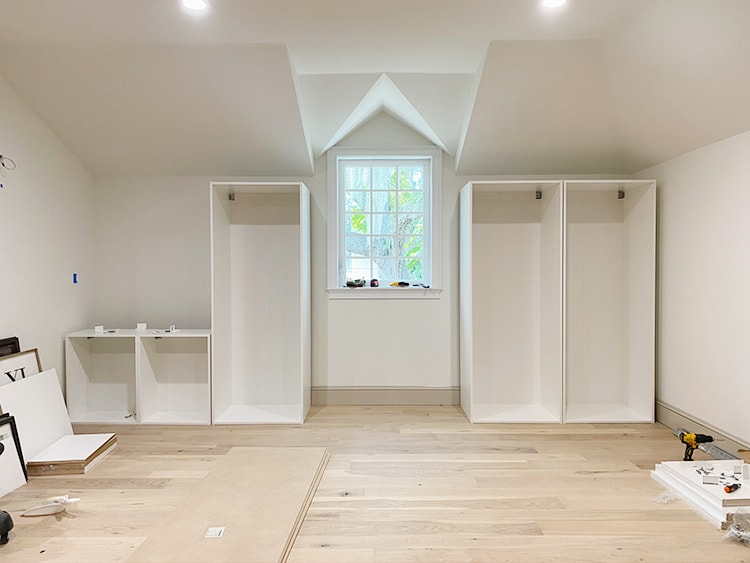
Once the bases were built and attached to the wall and floor, it was time to do a test fit with the cabinets.
A few adjustments to the bases were necessary at this point as our walls aren’t straight vertically. We had to shim out one of the bases to accommodate and ensure the cabinets were level from top to bottom.
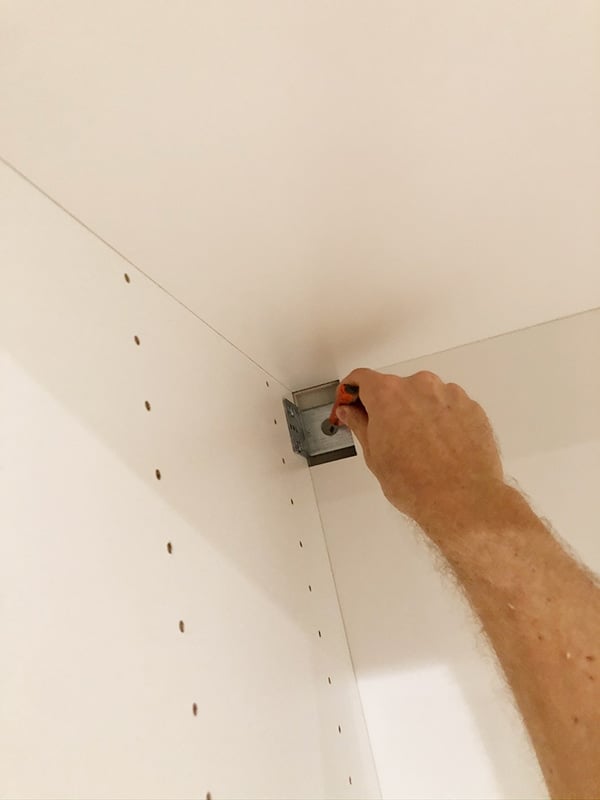
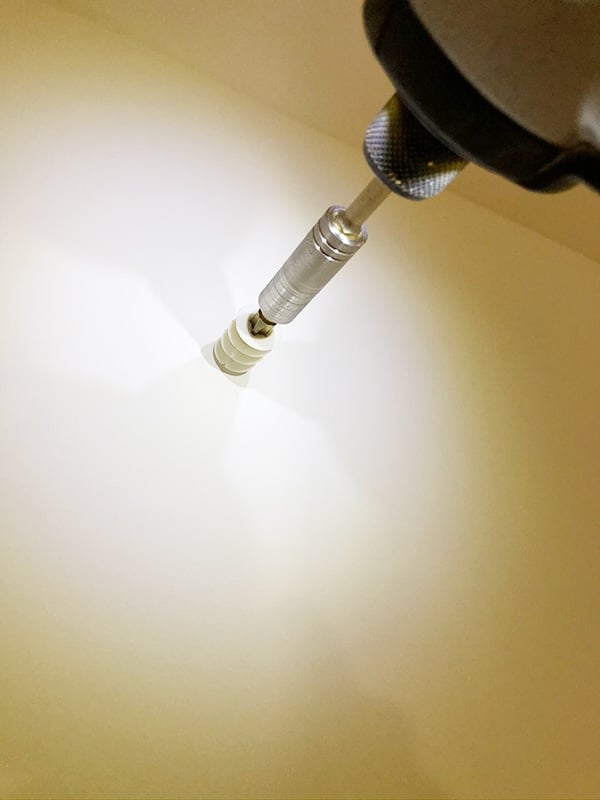
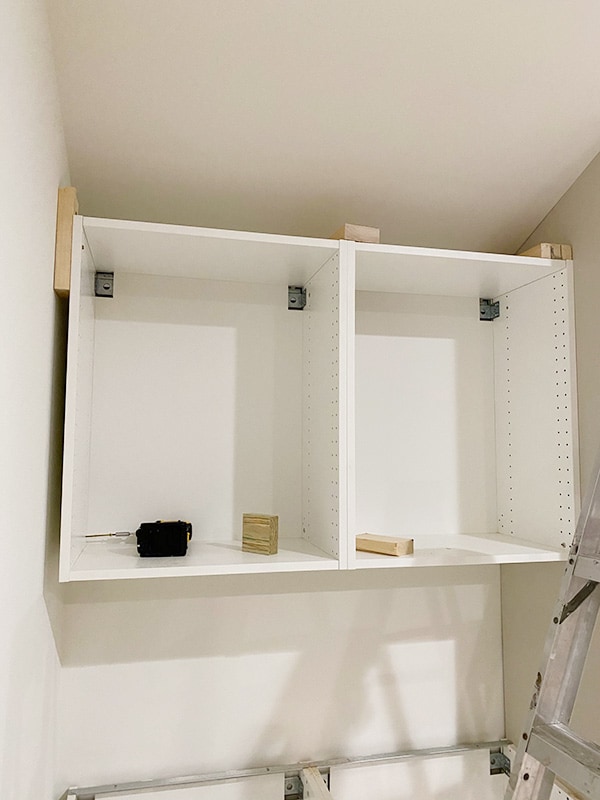
We used the IKEA suspension rail for our upper cabinets on the left, and attached the others to the wall using their supplied brackets. With the cabinets in place, we marked where the anchor needed to go and used a self-drilling drywall anchor to secure the screw to the wall.
Here’s the IKEA suspension rail in place for our upper cabinets (the desk/countertop will be installed below).
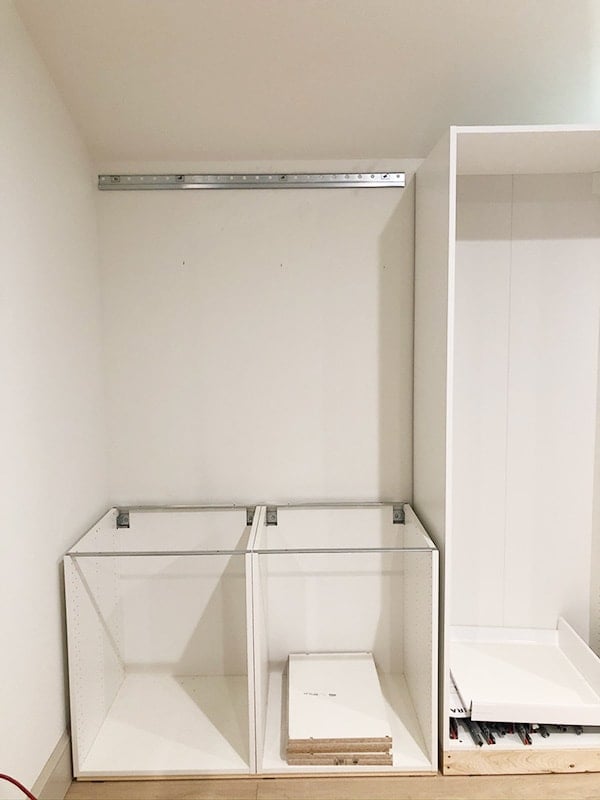
The rail system is very simple to use, you just have to make sure to double and triple check that it is level. It’s easy to make slight adjustments once it’s up. One person can manage a shorter rail, but longer rails might require the help of a friend.
With the cabinets in place, we used a combination of screws and bolts to secure the cabinets to each other and pull everything tight. We used these bolts and barrel nuts from a previous project on a few of the cabinets:

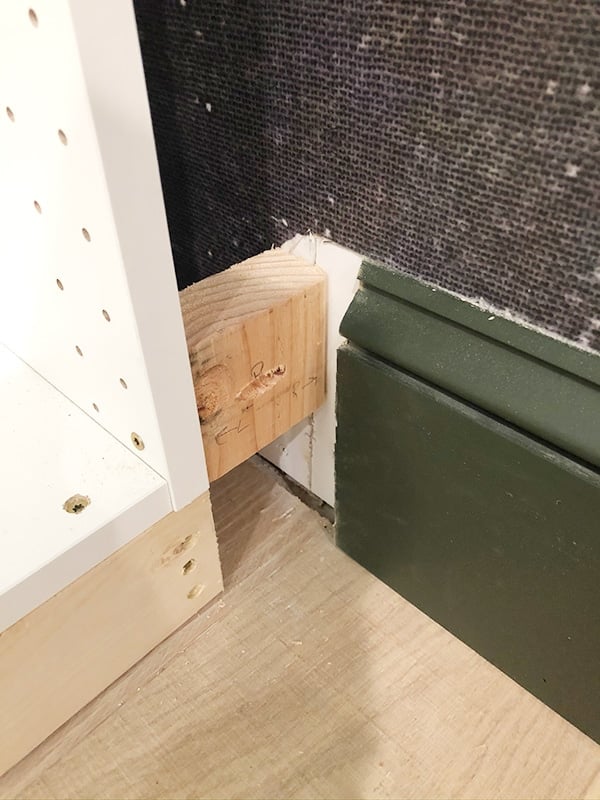
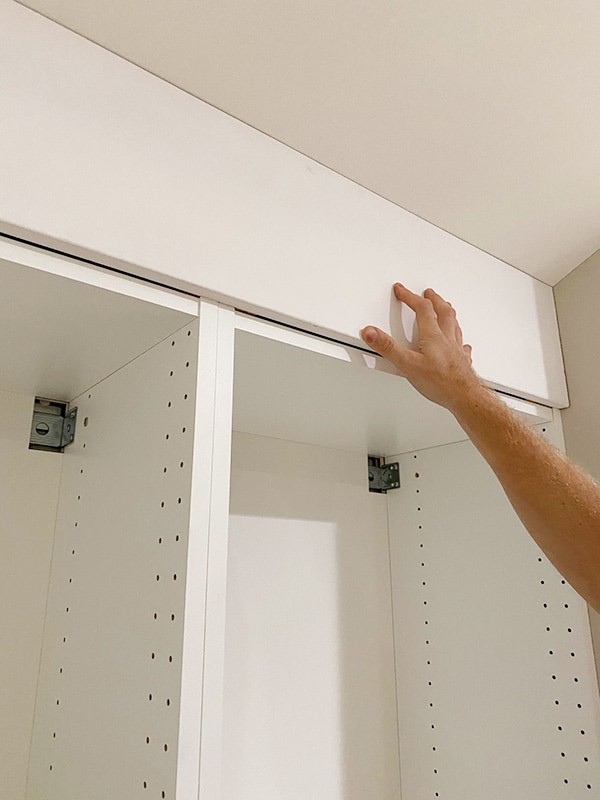
After the base and large cabinets were up and secured, it was time to move on to the trim and filler panels. When I ordered our cabinet doors from Semihandmade, they also supplied MDF panels and fillers to complete the built-in look. This process requires installing 2×4 blocks between the cabinet and wall, then attaching the filler pieces on top. It’s essentially one big puzzle, and you just have to take it one piece at a time.
This is our second time customizing Ikea Sektion cabinets—you may remember our Riverside Retreat kitchen:
For this kitchen we made the panels/filler pieces recessed from the doors, but this time we wanted to make them flush for a truly built-in look, like this:
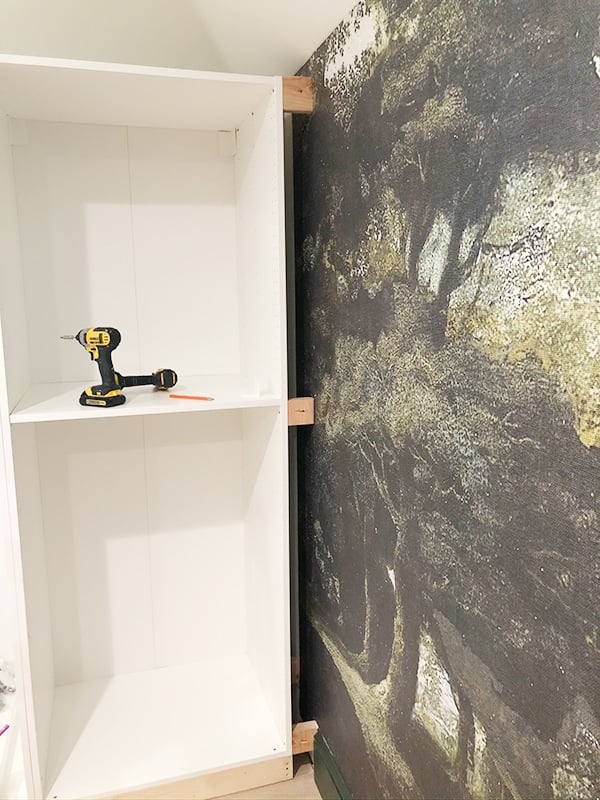
Starting in the far right corner, we cut our first 2×4 block to the size of our wall gap and drilled a pocket hole to attach it to the wall:

Here it is in place—attached to the wall through the pocket hole, and also directly through the cabinet:
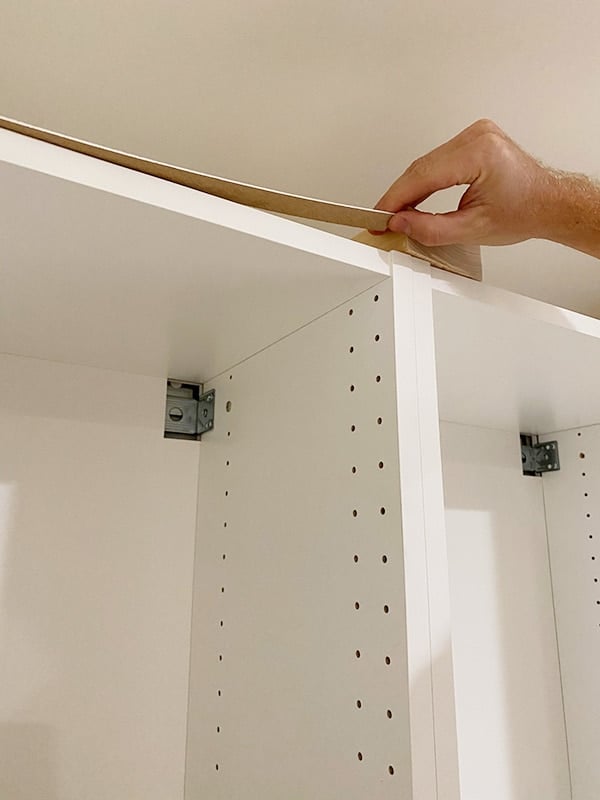
We wanted our filler piece to be even with the doors (both are 3/4″ thick), so we had to align the blocks with the edge of the cabinet. Here’s how the top looks (the two blocks in the back are for a second vertical filler piece):

For a tall filler piece, you’ll want to add at least three blocks for stability. They don’t need to go into studs, as they’re not supporting any weight.
Once the blocks are in place, we carefully measured and cut our MDF panel to fit.
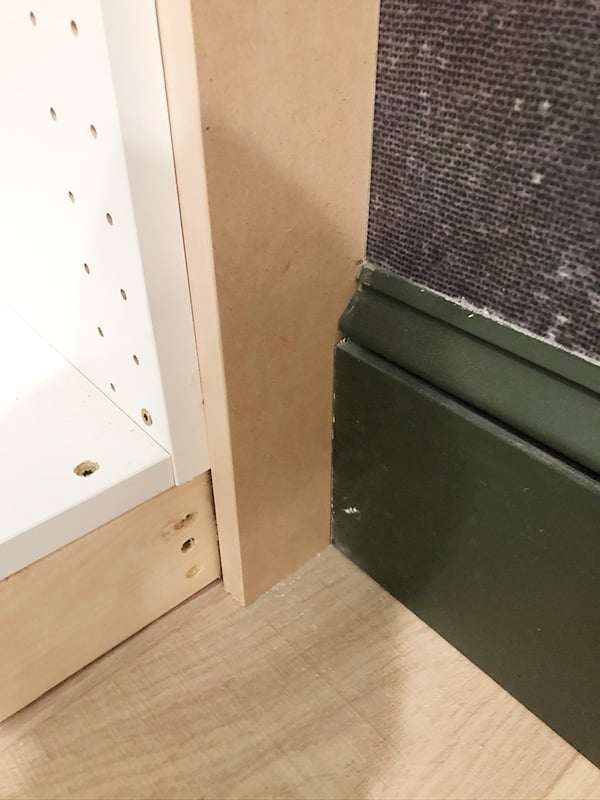
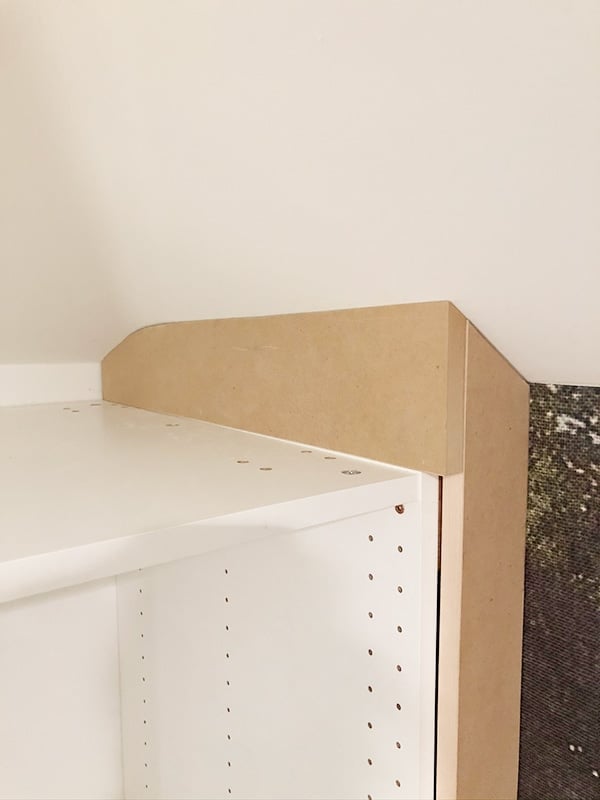
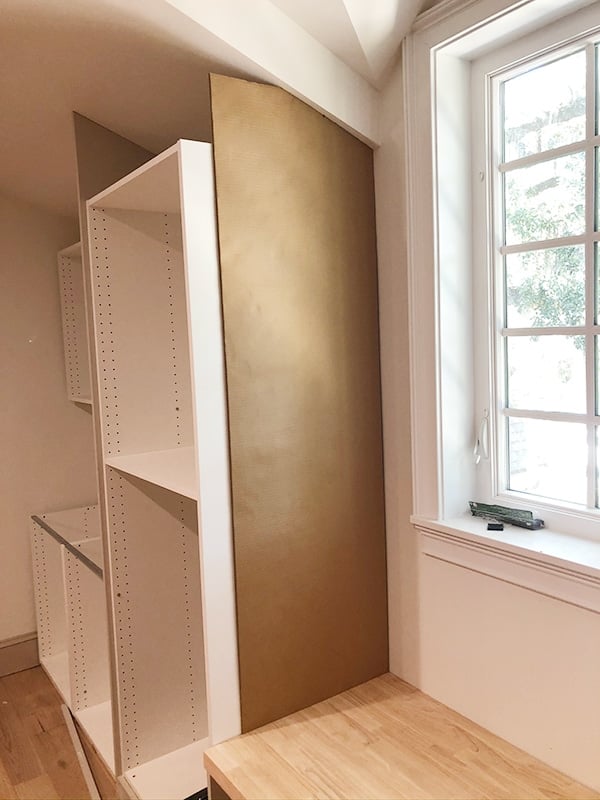
Nice and snug! But then things got tricky for us. As of now, our plan is to leave the top of the cabinets open to utilize the storage space, but we couldn’t leave any visible gaping holes on the sides. Our ceiling has some crazy compound angles/slopes, and our first challenge was to cut a piece to fit this section…
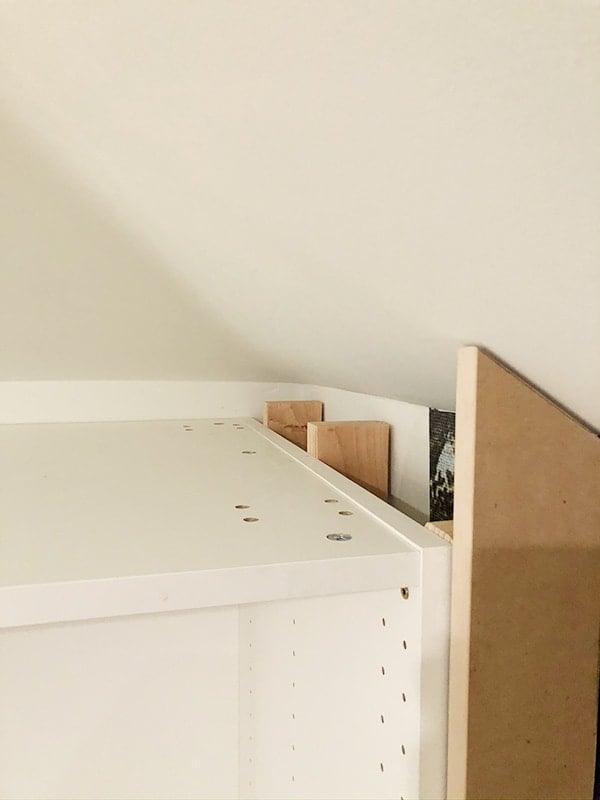
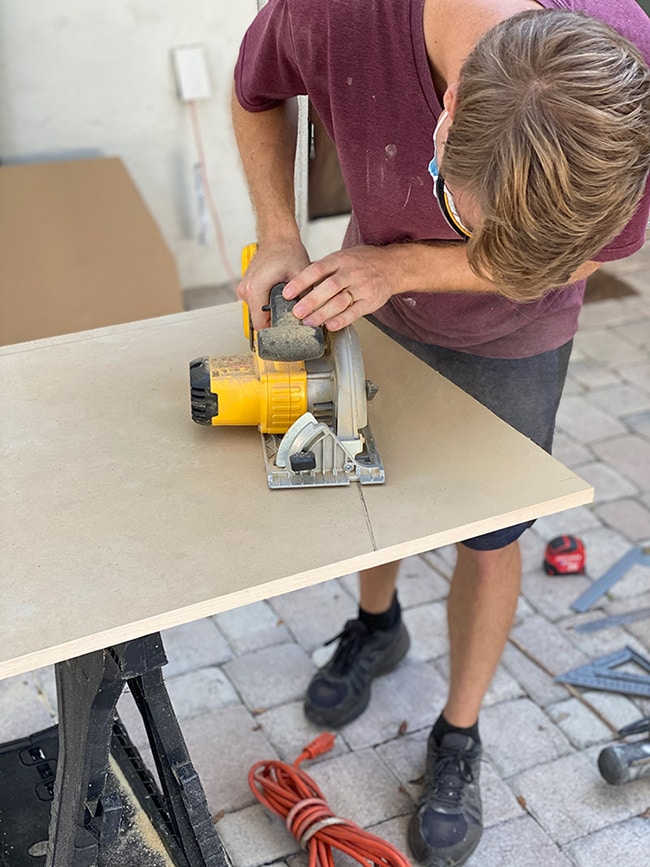
The easiest way we’ve found to tackle these situations is using cardboard to make a template. I let Lucas handle this one.
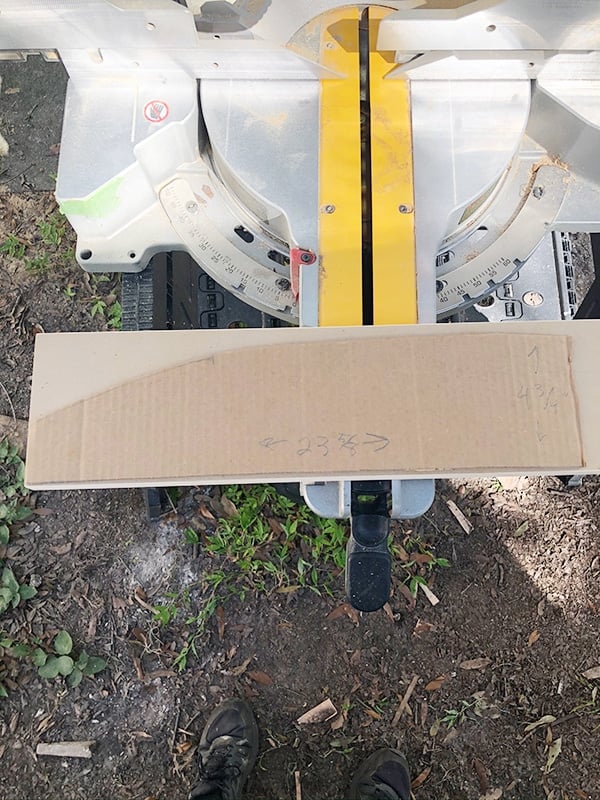
He used a combination of a miter saw and jigsaw to carefully miter the edge and cut along the angle. And it worked!
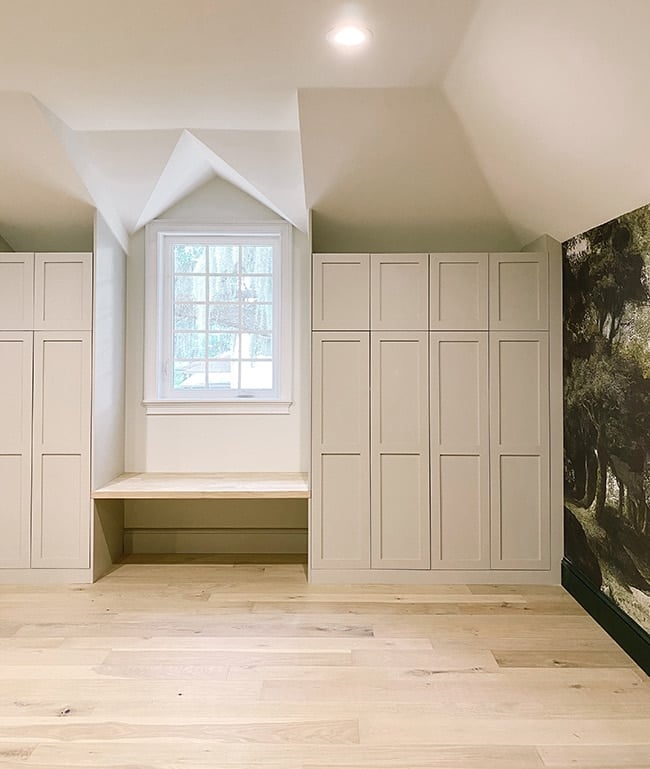
Here’s how the first four panels/filler pieces look on the right side. The short panel on the left would sit underneath our window bench seat, and the fifth and final panel added later above the window seat:
On the left side, we had another problem area with the large vertical panel between the cabinets. We were battling both the ceiling slope and a wavy/uneven wall, but we managed to get it pretty close (lots of test fitting and detail sanding!)
Additional blocking was added around the upper cabinets (there wasn’t a lot of space above these, so we decided to put a cover panel rather than leave it open for storage):
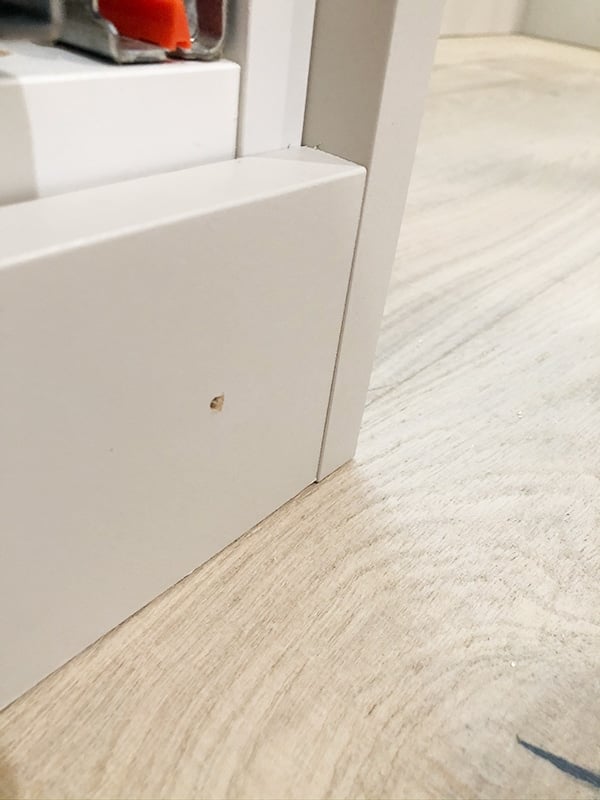
One small issue we ran across was a gap between the cabinet and filler panel, caused by the sides of the cabinet box sticking out farther than the top and bottom (why Ikea, why?!)
It’s only visible when the door is open and not a huge deal, but we decided to minimize it by adding a thin strip of MDF (ripped down with a table saw) to fill it.
You can still see a seam where the strip is, but it’s less noticeable than an open gap. We did this along the bottom of the cabinets as well:
Under the base cabinets, we ripped down a 3/4″ piece of MDF to fill the smaller gap:
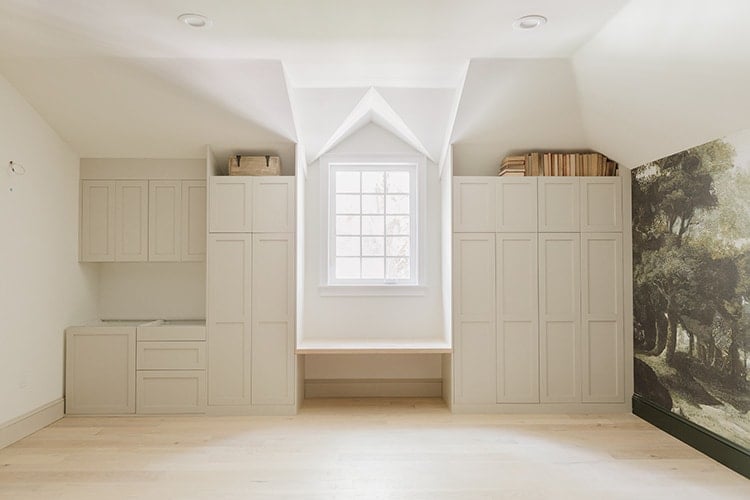
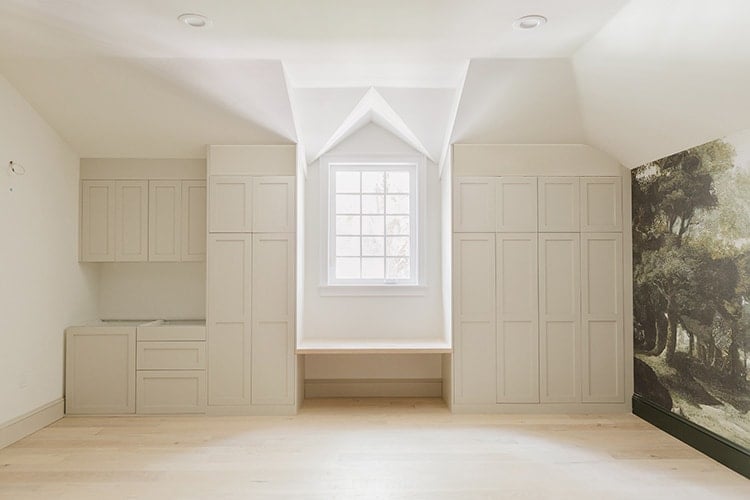
Before we could finish installing the panels, we had to fit our window bench in place. This butcher block was the best option I found (affordable, in stock, and a light color to match our floors). I ordered two 6′ lengths and one 8′ length to use for the desk top + window bench.
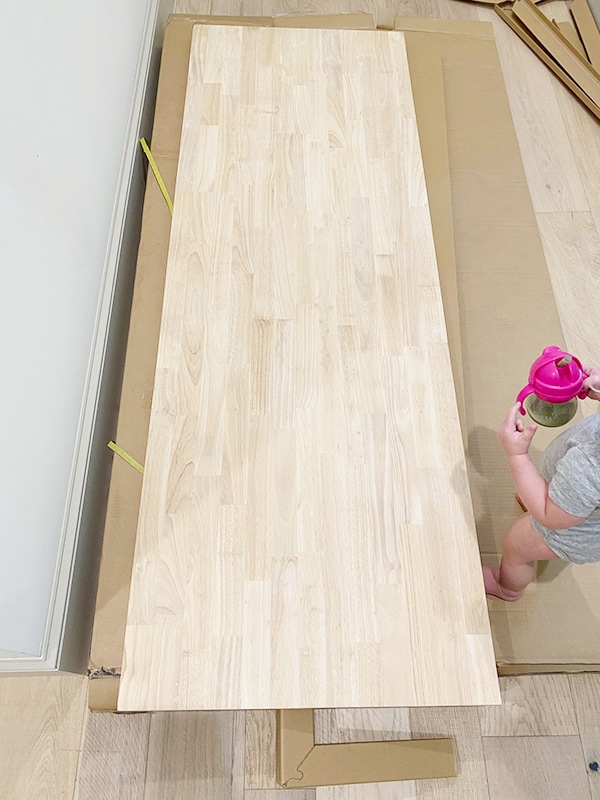
We determined the height we wanted for the window seat—23″, which would work well as a future kids desk. The lower side panels were then cut to 21.25″ to account for the butcher block thickness.
The panels were attached from the cabinet side so there were no visible screws. Then the butcher block was screwed into the cabinet on each side. Sorry, I only have an “after” shot of the bench!
I ordered two brackets to place underneath, but they ended up being extremely visible and distracting. The butcher block holds our weight just fine on the panels, but I’m nervous about it long term as a window seat so I’m on the hunt for smaller brackets that wouldn’t be visible unless you were crouching down. Any ideas?
The last piece of the puzzle were the two panels above the window bench. Once again, cardboard was used as a template to capture the shape of our contoured walls:
We used our table saw to rip down the length, then a circle saw for the top angle.
Lots and lots of detail sanding was key to get them to sit flush along the entire wall/ceiling. It was also critical to make sure they were exactly 3/4″ past the cabinet the whole way down, as any difference be very noticeable once the doors were installed.
But the extra effort pays off to make the job look professional!
One the pieces are dry fit, it’s time to paint them. You want to paint them before installing to save the hassle of trying to cut in around trim and cabinet boxes. It’s much easier and more efficient! We considered using our paint sprayer but decided it wasn’t worth the extra trouble, especially since we were painting/installing these a little at a time and not all on the same day. Instead, we used a velour roller which is supposed to provide a similar smooth finish. We’ll definitely be switching to these from now on!
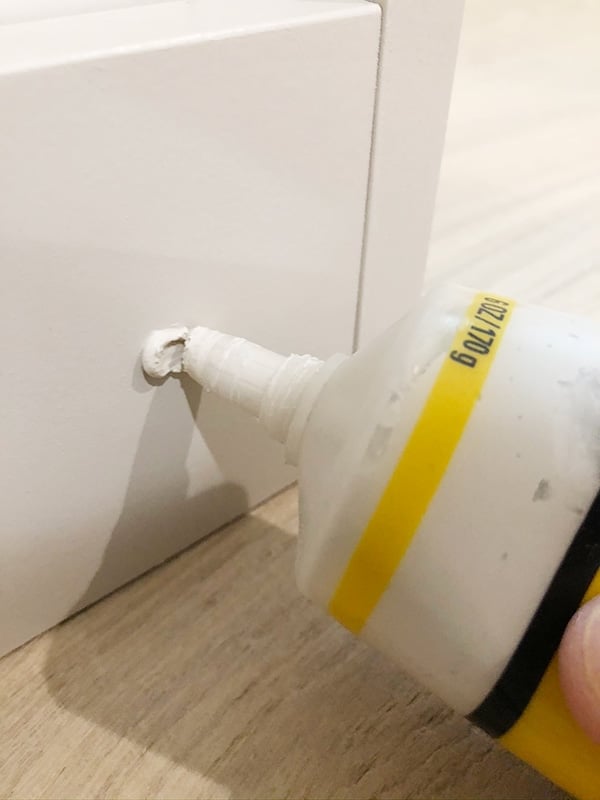
We nailed our trim to the blocks, so we had to go back and fill in the holes with putty.
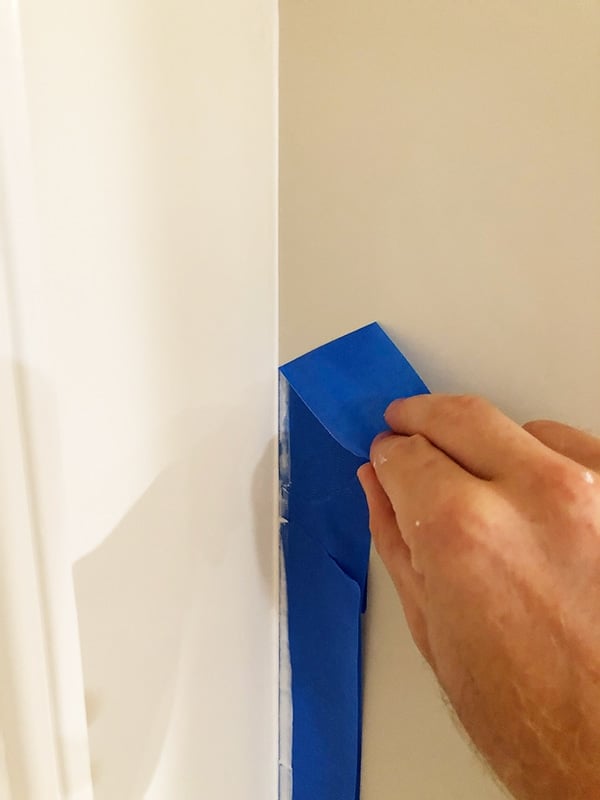
Then it’s a matter of sanding them smooth and touch-up painting, followed by caulking where the trim meets the ceiling and walls. One trick is to use painters tape along the edge of the cabinet, which is then peeled off immediately after caulking the gap.
This gives you a crisp line and eliminates the need for touchup painting due to a wide caulk line (but only works for white/off-white walls!)
We stayed up late to finish them in time, and put a few drawers in too!
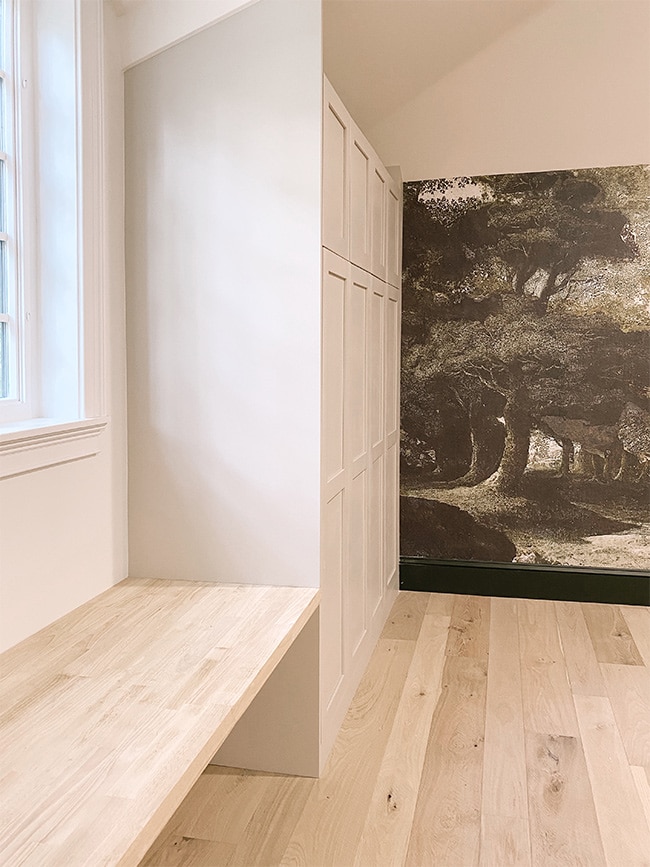
We painted the cabinet doors months ago (Sherwin Williams Accessible Beige) but we’re not done with them yet! I decided to customize them further, so we’ll be tackling that project soon (and I’ll share all the details in another blog post) but I was still anxious to see how they looked/fit…
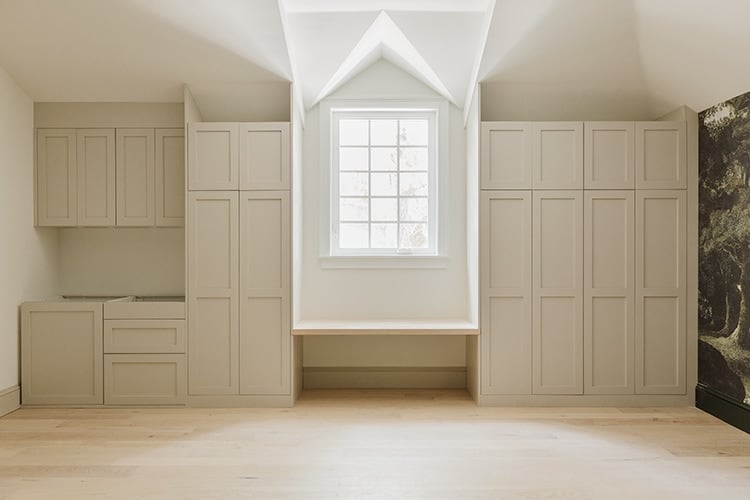
The doors haven’t been adjusted so they aren’t perfectly straight, but I’m loving this clean built-in look!
We didn’t bother adding a filler piece along the left base cabinet, since it will be hidden underneath a desk.
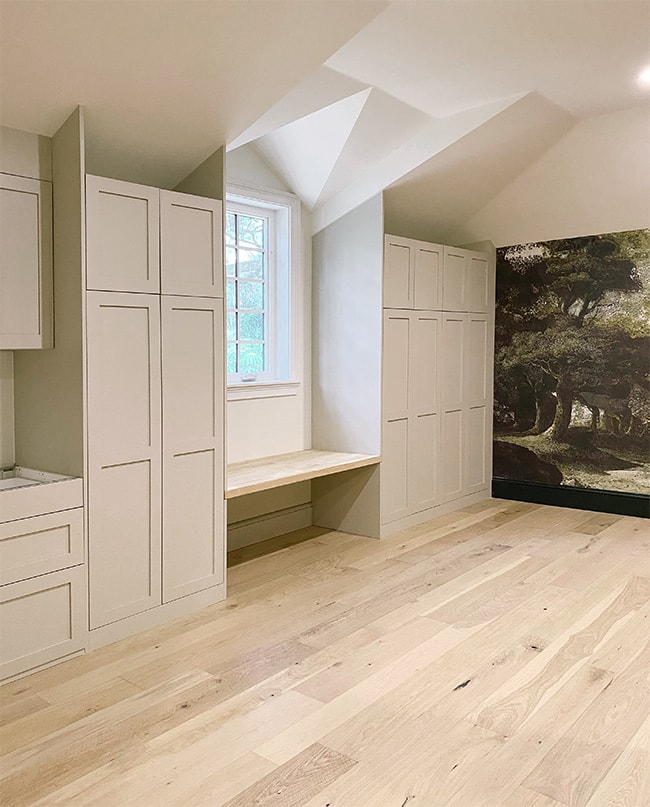
Here’s another view of that wall:
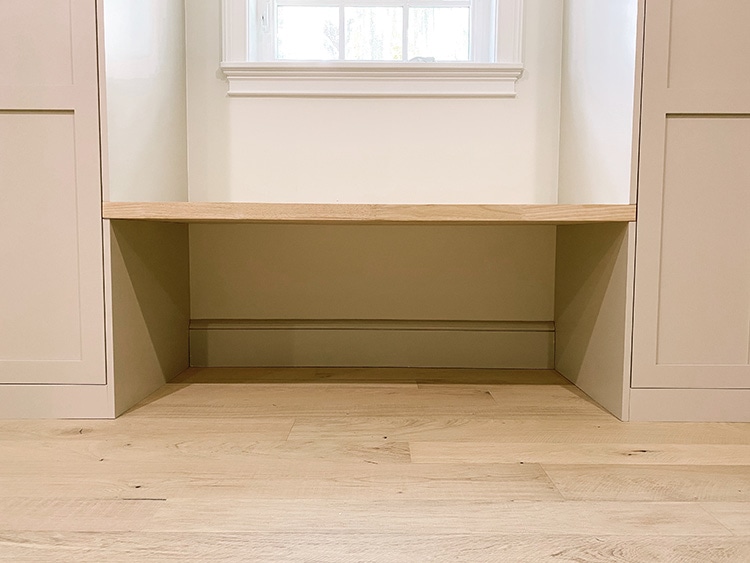
I think the window seat/kids desk is my favorite part! I can just picture Esmé snuggling up here with her stack of books, or doing school work when she’s older…
The biggest question that remains—what to do with the space above the cabinets? There’s a lot of usable storage up there and I’d hate to lose that just for aesthetics, but I also don’t want it to look sloppy/unfinished. I tried placing a few items up there, and landed on these old books…

I’m kinda digging the library vibe they give the space, and how well it fits in with the whole storybook mural theme. I don’t have enough books to fill both spaces, though, so I’d have to add other things… like boxes? baskets? (I tried pillows and blankets and they just looked sloppy).

What do you think? Should we keep the open storage, or close it off? I’m trying to figure out a way to add a door on a hinge, or some type of sliding drawer to be able to access it, but these angles and curves make that tricky!
Here’s a rough Photoshop version with panels:
Any and all ideas are welcome! While you think about it, let’s talk numbers. I know you’re curious about the cost for something like this, so let’s break it down!
- Ikea cabinet boxes: $1,185
- Ikea shelves and drawers: $642
- Semihandmade doors: $1,954 + $399 shipping
- Semihandmade panels: $773
- Grand Total: $4,953
Let’s call it an even $5k after adding in a few 2×4’s and misc hardware store supplies. I didn’t include the butcher block since that’s a separate project, but 20′ of material cost $622.
I compared Semihandmade doors with the cost of Ikea Torhamn doors (those are the doors we used in the Riverside Retreat kitchen, and the only Ikea doors I’d recommend painting since they’re wood) and Ikea’s door total came to $2,452—that’s $498 more than Semihandmade! Even when you add in the shipping cost, Semihandmade DIY shaker doors come out $98 less. Of course, these are for unfinished doors (the cost for their painted doors comes in higher) but if you plan to paint the doors yourself, using Semihandmade is a no-brainer.
Full disclosure: Semihandmade is a sponsor so that was not my direct cost, but I think they are worth a lot more than Ikea doors since they’re customizable and easily paintable (and their customer service is the best—Ikea is a pain!) I’ll share more on the doors in another blog post soon, but for now, we need to celebrate the fact that we finished the most challenging phase of this room renovation…

Let me know if you have any specific questions, and tell me your thoughts about the open storage and bench seat supports below! Off to work on our next DIY…
If you like this project, check out these popular Ikea hacks from my Project Library!
- Built-in custom Pax wardrobes
- The ultimate Ikea Dream Closet
- Custom Ikea Pax Pantry
- DIY fluted Tarva dresser


Chi says
As always you guys are amazing! My feel about the upper storage is to close it down. Full floor to ceiling clean look is more important considering the design and effort that went into building this amazing room, rather than having little extra storage for things that most likely you’ll never touch but will still have to clean for dust! Again, very well done!! What a team work you guys make!
Kathleen says
Amazing! Really impressed! I want to be your apprentice ? I like closing the top and put molding on a piece of msg so it “looks” like a door but isn’t. That’s if u want to avoid all the work of a real door. Good luck, can’t wait to see more. It’s really a work of art
Alix says
This space is going to be a family favorite for sure in the years to come. I love the idea of the library will the old books, something so cozy about filling that space. I also like the idea of the apron front on the butcher block window seats if you could attach hidden hinges on the top of the face maybe it could open upward and then you could create storage underneath as well. I do enjoy all the beautiful spaces you create. Thanks for sharing.
catherine says
merci pour ce tuto si complet! c’est vraiment beau..
thanks for all the explanations?
Jenn_ifer says
Hi!
I can’t decide… i like them open, but mainly because the top filler piece would be so large – maybe if a picture /library light was added to those so it seems more intentional?
Either way: looking good so far – great job you two, once again!
Best
Jenn
Jessica Pfluegl says
Looks great. We are debating this solution for our daughters playroom.
I think you could add a support panel under the bench/desk running the long way so it gives that support but won’t be noticeable since it will be slightly offset from the back wall. It will still allow for enough depth to put a chair under when it becomes the desk.
Leslie says
I like the open areas above the cabinets. Baskets and books add interest and the ceiling angles might make it look odd if you finish it off
Beautiful space!! Would love all that storage
Michele M. says
Looks absolutely amazing.
Leave the open top part – looks so cool.
I’d say get at least one one wicker picnic basket – hidden storage but would look great up there. Tidy but showy, too.
This room has really been coming along.
Your tutorials are awesome and inspiring!
And see Esme is getting so BIG! Love those chunky monkey legs of hers. ♥
She will be using that space faster than you could ever know.
Wendy says
Love it! Looks amazing! I definately vote for closing the top off. Looks cleaner and won’t collect dust!
jae says
Your project looks incredible! I love the open top. For now, how about centering the books to fill the space. Later you could use baskets or covered boxes, even color matching the painted wood to hold items without a cluttered look. I personally think closing it in gives an awkward look with the ceiling line…..
Jaime says
I love the open area up top! It’ll be a dust magnet but it’s worth it!
Katie says
Could you just box it off like you did by the desk? Add a couple sconces or make it where it opens from the bottom for hidden storage? Otherwise, I’d leave it open. The other way just adds to all the angles and takes away from the beautiful builtins.
Aryn says
I love the books on top, but I’m a fan of books just about anywhere! I think it gives off cozy vibes.
Janice says
I think closed off looks cleaner. Are you installing lights over the desk area?
It looks gorgeous! Can’t wait to see what you have in mind for doors.
Debi Hutton says
See the one picture where there is a perceived green haze or cast above the cabinets? I think that looks neat and balanced the green from the mural and other wall. We put mood track lighting in one of our kids’ rooms that can be controlled w his phone. It can scroll through many colors, or be set to just one and can change to the best of music. Fun for a playroom but still near and tidy and clean