Yesterday I tried something I’ve wanted to do for a while: fabric reupholstering. Although it wasn’t for furniture—it was for art.
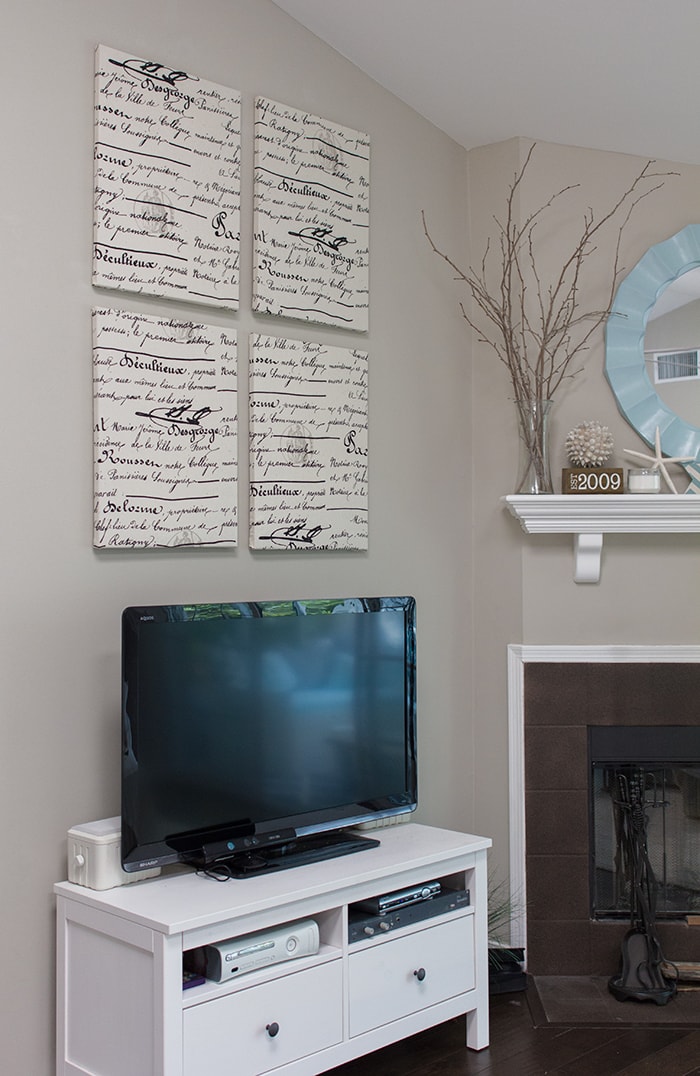
Let’s go back in time to see the transformation of the living room canvas art…
February 2011:

June 2011:

And for over two years it stayed that way. I liked the art, but it was time to switch things up. It actually didn’t even occur to me until I found myself with some extra fabric (picked up at Joann’s a while back:)
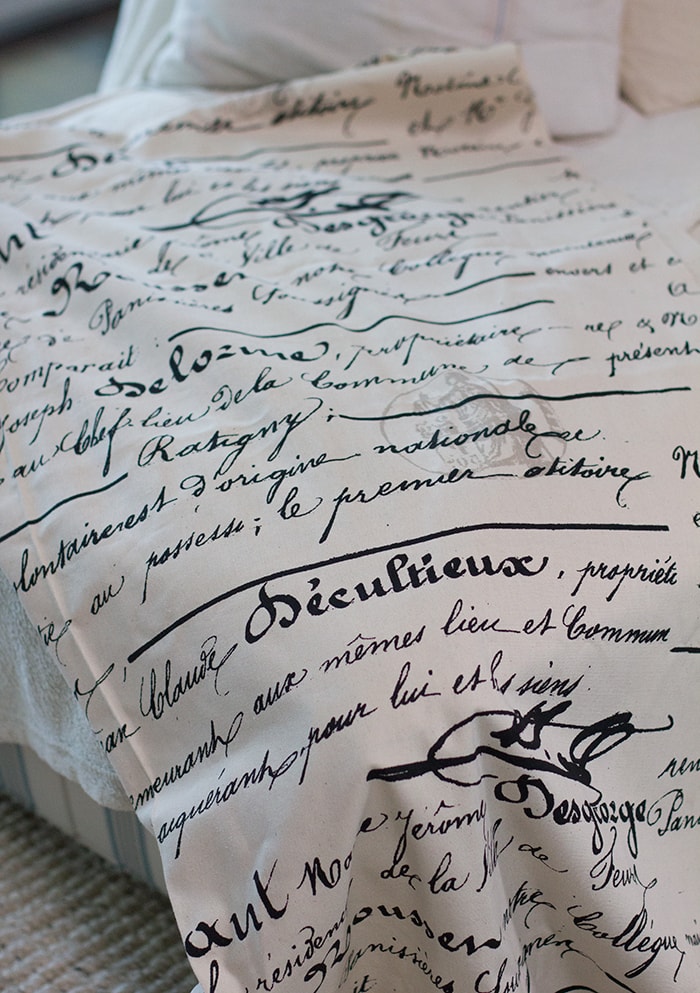
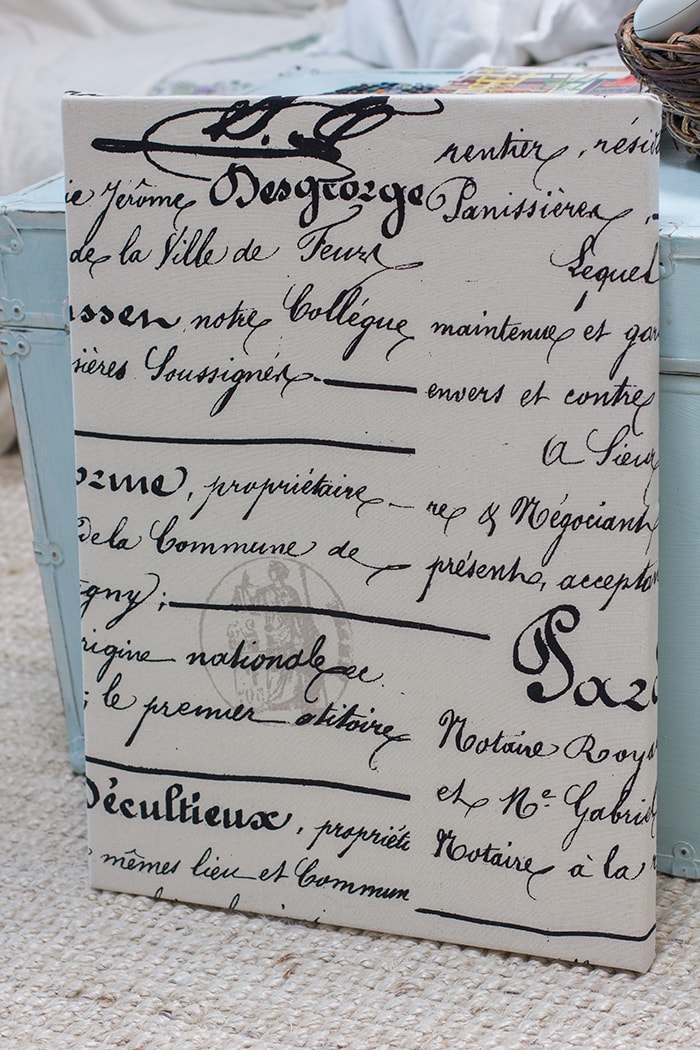
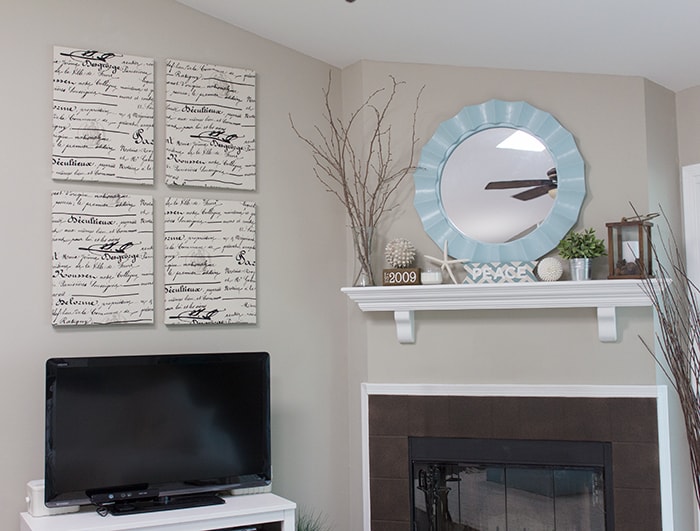
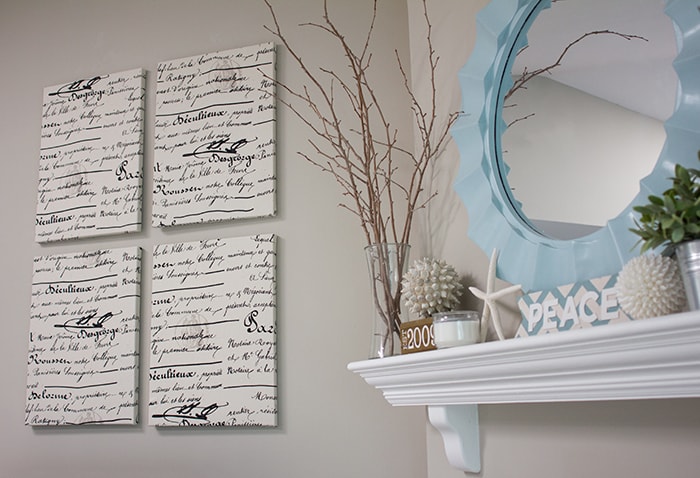
I love this old foreign handwriting design. So farmhouse chic.
This was originally purchased the line the shelves in our new closet, but I realized that’d be a waste of time considering you can’t even see the tops of the shelves.
I measured the canvases and it worked our perfectly…
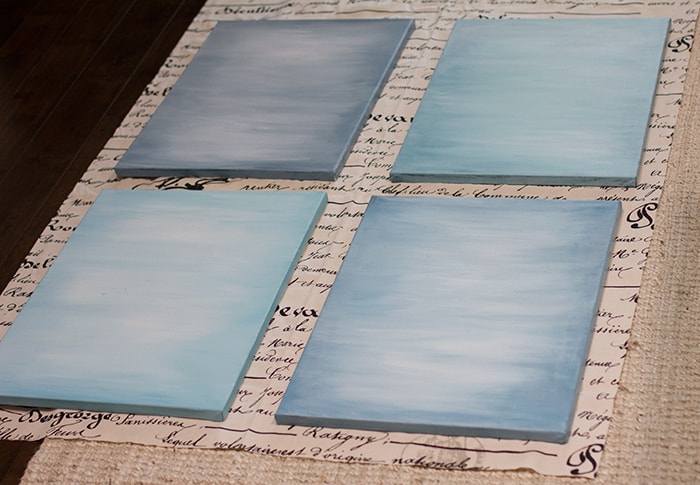
Just the right width.
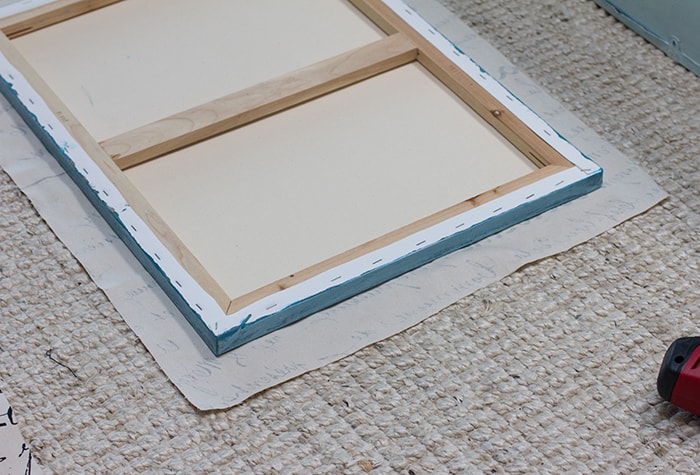
I cut it into four squares, leaving a couple inches on each side which was plenty to staple to the back:

Then it was time to put my fabric stapling skills to the test.
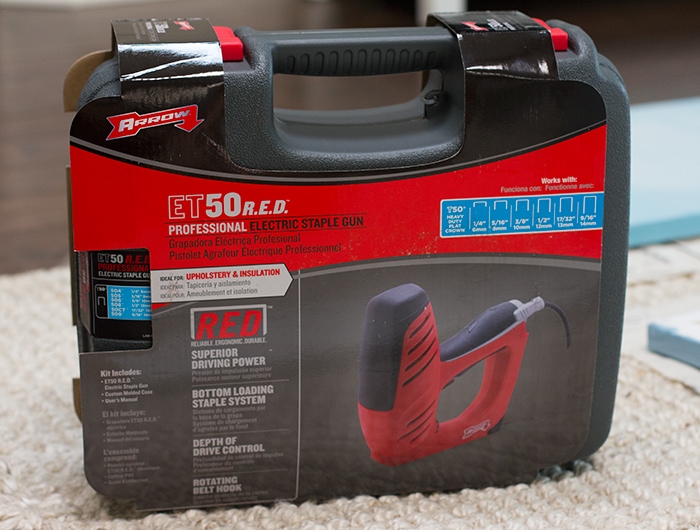
I headed into the garage to check out the air compressor, and realized that the staples that came with the nail gun were all wrong. They were long and thin, not short and wide like traditional staples. I needed an actual staple gun—not a nail gun. Womp womp.
I did a little research online and found a few good/cheap pneumatic staple guns at Home Depot, but once I got there I realized they were Online Only items and not available in the store. Double womp womp.
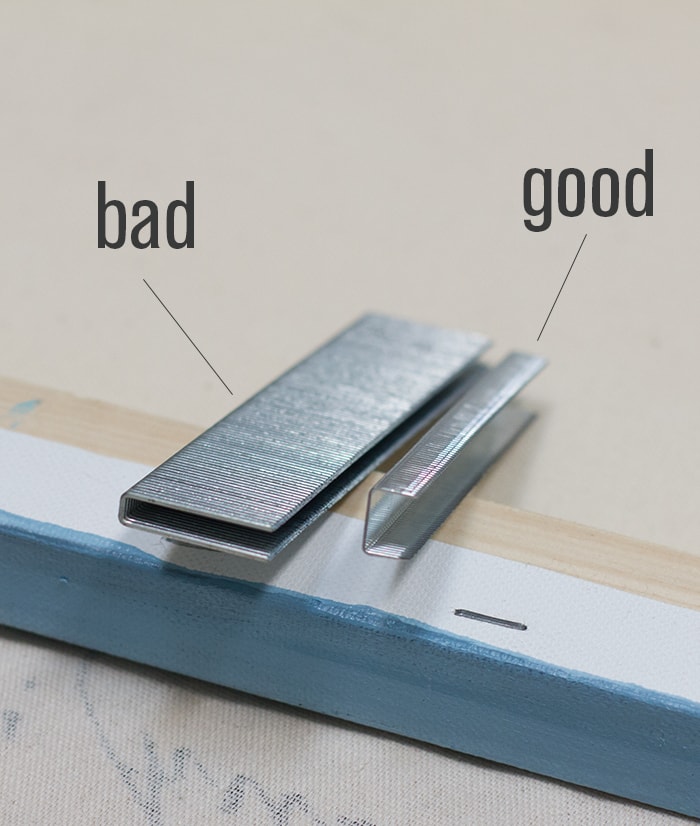
I didn’t want to deal with the potential headache of a manual stapler, so I splurged a little and bought this electric staple gun for around $60:
Along with 5/16″ staples, which you can see compared to the staples in my nail gun:
I didn’t look up any tutorials on the best approach, but I’ve scanned over enough fabric reupholster photos to get the gist of things. Seemed pretty straightforward.
I made my first staple at the bottom center, flipped it around and secured it at the top center, then did the centers of the sides so all four sides were secured.
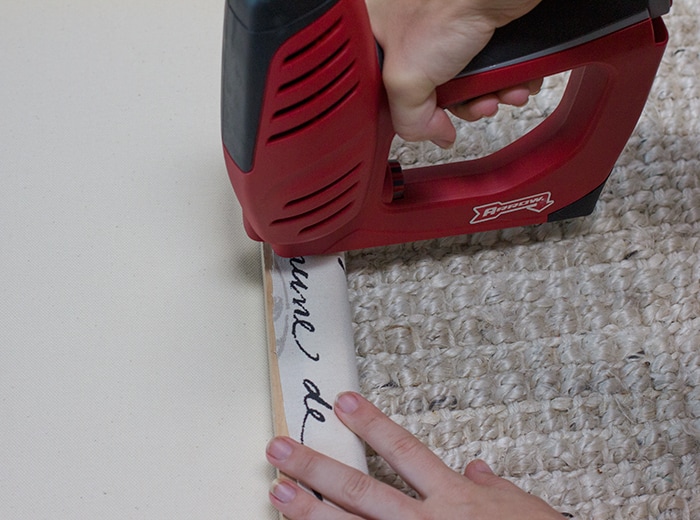
The stapler was super duper easy to use. I made my way around the frame, securing a staple every few inches or so and pulling taut as I went.
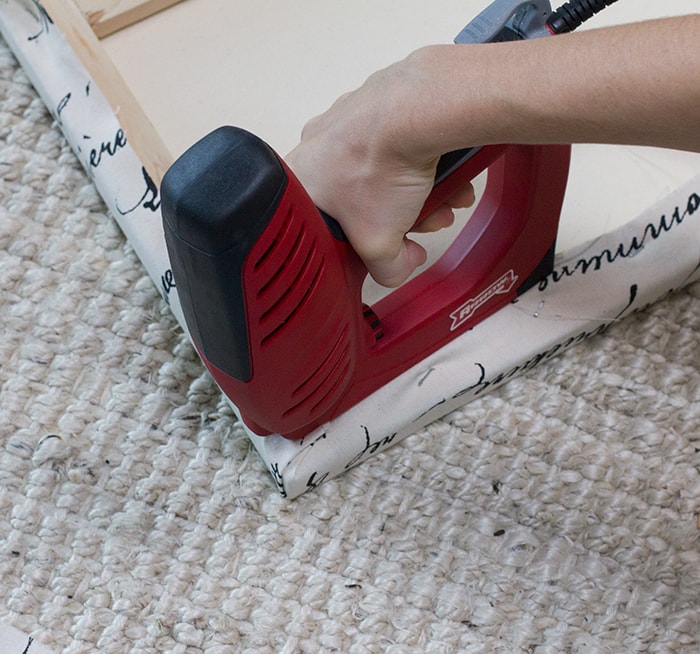
The corners were the most exciting part. You just fold and overlap them like a present:
In no time at all, the first canvas was complete:
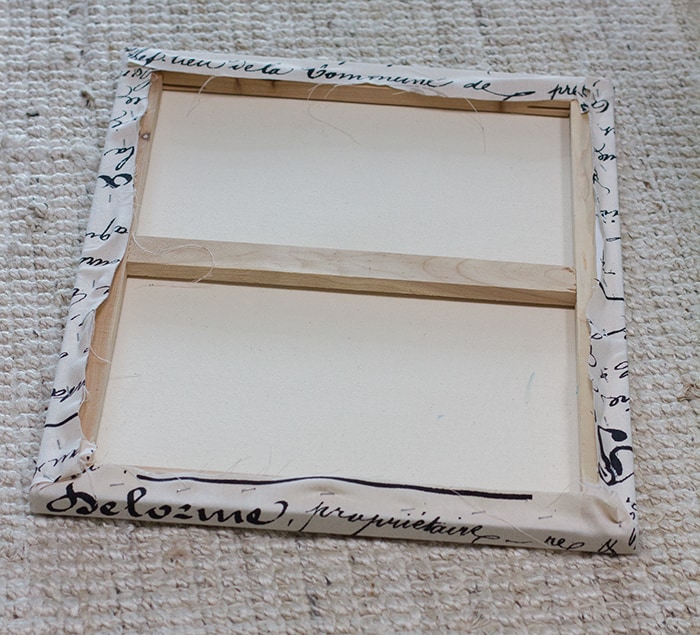
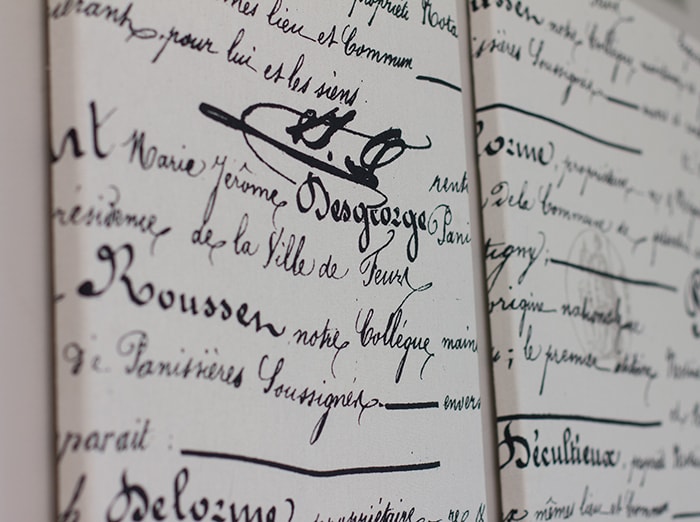
Here’s my biggest piece of advice: don’t pull too tight! You’ll have to be especially careful if there’s a pattern, because the fabric will stretch and warp. It took me a few attempts to get the hang of it, but by the fourth canvas I felt pretty confident with my method. There were some areas where the fabric is too tight, but luckily the aged/imperfect style of the fabric makes them pretty unnoticeable.
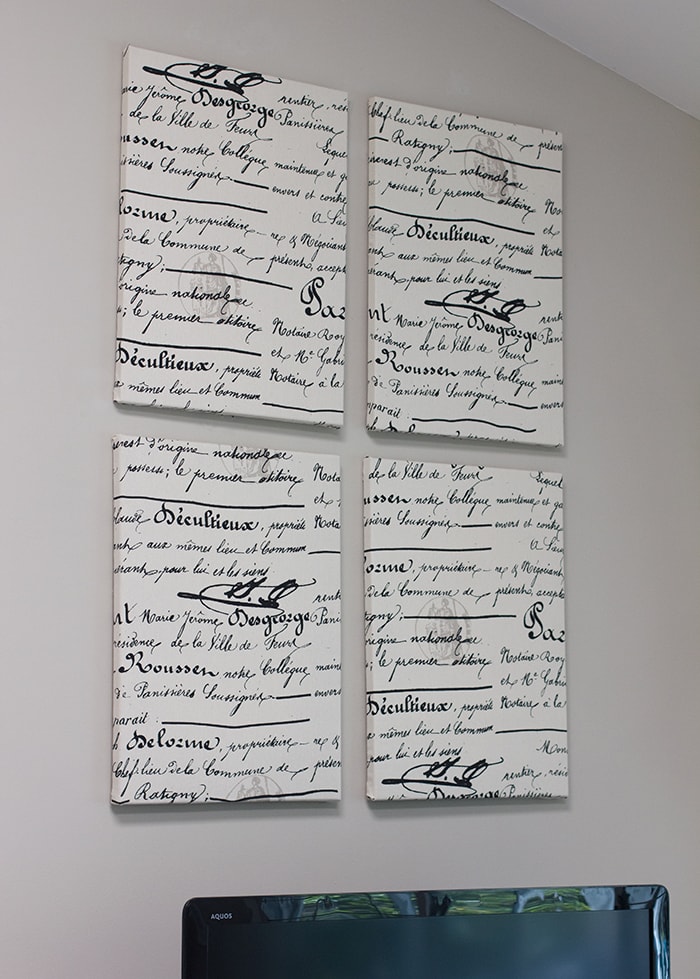
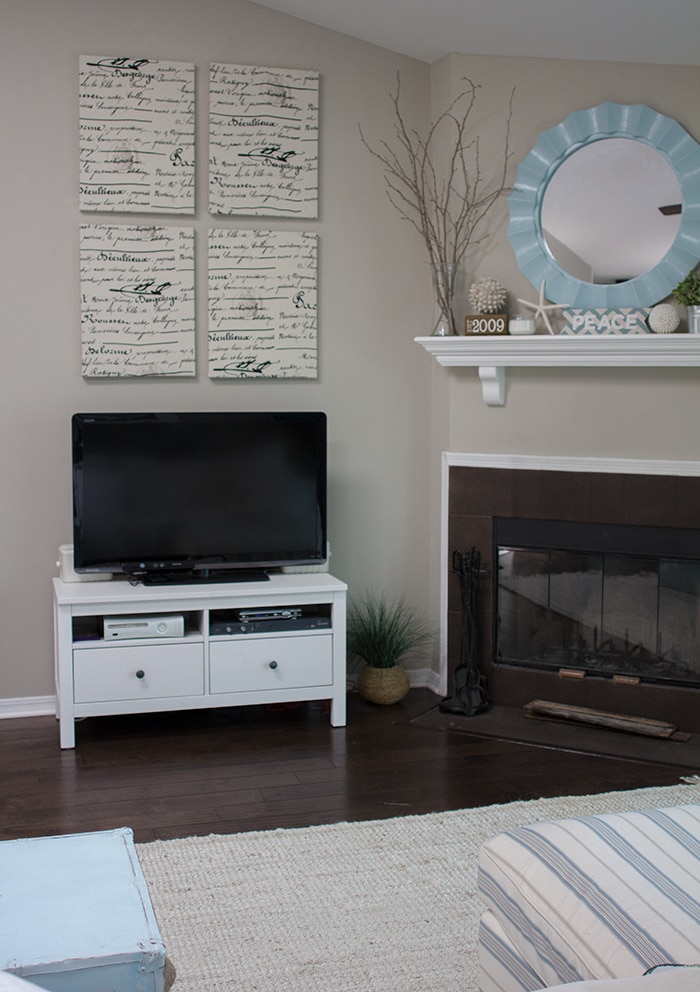
And here they are:


jackbenson03 says
Nice DIY project i love to do that types of projects and i surely try out this one to for my room decor.
Katrina Gelino says
I love it! You needed some texture in that area, and it goes together perfectly! kudos!
lanerbell says
I love this! I swear when we own I'm just going to copy your house. 😉
lanerbell says
I love this. I swear when we own I'm just going to copy your house. 😉
Jenna Sue says
Don't tell anyone else but it's Huguenot Park!
Ashley@Biggerthanthethreeofus says
Love the updated look. I recently covered a massive school-sized corkboard for our living room with fabric. So easy and it really helped with the cohesiveness.
Anonymous says
That beach looks perfect! I too NEED to recharge my sanity @ the beach. I also live in Jacksonville but drive all the way to Daytona or New Smyrna! please share your perfect beach! You have inspired me to recover so of my canvases.